I recently ordered a box of hardware etc, specified UPS NOT USPS, took 7 days from Oregon to Auckland…!
Very happy with that service.
The Falcon springs may in fact be the proper length, may be worth finding out.
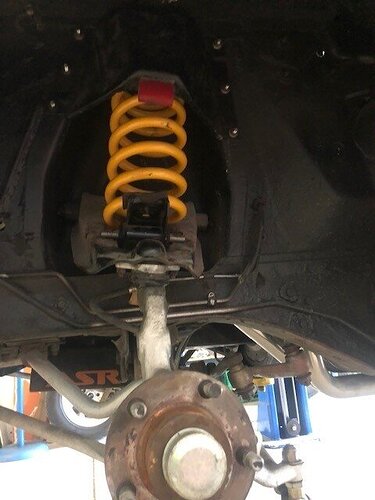
The Cougar originally had rubber insulators and cast iron wedges on the springs so a net 1.25" drop compared to the 2" drop blocks you currently have. If I were you I would order the proper parts from the USA to fix the rear suspension.
Thanks Royce and Bluestuff … if I had the patience I probably should have opted for the US sourcing suggestion… the car had the springs removed on a hoist with the axle left on stands and everything left connected for a spring re-set, when the springs were disassembled there was pitting found between the springs… the spring segments became the pattern in the meanwhile the car is tying up someone else’s hoist… I can’t afford any delays shipping delays, nor could I afford airfreight on two rear springs…
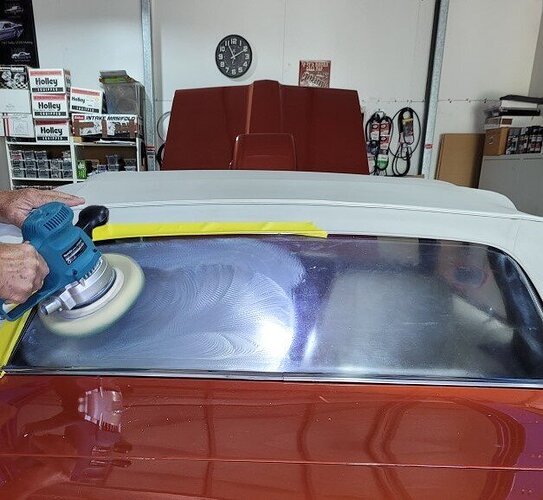
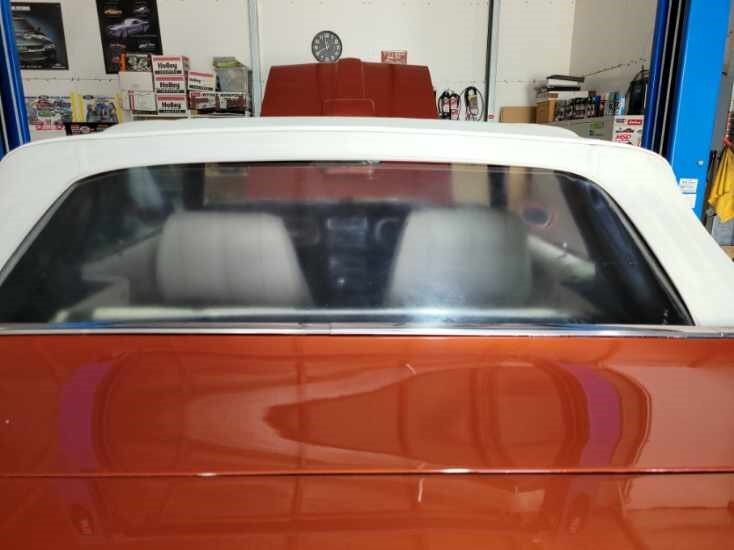
Whilst the car is tying up the hoist, Ron (the Mustang whisperer) whom I have helping me, had a shot at machine polishing the rear plastic window. I had mentioned that I had attempted to hand polish the plastic - all I seemed to do was spend about three hours buffing off the light brown tinge to a clear semi-opaque tinge…
the machine polish attempt
ended up marginally better, but still hazy
¯_(ツ)_/¯
Open to suggestions? During summer it is easy… rear window zipped open, but winter is coming …
Check the specs for ZA Fairlane rear springs. I have a reset set in my 69 vert. The lowered front springs that everyone sells for Mustang / Falcon can give a harsh ride if you go to 17" wheels and gas shocks. Konis give the best ride.
Front Springs are in… and shocks are OUT!
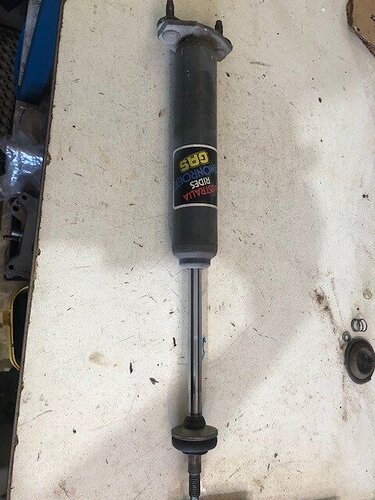
The shocks were, well … shockers… Soft, mostly degassed anyway (I don’t want to put gas shocks back in)… and sound super squelchie (tonnes of entrained air in the oil).
Konis are super exxie, Bilsteins are exxie (and seem to be unobtanium at the minute) so considering my options at the minute
The other thing is that this car (I expect) came auto-choke from factory. The stroker re-build was done with a Street Avenger 770cfm manual choke , with the choke disabled (via a bent wire to prevent the flaps closing) or maby the auto choke actuator removed?.. either way I want to put a manual choke on it (I dislike auto chokes) so with the cable bought and hooked up soon, life should be much easier that my current experience of pedaling it like crazy for 5-10 minutes (depending on ambient)…
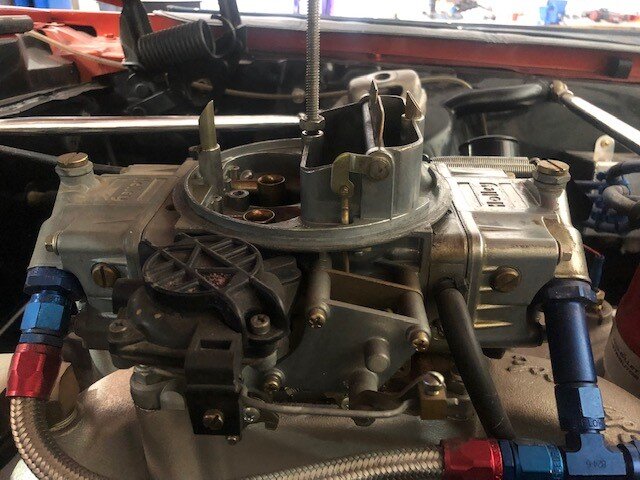
Cant really see it, but the other side has a rod-kick down that was disconnected “to make it drivable in the rain”, I ain’t going to drive it in the rain, so a Lokar cable kick-down will be installed.
If you get stuck for Mustang/Cougar shocks, you can use Falcon shocks by making a plate that bolts to the shock tower and had a centre hole for the Falcon shock mount. Everything else in the suspension is XW to XE Falcon. Do not put in new Monroe gas shocks. It will ride like a cart.
If you get stuck for Mustang/Cougar shocks, you can use Falcon shocks by making a plate that bolts to the shock tower and had a centre hole for the Falcon shock mount. Everything else in the suspension is XW to XE Falcon. Do not put in new Monroe gas shocks. It will ride like a cart.
We ended up going with the fastest over the counter option… the Pedders are the cheap interim solution… after researching a bit, your suggestion on the KONI is where I want to end up, the ones with the barrel adjustment for damp rate. In the meantime these will have to do to get it on the road.
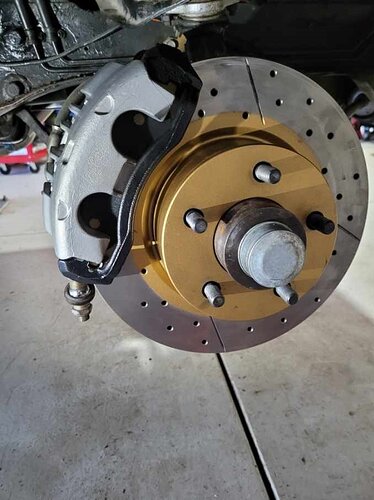
the Commodore front (DBA) hats got drilled out to the Ford pattern, and the Falcon AUII PBR calipers were installed…
Pedders will probably have a harsh ride with those springs
Don’t forget to grease those upper control arm bushes while the wheels are off.
I recently ordered a box of hardware etc, specified UPS NOT USPS, took 7 days from Oregon to Auckland…!
Very happy with that service.
I ordered a Marti with a door VIN/codes plate … USPS put their embargo on regular mail to Australia because they believe Australia is out of control due to covid and cant guarantee the mail getting through… we have zero issues… WTF USPS?
the Marti guys emailed me to advise that either they hang on to it until the embargo is lifted , or an extra $55 US to mail me a vin plate via alternate mail (UPS?) , I can wait …
What the?
Further world “shipping shenanigans”…
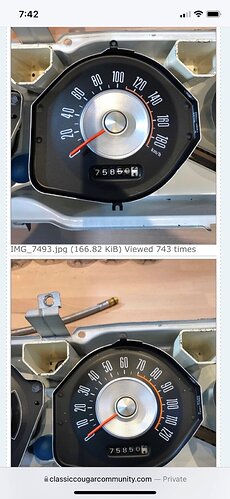
There are two things I want to do to the dash… I have classic instruments with an XR7 tach, I want to get the “Classic” base tach off WCCC - but I cant afford that right now (I have my cores ready to go)… but the other thing i want to do is this (from Don Karlos’ build thread)
I track down the source and try and order a decal for my speedo, then try and order it…
So I can order one if I live in Azerbaijan… but… Australia? No soup for you!
Don’t forget to grease those upper control arm bushes while the wheels are off.
yeah the only other vehicle I have ever owned with that many grease nipples is my “roadster”…
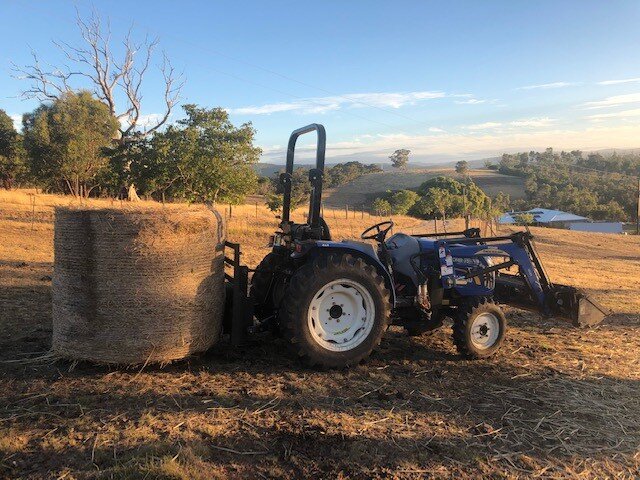
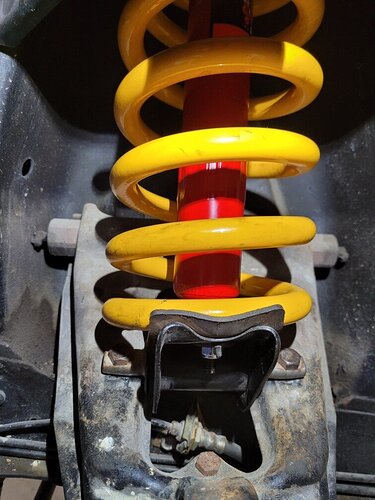
The bespoke leafs came back

and they are spot on for what I wanted for ride height

Front end has a hint of reverse rake which I don’t mind…

That is with new rubbers either side of the spring as well as carrying the wheel alignment for around two and a half inches lower, at this ride height it has big positive camber. If it looses half to an inch through camber and settling it will be flat … if it doesn’t it will carry a hint of true to period 60’s rake.
My somewhat now obsolete sig-pic shows the difference, at that height I was grounding the collectors everywhere
Progress is a beautiful thing and ride height looks much better now. You sure have a beautiful view of the countryside from where your tractor was pictured!
Thanks Calicat
The top paddock gets the views but also gets the winds (which is why the house is nestled into the gulley, you can see the roof).
Been a painful frustrating week.
FMX service lead to the discovery of a loose pickup… at least that was caught before too much damage.

the carby was farting a bit, and the throttle cable was damaged, both the carby and the fuel filter glistened with the faint sheen of “moist”…
the fuel filter I spotted weeks ago, but the carby also sweated when run (pumped up with petrol)
this was a disaster waiting to happen, it was dry when looked at (like here) unless run… slightest hint of moisture when run, the fact that the fuel drains out when not running showed there are slow leaks…

The 770 Street Avenger had a leak out the back bowl seal against the body… when removing the carb this cracking also revealed itself… sealed with silicone

That will not do

I am up at the mine so Ron took it to his carby guy who looked at it, and that bowl was unrecoverable , but even if I could easily get my hands on that component, an overhaul kit would not simply go through the rest of the carby as it had been modified with Bitza this and Bitza that… the carby guy recognised the hot rodding mods that had been put in to it for the strip, but not knowing which bits came from what would mean guessing and time and more $$$
so the 770 street avenger is going in the bin and I will have to look at a replacement. With supply chain issues, big carbs are thin on the ground… Ron could get his hands on a Holly 750 classic with vac/sec and manual choke which will simplify things during future rebuilds… a vanilla carb will help with drivability and will continue the “de-stripping” and more “Streeting” of the car (3.9 rear end to 3.55, 3500 stall to 2500 stall etc).
And further, after replacing 95% of the brake components, they still dont work, it can only be between pedal and master cylinder/vac assist… so out that will come…
the cracked fuel entry is overexuberant wrenching, but the rest of the work I have had to do or get done is a result of the car sitting … moral of the story for when it gets sorted is for me to “GO OUT AND DRIVE MY BLOODY CAR!!”
Okay, the hard pedal was an airlock across the front circuit, so that is a relief.
A lot got done in the back half of the week, and the car is running on a classic 0-3310 750 Holley like it was born to it.
The cut cross rails were a problem

They have now been capped and strengthened.

And the missing centre brace has been manufactured out of heavy plate. I didn’t want to mess with the exhaust, so it was fabricated to bridge over the main and H pipes. It was also rolled and shaped to add rigidity.


Also the catch washers were added to the Anti Bump Steer Kit.

There is not much room between the Calipers and the wheel, I live on a dirt road (roughly 500m of driveway and 500m of dirt road to the main road) I am hoping I don’t wedge a flint in there!

Getting close, two remaining big jobs - attenuating the exhaust and the hydraulic rams for the roof… following by a snout to tail nip and tune…
The closer we get to the end, the more frustrating things are becoming…
A standard 0-3310-SA Holley is on and already runs better than the modified 770 avenger that came off it (which came off due to cracks/external leaks). Also the new correct length throttle cable replaced the old too long cable that kinked, the kickdown rod hardware has been replaced by a kickdown cable, and the car now runs a manual choke.

It hasn’t been tuned yet because Ron had to sort out the exhaust manifold leaks - due to the SS fittings having spun out of the Aluminium Heads. Whether it be just the vibration of loose threads or attempts to re-tighten without the right tools, most of the threads were damaged. Also heat cycles whilst loose moved the individual manifold plates (one mini plate per tube rather than a common plate with four tubes) meaning that Ron had to put hours into realigning the individual pipes and fixing threads.
This is a before photo with the SS hardware, this was the “good bank” with all but one of the bolts in -albeit all loose… the other bank only had three bolts, so I never took the incriminating photo…

Another discovery was the Crane Gold Roller Rockers I had been told about (this was an interstate mid lockdown purchase) were Cranes, but Energiser Roller Rockers… they are all complete with no end roller shafts drifted out etc. they looked healthy (unlike the blue siliconed gasket that will be piffed) so they will stay for now…

I knew the hood rams were leaking and needed replacing, orright that I was expecting … (in a previous photo of the rear leaf springs s you can see the hood ram oil leaks)… but then dodgy leak fixes were found everywhere… This will mean new fittings and lines everywhere.

And finally, I guess I was in… “De River in De Egypt” (De Nial!) because I saw this when the car arrived, one of the yokes on the main rear hinge was damaged. I was hoping it was a replaceable piece, but to replace it is likely to be a full frame re-build… which I am not in a position to do.

Apologies for the blurry photo, but one side of the Passenger side base hinge(?) has fractured, the hood was held from one side only using a threaded bolt (this will need to be helicoiled) but is there any way of reinforcing this area without having to buy a full new frame? clamping from one side? Is it viable to create a re-inforcing plate? has someone done a MacGyver that worked? Obviously it is cast with a large crystalline structure, so I believe it can’t take a weld.
Any help or comment appreciated…
The yoke was helicoiled and bolt put through the spar into the helicoil, seems to work smoothly so that is the temporary solution…
Whilst the seats were out to do the 'Vertible hood… You know what they say about truth in Advertising… the car was bought during height of the lockdowns from Victoria (the Lock-Down Capital of Australia). Lots of discussions, videos, photos, about 8 months worth of tick-tack-toe… I saw the head unit (which is an Awful turn of the millennia job) and got told it didn’t work (which is OK i will replace that)… to be honest, with the car everything was as described… although it has become apparent that the car wasn’t driven much recently
Anyhow, I asked about the speakers, and got told the speakers were under the seat… Got to say, that was 100% accurate!
So I google “Cougar Speakers under the seat” and got the hit at WCCC and thought yup, must be those or something like them… I imagined those enclosure style two way speakers…
However, like when you go into Macca’s (Micky D’s), or Hungry Jacks (Burger King), and imagine the Big Mac or Whopper you are going to get, but then get disappointed with what you see…
Instead of my imagined enclosured speakers, stapled to the seats I saw this ![]()

220 MAX!!! or 35 real watts RMS free-air ![]()
Getting real close now…
I really wanted the 3310 to work… (750 holley, vac sec, manual choke) it was somehow fitting that the old carb that my mates had on their Cleveland Falcons (back in the day when I was the odd one out in a 13B rotary RX5) would suit this old muscle car… I liked the look and the nostalgia of it all.
But it just would not work on the car, it initially looked like it would idle, but it stumbled and wouldn’t run right.
So Ron threw a 670 Brawler on it (converted to manual choke) , and that worked out of the box… idles nice, sounds meaty. I am not super keen on how the main body looks (thankfully that is hidden under the air cleaner, I like the embossed classic Holley look, hate the black Brawler stickers!) Functionally though, I do like the glass float level windows, the four corner idle, and the screw adjustment of the Vac Sec… this all should make the dyno tune quicker (and hopefully cheaper)…

Is 670 big enough? I think so… fundamentally The purpose of this car is to drive a family of five between wineries in our local wine regions (Adelaide Hills, Barossa Valley, McLaren Vale, Langhorne Creek, Eden Valley, Clare Valley. etc) as well as the beachside Esplanades of Brighton, Grange, Semaphore etc. in style and safety (and make us feel special doing it) and not the 1/4 mile … so we have been backing off the “turn everything up to 11” and making her more civilised.
The roof has had a thorough overhaul with new rams, hoses and a seal kit through the pump. The main hinge on the frame was helicoiled and runs well on the half yoke, so we will leave it like that for now. I will try and source a back up frame… that photo makes the door cards look so crap, honestly, they don’t look that bad…One day I hope to hang proper Cougar door cards back on it…

A 16 inch hotdog either side to bring the noise level down, Hopefully it is enough to get it through Regency. Sounds nicer (less harsh) and a little quieter.

Wheel alignment and a Dyno Tune of the carb to come… then it is off to the Engineer’s for the engineers report, and finally Regency for a pit inspection.
I have already ordered the BFG tyres, my fronts were 10 week lead time!
The closer you are to the finish line, the more pernickety things get…
The car got taken to an alignment place and for a dyno-tune… the tune went really well, the new arrangement pulles 350 RWHP but a lot more streetable and torquey than it used to be (used to be all mid-high, I am not going to drive up in the 4500-6000 rpm band).
It ran like a jet on the dyno, but then when I went pick it up if farted and died… I thought it had sucked through crap from the tank, so I left it behind thinking the worst as I flew out, however it ended up just being being too cold plugs… I guess living in the land of the iron head Cleveland we should not assume those ranges work in alloy head Windsors… the worst thing was having paid for a permit to take it to the ID inspection…
Replay one week later, this time it ran great, so I whacked the permit on it and drove it to the Authorised Engineer…for their report. Ride-height was a lot better, took a picture on the ramp.

Two issues to iron out for the engineer… a firewall clamp on the steering column and seatbelts… that just legalises the “conversion” I then need to pass a pit inspection roadworthiness which is ultra harsh…
Looking for help/information! as it was manufactured in 68 it needs to have lap belts in it. Except I have retractable lap sash belts (which I would rather keep), which is fine as long as that was an option from factory, or factory endorsed dealer fit… because the angles over the shoulder are wrong and not to “code”, I would need to have to have my laps sash belts engineered or I remove them completely and replace with lap belts…
Question, did any MY69 Cougar convertibles ever leave the factory with lap sash belts in this position?, if so, does any one have a brochure or pictures of this?
ie positioned like my belts.

Any help appreciated!
Apart from that, this was the first big drive of the car, it is a lot better with the centre plate tying the torqueboxes together, the firmer springs and dampers, as well as decent travel! it has a tonne of torque!
ID inspection done, all that is left is the Engineers requirement and then the final Regency Roadworthy Inspection (Not a walk-in-the-park!, I am most likely to fail, probably more than once)
Meanwhile, in the United States… “Hoovie” manages to get a full blown racecar (complete with perspex windscreen, no wipers, no blinkers, no nothing) gets it ID’d and he can drive it on the road just like that… what the?
[YouTube]https://www.vintage-mustang.com/threads/hoovie’s-new-hertz-race-car.1196314/[/YouTube]
Factory seat belts would have been affixed the roof and non retractable. Those appear to be an aftermarket replacement in a modified location. I would be interested to see how they attached it there based on some of the other things that car has had done in a past life.
I do not envy the hoops you guys have to go through to get a car on the road over there. Seems over the top for sure. I understand the concept but seems they take it much further then necessary.
Nice work! Its coming together nicely!
I had been under the impression that the over the top inspection rules were to discourage unauthorized imports of cars and trucks. I recall that there was a story that a large number of cars owned by US soldiers stationed in Australia were pushed off an air craft carrier because Australia wanted them gone and the US military didn’t have the right equipment to move them.
Convertibles only had lap belts from the factory 1969-73.
This is where the SA regulations suck. In every other state you had to fit Australian compliant retractable 3 point belts in the front with a RHD conversion. If it is LHD you can leave the crappy original US retractables that are useless in an accident. If it has been previously registered in Vic, it should have been engineered for those belts (not sure if that helps).
