Hey Experts!
My dad and I are in the process of restoration to his classic '69 XR-7. We are currently in the stage of attempting to add A/C as we live in Arizona so it’s a must have if we want to ride more than 2 months out of the year…
We picked up a complete kit from ClassicAutoAir (20-3027) to find out that it doesn’t quite fit without major modifications to just mount the box. We discovered that we have (apparently) an extremely rare option for Power Vent and we are thinking this is why the kit we have does not fit, the guys at CAA don’t have any input for us because they haven’t had this scenario I guess?
Is there anyone else here who has this option that has already gone through this process? And if so, do you have any tips, tricks, or warnings for what is to come?
Thank you in advance!
Your in luck, I installed that exact system in my 69 XR7 and I too had the “flow-through ventilation” option in my car.
You have two center vents but no side (A/C) vents?
Do you have any specific questions on the install?
I actually removed the metal under-dash piece and replaced it with an under-dash from an A/C car, this gave me the correct side vents and made the installation look stock from the inside. Of course I had to remove my dashboard (and the under-dash) so removing the original air handler was not that big of a deal. I don’t recall any major issues mounting the under-dash unit.
There are many modifications that you will need to make to get this to fit.
What engine do you have, I have a 351W, so I also upgraded my radiator to the big block radiator for proper cooling, I’m in Florida so I have the same concern as you.
The first issue I came across was the orientation of the air handler fan knock out in the fire wall, the part that sticks out from the circle pattern was at 7 o’clock and I had to weld a piece of metal in that spot to make the supplied firewall plastic interface work, they were expecting it to be at 9:00 o’clock position.
I also didn’t like the fact that the A/C uses the PS belt, it made the PS belt squeal and slip on the A/C compressor under heavy load. I ended up installing a 3 grove water pump pulley and rework the supplied compressor mounting plate to move the compressor out to align it with the belt placement, so now I have a dedicated PS belt and a separate A/C belt. https://cccforum.discoursehosting.net/t/advice-with-replacing-the-crank-and-water-pump-pulleys/13681/1
Jay
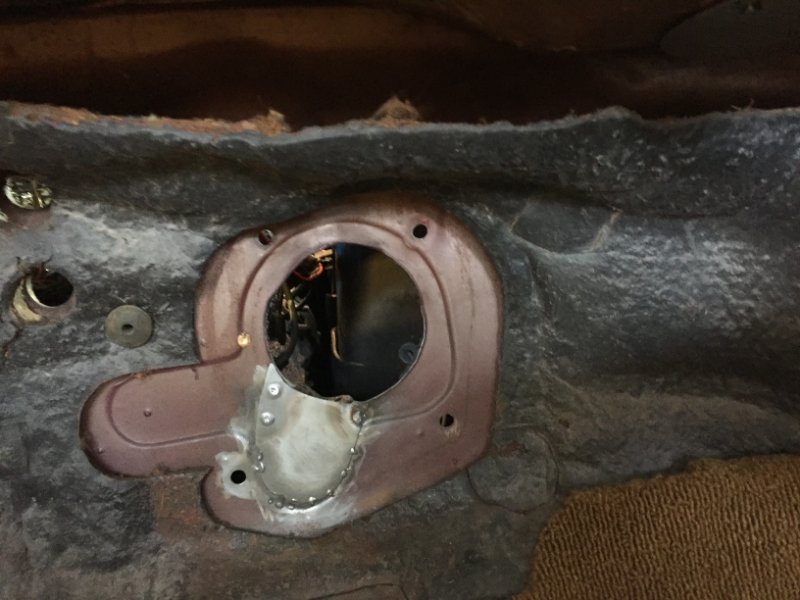
Here’s a picture of what I was trying to describe regarding the firewall issue (I had).
You can see the stamped firewall that is what was expected to be cut out, but for some reason my car had the cut you see here.
Part of the “Flow-Thru Ventalation” option?
The light part is me spraying a pre-weld primer.
This is the patch in place…
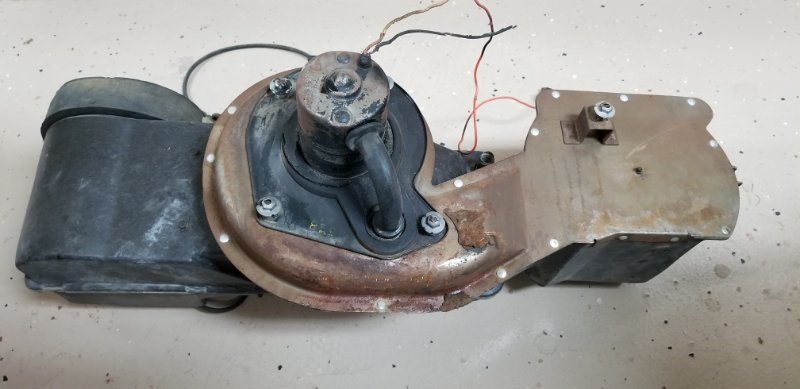
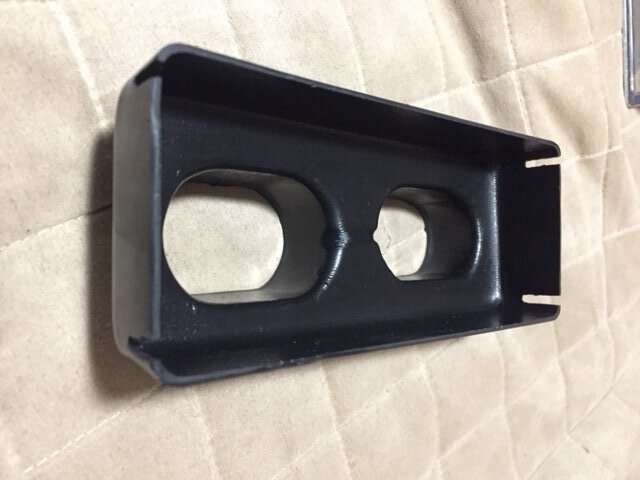
That’s the same cut-out we’ve got. Turns out that with power vent option, the blower motor has a rubber right-angle tube that comes from the bottom of the motor and goes back to the heater box. The diagonal cut is for that tube. Here’s a picture of the factory heater box with the tube.
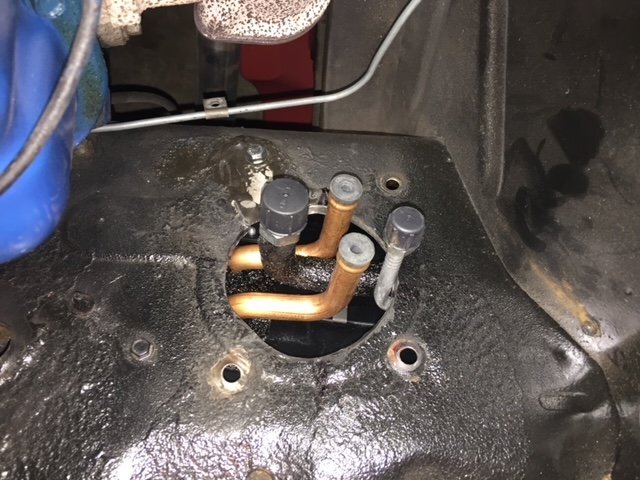
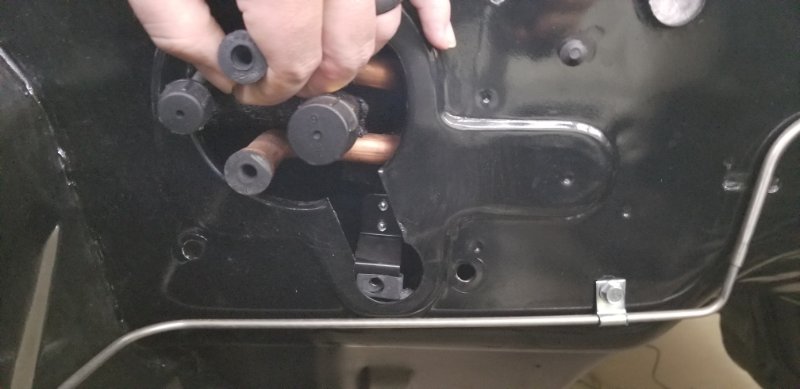
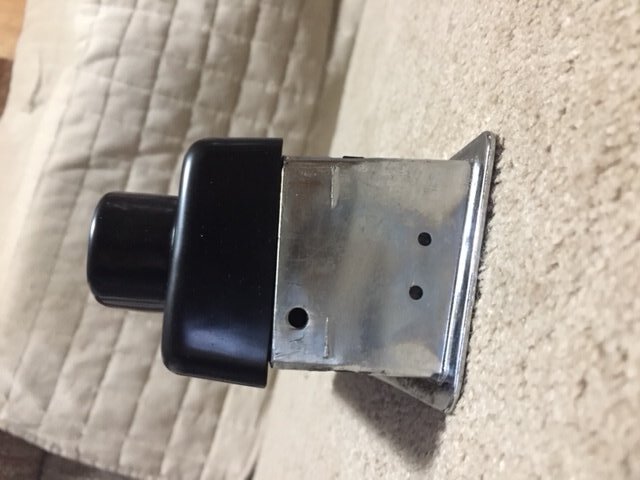
Did you have to drill a mounting hole in your fill plate? The instructions from CAA say to use the lower-right factory hole. However, ours does not line up. Here’s a pic of where ours is at with the tubes centered. For this pic, we had the cowl mount (the tab) loosely in place. You can see that the firewall mount want’s to be right where the fill plate would go…
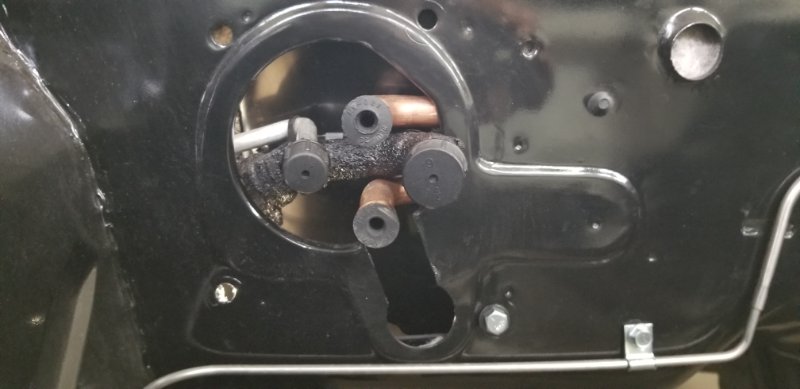
If we take out the cowl mount and force the box into a position where the lower-right firewall hole lines up, it forces the tubes way to the right as you can see in this pic…
That itself isn’t a deal breaker. But with the firewall mount forced in as above, the cowl tab is nowhere near lining up…
Again, the above alone wouldn’t be a deal breaker. We could drill another mount point or fab up another bracket to replace that one they’ve got on the motor, if we had to.
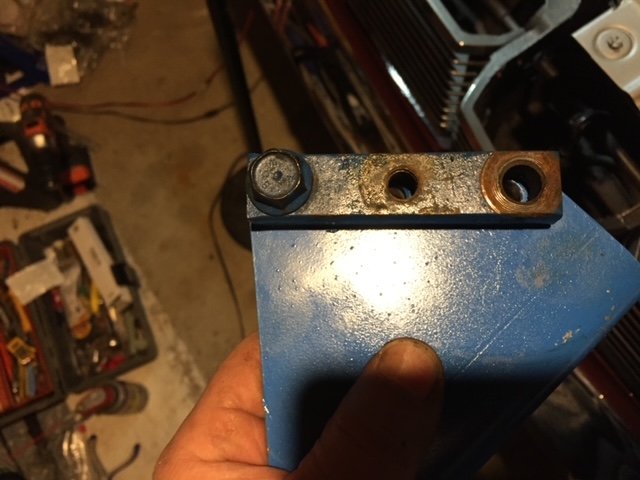
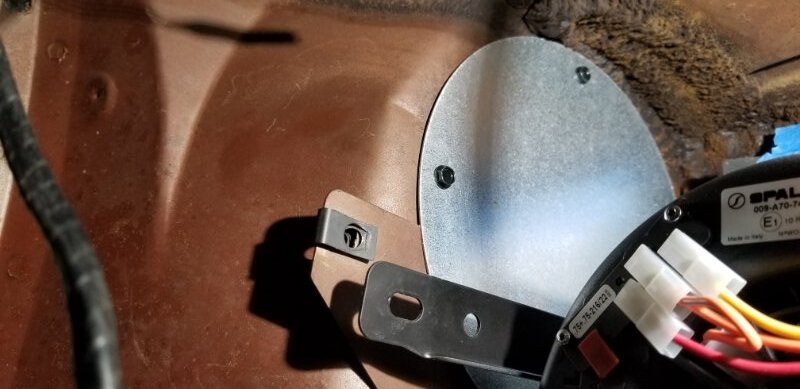
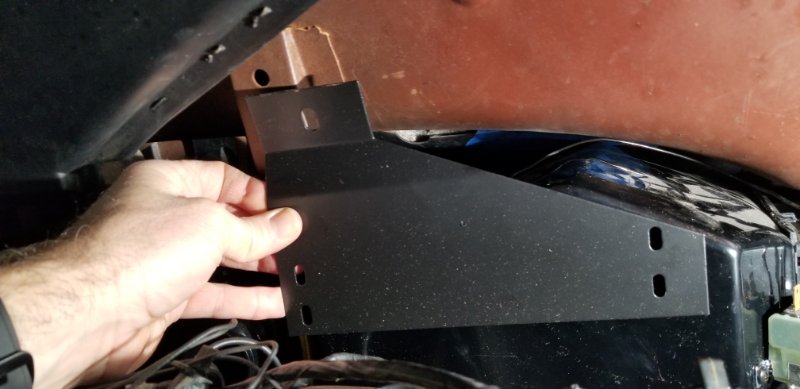
Next up is the large bracket they include with the kit. This again is nowhere near lining up. You can see in this pic that it interferes with the factory mount point (where the bar from the lower dash attaches).
Again, in itself not a show stopper. We could come up with some kind of bracket to work around this issue. Our concern though, is with all these mods needed, do we really have the right kit? Is there something funky about our car specifically that makes it different from all the other Cougars/Mustangs out there? I can’t imagine that’s the case.
Did you have any of these issues with yours? Also… do you have a functional glove box?
Thanks!
My heater motor didn’t have that hose, must have been removed at some point.
If I remember correctly I had to fill in that hole and drill a new hole.
I don’t recall having any issues with mounting the under-dash air handler, but with that said there were numerous supplied brackets and parts that were not quite right and required modifications. To your point, they aren’t complete “Show Stoppers” but do slow down the process.
I like to say “They can’t stop me, just slow me down!”
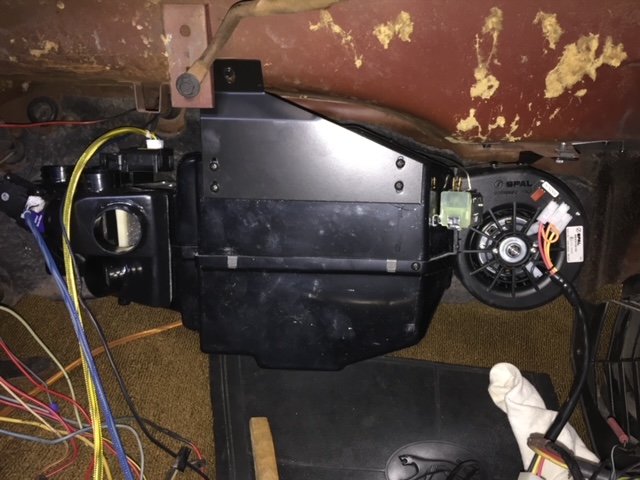
Here’s my under-dash unit installed…
The 4th and fifth Pic below
The standard glove box will no longer fit, you will have to get the smaller OEM “A/C” Glove box.
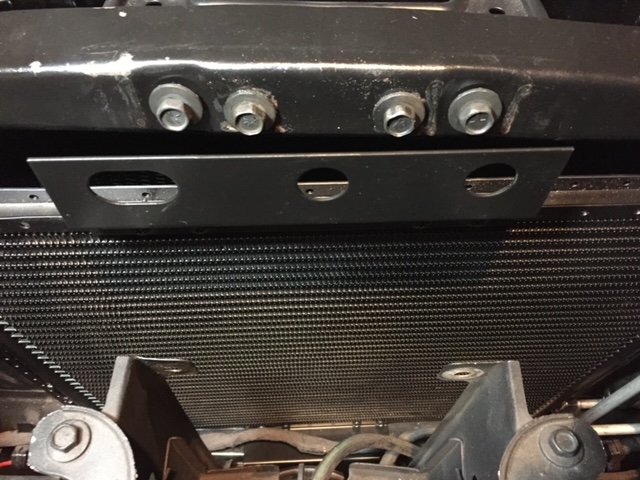
I had a mounting issue with the radiator mounting bracket, had to drill correct holes.
Final “Fixed” Bracket
Modified Bracket
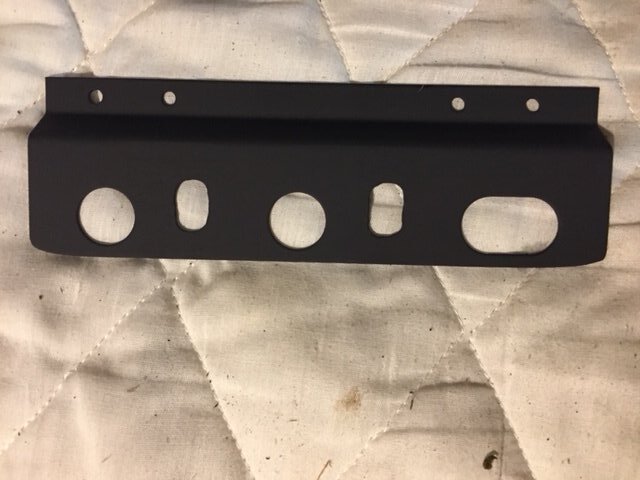
Original Bracket

One more memorable issue I had was with the compressor mounting bracket that goes on the engine. Mine did not align perfectly and required some reaming.