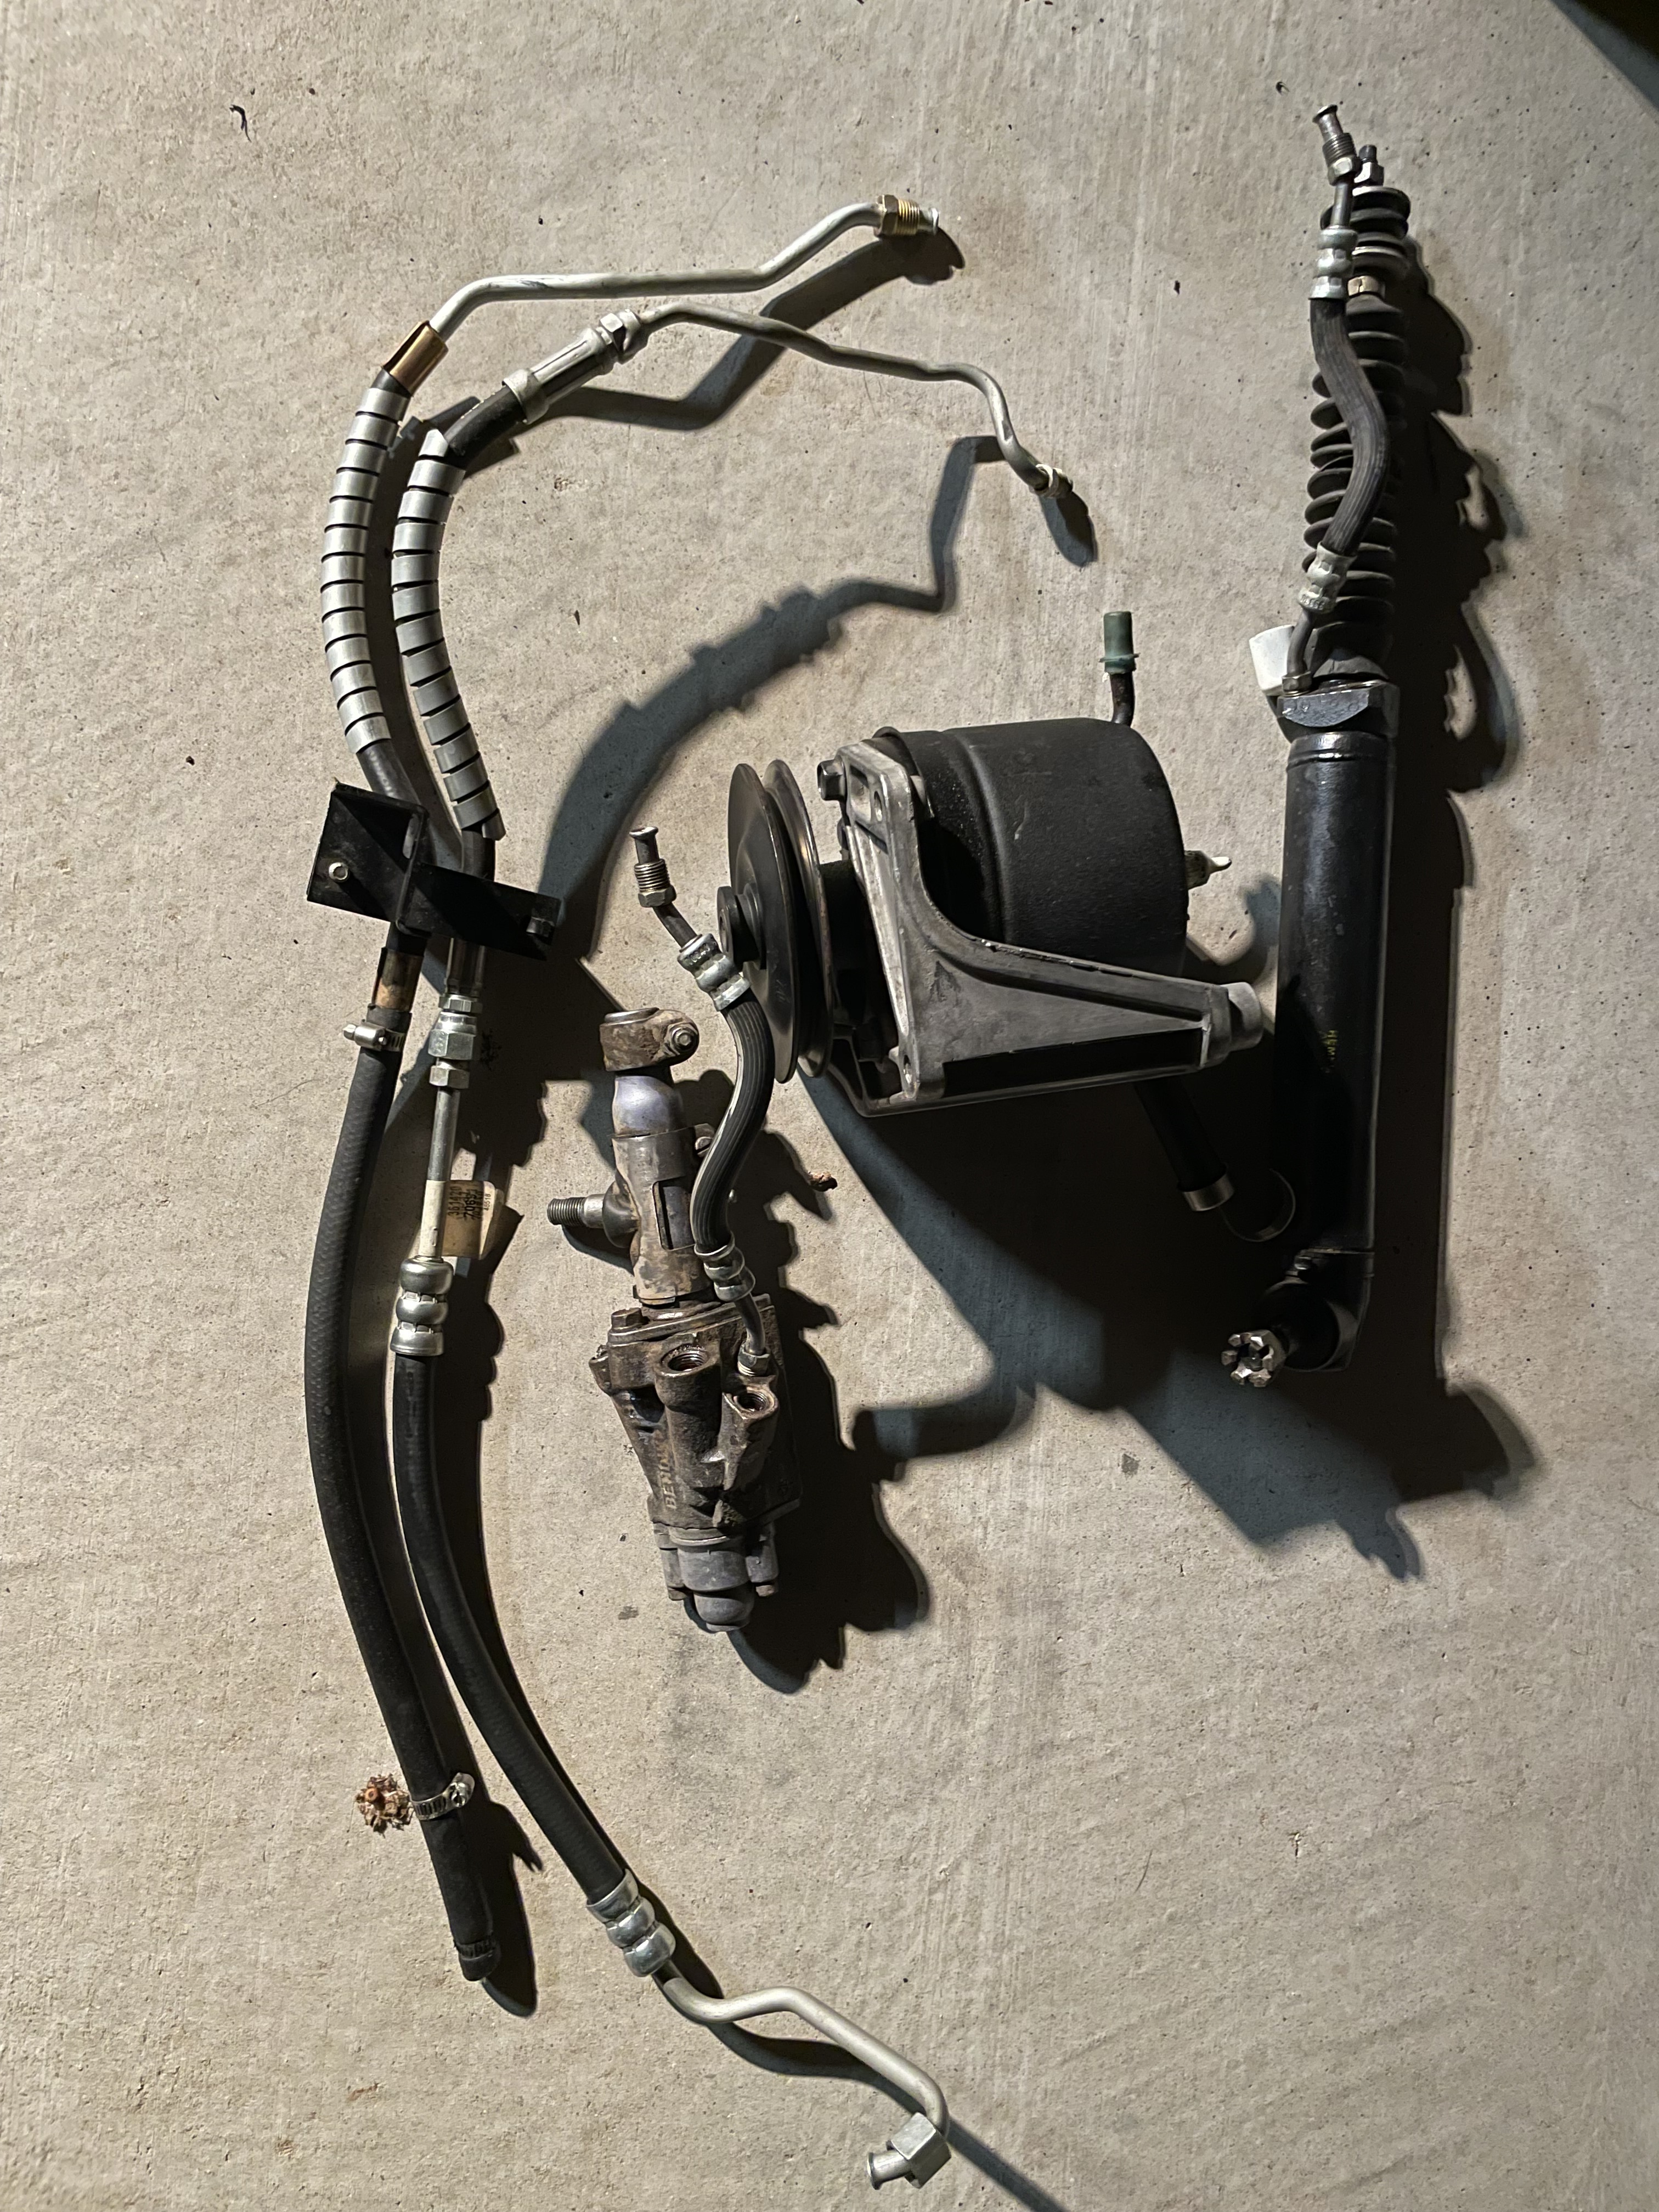
Will do, not much to see down there as all the linkage is the same except for the manual adaptor used to eliminate the control valve assembly. Here is the connection to the gearbox.
Not near as much progress as I was hoping this week but family time has been good.
Got the wiring ran and hooked up today along with trying to fit the fresh air vent which is not going to work. I’ll fabricate a block off plate for now until I can figure out something else. Anyway it’s interesting to have assist with key on and engine off. Not that is much help but it’s pretty cool.
So got this finished up and road tested, the only thing left to do is find a solution to the fresh air vent and clean up a battery connection. That damn fresh air vent just wont fit in the space provided after installing the motor. I would be interested how it all fits with an auto vs manual car. I really probably do not need it and can block it off but will see how it goes.
I was able to road test it a little bit to get a feel for how it would drive and so far Im very happy with the first impressions, my favorite has to be being able to adjust the level of assist desired, Like I mentioned before I always felt like the factory power steering had too much assist especially at cruise speeds, but that is my preference. With the EPAS setup you can set the assist to more or less depending on your preference. I only drove for a few miles but ended up setting the assist around 1/3 of what’s available and felt pretty good with that. On my roadtest I learned I under fused the supply wire to the control module and popped the fuse under a low speed maneuver. When this happens you still have full control just no assist, so in other words full manual steering. I know some guys question EPAS systems and this is one of the more popular concerns. After correctly sizing the fuse it corrected the issue. Nice to know what happens in the rare chance you loose power for some reason or a failure occurs.
Another thing I noticed is to change the assist level you may need a key cycle to reset everything before it actually changes. It may change at a slower rate while driving but not sure yet. I do not suspect I will need to change it much once I find my desired level but something worth noting. EPAS performance did release a new option that allows assist changes automatically based on speed but of course that comes with an additional cost.
A bonus is under the car is a bit more tiddy without all the factory stuff down there. No hoses, ram or control valve cluttering up the space! Also less parasitic drag on the engine with no pump. However this can be argued the other way with more load on the alternator from more electrical load. Either way less clutter under the hood and more room for ac compressor! Maybe that project will get done before it gets hot again!
Haven’t been on this board for awhile so I missed your posts about the Vintage Air and EPAS install. Awesome work on both! How do you like the Vintage Air setup so far? Mine’s worked pretty well, the only issues I’ve run into is having to re-calibrate the A/C controls and I recently had to replace the heater control valve as it developed a leak.
Wish I could tell ya how the vintage air works but I have not made it past the interior install yet! I have not had much time to dedicate to the old girl. I have neglected even driving it lately to be honest and the Epas install was the last time I touched it which was 6 months ago now. I had stopped on the vintage install to to the EPAS install as I knew that would take up some space under the dash. I decided it would be smart to get that in first then finish up the duct work after. Also with all the power steering stuff out from under the hood I can install the compressor mount easer.
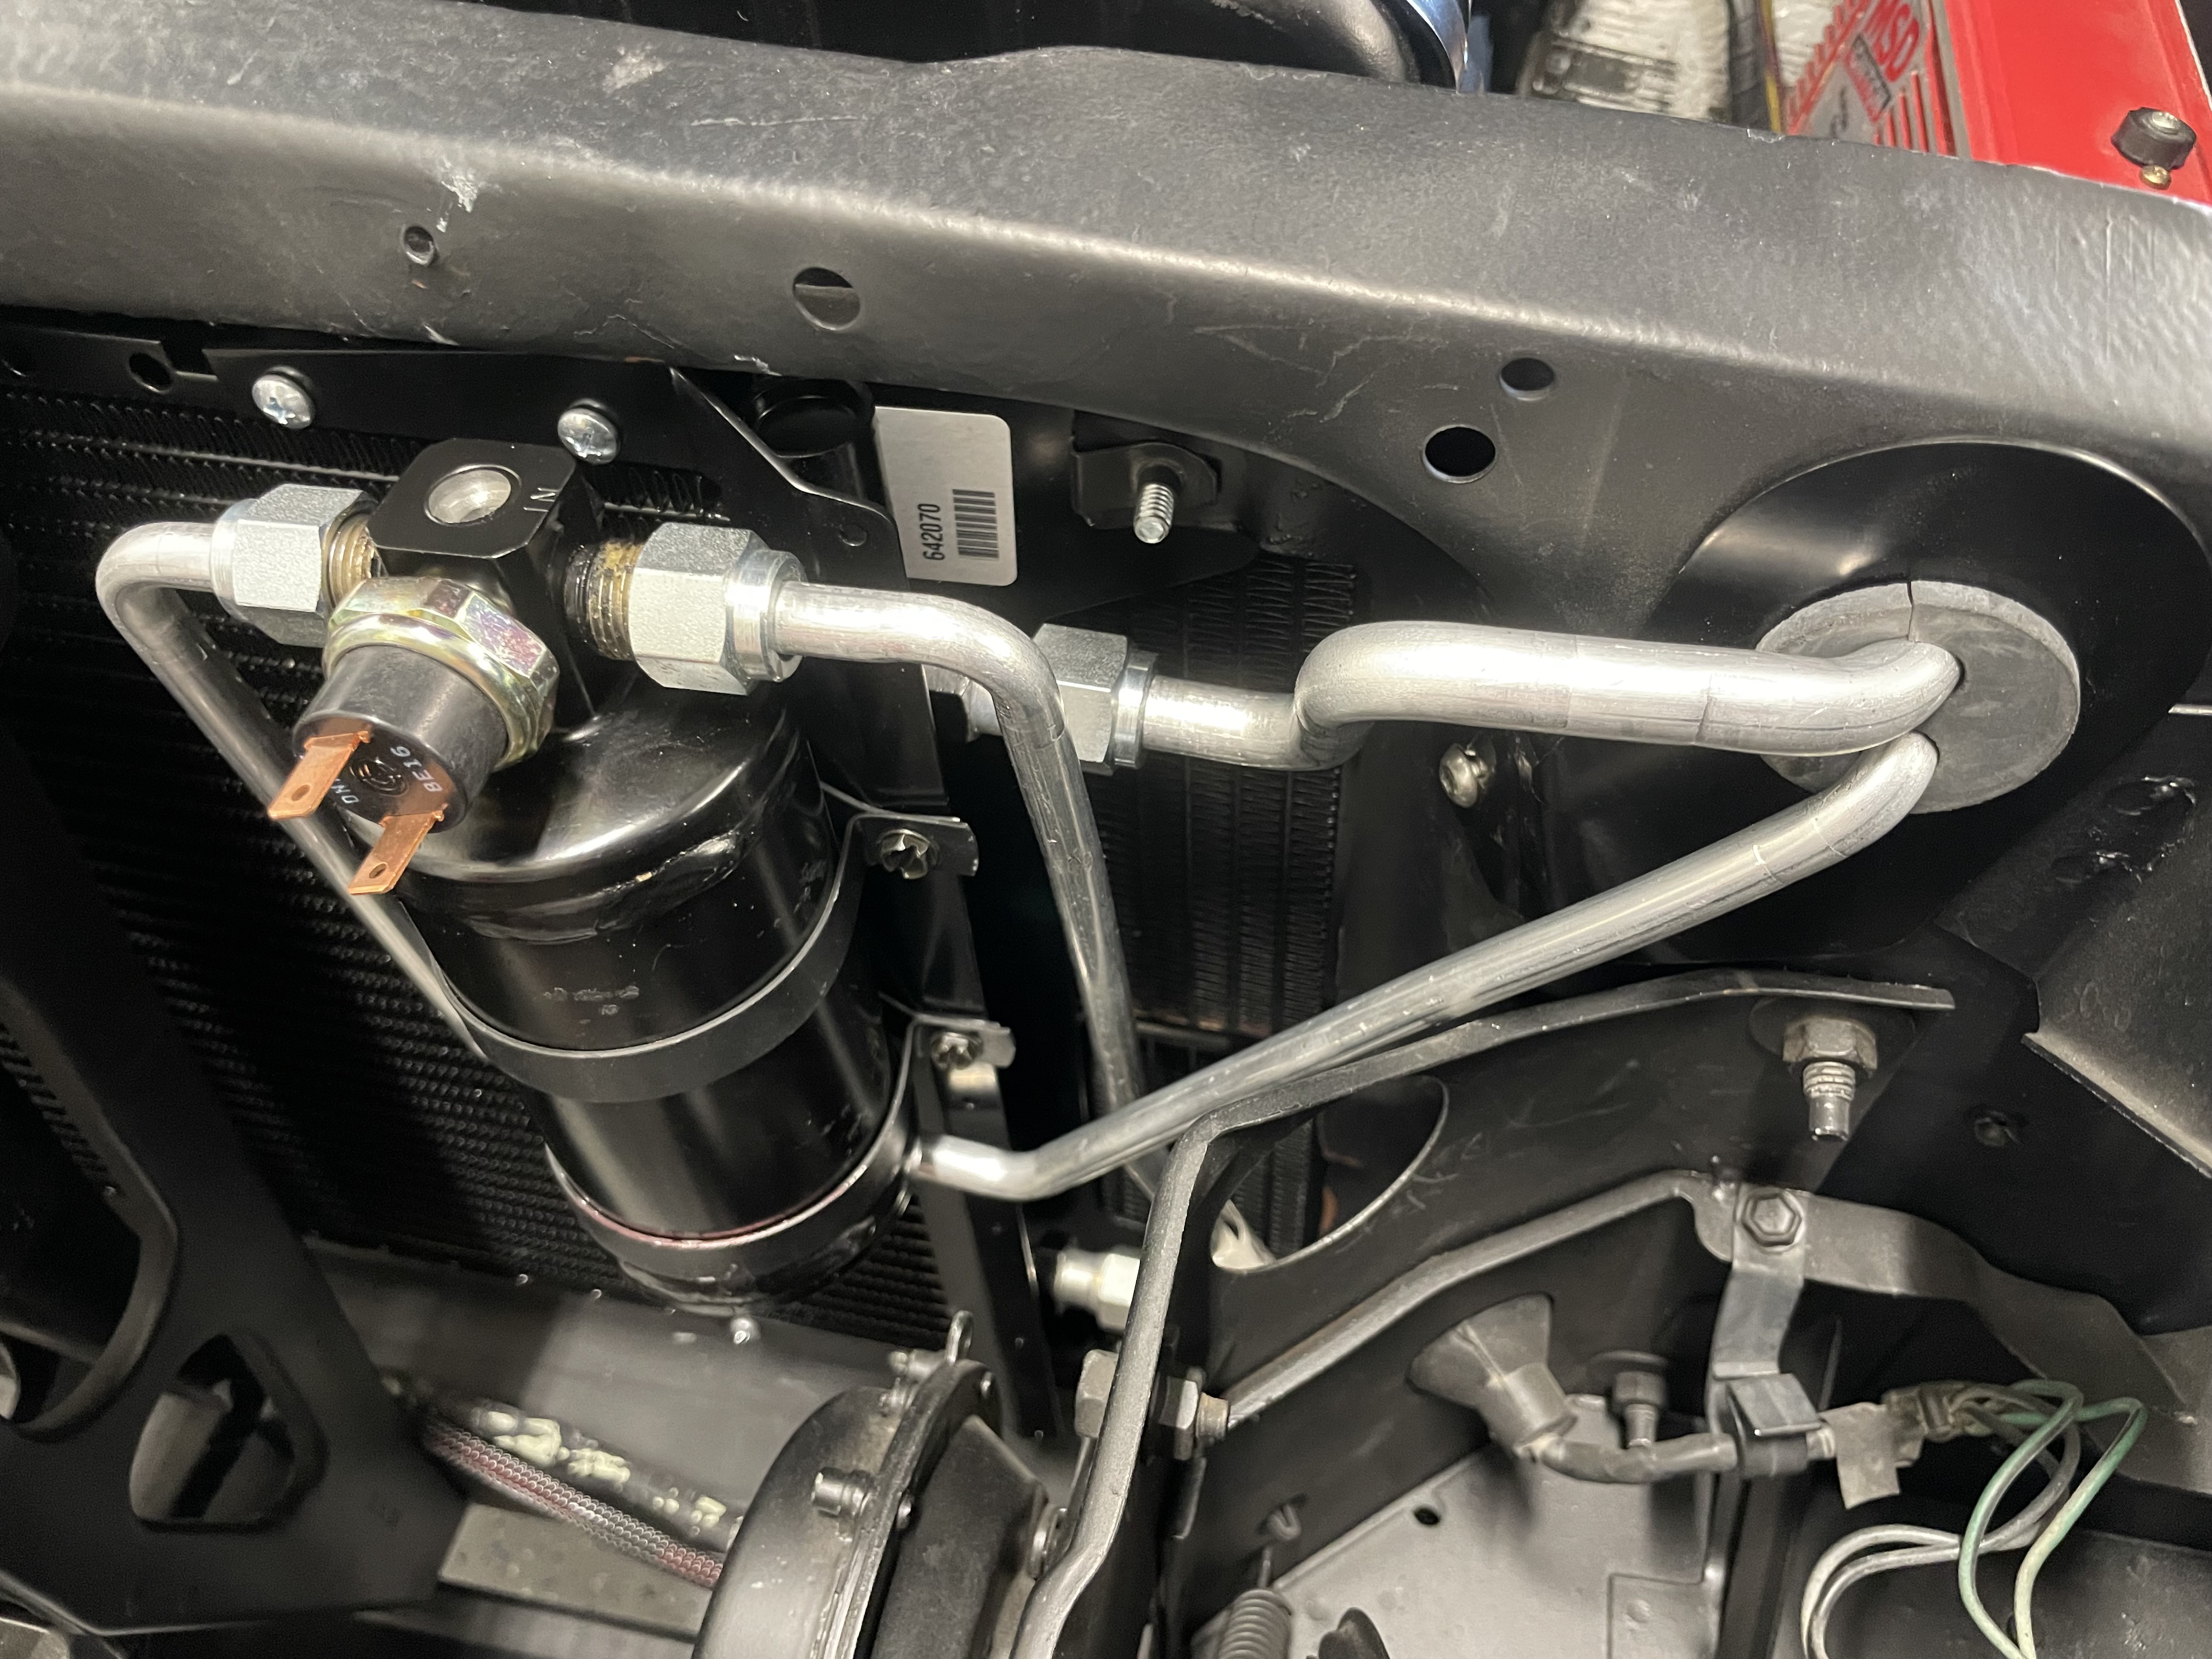
Thats as far as I was able to get in the past few months but do hope to pick back up on it soon. Just recently I was able to get the condenser and drier lines situated under the hood too. I had to fix the previous owners booger hole on the header panel where the a/c lines pass through. Really just need to get the duct work finalized, a/c compressor install and lines ran. heater valve and core needs hooked up etc. Hopefully before summer sets in here would be my goal but you know how that goes!
I still need to install the EFI that’s been sitting on my shelf for far too long! Life gets in the way of my projects most weekends it seems!
I know how that feels, hard to find time these days to get out to the garage. I can tell you that once you run the flex dchuct for the HVAC space under the dash becomes pretty mu non-existent so you made a good move getting the EPAS motor/column installed ahead of time. I’ve had my gen 1 Sniper installed for years, other than one failed O2 sensor it’s been bulletproof so I think you’ll have a good experience with it.
Forgot to post the line routing from the condenser/drier assembly. Someone butchered a hole in the header panel in the past so cleaned up as much as possible and used the filler plate to dress it up some and hold the lines. I mounted it on the front side of the panel rather than the rear due to my relay/fuse box location. This took a little modification to the bracket. I plan to get a connector for the binary switch to clean it up. I don’t want spade connectors hanging off.
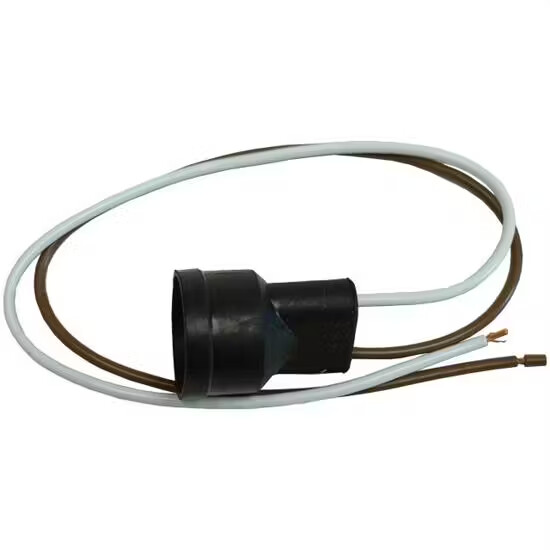
There is a minor hack for compact connections
Use flag style female connections. The wire feeds into the side of the connector. It will look like a flag with the wire as the pole. Slip shrink tube over the entire connector. Leave abut 1/8” at the top and a little more than that on bottom. Shrink the tube. Then use a razor blade to cut a slot in the side for the male part of the connector to enter.
This makes a very tight connection that’s also well insulated
So the vintage air install has been an on going project for over a year now! Can’t believe it’s taken me that long and it’s still not complete! One positive about arizona summers is no one wants to go outside so I actually get garage time!
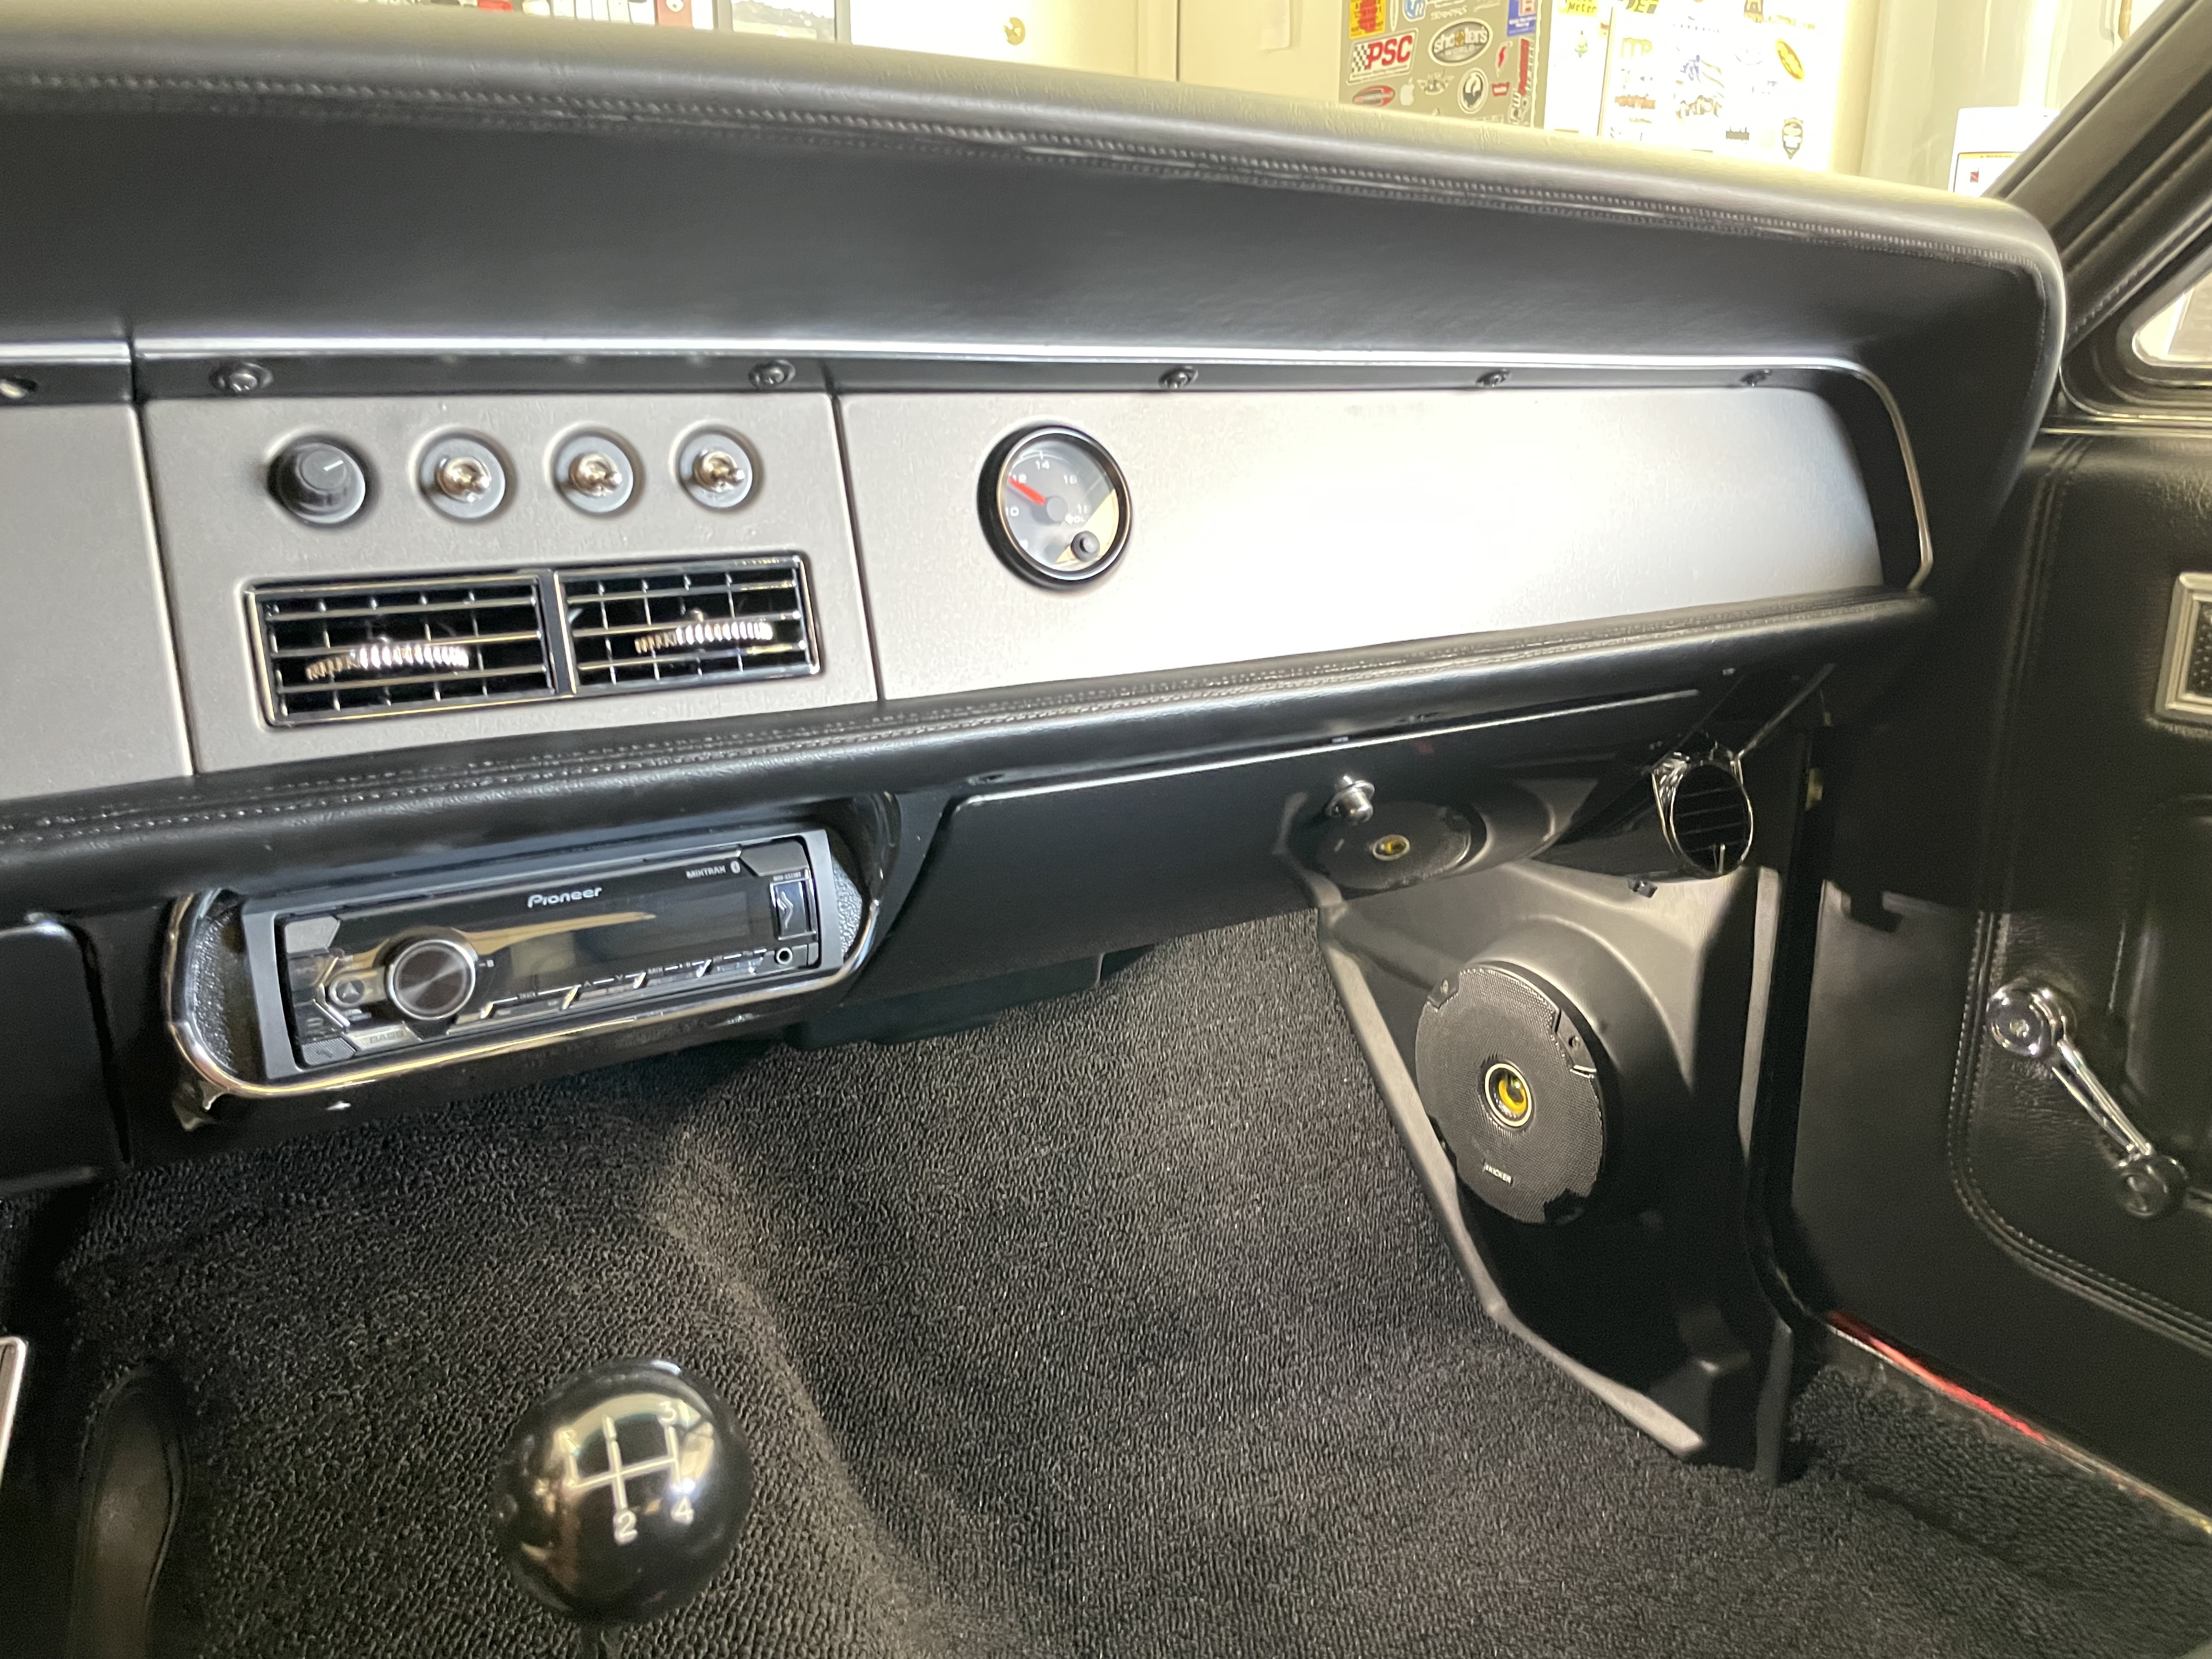
However as long as it’s taken Im getting close. All the wiring and interior behind dash work is now complete. Just need to finish the underhood work with the compressor, lines, heater control etc. the vent tubes behind the dash have been the hardest to deal with. Just isn’t enough room for them all so had to make some adjustments and change it around to fit my particular needs(epas stuff in the way, center vent adaptor size issues etc. Finally after fighting it for hours I’ve got a good layout(I think) I did eliminate one of the hoses to the center vent and used a Y adaptor to split one hose into two alone with stepping down the 2.5” hose to a 2” to properly fit the center vent. This leaves one open port from the evap box and frees up a little space in the dash. I think I’ll use that extra port to get ac to the rear seat via center console. Programmed the controls and tested for air flow. Sides vents are strong and the center is not quite as good as I would like but it should be fine.
Not a lot of pictures since it’s not very easy to see what’s going on back there now without a mess of ac vent tubes. Gotta give a shoutout to xr7g428 on these Ac vents, these things are nice and worth every penny he asks for them. The fit and finish is top notch, I’ve had them for a bit and just realized the side vents are adjustable by turning the center. These are truly better than original!
Another thing to mention is avoid the vintage air kits from NPd and maybe other vendors and go direct to vintage. I have had to make several adjustments and purchases to get what I need which have offset anything I may or may not have saved by buying through NPD. Also I see vintage now has a GEN 5 kit which has some nice upgrades over the GEN 4 that I’m am currently installing
Like everything you do it looks great! This is a future project for me (thanks for the parts Gary!) and I’m interested in your feedback once everything is wrapped up.
Damn life moves fast, it’s been a while since I’ve been able to work on my car and I’ve got plenty
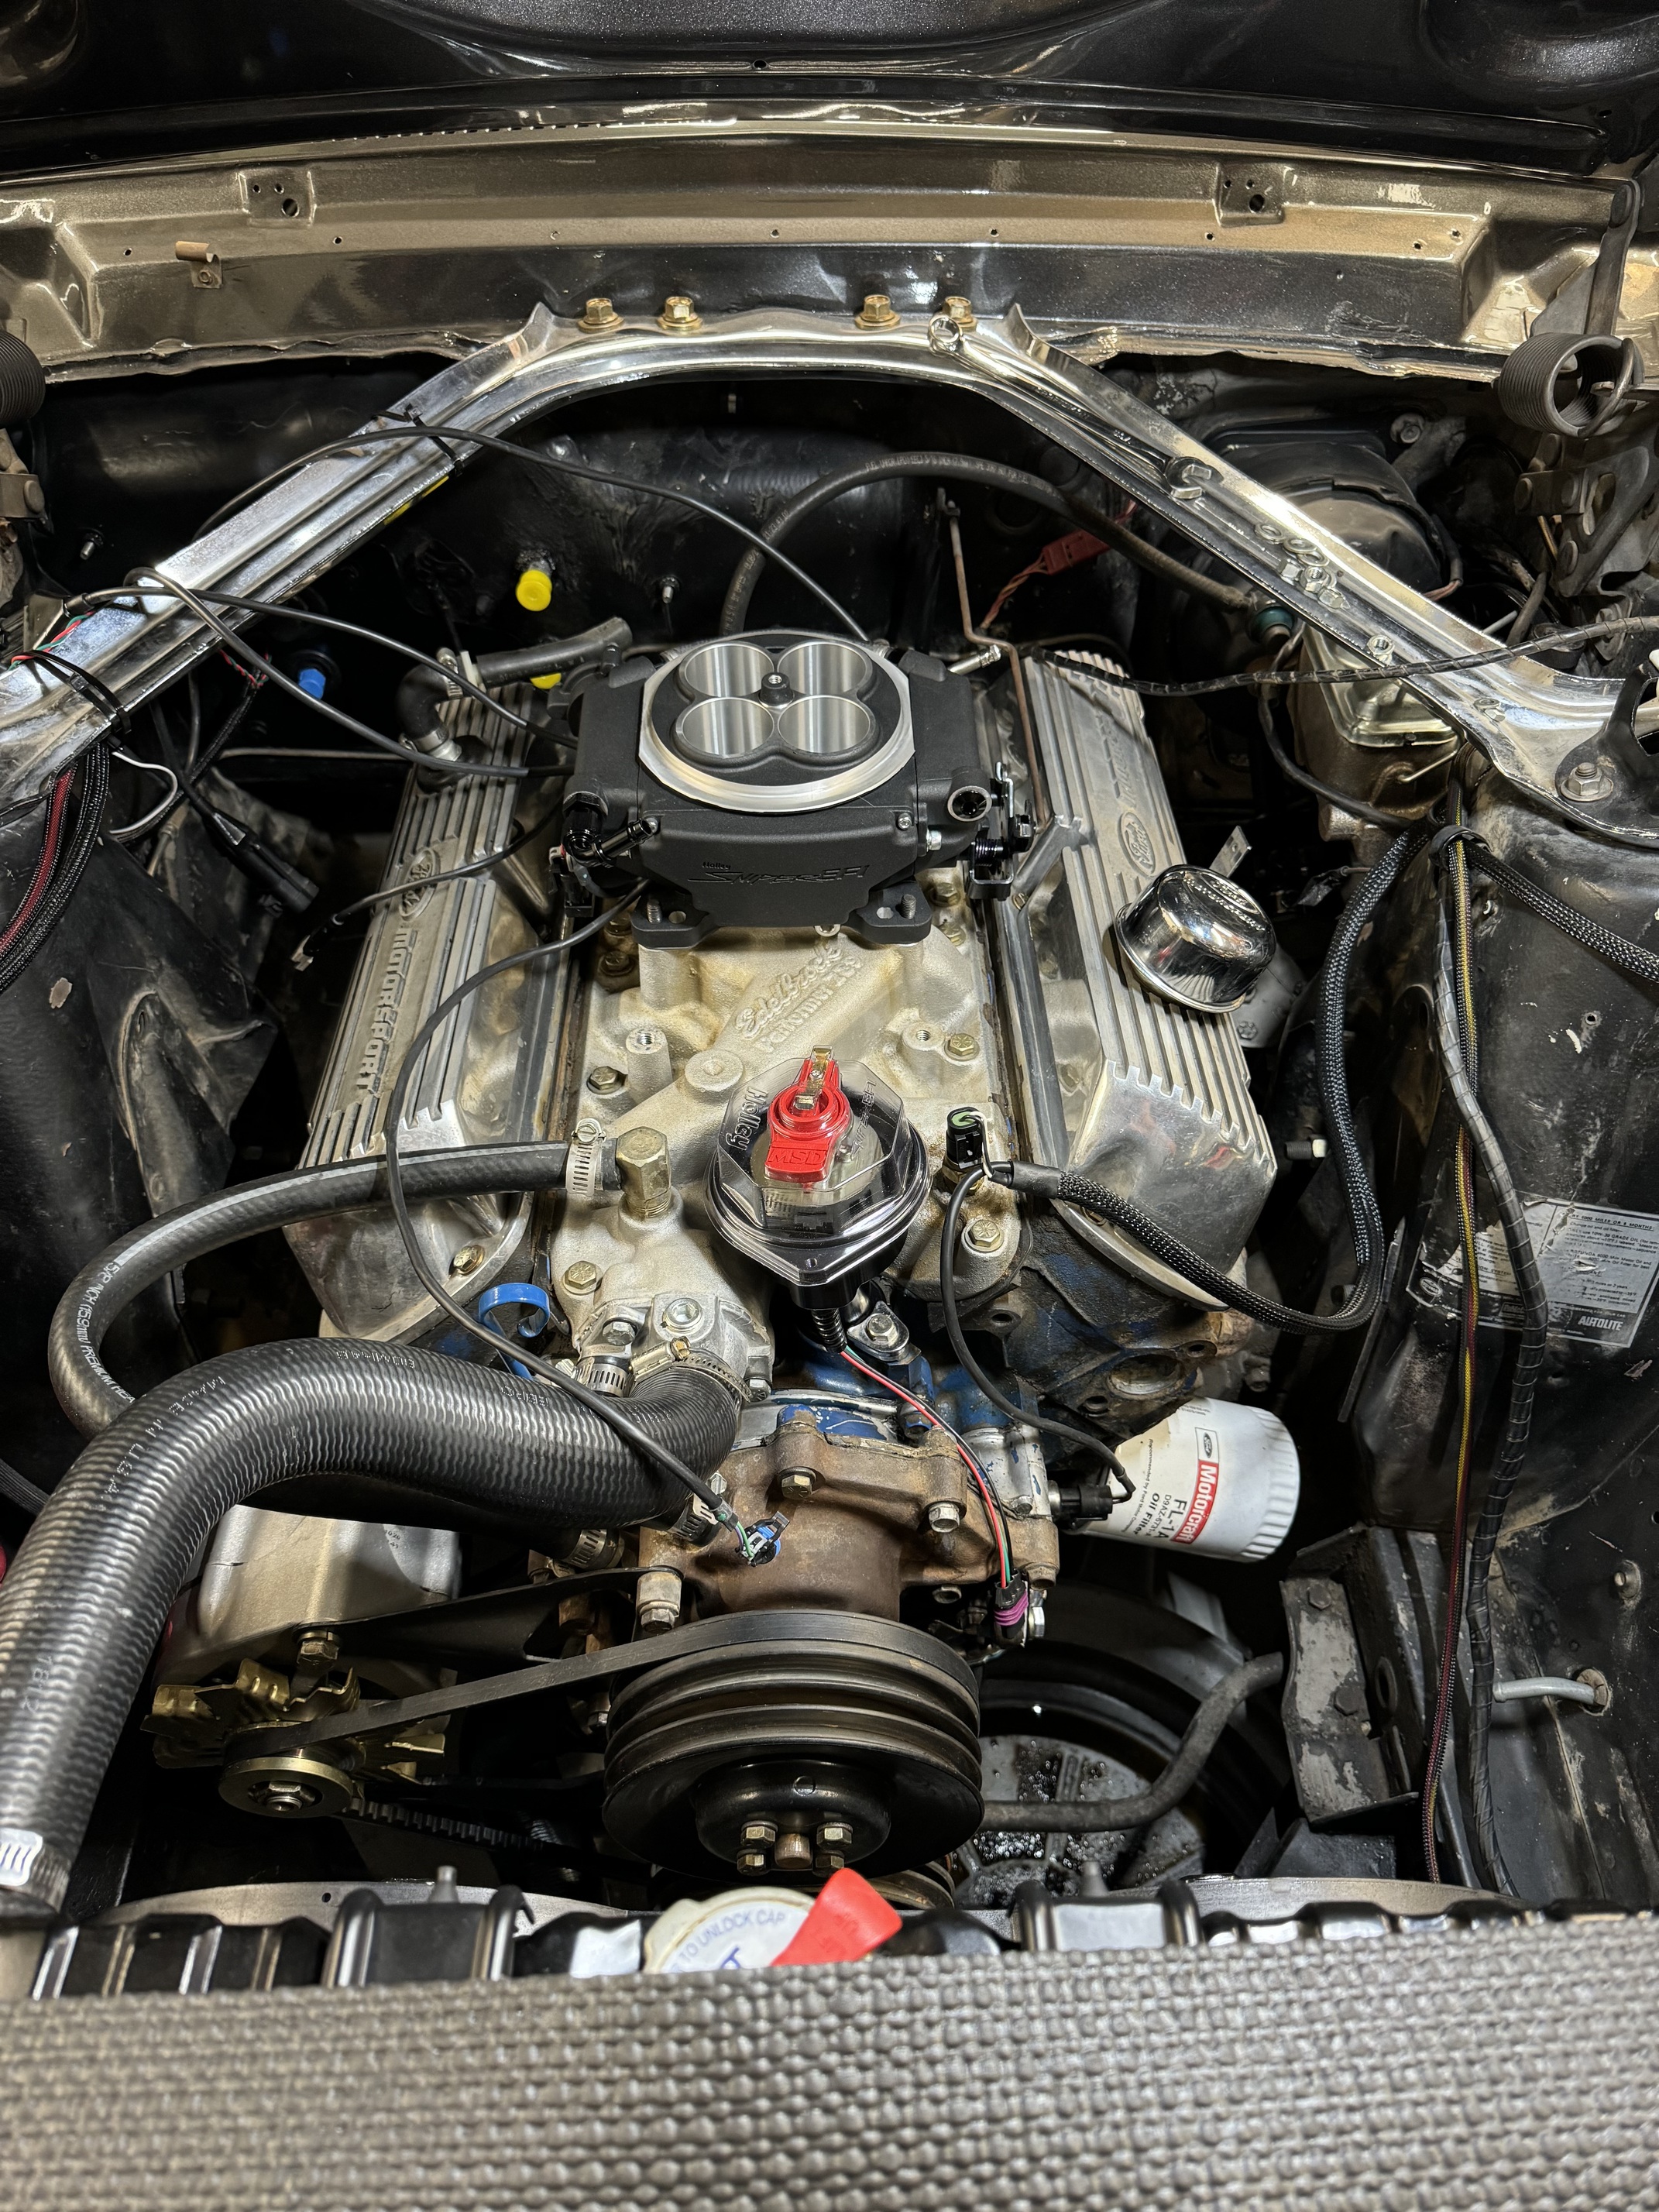
of loose ends and half completed upgrades going so why not add one more. I’ve had my sniper efi kit for about 3 years and have yet to install it. It’s that time again my carb is starting to leak and needs to be resealed again and I don’t want to mess with it. It’s been so long the sniper has now been updated to a gen 2 now. Such is life I guess! However this is the week it gets done!
In case your wondering no I have yet to finish the AC install, it just needs the compressor installed and some lines crimped so it’s close and won’t take much to finish up.
I’m happy with my EFI conversion, I just need to take a day to really fine tune it.
I’m getting a stumble and shutdown when I mash the peddle from a dead stop.
I already know the fix, just have to do it.
EFI really woke up the bottom end for me where it can spin the tires and chirp 2nd.
I’m looking forward to the increased drivability, I’ve always had a poor cruise characteristic but would idle fine and wot open hard pulls ran fine too. I think that was due to the mechanical advance msd distributor the previous owner installed. I think he set it up for wot rather then overall performance. I didn’t care enough to mess with it as it was the wrong setup for my needs.
On my previous sniper install on my dad’s mustang I want to say it tuned itself pretty quick after we got the initial RF issue resolved. That happened about 10-20 miles into testing. So after starting over on learning after the repair I wound say 50-100 miles at most. Or at least perceived learning changes that are noticeable took that long, it’s makes smaller changes over time.
I’m thinking on mine I can play around more with tuning manually as I have time. I have to learn Holley software as it’s different than anything I have used. I just didn’t have time to play with any of that on his car. I know there are guys specifically tune Holley efi and you can send recordings to them and they can fine to your needs so there is always that option too.
I’m running the returnless drop in tank pump. I also replaced on my factory fuel line as it was something I never replaced, it’s never been fully clean and sends junk up to the filter more often then I like. Efi hose used on all the rubber sections. I do need
To find a better solution from frame to engine but will just run rubber line for now.
Will see what else pops up once I get it fired up. Always a chance for bugs with these types of installs. While setting TDC for the distributor install I didn’t like the plug being wet fouled, Pulled a couple others for sample and they look good. Hoping it’s just carb things since It got started cold to move then shut off. Before that I drove it to a cars and coffee show for a round trip of 10 miles. Never had a misfire, smoke or runs rough but it’s unknown mileage engine or rebuild original to the car.
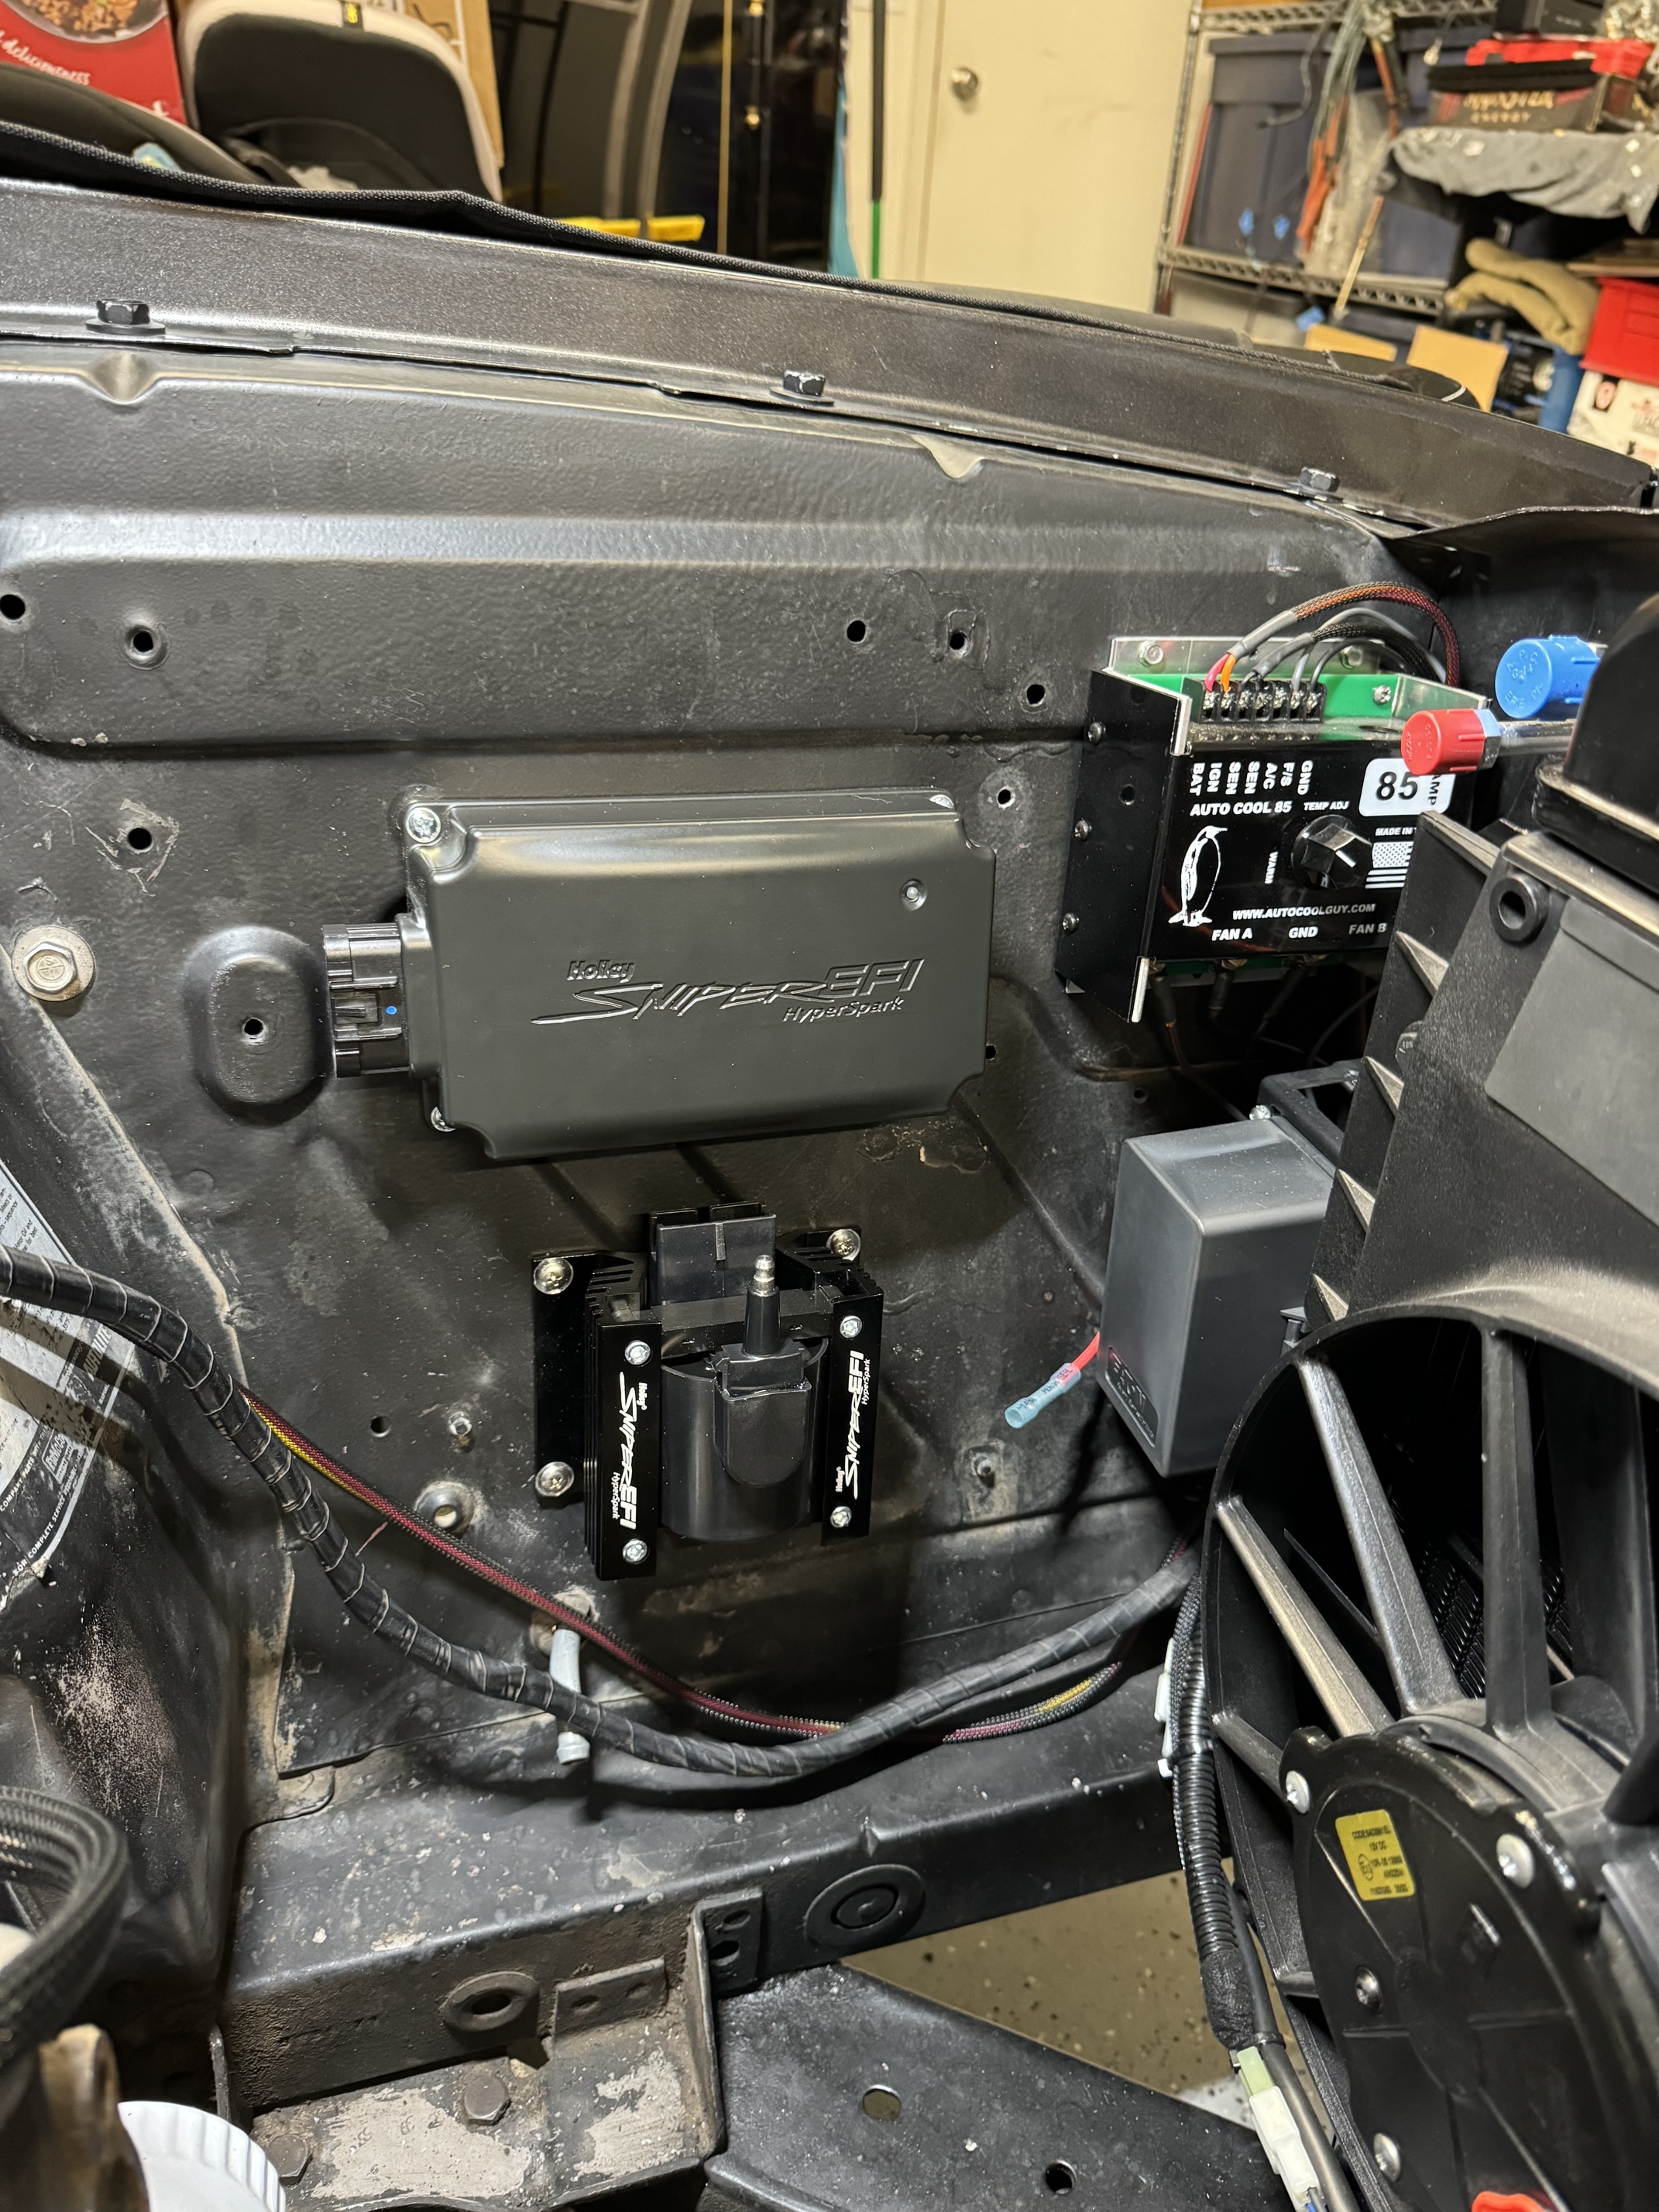
Today’s progress was mostly spent fishing wiring to the fuel pump without taking the interior out, mounting the cdi box and coil. Still need to drill and weld a bung for the o2 sensor and wire up everything and build new plug wires. Hopefully she is running again by the weekend.
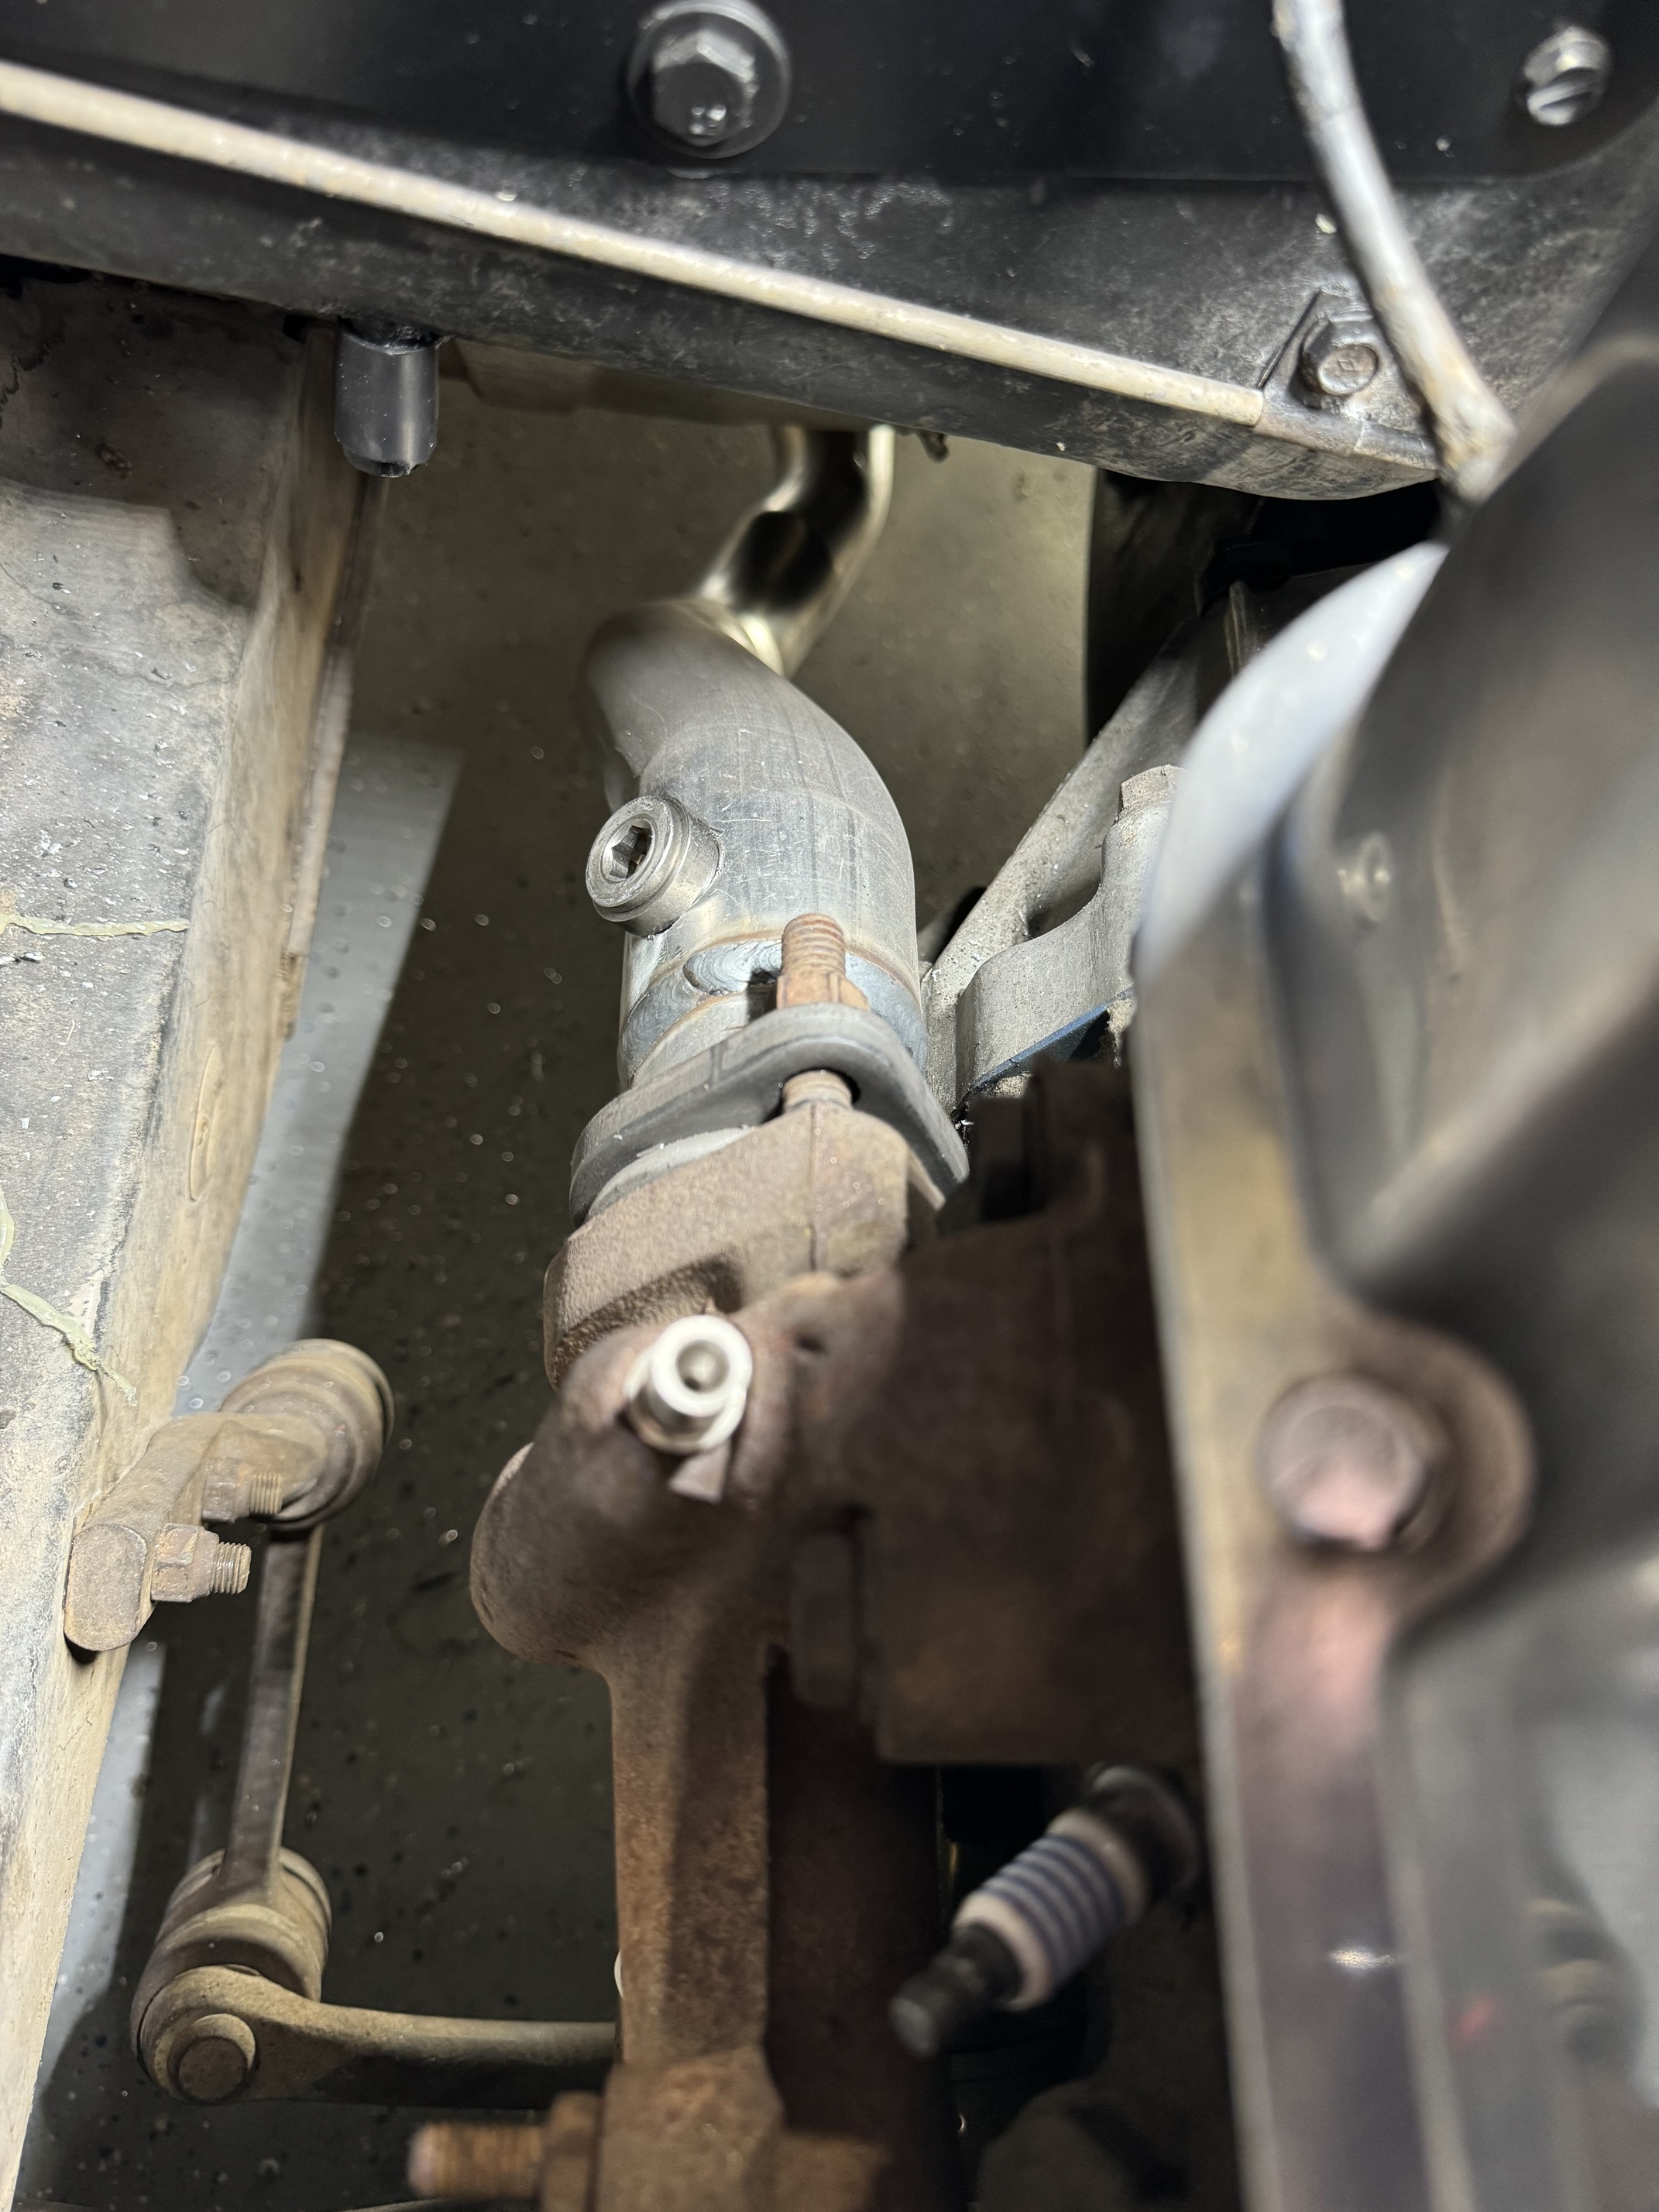
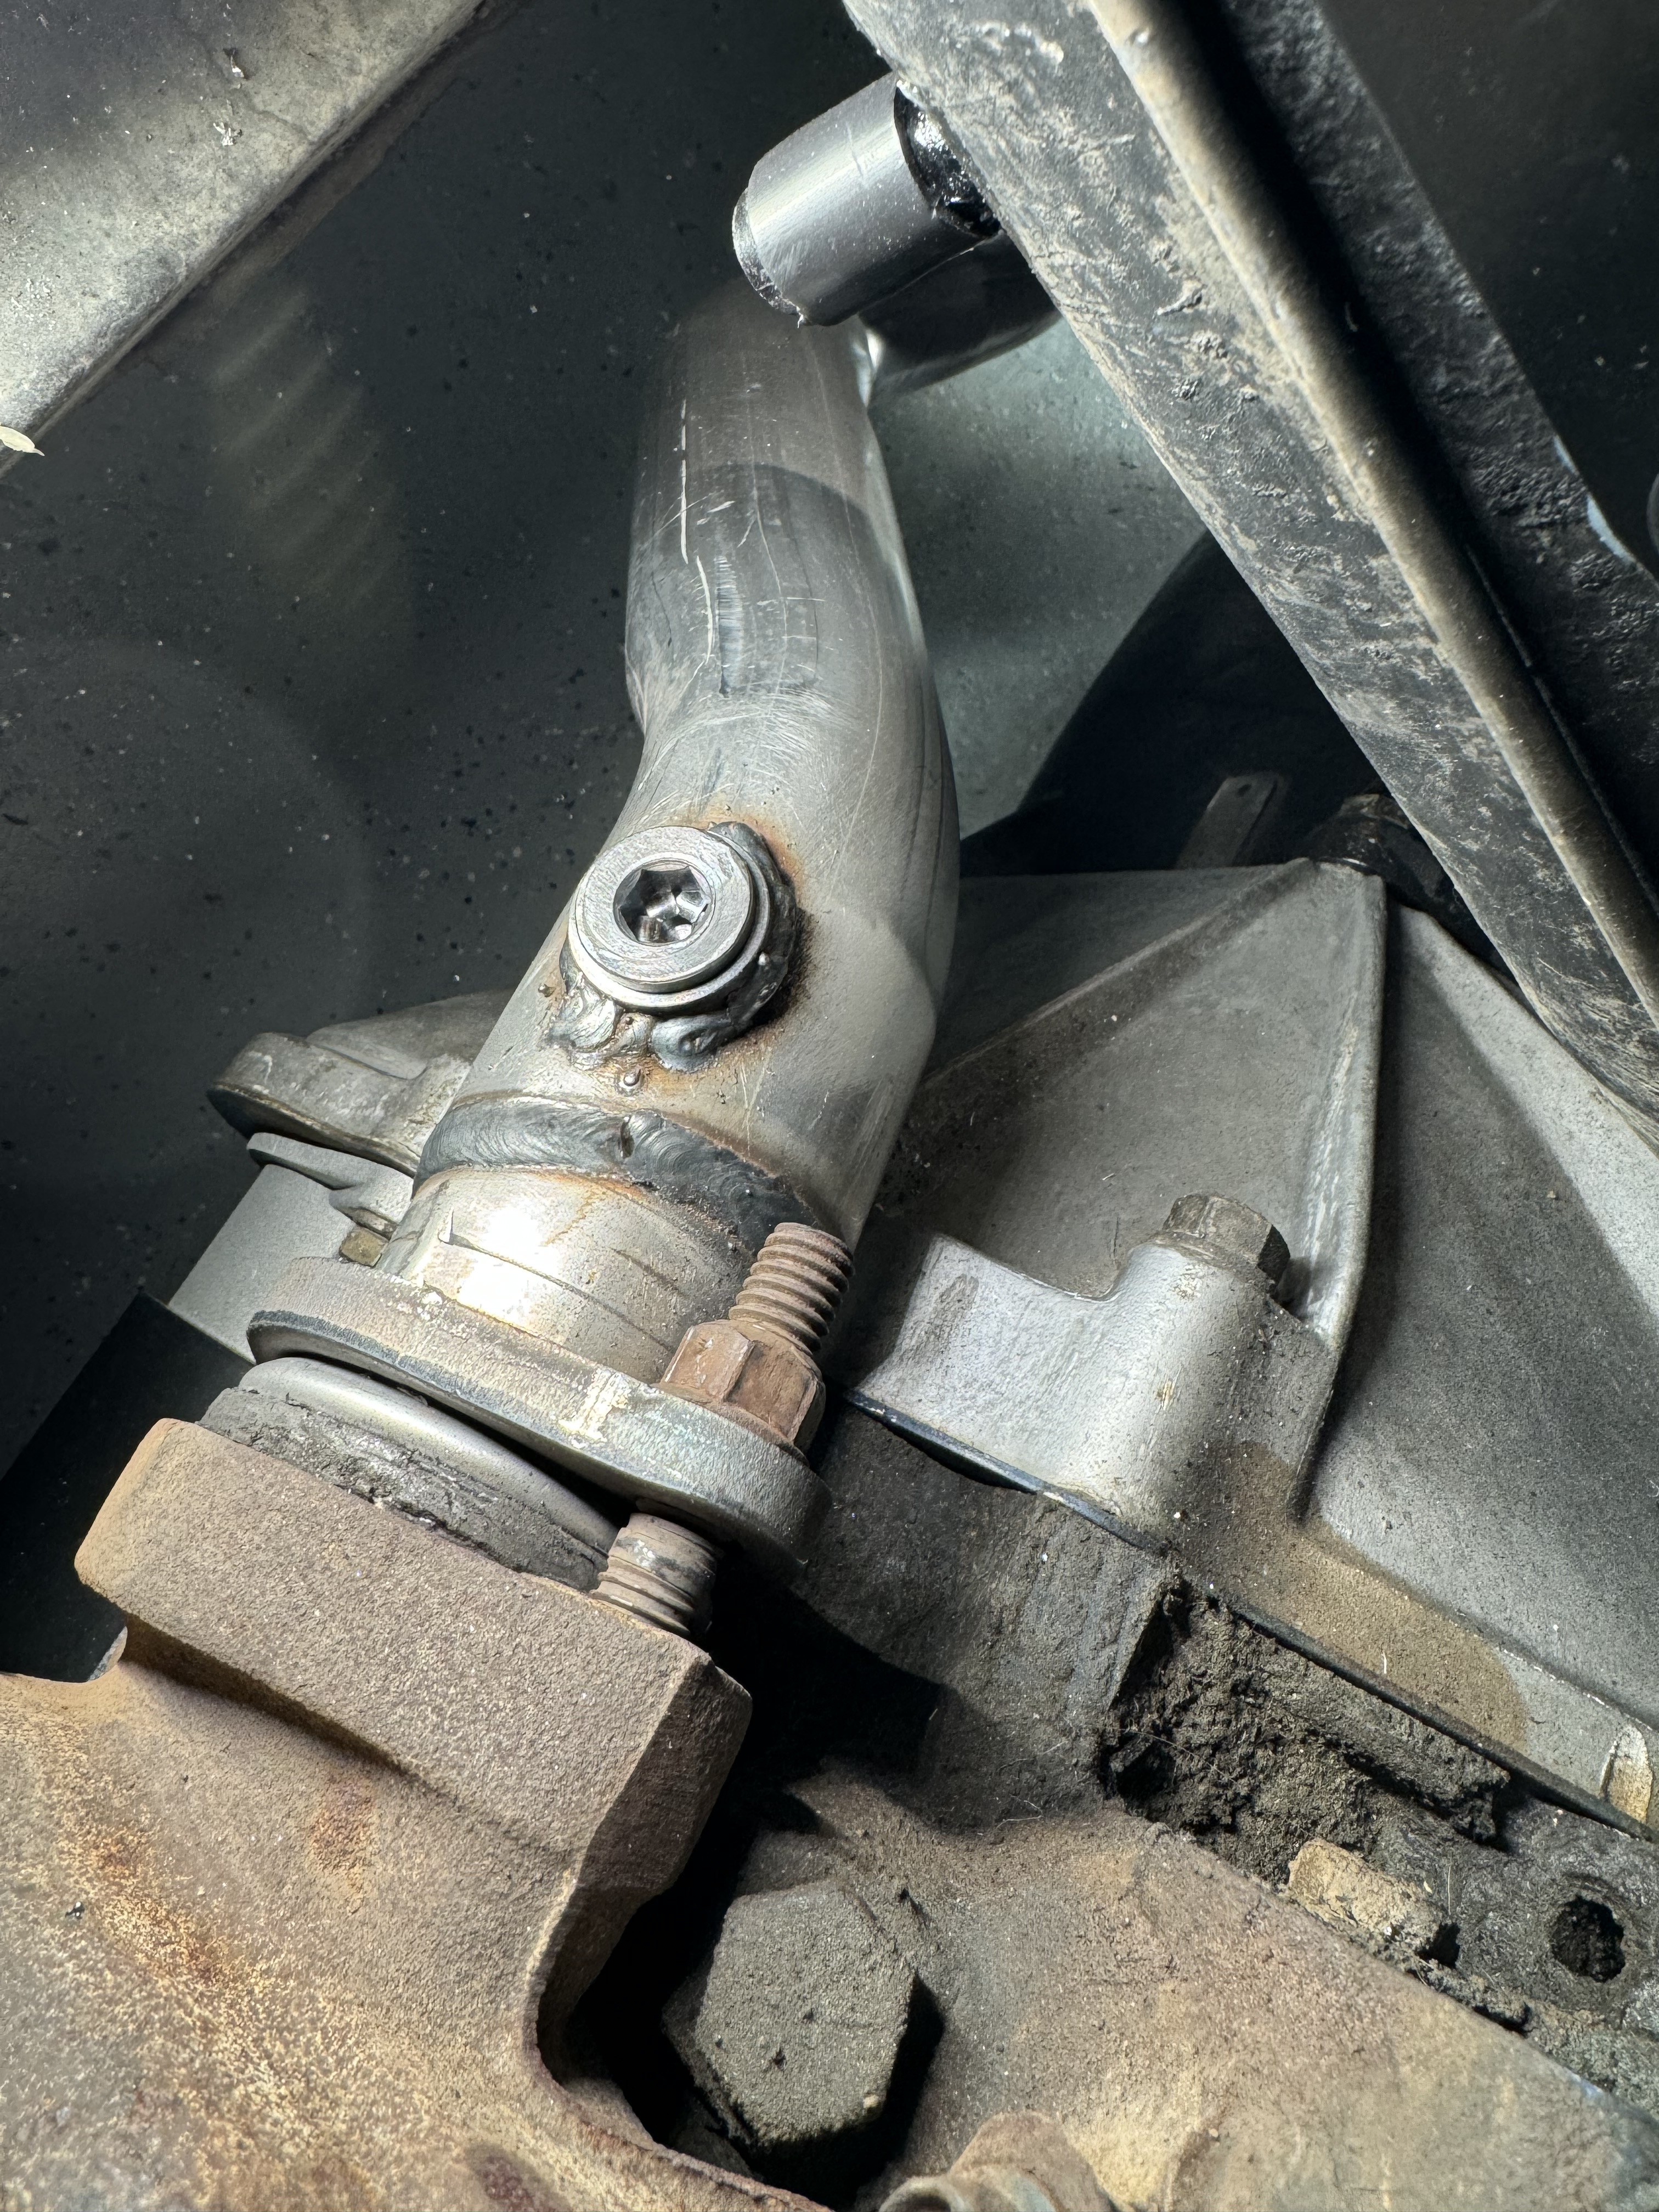
Today’s order of business was to work on some wiring and get the o2 bung welded in. Was able to do it on the car which part of the reason I chose that location however still a pain to get the mig gun in there to weld it in. I will eventually run headers so it will get moved eventually and done on the bench will result in a much cleaner install. Highly suggest using a weld in bung if you can over the clamp on system that comes with the kit. That kit is for 2.5 pipes rather the 2.25” and used band clamps to hold on a bracket that has the o2 bung welded onto it. While it does work just not as clean as a welding in a bung.