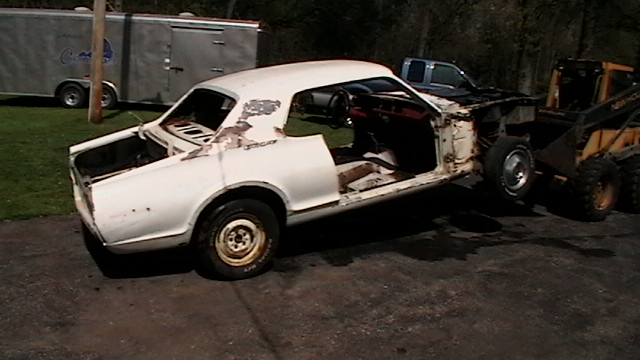
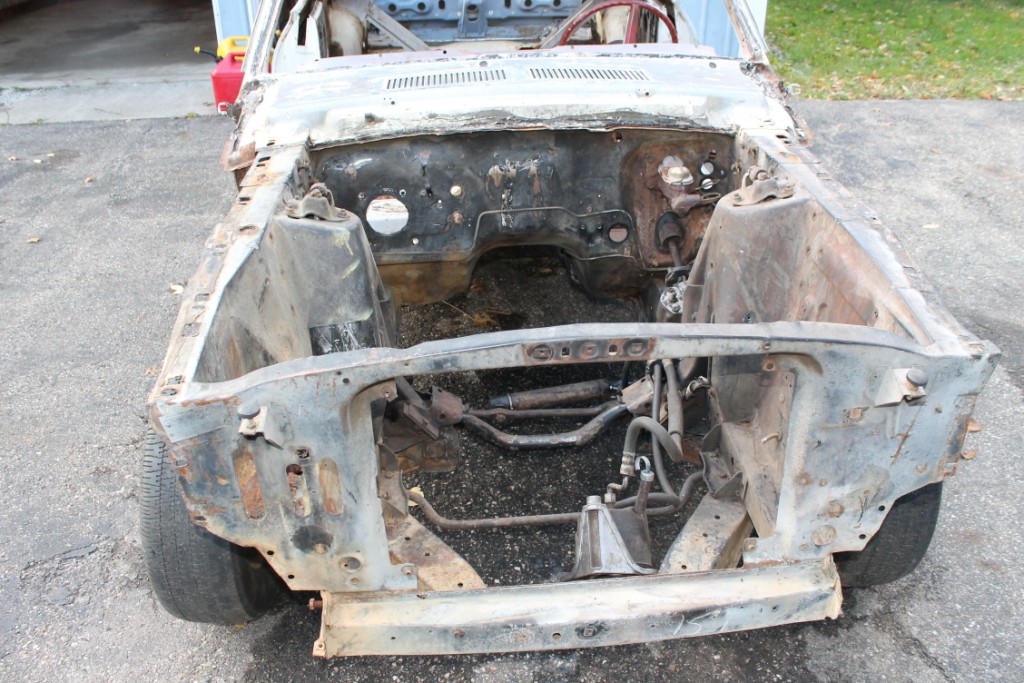
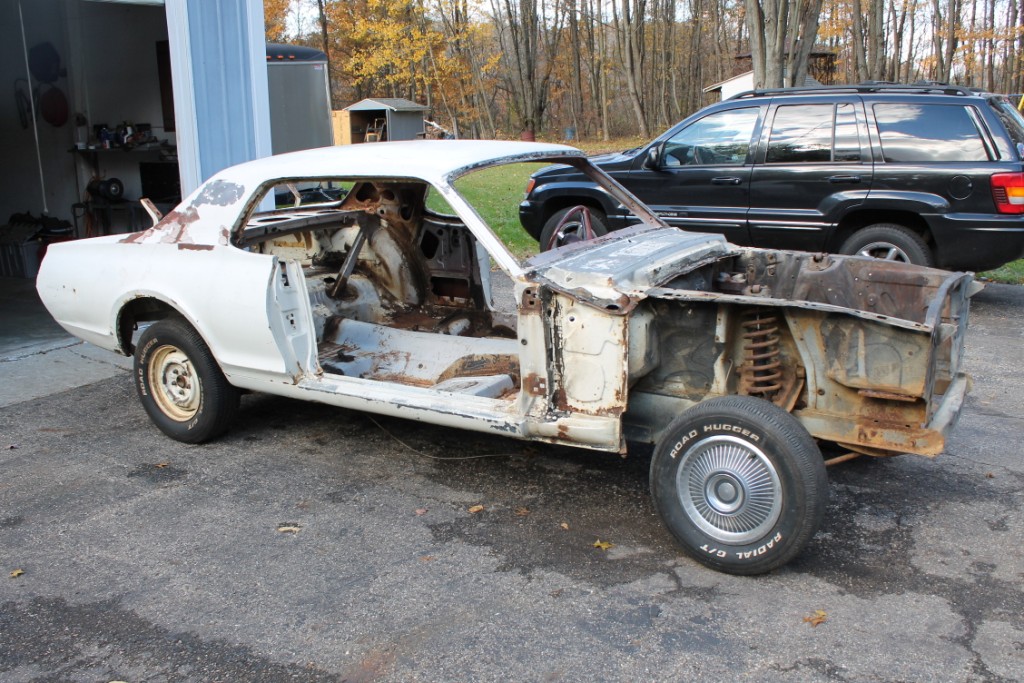
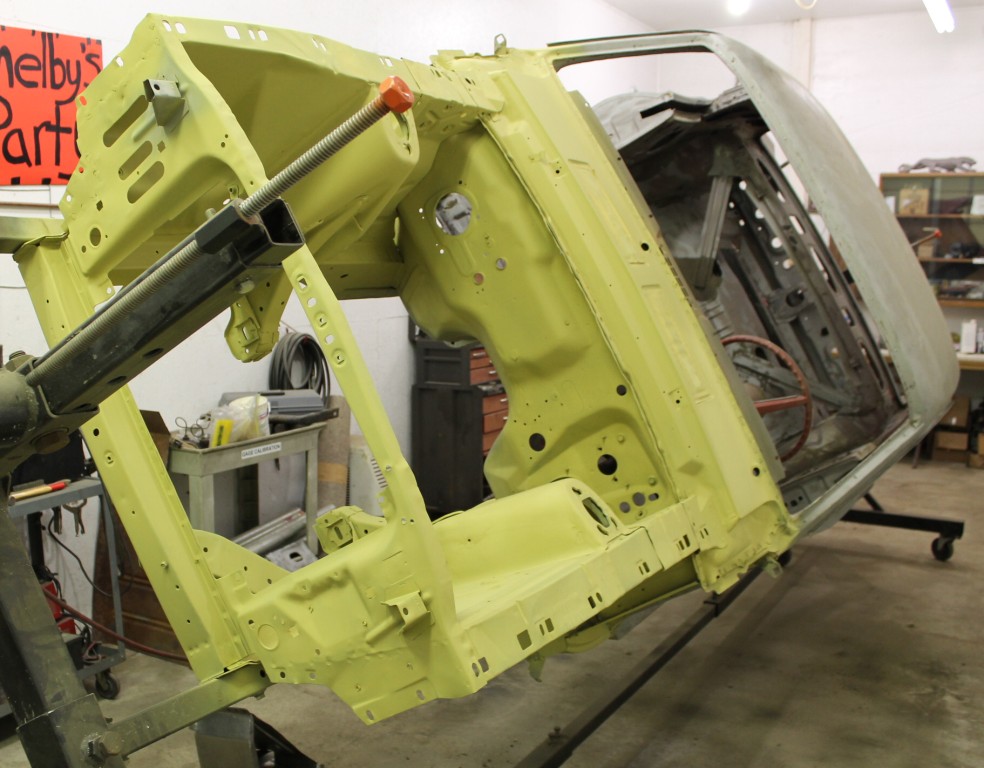
Well seeing how this (Seattle) project just got moved from the barn to the shop and I delete all the old pictures. Here is a picture of what I’m starting with (picture taken last year). First is to fix some of the rust on the body. It will need a front driver-side floor pan and a patch in the rear passenger-side pan. Some work around the rear gas tank and a little on the driver-side quarter. Well that’s all I can see for now, but I’m sure their will be more discoveries. The rest of all the sheet metal not on the Cougar is all really nice and shouldn’t need any body work. Let the fun begin!
My son and I got it all stripped down and the engine/trans removed. Taking it to the blast booth on Saturday for some dirty work. I think my son is actually looking foward too it ![]() Wait until he really finds out what a dirty job it is. This will be a good test for his enthusiasm towards the Cougar project
Wait until he really finds out what a dirty job it is. This will be a good test for his enthusiasm towards the Cougar project ![]()
Five hours and $200 later it is all blasted. Mitchell did just fine blasting, and with both of us in the booth it went relatively quick. Got the rest of the suspension removed and mount on the rotisserie to finish getting all the media out.

Brian it looks like the body is really solid. What direction are you going with the build? Restomod or original?
Steven
That’s a pretty cool project. A body in white makes for a great starting point.
I’m about ready to get something like that and make myself a roll cage/no interior kind of driver.
Turning it into a road racer/street car. Nothing will be stock on this one. Upgrade suspension the works. Haven’t committed yet on everything as it is still in the planning stag as I get the body in order.
https://cccforum.discoursehosting.net/t/suspension-setup-for-road-course-street/3167/1
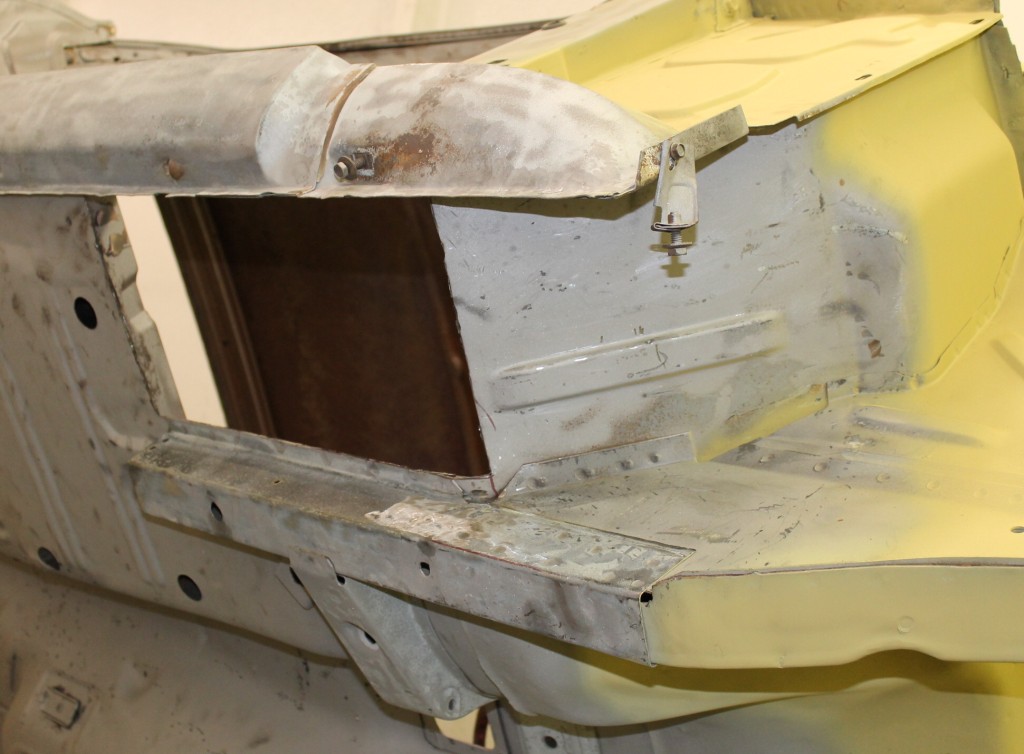
The body isn’t to bad and worth saving, but it is the most rusted Cougar I’ve worked on. Currently have the battery panel removed to replace. It will need the cowl repaired and some patches in the floor pan and trunk area. The lower quarters will need some repair as well…stay tuned I’ll show the body work as I go. Not positive on the engine choice yet, but plan on being around 500 hp range.
That’s a good one to do with the kid, what with all the rust repair and stuff.
I’m eager to see the process. ![]()
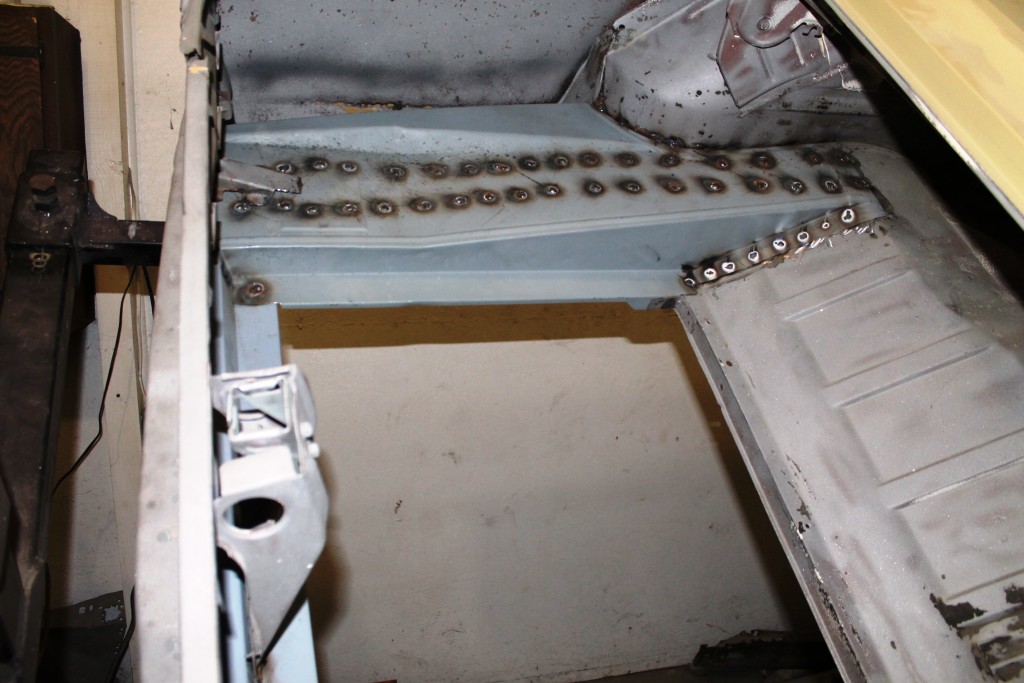
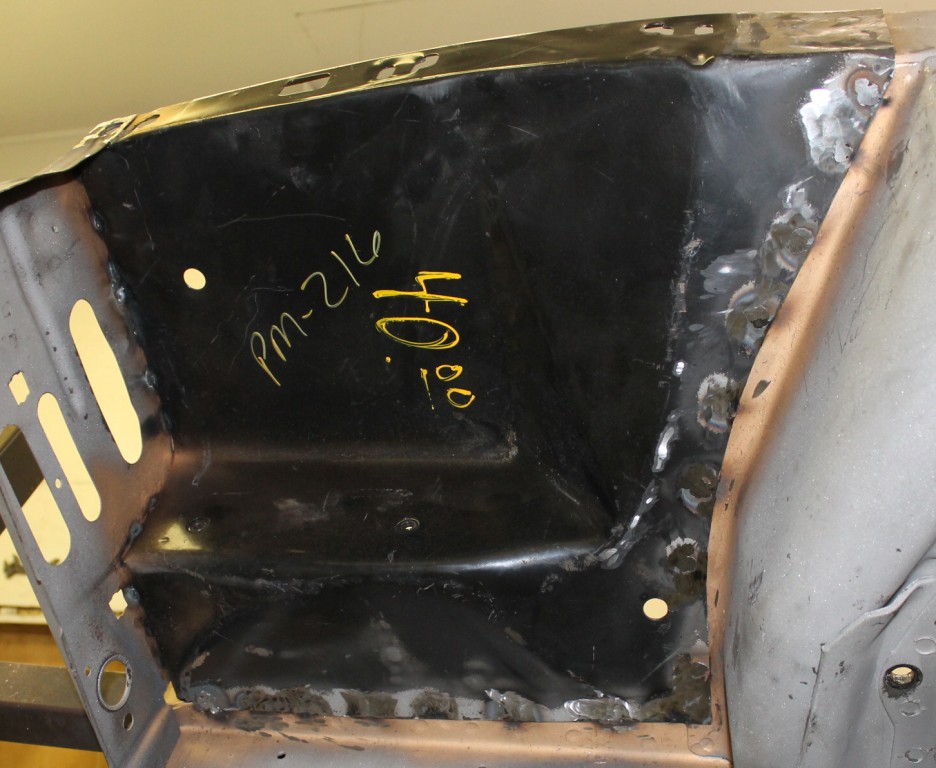
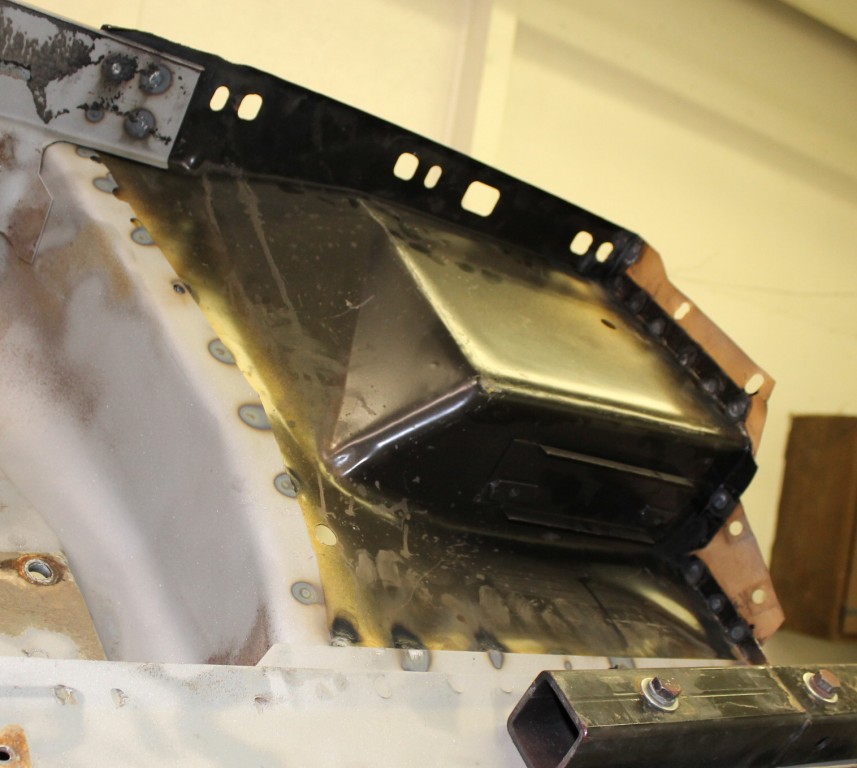
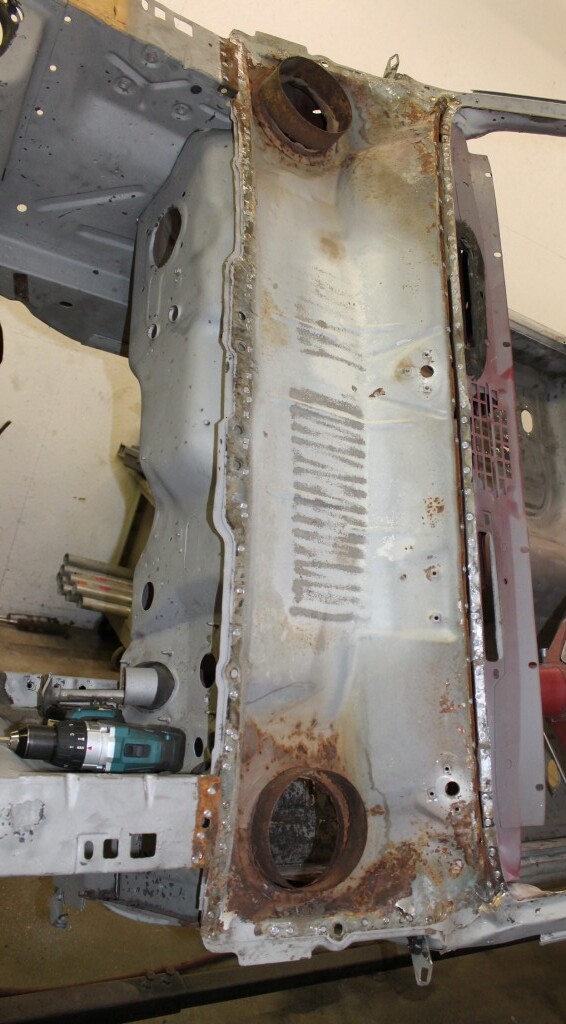
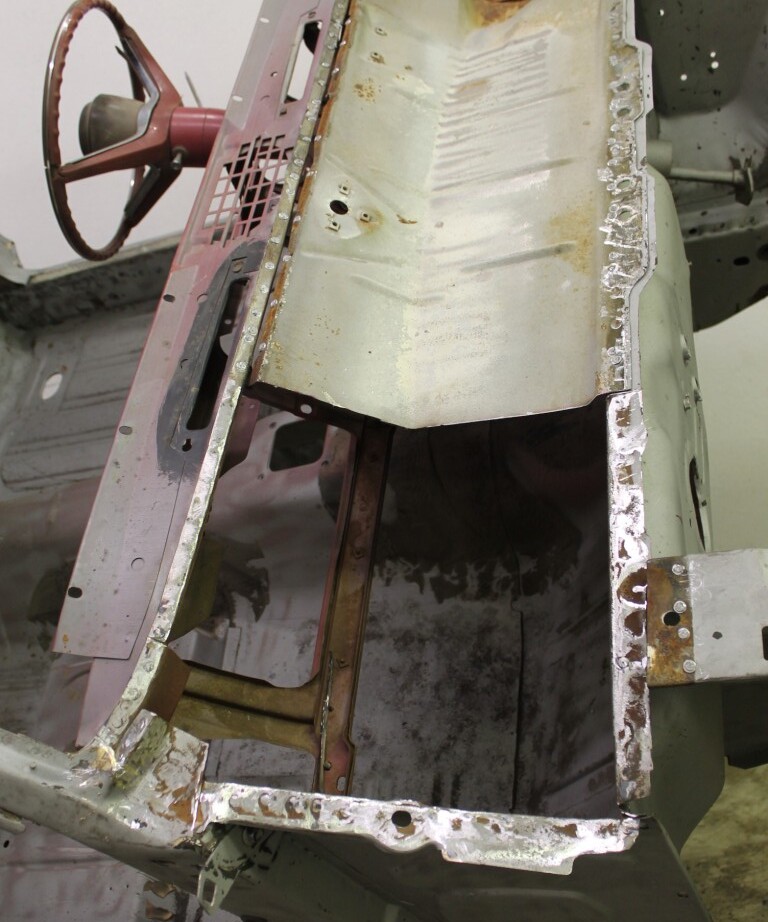
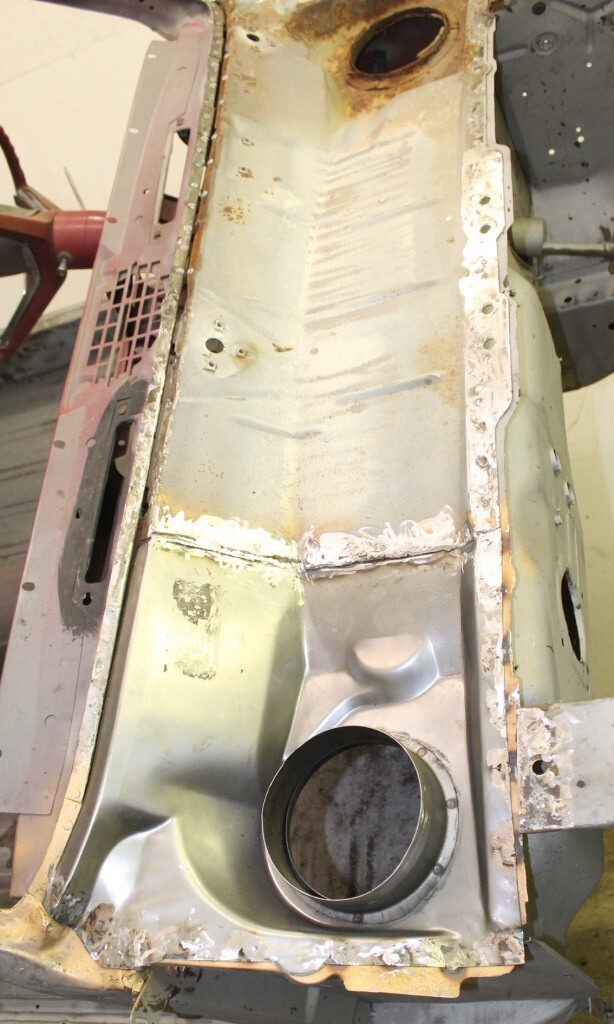
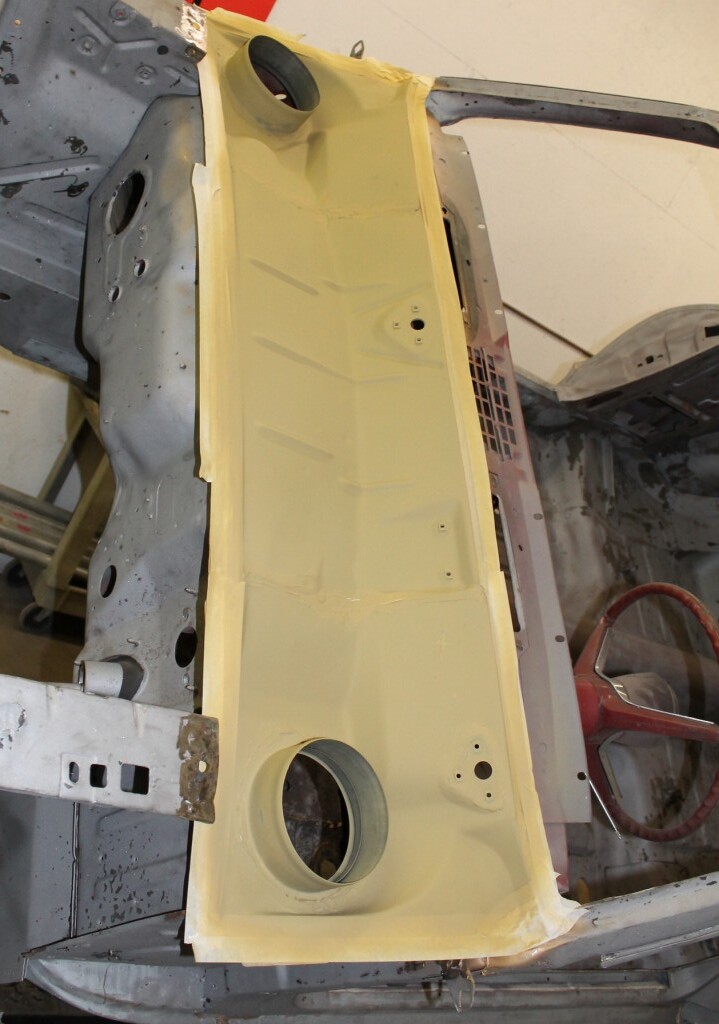
Update time: Got a delayed some this last week as my grandma (last surviving grand parent) past away Sunday at 97 yrs old. Then to make matters worst in the middle of welding last Sunday afternoon. The storm hits us and I’ve been without power for four days. But, the house and shop are undamage and no tree damage, so not complaining as others suffered a total loss. Things are back to normal and progress continues. First off last week we got the new battery panel welded in. Then on to the cowl repair. After drilling a bizzillion spot welds the upper panel was removed. The cowl vent wern’t real bad as mainly just the top hat was rusted off and could have been repaired with the slip in plastic sleeve that is offered. But, having the car down to a shell didn’t make this job to difficult.
Sorry to hear about your Grandmother, sounds like she lived a full life. Glad your house and all are safe and getting back to normal. The job looks great!
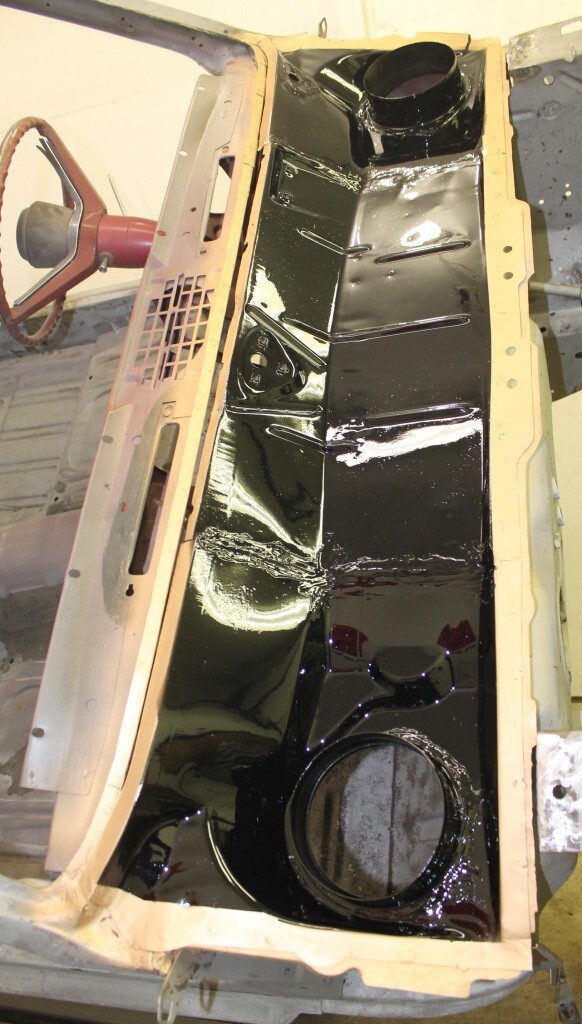
Got the cowl repair completed. Not a hard job especially with the Cougar tore down to a shell, but very time consuming! I thought when Bill Pratt said he paid over $3,000 to have his repaired it was on the high side. Now that I’ve done one it can see where it would cost $3,000 to have a shop do this repair. The main cost is the labor. I figured I have a good 40 hours into this repair, but I could reduce that down some if I did it again. You would have to add more labor if the Cougar was altoughter.The bad part is when you get done and have the top panel welded back on. It looks no different from when you started, so no great feeling of accomplishment. When finished I primed it and hit the seams with some seam sealer. Then painted it black with some leftover paint I had.
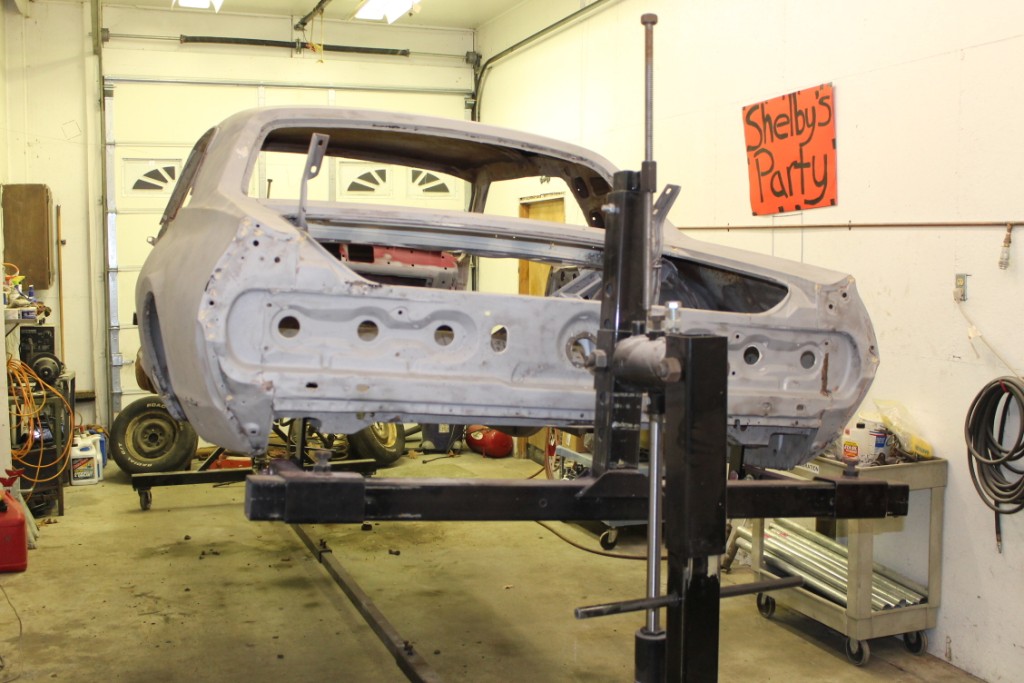
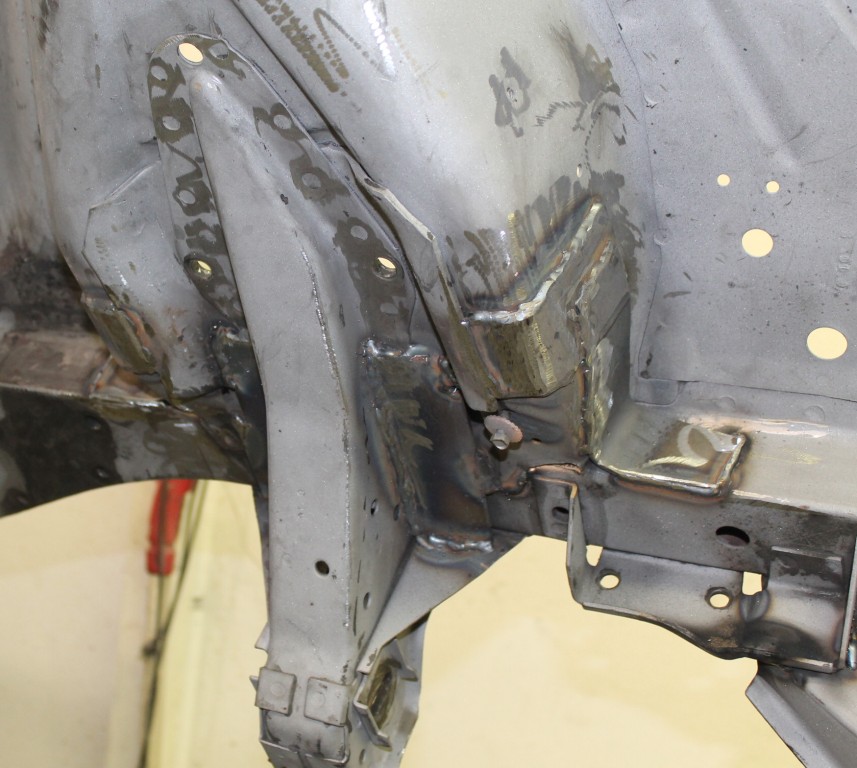
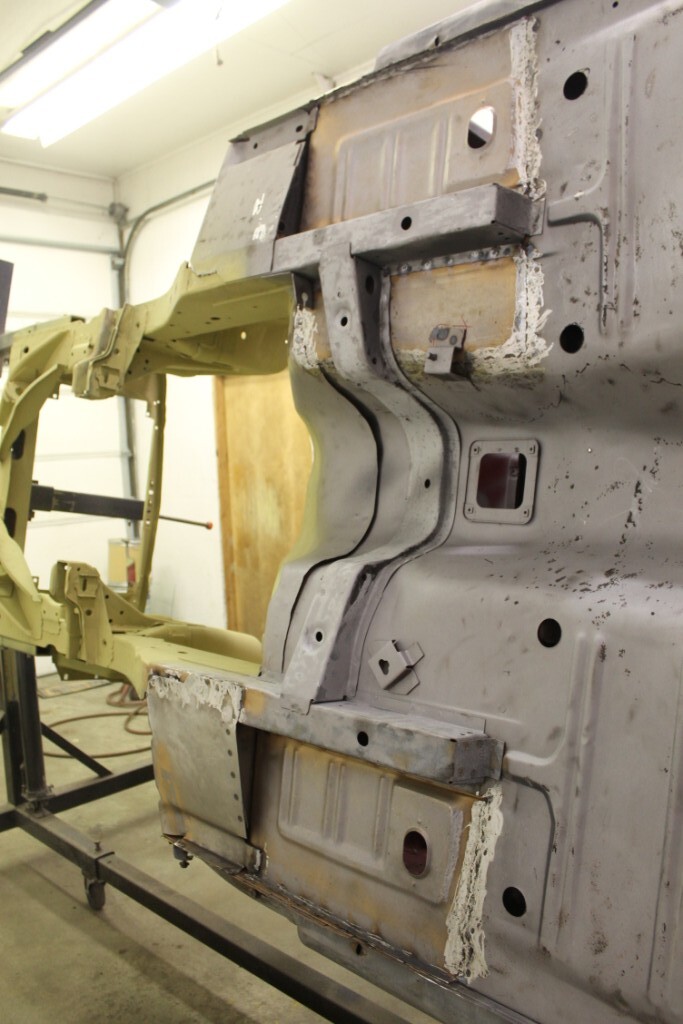
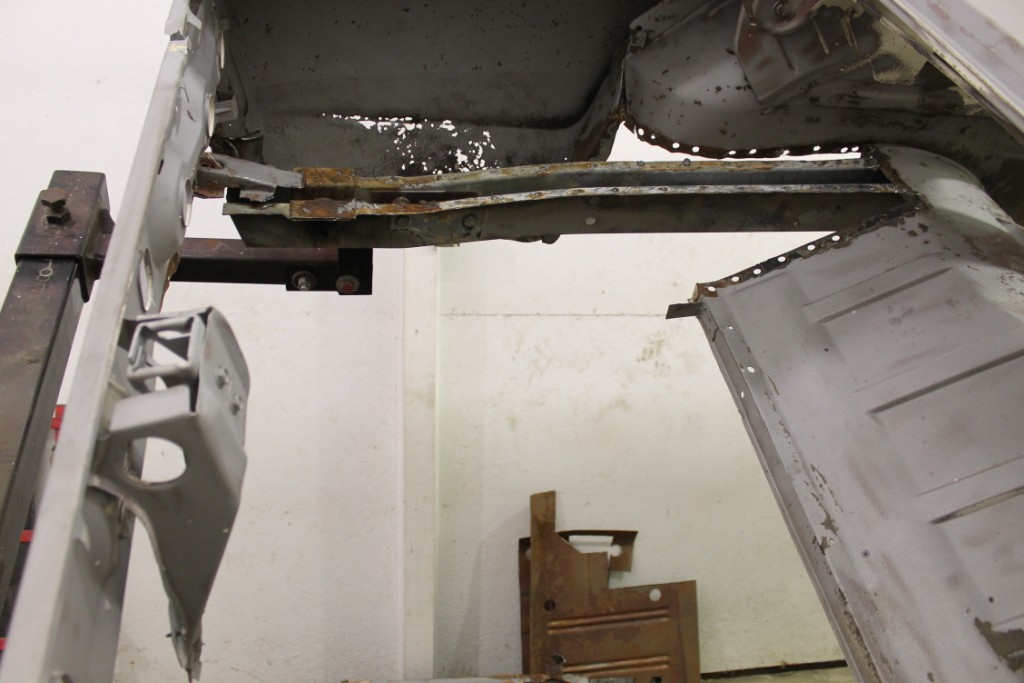
I moved on to the shock towers next. These are in excellent condition! as I found no cracks at all in them which was really surprising. Instead of buying the $200 kit I made my own brackets to stiffen up the towers. I had the metal and it was really easy to do. Just use poster board and make some patterns. This will add some good strength to the towers when it’s carving the corners. I redid and added some welds to the front structure where needed like the strut rod brackets. From the firewall forward was sprayed with etching primer as I’m completed with the front for now.
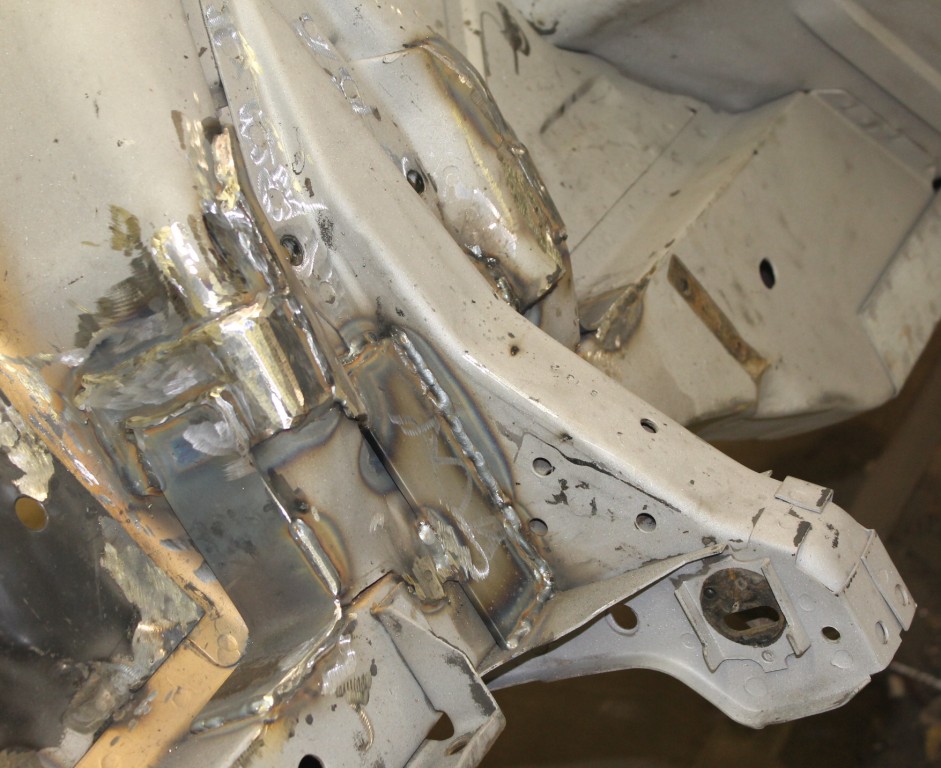
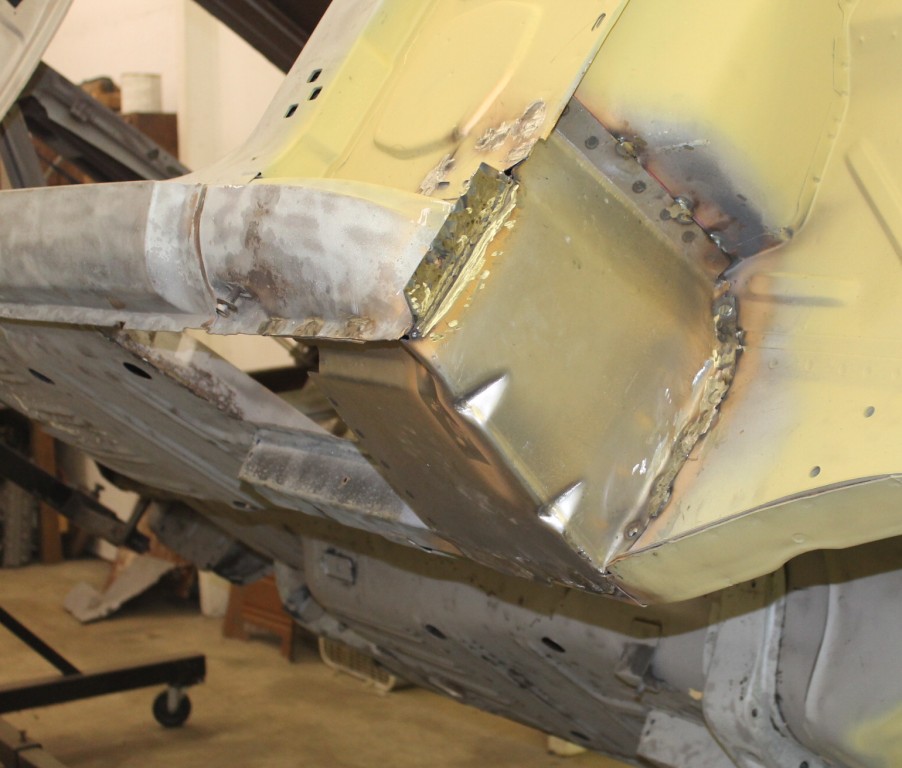
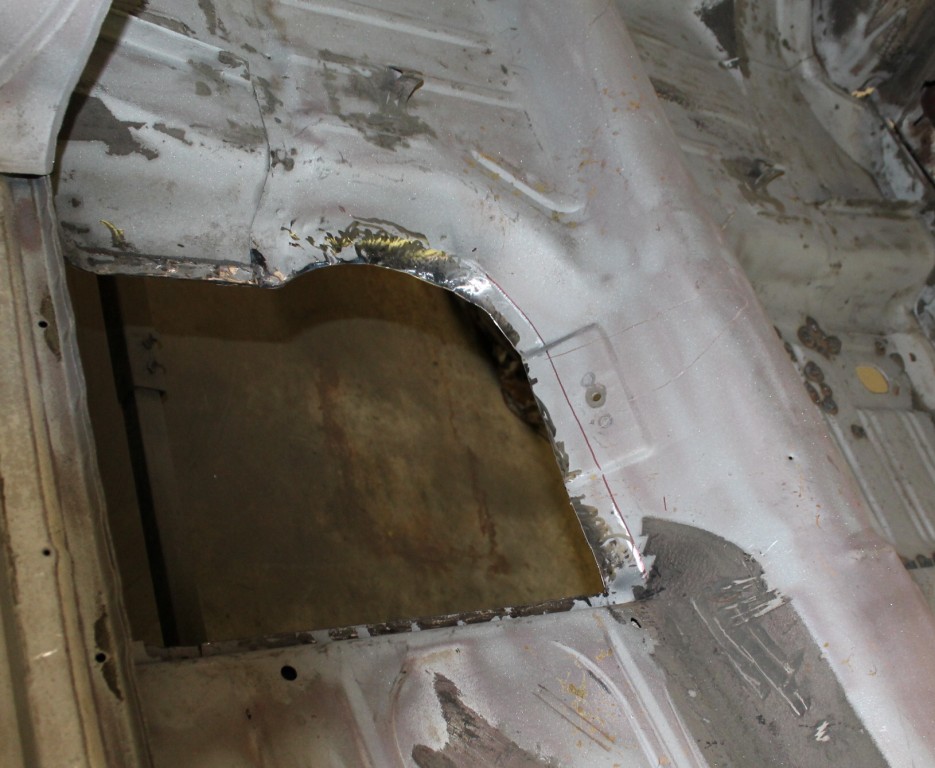
Got the bad part of the floor pan cut out on the passenger-side. I bought the cheaper Mustang torque box knowing it would need some modify anyways to fit into the 67 body. After a couple of hours bending/grinding and beating in into submission ![]() I got it to fit properly. After welding it into place I got the floor pan replacement panel cut to fit and ready to install. I’ve read in the past where this torque box doesn’t do a lot to add stiffness. But, I got to believe it does otherwise why would Mercury add it to the 68 body. Whenever you can tie the rocker panel structure to the frame rail it sure seams to me it would add some stiffness. Now it it will be onto the driver-side floor pan for replacement.
I got it to fit properly. After welding it into place I got the floor pan replacement panel cut to fit and ready to install. I’ve read in the past where this torque box doesn’t do a lot to add stiffness. But, I got to believe it does otherwise why would Mercury add it to the 68 body. Whenever you can tie the rocker panel structure to the frame rail it sure seams to me it would add some stiffness. Now it it will be onto the driver-side floor pan for replacement.
Good news! I have a title on it’s way. The original title got stolen before it put it in my name. No record at DMV as it was last registered in the 80’s. I had all the info on the Cougar and previous owner info. The DMV sent me on a wild goose chase looping me in circles until I was ready to lose my cool with them. Then, one gal told me you would have a better chance if you knew nothing about the car. So, I went to a different DMV office and said I knew nothing about the Cougar and I had a title in an hour. How backwards is that… no common sense in gov’t anymore. The whole ordeal started at 9:00 am and finished at 3:30 pm!
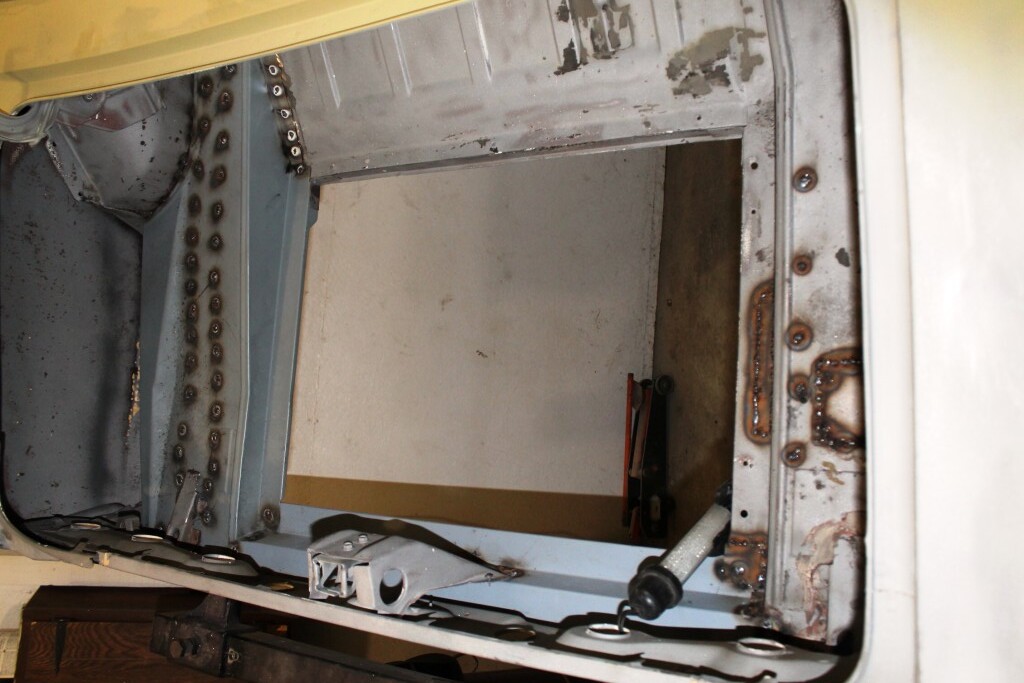
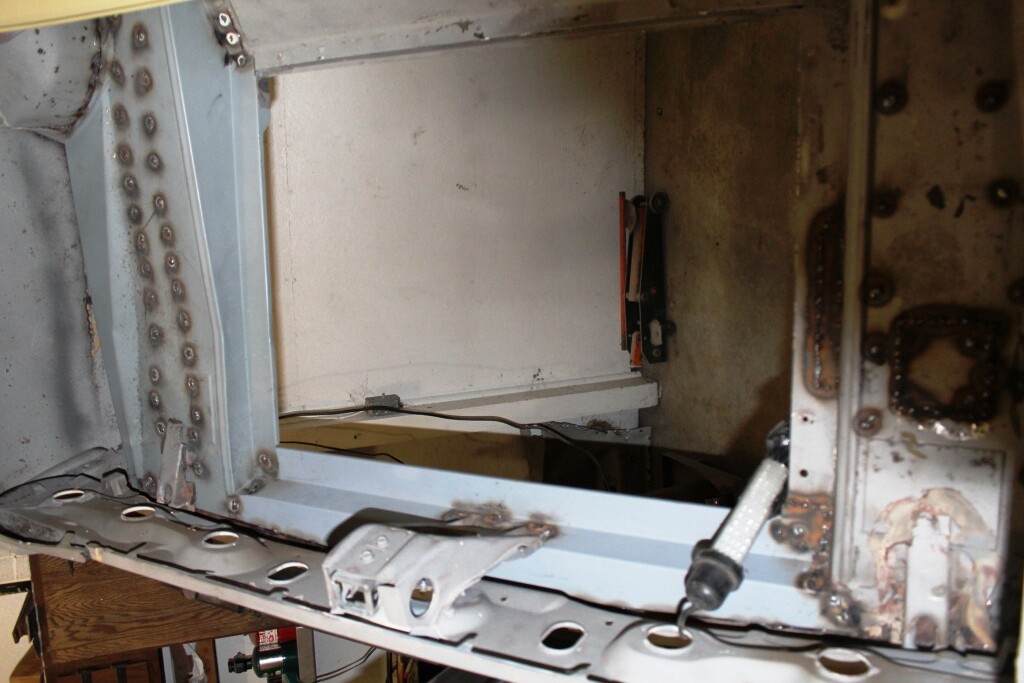
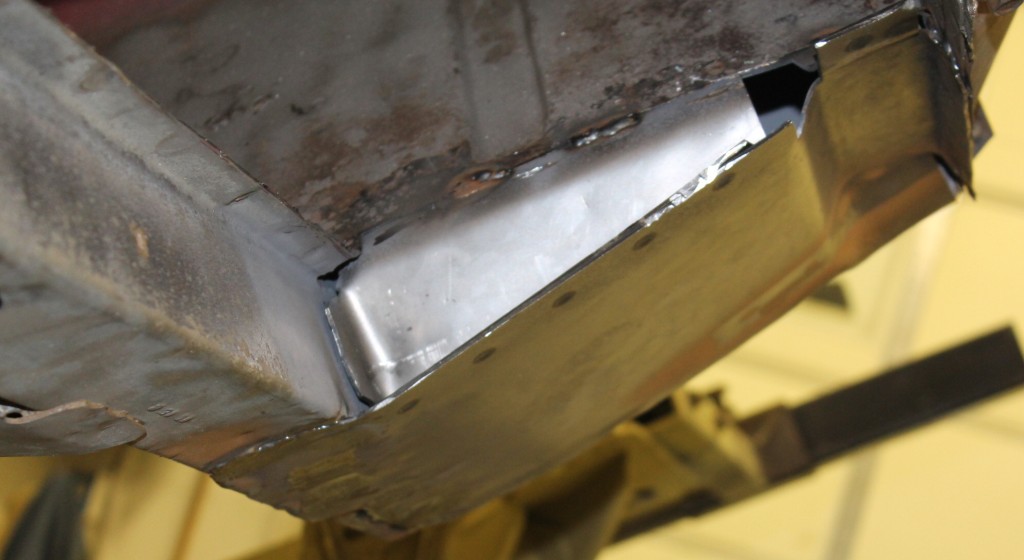
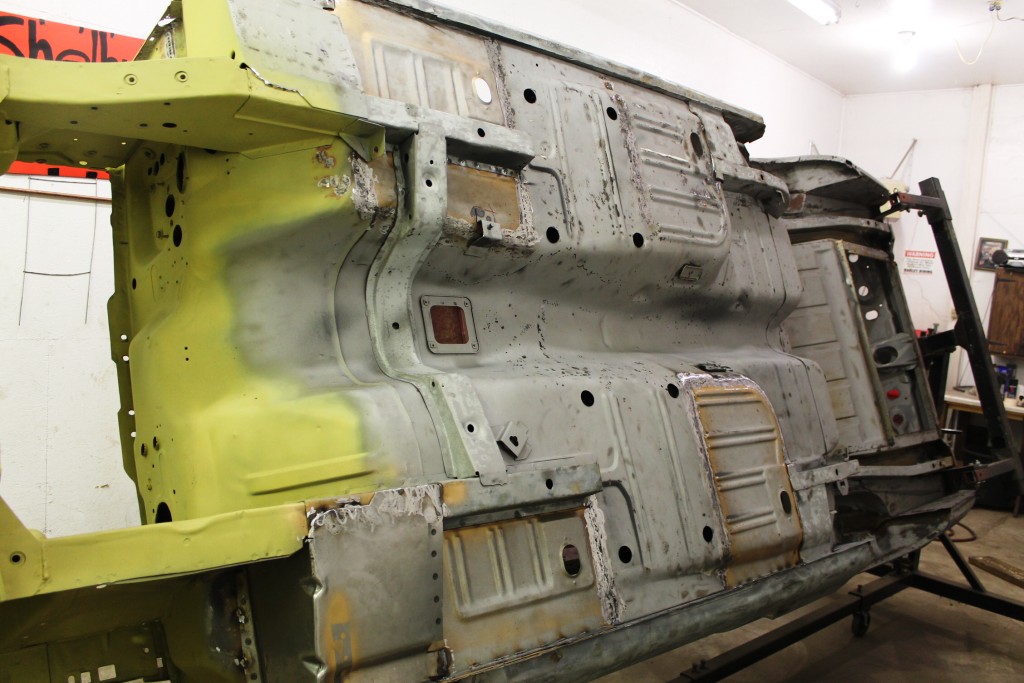
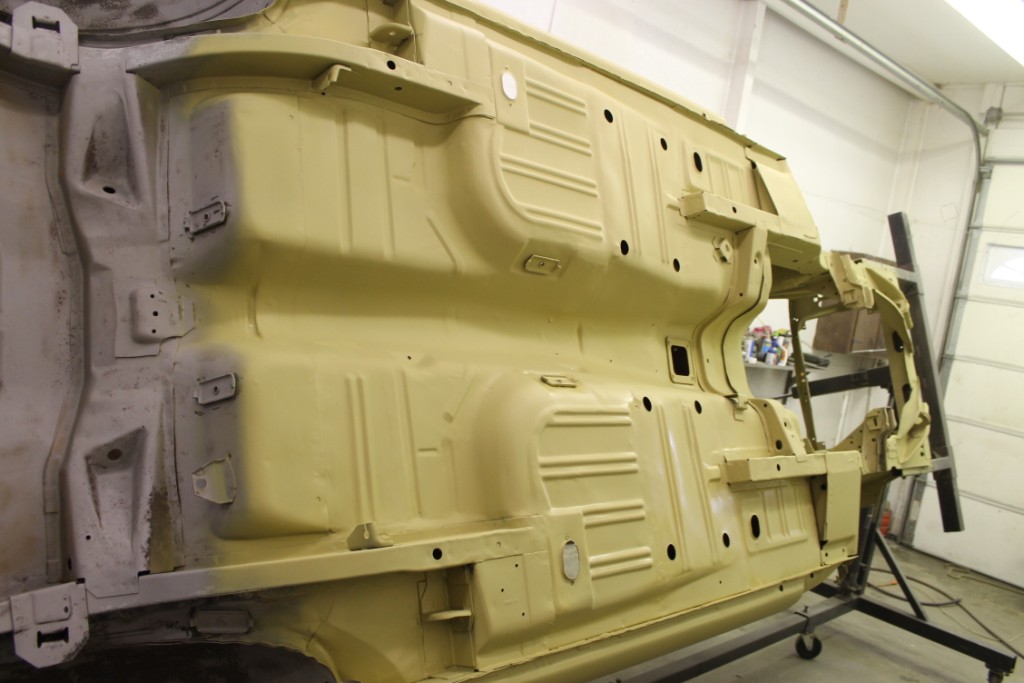
The floor pans are done. Got the driver-side front cut out and replaced and the back passenger-side replaced. I lapped and plugged weld the pans in vs butt welding. Just because, it is easier/faster and this is not a show car. Still turned out very nice and you couldn’t tell unless you looked under the carpet.

More pictures of the floor pans finished and in primer. Move on to the trunk area. I have the back tail panel filler area at the bottom removed. Also, removed the driver-side drop down panel.
Enjoying the update and the pictures. It’s crazy about the DMV but it’s just today’s reality. I’m ad in the long run you were able to get the title.
Steven
if you have not already purchased the 4 link or a front end let me know , i work for heidts auto group
justin
OK Justin, I’ll get in touch with you in couple of weeks when I get back from vacation. I looked at some heidi products.
ok Brian!
While we were waiting on parts for the trunk we started on the doors. The driverside was real nice shape. Just had to fill a couple of door dings and it was good to go. The passengerside we had to cut a 4x7" patch in the front corner to take care of some rust. They are both in primer now ready to hang as soon as I get the door hinges rebuilt. Sorry, forgot to take pictures of the doors being processed ![]()
Got the trunk pan from John’s for the driverside and got it weld in along with the lower tail panel. Nice repo parts as eveything fit back together with no major problems. The passengerside trunk panel was pretty nice except for the body mount hole area and a spot by the gas tank flange. Went ahead and just patched these two areas. next we will tackle the driverside lower quarter panel and weld in the drop down. Got the heat shutdown now in the garage from awhile until we get past all this below zero weather as it gets a little pricey heating the garage when it gets that cold. Not worth it when you only get a couple hours out there to work in the evening.