Lots of good news on the test drive. The transmission shifts like it should. The engine ran cool. No leaks after the drive were found. It’s been a pretty good day.
Awesome! Incredible progress!
So what’s left on the “To Do” list?
Well the turn signal motor quit during the test drive. Still no seat upholstery but maybe next week. No pinstripes so far. And the front end needs alignment.
That’s a pretty short list!
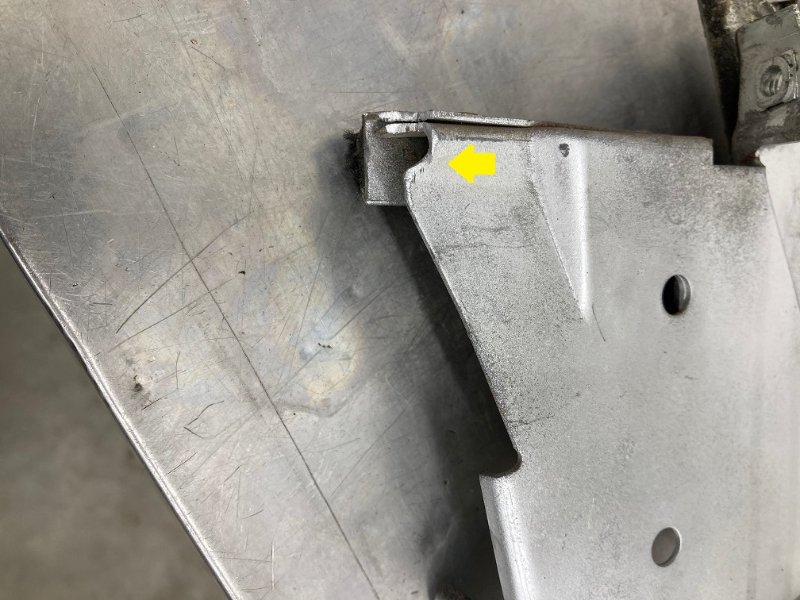
Tried to adjust the headlamps and the LH grille broke where the adjuster spring attaches. It’s an easy repair - once the entire grille is on the bench. That took a couple hours of work.
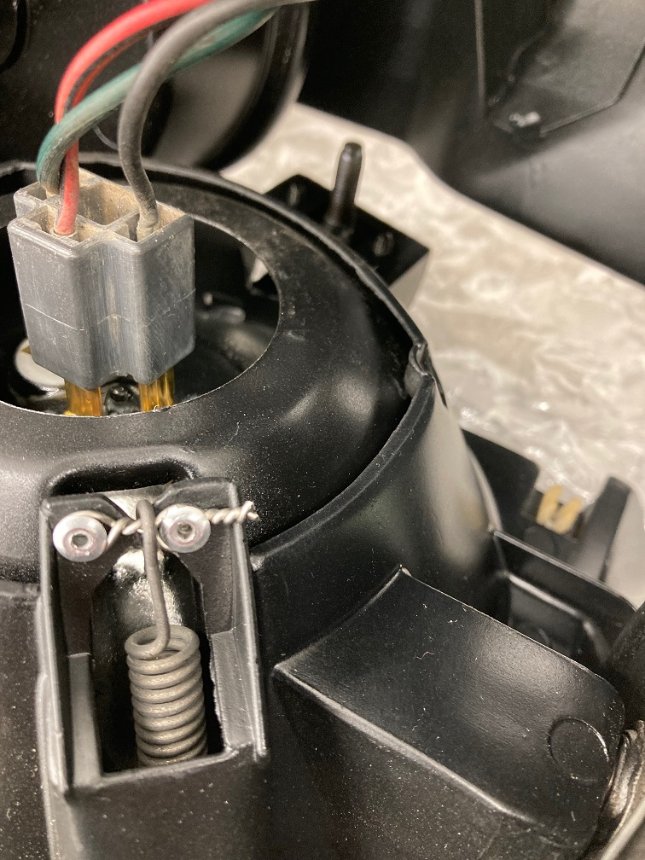
The turn signals are somewhat of a mystery. Tried them again yesterday morning, they didn’t work and the turn signal flasher motor didn’t run. Took the motor off and bench tested it - it worked fine. Measured for power with left or right selected at the motor connection - all good. Checked the ground - it was zero ohms at the motor connector. Reinstalled the flasher and it all worked perfectly.
Went on a test drive for 30 minutes. Put the car on the lift afterwards to check for leaks - none found. Turn signals worked flawlessly.
That’s annoying! I think these repair clips are a much cleaner solution, though you probably didn’t want to wait around.
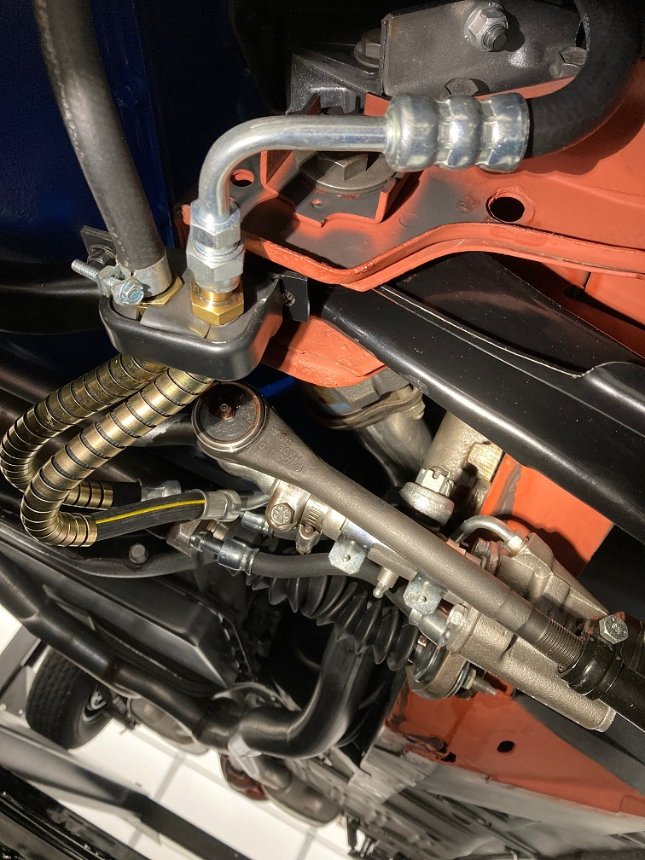
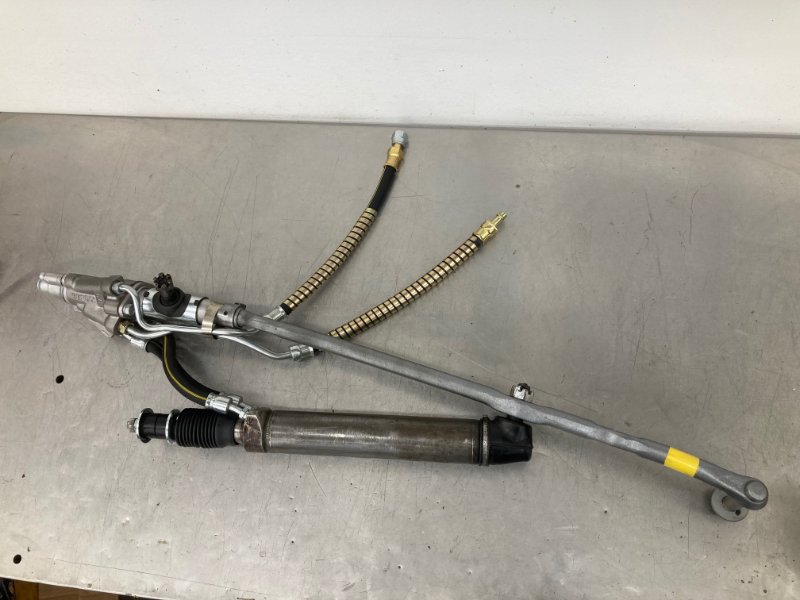
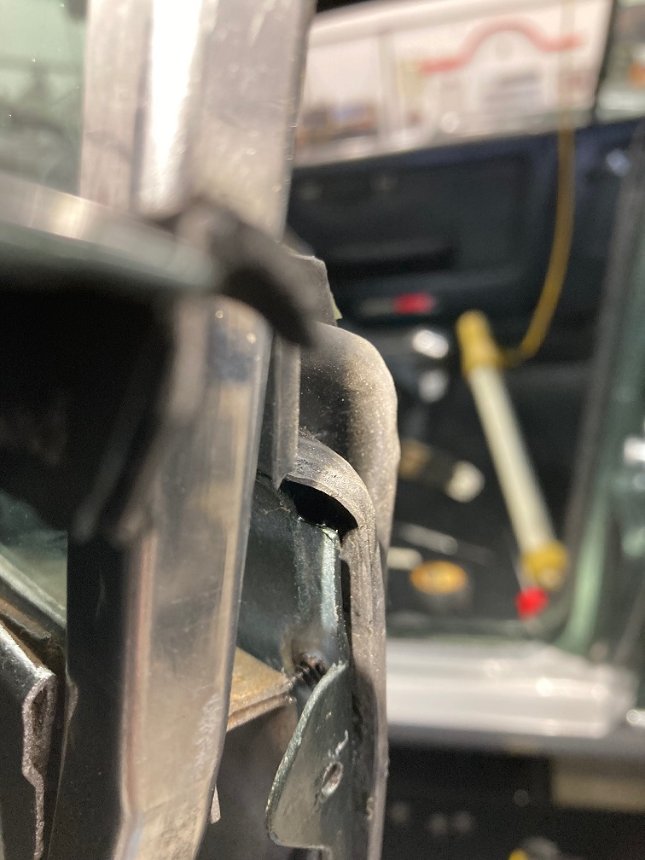
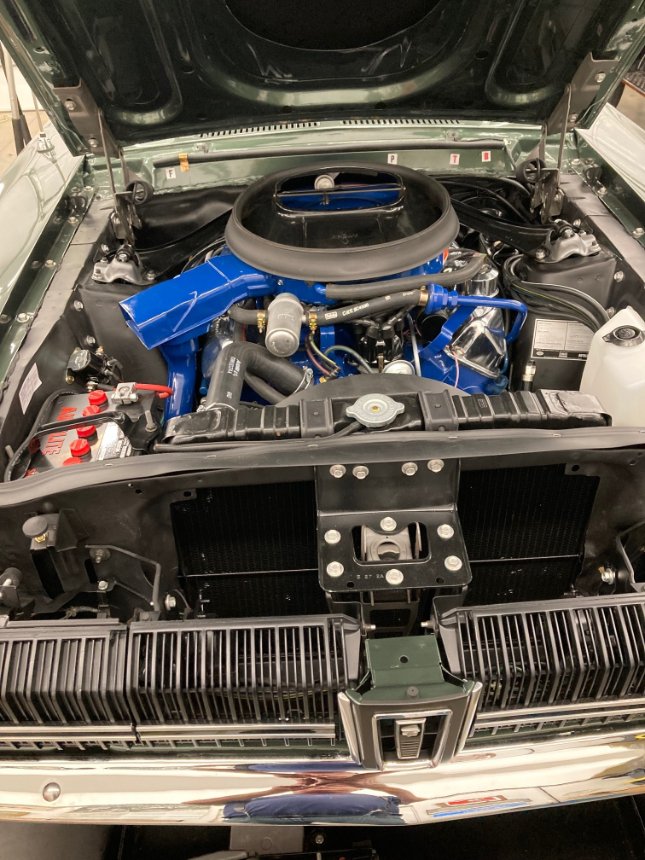
Also your PS hoses tuck up much nicer than mine, I have one that dangles down pretty badly. Did the big block routing so I’ll use your pic to compare what’s going on with mine.
I also didn’t want to buy anything.
Using hoses from Blue Dot makes a huge difference in how they fit. Also have the OEM worm clamp holding all the hoses to the control valve.
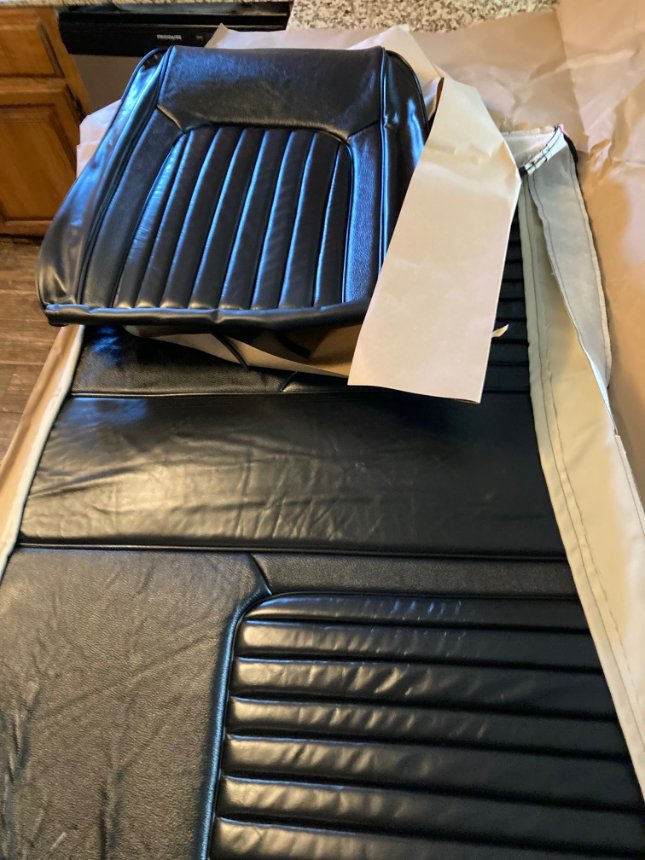
The seat upholstery came yesterday from SMS. Took a long time - 13 months - but it looks fabulous. I took the upholstery, the foam kit, and the seat springs to a local upholstery shop for assembly.
With the seats coming soon it was time to finish the rest of the interior. I started with the carpet underlayment. The two oval pieces on the seat risers are originals. They don’t come with the kit.
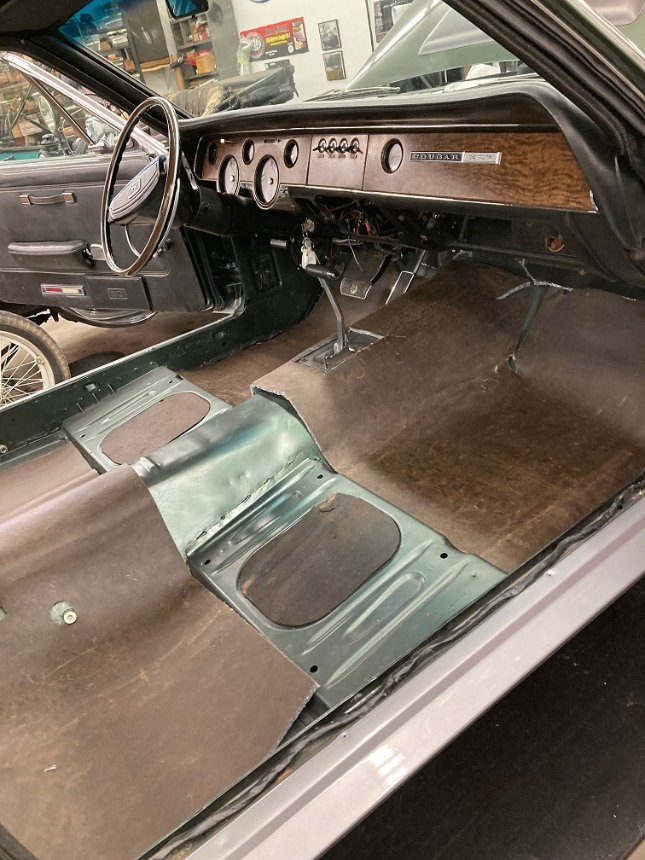

The rear carpet piece goes in first. They are cut precisely to size so the edge rests against the clips that secure the rear seat springs. You have to trim the front to allow the seat studs to go in. I used a screw sharpened on both ends to locate the screw holes for the attachment of the carpet hold down screws. That way I don’t need to add more holes. The carpet also needs a hole for the dimmer switch, and the seat belts. The ironed - in contour locates the carpet in the car.

With the carpet in place the radio comes next. You have to install the radio before the console to have any hope of installing the bolts in the rear radio support bracket. that bracket is best installed on the radio first.
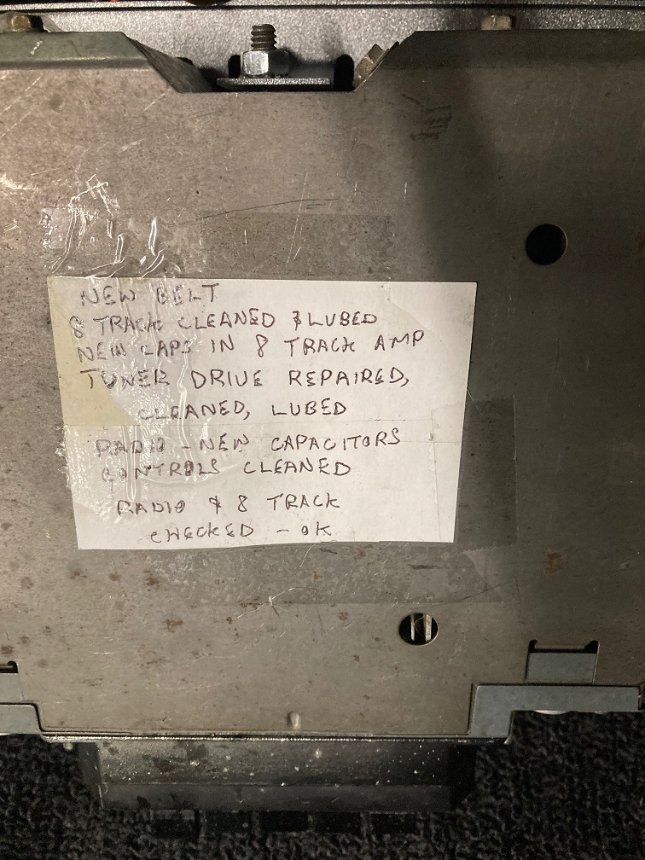
This car came originally with an AM - 8 Track stereo. The guy who restores them for me puts a card on top describing what he did. I like to keep it in place.
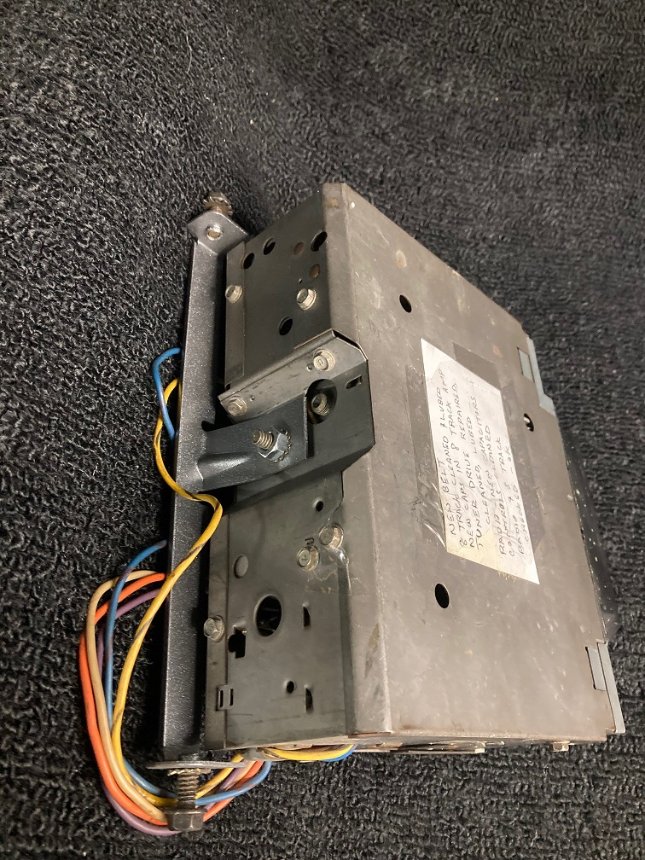
With the radio installed I felt obliged to test it. It sounds really good!
https://www.facebook.com/royce.peterson.98/videos/1708112649386996
Bad Company - the name of the band, the album, and a song on the album!
Does sound good Royce - and the unit looks unusual to me, guess I’ve never seen a factory '68 AM 8-Track.
- Phillip
It’s unique to 1968 Cougars and Mustangs. Made by Bendix. No name on the door, with push buttons. I have three of them right now.
Rework time again. The driver’s door window was nearly impossible to move. Last time I worked on it I swapped the regulator from the new Scott Drake unit back to the original which helped a lot. The other day I tried to roll the window down and it was very stiff again.
I looked at the door glass at the rear and noticed the window was pushing hard on the outer belt line weatherstrip. Hmm. I removed the rear seal and saw why. The screw hole for the door weatherstrip / window end cap was mis-located about 1/8" forward of where it ought to be, so the screw, when installed, would push the rear window track outward.
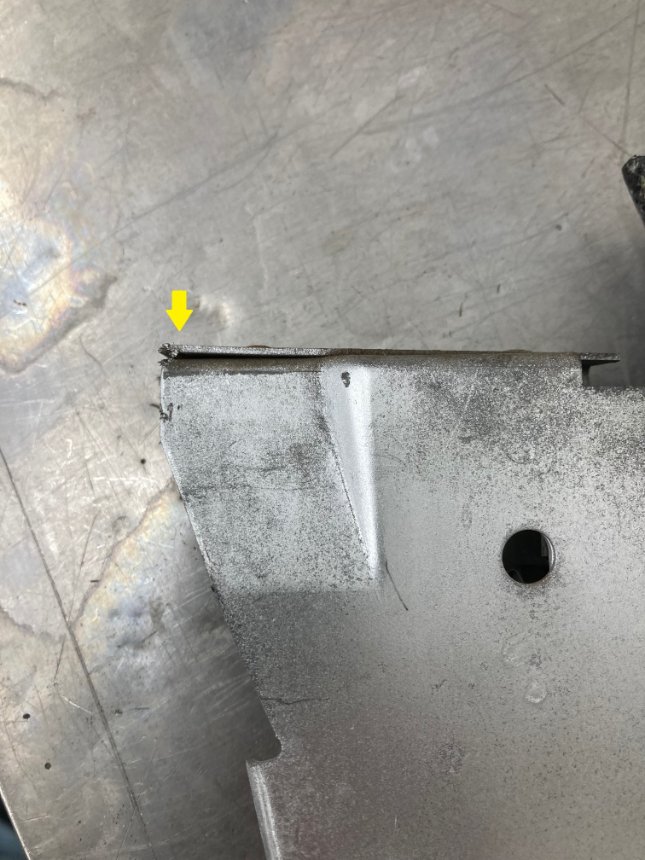
To fix this issue I had to remove the glass so the rear track assembly could be removed. I notched the corner so the screw would clear.
Well the LH door window regulator (original one) was locked up tight, apparently the brake failed completely in the “ON” position. So I got the Scott Drake part out, and started experimenting with lubricants. The spring responded well to being slathered in Mobil #28 red grease. The gears got Mobil #28 as well. The brake got hosed down with PB Blaster. All of these things combined to make it much easier to move. It still makes annoying popping sounds but at least it works well.
The air cleaner housing was not fitting well around the carburetor. Turns out it was significantly bent. I used a rubber mallet and a dolly covered in masking tape to try and avoid damaging the powder coated finish. It worked well. I put the rest of the under hood decals on this afternoon.
The weather was grade “A” fabulous today so I decided to go for a drive. On a whim I tried the turn signals with the engine running. The motor didn’t spin the flasher. Hmm. Checked battery voltage with the engine running. It was about 11 volts. Not good. Checked with the engine on or off, always the same. Swapped voltage regulators. No change.
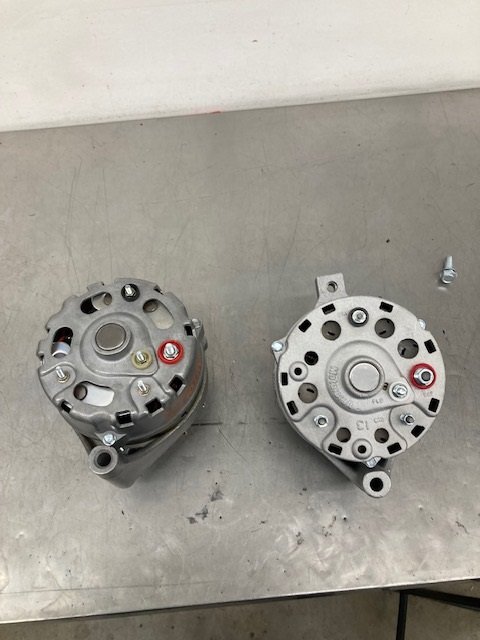
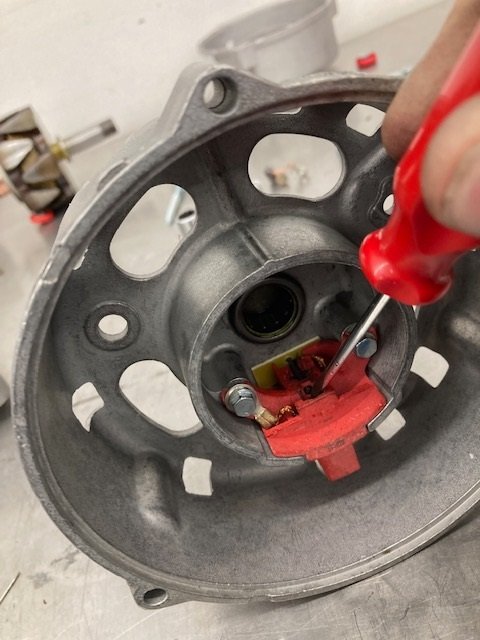
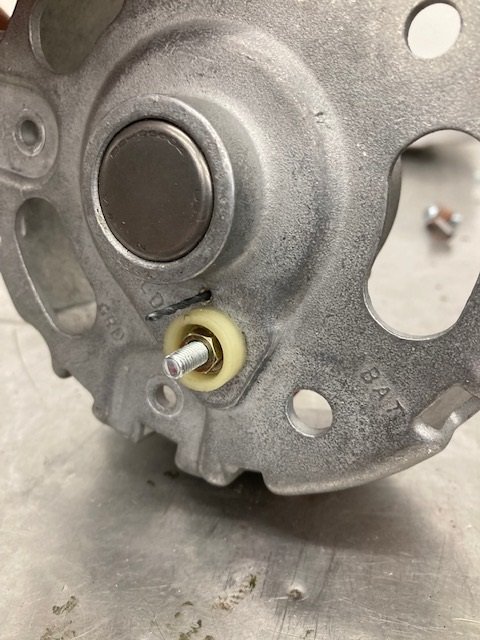
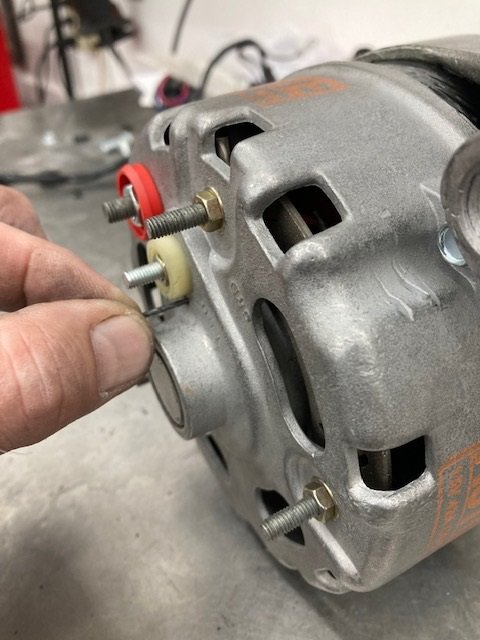
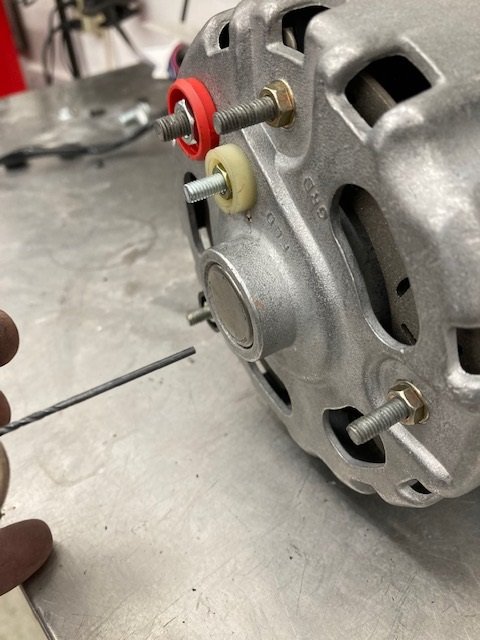
I took the alternator off and took it to Auto Zone for testing. No good. The alternator in question was a rebuilt concours correct Autolite 42 Amp unit. The folks who sold it to me are now out of business. So I got a rebuilt one from the auto part store and proceeded to swap the internals from the Motorcraft case to the Autolite case.
Here’s what I started with.