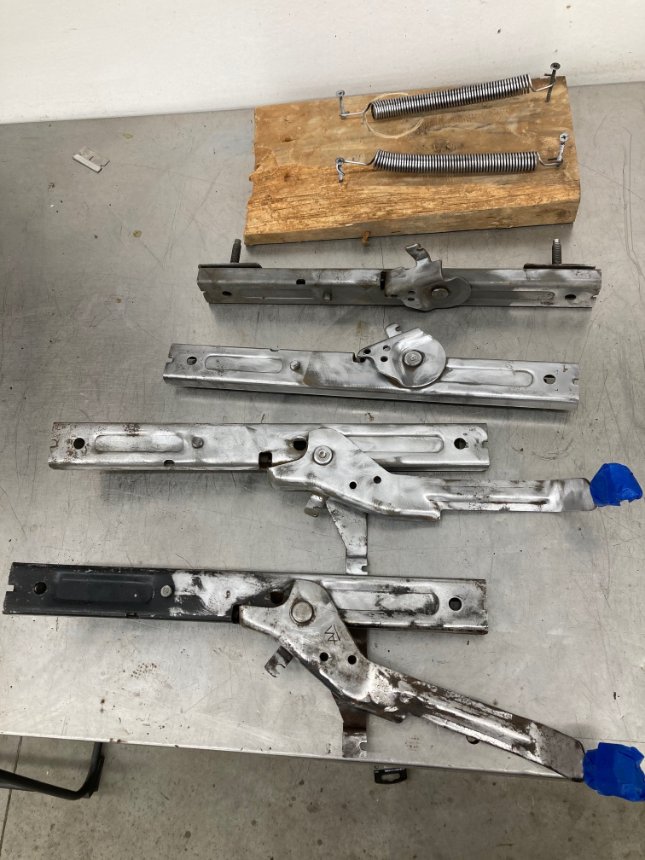
Working on the seat tracks today and came across something unusual. One seat track (nearest one in the photo) was painted a semi gloss black. It has a logo that appears to be an “M” with an “A” superimposed on it.
The other three have a unique rivet that has the letter “T” in the middle and the one nearest the camera (second one from front) also has a date code that appears to be 8 65. These all appear to have had a clear zinc coating originally, no sign of any black paint.
I am used to finding these painted semi gloss black, all of them in '68 that I can remember. Any ideas?
I was cleaning up some 67-8 interior door latch pieces today and I found several of the interior door release mechanisms that had this same logo on them. It probably is a manufacturer’s mark.
Starting to go back together with the seats. The seat back locking mechanisms were removed, the springs media blasted, then painted semi gloss black. All the mechanism went back in and then the fun began.
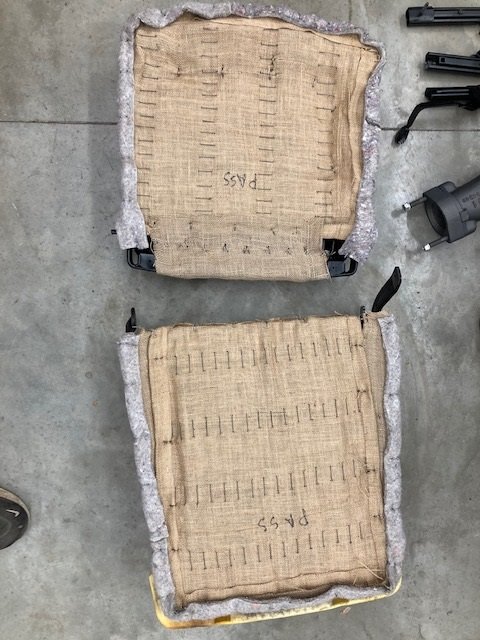
I found a vendor online who sells the burlap with wire reinforcements for a 1968 Camaro seat which is close in shape and size to the '68 Cougar seat. So by modifying them slightly they worked. Lots of hog rings later I have the passenger bucket ready for foam and upholstery.
Royce, that is really nice. I’ve been looking for the burlap with the reinforcement many times but never found them. Would you mind telling us where you bought them? Thanks.
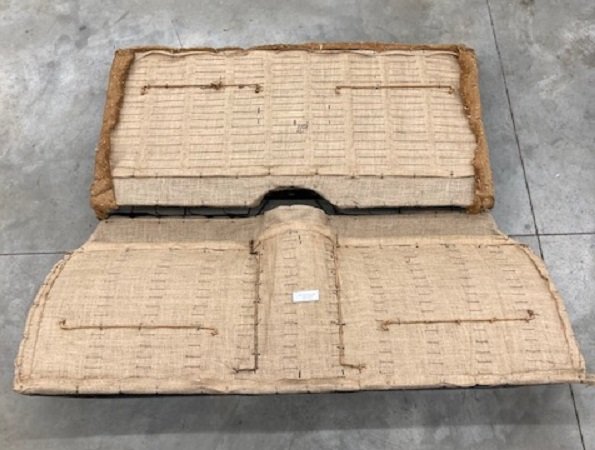
Finished up the other front seat today. Then started working on the rears. They are done too!
Lots of work to get them to the point where they are ready for upholstery. The rear padding and attach wires were near perfect so they were re - used. I used almost exactly a pound of hog rings to get all the cushions to this point - like 4 remaining.
Thanks Jeff. Letting my hands rest for a couple days, I still need to cut new edge foam for the bottom rear cushion to keep the spring from cutting the new upholstery. Very hard to cut that modern material with industrial Wiss scissors. Makes my hand sore. Razor knife doesn’t do anything to it.
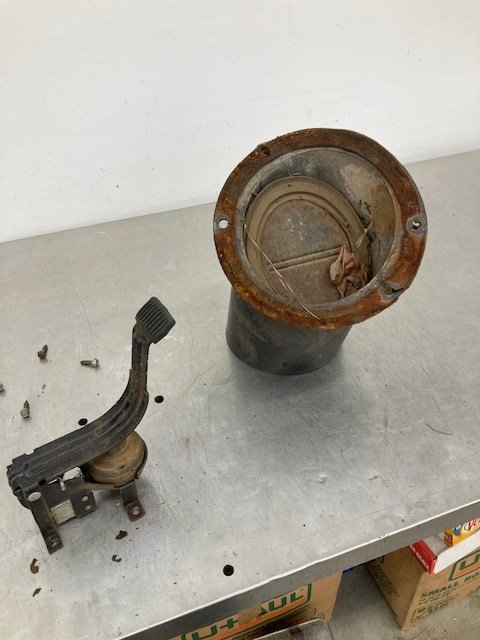
When bead blasting I mask off plastic and rubber with duct tape to keep them from being damaged. The vent door had a very nice molded rubber seal that is irreplaceable.
After bead blasting I remove the duct tape, blow off the dust, and wipe down the metal with wax and grease remover before painting. The bracket got matte clear while the door was semi gloss black. The shaft was originally phosphate and oil, I sprayed it dark metallic steel.
The foam was rotten so I used 1.25" X .125" adhesive backed Rubatex tape to replace it. The Rubatex is overly wide in some areas so it got trimmed. Then I used a leather punch to open the attachment holes.
I got 95% of the chrome and polished items back so lots to do with those parts.
I started by masking off the chrome on the bumpers. We bead blasted the back side before the plater got them so there was no rust. Painted the back side with Krylon Aluminum paint just to keep it from rusting. This is the rear, front got the same treatment.
Bead blasted the ash tray, glove box door and glove box door hinge. Then masked off the ash tray and the two little teflon buttons so it could be sprayed flat aluminum. A couple days from now I will prime everything.