The beginning
As some of you might know I had a story about the restoration of my XR7-G going on the other forum, but for several reasons I decided to stop posting there after the new ownership of the forum took place. My plan was to continue the story here and link to the other forum so readers could get the first part of the restoration there. Well, I changed my mind and decided to move all my posts to this forum to make it easier for readers to get the full story. Before I go on with the copy and paste I have decided to start with a short summary on how this unique car came into my hands.
The new posts will be at page 6 or 7.
My car started its life February 27 in Dearborn, Michigan. I assume it was built into a XR7G-Hertz car soon after that. According to the Marti report it was released from Mercury on April 10 as the 43rd Hertz car built and went to Van Nuys Motors INC in California. Since the car is a Hertz-car it is obvious that it served as a rental car for its first part of its life. After that I know little about the car until the mid seventies. Fast moving forward, I noticed the car being for sale on Craigslist, and it was also discussed on MC.net for being a true Hertz car or not since it had a 302 engine. to make a long story short, I called the owner, who had very little knowledge about the car, and after some negotiation we had a deal. It turned out that the car had been in his family since mid seventies and that his dad had restored the car back then and also replaced the 390 with the 302.
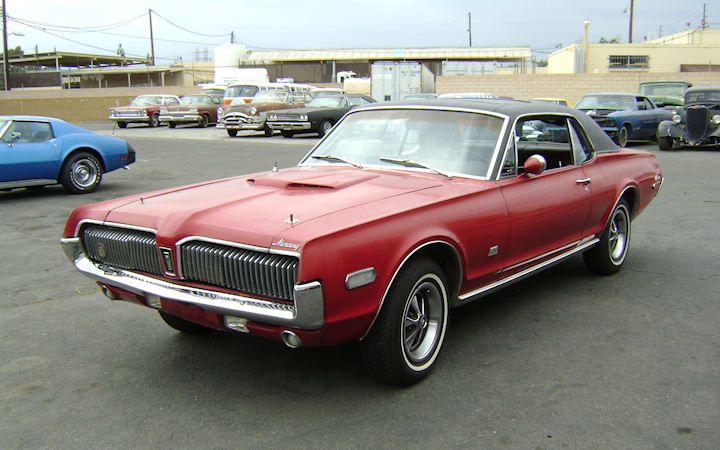
Here is the car at the port in Long Beach, CA, ready to be shipped to Norway
First year in Norway
After some time the Cougar finally arrived Oslo, Norway. After paying the taxes I was ready to drive my red dream the 40 miles home. It started right up and home I went. 40 miles does not seem to be a long drive, but with this car and all the problems it had it turned out to be a long trip.
Back home I started to look over the car and found that it would need new brakes and everything in the front end replaced to pass the inspection to get its Norwegian plates. I also made a few small fixes to it, like making the sun roof operational again this first summer. Then I drove the car and had a lot of fun with it. My plan was to keep it like this for a few years before I started to tear it apart for a full restoration 
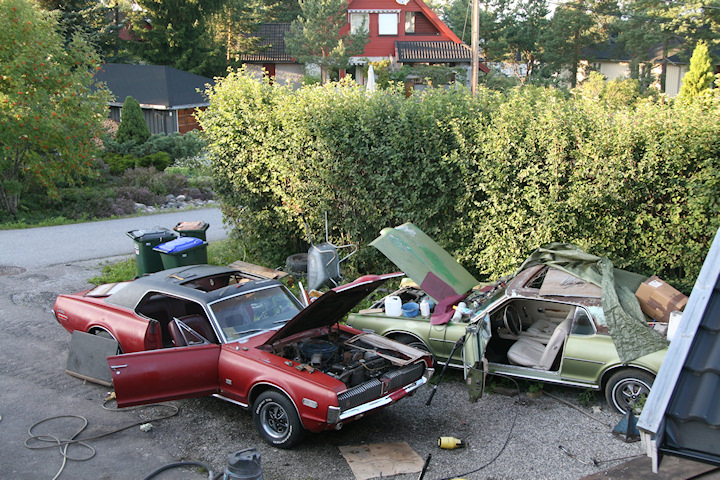
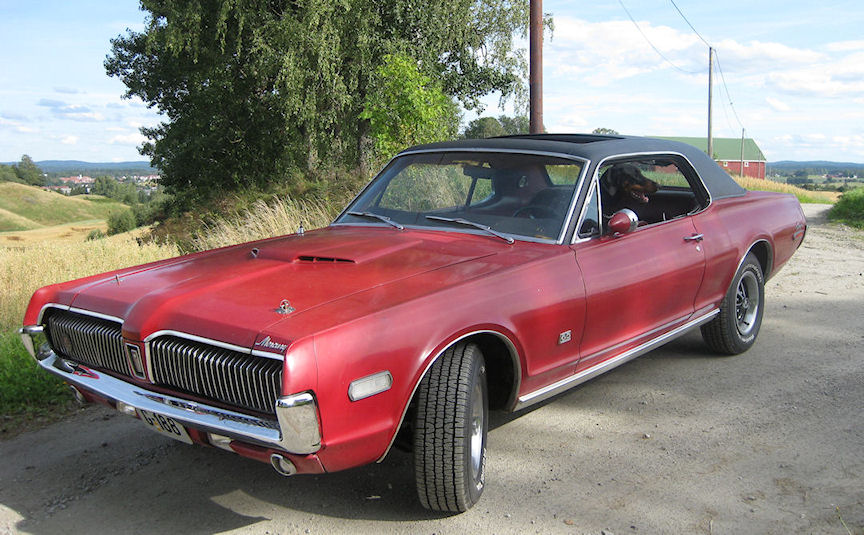
Here is a couple of pictures of the car from the first summer and fall I had it . The first picture is from when I fixed the sunroof. My green sun roof 68 XR7 had to donate some parts.
April 16th, 2010
The restoration
From now on it’s a lot of copy and paste  Most of you have read this before so I guess you can just jump to the new post when I get time for those. I will just copy my own posts as I feel I have no right to copy what other people wrote in my tread. So here we go:
When I started to work on the car in November 2009 the intention was to have the engine and transmission replaced. So I got the 302 pulled, just to realize that I just could not put the 390 into a dirty bad looking engine compartment like this.
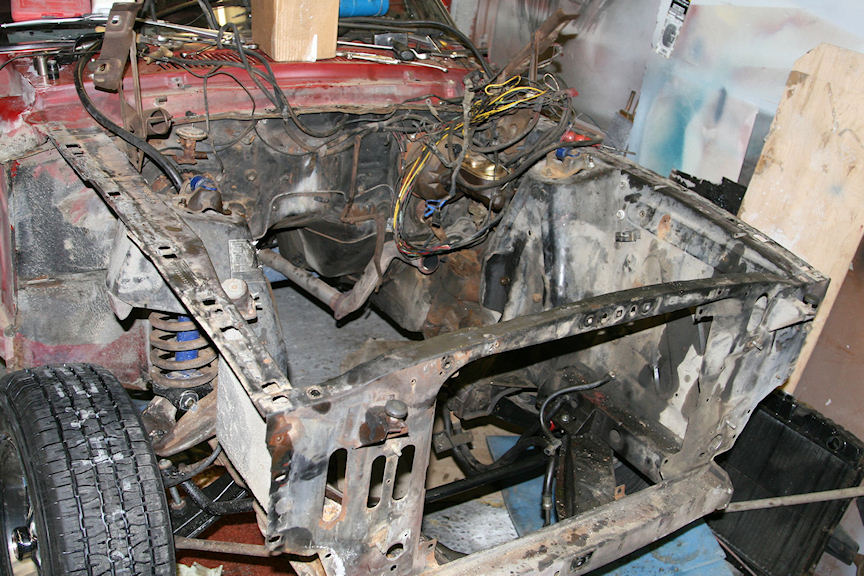
I also found some rust under the battery shelf and while I had the engine out I wanted to reinforce the shock towers to avoid them to crack. The steering gear was also worn out, so I decided it needed to be replaced at the same time. Then I discovered that the wiring system was junk too. OK, I still had a long winter ahead, so I figured I could just as well pull everything in front of the doors apart and have the engine bay done properly. So after a few more visits in the garage the front looked like this:
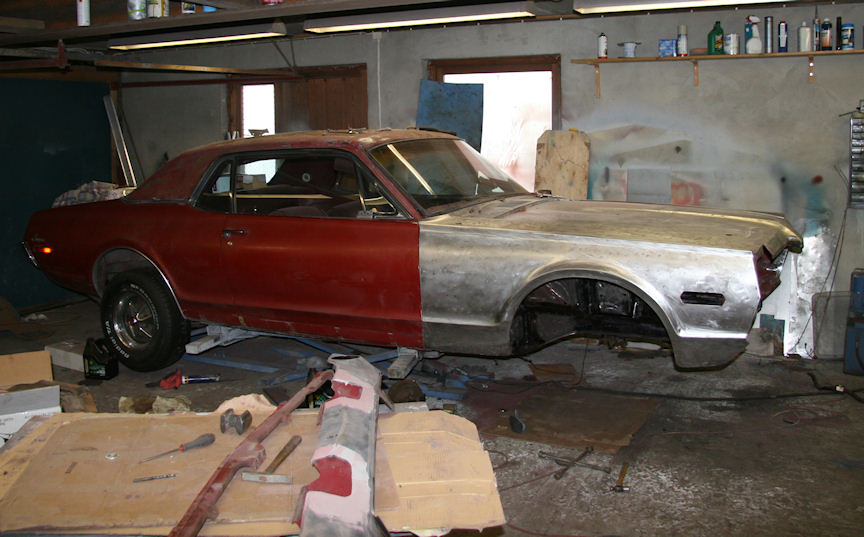
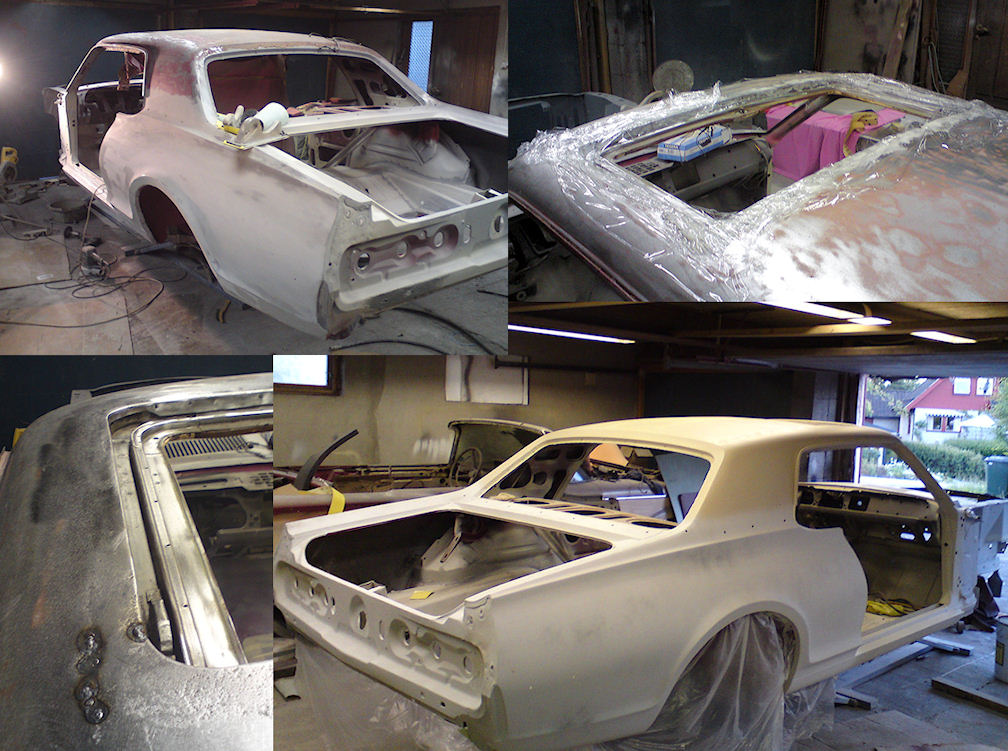
Of course I discovered that the front fenders had a few older dents that I wanted to straighten out, and the front valance was also no good and needed to be replaced. I could just as well take care of those problem now. Just because I was eager to see what the vinyl on the roof was hiding (there was a few bubbles) and how the car would look like without it I ripped it off. Suddenly the car looked like this.
Removing the old vinyl top revealed some common rust problems in the lower parts and corners of the rear window frame. Otherwise the roof was rock solid :icon16: A couple of nights later that had been taken care off.
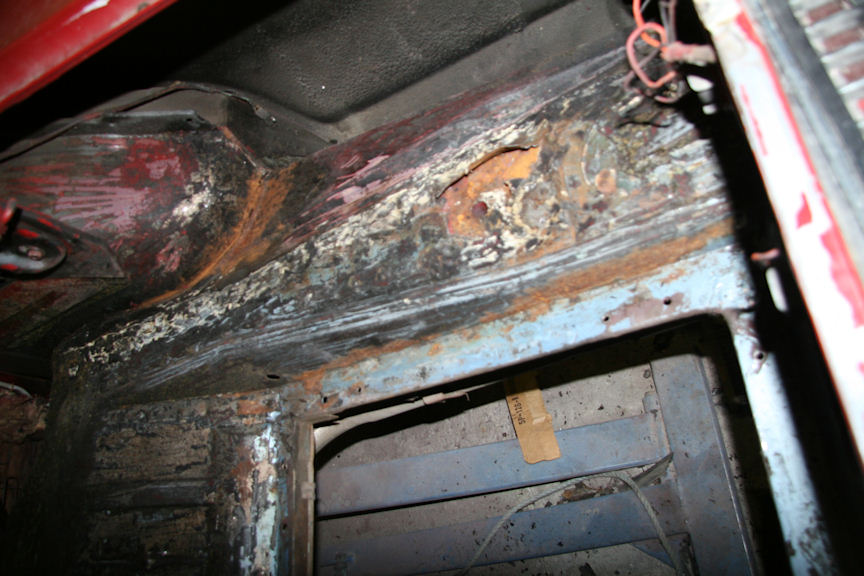
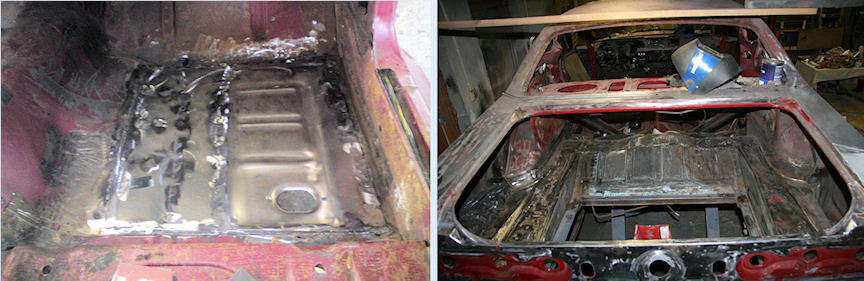
Then I started to look at the trunk floor. I had never been able to examine the work that had been done after the collision damage because the trunk mat was glued to the floor. I decided to pull it as well, just to realize that it covered less desirable work. First of all, everything under the trunk mat was covered with a sprayed on asphalt like goop that was really hard to get off. Then I found heavy layers of bondo and then 2 layers of trunk floor over the frame rails. Of course there was also some rust there. When they replaced the rear floor they did not cut away all the old floor and just had the now floor put on the top of some of the old. That is an interesting way to do it  but not recommended.
The trunk lid that was put on the car after it had been hit in the rear was rusty as well. Now I need a good one, so if you have a rust free 68 Trunk lid please send me a PM

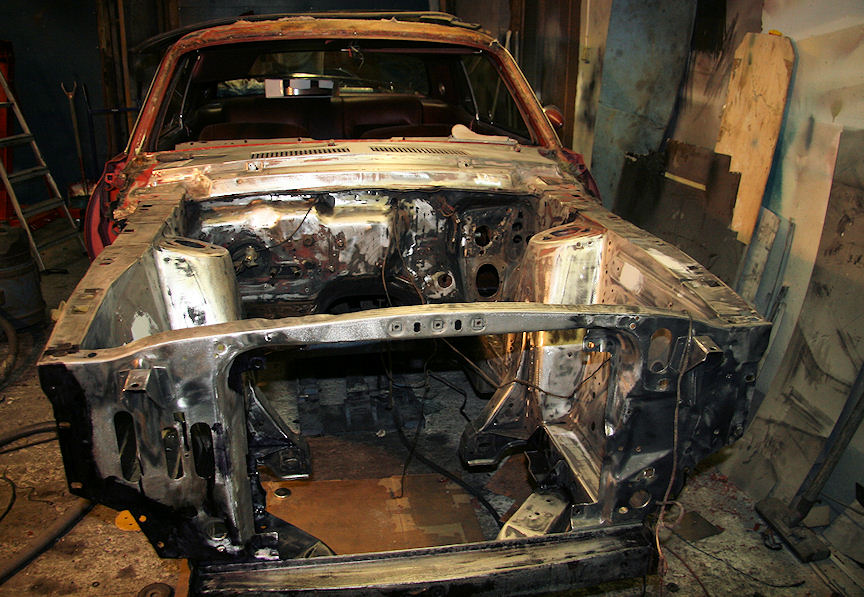
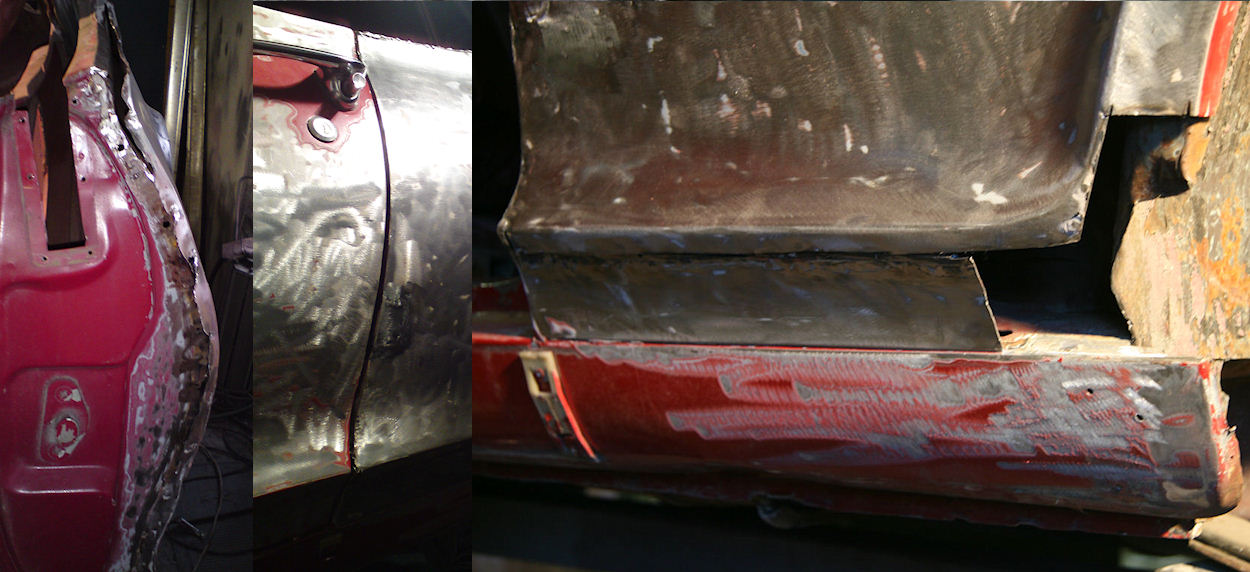
At this stage I decided I could just as well strip the whole car down to bare metal to see which other secrets the red paint was hiding. I can tell you that it was really exciting to take off all the bondo, which in places was almost 1 inch thick. The conclusion I have made is that bondo must be incredible cheap in the US, while a hammer to knock out the dents must be extremely expensive. I also found some patches welded on the top of the rust in the front and rear of the rear wheel openings. But otherwise it is a solid car.
Here you can see how it looked. Notice the front patch that covers the groove:

And here is how I like to do it
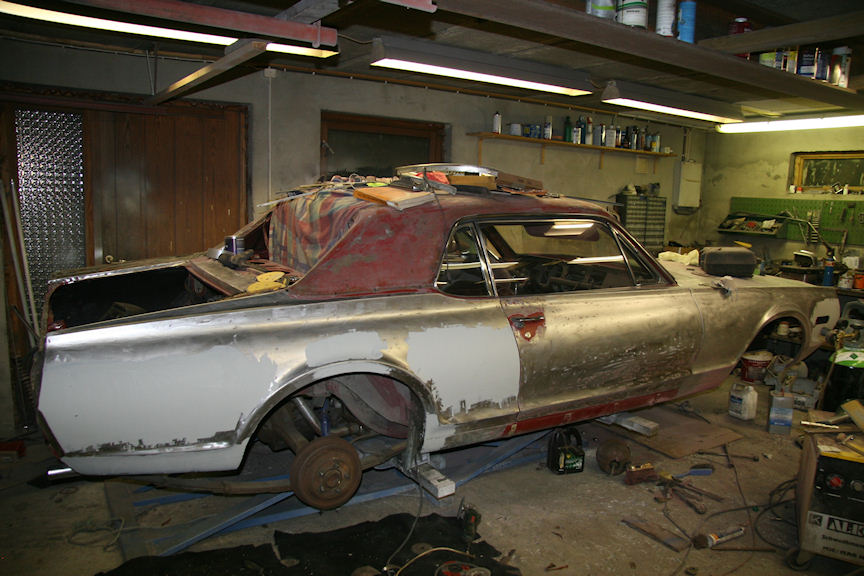
This is how the car looks today, April 17.
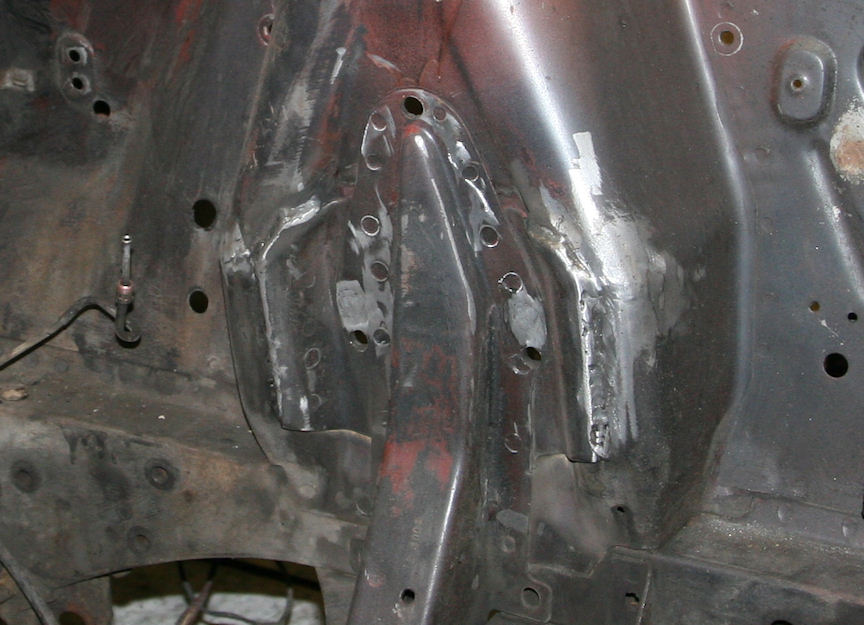
I did not do any major changes to the shock towers as I am not going to race this car. From the factory the heavy braces are just spot welded to the towers, and the cracks always starts out of these spot welds because of structural stress. This small modification will not really make the front suspension any stronger or add much to how the car drives, it will just prevent the shock tower from cracking. I will also put on the export brace instead of the cheap factory braces, which I think will add enough stability of the towers to make me pleased.
Another thing the sharp eyed reader will notice is that I’ve also done the Shelby drop.
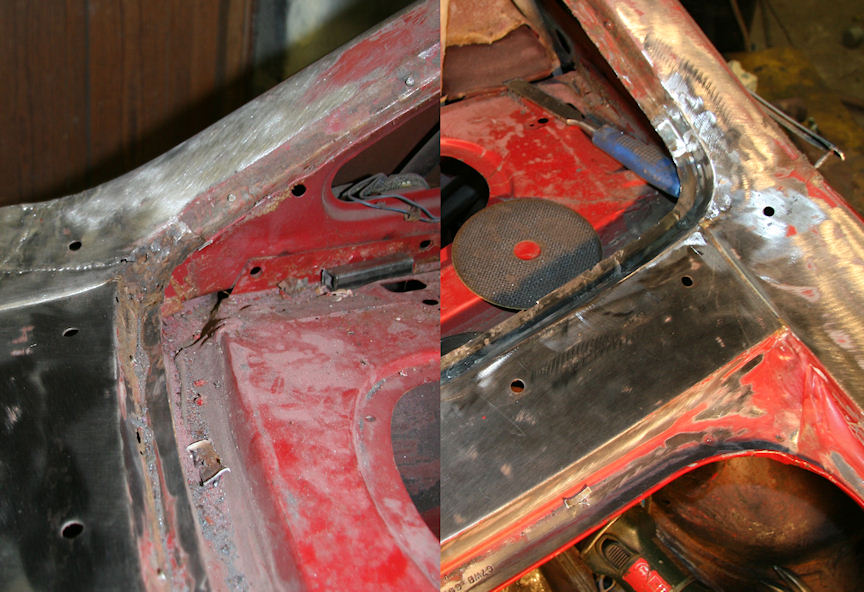
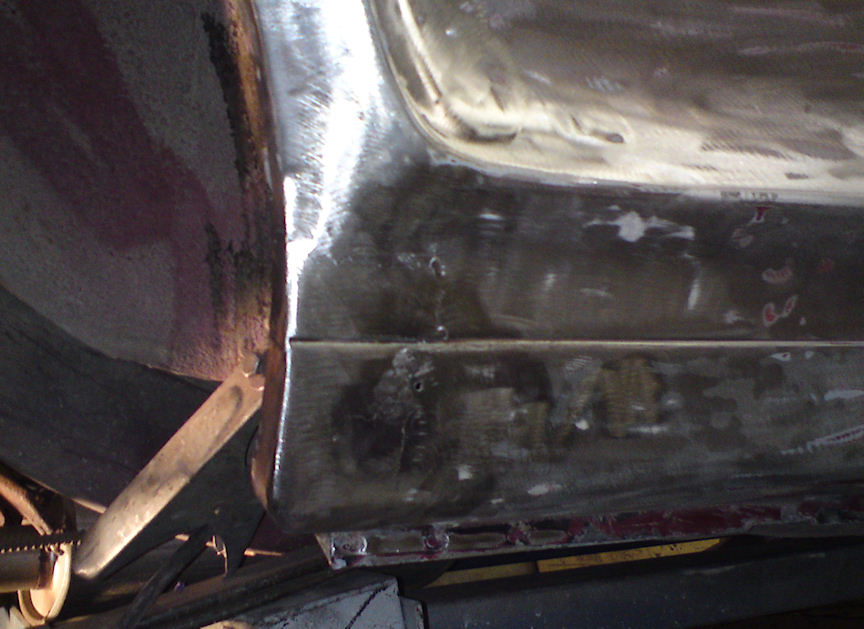
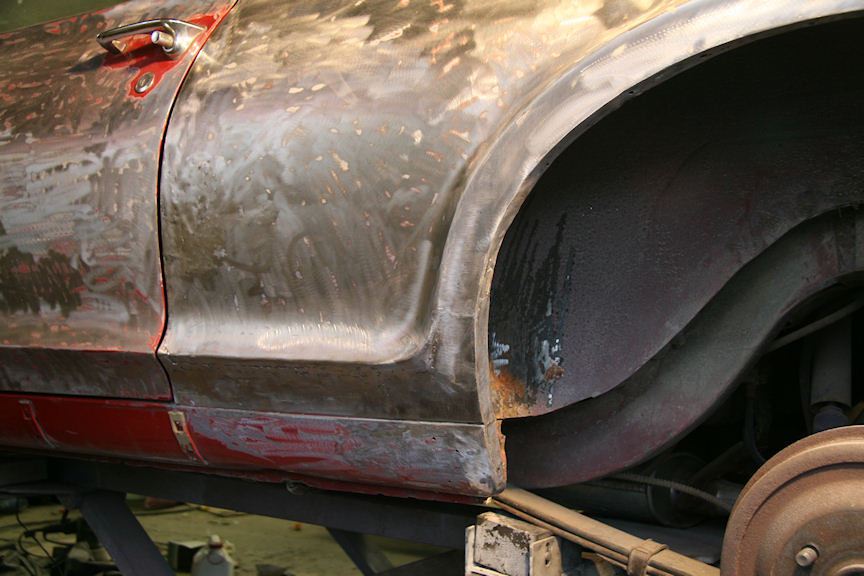
The left hand quarter panel did not line up good at all. It turned out that when it had been replaced years ago it was not done right, as they had the outer skin welded outside of the old skin at the door post and under the quarter window. I also found that the quarter panel was located about 1/4 inch too high on the car. As a result I decided to cut the panel off, cut out the old original panels where there was to layers and relocate the newer panel. There was also some common rust in the front of the wheel opening that I had to take care of.
When I started working on the car I was hoping to have it done before spring, now I hope to have the car painted in June and finished in July, but I am not sure if that will happen.
I am kind of picky when it comes to the bodywork, so even if I make plans for when I want to have the car done I take the time needed to become happy with the result in the end.
Anything else would be a waste of time and money.
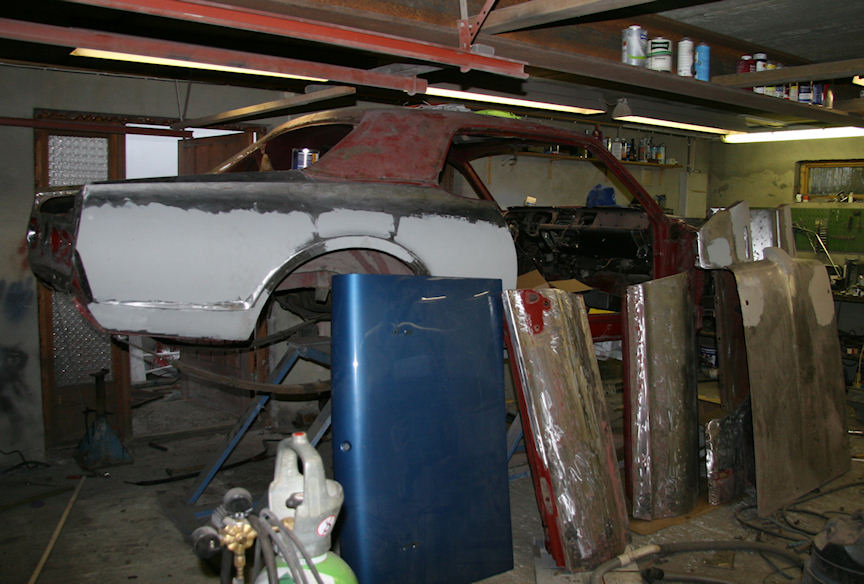
Anyways, here are a couple of new pictures showing some finished areas.

Since I found some common floor rust and a bent rear frame, I decided to do a total restoration job on the car. That means taking the car totally apart, have the underside sandblasted and to do all the detail work on the underside as well.
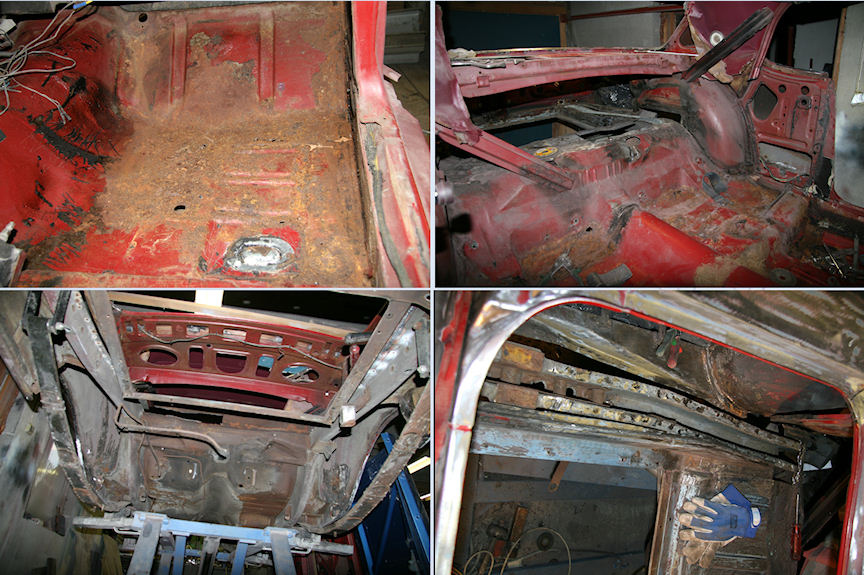
Here are some pictures showing some of the misery. RH front floor was rusty as a result of a leaking AC and most of the floor under the back seat was bad too, most likely caused by mice living in the back seat.
But the worst part was not the rust but a bent frame frame rail and lousy previous work in the trunk after the rear hit. Instead of trying to straighten out the bad floor sheet metal I decided to cut away everything that was bent and deformed and to make new parts . This also gave me the access to the frame rail from above so it could be straightened out properly.
I bought the floor pan from WCCC and it is made out of nice and heavy sheet metal compared to some of the other floor pans you find out there. It still needed some massage in my hydraulic press to improve the profiles to look more like the original floor pan.
After I was done welding I had the body sandblasted.

June 1st, 2010
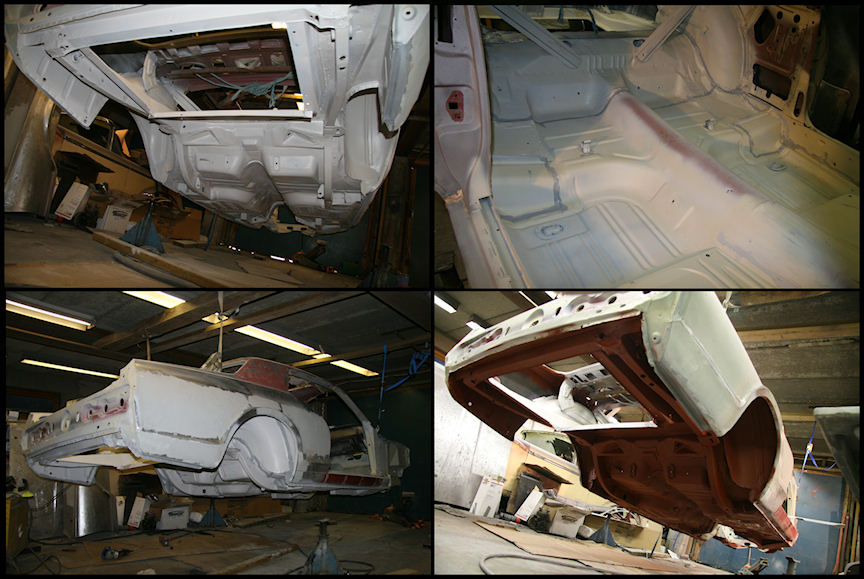
I guess it is time for some updates again. As expected the sandblasting discovered a few more spots of rust rust, so I had to take care of that before anything else. When that was done I brushed on an epoxy sealer on all the welds to seal them 100%. The stuff I use was made for the off shore oil industry, and it is really good stuff  Then I painted the trunk floor, inside , and under the body with a good epoxy primer. After the epoxy primer had dried I used an acrylic sealer on all the body seams to prevent water to get into places where it can cause rust. Then it was time to paint the underside of the body with a red original looking primer.
June 1st, 2010
Both doors have been sandblasted here at home and while the drivers door was very solid, the passenger door had some common rust in the lower front corner. Both doors had lots of old dents that had to be taken care of and then I could start the paint prep work. I prefer to put the bondo directly on the steel and then paint the epoxy primer before the surfacer.
he trunk lid I found for my car is actually from a 69 Cougar that also had an Eliminator wing on it. As a result I had to relocate the key hole and wld the holes for the wing. Otherwise the lid was in good shape and just needed the regular paint prep work.
June 11th, 2010
Things are going fine on the project and at this point doors, fenders, hood, trunk lid and valances are ready for the paint shop. Unfortunately it seems like the car will have to wait until August before it is getting painted as the painter got trouble with his back and now he is way behind. At least I can paint the underside of some of the parts here in my garage, so that is what I did tonight
June 27th
I guess it is time for an update and a few new pictures of the restoration work on my cat. But first of all I would like to answer the question from my friend down the street; Finding another painter is easy. Finding a another painter as good as the one I use is impossible
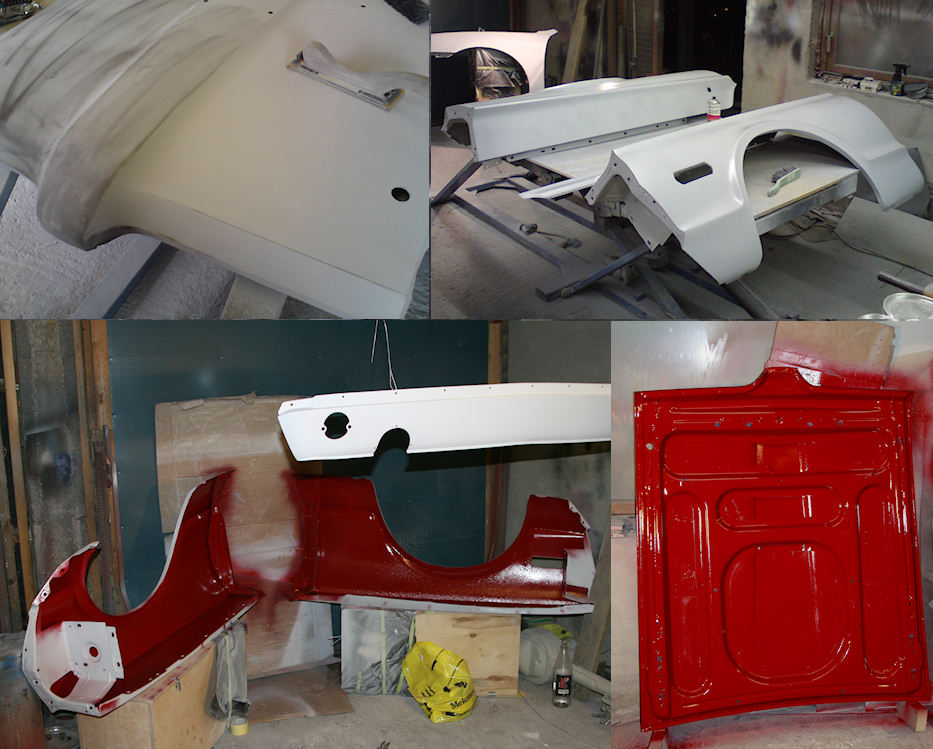
Since I posted the last pictures I have finished the bondo work on the quarter panels. It took a lot of work to make them nice and straight again, but I think they came out pretty good.
The roof, and especially the sun roof lid and the area around the sun roof had some pitting. I don’t like to sandblast the roof of a car, so I decided to remove all the deep rust with citrus acid. I made a mixture of acid and wall paper glue and got a pretty sticky goop that I brushed on the rust and then covered it with plastic to prevent it to dry up. I then left it there for about 12 hours before it was removed and I washed the steel with lukewarm water and could brush off the remaining rust. Not too surprising I found a few pits that were so deep that I needed to add some metal with my welder. Then I brushed the clean steel with the special epoxy before the roof and quarter panels got a nice layer of epoxy primer.
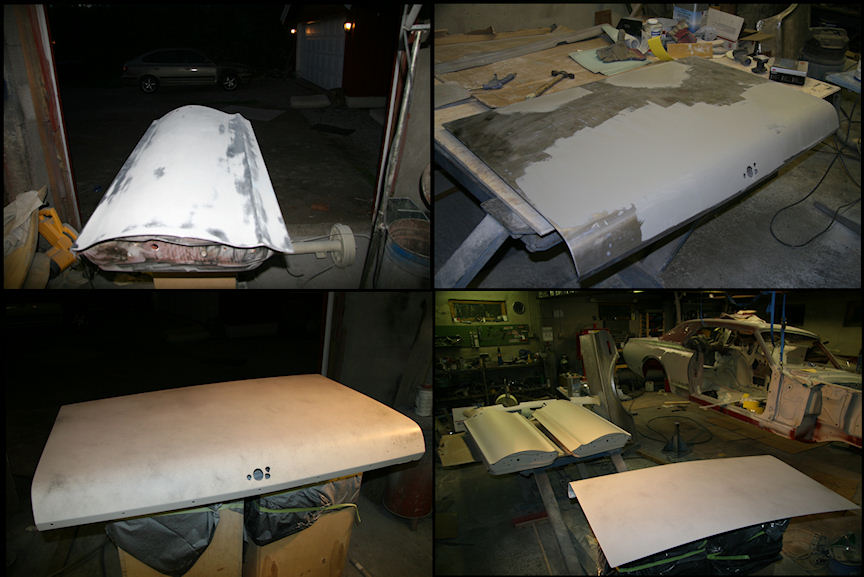
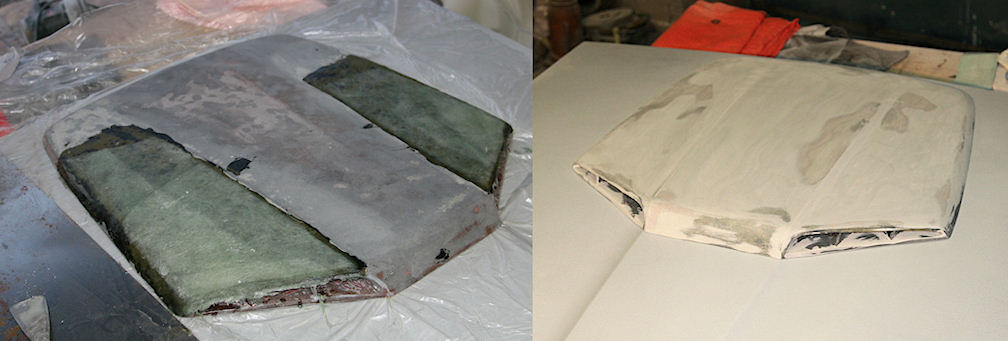
The hood scoop on my car was in miserable condition, and I have very little experience with fiberglass work. The problems was that it was heavily cracked and it was warped totally out of shape with most of the scoop sagging.
Some previous owners has tried to compensate for the sagging with a lot of bondo, which of course made the scoop more heavy and likely made it even worse in the end.
After a some thinking I decided to grind away most of the original fiber glass so the remains of the original scoop was a very thin shell of the scoop and the front simulated air intakes. Then I made some supports that I put inside of the scoop to press it back into shape and bolted the scoop to the hood. That way I had a perfect base for making an almost new scoop with fresh new fiberglass and resin. I used 4 layers of fiberglass mats and a quart of resin, and after it all cured (and a lot of sanding) I got a perfect looking scoop for my car
June 30th, 2010
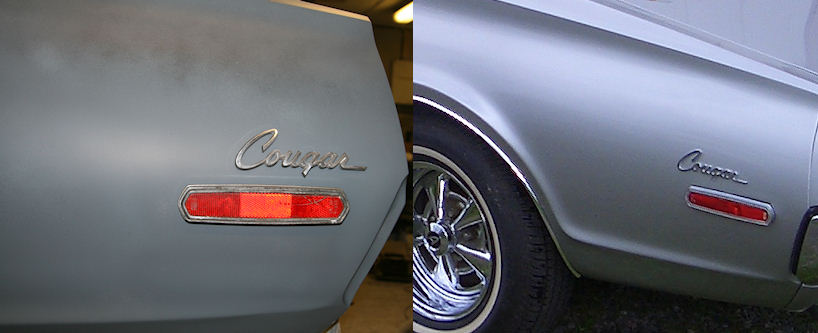
Well, nobody is perfect, and tonight I realized that I had overlooked one mistake that has been made on the car by the person who replaced the left hand quarter panel a long time ago. The emblem on the quarter panel isn’t located where it is supposed to be. Of course I found this out after I put on the final primer coats. . . Now my dilemma is, should I weld the holes and relocate the emblem to the correct position (which will be a lot of work at this stage), or should I just leave it as it is and pretend that this is the way my car was built 
July 1st, 2010
The first thing I was thinking about when I woke up this morning was the Cougar emblem… And I immediately knew I didn’t want to wake up another day thinking about it being in a wrong place. Well, it turned out that the reflector also was misplaced so I had to move it 1/2" up on the quarter panel and about 1/4 inch backward.
Now I am happy again

July 2nd, 2010
Finally time for some paint. Because I am so cheap I decided to paint the roof with some left over paint from my shelf, all the time it later will be covered by the vinyl anyways. Well, one thing often leads to another… Does anyone know if all the Hertz cars had a black top? Right now I am tempted to go for a white top as I think it looks a lot better than the black one. Unlike my other 68 Cougar where the Marty report says black vinyl top, the report says nothing about that on this one.

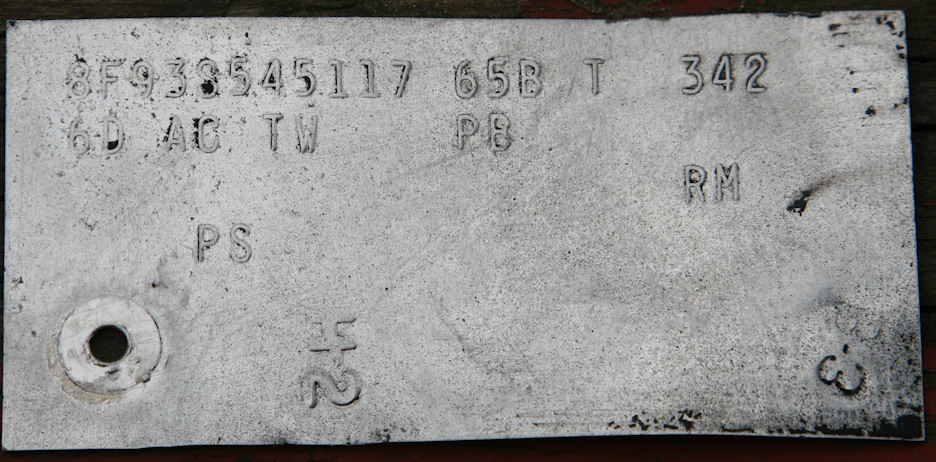
July 3rd, 2010
Here is the buck tag. I have a feeling that this car never came from the assembly line with a vinyl top as the drip rail moldings are the same as on cars without a vinyl top. My green 68 with sunroof has the other type moldings for cars with vinyl top. Or maybe the moldings something on cars from a specific date? :thinkuh: