I want to repaint the round emblem on the roof pillar and also would like to take the backing off to clean and paint. It’s held on by some small rivets? I’d like to know how to reattach it and if I can get a new backing and clips for it. The one on the other side fell off towing it home… ![]() Any other tips are welcome. I’m planning to use very thin model paint and a hypo-needle to apply.
Any other tips are welcome. I’m planning to use very thin model paint and a hypo-needle to apply.
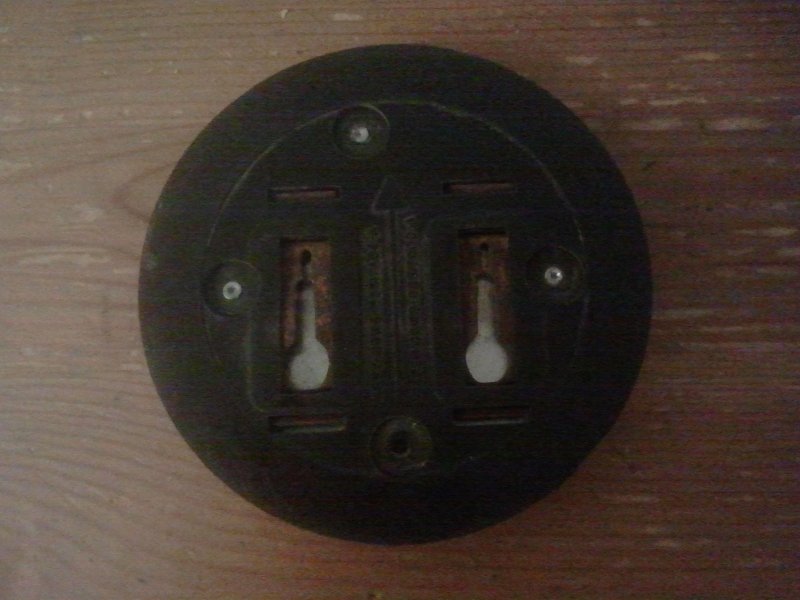
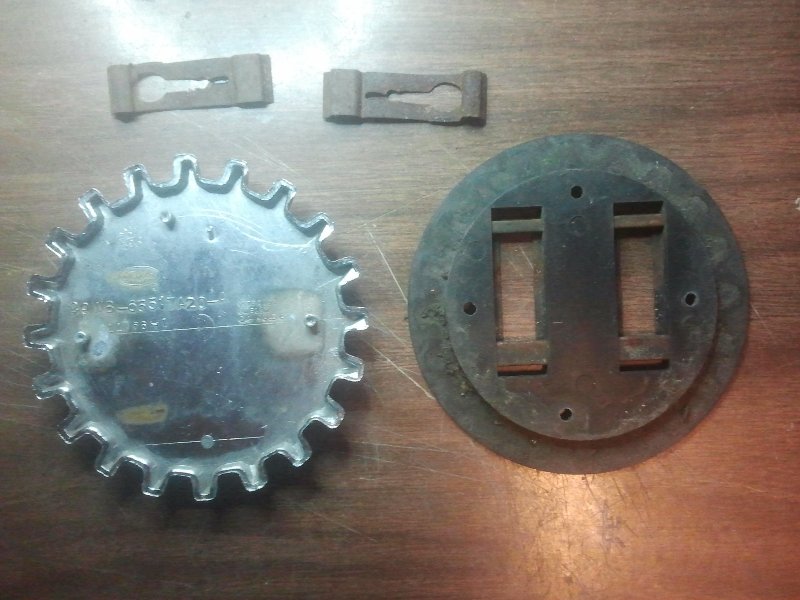
I’m fairly sure that the backing plates are not reproduced. If they are I’m sure someone will chime in and correct me.
Keep in mind that after it’s painted it gets a thick clear overlay. You should make sure your paint will survive that process. I do not have any information on the rivets.
I bought a Set from a forum member here who restores them to a very high quality. You must send in good cores with the backing plates in order to purchase a set if I remember correctly.
Thanks good to know, last night playing around with it, it kinda came loose and pulled easily off so now I can clean it but not sure the best way to reattach it. Also someone mentioned finger nail polish, so I’m gonna play with that today and I have some thick varnish to try too.
Paint the base with SEM Landau black. The paint can be model paints. Gloss Black, White & “Ruby Red” The over coat was a plastic similar to “Decoupage” excuse my French! Trick was to get the base hot. Then slowly poor the plastic while blowing gently w/ a straw to diminish bubbles.
Or pay someone else!
Try just painting them. Bend clip to regain strength. Re assemble w/ adhesive on the pins only. Wait 24 hrs.
To install - palm the emblem (fingers pointing down) & with a strong downward push - in & down.
They might click. Just be sure they are on the pins & stay!
Enjoy your work!
Back in the day… the original hub caps centers matched this emblem.
Cool! Thanks, yeah the nail polish didn’t thin down well so I got some testors enamels, thinner & some triple-thick varnish… I’ll try your trick heating the emblem up and blowing on it.
What ever you use for the over coat make sure is is UV safe. It will degrade otherwise and as it does it will discolor.
More good tips… after painting it i don’t want to put the wrong stuff on. Not having luck finding UV resistant decopage. So any recommendations welcome. Also, how thick should it be on the emblem? I haven’t seen a good one and the best pic I have of a new one looks pretty thick above the letters around the rim, but not sure about the inner part. Its not above the cat is it? And lastly, glossy or satin?
Keep us posted with your progress. Keep sending pictures as you go too.
Well i did give it a go today… took a couple pix with my phone but unfortunately the quality and lighting were sub-par.
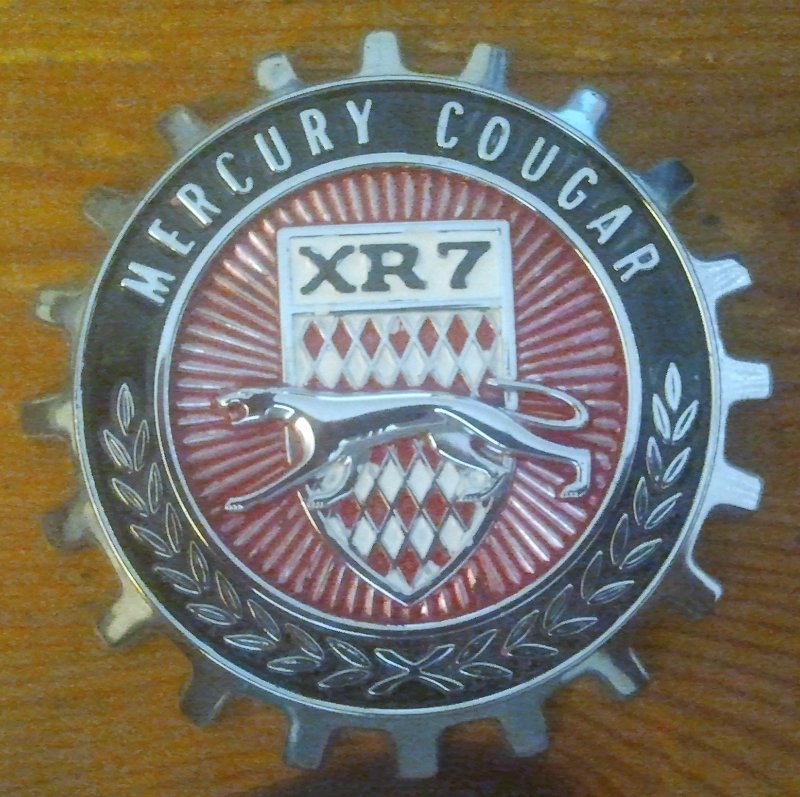
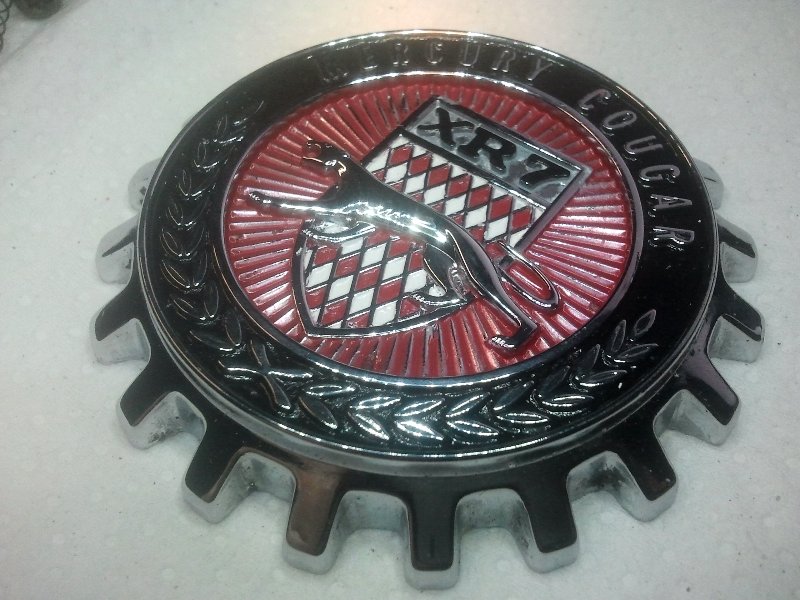
I’m using the Testors gloss enamel paint. For the black I thinned it down enough to run like ink, only a few drops to the capful i mixed. I put it in a blunted syringe like the ones used to refill ink cartridges and slowly squirted a little here and there along the outside rim. I tilted it back and forth and it filled in all the spaces and cracks and self-leveled itself nicely. It dried nice and glossy and level.

Before the black completely dried, i started with the red. The grooves around the shield I used the same technique and the diamonds I just needed to touch the syringe to them to fill with paint. I made several little mistakes but with various tools managed to scrape cut or wipe them away. You see here after the white was applied the mistakes. But toothpicks exacto knife, pencil eraser, syringe and magnifier helped to fix them.
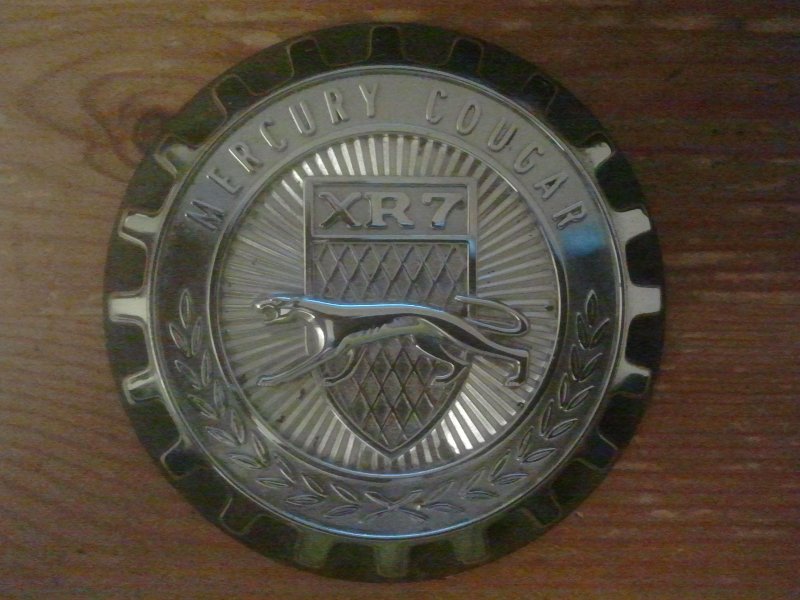
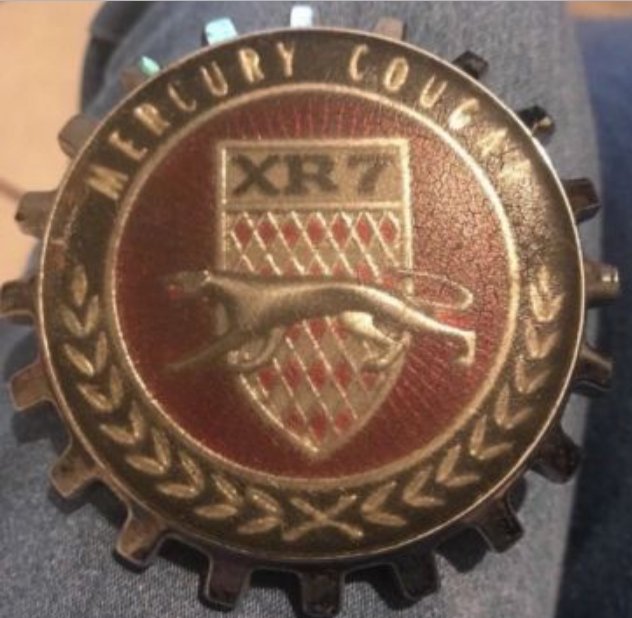
Here’s an original one I assume, So when I’m done painting i’ll have to cover the whole thing with about a 1/4" of plastic…
Tomorrow I’ll try to work on it more.
Great progress! Can’t wait to see the finished emblem!
Keep in mind if your used unit looks like the last one you can sand and buff and the results are amazing, if the clear epoxy coating is not lifting it will look NOS upon completion. Look at our restored emblem, epoxy glue will reattach the plastic to the chrome.
https://secure.cougarpartscatalog.com/c9wy-65517a56-restored.html?attribs=79
Looking nice. You just might have yourself a side job! LOL!
I got that image from ebay but I wasn’t aware of that. good to know…
I got sidetracked rebuilding the carb, but I cleaned it up a bit, though I see from the image there’s more to be done. Since the paint is so thin it will need 2 or 3 coats of each color. I redid the black XR7 but my syringe froze up before I could float the white.
I’m hoping to get a recommendation for a plastic coating that is Crystal Clear, UV resistant and Outdoor/Weatherproof (apparently waterproof isn’t the same). Also do you think gloss or satin finish would be best?
Went to a place called Tap Plastics here in Seattle and they suggested I try their casting resin product. Its clear, hard and UV protected.
It seemed to work great however the red background paint lifted and blurred out some of the detail…
My partner, who actually owns the car says their good enough but I will try it again a little later. I think I will try spraying sealer over the paint before pouring the resin next time.

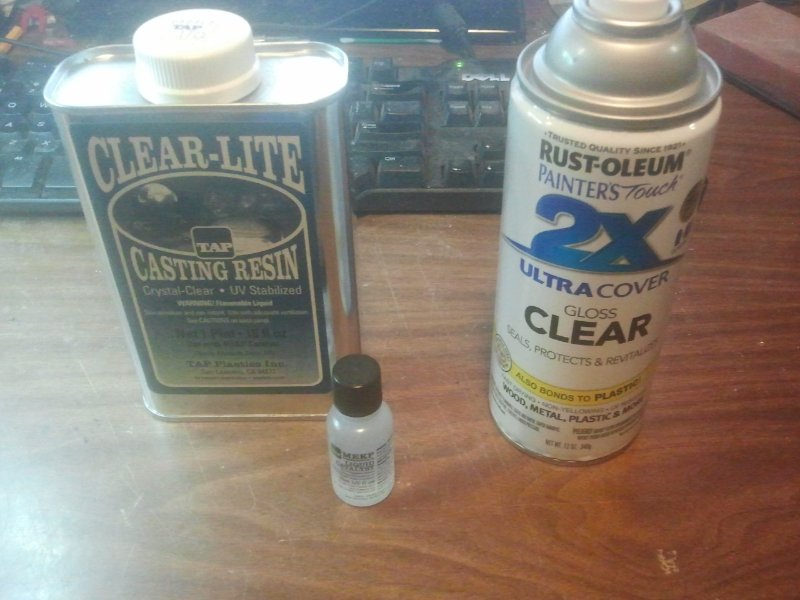
I restored some chrome Ghia emblems years ago and used clear polyurethane and it worked great. There is a version of that stuff at most hardware stores that’s made to pour onto tabletops, etc. It goes on super thick and dries thick. It did yellow slightly over the years and gave the emblems a bit of a gold tint.
It’s looking really good. How did you strip the old clear and colour from the emblem? I’d like to do this too but scared of wrecking the detail getting the old stuff off. I would probably look to use a marine UV resistant varnish or 2 pack polyurethane clear to finish.