Gry with XR7-G.
Well folks, first of all, thank you all for the nice words about my work. I also wish I could say that I’ve been driving my other cars a lot lately, but that is not the case. This summer has been terrible with pretty much every car show I usually go to cancelled. The only cars I’ve been driving this year is the 70 XR7 convertible that I am repainting (half way restoring) and my 66 Mercury convertible. I’ve been restoring 3 Mercury Park Lane convertibles side by side for the last year so that too has been taking a lot of my time. After several full size cars and a Jaguar E type it is very fun to be back doing a Cougar again. For those who are new to what I’ve been doing before, I started my Cougar carrier with restoring a 69 Eliminator, then continued with my XR7G, a 68 390 GT, my brothers 70 XR7 convertible and then as the topping of the cake did my friends 67 390 GT. After that I needed some variation and restored the Jaguar and my 60 Park Lane convertible. Then a 68 Park Lane with yacht paneling came sneaking into my garage, and soon after another 68 one showed up… and then a third. So it’s been busy here for sure.
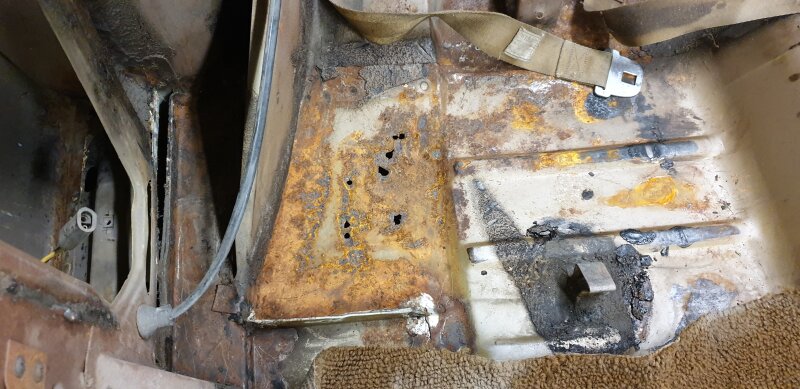
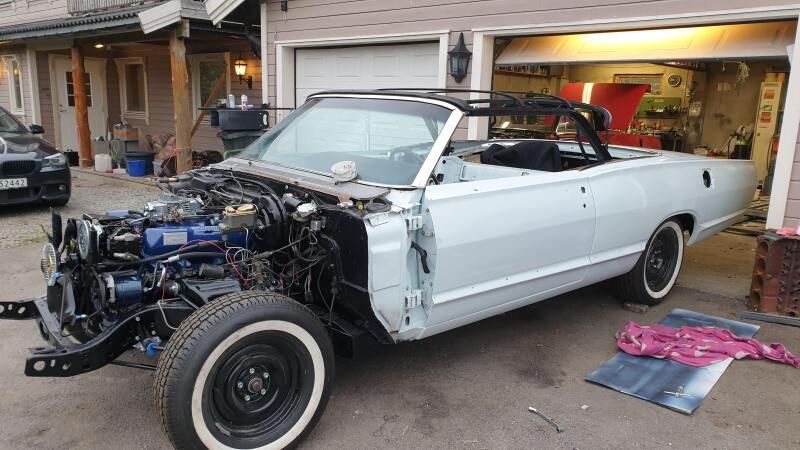
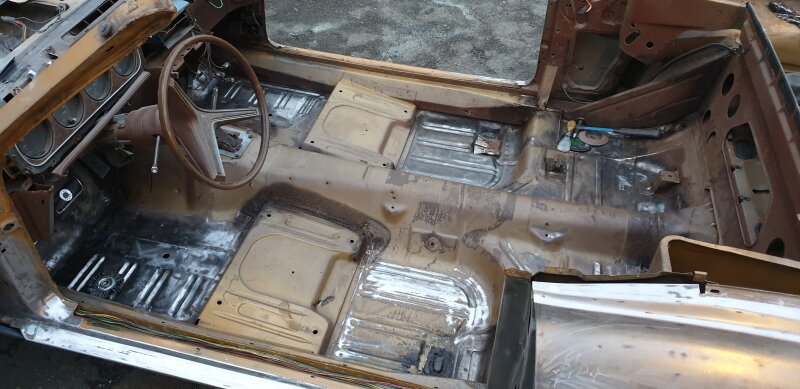
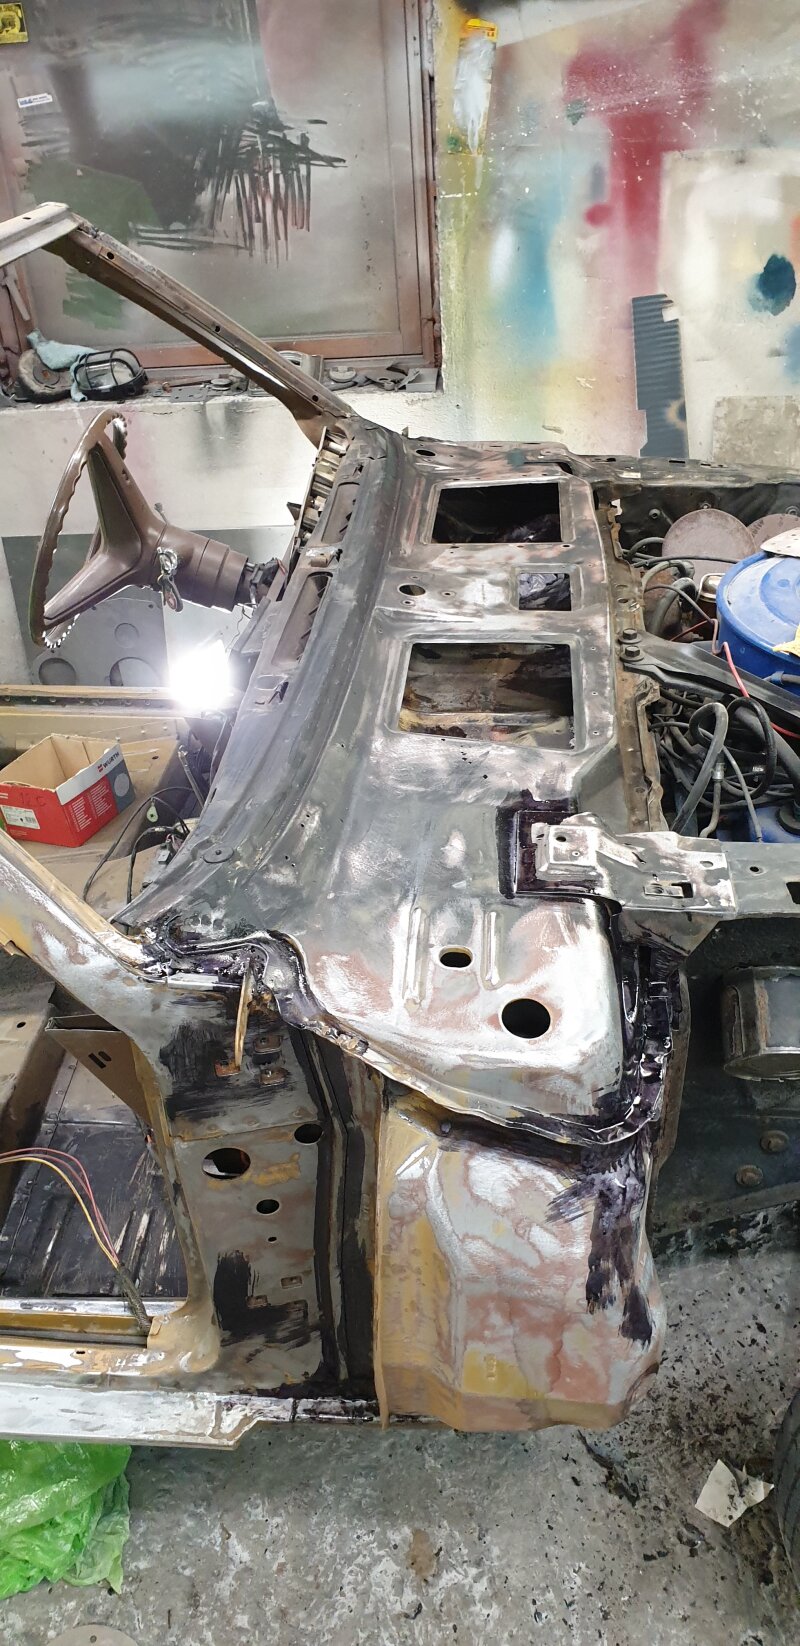
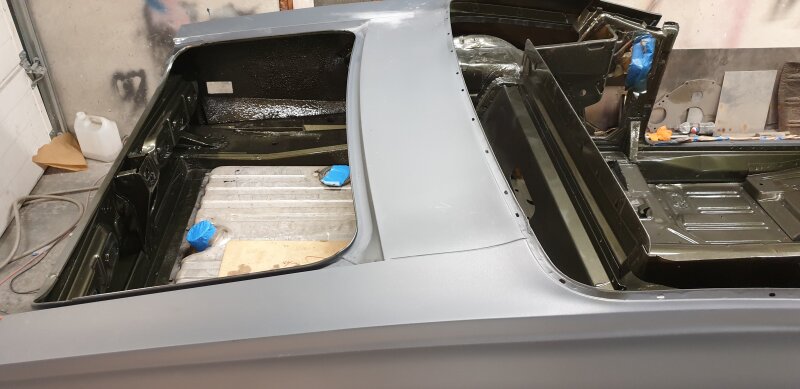
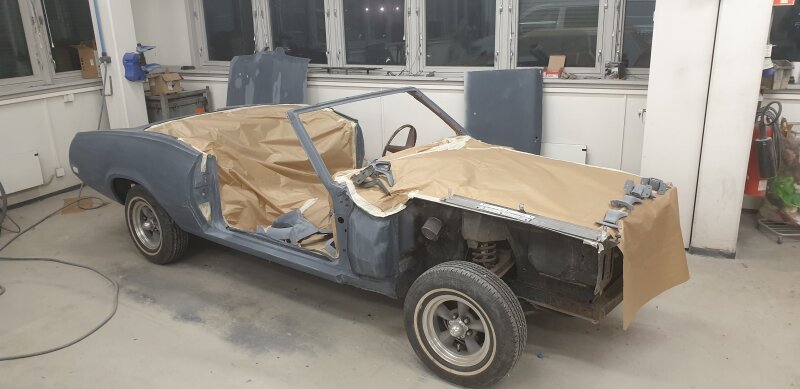
Plans for my 70 was actually just a quick paint job, but I am about to dig a little deeper into it than that (as you can see) Time will show if I am able to stop before this also turns into a full restoration. The last I did was to pull out seats, console and the carpet, just to find some unexpected rust. I know, it is a stupid thing to write, but I was really hoping the floor pans only had minor surface rust. Even so it is not by far the worst I’ve seen so I am not too unhappy as what I found is limited to one area under the back seat and a part of the rh front floor pan.
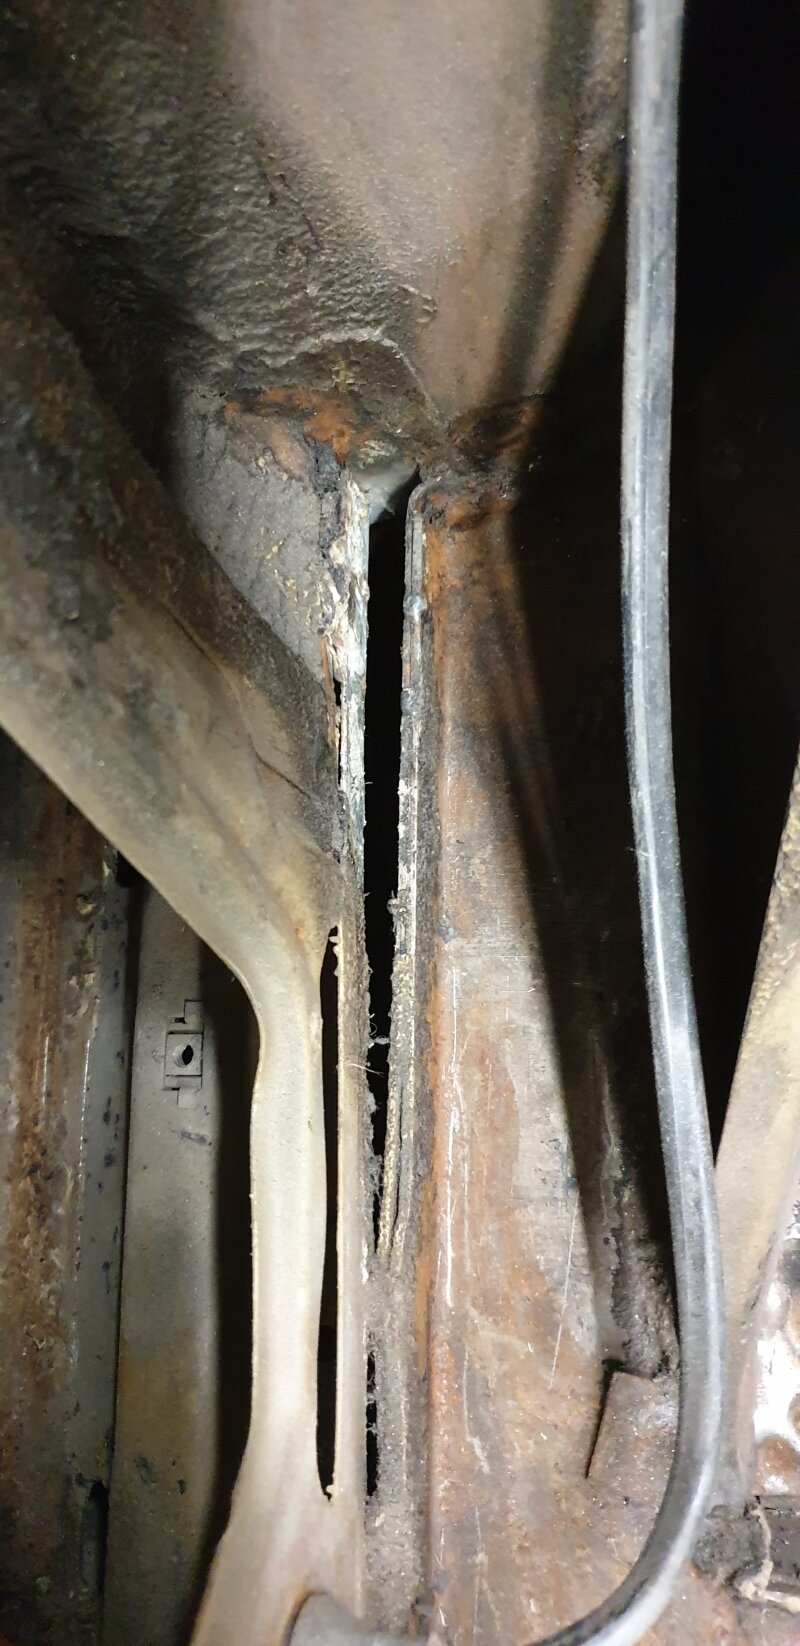
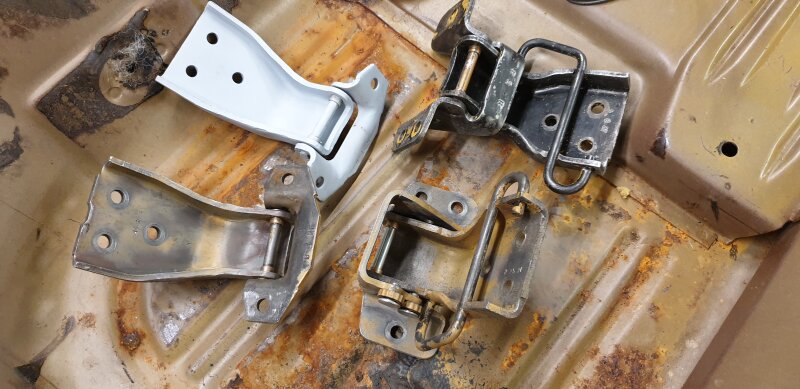
Then I found something else. I mentioned earlier how different the top of the quarter panels looked, and then when I looked closer at the car when I removed some old seam sealer I found that they really didn’t have their best time at the assembly line when they built this car. Look at how the inner rocker is fitted on the rear of the RH floor and how the trunk hinge bracket on the left is put together. I have seen worse, but I surely have seen better as well ![]() BTW, I also got my door hinges rebuilt. I have to say that I am very disappointed by the rebuild kits that are out there these days. I have bought bushings and pins from 3 different places, and they all have problems with the dimensions. Some are just so bad that they are useless. By mixing some of this and some of that I was finally able to make a set of tight and nice hinges.
BTW, I also got my door hinges rebuilt. I have to say that I am very disappointed by the rebuild kits that are out there these days. I have bought bushings and pins from 3 different places, and they all have problems with the dimensions. Some are just so bad that they are useless. By mixing some of this and some of that I was finally able to make a set of tight and nice hinges.
OK, time for some pictures. Since I mentioned my 68 Park Lane I also posted a picture of that one at the end.


Wish my front seats looked as good as those on your Cougar convertible. Those look as original as any I’ve seen. If they aren’t original, can I ask where you got them? Keep up the good body work!
Calicat, the front seat covers are not the originals as they are all vinyl covers. And you are right, they look like originals beside being all vinyl. I have no idea who made them, they were installed in the car before the car came to Norway in 2000. I have had really good experience buying upholstery sets from John’s classic Cougar and they totally looked like originals. I am not sure if they are able to make them like that anymore, but if you appreciate seat covers that look like the originals I would check them out. What bother me most with the after market made by Distinctive Industries is that the head rest doesn’t look right, unless they have corrected that lately. I see 69 and 70 Cougar Eliminators and XR7 restored for a lot of money and everything is absolutely perfect except for the front seats covers that looks cheap and without the correct seat padding in the head rest. That’s a shame.
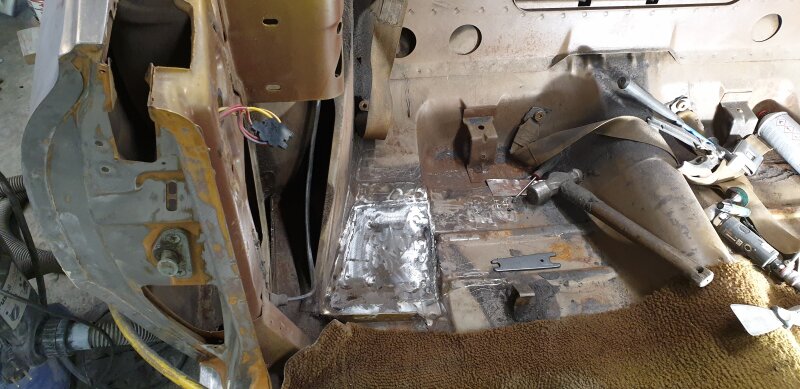
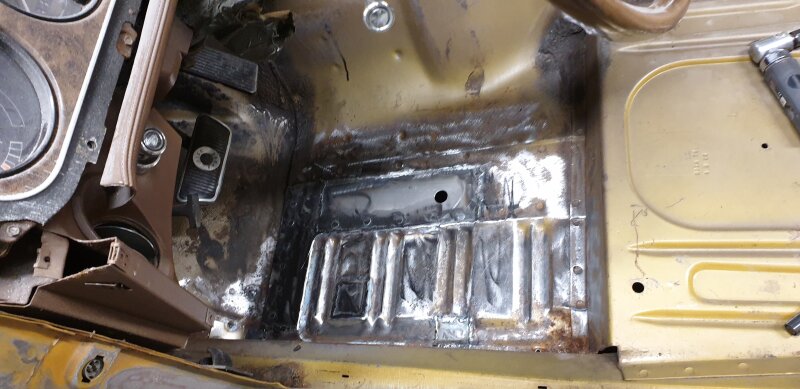
Now for my project car. There is a little progress with the rusty floor that no longer are rusty (except some surface rust). I had to make some patch panels for both front sides. It seems like the air ducts behind the kick panels had a leak on both sides, so moist were able to come into the car and caused the rust. The floor behind the front seats are really nice and will only need some clean up and to be painted.
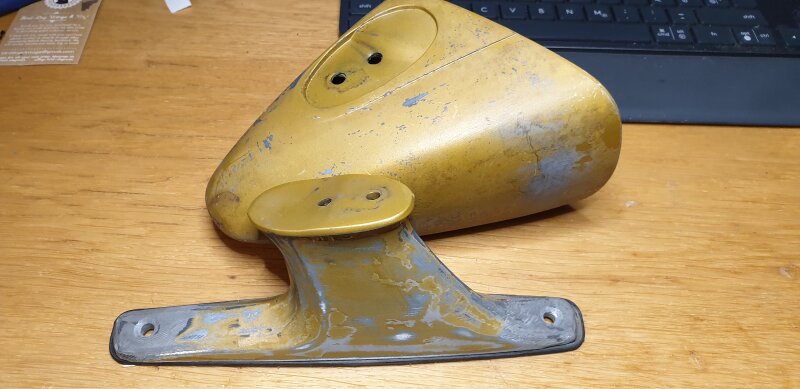
I have also been looking for a RH mirror for the car and found a pair of 71 Cougar mirrors dirt cheap on ebay. Unfortunately the RH mirror base was damaged where the screws hold it to the car so I have reinforced the base with metal inserts and chemical metal so it will never break or crack again.

Left side

Right side


Mirror base after rapair.
After a few of hours of dirty work the inside floor is ready for rust inhibitor and epoxy primer.

Excellent work. I sold a Medium Blue XR-7 convertible to Jan Ove in Norway about 10 years ago. It was medium blue with a white top and interior.
Ken
Thanks Gry! It looks like John’s Classic Cougars is selling his locally crafted seats and Distinctive Industries both. I think Don at WCCC sells the Distinctive Industry vinyl ones too. The online pics look good, so I wonder if they look loose because the foam pad was not replaced? I bought a Distinctive Industries convertible top boot and the vinyl was nearly an exact match, but the spline did not fit the channel behind the rear seat - so beware of that. WCCC has a new boot in stock now that they say fits much better. I just hope I can find front seats that look as good as yours - lol! You are really doing awesome work on your car. Did yours have the top of the rear wheel buckets smashed flat at the factory to fit the convertible brackets? At first I thought it might be hidden collision damage, but it is just the same on both sides, and was dented down from the top which only had access during assembly. Rust on the floor pans in convertibles is common because they get rained in with the top open and moisture gets trapped under carpet pads. My Cougar is exactly same colors as yours, and a even has same tan roof that I will change back to original black. Mine is a mostly rust-free low-mile California car, so the top was not likely down during their winter rainy season. But I did find some minor surface rust on driver floor pan under a moldy carpet pad. Unfortunately, that’s where they left the factory build order and it was destroyed. I think it got wet because the rubber hole plug had come partially out. I like your epoxy primer idea. I just removed rust, primed with red oxide, and lightly dusted with gold to look original. Yours will no doubt resist future rust a lot better.
A few pics of my car after fixing drivers floor pan surface rust. The rest was left untouched as I found it. Assemblers had left a pile of unused fasteners, a matchbook from 1969, and even a door hinge plate under the rear carpet pad. I found where some of the fasteners had been left out and installed them 50 years later. I wish somebody still made the heavy thin tar sound deadener underlayment. Had a hard time with repro underlayment breaking apart and ended up adhering Dynamat to the top surface to hold them together.
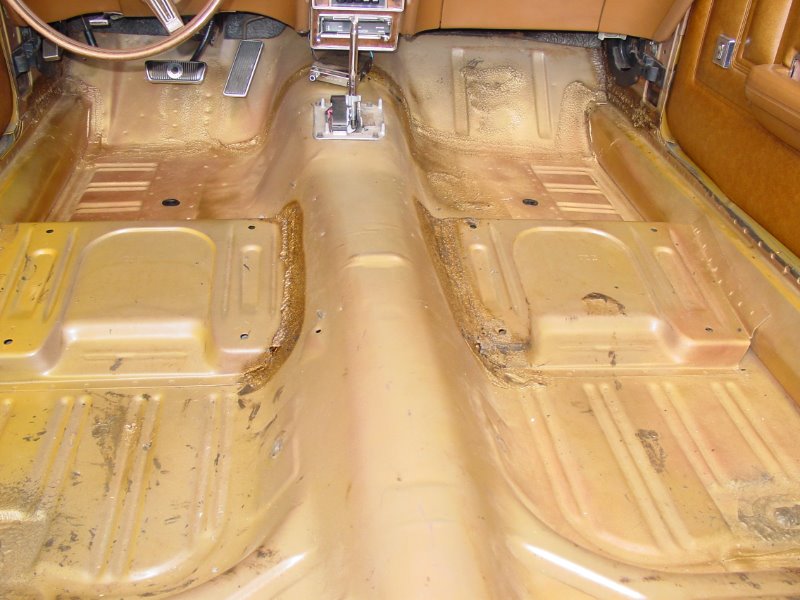

Nice floors… they look like new!
Ken, do you have the VIN # on the car you sold to Jan Ove? I have the Cougar registry in Norway and I really struggle to find a car there that match the description. It might have been repainted a different color, I don’t know.
Calicat, the floor in your Cougar looks awesome, wish mine had been as nice as that. What did you use under the paint?
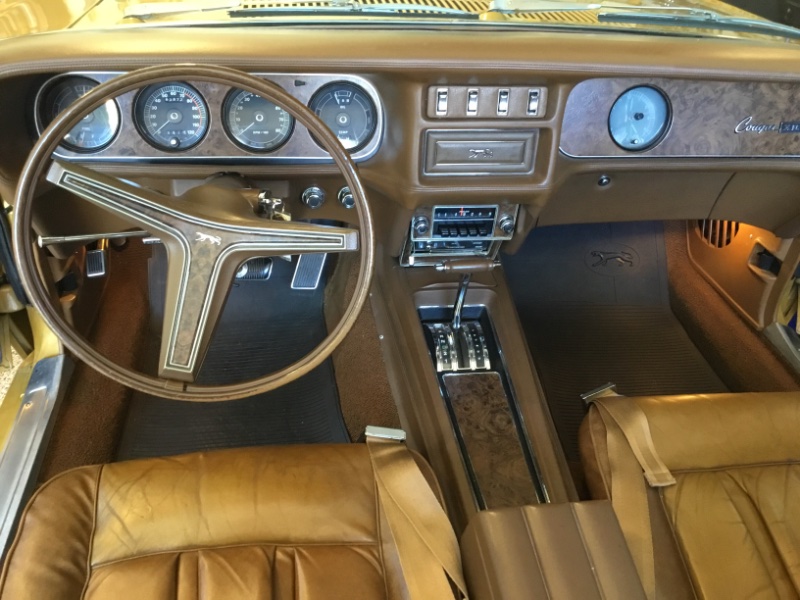
I also notice that your dash has a different color than mine. Both my dash, steering column and the console has a darker shade of brown compared to yours. At first I was thinking it has to be redone, but it does seem to be original. Anyway, someone might have replaced the whole dash back when the car got the AC installed and it is obvious that my car has been totally restored once before. When it comes to seat covers, I don’t think I would ever use those from Distinctive again. The padding in the head rest area they are missing is sewn into thee seat covers so it doesn’t matter if you replace the seat foam or not, they will look wrong no matter what. It is strange, but if you buy a Mustang seat cover for a Mach1 from Distinctive you will see that they got them right so why they just does not seem to be able to do it the right way on the cougar seat covers is a mystery. Don @ WCCC, can you help us understand this?
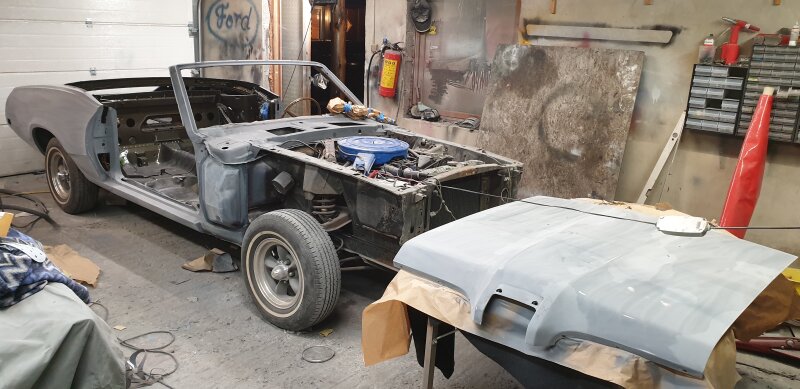
So a little about the newest progress.
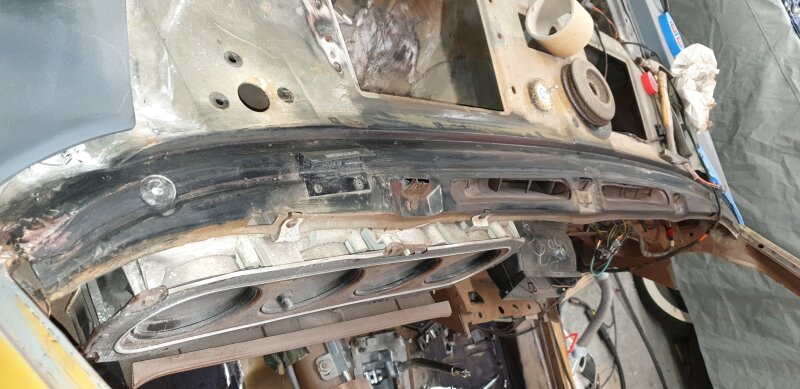
I have done two really dirty jobs. One was to remove all the old butyl glue from the windshield frame and the second was something I’ve never seen before. The rubber seal for the shifter had disintegrated and become a black tar like goop that covered the pointer and light and shifter mechanism. What a mess! I’ve also got the epoxy rust inhibitor on the floor and yesterday I finished the body work on the quarters so now they are ready for epoxy primer and polyester filler. ![]() My goal is to have the car painted before new year, but the time is running fast so I can’t promise that.
My goal is to have the car painted before new year, but the time is running fast so I can’t promise that.
BTW, the only reason why I have not removed the dash from the car yet is because I want to be able to drive the car in and out when needed.


Gry,
I used red oxide primer under a light coat of gold on the drivers floor pan repair area. I think the lighting is what made my dash look lighter. I just took this picture and it looks more like your ginger interior. Mine was a San Francisco Bay area car, so no AC was ordered. It still has the original leather insert seats but the seams and foam pads are starting to come apart. Yes, I would love to hear Don’s thoughts on best original looking seat covers. I don’t see the XR7 vinyl bucket seat set on the WCCC website anymore.
Calicat, you might be right on the color of the dash, but I still think the one in your car is a little different than in mine.
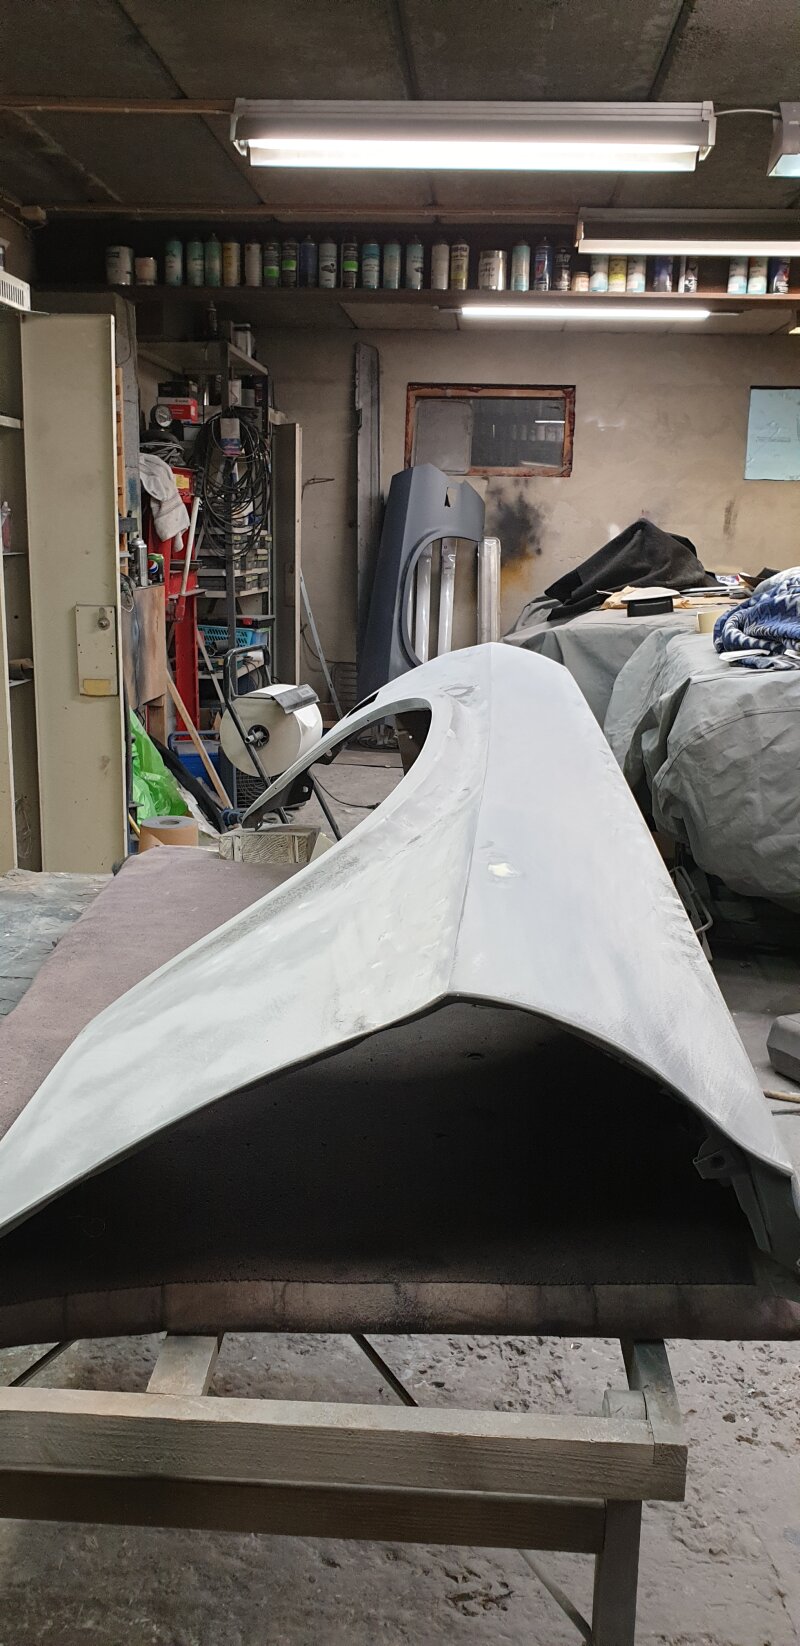
My Cougar is a few steps closer to paint. I finally were satisfied with the body work on the quarter panels so could cover them with epoxy primer and polyester filler. Then let it cure over night before I sanded it down with 120 and 240 grit paper. Next step now is the top filler. Then I have the door openings and some small parts left to do before I can do the final sanding. I am so much looking forward to be done with the paint prep work and to get some shiny paint on this cat.

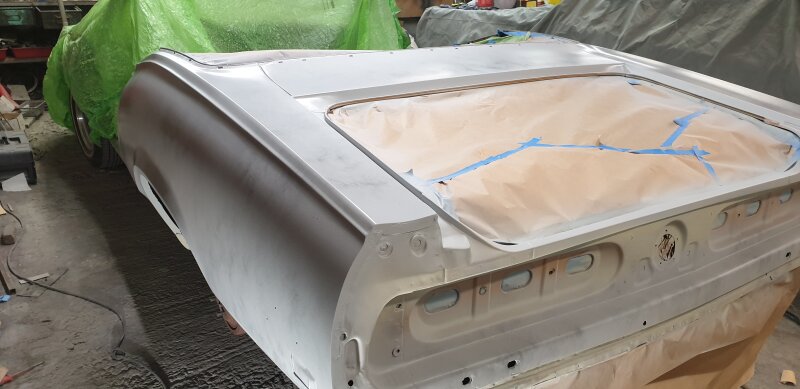

All the time I am pushing the line when it comes to how far I am going with this car. I found that the firewall area needed to be cleaned up, re-sealed and repainted as well, so I spent a little time doing that before I sprayed it with etch primer and top filler.
Body is ready for final sanding

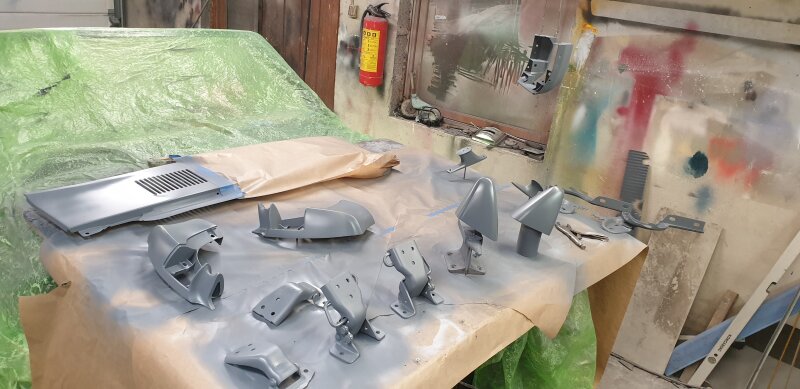
Small parts like mirrors, door and trunk hinges and extensions are done too.
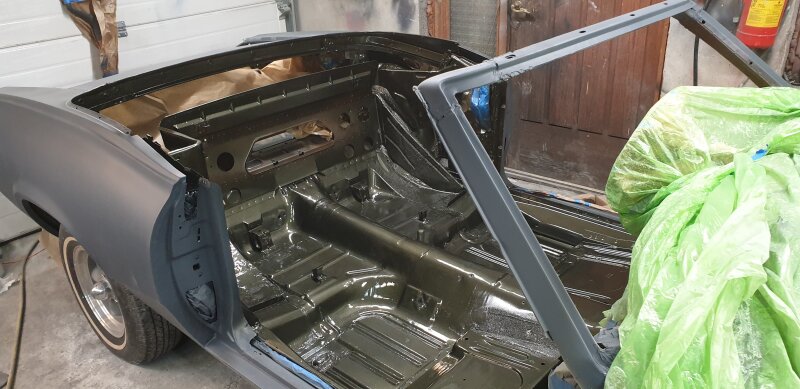
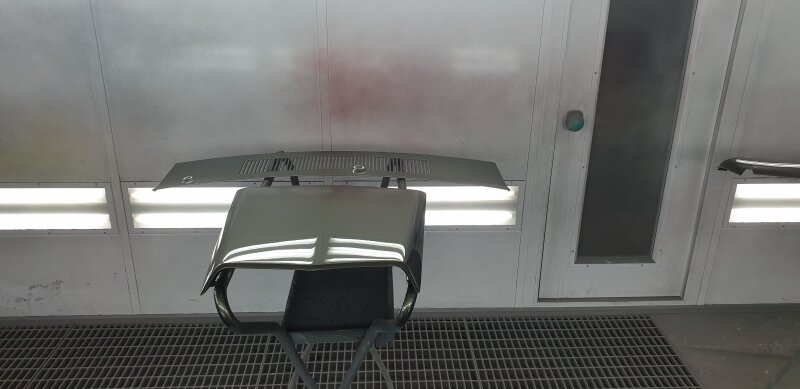
They say “go green” and so I did. It is always interesting to see the color on parts for the first time. ![]()

Timeless and beautiful color!
From Kevin Marti’s data, the top 5 color choices along with top corresponding interior colors in 1970 were:
K Deep Gold Metallic/F Med Brown
G Med Lime Metallic/G Med Green
M White/A Black
C Dark Ivy Green Metallic/G Med Green (F Med Brown was 3rd)
2 light Ivy Yellow/G Med Green
I am happy to tell you that I am finally done with all the sanding and paint preparation work on my Cougar and that all the parts and the car itself is at the paint shop and hopefully will be painted soon. The weather here where I live in Norway has been terrible for the last weeks, but today it was supposed to clear up and stop raining. Well, it did in fact stop raining, but they did not say anything about snow. ![]()
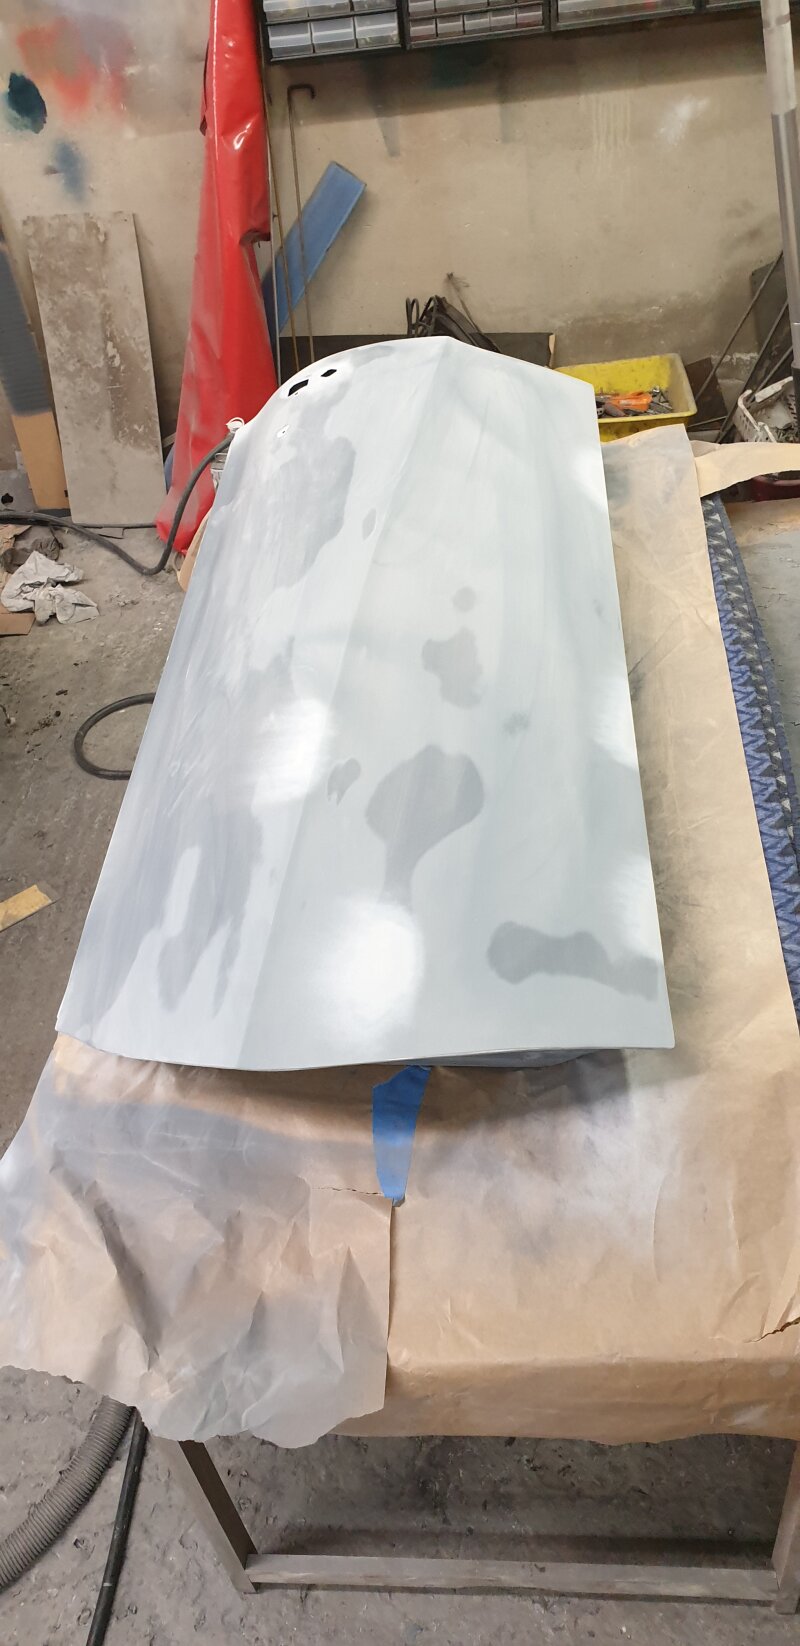

Short Monday afternoon update. We got new color on door, fenders and some other parts. I love the new color, and tomorrow parts will be block sanded before the final clear coats. That’s when the really deep shine will appear.
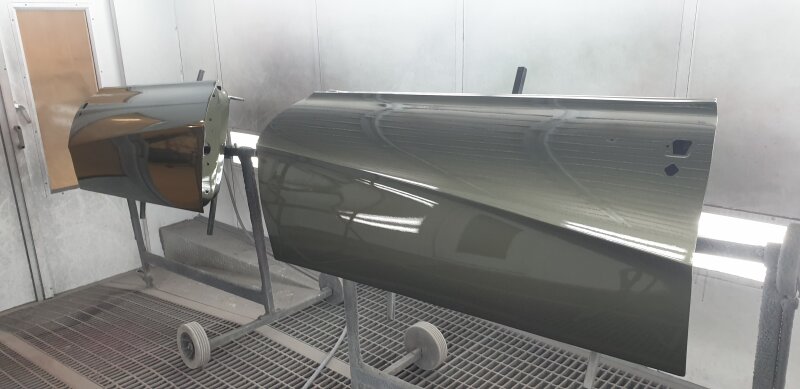

The car is also ready for paint. That will happen later this week ![]()
Happy owner today.

Looking GOOD!
Very classy!
- Phillip