Men and brethren
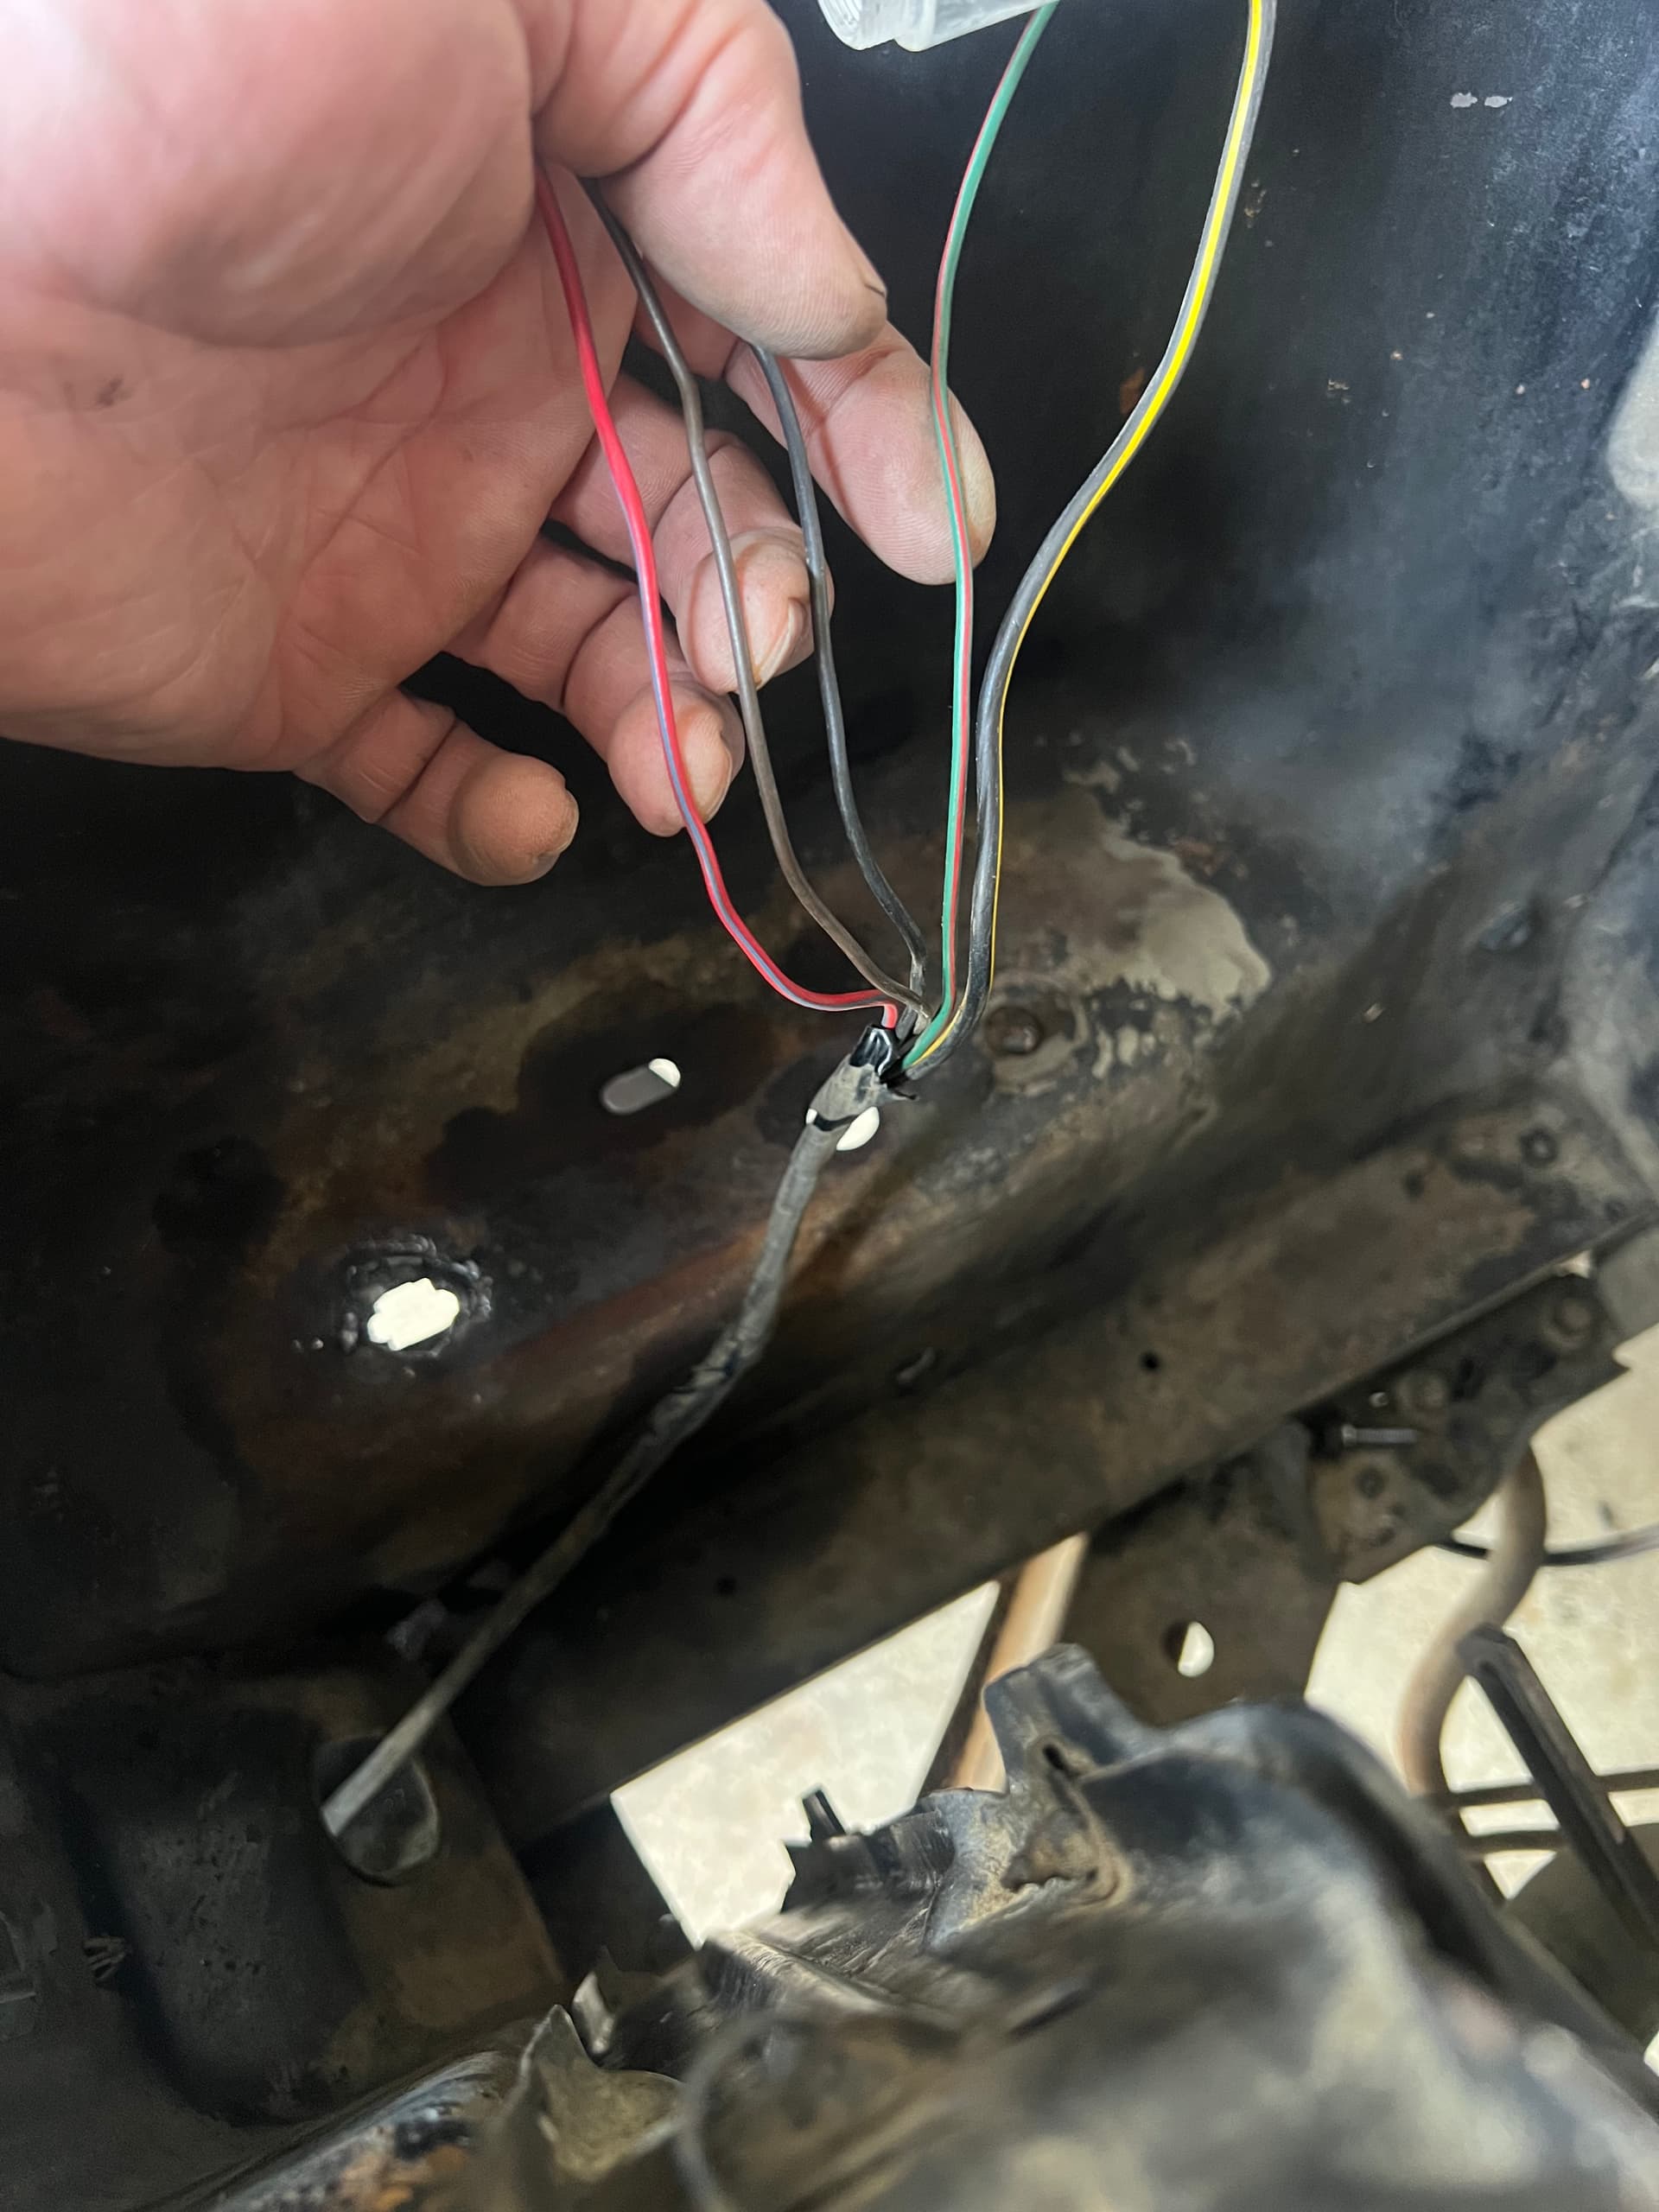
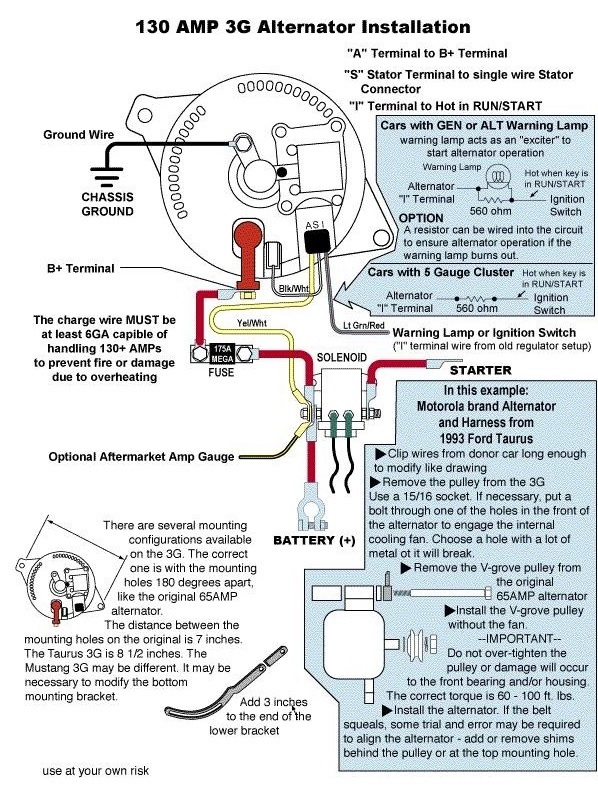
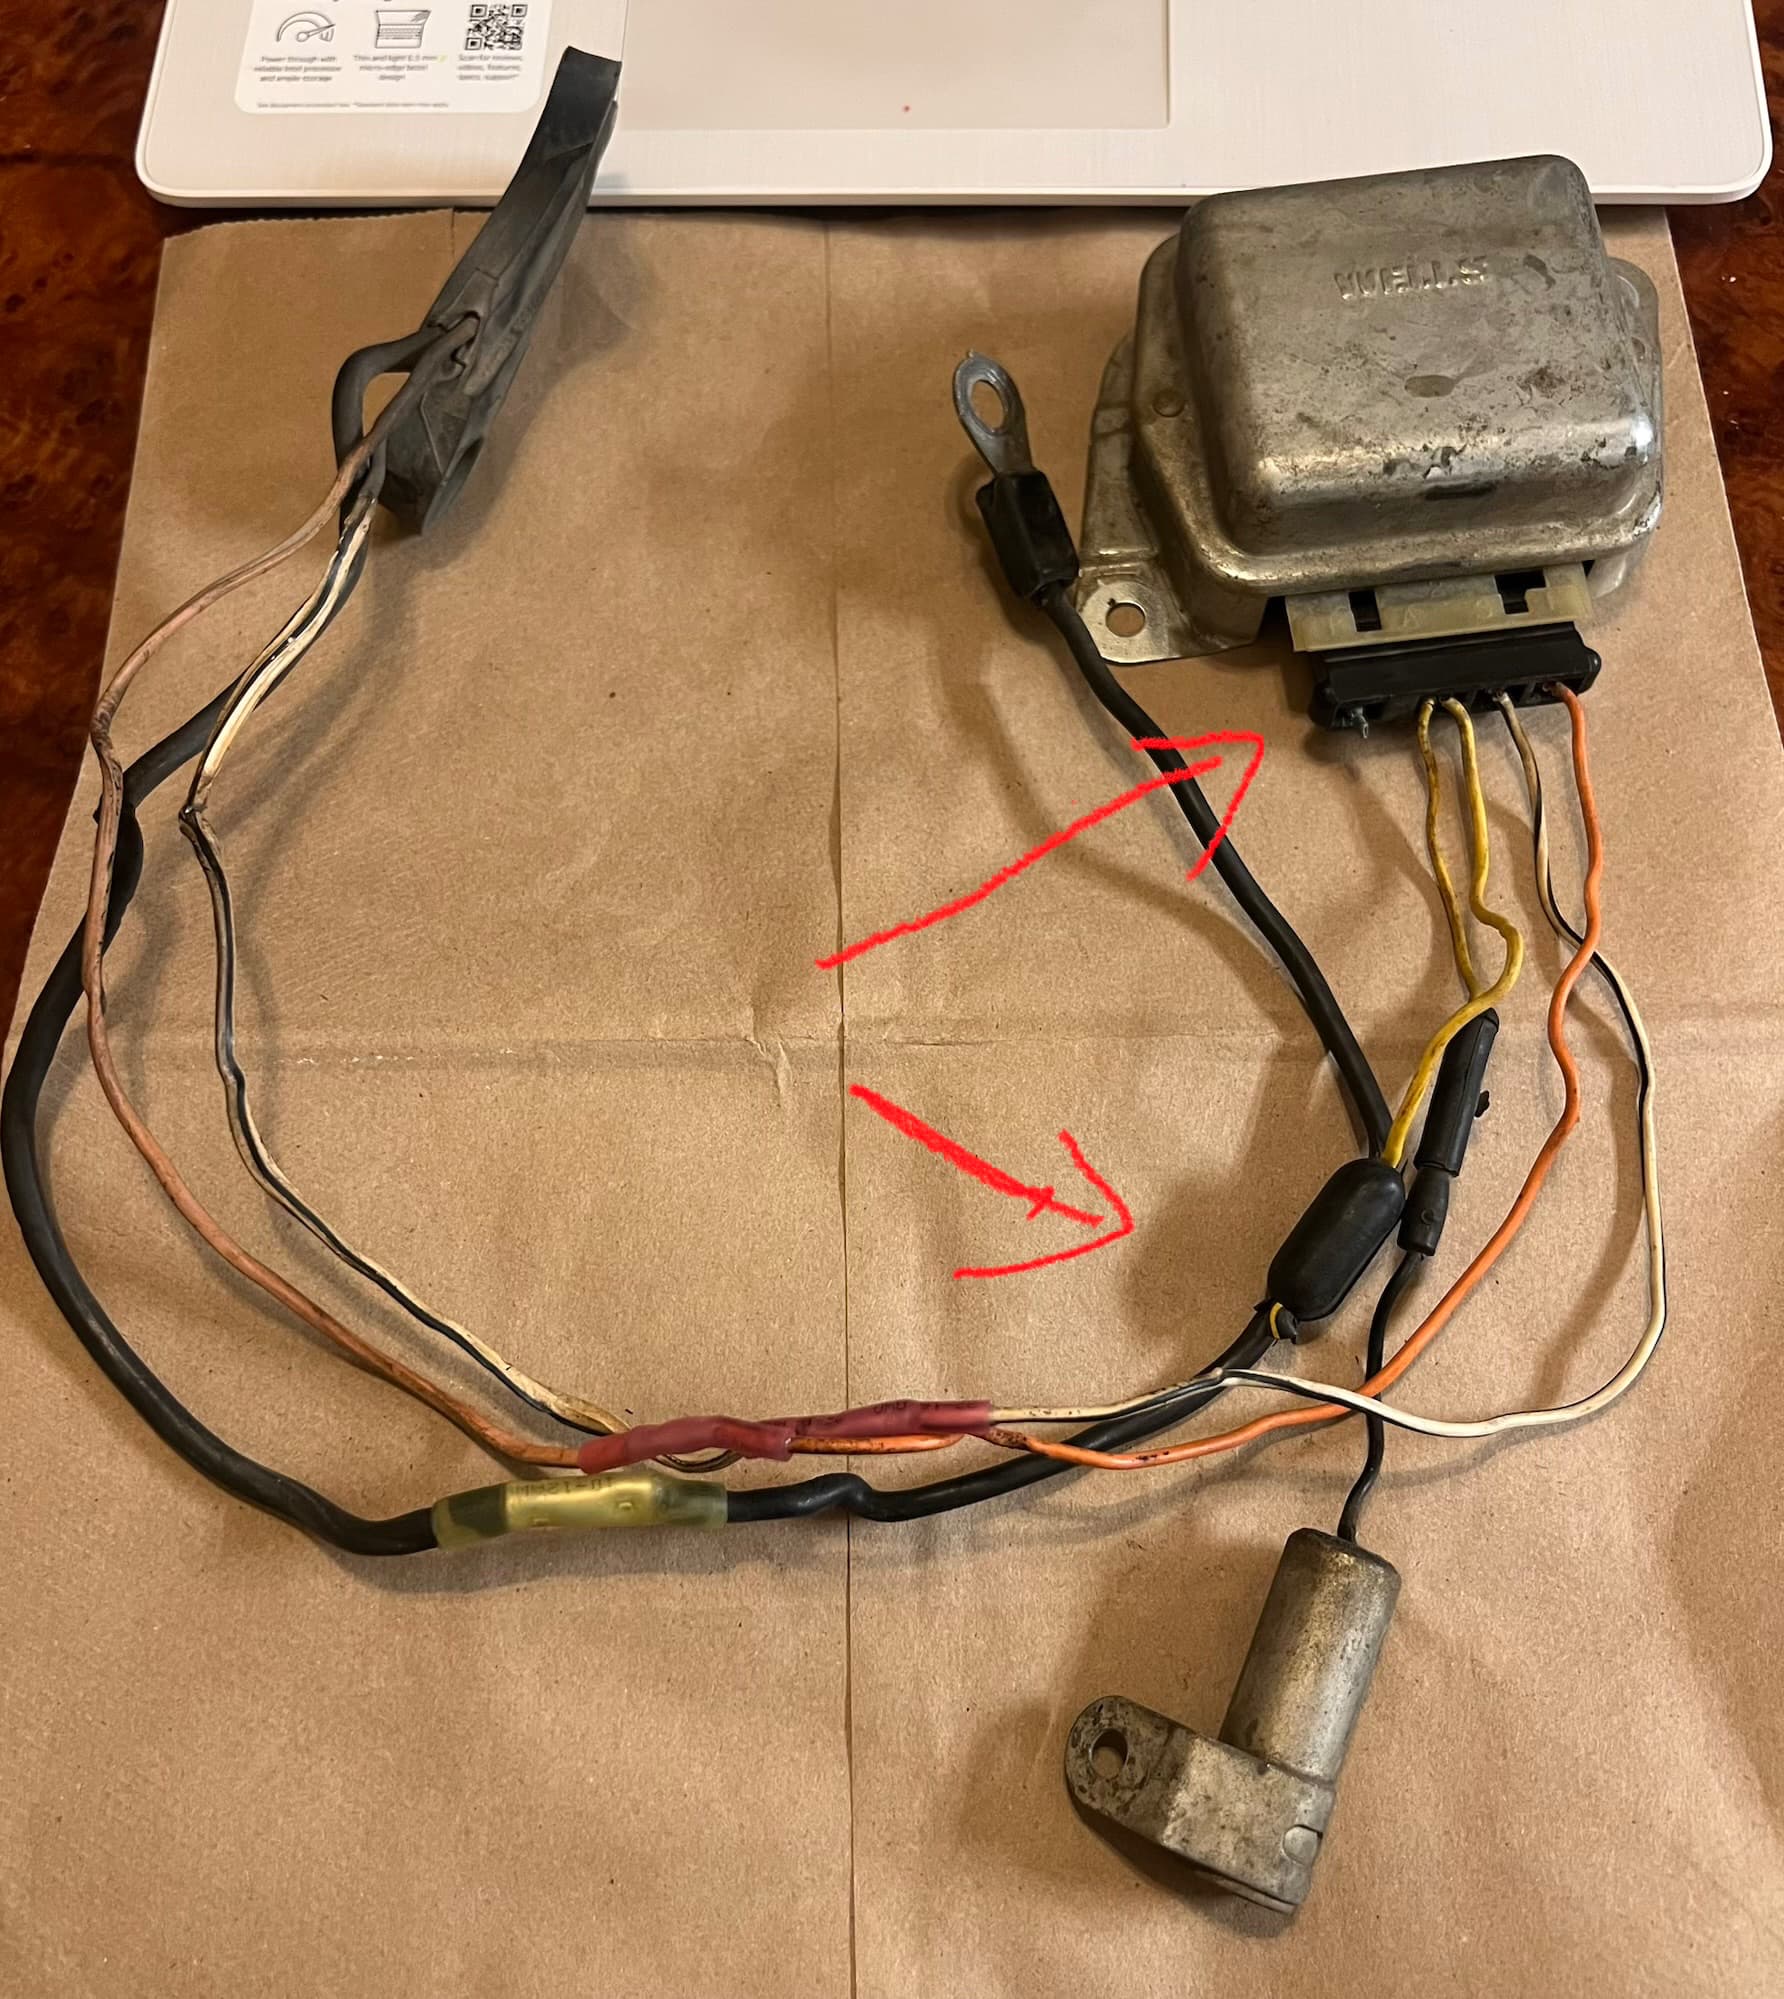
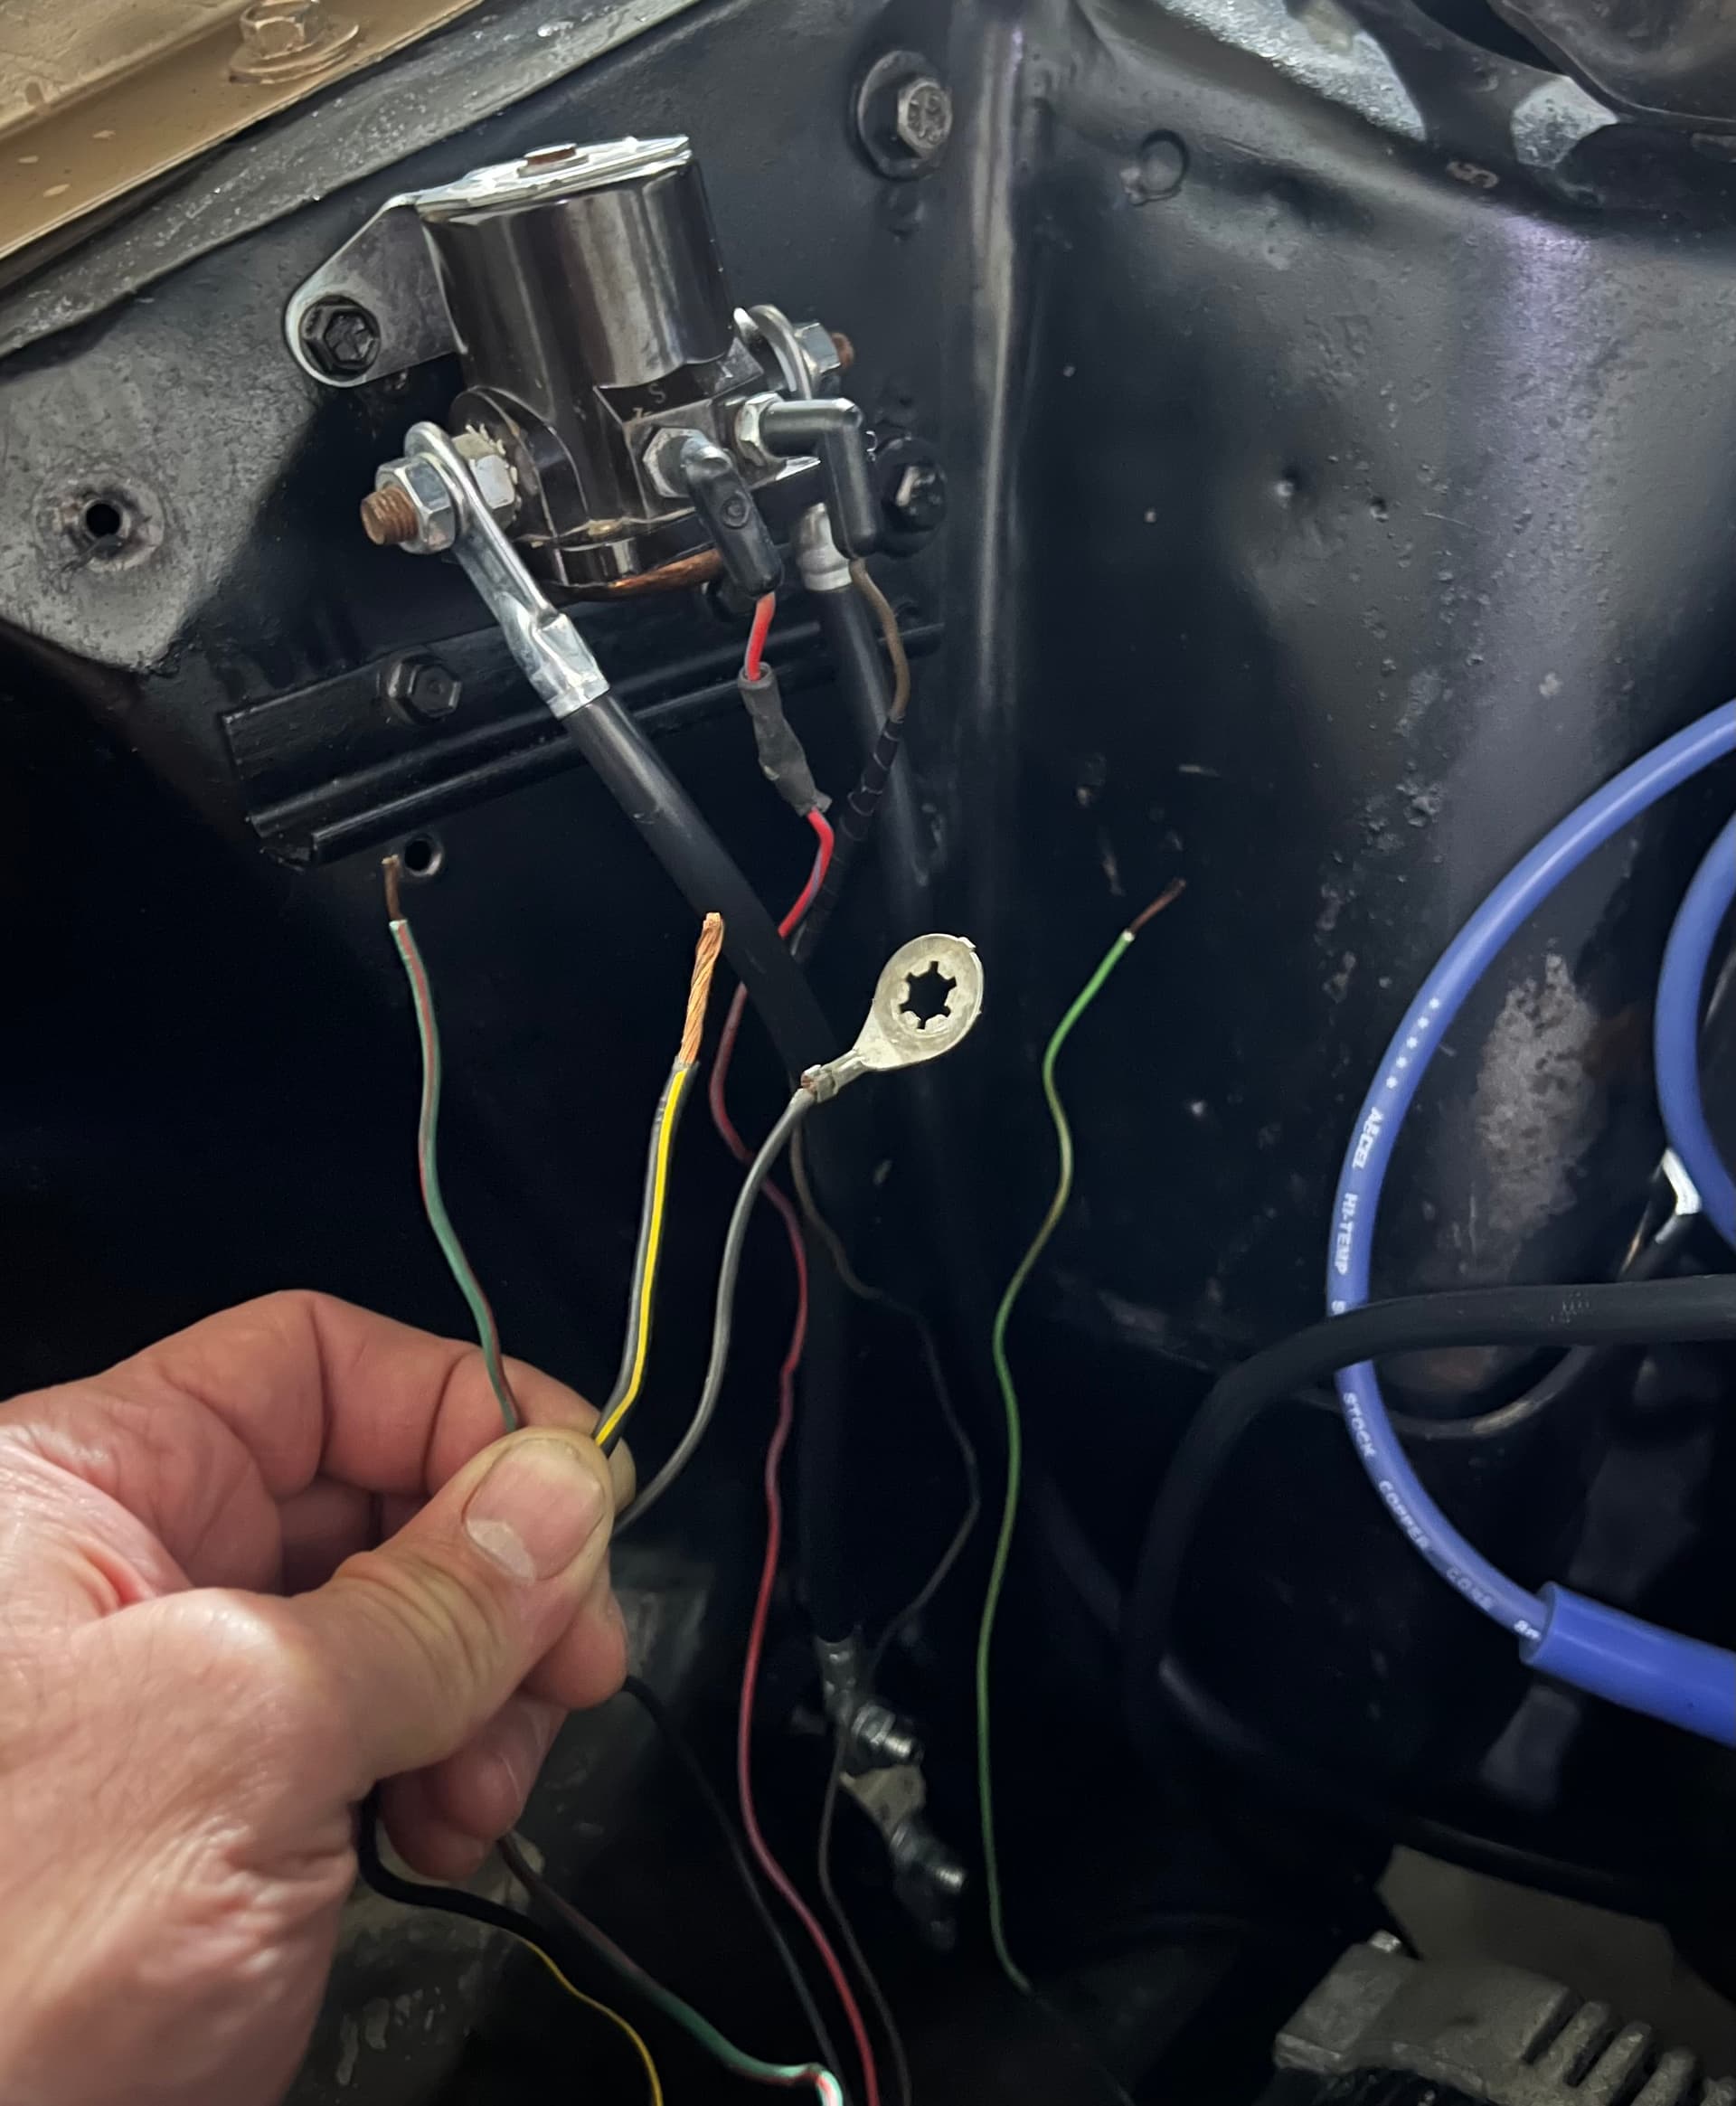
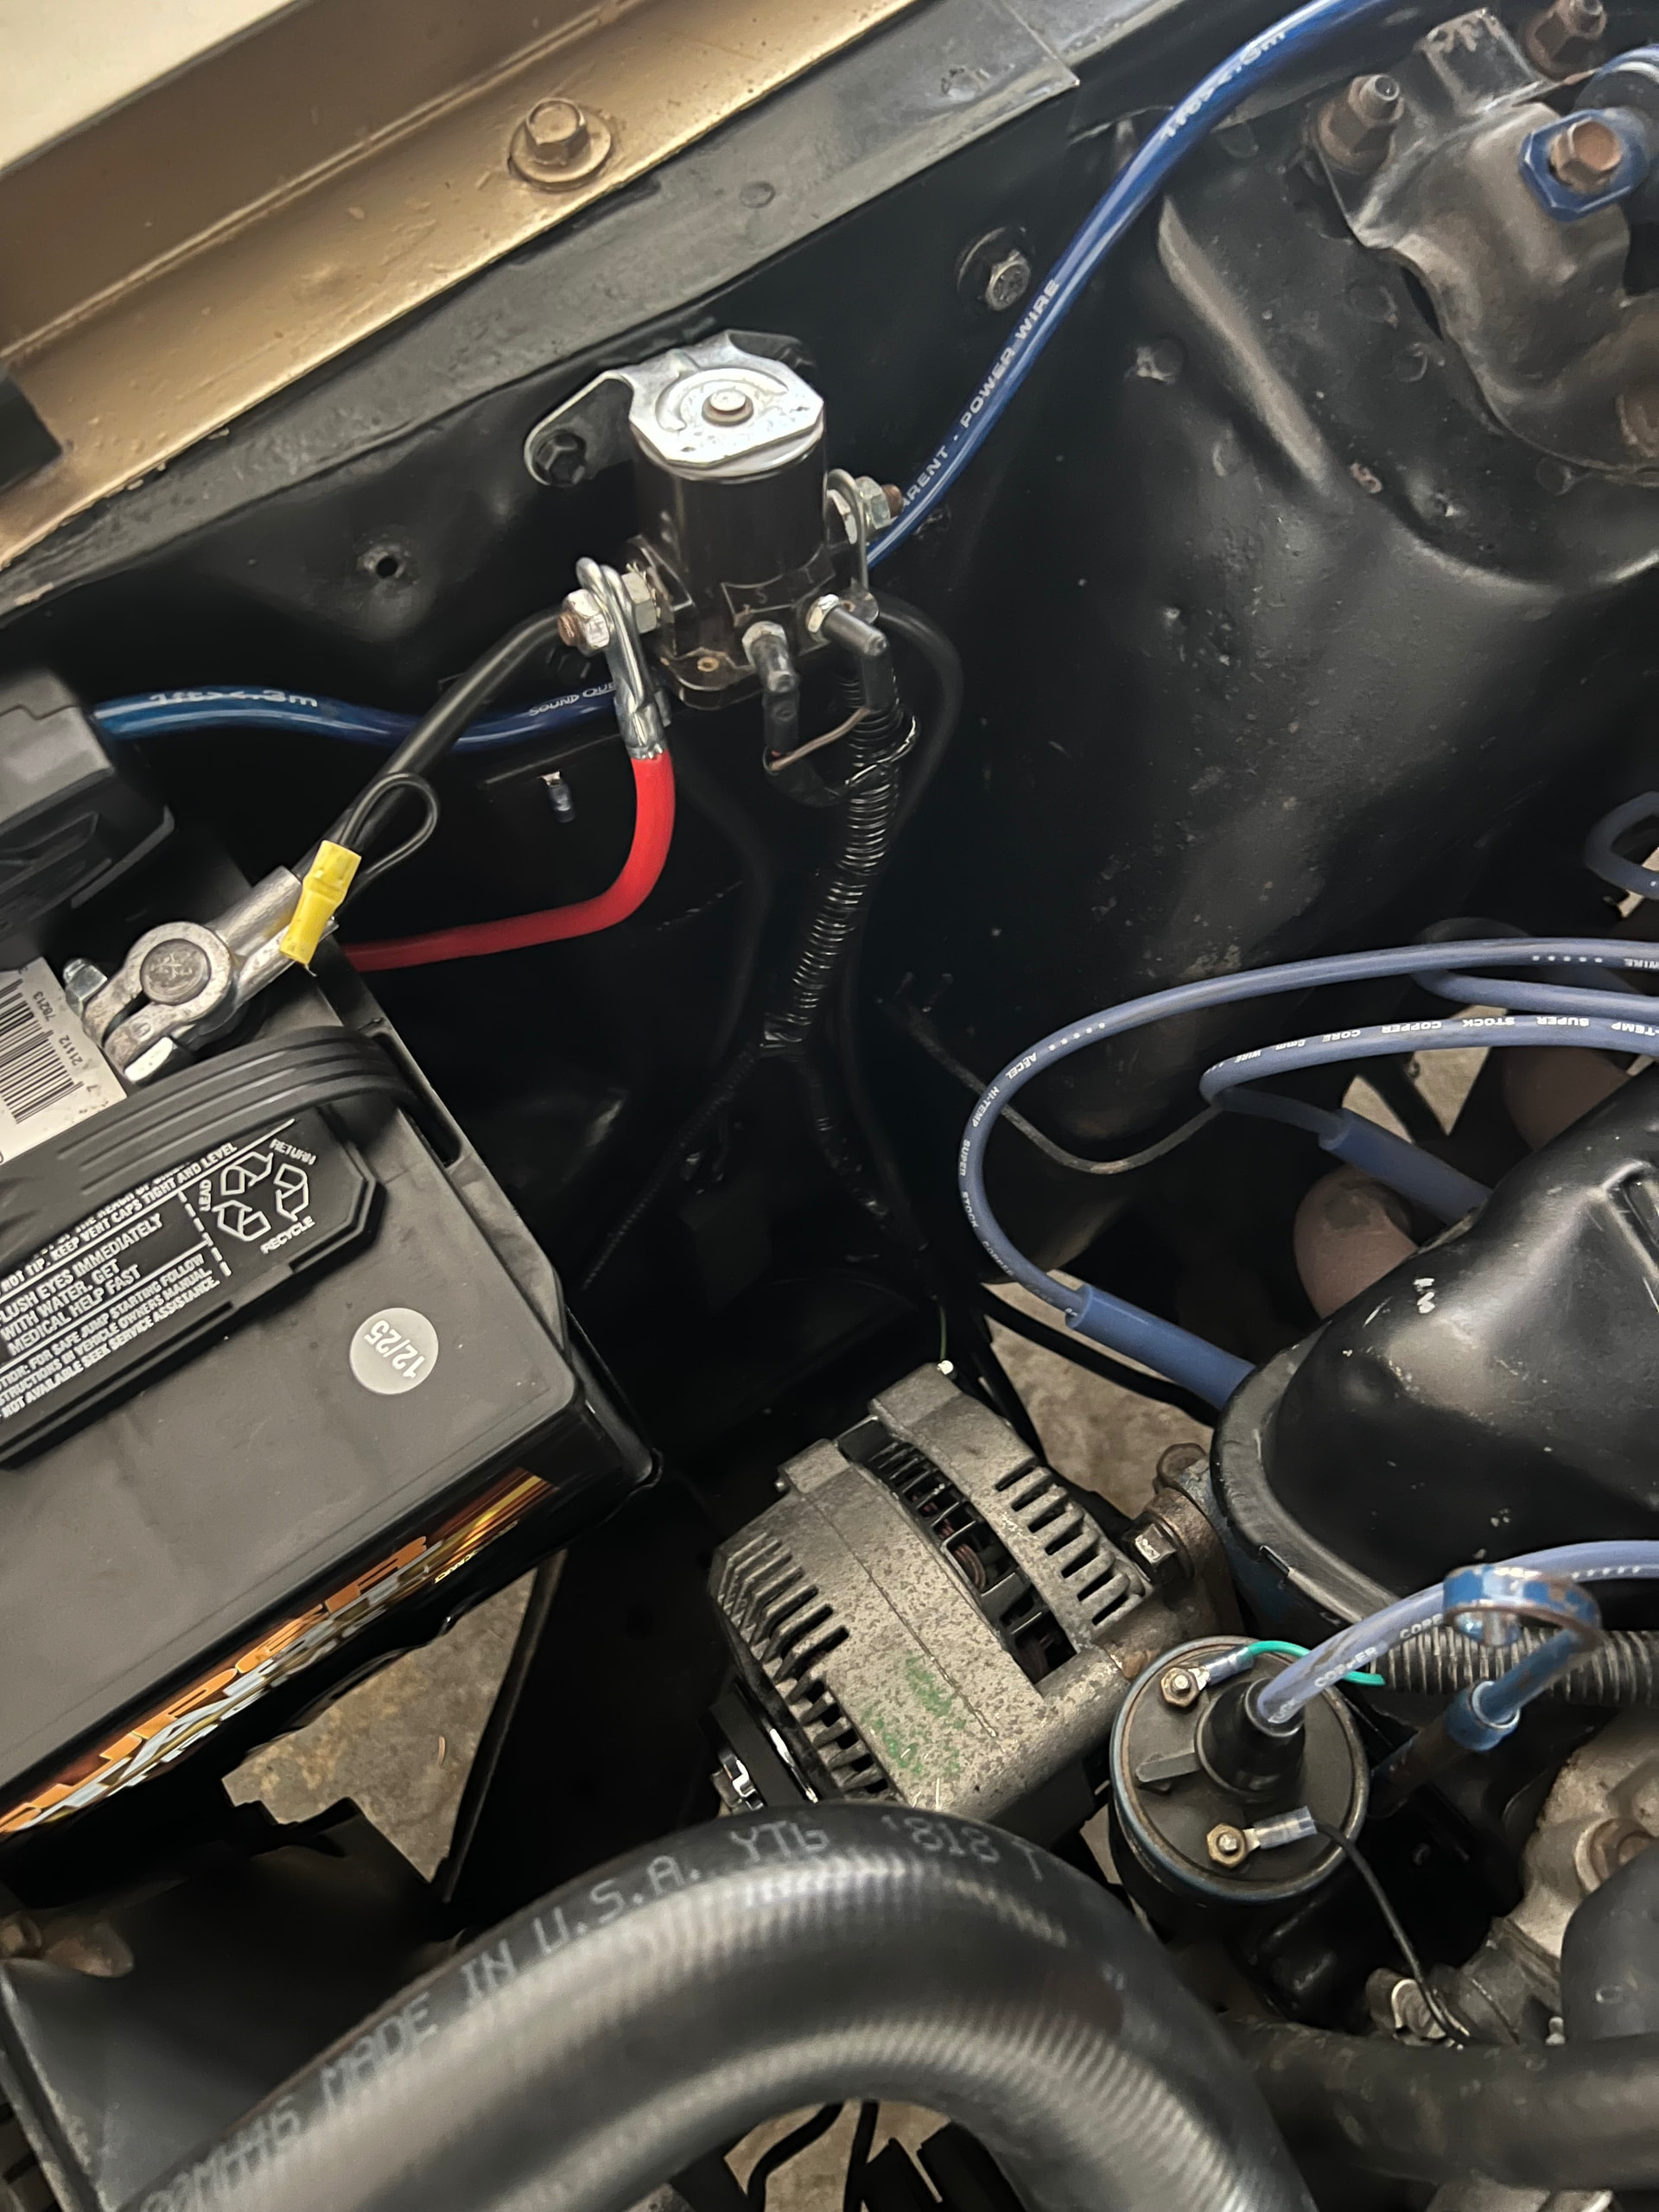
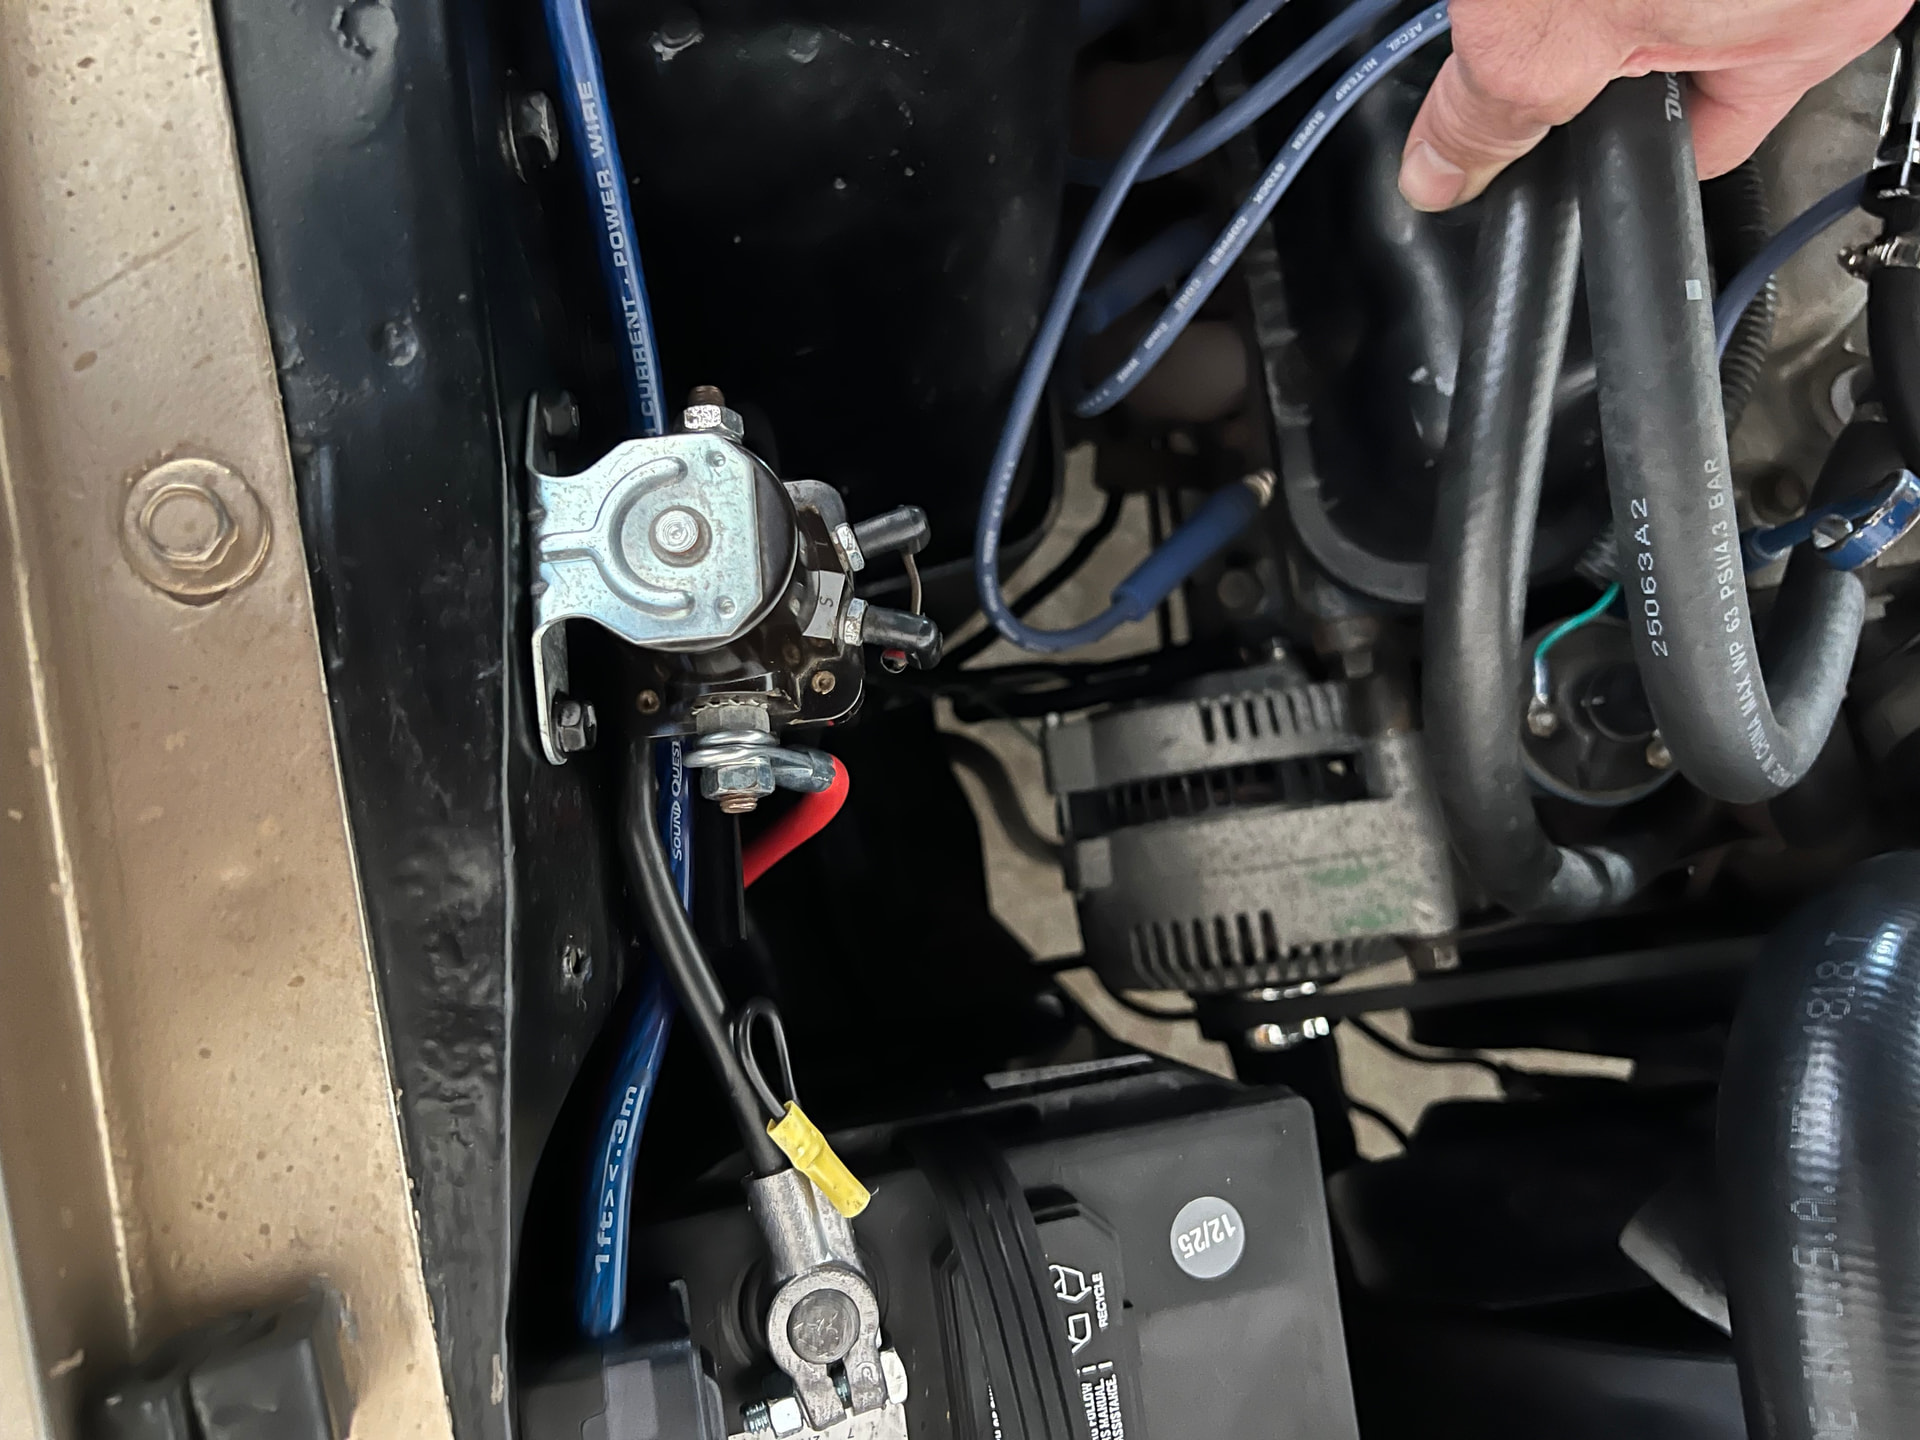
Please help your fellow Cougar owner with some expert advice. I am putting a new alternator in my 1969 Standard Cougar with the 351w. The original alternator was already replaced by a shop I took the car to with a Powermaster 1 wire alternator. It was a GM alternator. It worked fine initially, meaning it started the car and allowed me to operate the electronics until Recently when my ALT light came on. Then the car stalled and the charging situation took a turn. That’s when I started looking for another solution to the issue. I first discovered that the original voltage regulator was still somehow wired in to the 1 wire Powermaster setup which I thought was a problem because it has an internal regulator. I then decided to get a different alternator setup. I have a aftermarket stereo and alarm system and I will be installing electric fans and aftermarket A/C. I began doing research and found that many Cougar owners did the 3g upgrade and have been happy with it. After reading several posts I went to pick and pull and pulled an alternator from a 95 mustang with the 3.8 V6. I then began to try to complete this installation myself. I want to remove the old voltage regulator and clean up the wires. I read many articles about it but I can’t seem to find one that answers my specific questions. So… I have the alternator mounted. It took some modifications but it’s now mounted and the pulley lines up. Then I put a 4 awg ground strap to the back of the alternator in a threaded hole with a stainless steel bolt and attached it to the engine block near the alternator. Then I ran a 4 awg power wire from the terminal on the back of the alternator to a 175 amp mega fuse and then to the starter solenoid. There are 2 wires now coming from the harness on the alternator. The first is yellow and the other is green w/ red stripe. I attached the yellow one to the post on the alternator before the 175 mega amp fuse. I am unsure where to run the green w/red stripe coming from the alternator. The other question is about the wires coming off the old voltage regulator. Since I removed it and the original alternator harness there are 5 wires I need to put in there right place. The factory harness that come from under the battery tray has 5 wires. The red and brown wires I know attach to the starter solenoid posts. The other 3 I am unsure where to connect them. I believe the thinner solid black wire with the factory eye terminal is a ground and attaches to the firewall as a ground. I am unsure. The other 2 wires are a green wire with a red stripe and a thicker black wire with 2 yellow stripes. I don’t know where these tie in with the 3g upgrade. I also removed the alternator noise suppressor and I am unsure if I need to put it back in the configuration. Last thing, my dash doesn’t have an ammeter or voltmeter. All I have is the ALT red indicator light. Can anyone talk me through this?