I must congratulate you on your effort. It will definitely speed things up for the next person who is thinking of doing such a swap. FYI I am actually paying my mechanic to change out the power steering control valve. He’s younger and has a lift!
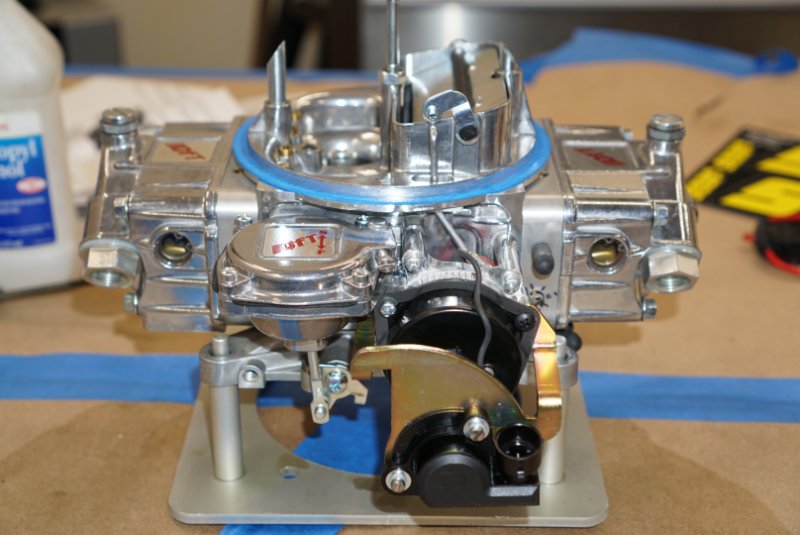
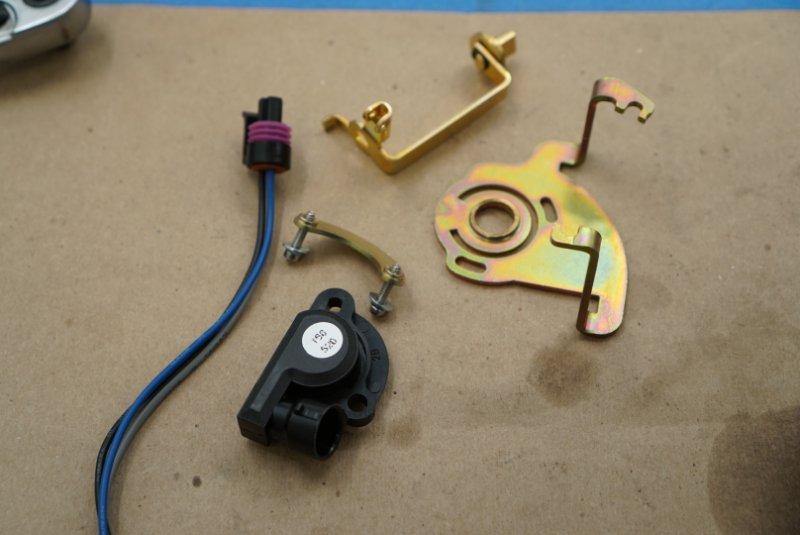
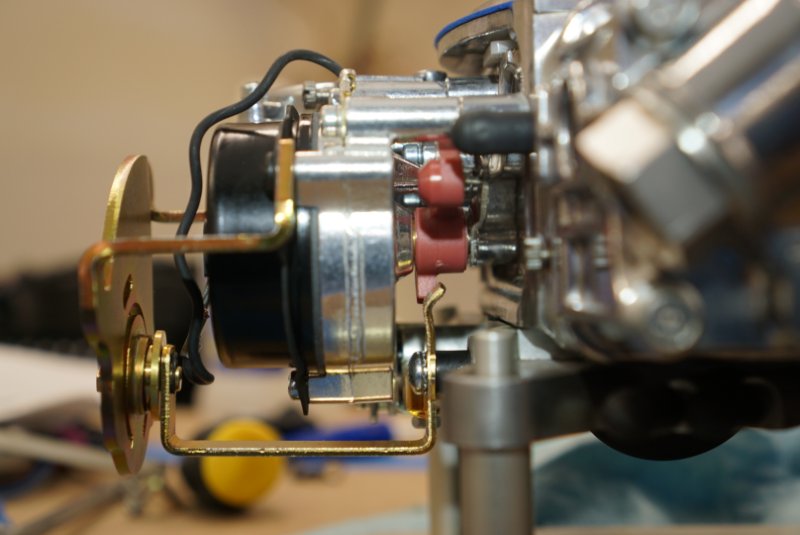
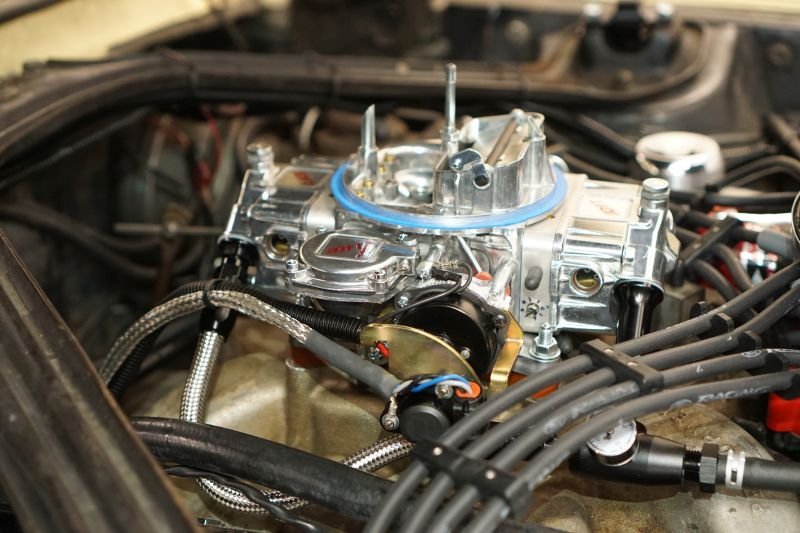
Thank you. As I wait for parts I’ve been doing some bench work. Much easier on my body. Here’s my Quick Fuel 680 cfm with the throttle position sensor installed. Plenty of wiring ahead for me to work on.
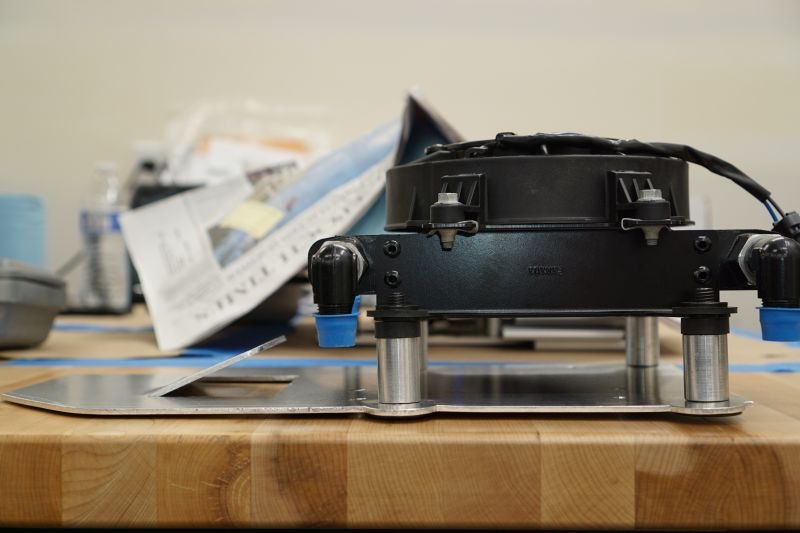
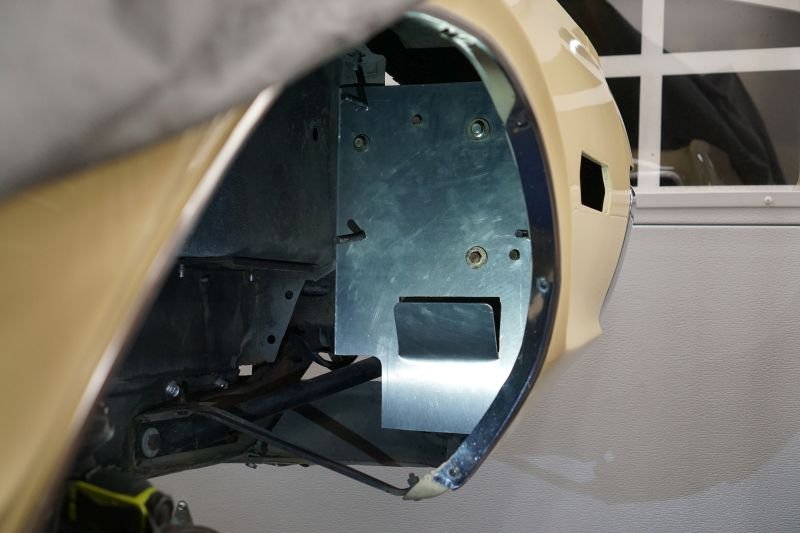
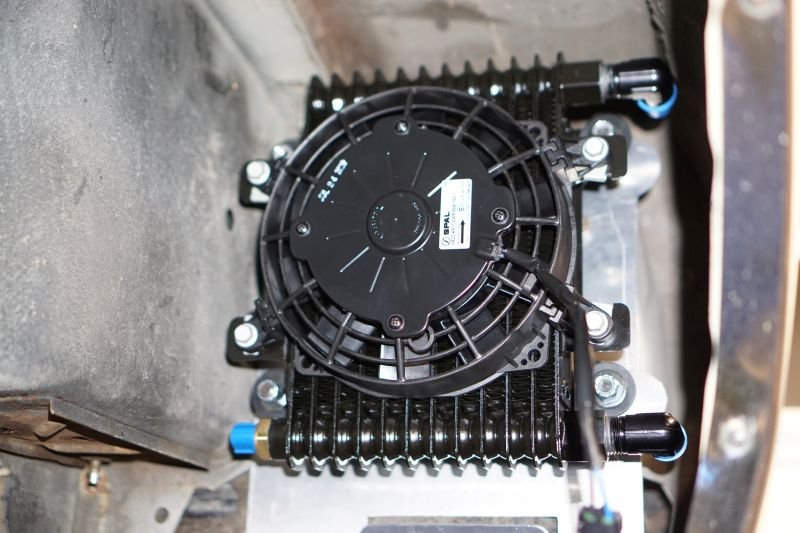
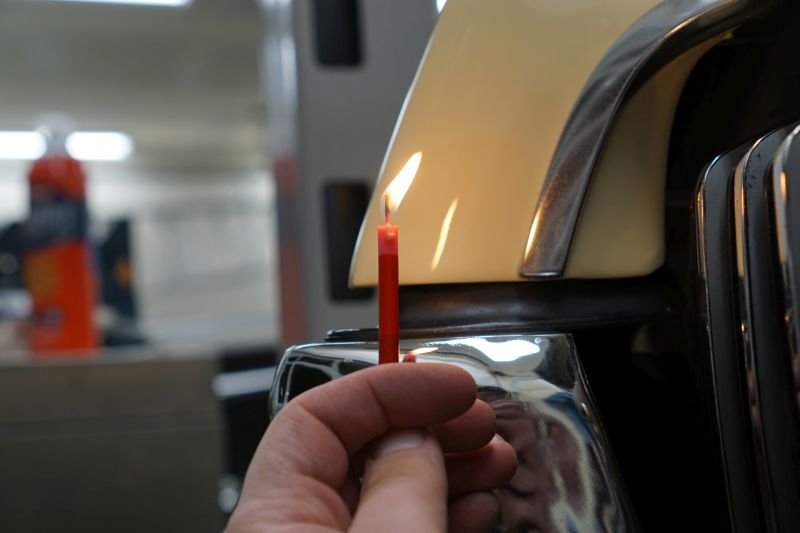
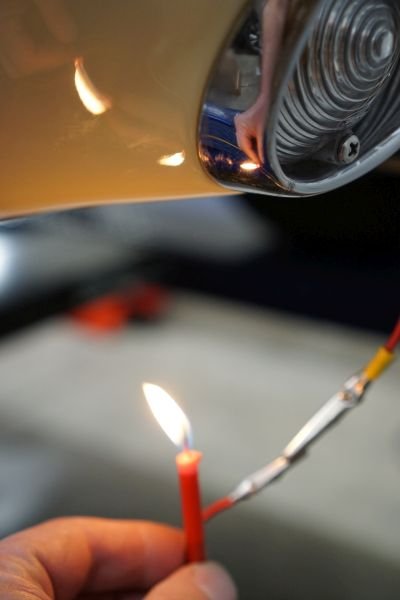
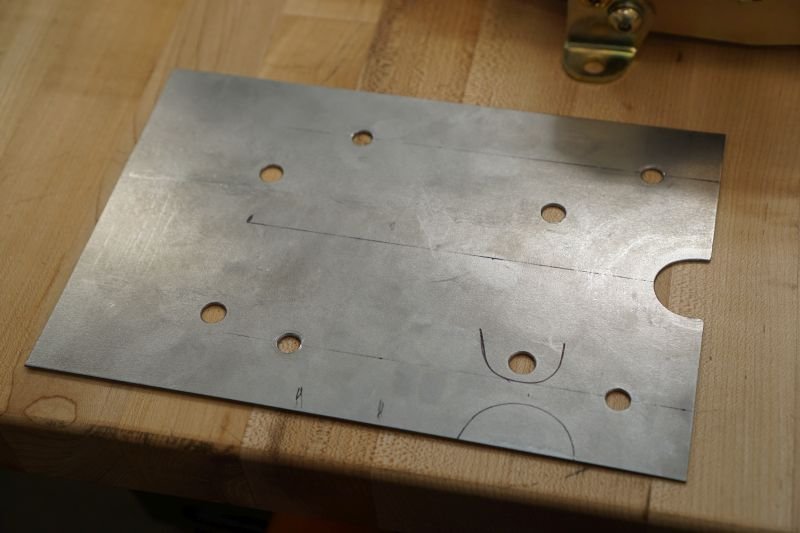
I worked out the design of the fluid cooling system. Very happy with the initial results. I made a mounting plate that replaces the factory splash shield. Need to finalize the 8AN hose routing and prepare some form of shield to protect it from road debris etc… I did a “candle test” and didn’t burn the house down. ![]() The side marker light bezel was removed. I expect the air flow to become even greater when I cover that hole in the fender.
The side marker light bezel was removed. I expect the air flow to become even greater when I cover that hole in the fender.
Seems like the opening at the bottom is upside down. Won’t that tend to collect water and debris and feed it into the fan area?
If it were reversed (opening at the bottom, tab bent out towards tire) the wind rushing past it would actually create a vacuum across the bottom of the slot pulling air through the area in front of the mount. A spinning tire moves a ton of air. Think about what you see coming out of a wheel well when a car drives through rain at high speed.
That’s a good point. Hadn’t thought of it that way. I did watch several videos about vehicle aerodynamics. All were targeted at legit sports cars that added vents to the fenders to combat lift from happening. So I just assumed the whole wheel well area would be a net vacuum compared to the front of the vehicle. Not really a fair comparison given the Cougars age but I had to go with something. It’s easy to over think this stuff too. As it stands now the fan/radiator would shroud any channel of air that was spinning forward and opposing the fan direction. Based on your comment I should design the debris shield to cover the opening too. The power source of the fan is fused. If the fan is on and I blow the fuse at highway speeds than I might need to do some rework. No driving in the rain if I can help it. Heck I don’t even wash the car with a hose. Dry clean only. ![]()
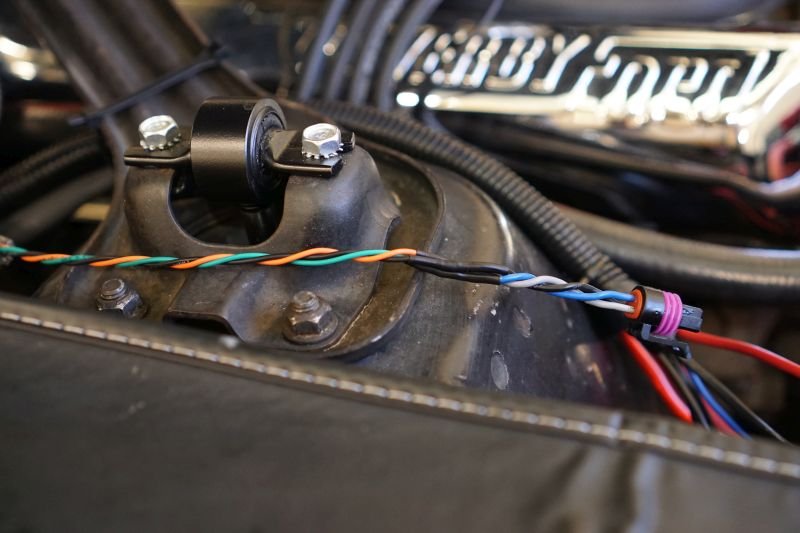
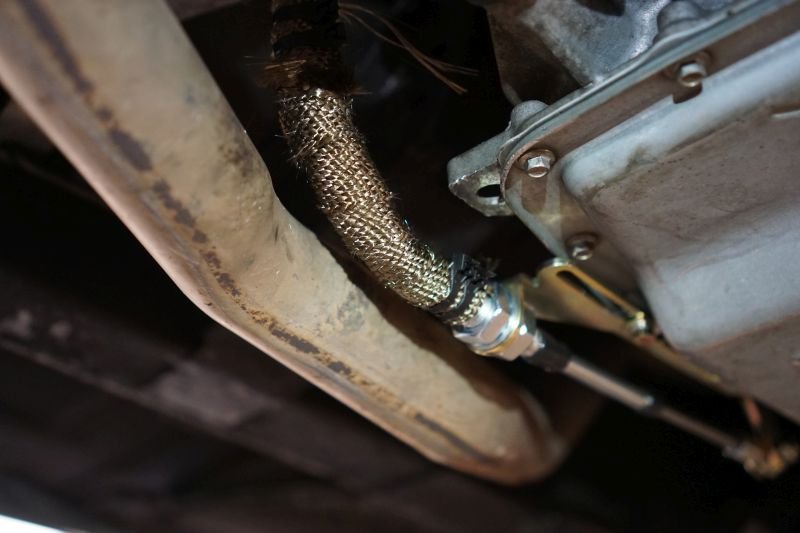
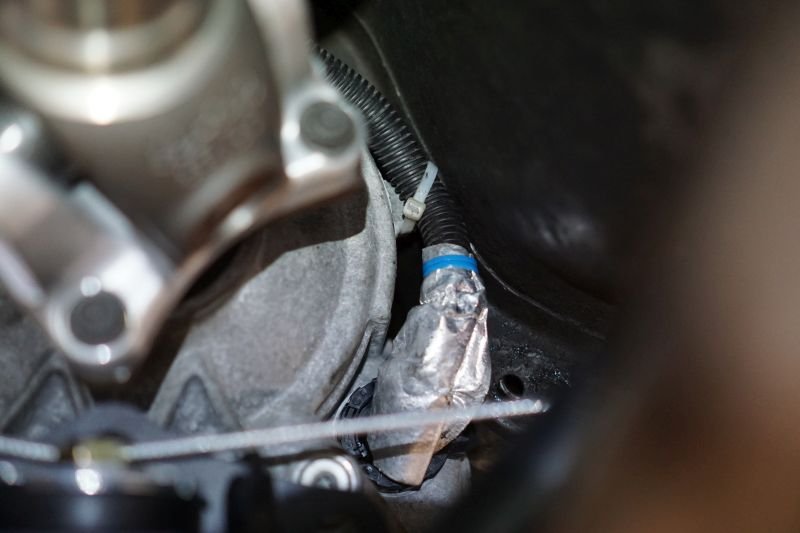
In the past couple weeks I was able to finalize the installation of the 6 speed onto the 390. A solid “three clicks” to seat the torque converter. Also did the lion’s share of the electrical in the engine bay. Electrical updates include 1) dedicated choke 12V feed from a relay with the coil switched on from the alternators “field” post. 2) dedicated Switched 12V for the US Shift Quick 6 computer and 3) dedicated 12V feed for the trans cooler - thermally switched. Next step will be the X-Member installation and benchmarking my engine angle options. Just a quick plug - I have had some in depth conversations with the people over at Stiffler’s, Lokar and Power By the Hour. All of them have been awesome in support of my quest.
And the Vid’s…

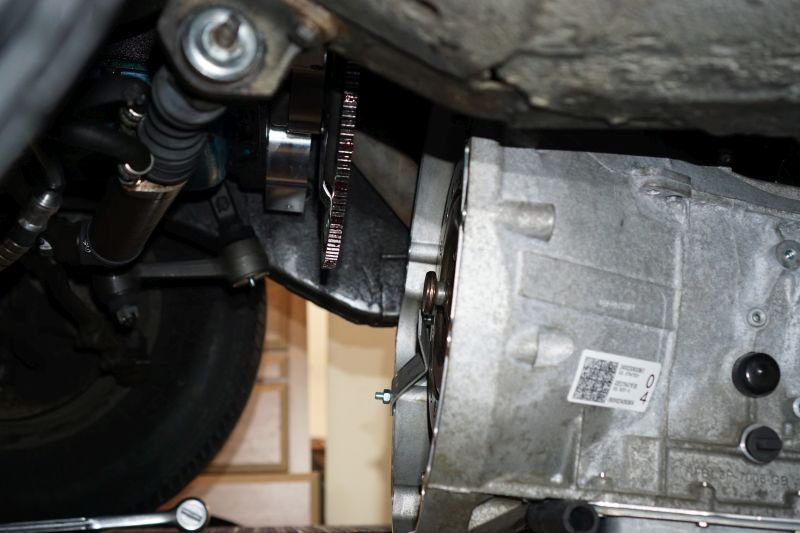
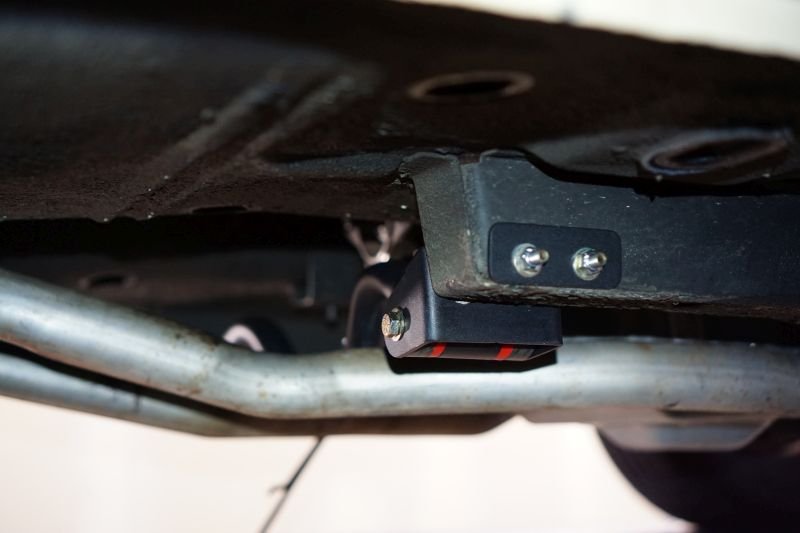
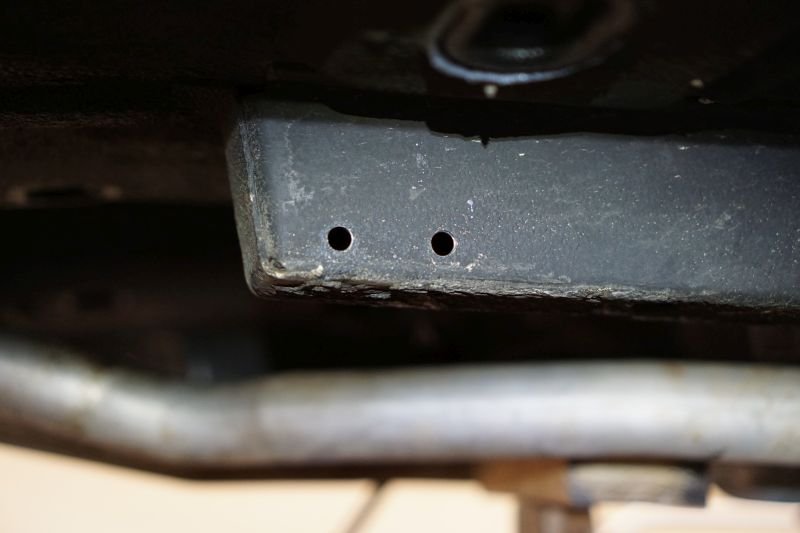
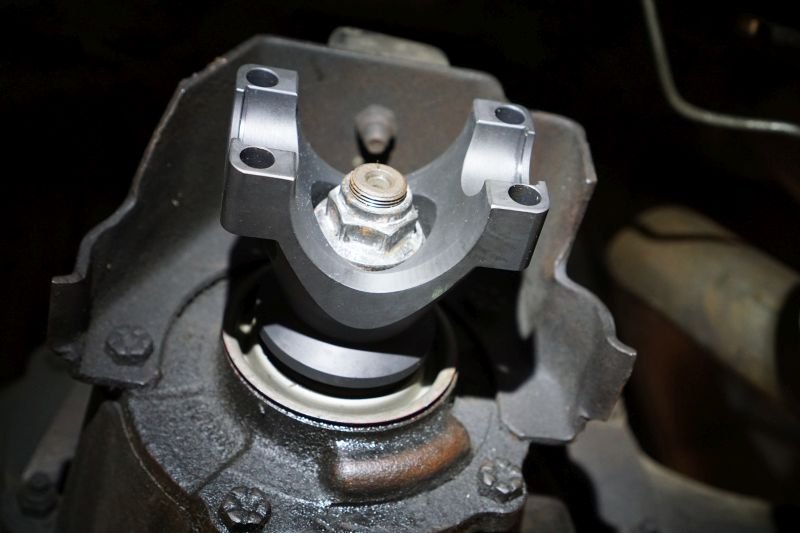
Stiffler’s cross member went on with ease. I am measuring the engine/transmission pitch from two spots. 1) crank pulley flange. 2) output shaft flange. Referencing the crank pulley seems more reliable. Way easier and repeatable measurement using a straight edge and a inclinometer app on my smart phone. ![]() Based on size of the transmission, current tunnel shape etc… I can dial in anywhere from 2.5 to 4 degrees of downward slope.
Based on size of the transmission, current tunnel shape etc… I can dial in anywhere from 2.5 to 4 degrees of downward slope.
You need to measure the pinion angle. It will be tilted upwards. Optimally you want the engine / transmission inclination to be equal but opposite of the pinion angle.
Thank you Royce. The pinion out back was nearly zero when I documented it at the beginning of the project. However my measurement technic has improved since then. Yes, I’ll have to adjust both to cancel the driveshaft harmonics because of the u joints. Some more modern driveshafts use CV joints but I shouldn’t need to go the route. Plus they are generally more expensive.
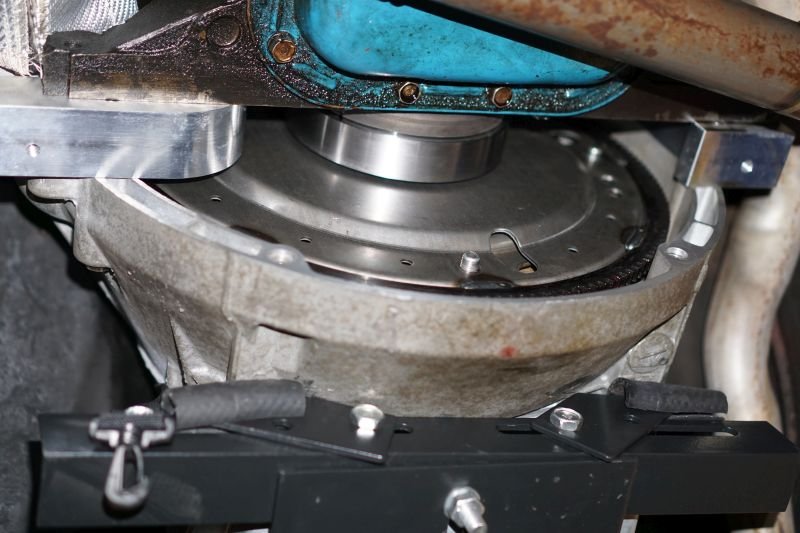
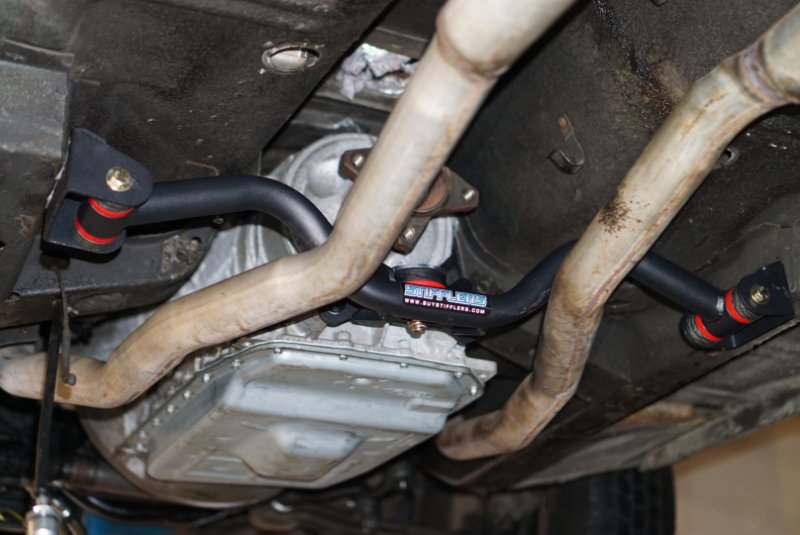
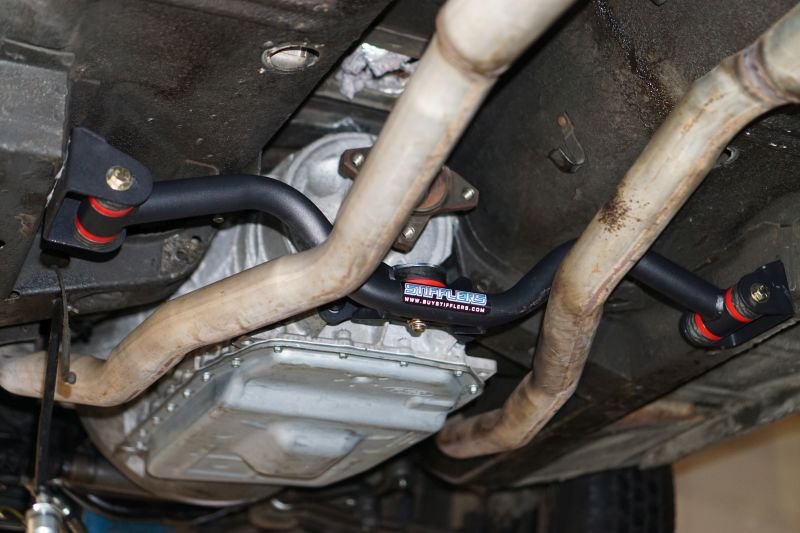
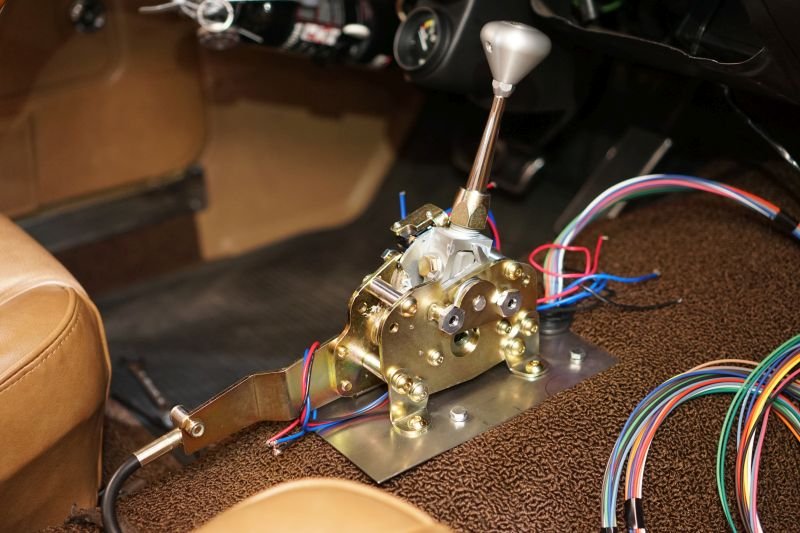
Still working diligently on the Cougar upgrade. It was a great pleasure to install the Stiffler’s cross member. This puppy just bolted right in place which is a first for this project. ![]()
![]()
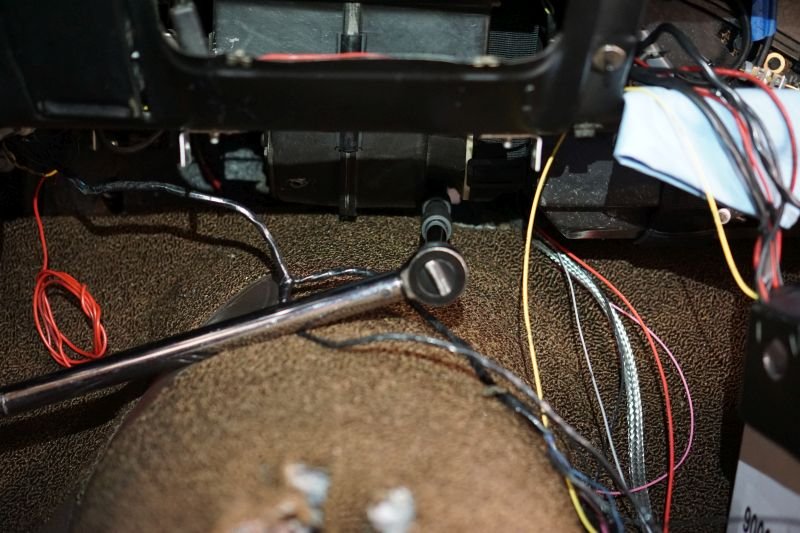
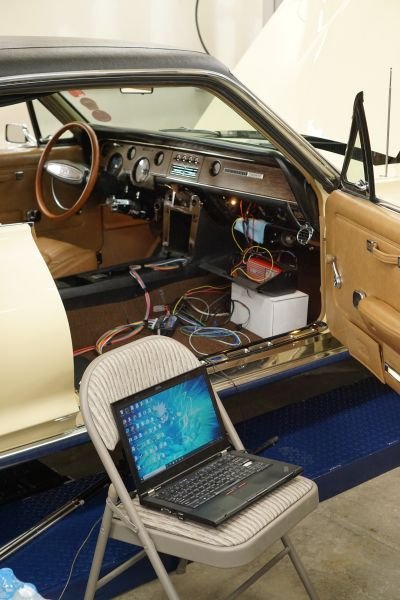
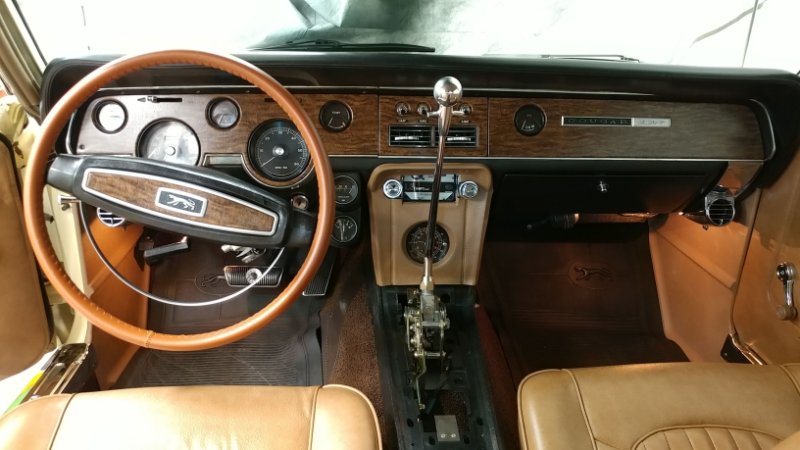
![]() I can achieve between 2° - 4° of rearward engine slope. This should be fine but I won’t know for sure until I source the drive shaft. It was a minor miracle that my exhaust cleared as is. I’ve been getting familiar with the Quick 6 controller and evaluating the throttle linkage/TPS setup. I am waiting for the Lokar Sport shifter and some cooling line fittings from PBH. Those should start showing up in the next couple of weeks. I removed the instrument cluster since I needed to replace the throttle cable with the one provided by Dakota digital for the ECD-200. I took the opportunity to deep clean the insides. I think I have come up with a real slick way of mounting the Quick 6. It should be bitchin! Here’s a video with some more detail on the TPS install.
I can achieve between 2° - 4° of rearward engine slope. This should be fine but I won’t know for sure until I source the drive shaft. It was a minor miracle that my exhaust cleared as is. I’ve been getting familiar with the Quick 6 controller and evaluating the throttle linkage/TPS setup. I am waiting for the Lokar Sport shifter and some cooling line fittings from PBH. Those should start showing up in the next couple of weeks. I removed the instrument cluster since I needed to replace the throttle cable with the one provided by Dakota digital for the ECD-200. I took the opportunity to deep clean the insides. I think I have come up with a real slick way of mounting the Quick 6. It should be bitchin! Here’s a video with some more detail on the TPS install.
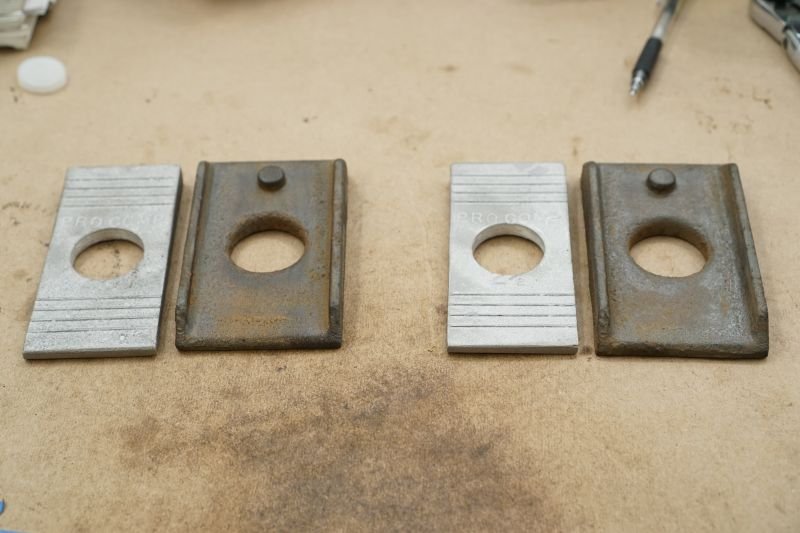
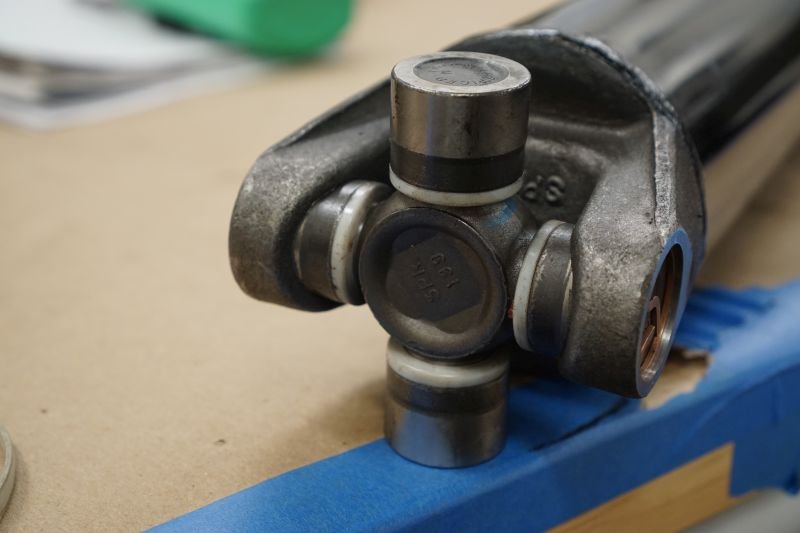
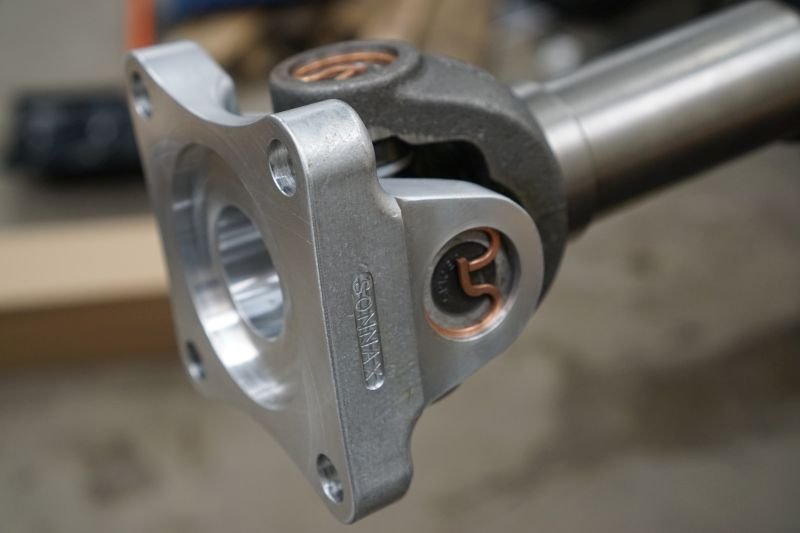
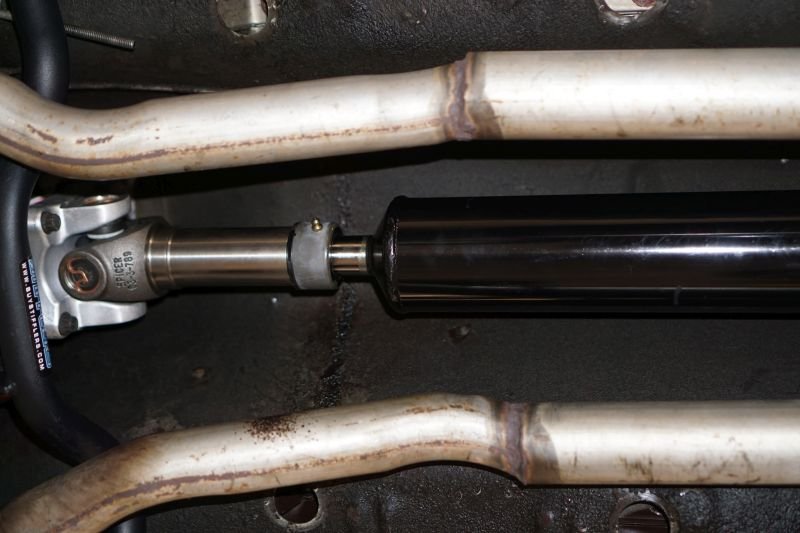
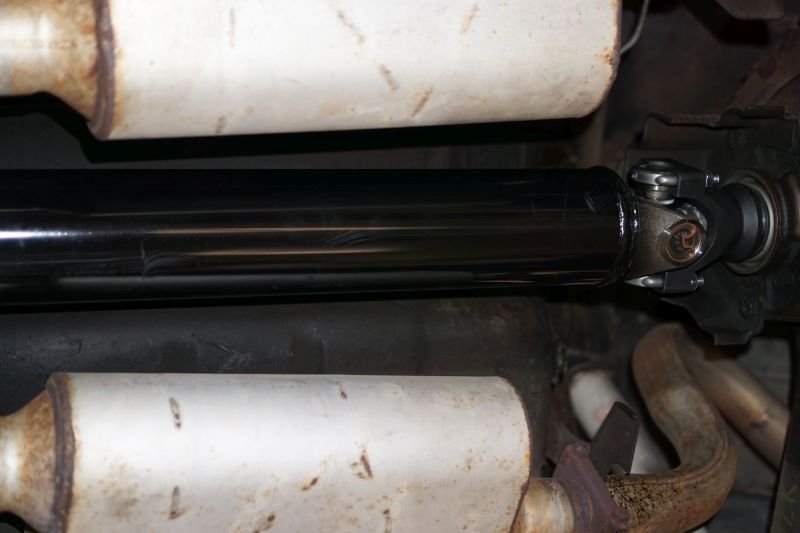
Long term I am planning a motor upgrade that should be in the 600-800HP range. So I decided to bite the bullet (billet) and upgrade the pinion when purchasing a custom driveshaft. Went with a billet yoke and a 3.5" chromoly driveshaft. U joints are all the larger 1350 type vs 1330. I am working out the particulars of the u joint angles and these 2°shims should do the trick. Had to bore out the center considerably. The current U-Bolts are 7/16" diameter which doesn’t seem very common. So I am planning to upgrade to 1/2" diameter. Gives me more options for u-bolt length as the pinion shim(s) will require more length. Shims will lower the rear end a bit. Probably will need to bring the front end down a tad.
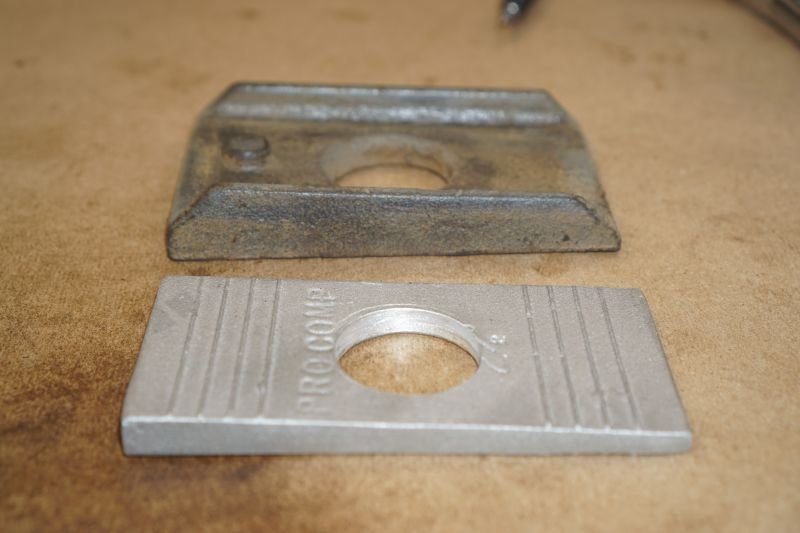
Here’s the OEM shim that WCCC describes at 3°. The aftermarket one intends to add 2°more. Based on the initial data this should be what is needed. I’ll find out next week once I get deliveries from Summit and WCCC. ![]()
You may want to cut and reweld the spring pads on the axle with the required degree needed. This will keep the shims from wanting to walk around and loosen up ubolts. With that much engine under the hood it would be a good idea and be worry free down the round. At least keep an eye on them and make sure they dont loosen up. Ive had this happen a few times with pinion shims. They work well to dial in your angle but its best to move the springs pads if you can.
I will keep that in mind. Before the power add the whole rearend will be beefed up. Posi, axles with more splines etc. Probably something like Caltracs or similar too. I know it needs upgrades but haven’t put a bunch of though into it just yet.
A quick video update. Things going well but still waiting on my custom Lokar shifter to arrive. Live is Good!
https://rumble.com/vf2ufn-6r80-automatic-retrofit-1968-mercury-cougar-390-fe-big-block-p12.html
Is the tach not working or just reading really low?
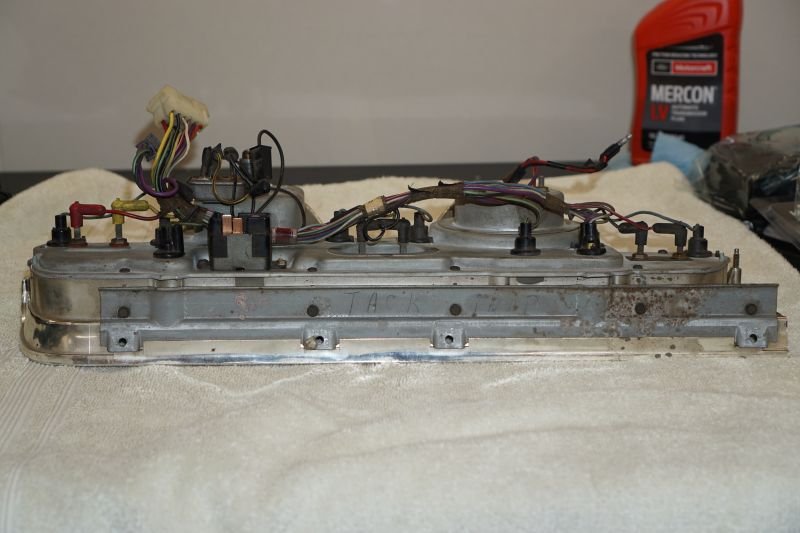
I was intermittent last year. Hoping it was just a loose wire but apparently not. Worked on the second start up however. The computer is reading RPM fine so it must be something about the gauge. Here’s a note “TACK INOP” that I found on the top of the cluster when I was installing the new speedo cable. Guess I could have been more proactive. TACK vs TACH…LOL I wonder if there is an easy fix or if I need to send it out to that Rocketman dude?
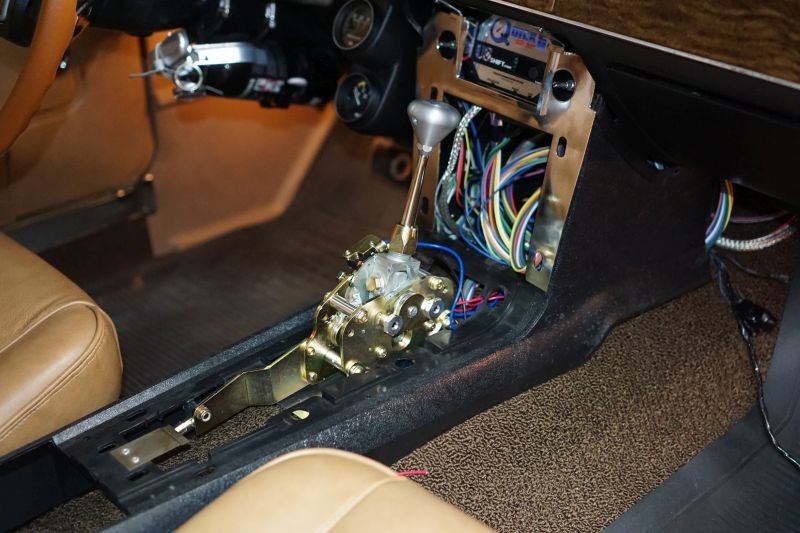
Well - This about wraps it up. Using the regular Lokar Sport Shifter while I what for my custom one to ship. Looking forward to putting some serious miles on the setup tomorrow. I have a few more things I want to do to the car this season but hoping to take a break from wrenching and just enjoy all the effort I have put in over the winter. Over time I will reinstall the clock and console lights. Also I want to try and make a lower pad to replace the old one that won’t fit over the new shifter.
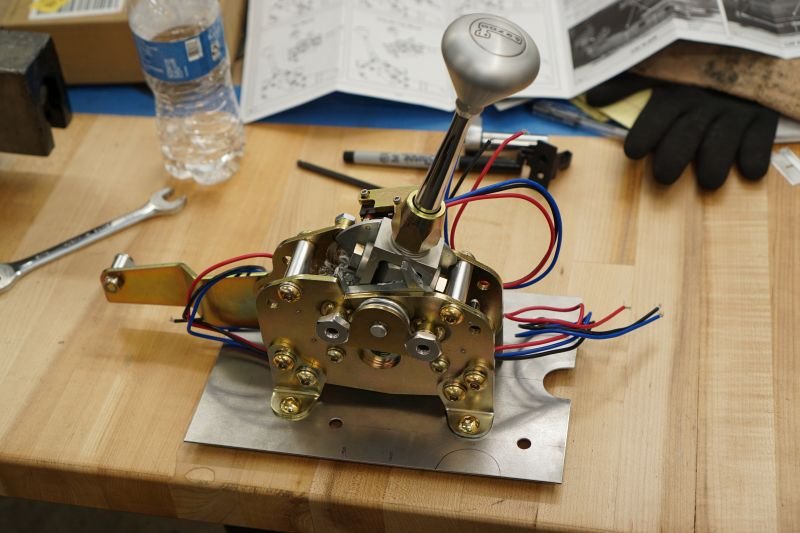
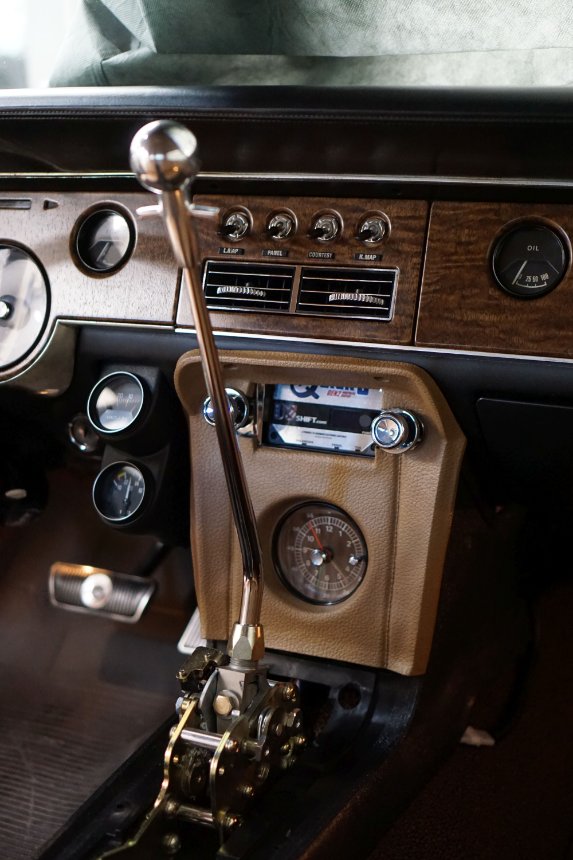
I have been extremely happy with this upgrade. Gas mileage went from 9 to 13 miles per gallon. Something like a 40% improvement. ![]() Have put over 4000 miles on the Cougar with this setup and really no complaints except for not having my intended shifter. Well it came in today after something like 8 months given ordering it before Christmas. I’ll be making a new console pad over the winter and looking into a rear end upgrade for strength and better traction.
Have put over 4000 miles on the Cougar with this setup and really no complaints except for not having my intended shifter. Well it came in today after something like 8 months given ordering it before Christmas. I’ll be making a new console pad over the winter and looking into a rear end upgrade for strength and better traction.
Added video 7/11/21
Looks good…glad its worked out for you.
After taking mine out on the local toll road 3 weeks ago and cruising at 70-75, I started thinking about overdrive due to the engine RPM at that speed. I have a 390 as well and it appears we have limited options. If I ever attempted this type of project, was think abut the Gear Vendors overdrive as it may be simpler for me as I don’t have the space for a big project and time it takes.
If I go the trans swap like you did, was hoping for something where I didn’t have to carve up the trans tunnel…curious if the 4R70W would be better from that perspective. The Gear Vendor solution may be better for me from a price perspective as well.
Thanks Jeff!
Unsure about the size of the 4R70W. I did meet someone that had it behind an FE. They had to pull the engine to install the upper bolts. 6R80 is generally consider a more robust trans all around and that was one of the deciding factors for me. Note the adaptor used works for both the 4r70 and 6r80. I’m an automatic guy but don’t forget to research the manual options.