68 standard, just a classy driver!

Had mine redone. Not cheap but original look to them.

Thanks for the offer Bill, the sender can be any ohm range, you can program the gauge and sender to match. This should help match the repro sender that is notoriously wrong.

The gauge has pre programmed ohm ranges close too what would be expected stock or you can set the range to your actual sender by running it through empty and full. I have a repro sender now but it it seems to live between empty and 1/4 no matter how full it is so I need to pull it and test it to see what the range actually is.

These are the preprogrammed ranges

Those Speedhut gauges are slick! I like how they look they’re in the style of the XR-7 gauges with a modern slant. Can’t wait to see how the finished dash turns out.

How funny is that. The chart is backwards for our cars.

The problem with the reproduction senders is that they build resistance over time reading lower as they go. I can’t say for sure that is what you have with out seeing the sender. It could be as simple as a bad float.

I did something similar in my Toyota with a f150 fuel tank and sender with an autometer gauge, however it was easier with the OEM sender since it was accurate.

I’m banking on this setup working based on I can program to any resistance range I need. The repro sender I currently have isn’t that old and it has read the same since I installed it. I remember checking with it out side of the tank to verify gauge sweep and it worked. Also tested the float before Installing to very no leaks. So it’s possible the range was off from day one which is the one thing I did not check before installing. Im going to have to pull it out to program it anyway so I’ll test then. If it’s not going to work I’ll get with you too see what we can build to work.

When I got my car the previous owner tossed the tank and sender assembly so I never had the original to save or compare too.

I will also eventually go with the sniper efi setup and plan to use there drop in pump/sender assembly so I assume it’s going to match the OEM range but hard to say but that’s where being able to program the gauge itself will be helpful

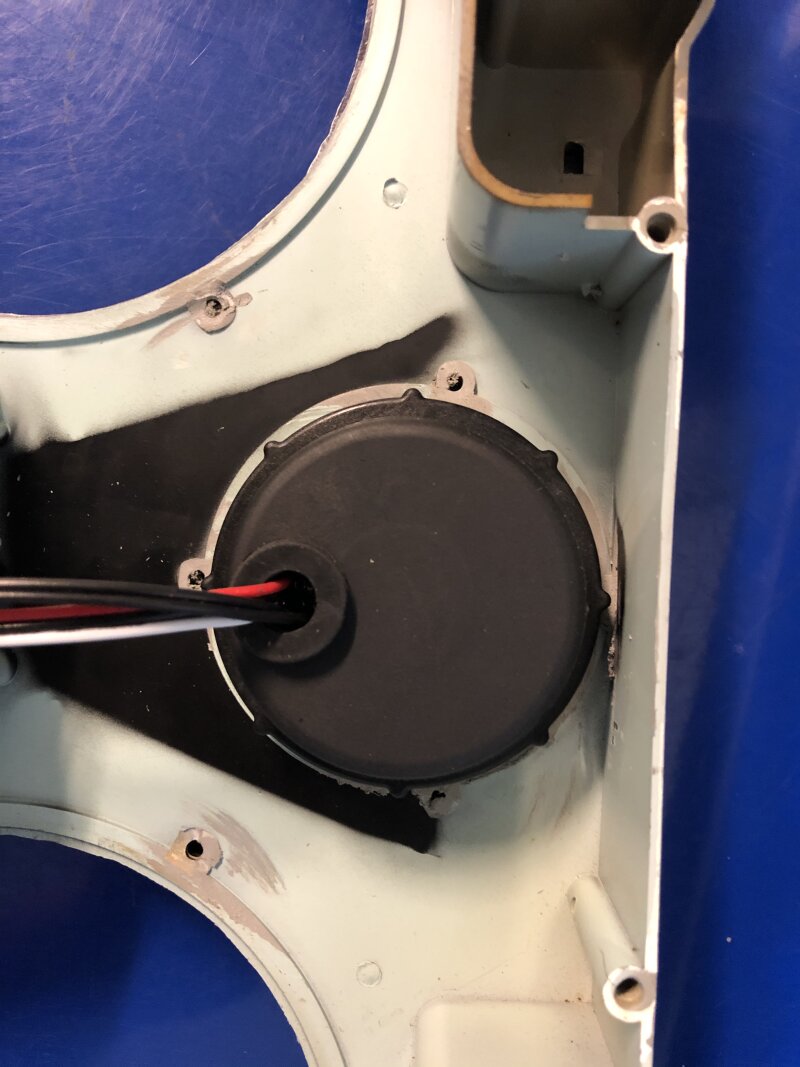
Got the smaller gauges fitted and happy with the results, I won’t have to trim anything off the cluster structure assembly like I had originally thought I might have too. The compact nature of the speedhut are a big plus here. Nothing special needed, simply enlarge the factory holes is all that is needed.

I only need to find a solution to retaining the brake warning light which will probably involve adding a light somewhere(maybe the xr7 switch holes)


Can see some of the needed trimming here, mostly just the tabs that hold the original lense in place.

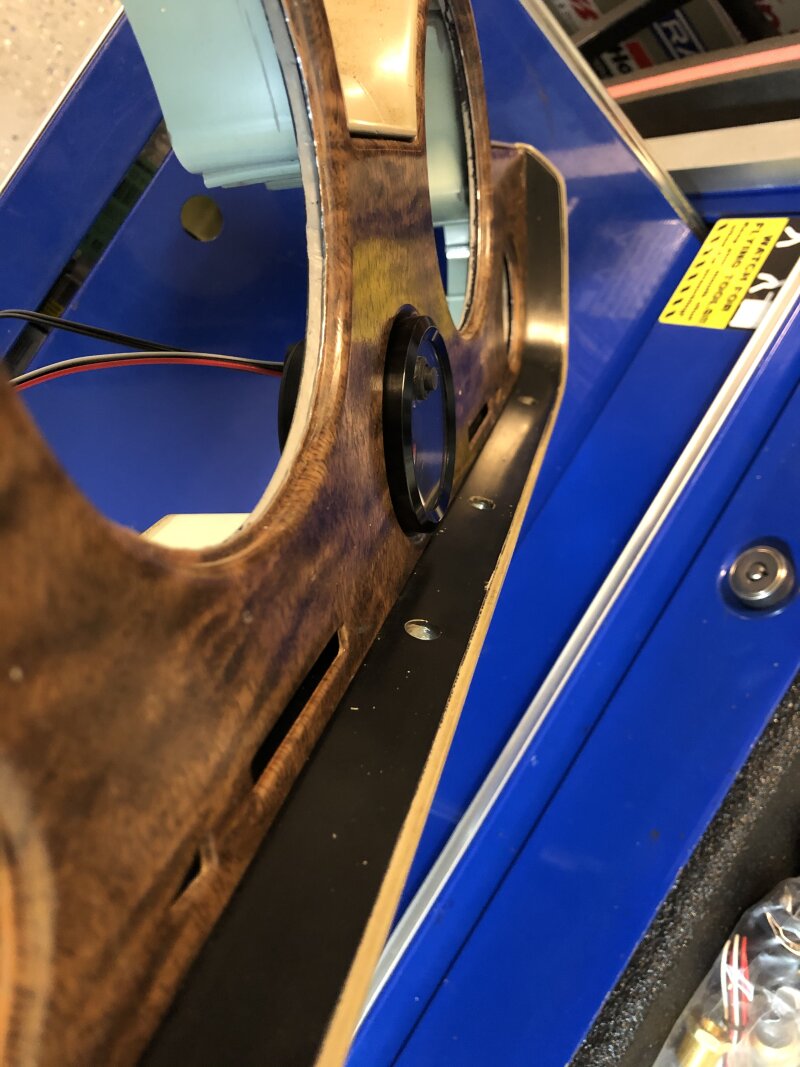
Gauge does not stick out too far either,

I’ll work on wrapping the face plate and painting the cluster face this week.

I have a cutaway tank and everything neede to evaluate what you have. You are in the Phoenix area right?

Yes NW Peoria actually.

Wrapping the dash face proved to be tedious but happy with the results. Once it was mounted it hid all my imperfections. I’ve played with a couple different layouts with the gauges but think this is what I’ll settle on. Very happy with how it’s coming together. I still need to work on the main cluster structure which should just be cleaning and painting. Also need to modify the wiring to omit what I don’t need and keep what I do. I want to get led bulbs for the turn signals and hi beam warnings as well.

I want to find the xr7 dash vent as I will eventually
Install ac but want to use all the original vents for a clean install.


Everything fits surprisingly well, did not have to remove much material


Little preview to how it will look in the car

A reproduction center vent will be available in the not to distant future.

That’s great news, Seems like those are the hardest to track down in decent shape. Will just need the face plate and maybe the distribution housing behind the vent to make the vintage air stuff hook up.

I’ll get with you when I’m ready for the sender calibration to see if we can get what I have working or if I need to do something else.

I like how this turned out. Maybe I missed it, but are you not running a volt meter? I always thought the better spot for oil pressure is in the main cluster instead of on the passenger side.

I agree with the oil pressure being in the main cluster.
I plan to put the voltmeter on the passenger side in place of the oil pressure. That’s going to be the gauge the least looked at.

You dash cluster is looking great. Well done. :thumbup:

Steven

I had been planning to wait to install these with some other interior stuff I wanted to do but couldn’t wait. Now that I have the car registered I’m prioritizing some things to make it more road able. My fuel gauge sucked and never read right along with the speedo bouncing so that’s my excuse to get these done sooner then later. I actually ran it out of fuel the last time I drove it so that worked in my favor to check the fuel sender and match up the ohm range with the gauge. I gotta say after taking this repro sender apart it’s pretty cheap inside. I mean it works for now but wouldn’t be surprised if it failed so if you have them save your original senders! Anyway it did match with one of the preprogrammed selections in the speedhut gauge so programming was easy.

For wiring I used the harness from the xr7 cluster and removed all the wiring that would not be needed and saved what I could use like the fuel sender input, illumination, turn signals, 12v ignition high beam light and brake warning light.
All those circuits where the same as my standard so I could plug it in with the factory connector. The gauges had their own harness and dimmer circuit harness that came with the set. Coolant temp and oil pressure had senders and the harness to run up to the gauge. I removed the speedo cable and used its grommet to pass the wires through the firewall. Unfortunately no pictures here, I was about over the tedious job of making all that wiring clean and tucked in the dash behind the cluster the best I could I neglected getting a couple pictures.

I decided to swap the tech and speedo, I found it easier to keep an eye on the speedo in this configuration.

As part of my other interior upgrades I wanted to use the toggle switches with rear view mirror map lights and the interior lights with the door closed. I did not have time to wire that stuff up so I simply installed toggles to fill the hole. I used standard switches for now as I needed a washer to hold the vinyl tight and the factory switches wouldn’t fit. I’ll revamp this game I the future.
Also note the use of washers, I found out the hard way I was missing the metal support for the passenger side dash panel, no worries I’ll steal the ones off my standard. Yeah nope not the same! I was too far along by this point and was not going to get hung up on the install. I found some nice finish washers and painted them black so I could get longer screws in. Don’t think it looks all that bad and I may just leave it.


Overall very happy with the speedhut gauges, the gps speed works flawlessly but it can have a short delay in acquiring gps with a key cycle. However there is a provision for wiring that will keep it active unless it’s been parked for more then 4hrs. The fuel gauge works great and has a programmable low fuel light( all the gauges have built in warning lights)Also had a built in anti slosh so you needle doesn’t bounce around like some aftermarket gauges do. Backlighting is plenty bright and has a dimmer to adjust to your liking. Took it for a roadtest to add some fuel and check operation of all the gauges. I feel much more comfortable being able to see actual data instead of generic read outs or warning lights and as a bonus it looks pretty nice as well!

Man that came out really good with that color dash face and the black Speedhut gauges. I like that you kept the character of the original dash, but gave it a more modern look.

So it’s been a bit but finally had some time to install the Wilwood brake kit I picked up a couple months back. Well partial install since I only had time for one side and not the other. I take what garage time I can get between family obligations.

The PO of my car had done a Granada disk swap in the past and while they did work I believe one of the calipers where sticking. Not wanting to mess with repairing the Granada stuff I decided to find a replacement. While there are a ton of options you can go with I stuck with the entry level stuff
from wilwood. More or less designed to be a cost effective kit for a disk swap. The rotor is pretty close sizing as the Granada rotor and should be plenty of braking for my needs. Now that I don’t have the factory drum spindle so I wanted to utilize the Granada spindle which just so happens to have the same bearing size as 70 and up. I needed to use a wilwood kit for a 70 mustang which really all that is different is brake lines and whee bearings. Since the wilwood kit uses a caliper bracket that attaches to where the dust shield mounts the way the caliper brake mounts on the Granada spindle is a none issue like it would be on other kits.

Install was pretty simple, however i doubled and tripled checked everything to make sure it would fit the Granada spindle ok. Also I want to address the front brake lines, looks like the hardline was replaced at some point and has the wrong bend near the frame.Also an adaptor was used to step up the fitting size before it goes to the wheel. I had to reuse the adaptor and bend the line to fit which I don’t care for so I’ll look into new lines for a better fit.

Spindle stripped down and ready to drill out the dust shield bolt holes to 3/8 fine thread. On the drum spindles this is not necessarily. You do need to acquire a Q sized drill bit and a quality tap. Now wilwood recommends a machine shop to do the drilling which I assume they figure drilling a tapping a hole is more then average guy would take on? They also want that hole counter sunk which makes no sense with how the bracket is built. Could be the bracket got updated and no longer needs countersunk holes, either way I felt it to not be needed for my application and I’m qualified for using a tap!


Caliper bracket mounted

Everything installed, gravity bled first which I found my issues with brake lines, after that vacuum bled the system to finish off the passenger side.


And my youngest helping out

Another thing I’m working on is getting a single din radio installed. I could not find a single din mount that wasn’t plastic and doesnt look like the metal ones are in production anymore so I cut mine.


Same Wilwoods I put on mine this winter, they work really well once the pads are bedded in. Good to see you’ve got a helper out there with you!

Good to hear, Its a very nice kit and Im happy with it. I was impressed the wheel bearings are USA made even. I almost jumped up to the next level but I didnt feel the cost vs reward would have been there for me to justify. I still need to replace the rear brake line and maybe a wheel cylinder, probably both just in case. The master cylinder was low when I popped the top to bleed the front which would explain why the brake light was on after I installed by gauges(hey it actually does work!)

He loves to be in the garage anytime Im there. I did take them for their first ride around the block a week or so ago which they loved and asked why it was so loud :laughing: (I really need to address the tailpipes as the dumps are just too annoying inside). Looking forward to more drives with the family in the future.