Not a bad idea, I like the idea of something a little more modern in both form and function then the originals.
I love auto meters but I don’t think they make a set that will match what I have in mind. The speed hut gauges let you customize the font, needles, gauge face etc. can even add logos. One huge feature that I like is you can program warning lights such as low fuel,oil,voltage etc, built into the gauge. The fuel gauge is also programmable to match whatever sender you have and not just a generic ohm range. Not quite as nice as Dakota digital but about half the price.
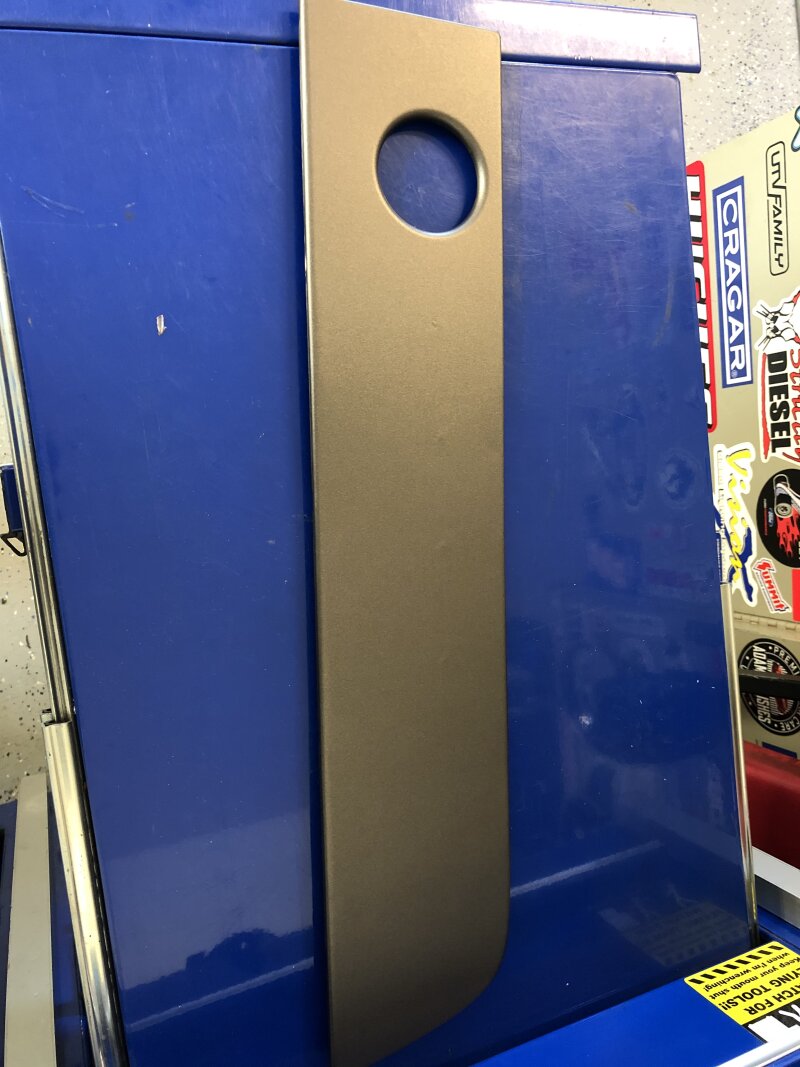
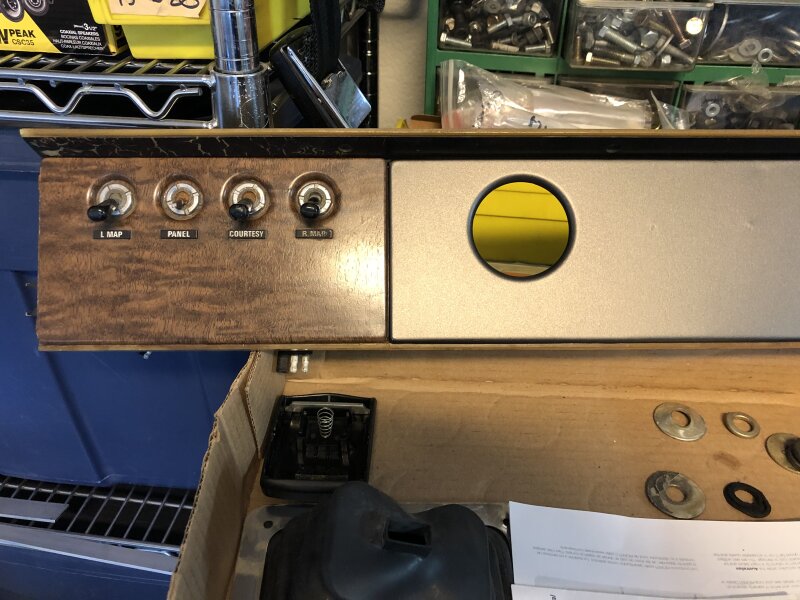
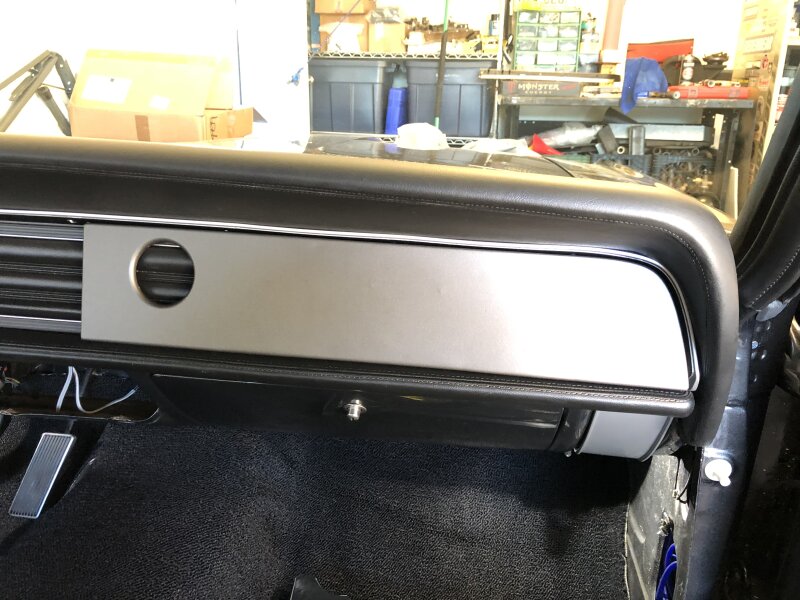
I was playing around with vinyl wrap to cover the wood grain instead of painting. Think this is the color I will go for but that challenge will be wrapping the cluster itself with all its curves. I will use argent silver for what would have been chrome. I’m aware I can buy the classic dash kit and install it all but I don’t think it fits quite as nice as the xr7 stuff does.
I really dig that vinyl wrap, definitely will give a more modern feel and should work well with the rest your interior. Speedhut gauges are awesome, I always wanted to use them on a project. Looking forward to seeing how it all comes out.
So I’m renaming this thread. Was not all that happy with referring to my car as a restromod but did not know what to really call it at the time of acquiring it. Ive made some changes and upgrades with more planned for the future but they are not a great enough change to really call it a restromod. Todays restos have much more custom modifications such as power train and suspension, custom body work for huge tires etc. The craziest I will end up will be a full coilover suspension, SBF based engine and transmission. Dont think that quite qualifies as a restromod in my opinion, so instead we will call her a classy driver!
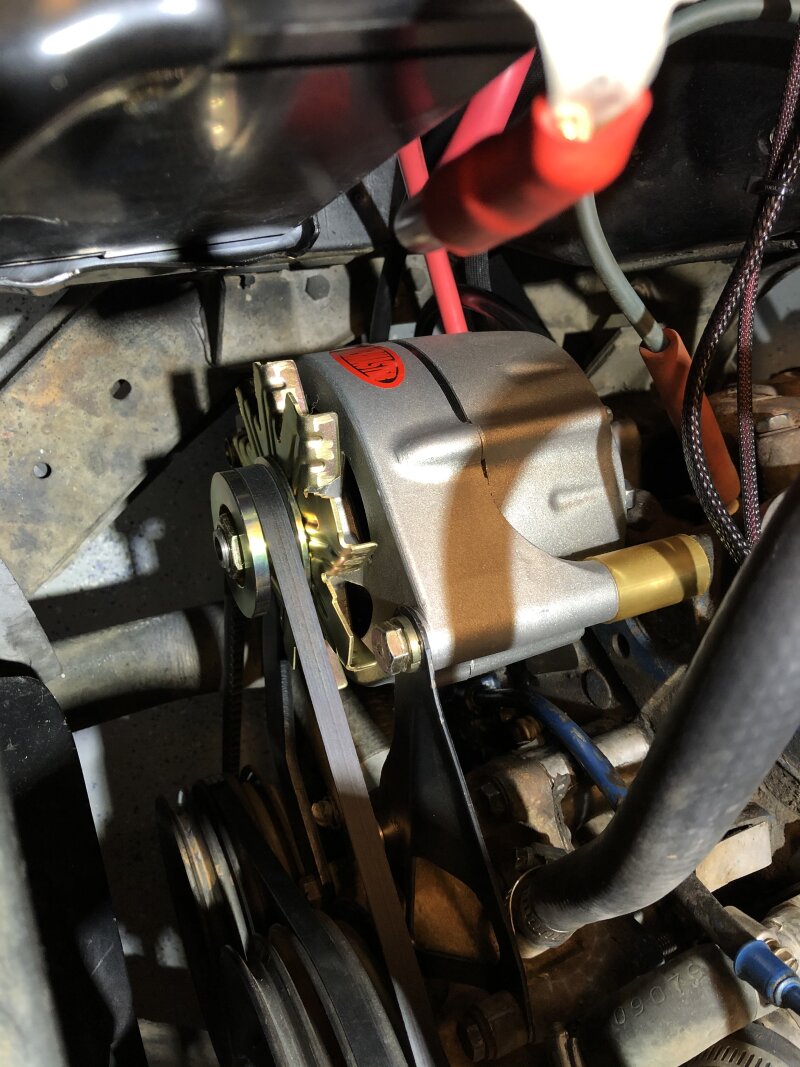
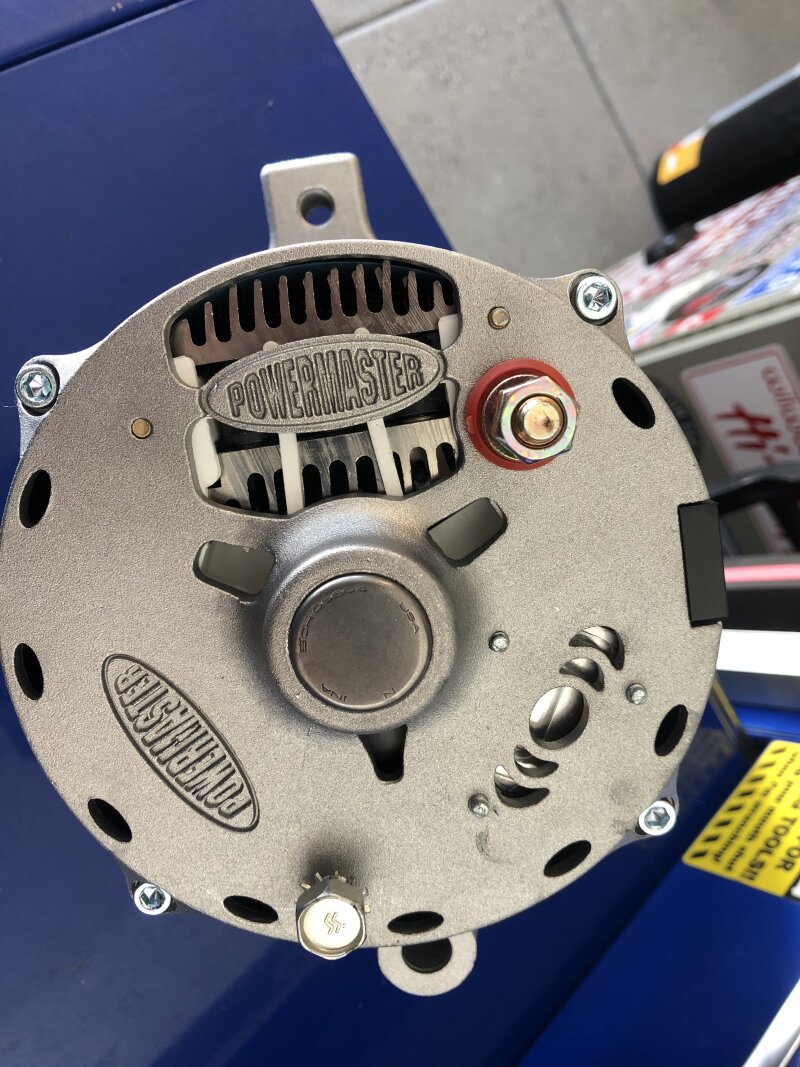
Anyway tangent aside I got a little time to mess with her over the weekend. In preparation for other upgrades I wanted to get ahead of the game and get an alternator installed that can handled the extra electrical loads of a stereo W/amp, EFI, electric fans etc. I debated quite a bit on a 3G conversion or a 1wire alternator. In the end I decided on the 1wire for the sake of simplicity and it truly looks like it belongs there. No more external mounted regulator either. Easy to install and took about 2hrs including building battery cables and watching a toddler in the garage! Went with the powermaster since its made in the USA, 150amp and less then 200bucks from summit. I ran all 2Gauge wiring from alternator to battery and ground which is what I have running to the solenoid and starter as well. A bit overkill kill but its what I had on hand for wiring and always go bigger then smaller when it comes to cables.
With 1 wire alts they may not start charging initially until you get past a certain RPM, typically this is pretty low but once its past that it will stay charging even if the rpms drop below that level again. This is not a big deal but something to be aware of. For me I will have a volt gauge with a warning light. That light can be on for which ever voltage I decide to set so I will be able to tell when its not charging on initial start up and blip the throttle if needed. However there is also a provision on the alternator to hook to an idiot light to perform the same function if you dont have a voltage gauge.
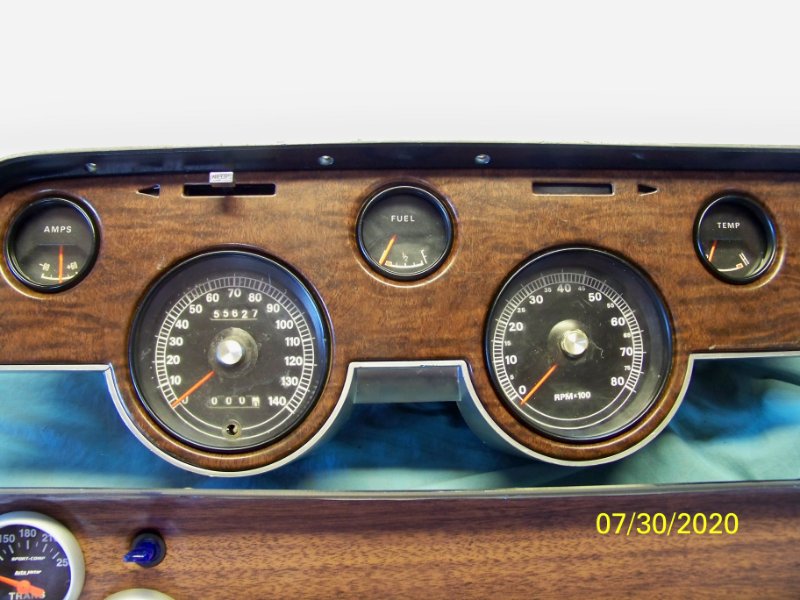
I ordered a set of speedhut gauges under a black friday sale. I had planned to wait but the saved a nice chunk of change so decided to pull the trigger. With the speedo bounce, a fuel gauge that always reads empty and always questionable stock gauges it will be a nice to have before I start driving this thing. I have also been needing to swap my dash pad out but dont want to keep taking the thing apart so Im going to do it all at once. dash pad, xr7 dash and gauges.
Put the same alternator in mine not too long ago, very happy with it. Even at idle with everything on it handles it no problem. I also did a separate ground cable from the case of the alternator. I figured with EFI making sure all the grounds are solid is a good idea.
The most important ground cables are from the engine to the chassis and from the battery to the chassis. The battery is grounded to the engine block. This is because the starter is bolted to the block for its ground connection. Think of the chassis as a giant buss bar capable of near infinite current capacity. The alternator will ground just fine through the block.
I do need to add a better chassis ground, I simply have the factory block to firewall ground currently. I currently have 2ga battery to block, 2ga alt to block and small gauge block to firewall.(alternator instructions only called for 6ga.)I ran the alternator to block ground out of precasting with painted brackets and block. Hardware was there and cable is easy to make. For power 2ga battery to solenoid and to starter. 2ga battery to alternator. I’m going to end up installing a remote fuse box for all other circuits required for fans, fuel pump etc.
I remember a truck I was working on catching the ground wire on fire due to no block to battery ground. Something unrelated to what I was working on the time but drilled into my head the importance of grounds.
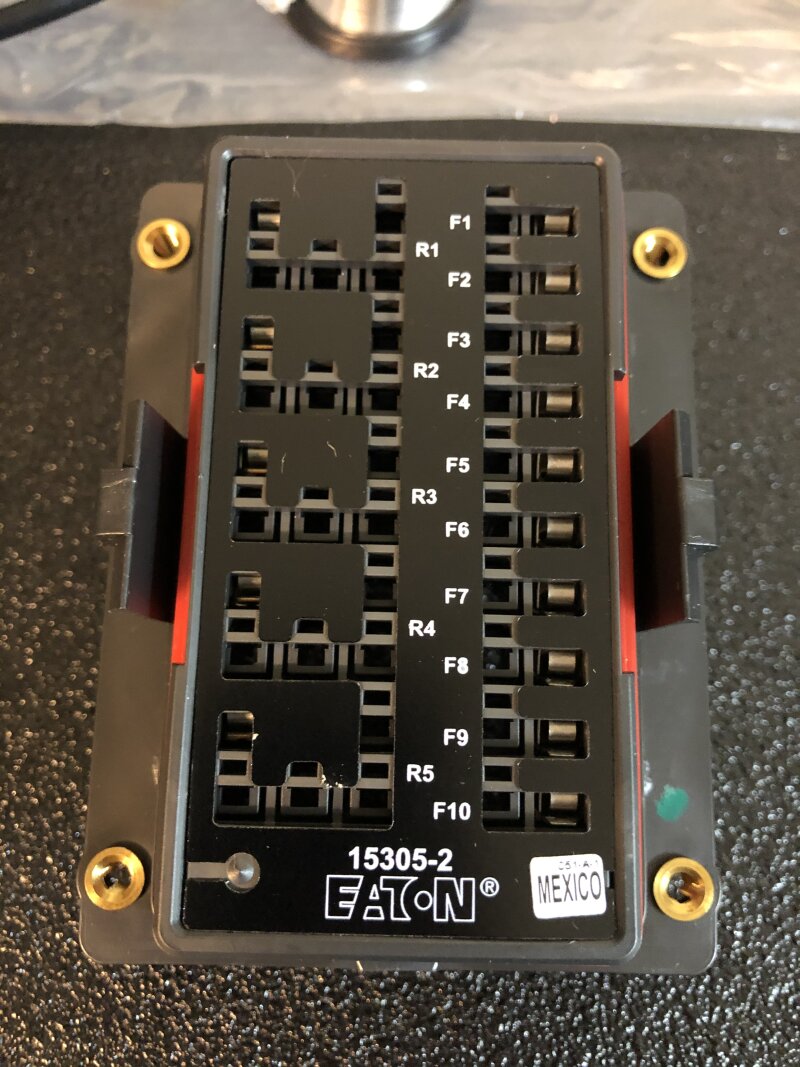
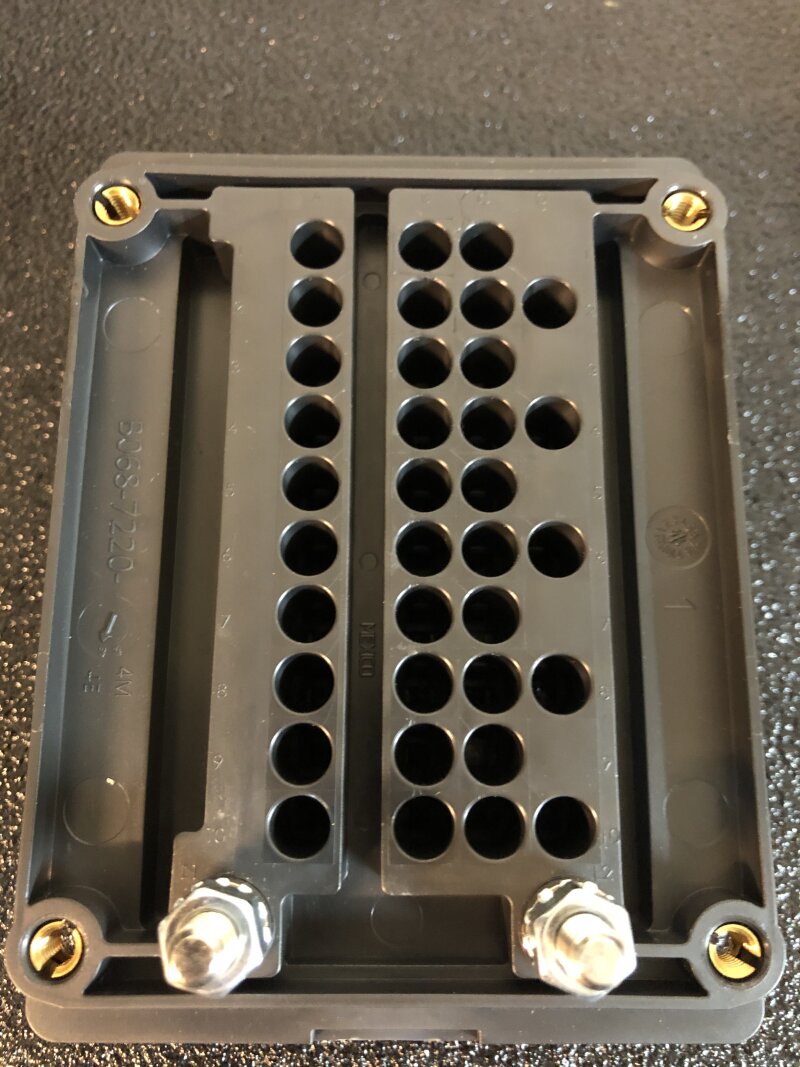
Fuse/relay box I picked up from waytek, it has two inputs so you can run battery and ignition powered circuits all in the same box.
I do remember seeing that now, I was leaning towards a 3g install at the at time I believe. Good to hear it’s working out for you. Obviously Pro’s and cons to either setup but gotta love how simple this one is.
I like that electrical box even more that I now know it has dual inputs. Off to order next.
I’ve got that same alternator though in black with black fan and pulley. It works well!
Be mindful of the part number as some don’t have dual inputs. They also have mounts that can be helpful as well. Its a quality box, every bit of a factory level quality.
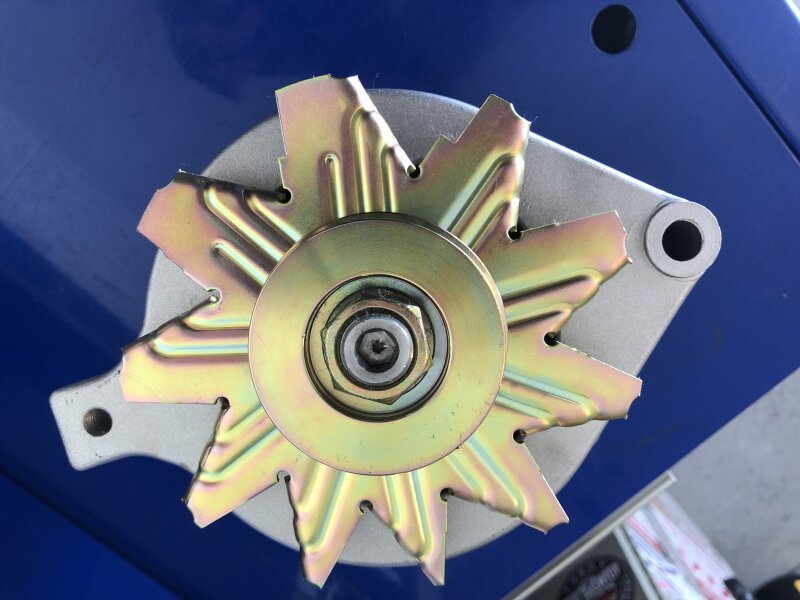
I kinda wish I got the alternator in black or at least something other then the gold zinc coating on the pulley a fan. Maybe I’ll paint it later. Overall quality alternator tho, very happy with it
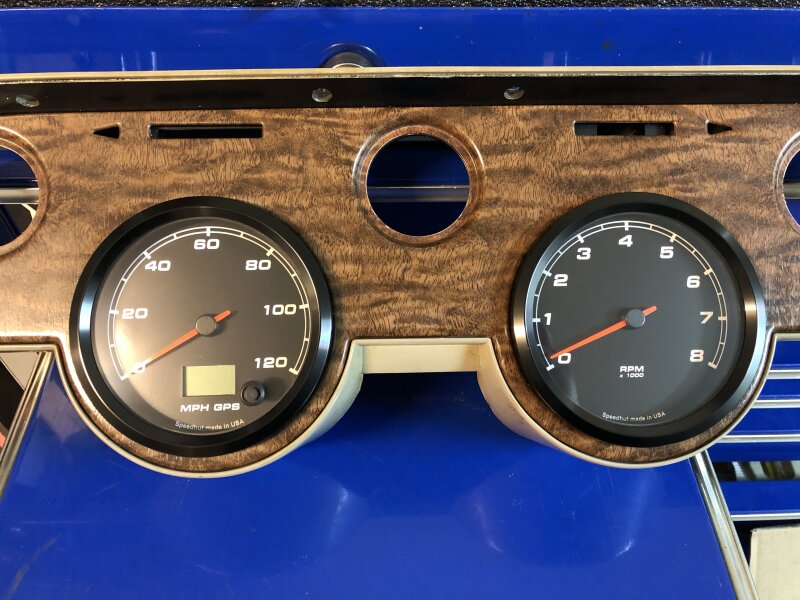
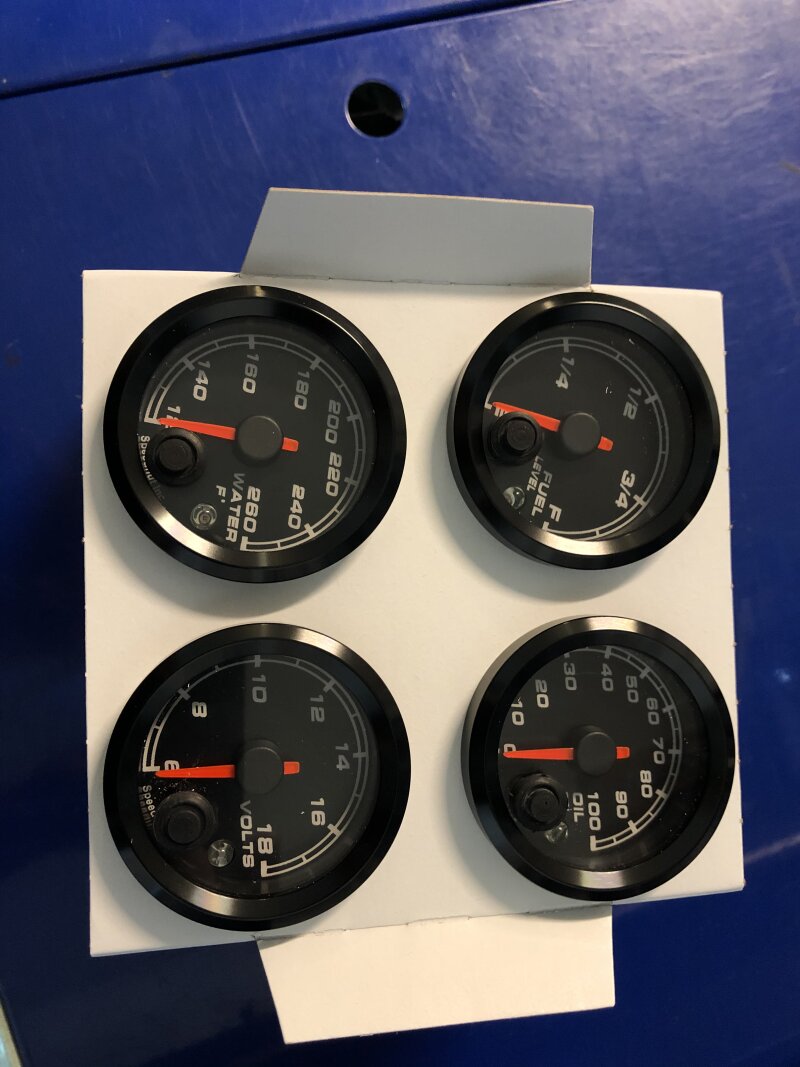
Christmas came a little early! Pleasantly surprised to have my gauge order show up yesterday. So far I am very happy with the overall build quality of the speedhut gauges. What is great is you can customize to your liking. I had a bunch of ideas and played with the configuration way too much but in the end I choose to keep them simple and clean. I did change the tick marks to resemble the factory xr7 gauges but wanted a modern font.I almost went with a light blue backlight to again resemble the original but I have a hard time seeing blue backlighting at night so instead I went with the white. I can’t wait to get them hooked up and installed…but first I have got to get them mounted.
I did my fair share of measuring before pulling the trigger but was still unsure of how smoothly mounting these into a factory xr7 cluster would go but I am pleased with the results thus far! One big plus to these gauges is how they mount. They have a screw on lock ring vs the awkward mounts autometer have. Another plus since the gauge is led backlit vs a typical bulb its very low profile so it looks like I won’t even have to trim the support structure.
After getting all the holes big enough to fit I’ll wrap the face plate and paint the rest of the cluster black and silver just like my standard. I’ll post some pictures as I go along.
Each gauge comes with the wiring and sensor needed with the exception of the fuel gauge. When getting a full set they include a dimmer potentiometer and a power harness to make install easy. I had planned to make my own harness and tie into the factory connector so it was plug and play but I’m thinking now I may use
The provided harnesses as they a nice enough quality. I’ll decide once I get to that point of the install.
Thanks for the offer Bill, the sender can be any ohm range, you can program the gauge and sender to match. This should help match the repro sender that is notoriously wrong.
The gauge has pre programmed ohm ranges close too what would be expected stock or you can set the range to your actual sender by running it through empty and full. I have a repro sender now but it it seems to live between empty and 1/4 no matter how full it is so I need to pull it and test it to see what the range actually is.
Those Speedhut gauges are slick! I like how they look they’re in the style of the XR-7 gauges with a modern slant. Can’t wait to see how the finished dash turns out.
How funny is that. The chart is backwards for our cars.
The problem with the reproduction senders is that they build resistance over time reading lower as they go. I can’t say for sure that is what you have with out seeing the sender. It could be as simple as a bad float.
I did something similar in my Toyota with a f150 fuel tank and sender with an autometer gauge, however it was easier with the OEM sender since it was accurate.
I’m banking on this setup working based on I can program to any resistance range I need. The repro sender I currently have isn’t that old and it has read the same since I installed it. I remember checking with it out side of the tank to verify gauge sweep and it worked. Also tested the float before Installing to very no leaks. So it’s possible the range was off from day one which is the one thing I did not check before installing. Im going to have to pull it out to program it anyway so I’ll test then. If it’s not going to work I’ll get with you too see what we can build to work.
When I got my car the previous owner tossed the tank and sender assembly so I never had the original to save or compare too.
I will also eventually go with the sniper efi setup and plan to use there drop in pump/sender assembly so I assume it’s going to match the OEM range but hard to say but that’s where being able to program the gauge itself will be helpful
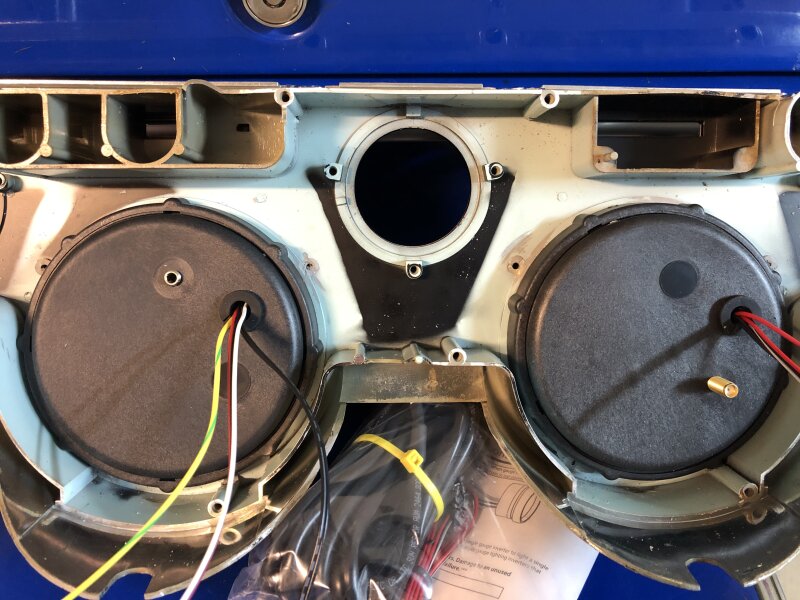
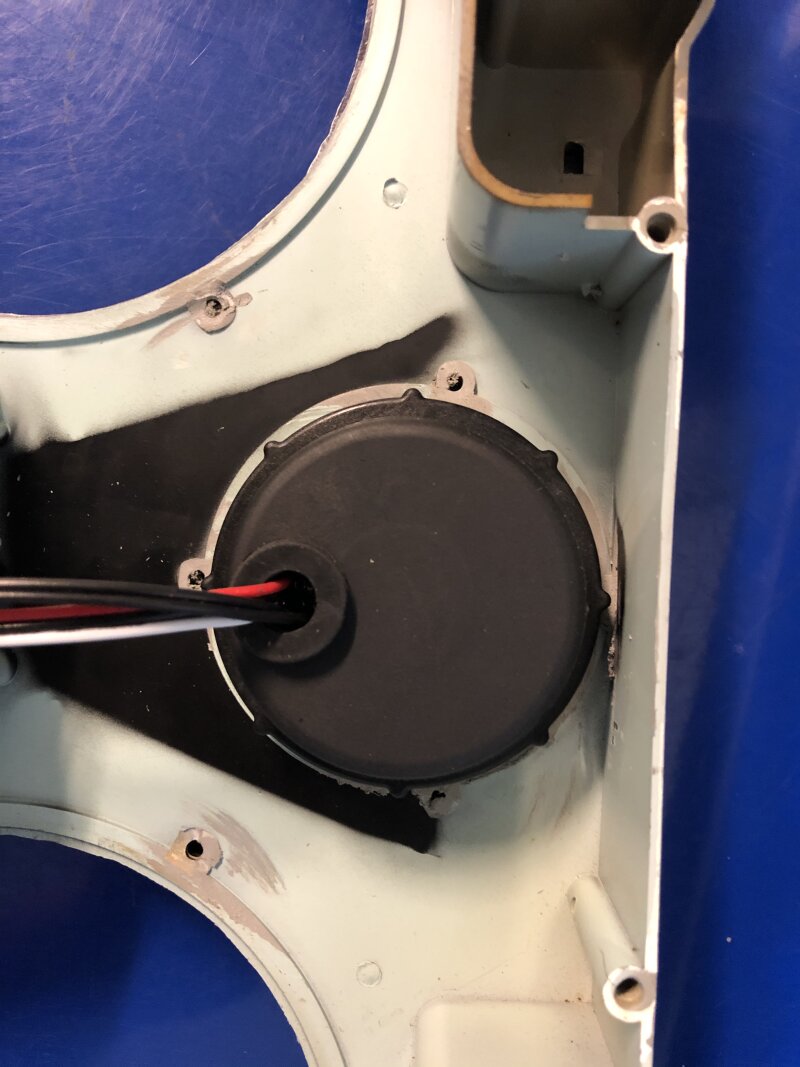
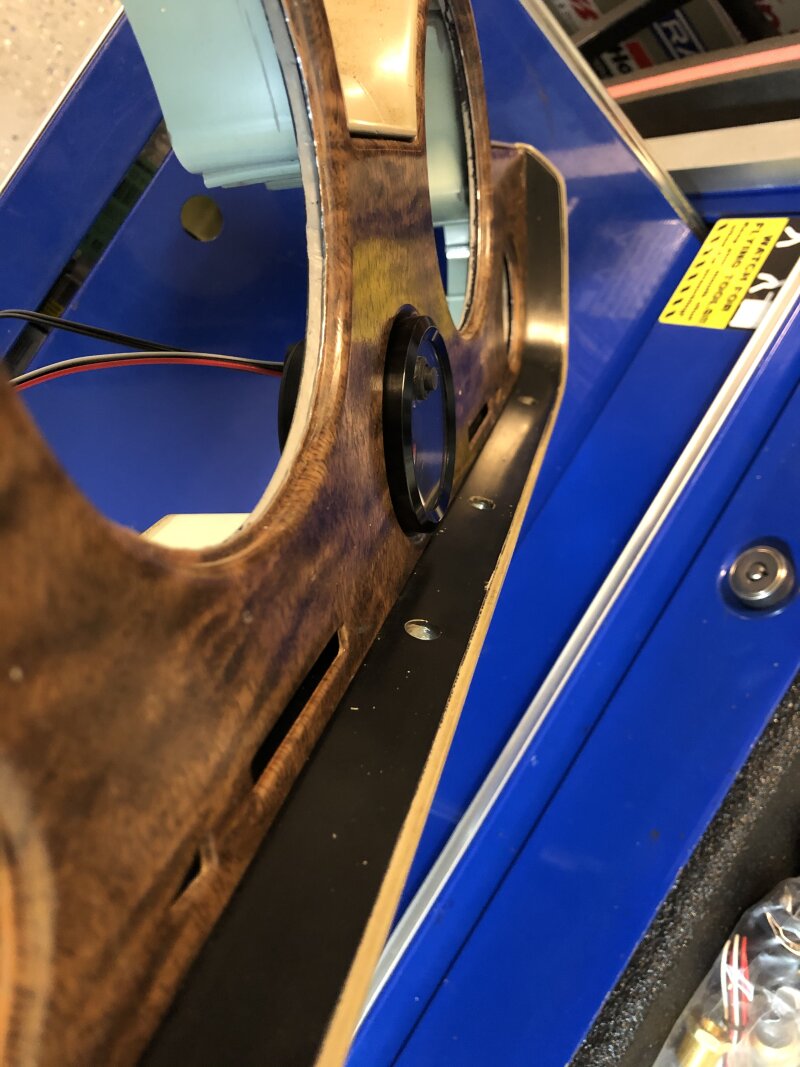
Got the smaller gauges fitted and happy with the results, I won’t have to trim anything off the cluster structure assembly like I had originally thought I might have too. The compact nature of the speedhut are a big plus here. Nothing special needed, simply enlarge the factory holes is all that is needed.
I only need to find a solution to retaining the brake warning light which will probably involve adding a light somewhere(maybe the xr7 switch holes)
Can see some of the needed trimming here, mostly just the tabs that hold the original lense in place.
Gauge does not stick out too far either,
I’ll work on wrapping the face plate and painting the cluster face this week.