That’s a good idea, I didn’t even mess with it just went straight for a bung. It’s definitely a good easy solution for those that can not weld or plan to do it later.
Awesome, nice work on the install and I like where you mounted the CD box and coil. In my experience it’s worth taking the extra time to fine tune the calibration once the self tuning completes. You can really dial in the drivalbility once you get the hang of the Holley EFI software.
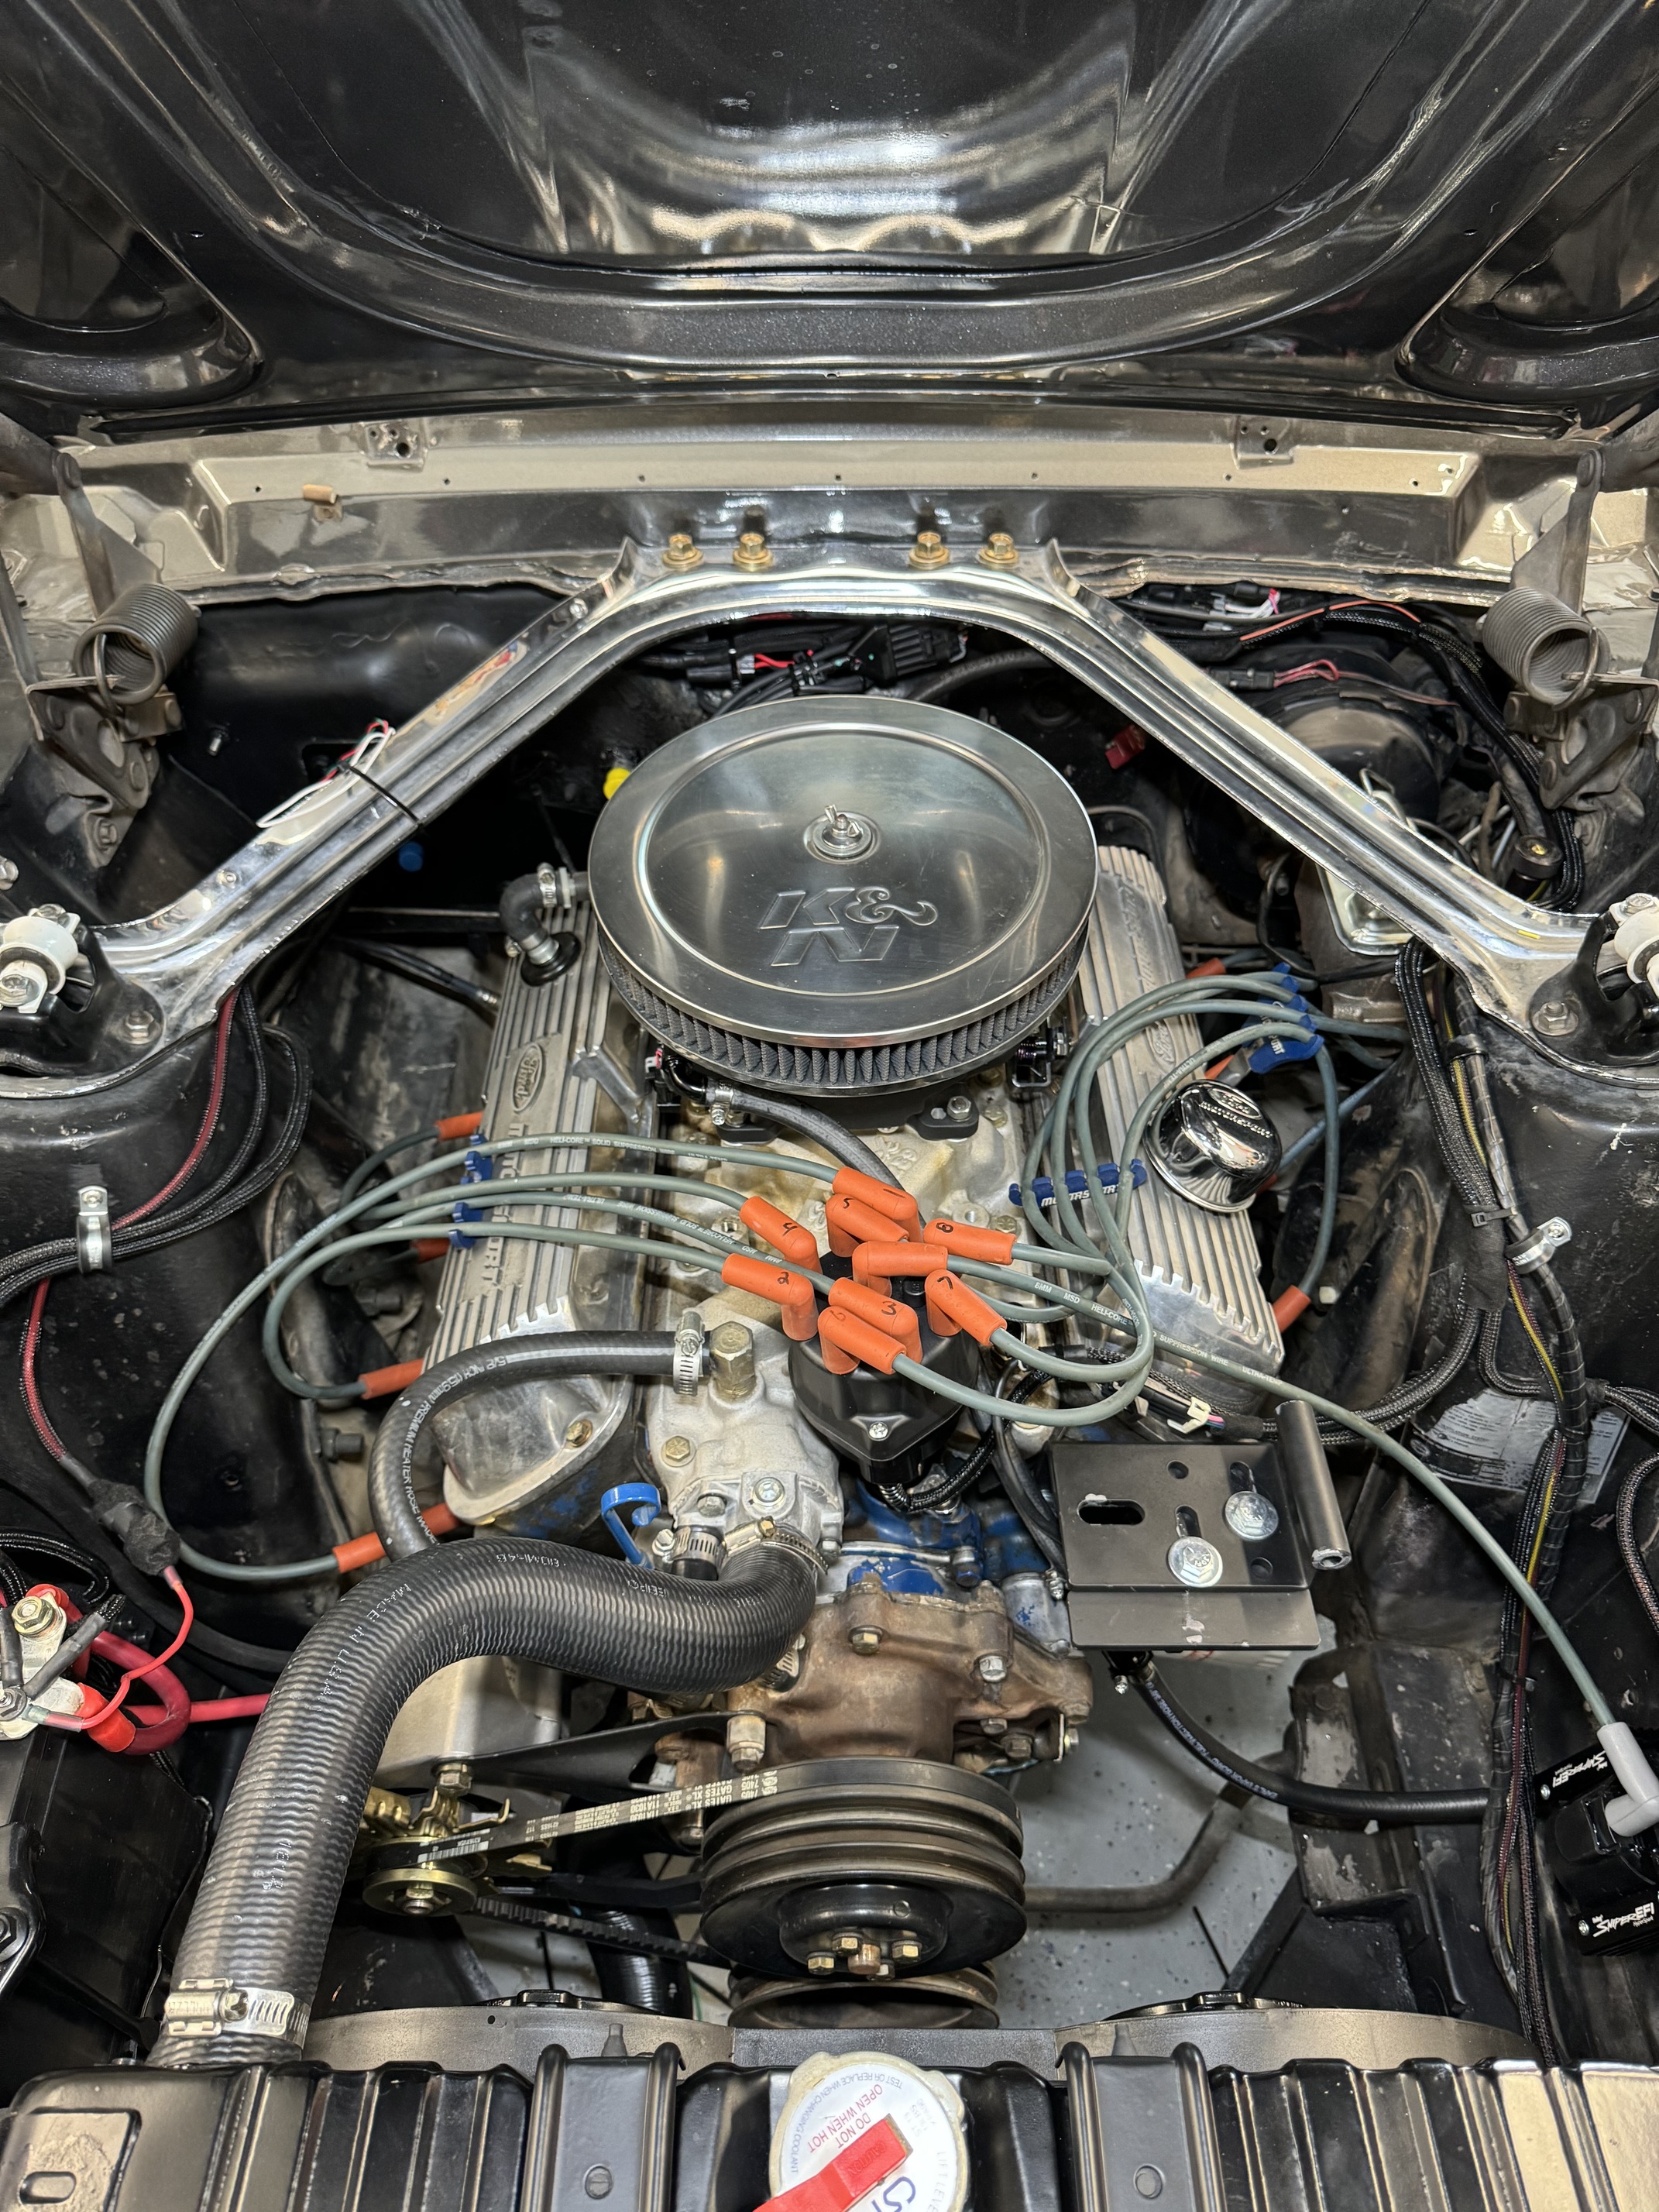
Install is about 98% complete with only some small loose ends to clean up! I was quickly running out of time this weekend so I had to cut a couple corners to finish it up enough to get a good roadtest in. Nothing major except for not being able to build and install the new plug wire set, I lucked out and was able to use my old set of wires for now by just changing an end on the coil wire. These are circa 90s era MSD 8mm wires and they had some terminology on the wire that had me worried they might be solid core which Holly made clear not to use due to increased RF noise they create. Once cutting the coil end off I was able to check the core and found they are not solid core so they should be ok for now. I have a brand new set of 8.5mm wires that are cut to fit and will clean up the install much more.
I also want to clean up some stuff under the hood. I have not spent much time restoring the engine bay as the motor has yet to be pulled out of this car. In the back of my mind I always felt unsure of how long this engine would run and would just do it all when it died and needed a rebuild, however its been long enough now and I’ve made upgrades along the way its starting to bother me that the rest of engine and engine bay isn’t clean and put together. However I don’t want to down the car for an engine rebuild when this one stuff runs well enough. Eventually I may just bite the bullet and do it anyway but I need to find a good local rebuilder first. The rest of the car is pretty well put together except for under the hood and of course that is what everyone wants to see when they ask you about your car!
Anyway things still left to do is clean up some wiring and tie downs, Fabricate a fuel hardline from the TBI to frame, mounting of the handheld screen or hiding it somewhere easy to get to, plug wires, and integrating the ac compressor for WOT control and idle up to compensate for the compressor load. I need to do a little more research here to determine how to wire it and utilize the holley software to manage it.
First start went well once the pump primed the system. The intake pump is a little louder then I thought it would be but once the car is running you really cant hear it. My old hand me down timing light died right as I needed it so had to run and grab a new one to verify everything was set right. Idle was a little rough at first but as everything warmed up and the Holley software quickly started learning and cleaning things up I could make the idle adjustments needed. The first drive was impressive and it quickly made the cost and time involved very worth it! My carb ran ok but never as good as this even on the first pull out of the driveway! Im sure there are guys that can get a carb dialed in way closer then I can but for me the increase in responsiveness, power and over all drivability is night and day better then a carb! I’ve always had a surge during cruise speeds that I suspected was carb related and/or timing advanced based on the mechanical advance(MSD mechanical distributor) not being dialed in right. All those quirks are gone and whatever was left got tuned out. No regrets at all with performance and the longer I drive it the better it got. I could feel, hear and see on the gauges as the system learned and tuned out the quirks quickly. Performance is night and day better than the carb, Not sure that can be stated enough, Its like a completely different engine all together and my engine is nothing more then a stock unknown history original. I can only imagine the improved performance I would get from a fresh engine build with proper exhaust, heads and cam.
If your on the fence on EFI I would Highly recommend! Its worth the money and time to do it.
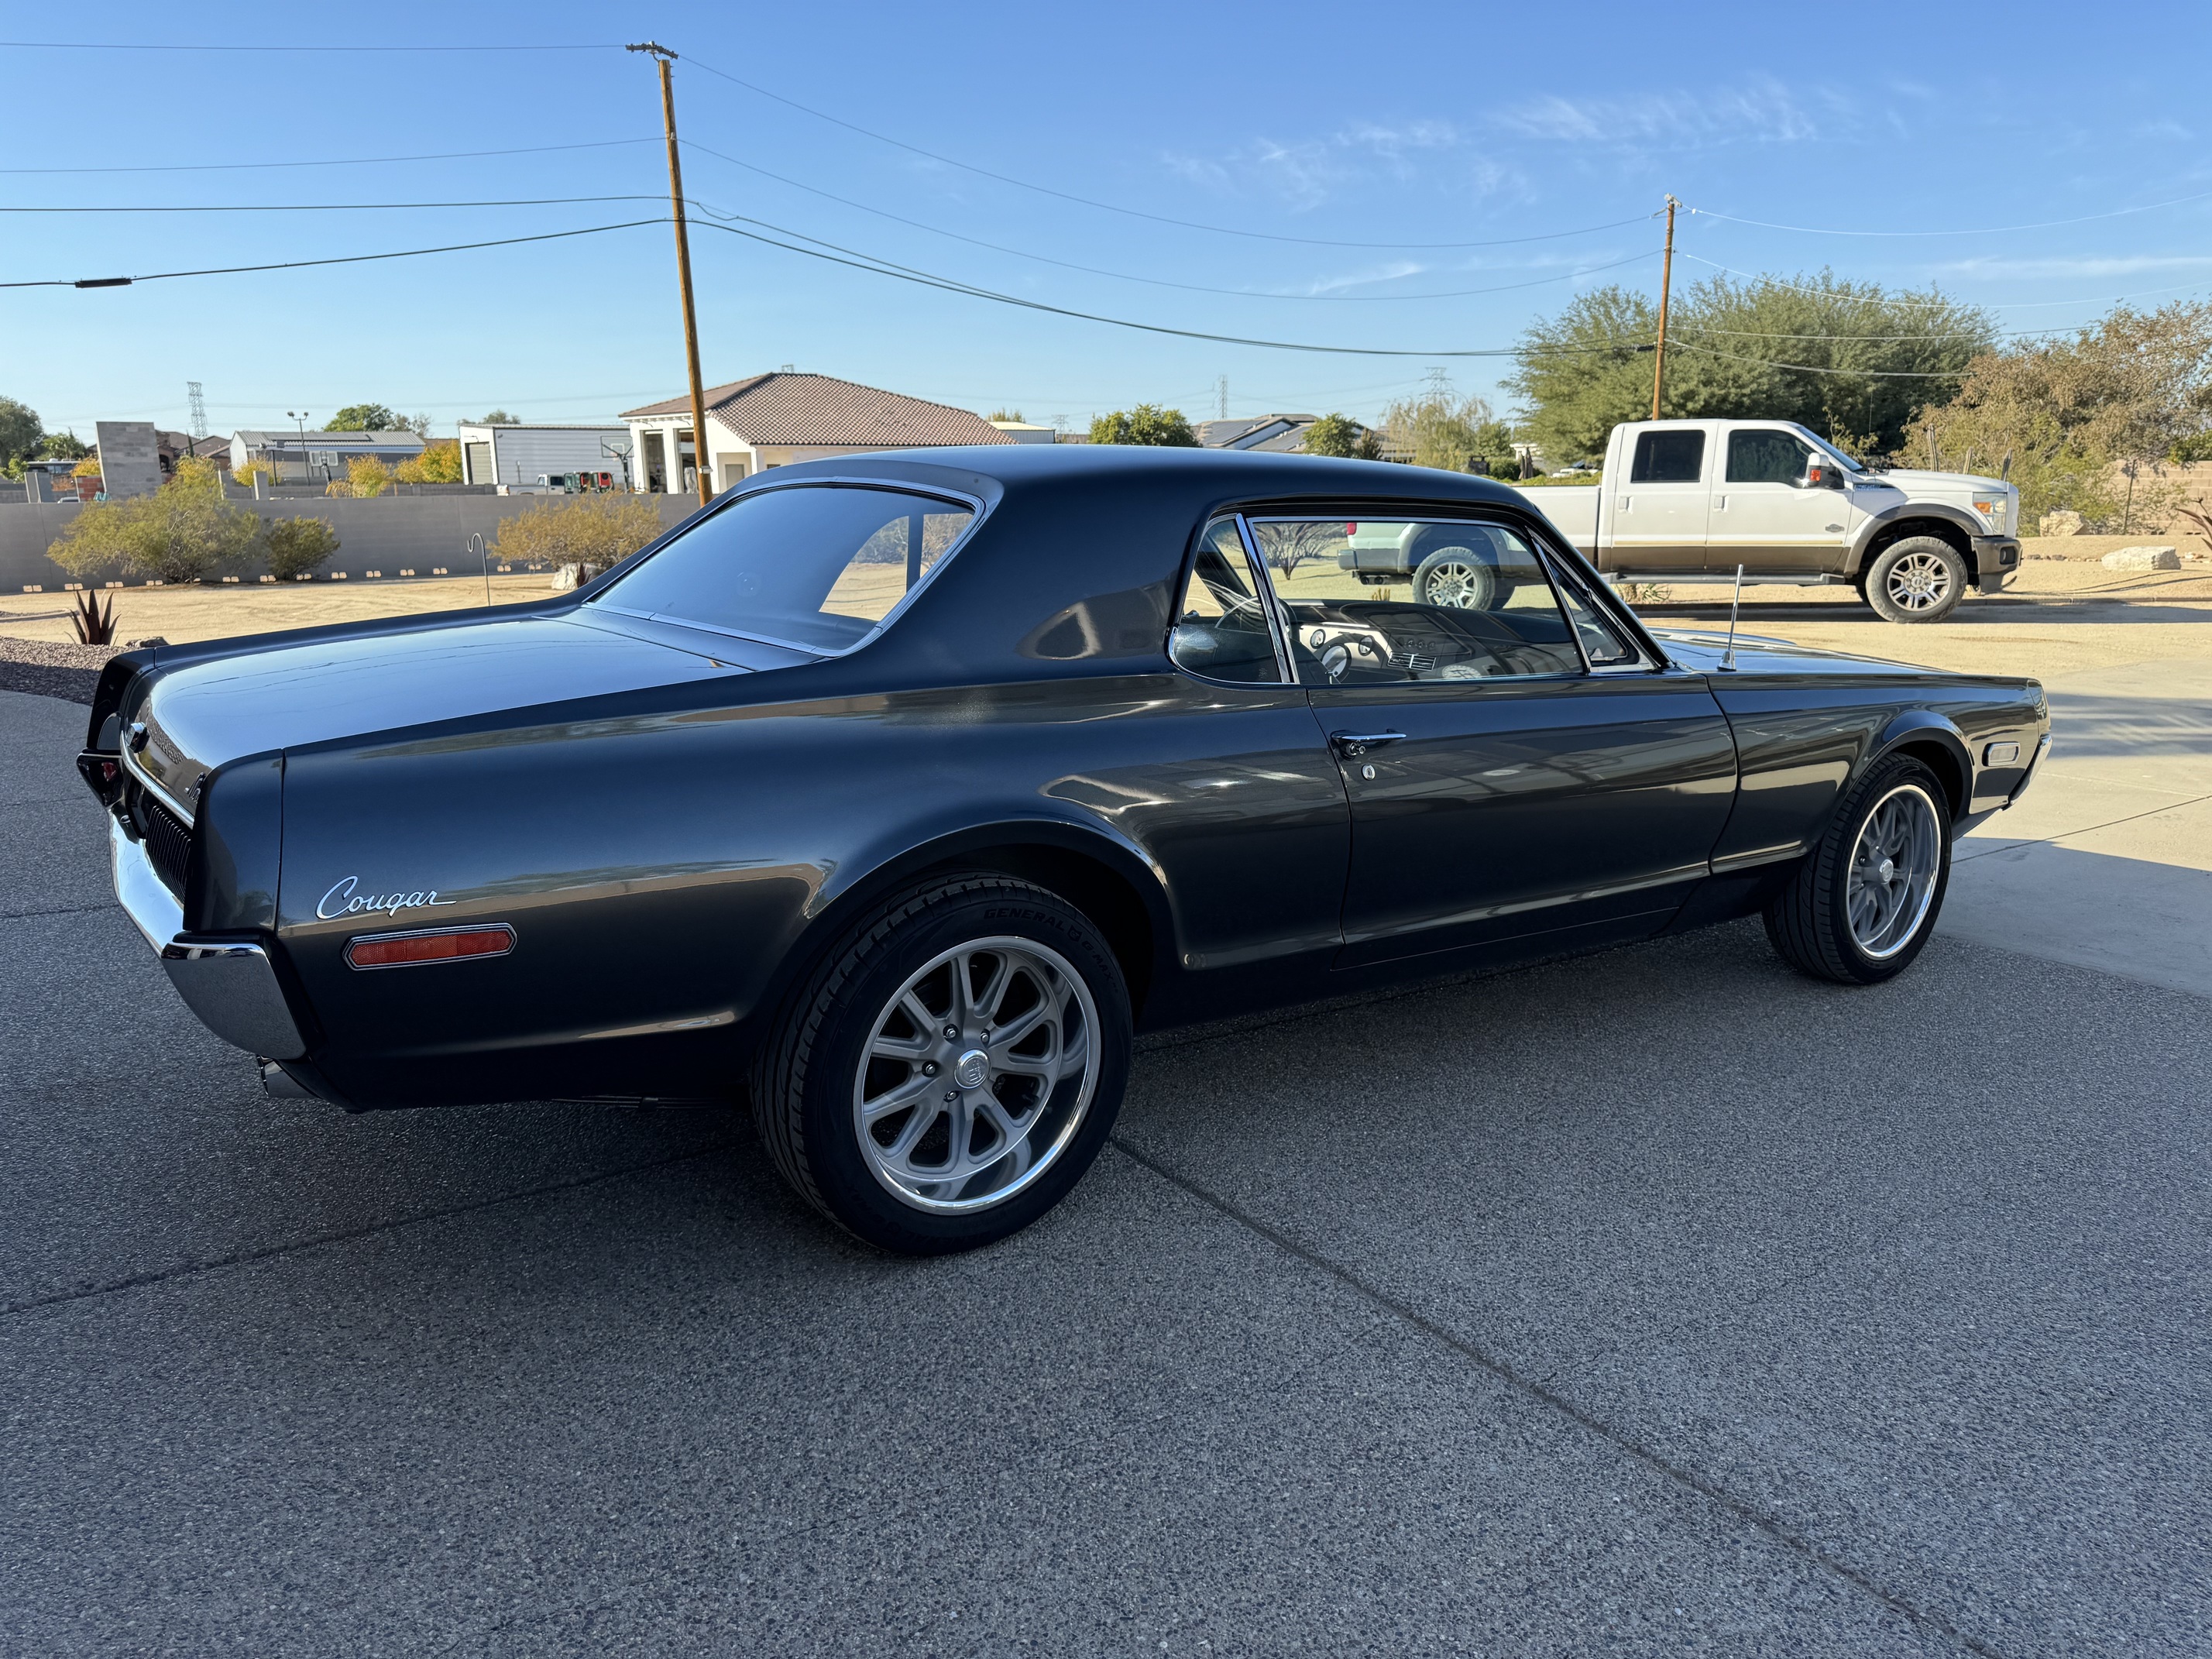
First roadtest I put 25miles on it and while its still self learning I think its got most of the quirks out of itself . Looking forward to putting some more miles on it soon! I think I have used up my garage hall pass for a while with this project so all Ill be allowed to do it take it for drives! ![]()
ignore the messy plug wires but overall not too different from what a carb motor looks like
1 Like
Finally got another short road test in today to see some family and not alot more to say then it’s a whole different car on all levels! Just as impressed this drive as I was previously. Cold start after two weeks was no problem. No long crank, no pumping the peddle, no idle time to warm up, no burning my eyes from stinky exhaust, just fire it up, back it out of the garage and drive. I should have got this thing installed a long time ago!. Drivability is so much better over my previous setup it’s not even comparable and it’s hard to describe all the improvements such as shifting improvements(yeah it’s a 4speed manual), less exhaust drone and overall quieter. I can only imagine how well a fresh motor rebuild will be!
One negative I would say is the 3.5” touch screen kinda sucks. I find my self fighting it most of the time to select what I want to see, the touch function doesn’t work well and is overly sensitive
Pic just because
2 Likes
I travel with a laptop in the seat next to me. Just get a y cable and you can have the 3.5” screen and laptop at the same time. Laptop has gauge screen that’s pretty good. You can also set gauges to alert if they fall outside of normal parameters
Im thinking of a more permanent solution. Having a laptop plugged in is good for tuning/diag etc but not something I want to leave hooked up normally. I like the larger screen holly sells and it would look good built into a center console but not sure if its touch screen is any better.
Diesel, great job on your car, that is going to be a fun cruiser! I recently installed the Holley Sniper system on my 67 and have had great results with the drivability. That little screen can be incredibly frustrating though. In my business, people love to drop off pens as business advertisements. I have a few with soft tips designed to be used on phones and tablets that work great on the Sniper touch screen, no more frustration with tapping the wrong icon and I just keep it on the console or glovebox.

1 Like
Thanks for the stylist pen idea. I get promotional pen drop offs at my work all the time too, I’ll have to look for one!
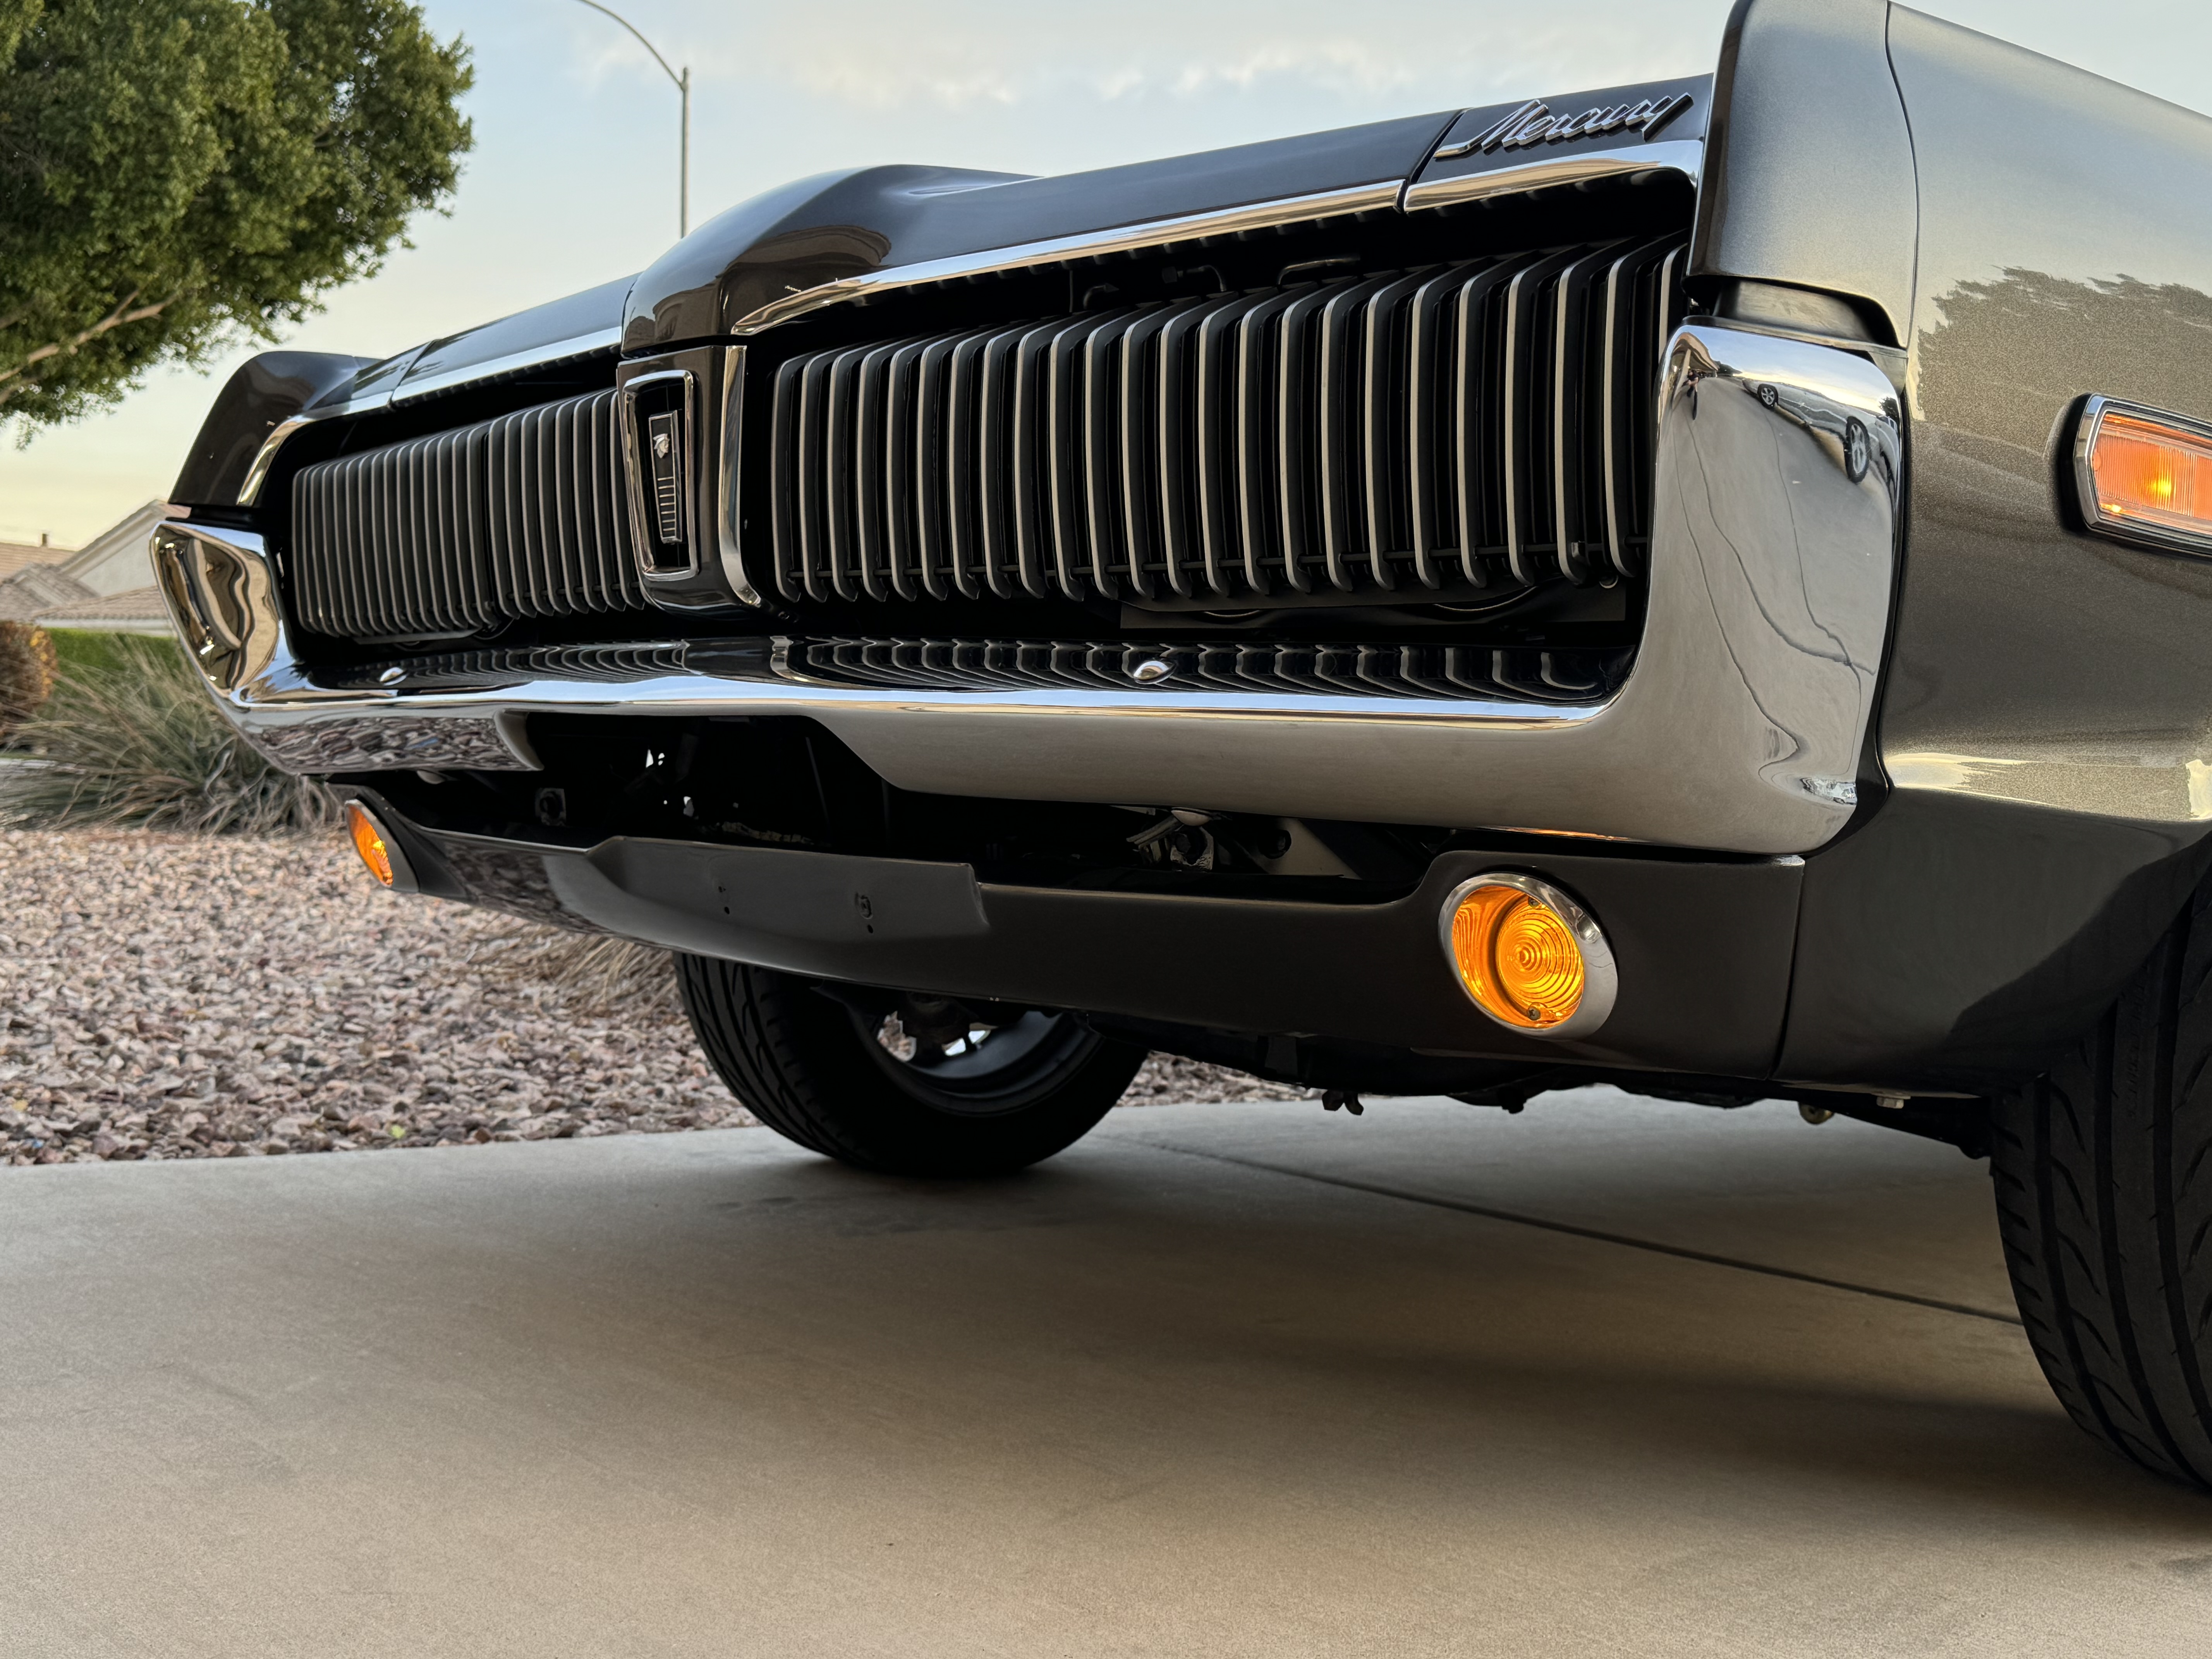
Yesterday for the first time I loaded up the family and took the car to church for the evening. I think this was one of the only times we have all been in the car at once to go somewhere. Not to mention one of the longer drives I’ve made in it. Usually it’s always been short trips here and there to test things out, finally everything is coming together to feel more complete and can’t wait to drive it more. On the way home I realized I don’t think I have ever driven it fully at night. Dusk sure but never when fully dark, appreciate all those led interior and exterior lights! Halogen headlights not so much!

4 Likes
hello i know this is years past however can u let me know how much extra material u needed for u to make the rear bottom seat covers fit
also, what did they charge just to have an idea
and beautiful car i have mine in shop as we speak getting some metal work done
Welcome to the forum! good luck with your build. I can not believe Ive been at it this long and while many may think its done I never see it that way. I still see it as having a long list of to do items!
I want to say I had got 2-3yards of material to make sure we had enough. only the bottom over needed the extra material added. I paid about 200 bucks for the upholster to modify and install the covers.
However I believe TMI is building cougar specific covers now so may not need to go through the process I did.
unfortunately, I purchased everything before I knew that they were starting to produce them for our cars i contacted them to see if i can purchase just the lower section and they will not
I’m also still waiting for the 1 piece headliner that they said they were going to have available
I did get the material form them as well so its an exact match, you can not tell it has been modified at all. Your on the right path either way it should come out well for ya
Father’s Day was a good excuse for garage time, hope other dads out there got some free to themselves!
I do have a small update to this build thread, They are coming fewer and farther in between but such as life. I also wish I could drive it more and hopefully getting this ac install finally accomplished I can do some summer driving. Ac install is about a 2 year install so far! Granted I stopped to do some other things first but either way its taken far too long to get back to it.
All that’s left is installing the compressor, hoses, heater hoses and shut off valve. When installing the compressor I quickly found an issue that really shouldn’t be an issue with a vintage air kit but kinda expected at this point on my install. Like I mentioned about I would buy direct from vintage and have a conversation about your car first to make sure you get all the right parts. Since I originally purchased my kit there have been some updates to several parts. Anyway My issue was with the compressor mounting. The compressor needs to mount with the oil fill plug no more then 90* off vertical which is not an issue alone however the discharge ports exit at 12 o’clock and once installing the fittings for the lines it will hit the hood once closed. The only other way to mount the compressor to get the manifold parts to an ideal location put the fill port past its 90* recommended position. While I have not been super happy with the mount, they do offer another style but its not much better and still wont solve the issue.
After some research I found an old thread on the vintangemustang site that as the very same issue as I was having. There was a post talking about reclocking the manifold cover on the compressor itself to achieve the ideal line position. This compressor is not really meant to have the cover clocked to a different position(at least not by the end user) but nothing inside indicates it can not be done except for some roll pins holding everything inline.
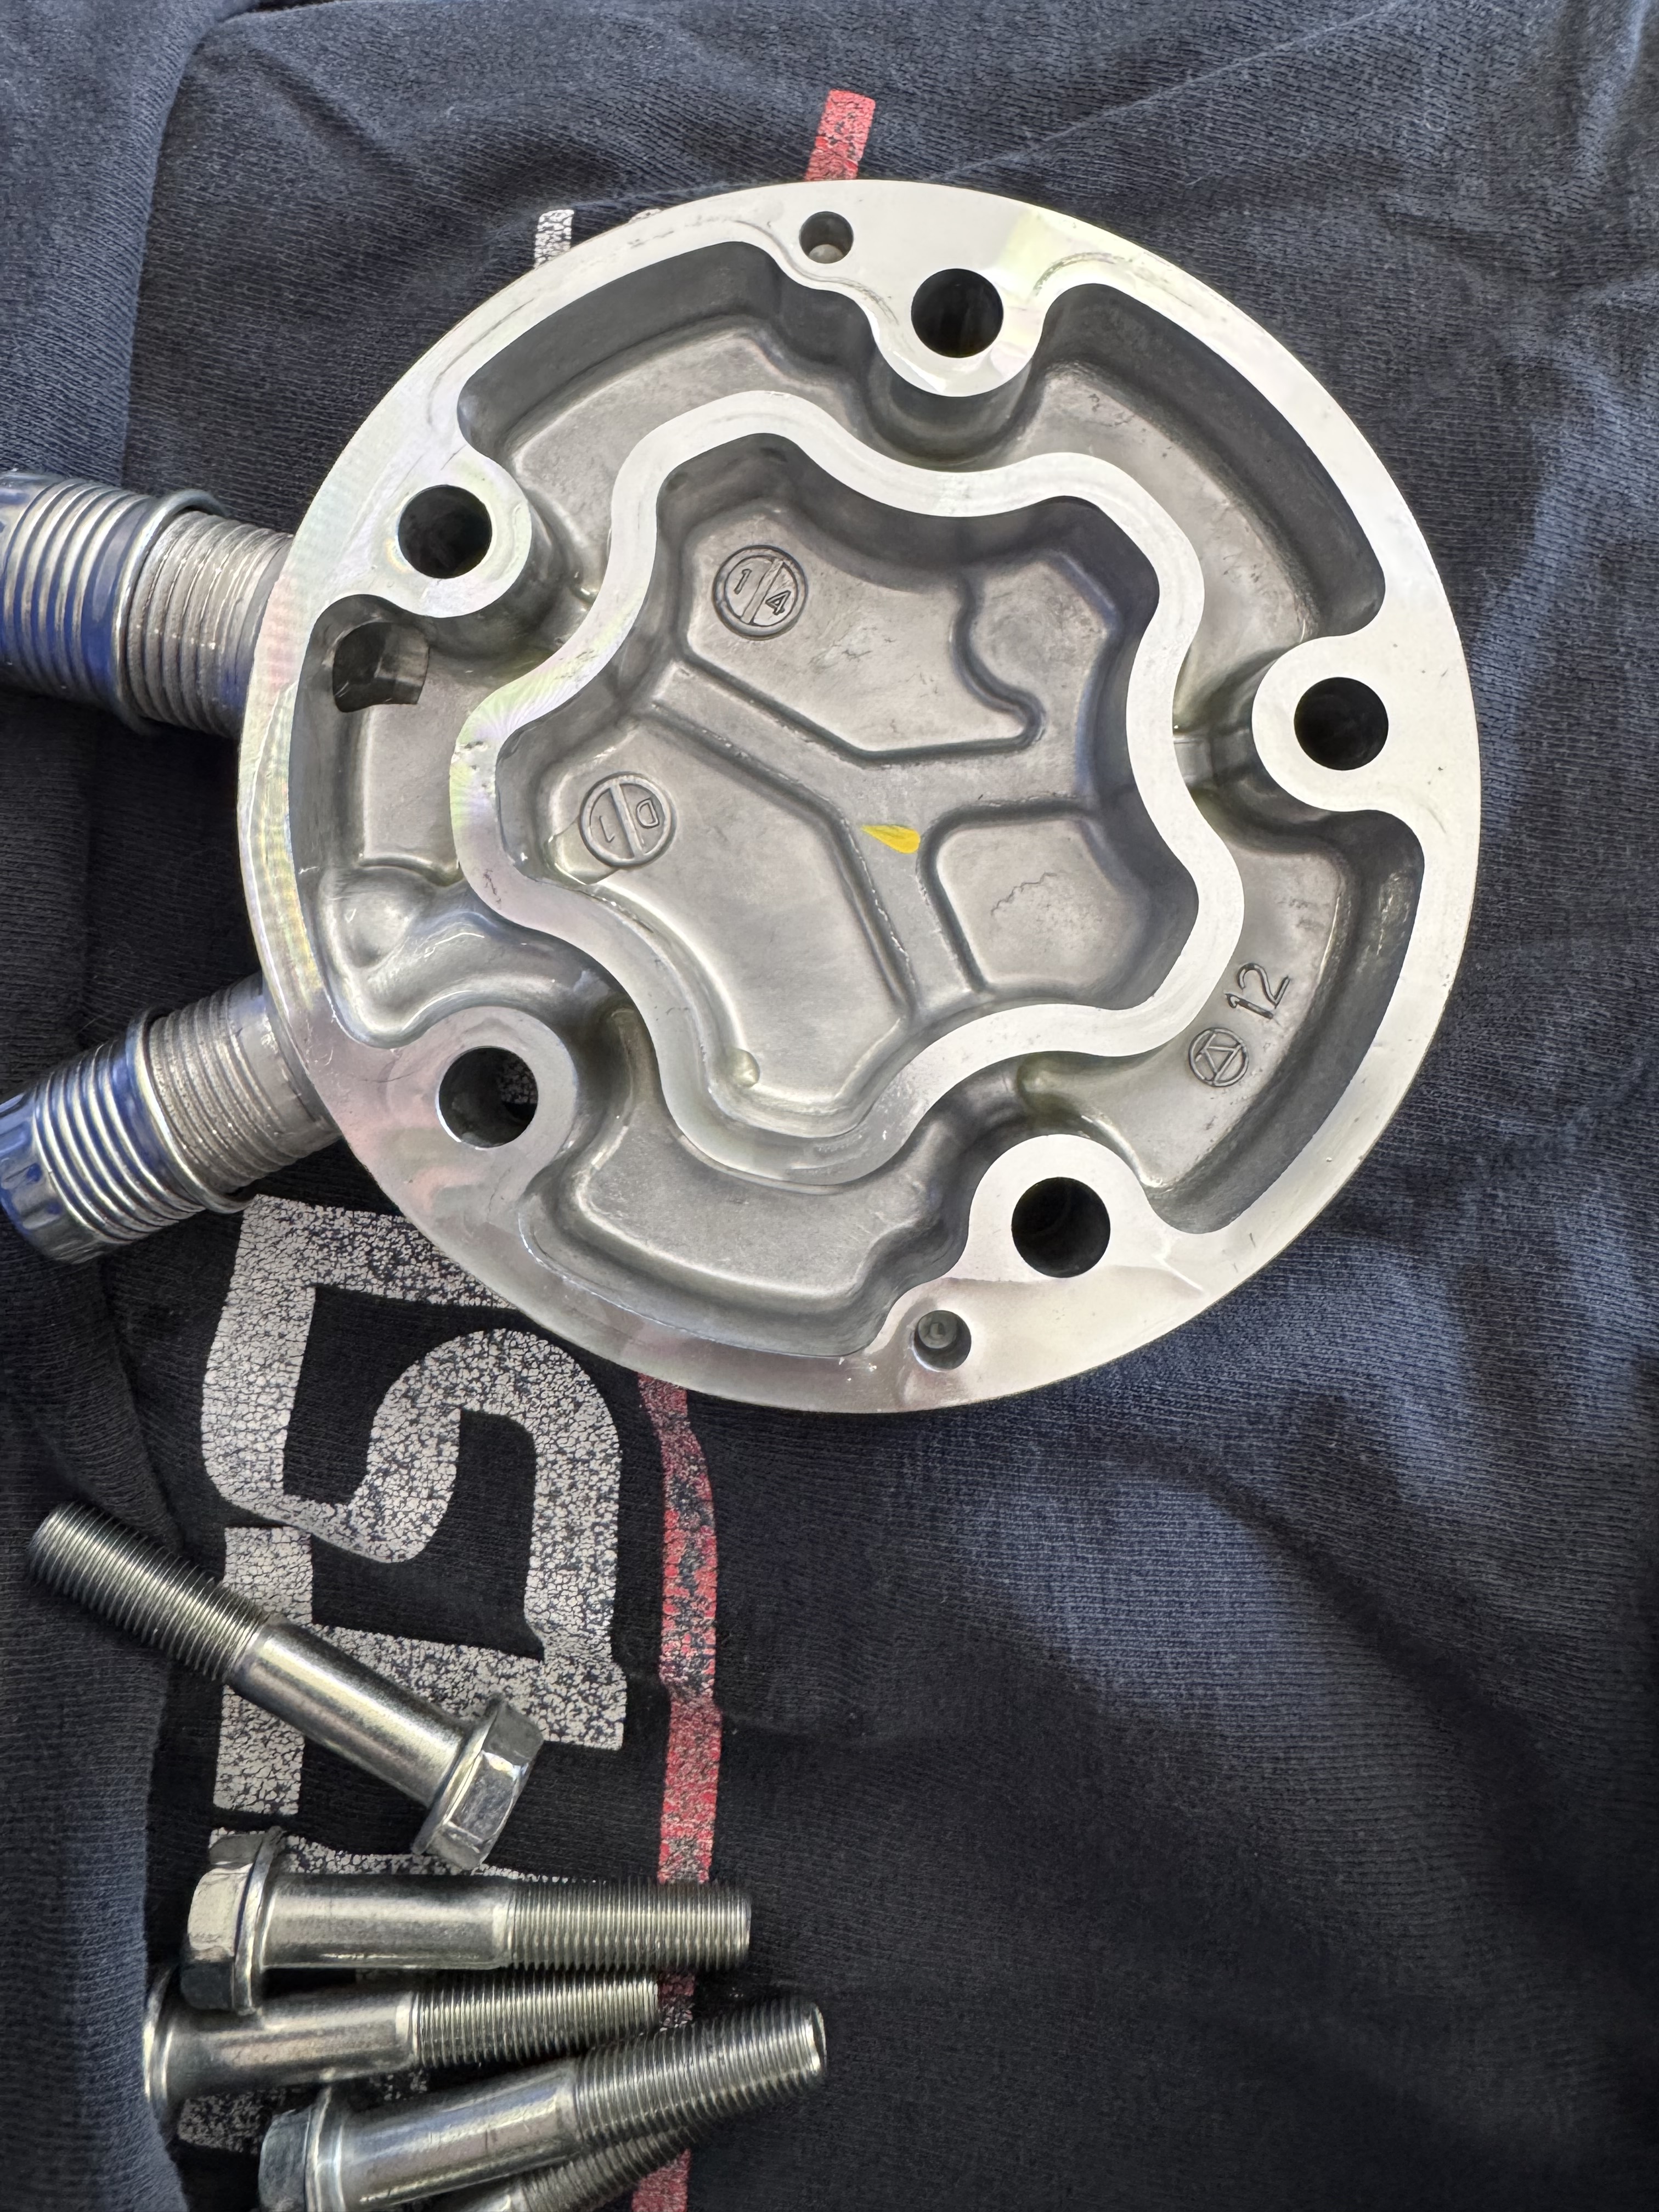
I pulled the rollpins out and ground them down enough to keep location of the reed plate and gasket but sat flush for the cover to be placed in any position
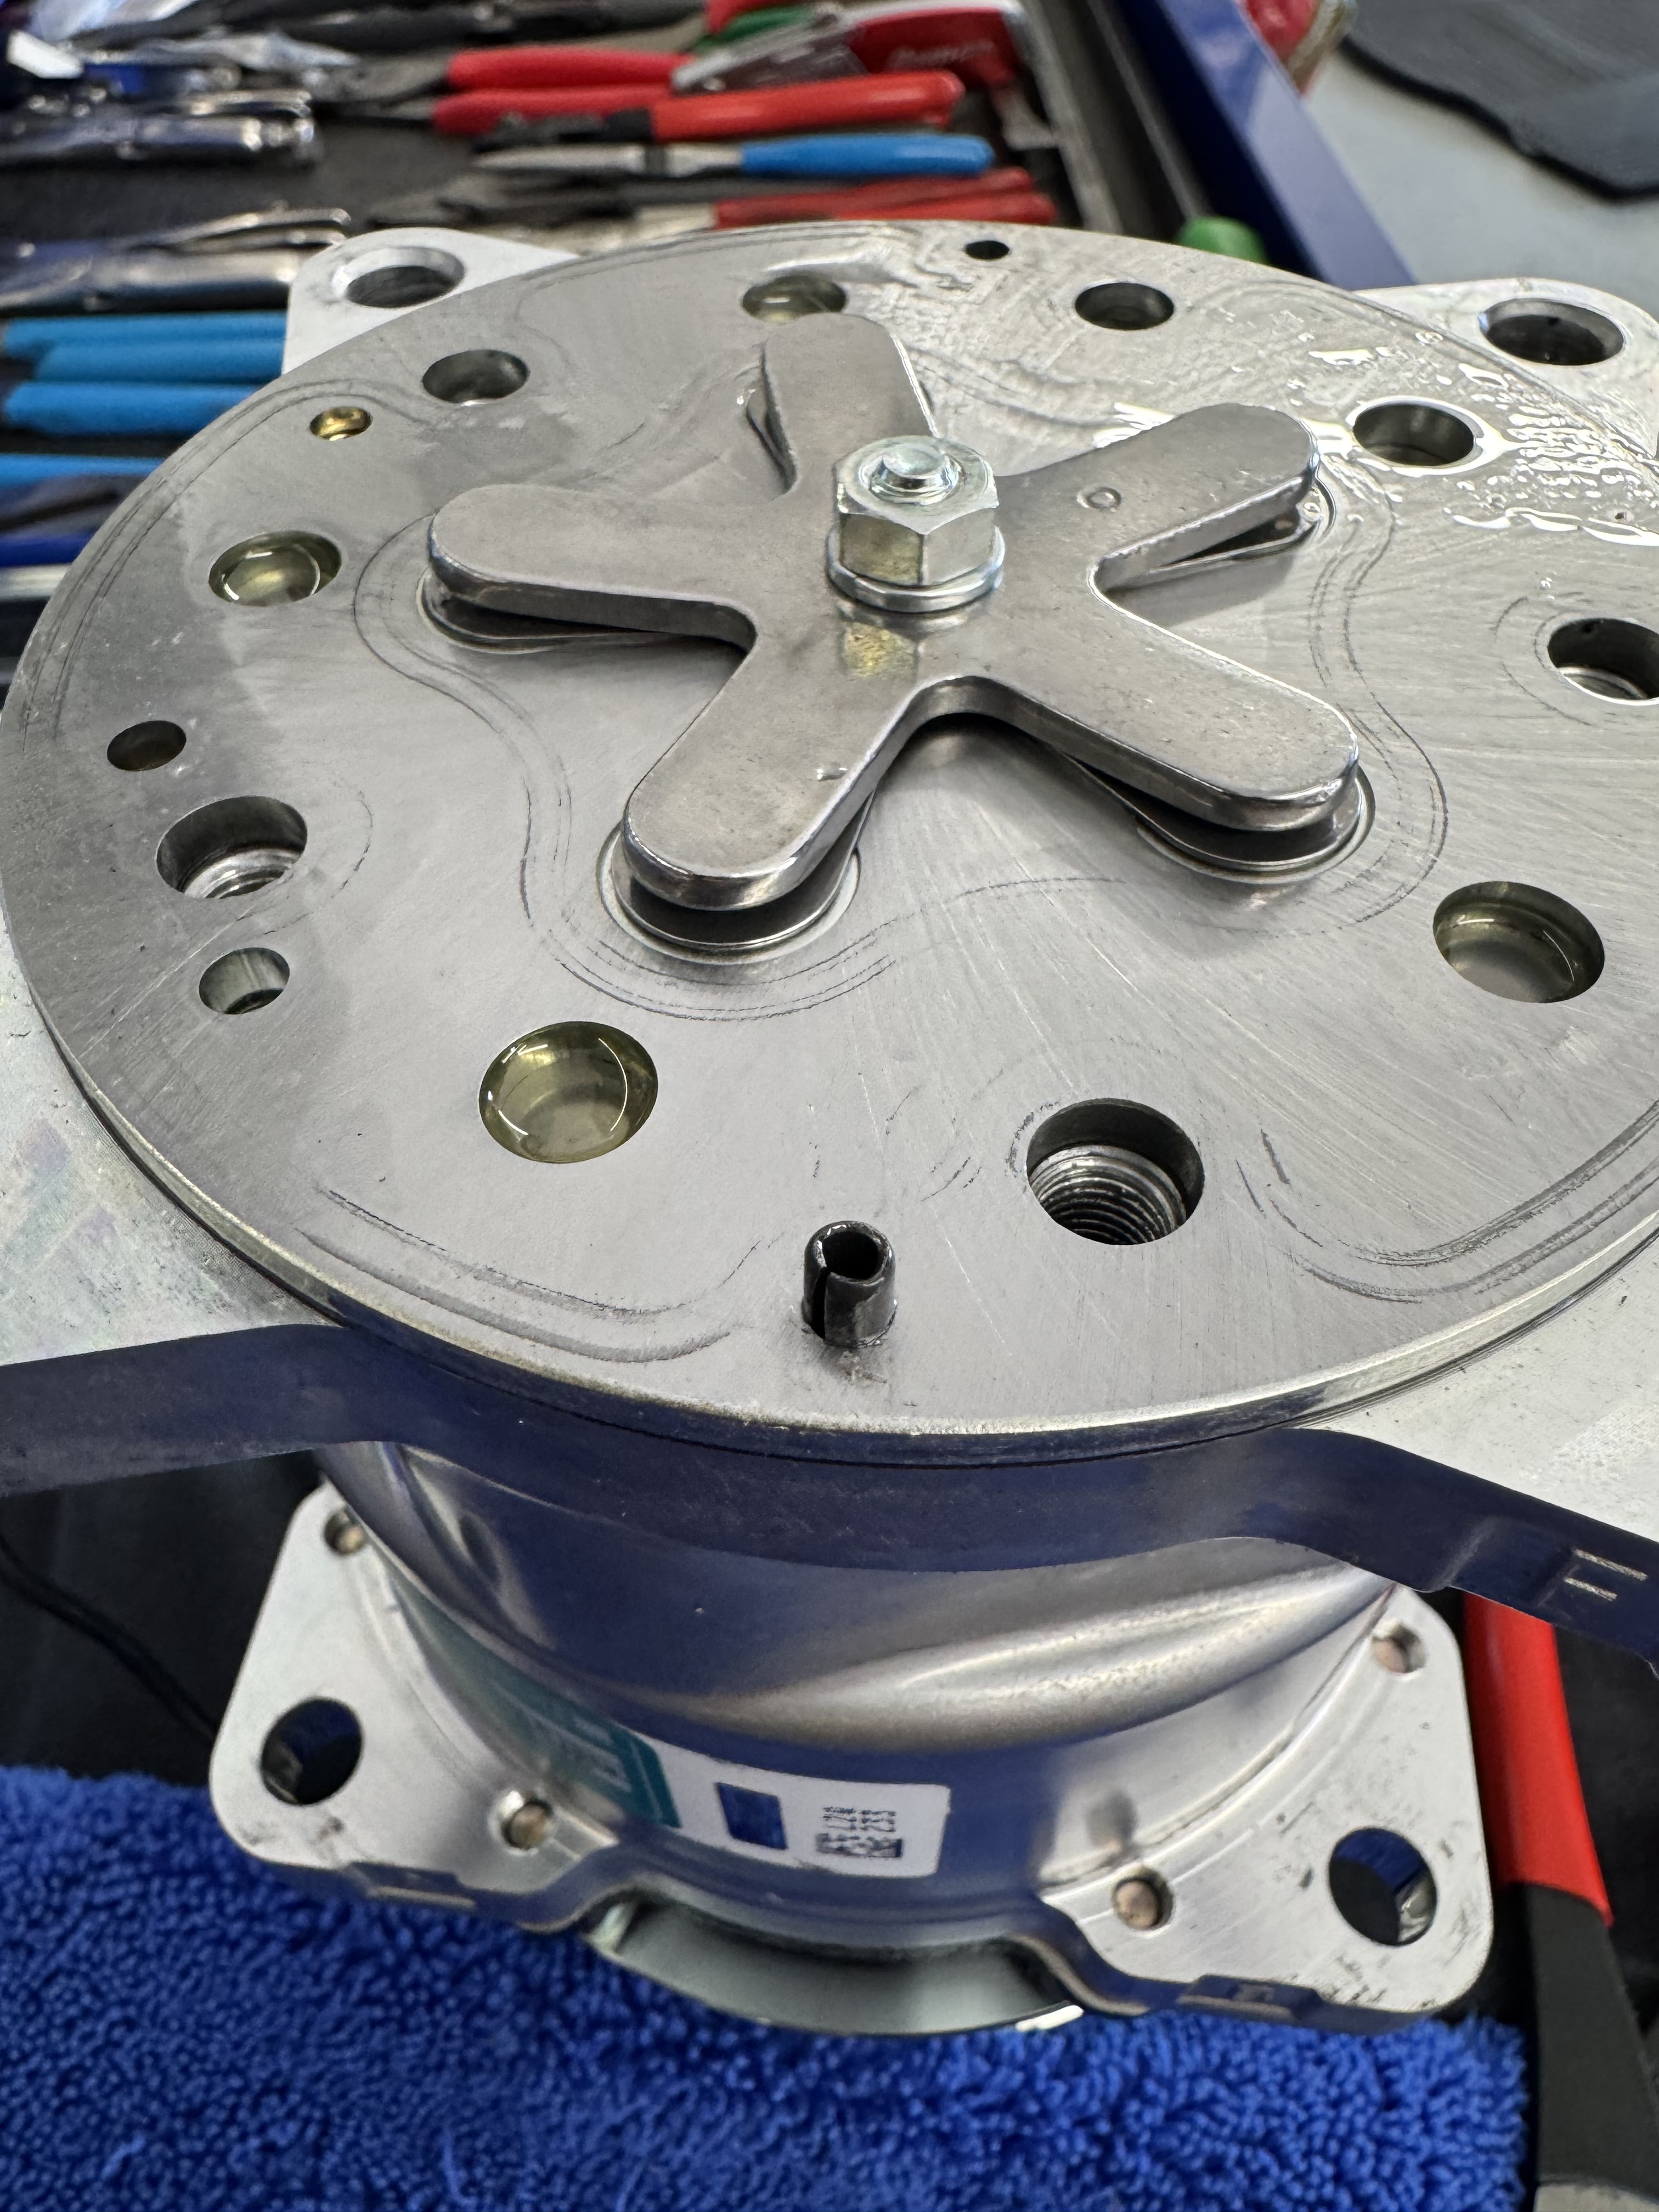
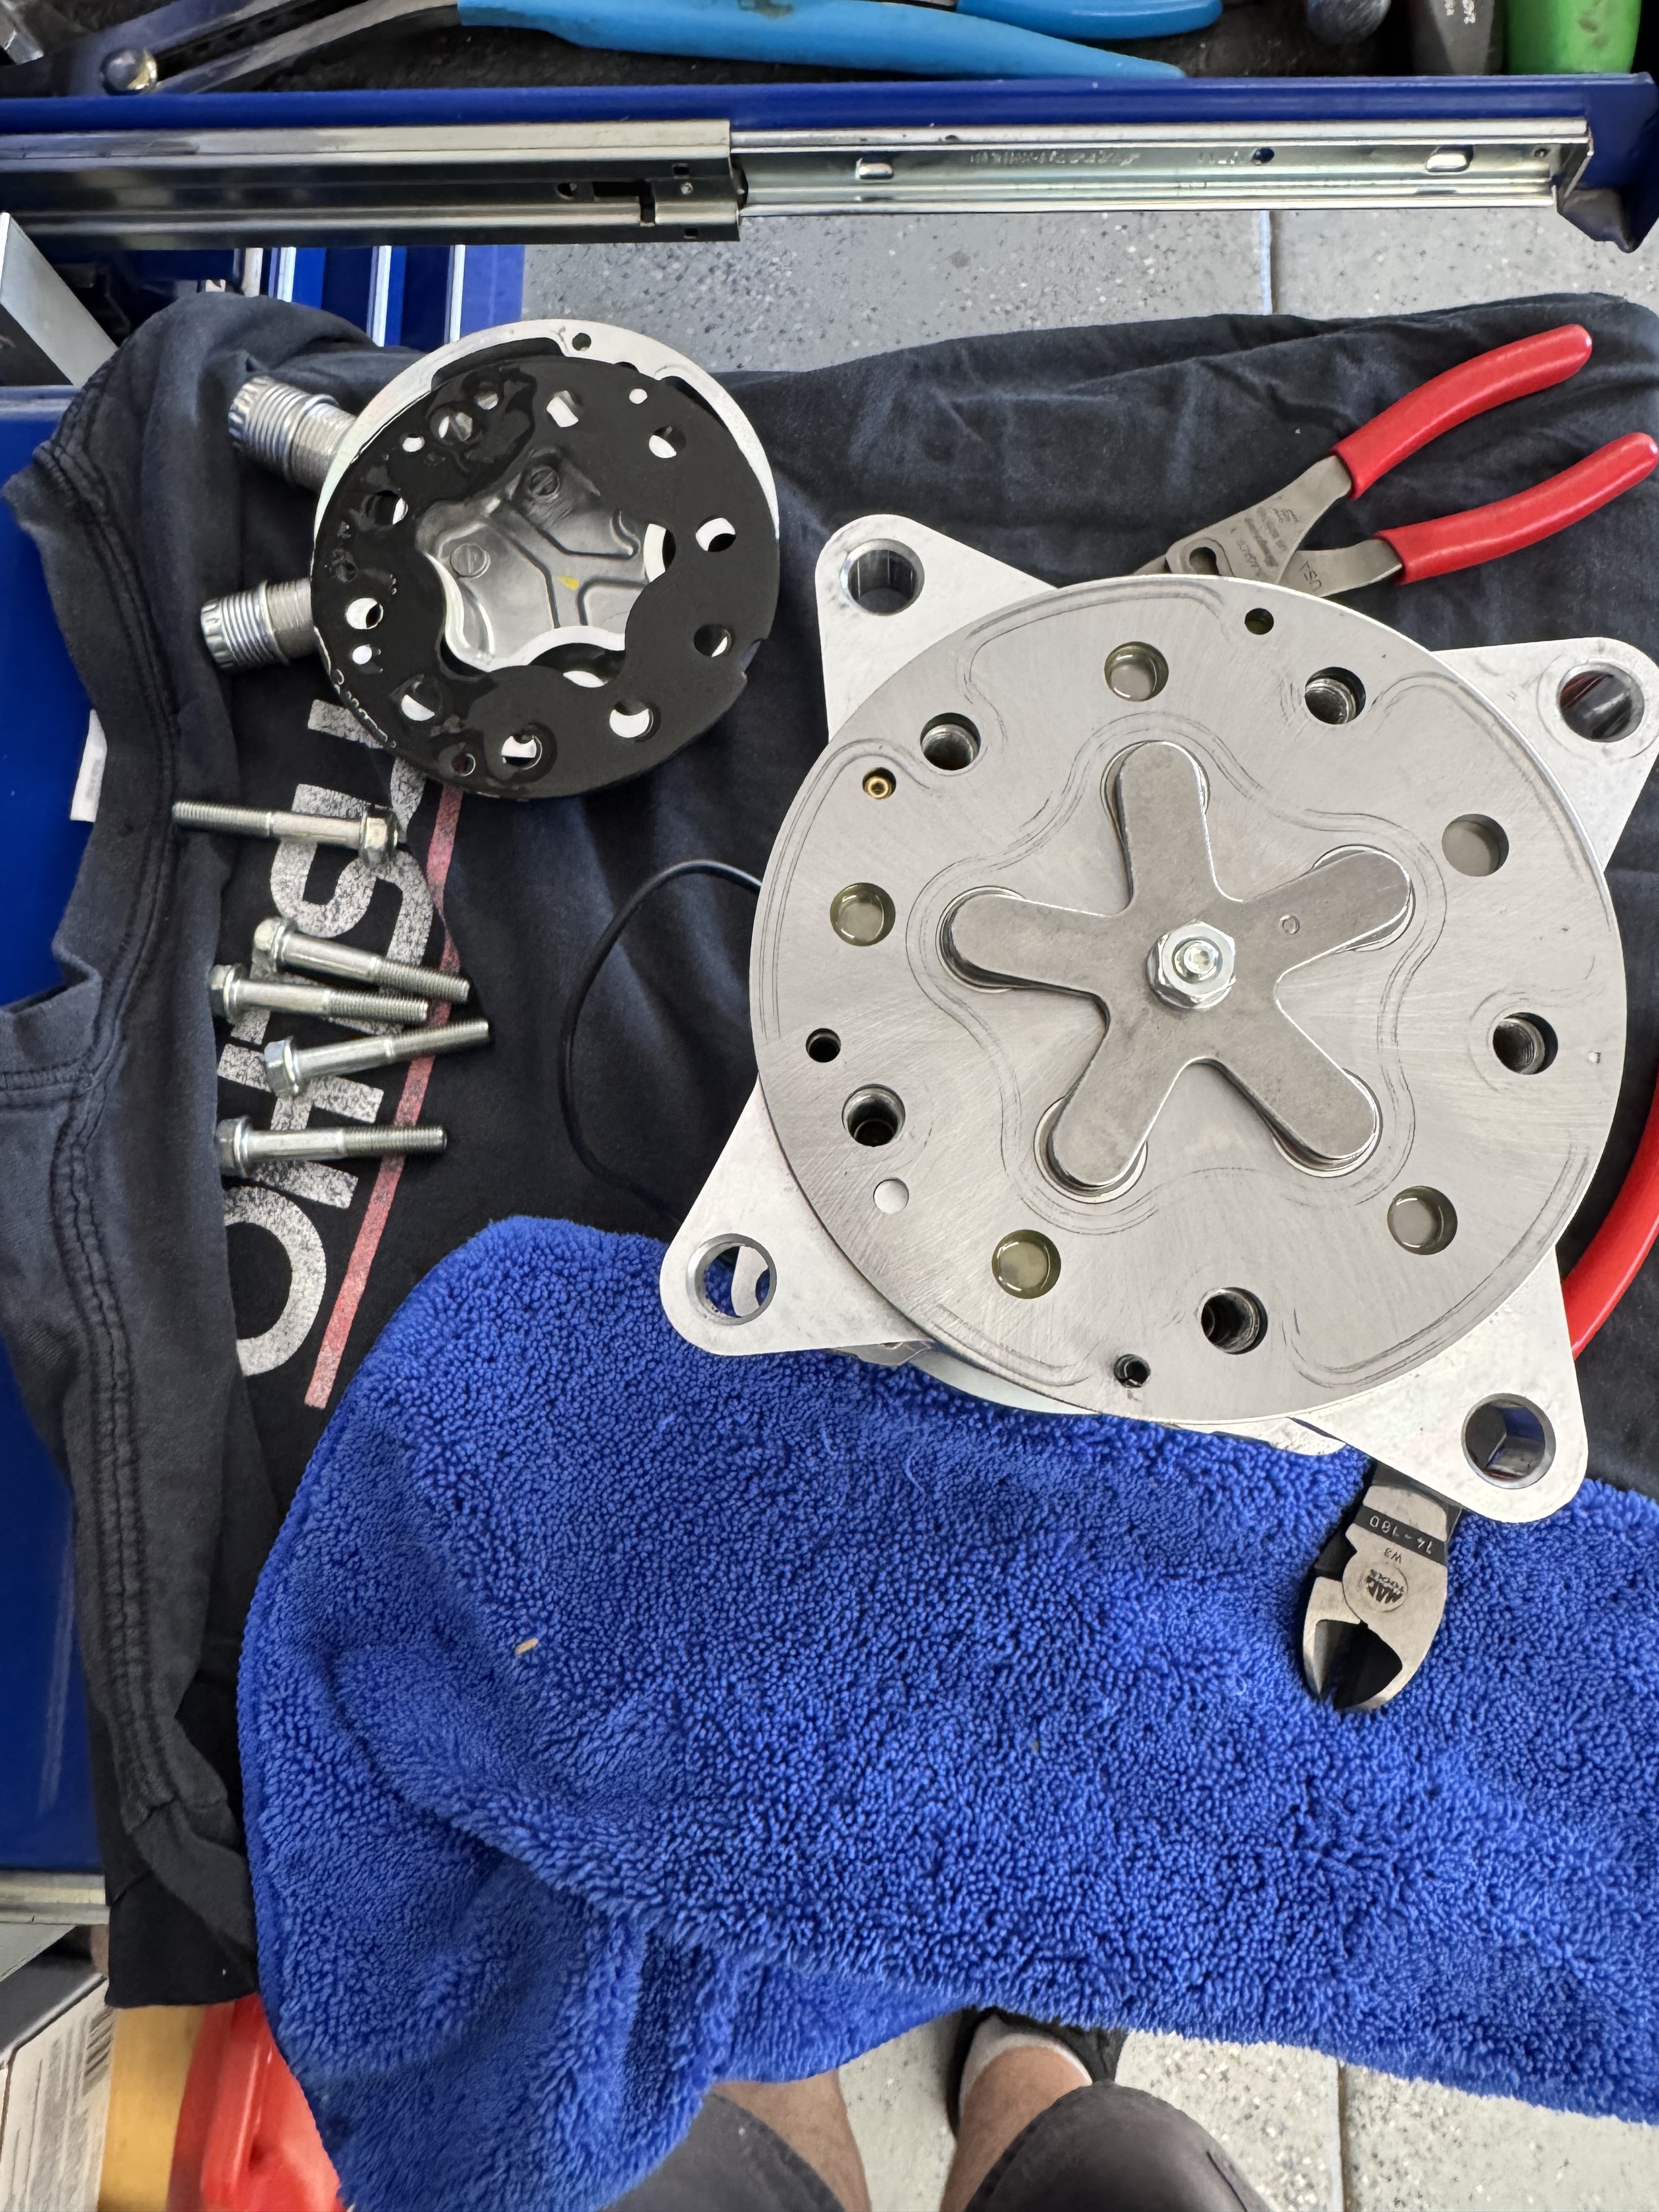
Only needed to turn the plate about 90*s, this gives a much better location for the hoses to hook up

Since my kit only came with one side of the hose crimped with a fitting I picked up a cheap ac hose crimper to install the others. Honestly if you can go this route I recommend it since you can shorten the hoses for your particular routing instead of a one size fits most hose.
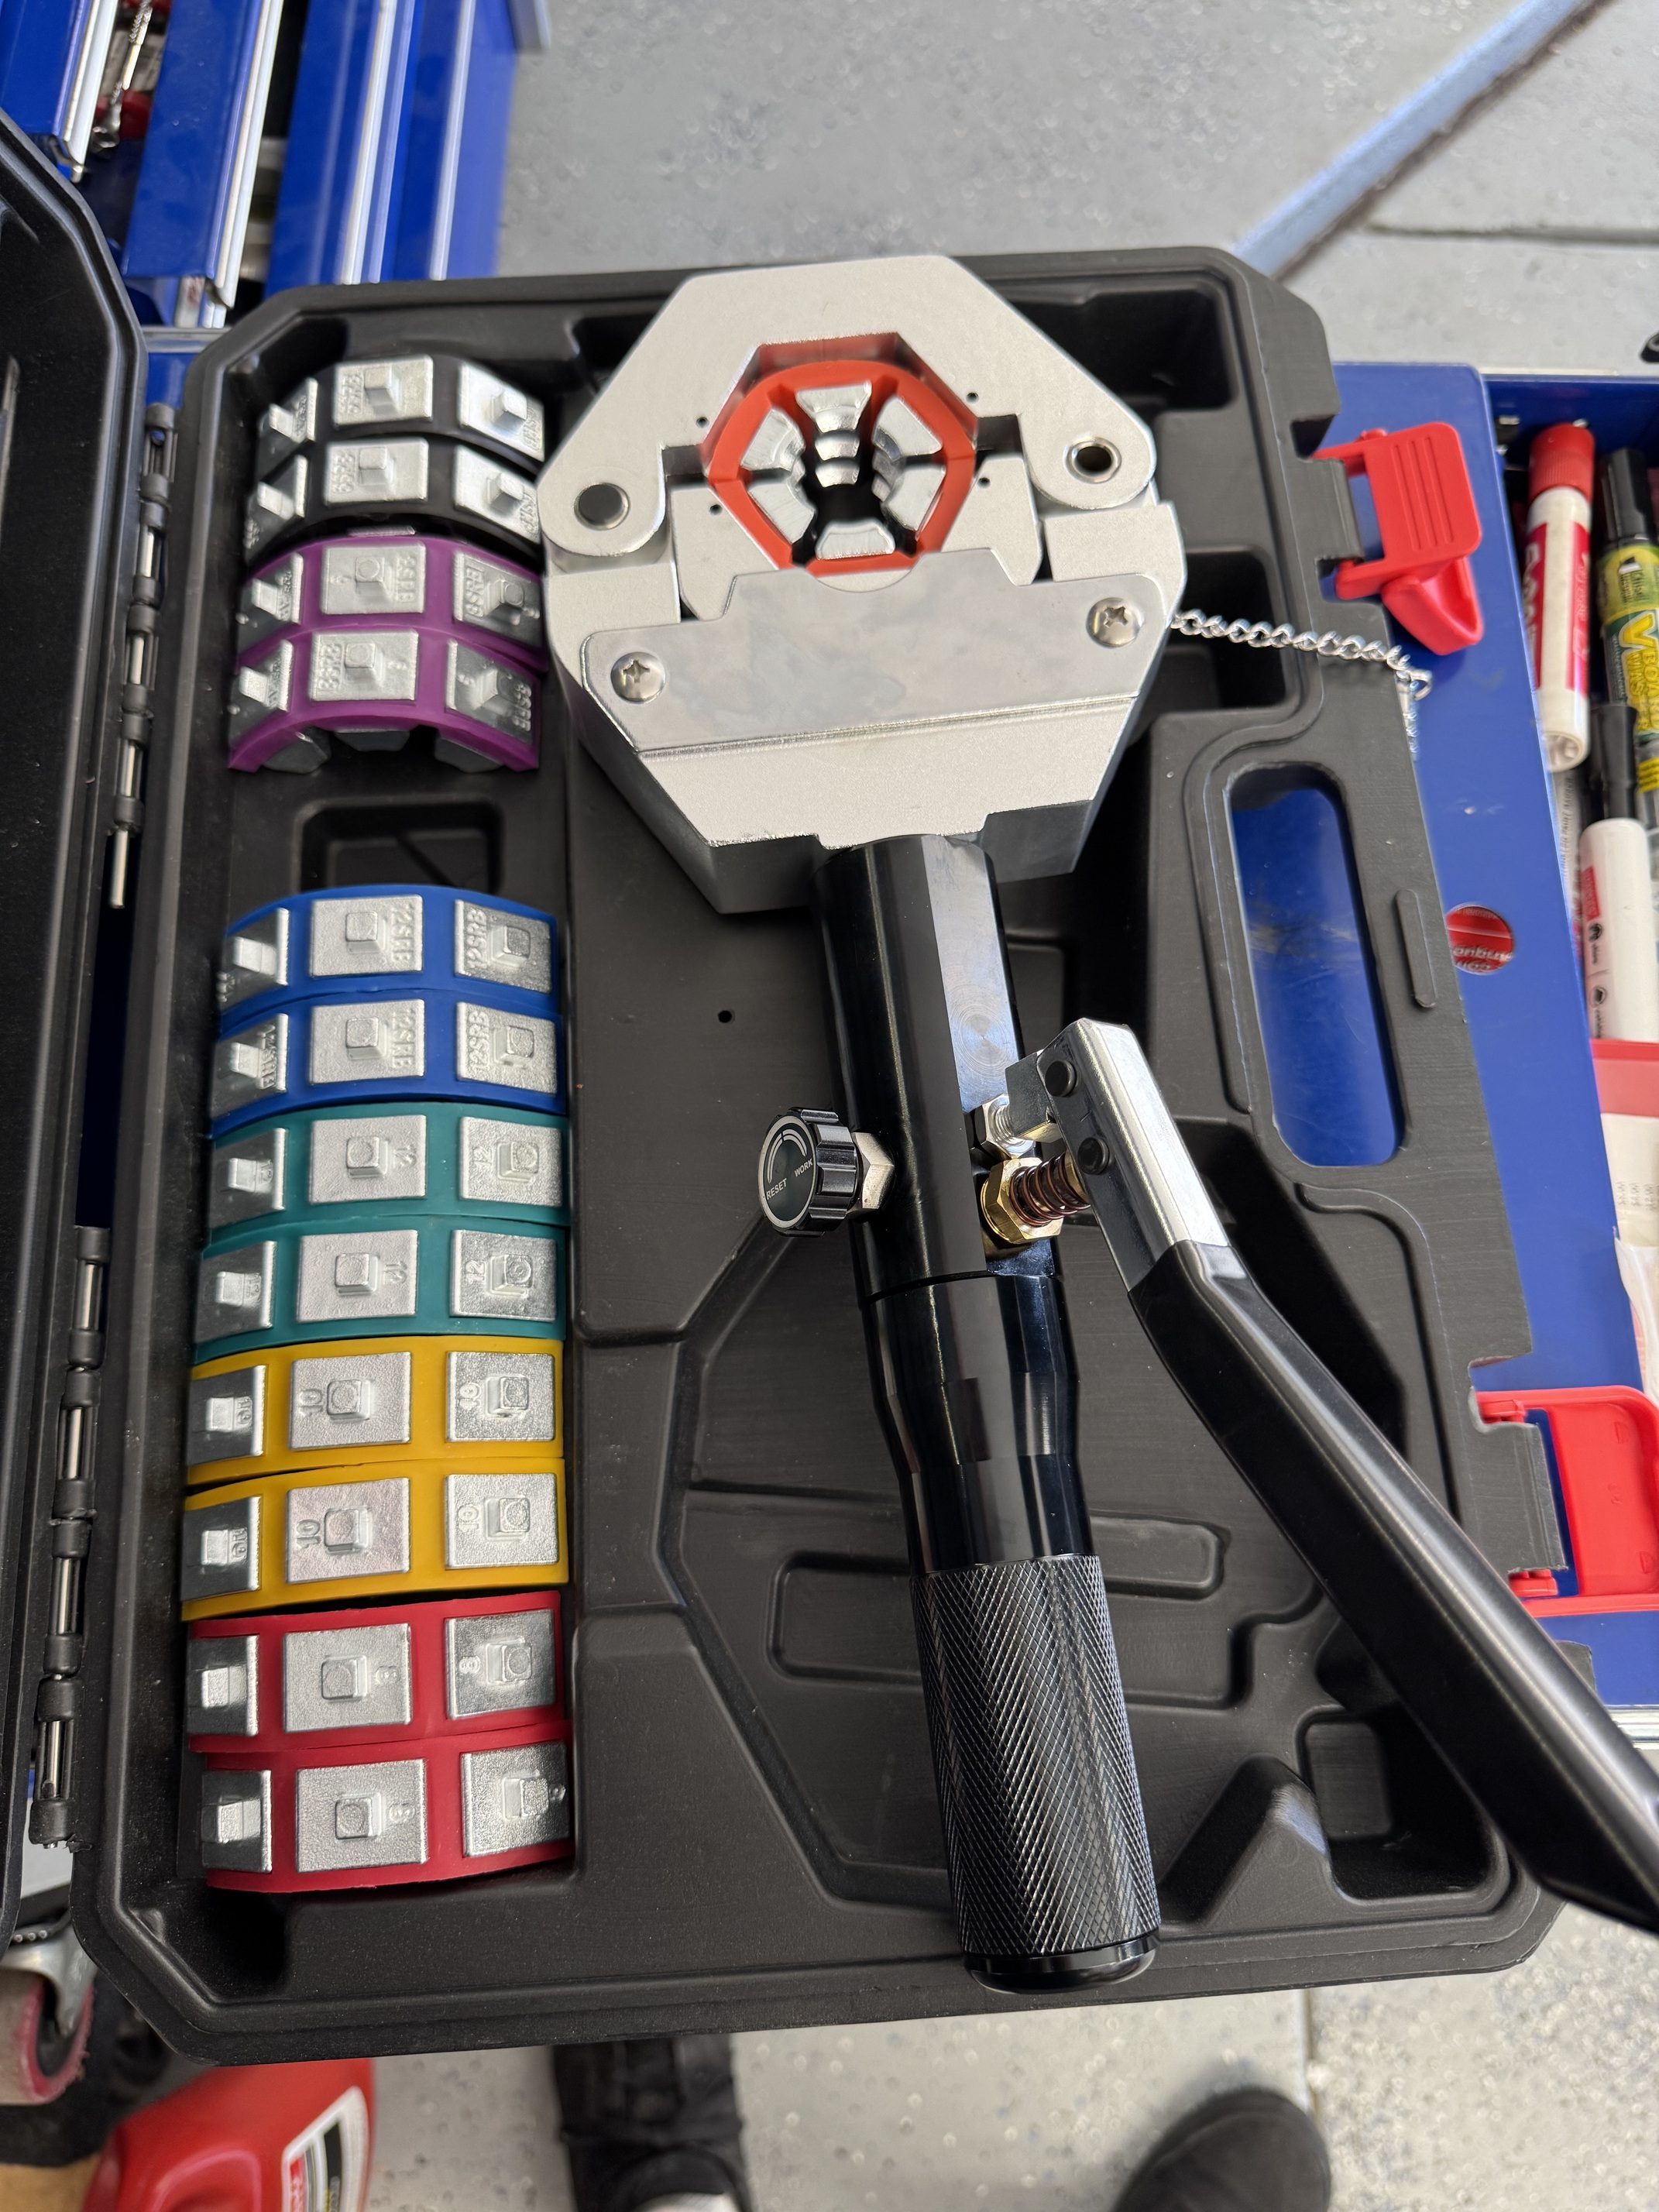
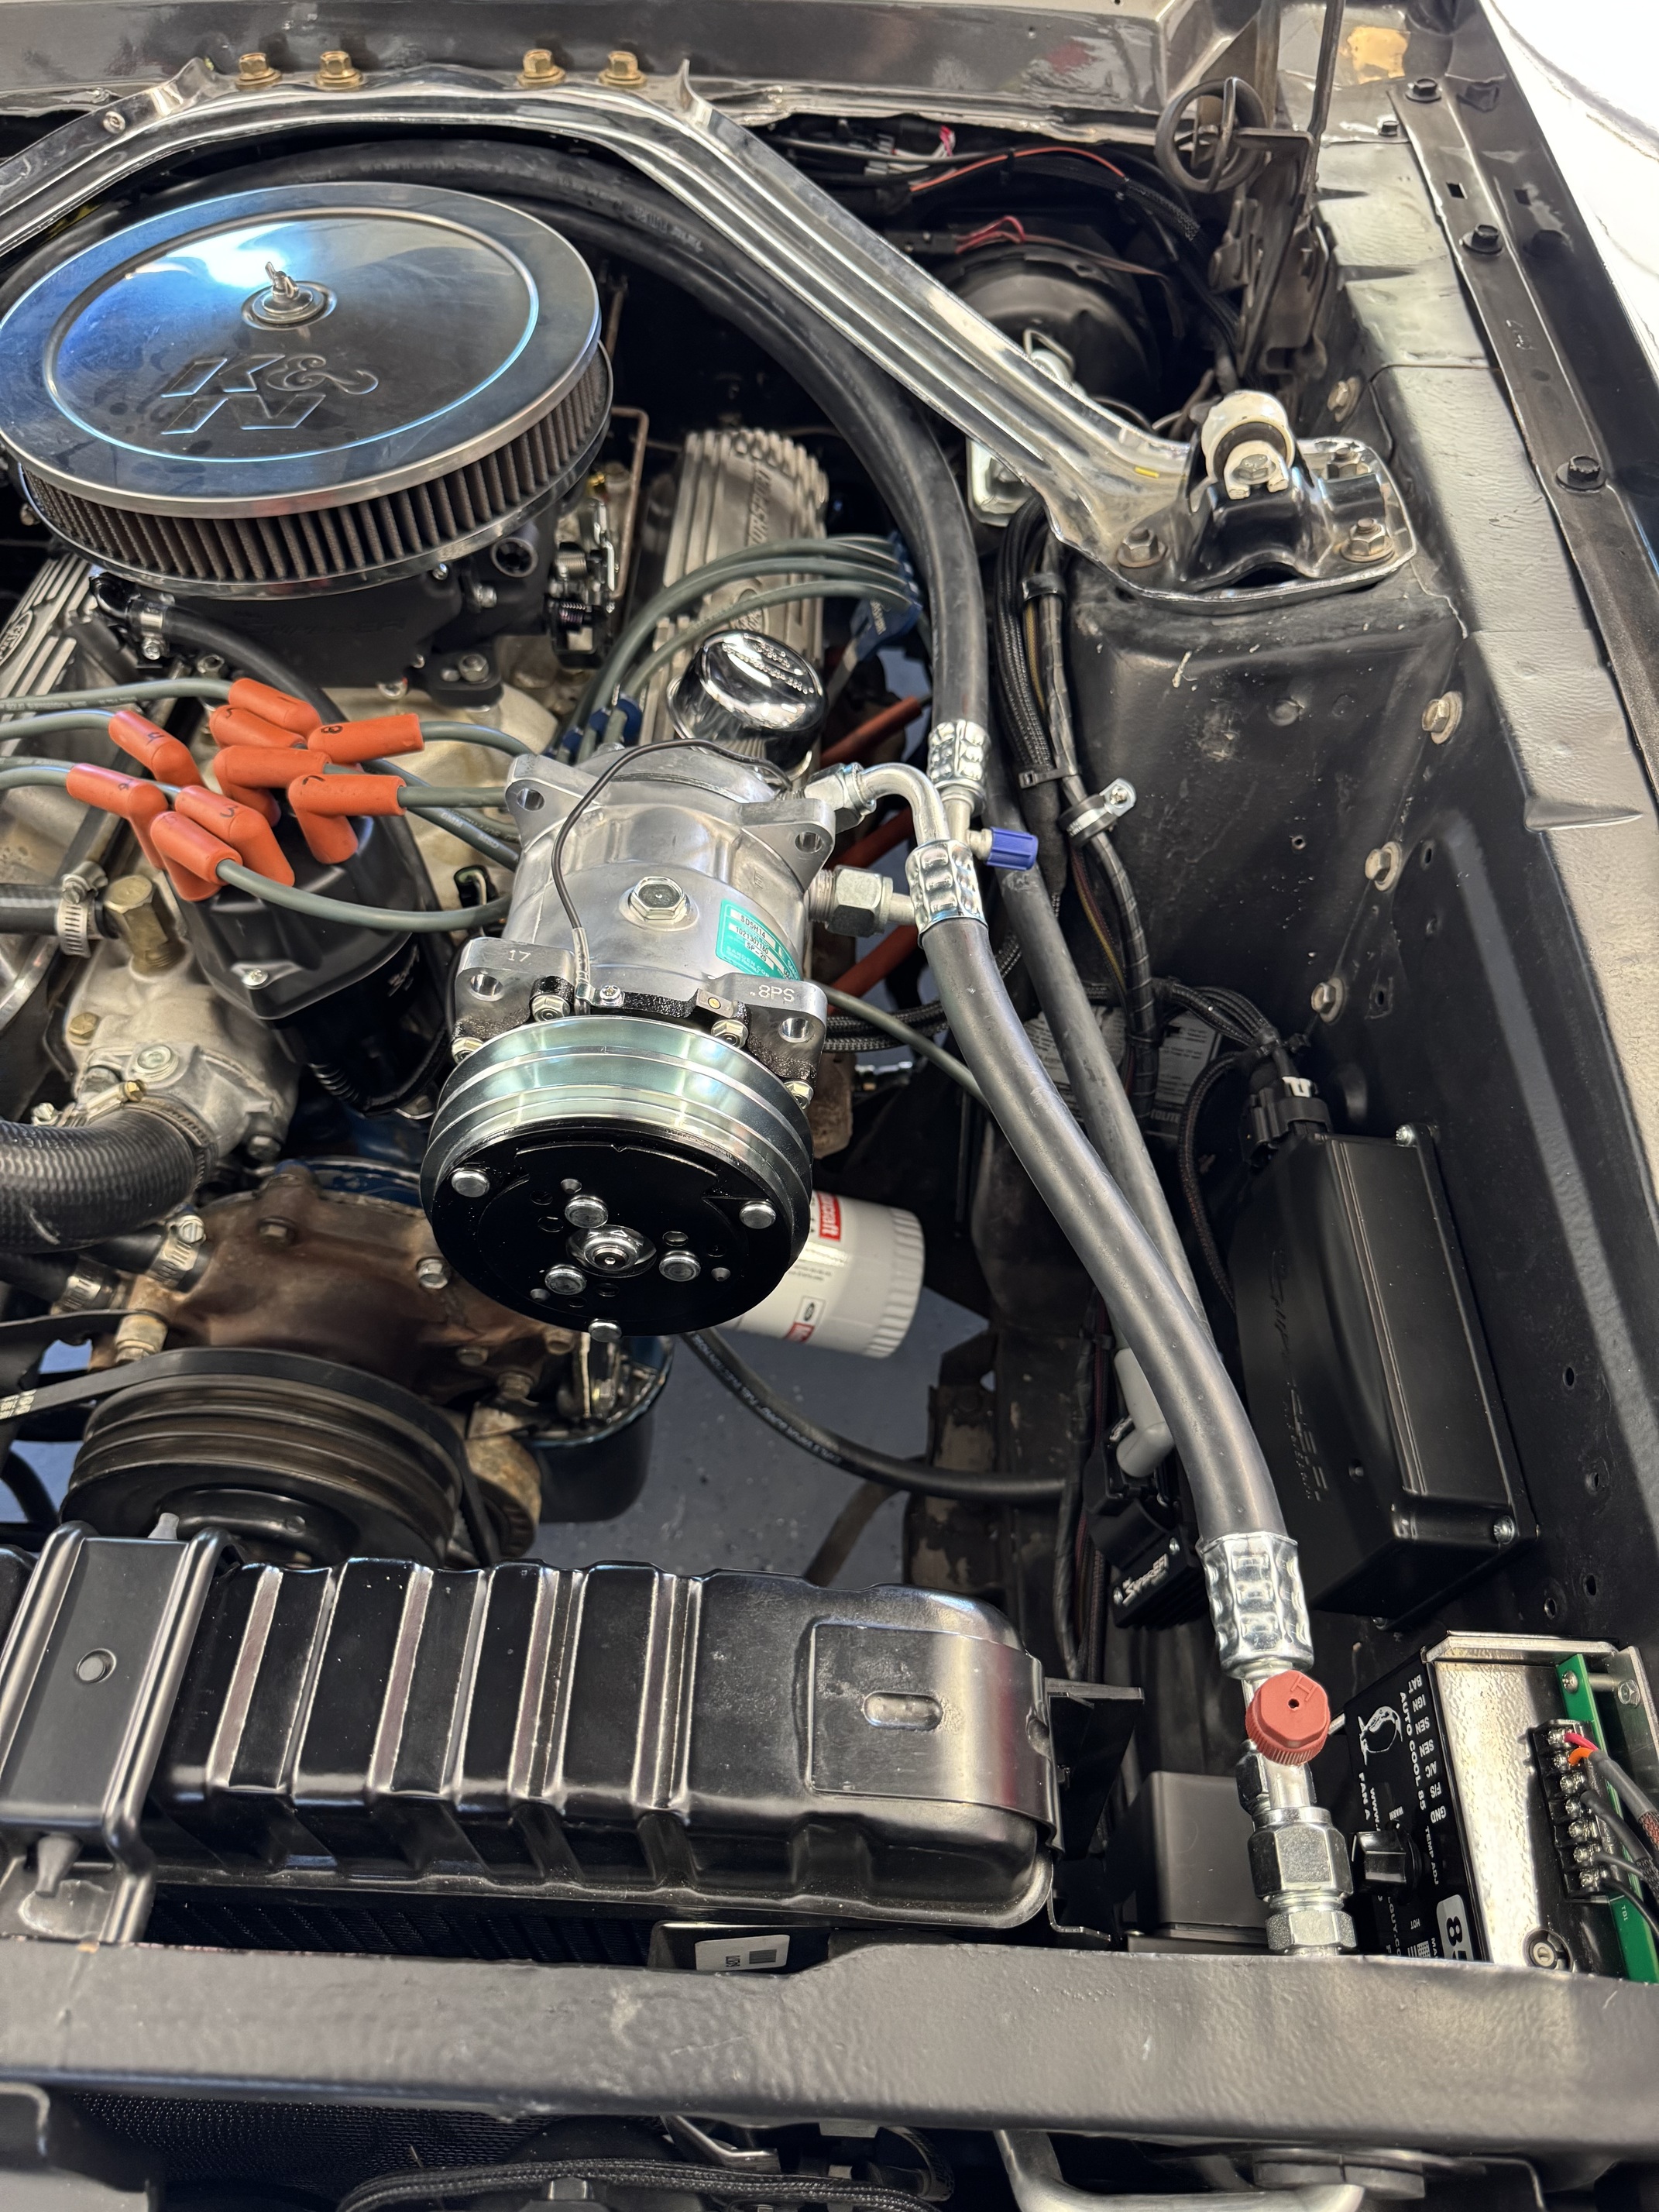
All hoses crimped and installed. Just need to pick up a belt and install the heater hoses then its time to charge it.

Man you are brave to do surgery on that compressor! Nice work though, and it looks super tidy under the hood with the custom hoses you did. I just realized with my style mount I have the fill plug at exactly 90 degrees. It’s been working fine for several years, hopefully it doesn’t hurt the life of the compressor. But I’m not brave enough to re-clock mine so I’ll probably leave it ![]()
So the fill plug at 90* should be ok if that’s your final position after the belt is tight, however for my bracket the belt tension is done by pivoting the compressor(much like an alternator) If you talk to tech support at vintage they recommend between 11 and 1 oclock positions however the instructions so up to 90* is acceptable. My issue was going to be I was at 90* at the shortest position of the mount however it could and would go past once getting a belt tensioned up. The whole issue here is the ability for the compressor to hold on to its oil charge during operation.
Also another advantage of crimping your own lines is being able to position the fitting and hose how you want it, No twisting and turning trying to make it all line up.
Once I eventually replace the engine I would like to find a more compact way to mount the compressor. It looks really odd to me and not as clean as I would like it. Part of the problem is I do not have a mechanical fuel pump or power steering taking up all that empty space below it so the compressor kinda looks like its just hanging out there.
Again, you do really nice work my friend!
At some future time point I want to add an aftermarket AC unit to my car. I bought a complete collection of the interior parts from Gary (Katnip302) as I like the look of the OEM bits. What was the deciding factor to buy the Vintage Air system instead of another brand?
Thank you sir. My engine bay drives me crazy still but it’s getting there. Can’t wait to be able to replace the engine so I can clean up the bay much more.
I had considered going with factory ac and using a modern sanden compressor but since my car is a non ac car I would need everything to convert over and I felt that was more cost prohibitive then going with a setup like vintage. I picked the vintage kit based on seemly most complete kit, popularity and customer support before and after. I also felt they would be the best for future support of replacement parts. My only real gripe is I wish I went straight to vintage rather than NPD for the kit.
One thing that I think I would have preferred OEM over would be the air distribution, running all those hoses is kinda a pain and takes up a lot of room.
They now they have an updated system that addressed a few of the issues I’ve encountered and had to work around. Of course this has happened to me 3 times so far. Sniper 2, EPAS system and vintage all made updates that would be nice to have now. Been sitting on all my parts for too long!
Yeah I get that with the updates! Street or Track and FiTech both have had some nice upgrades since my purchases. Oh well!
Why the reservations on buying the Vintage air system from
NPD? I ask as I just left their MI location with a load of parts!
I also get it on the under hood look! I’m trying to get my new to me engine installed but life keeps throwing me curve balls these days-my
mom passed away in April and my Dad’s dementia has gotten dramatically worse since she died. One of these days.
Nothing particularly wrong with npd(countless orders from them in the lpast)but the kit they had been selling at the time was supposed to fit a cougar but clearly didn’t it have some of the cougar specific parts needed. I had to call vintage and order the parts I needed. At the time I was not aware I could buy direct from them and not go through a vendor. This may have changed as it’s been a couple years.
For example one of the dryer lines wouldn’t fit due to how different the cougar head lights are. The line was included was for mustang and not Cougar. Also the dash vent adaptors did not fit the cougar vents so had to purchase those separately as well.
Not really a bit deal but could have saved myself some time and money by just calling vintage direct and ordering the correct kit for my car.
After about 5 attempts to finding the correct belt (since most local parts houses can’t be bothered to pull a part of you can not provide an application for them to look it up)I found one that would work.
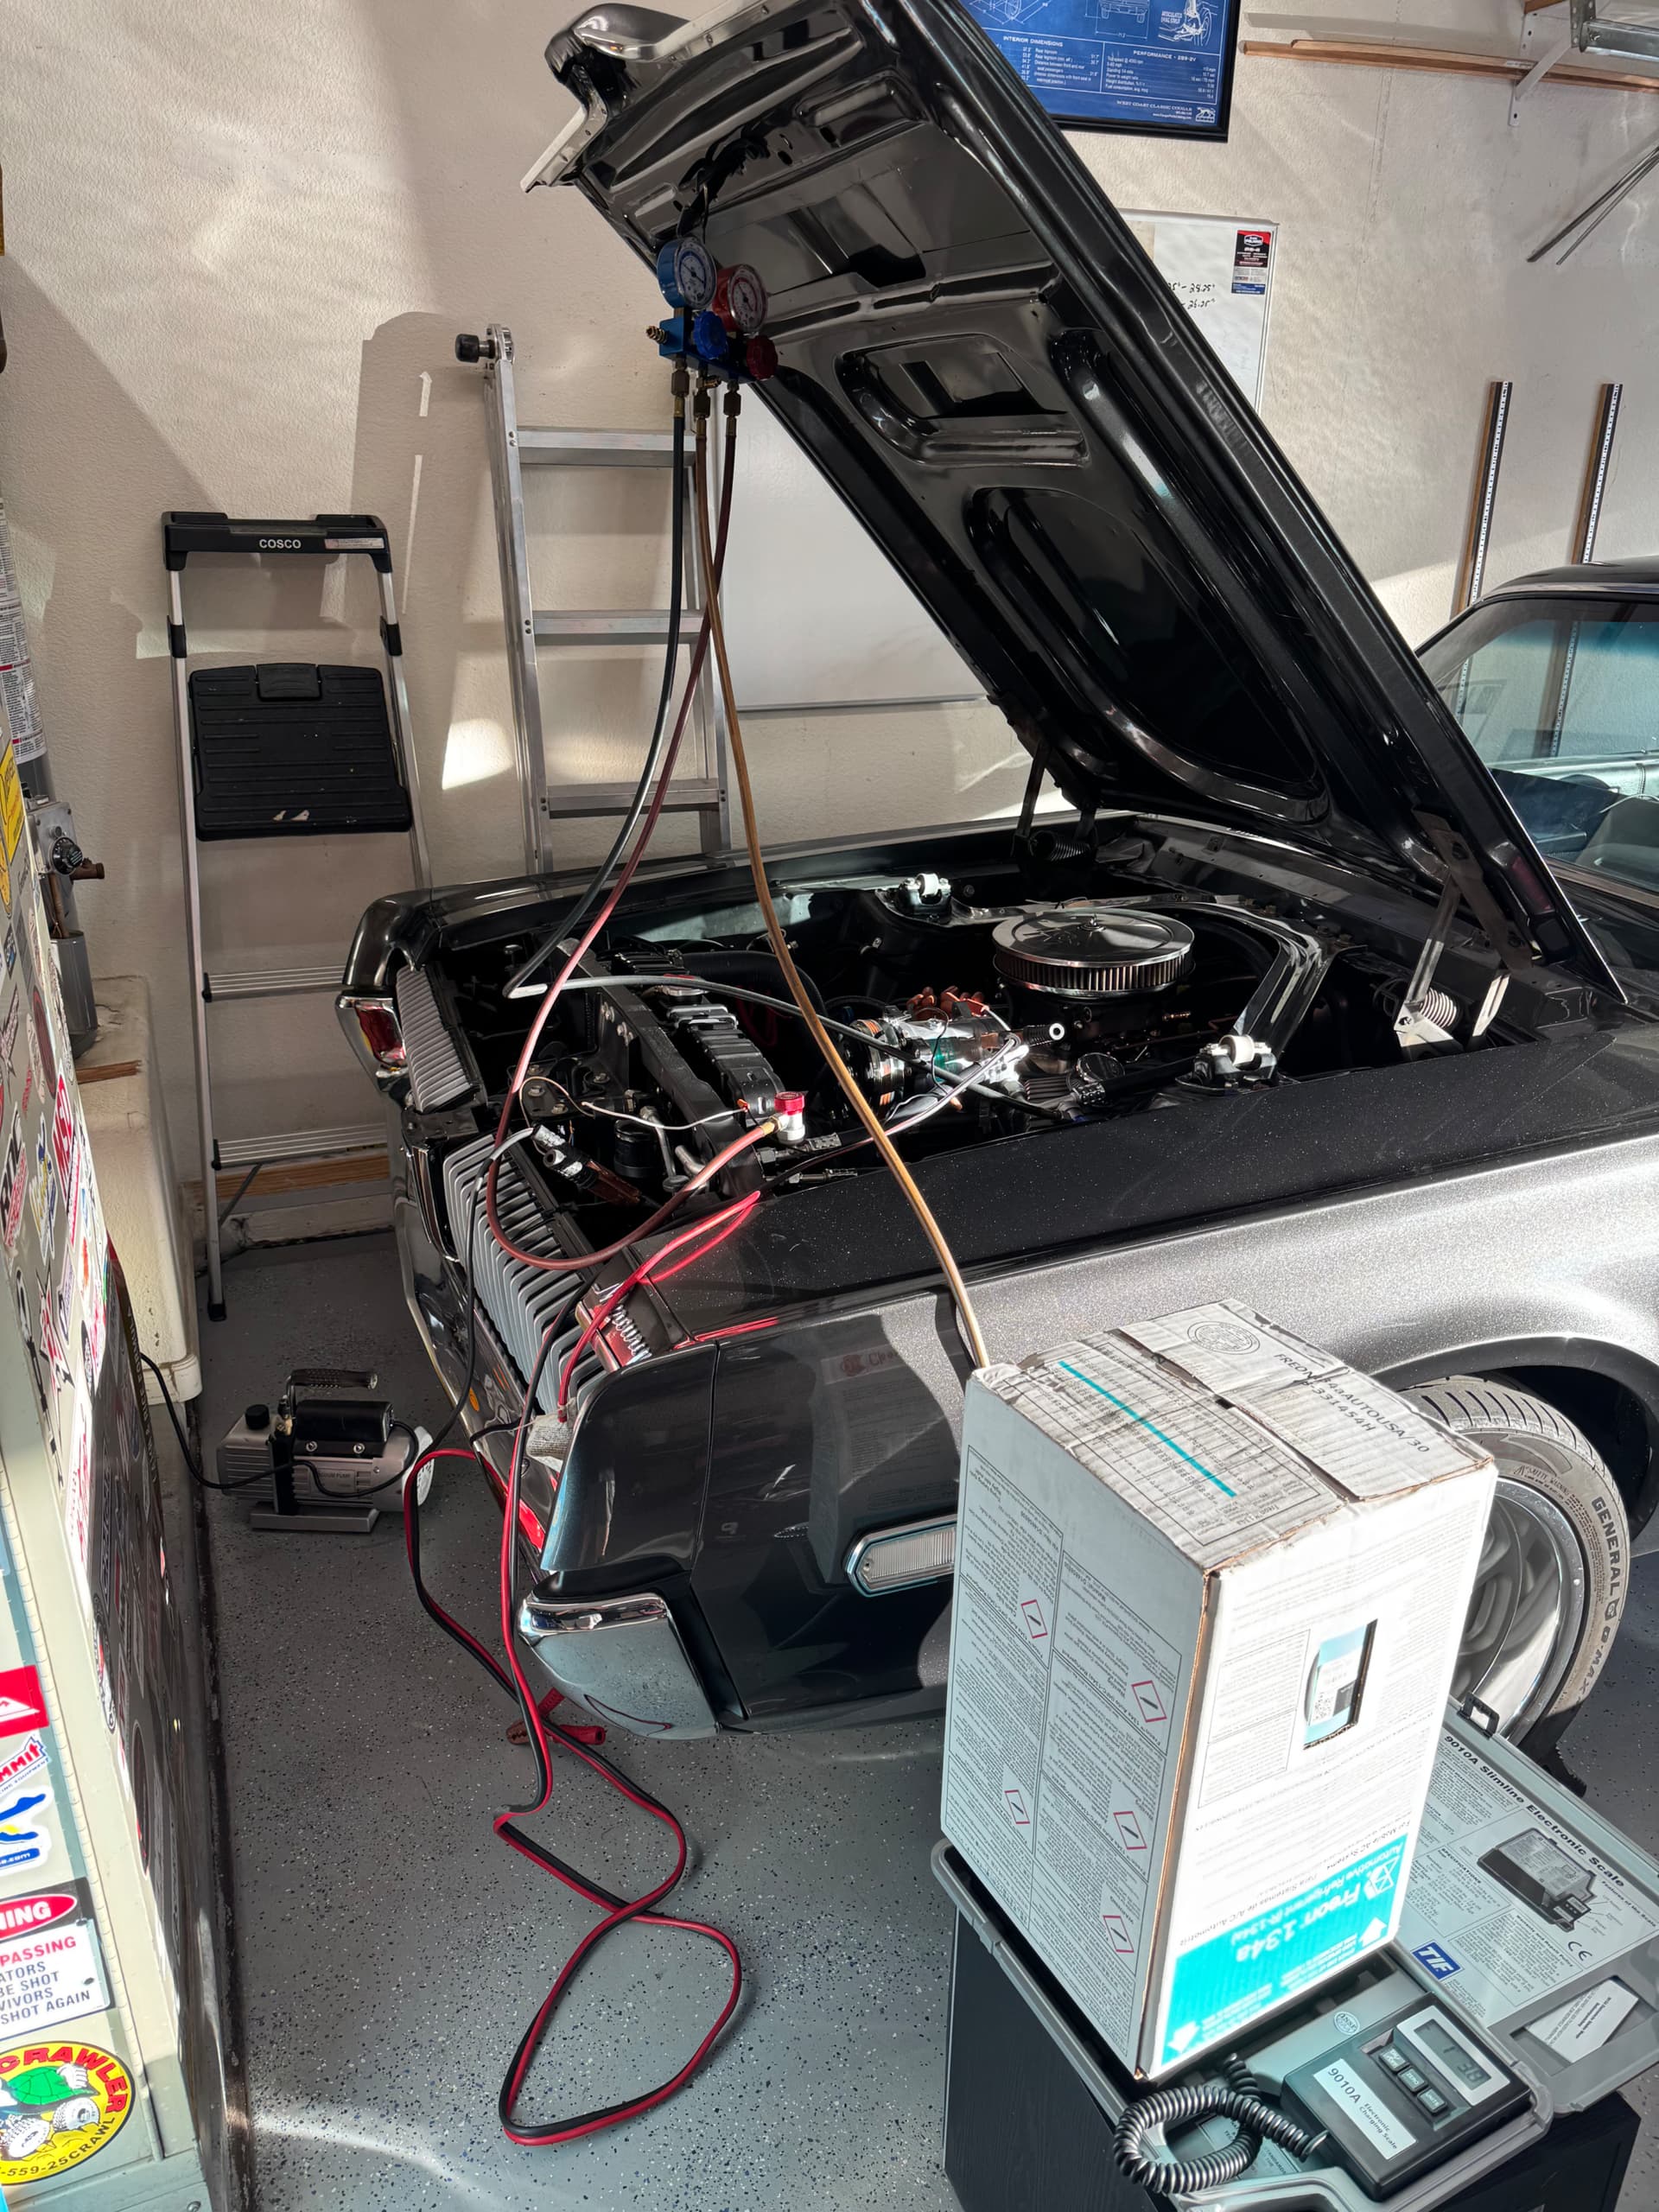
With a belt finally installed I couldn’t help but charge it. I still needed to wire up the compressor, fan module and efi to know to adjust idle with ac on. Not having time for that but anxious to charge it I rigged up the compressor wiring to at least test it out(look close for the wire nuts!). Quickly found out I needed to add a ground to the ac compressor as it would not engaged when turned on. Solution: hook up a set up jumper cables to get a quick ground. Once the compressor was engaged I completely spaced the fans not running on a cold engine. This will cause the high side pressure to increase beyond normal pressure. I have a manual override switch that can run the fans at 100% but that’s not likely where the fans will live during normal operation.
It’s been a minute since I’ve charged anything manually without a machine and my equipment was just not playing along, vacuum pump sucked and had a leaking fitting on the pump. Ended up having to creep the charge level in based on pressures but not having my fans dialed in first may have upset that
While everything seemed to work just fine and had cold ac inside for the first time in its life I do need to fine tune some things. I need to wire the compressor correctly and add a ground wire. Add a signal wire to the efi for idle control and signal wire to the pwm fan controller for fan speed control. From there I can set my desired fan speed when the ac cycles and double check my charge levels. Oh and still need to install the heater valve and hoses.
bonus was no issues with the ac compressor after reclocking the head .

.
1 Like