70 undercarriage restoration colors/patterns

Does anybody have detailed pictures of their undercarriage? I have tried to find the correct color scheme’s/patterns online but I get snowblind after a while of looking at nothing but mustangs. The car is currently on a rotisserie and has been cleaned/media blasted. I remember the color being a dark green/olive color in the tunnel area before being stripped. The exterior color was competition orange. Stupid me, I didn’t take photos of the paint and markings before! This is a 70 convertible xr7 428scj 4spd car if that make a difference and is a Dearborn built in april 1970. Thanks in advance!

Jon Jensen.

Should be pretty much the same as a Mustang. Great undercarriage document over on the Concours Mustang forum.

http://concoursmustang.com/speegle/Articles/70/70%20Dearborn%20Undercarriage%208-2017%20v3.pdf


Underside of my own '70 Dearborn built car is also a dark olive metallic color.

Wow! That’s an incredible amount of info! Thanks for the link.

Jon Jensen.

Too late now but you should have tried to find and document what colors were used on your car as we can’t tell you now what was used. Since you provided that the car was built in April at Dearborn we can at least look for cars built around the same time period for at least some documented information to back up your choice going forward. Will look to see what I have for that month. Will likely be Mustang but as Mike mentioned, same workers, assembly line and products

Some of the differences from the 69 Dearborn article posted is that by 70 all the new bright colors affected the batch colors allot more than what we see in 69 leading to some nice and really odd looking combinations. Orange or red exterior and overspray on green batch undercarriage comes to mind Also by 70 the front wheel wells and frame forward paint changed from typically red oxide base to a batch color base. On Dearborn cars this is more noticable since the “primer”/batch paint is visible on the finished car sometimes depending on the angle and coverage of all the different colors/paints applied there.

Remember the dolly marks. Since Mustangs were shorter you will have a shadow dolly mark forward from where the rear most lines up with the one that goes through the frame rail and trunk floor. Some of the sealers will differ also differ since the 70;s used different ones.

Hope this all helps a bit

Any/all advise and direction is greatly appreciated. I started this project 20 years ago when my dad gave me the car. I promptly disassembled and started on it but life got in the way, so the cougar got put on hold. Finally getting back at it and is now on a rotisserie for work on the belly of the beast. I am currently scouring through old pics of when I took it apart, 35mm pics as that was before digital cameras were everywhere.

Thanks!

Here are a few pictures. Does illustrate the wide range of tones and colors they ended up. You see allot (not included in these since didn’t find any yet in this production period) dark blueish gray often with a little of metallic

From 0F169xxx - sort of a light greyish purple sort of color


From two April 70 Dearborn examples

Cleaned of all the sealants

Didn’t hold up to the elements as well as the example above


Also remember that 30-60% of the main floor will have a coat of sound deadener over the surface which will cover over allot of this

Thanks for posting the pictures, that helps a lot!

I thought I’d add one from my 70 Hardtop(Ginger)

The slop gray has some metallic in it. It is close to the same on my Convertible, those Cougars were built a day apart. I have to make a comparison to my 428 Cougar, but I’m thinking it is close.

Funny thing is my 71 the slop gray is more gray and much lighter. But it is from late in the 71 production.

When were each of the pictured cars built?

Thanks

Mine was built 4/28/70

First picture is my 70 XR-7 hardtop, it was built on Nov 12,1969, the second picture is my 71 XR-7 that was built on July 26th, 1971. My Convertible XR-7 was built on Nov. 13th 1969 and my 428 Cougar was built on Sept 5, 1969.

Not to get off the topic of the underbody for a 1970, but my 1971 built 5/71 is red oxide, unlike Neals 1971 example which is gray. Any reason for this or is it just random? This is a picture of my tunnel.
Also, I have an 11/69 built 70 vert, competition orange. I believe the underbody was gray, but I stripped/restored it in the 90’s so I don’t have original sample to match. Would light gray be plausible in this time frame? Hopefully it is because that’s how I did it…
Jim

Dearborn in the 69 and up appears to revert to a standard premixed epoxy based red oxide sealer from time to time. This may relate to problems with the batch making process at some point or some other issue. With enough data these periods can be identified


Also, I have an 11/69 built 70 vert, competition orange. I believe the underbody was gray, but I stripped/restored it in the 90’s so I don’t have original sample to match. Would light gray be plausible in this time frame? Hopefully it is because that’s how I did it.[/quote]


My first picture in reply #6 could be interpreted as a version of tinted light gray. All depends on what the makeup of the paint left over from the day/shift before the car was sprayed

Thank you for the response Jeff, and thank you for your research on this subject, and your underbody finish guides. I wish I had this information available when I did the underbody of my 70 vert back in 1998 or so. About my only reference available then was a mustang monthly article explaining the underbody of the 1500 mile 70 boss owned by bob perkins.
I went a little overboard with the orange lol.
Jim

I also have been trying to determine the correct under side colours for the 1970 cougars, but I had come to the concussion that they where not as the 69 mustang chart above, but the exterior colour of the car was sprayed on the underside?

The three main examples I was looking at are David Wyrwass’s Dearborn Oct 13th 1969 built Boss 302 car, and my Dearborn Oct 15th 1969 built Boss 302 (both 1970 models) and my Dearborn 27th of May 1970 cougar convertible. In all three cars, none of them have had any underside restoration and all show the underside to be painted the same colour as the exterior.

I also have another 70 cougar in unrestored condition, not played with, I don’t know underneath colour or it production date, but if push came to shove that car could also be investigated, it still has a lot of it’s original chalk marking and even muflers.

Now getting back to your car 70scj4spvert, a 28th of April 1970 convertible, you say it was a Competition Orange car with a possible dark green/olive colour on the underside. Well that sort of stuffs up my theory and it also creates more questions. You see my 27th of May 1970 Cougar Convertible is the same colour underneath as the exterior, but it is a Medium Lime Metallic car (green if you like).

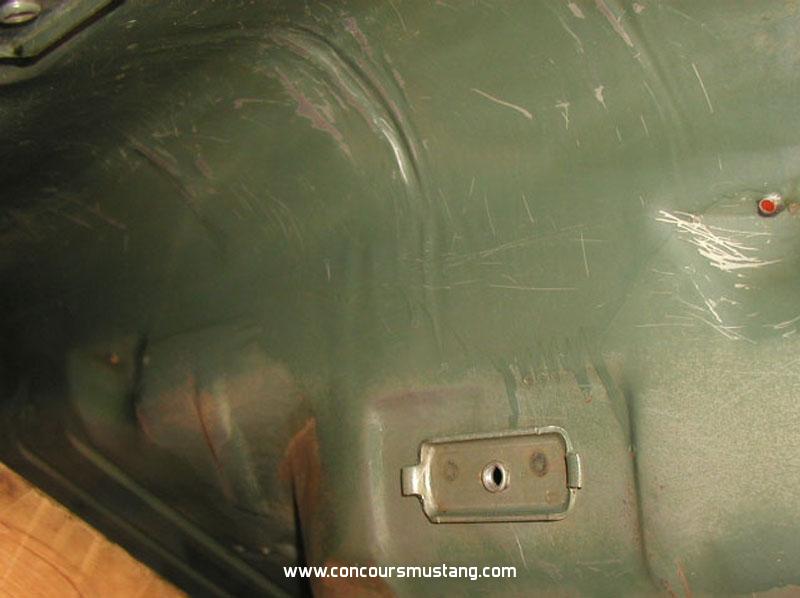
Picture showing trans tunnel on my 1970 cougar convertible.

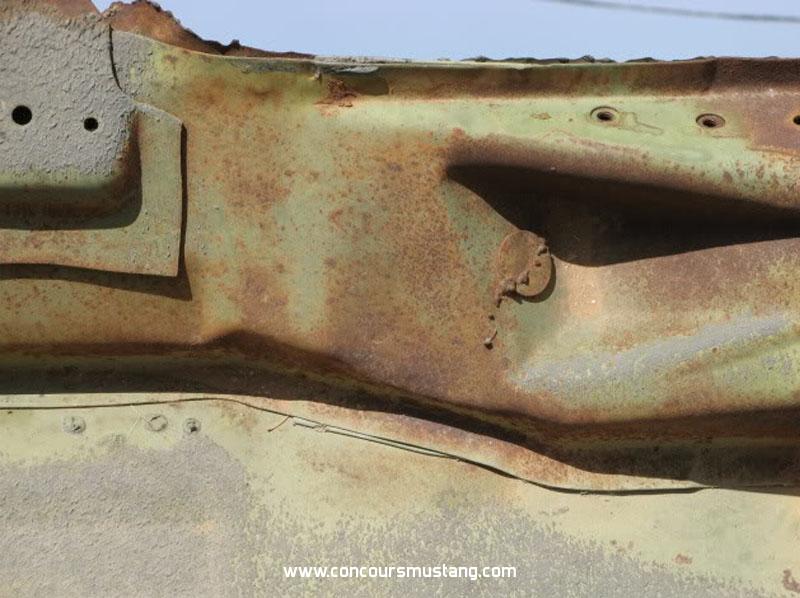
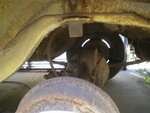
Picture showing diff tunnel on my 1970 cougar convertible

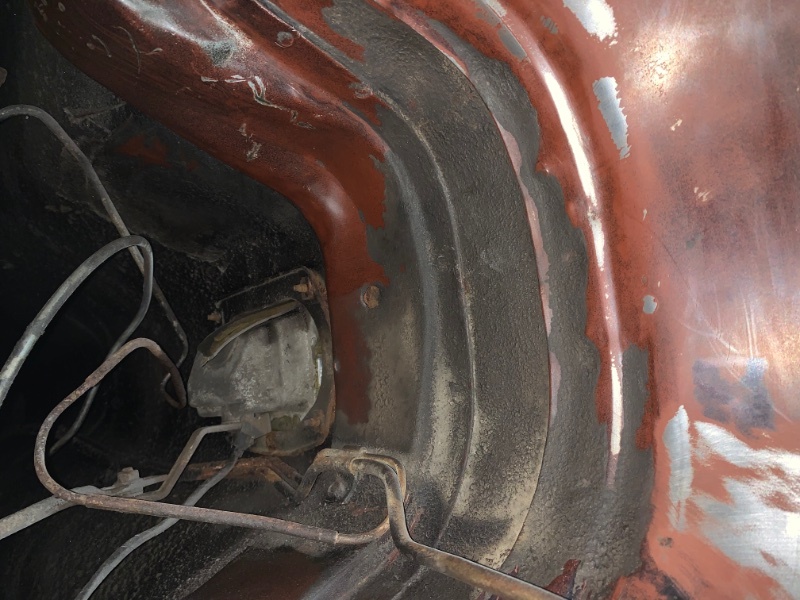
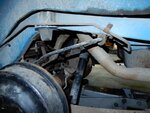
Picture showing the diff/rear axle tunnel on my competition yellow Boss 302.

Yes the Nodular Iron 9 in is missing, so is the rear sway bar and the pinion snubber rubber and bracket. I have a photo of the car with at least the snubber rubber and bracket on the car when I purchase it, but it was not on it when the car was delivered after purchase. :newburn:

Anyway lets move on. Here is what I think is David Wyrwass’s completion blue boss 302 eliminator showing diff/rear axle tunnel.

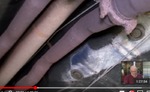
Here is two pictures taken from the WCCC youtube video about David Wyrwass’s boss 302 eliminator, in the video they talk about the colour of the underside of David’s original eliminator. It is completion blue in colour.

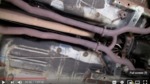
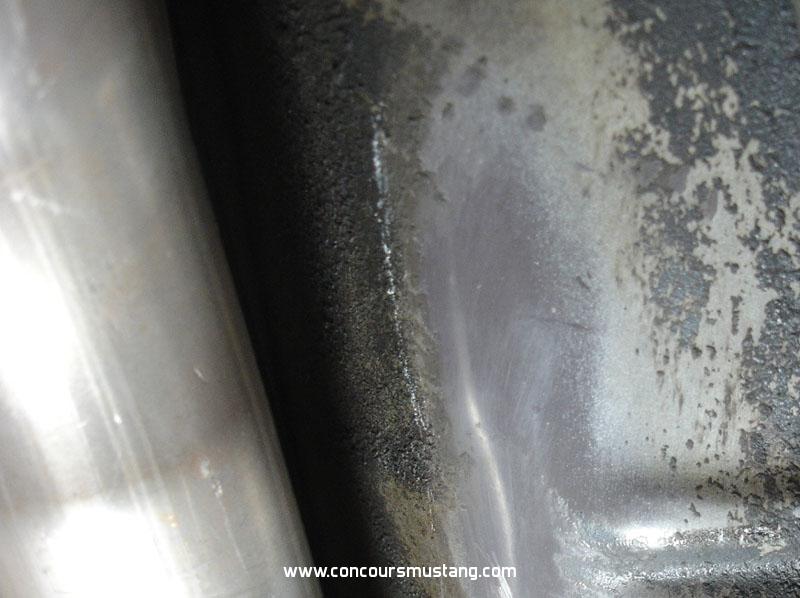
In the last picture of David’s car, you can see the spray pattern of the sound insulator, my car is similar but not the same, I guess it depends on the operator. On my boss 302 car the black sound deadener/insulator is wider along the trans tunnel and comes out closer to the sill panels, when I scrape off the insulator, the competition yellow paint is there.

The underside of my green cougar convertible looks too good to be original but it is, it was stored by a car collector in California for 37 years. From what I can make out, it was ordered for a Washington state dealership but has (what looks like) the pre-delivery order for a Californian dealership which is still stuck to the windscreen. I can’t really read what it says because it is folded, I can only read parts of it by looking through the windscreen, I would have to rip it off the windscreen and unfold it to read it correctly.

Hope full this helps the topic, and if anyone need some more photo’s of under my green convertible, shout out, I will see what I can do if you give me a little time. :wave:

I totally agree with the body color in the rear wheel wells. I have noted it before. I don’t have pictures from my 1970 Cougars, but here is one from my 71 XR-7.

I have noticed the body color on all 4 of the 70 Cougars I have here. The Convertible has had several paint jobs done in colors other then the factory color. Both the White XR-7 hard top and the Competition Yellow 428CJ standard have had a repaint in the factory colors. The parts car as far as I can see was never repainted but received a lot of spray bomb primer.

I will look them over more later, but don’t have time to properly photograph them for the discussion until some time later this month.(if it gets done) I think this thread is beneficial to folks who want to do a proper restoration to there Cougar undersides. Keep posting any collaboration and contradictory information. These care were built on an assemble line and there will be differences. The slop gray will not be the same day to day. Close usually. But as was noted earlier, some days got a red oxide finish. Myself I have never noted one. But I have only seen small over all number of Cougars on the bottom side.(though more then some, fewer then others.)

Not sure what “69 mustang chart above:” is referring to. If your referring to the link that was posted then in that article the body color overspray is covered in three sections of the article. Maybe your referring to something else. So far the discussion as I see it has focused mostly on the base - the color of the floor pans before the other processes.

Correct and expected on a restoration. During the application of body color to the unibody there was no attempt to keep the body color off of the undercarriage, exterior facing sections of the front inner fender panels and shock towers or rear wheel well. Paint passing from the rear of the car was limited because the rear valance had been installed already some limited amounts of paint entered around the ends that were left hanging open and through openings in the valance were backup lights would mount on cars with them. At times the exterior color and the undercarriage color are so close it can appear that both colors are the same or that the undercarriage was fully painted with the exterior color. A fact that lead many int he hobby in the 80’s to suggest that the cars were painted completely body color like some other car makers. Think that has been well disproven with the contrasting colors found on many examples over the years

The distance of coverage from the exterior application differed depending on how much effort the worker put in, how tall or short they were and possibly how old (not wanting to bend down as much). How far forward they applied just depended on what the guy on that side was doing on that car.

At the rear the worker passed the high pressure high flow guns of the era around the wheel well opening with 90% of the spray traveling onto the wheel well or out into the air. Passes over the wheel well opening from front to back passed over the opening flowing as they moved applying a nice coat of paint onto the back side of the wheel well and exposed surfaces such as frame rails. As they painted these areas and the rockers the paint and overspray traveled over the undercarriage panels and frame. Often leaving a shadow behind the pinch weld for a short distance but applying a heavier coat towards the outer edge and panels that hung down, reducing to a dusting at its furthest point inward.

Over this was the pinch weld black- out application. Smaller guns?, less pressure and different angles typically produced overspray that did not travel as far in towards the center of the car as the body color. Since the fenders were not installed at this point the pinch weld black out appears on the finished car, behind the front fender, travels to the rear wheel well where there is often signs of a “blow out” in the wheel well at that end of the pinch weld. At the rear of the wheel well instructs were to start back up with the black out and continue to the back edge.

We’re still unsure if the pinch weld black out was done by hand or by premounted jets triggered by the passing trolley/body like the floor pans were painted. Firewall rearward


Have allot of pictures of unrestored car floor pans and paint patterns.

Just another thought but realize that you don’t have access to both of these car or possible either but if you sand or buff through the layers of paint it will likely provide you with what was applied over the base metal originally and what coatings there were - in order from first to last. Done this a fair number of times (wrecking yard owners will stare, point finges and have their comments about the crazy guy cleaning wheel wells and undercarriages ( shops not so much) but a pizza and some drinks normally get them on their way and an invite to come back again. Got to make the effort to get to the bottom of things :slight_smile:

The article I was referring to is the one posted here by Mike_B_SVT

I am guessing you J_Speegle had something to do with this article, and I can see it is well researched and informative. I have been using it for my own reference prior to the start of this topic. I also will admit that I am some what limited to the cars I have access to, it just seemed to me that this did not seem to apply to my cars.

Unfortunately the pictures I posted here did not come out as large and clear as I expected them to. :slight_smile:

This the same photo I posted before, it is looking up from under the diff towards the outside of the drivers side. I polished the panel to get a clear picture. You can see the runs in the paint.