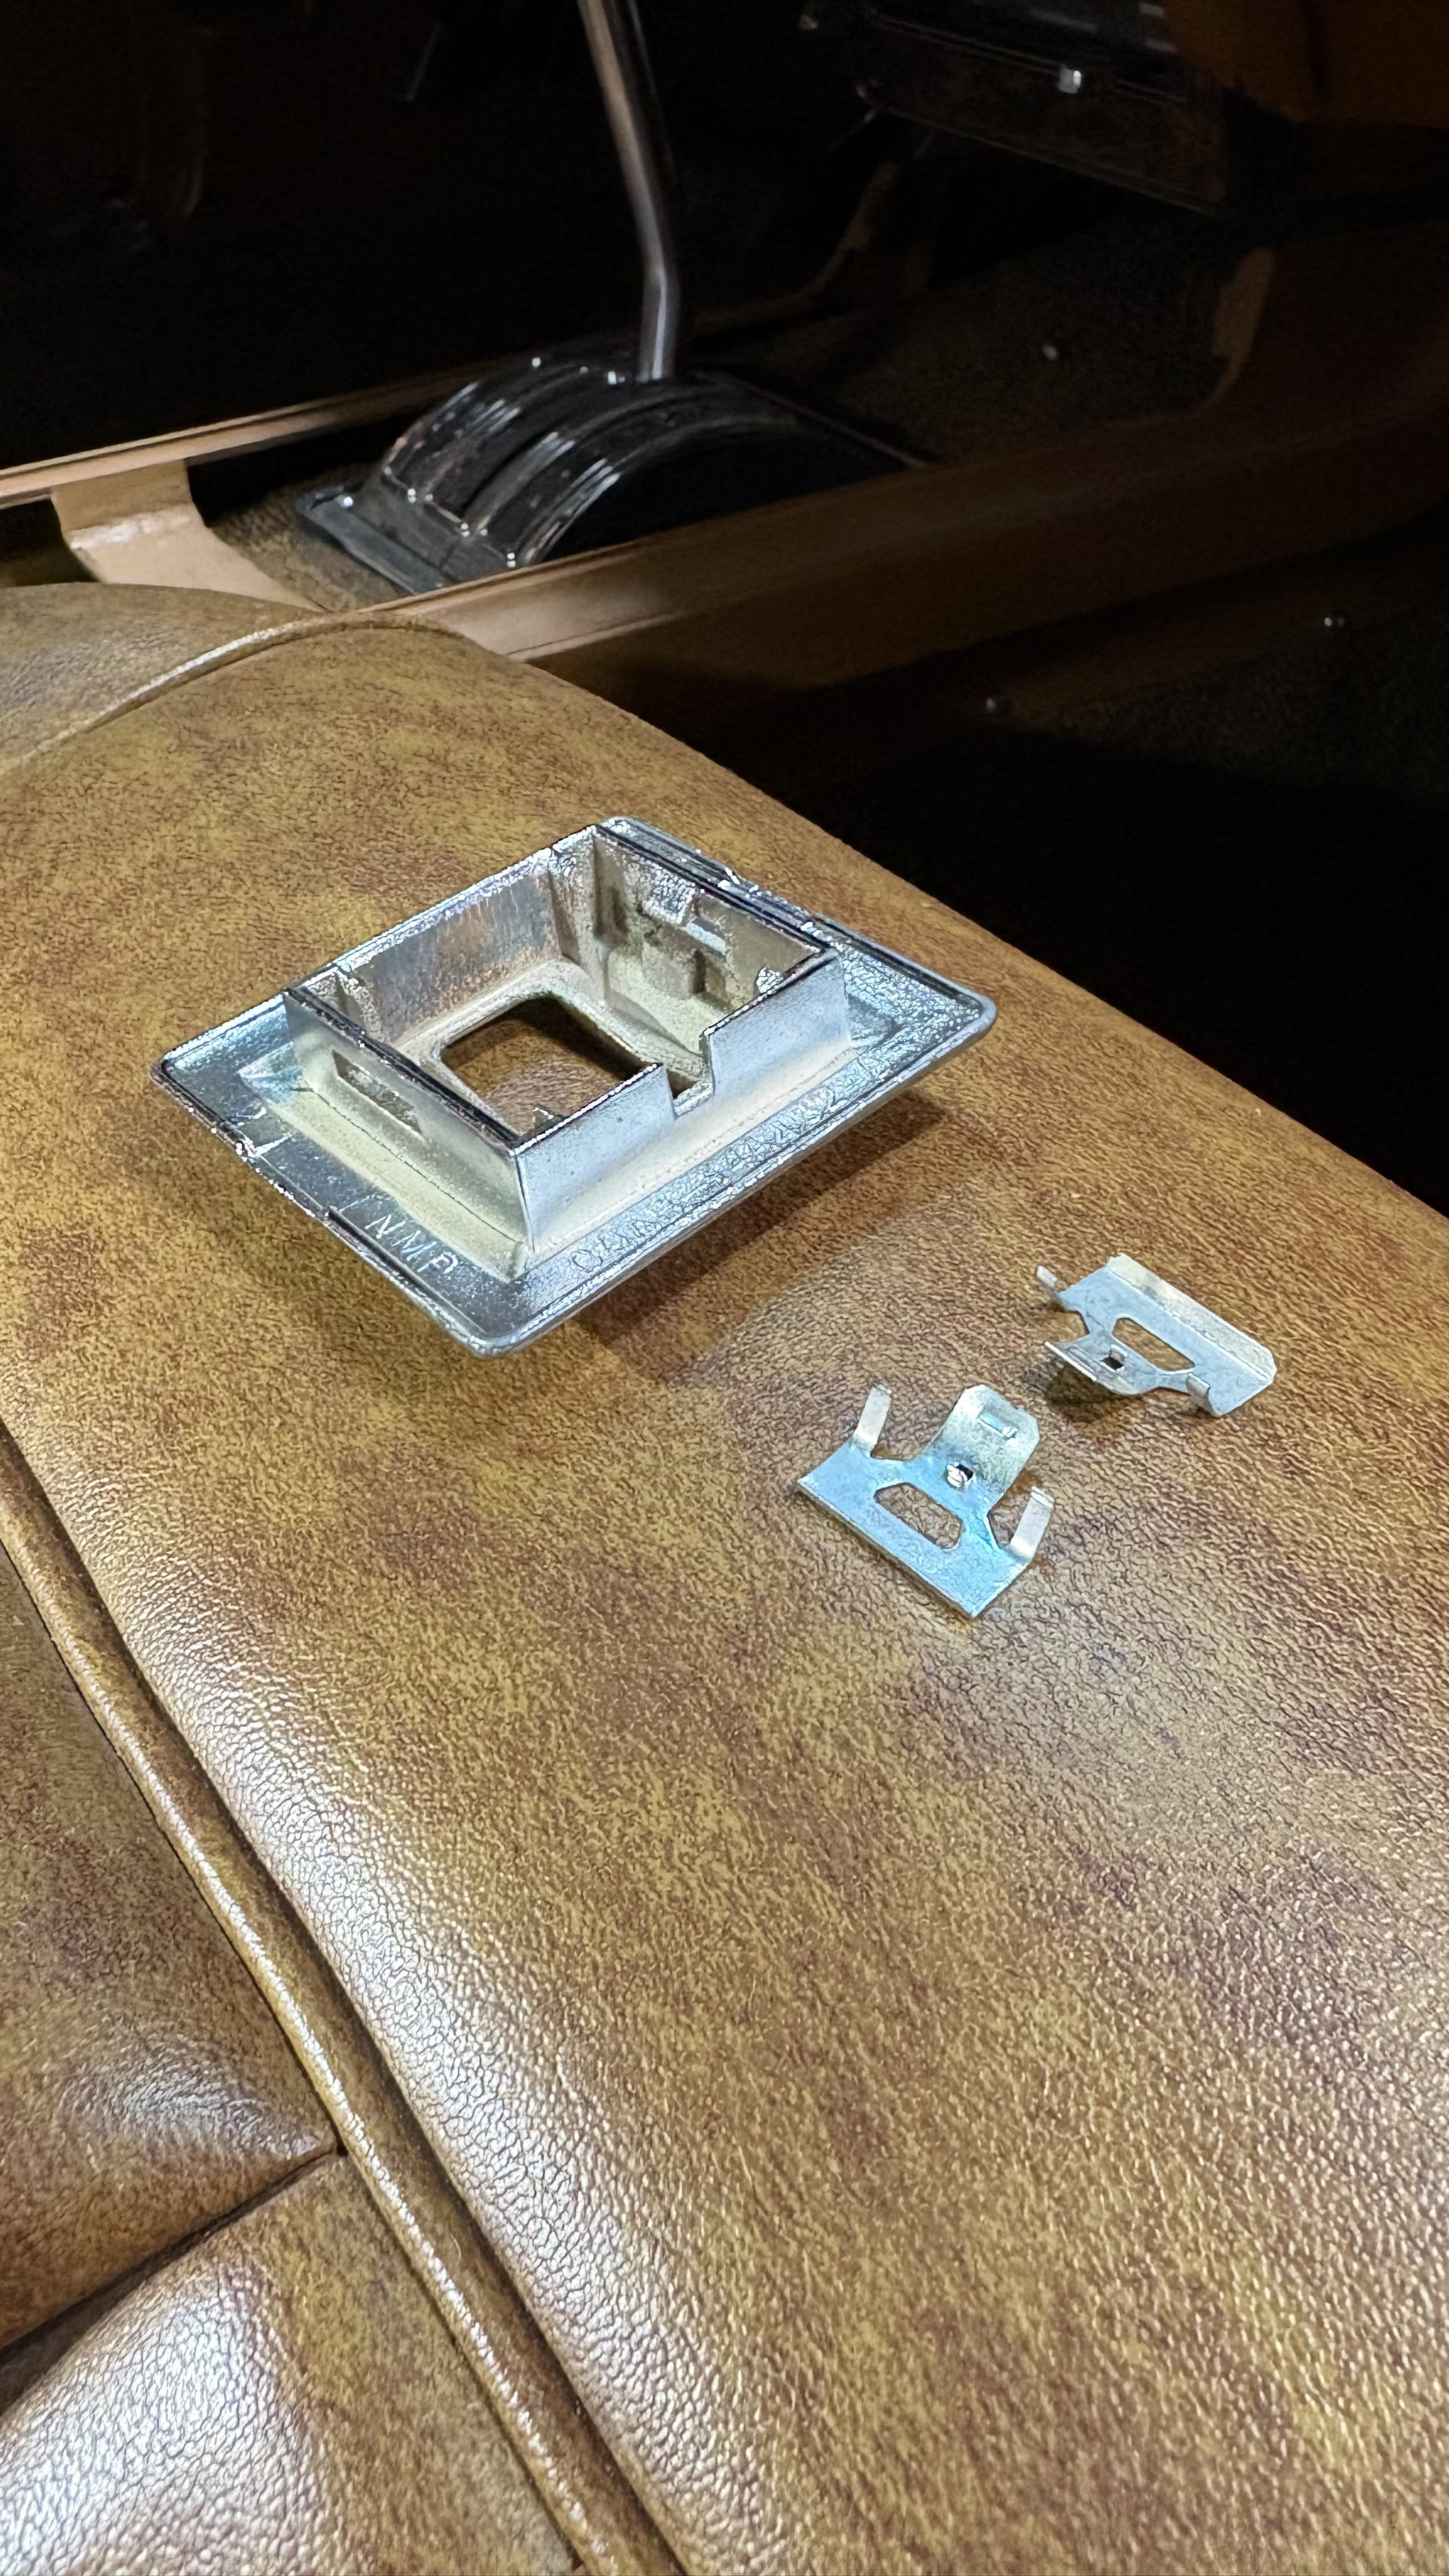
70 XR7 convert passenger door power window switch cover diagram

Thanks for the opportunity to going the forum and I have a question hopefully someone out there has a diagram of and answer thanks in advance

I have a 1970 XR7 convertible it has power windows on the passenger side I’m looking for information or a diagram showing how the chrome single switch cover assembles onto the rocker switch using the clips the chrome switch cover plate is sandwiched between the chrome and the switch mounted on the door with two clips here are some pictures showing the chrome switch cover the two clips and the switch just not sure how they all go together and I can’t find anything in my books

O
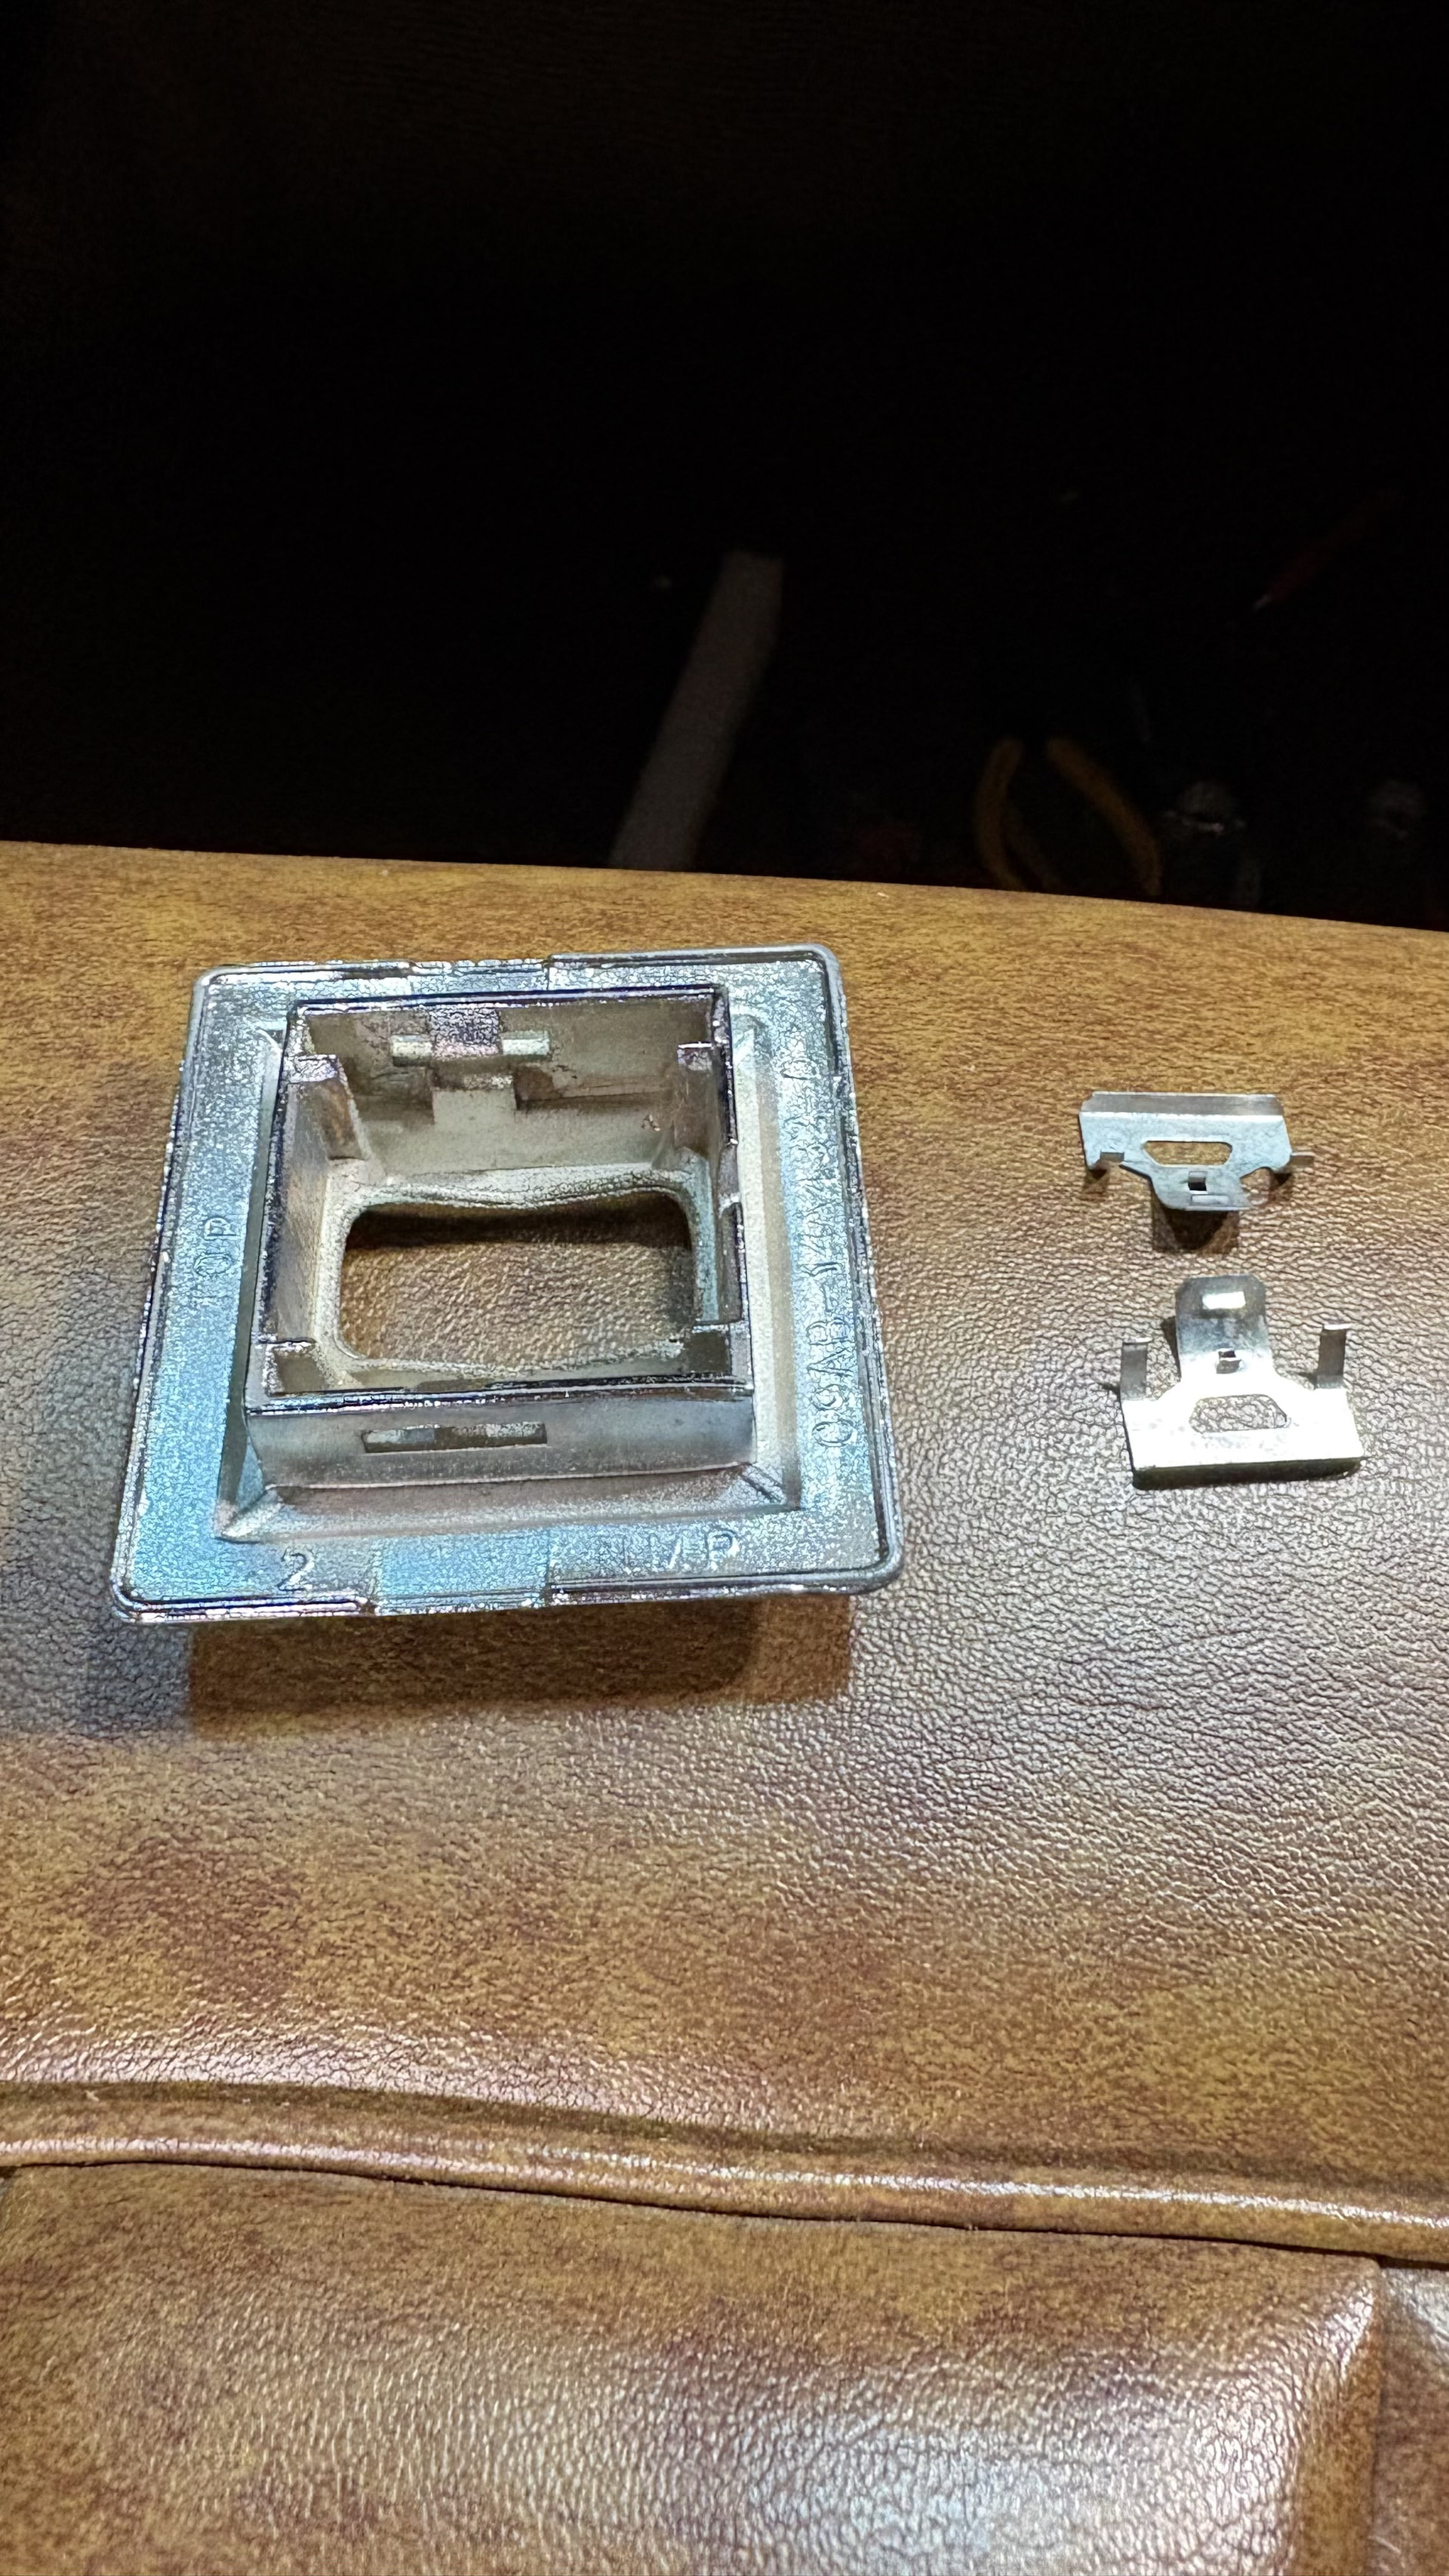
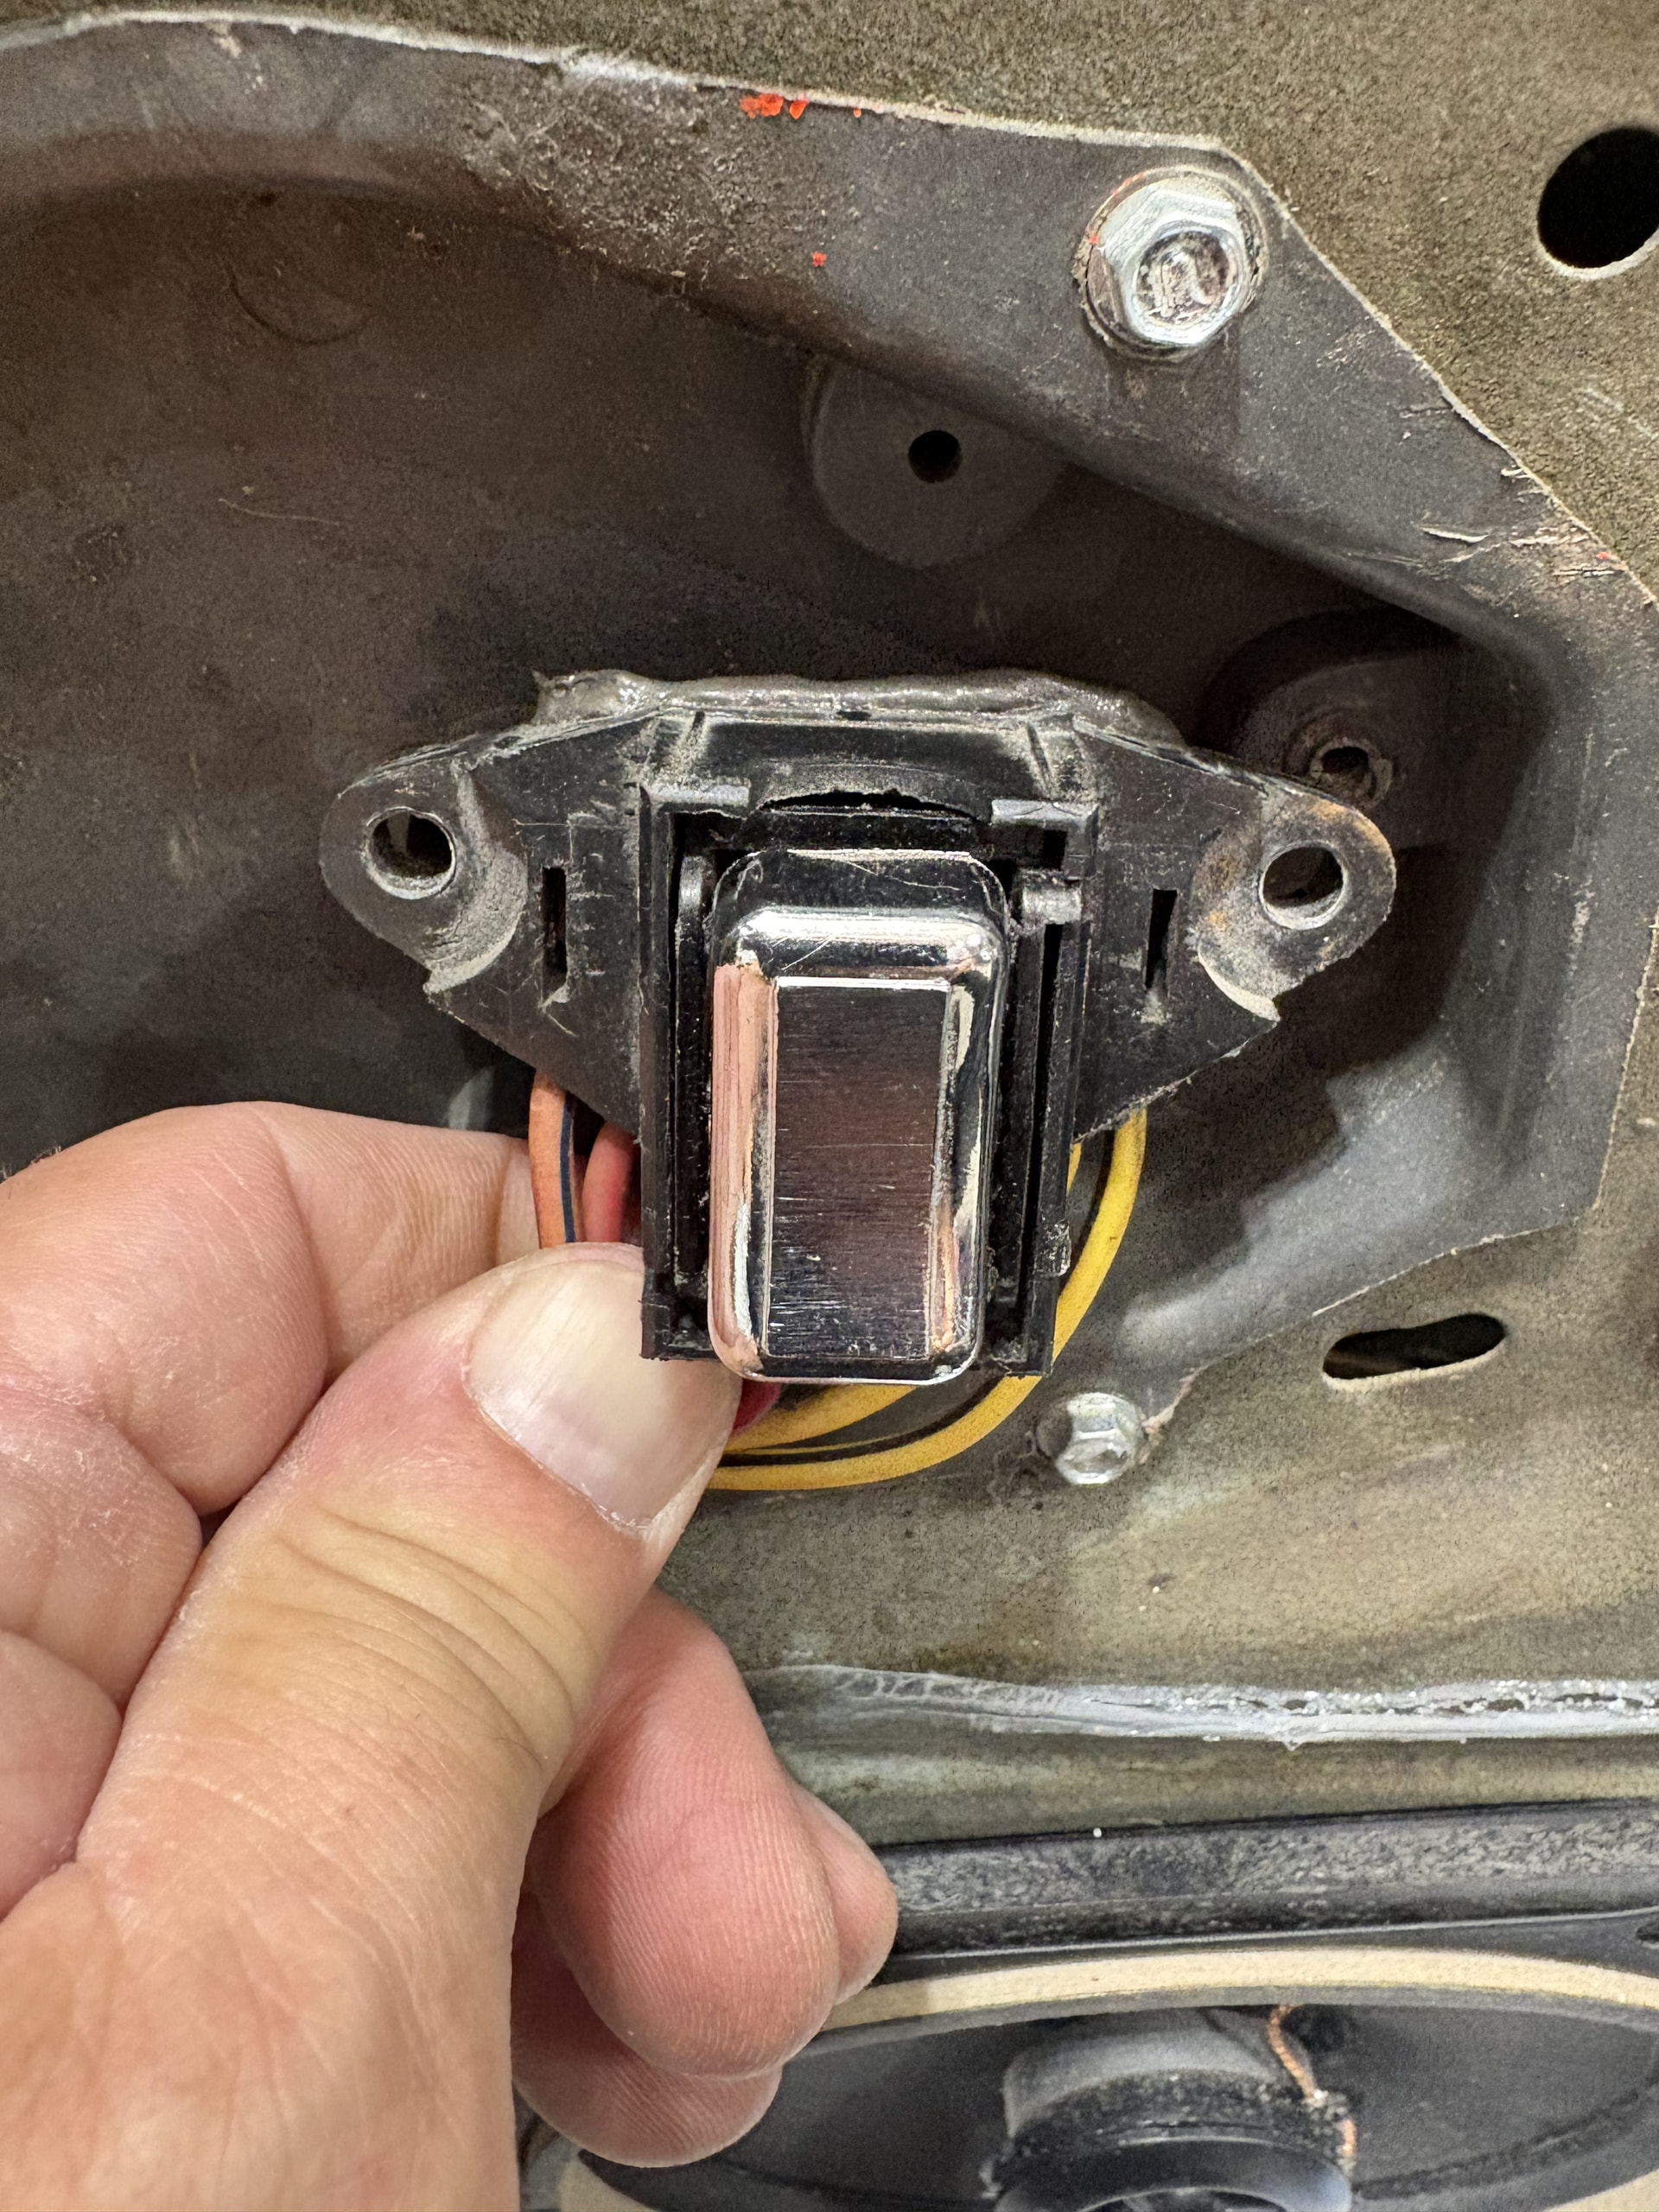
the driver side was easy but can’t find any information on the passenger assembly installation thanks in advance

1 Like

Mmm, Ginger interior…

You can use the back seat ones as a reference. They mount the same way.

1 Like

How hard is it to get to the rear switch location? Not familiar with how that area is put together in a convertible

Pull the back seat, remove the screws that secure the side panel, pull it, and then unscrew the bezel from the back of the side panel. The switch clips into the bezel with 2 metal spring clips with J-hooks which hold the wire harness plug in place.

Clip - Power Window Switch / XR7 Toggle - Pair - Repro ~ 1969 - 1970 Mercury Cougar ( 1969 Mercury Cougar, 1970 Mercury Cougar ) at West Coast Classic Cougar :: The Definitive 1967 - 1973 Mercury Cougar Parts Source

1 Like

The tab on the clip slides into the slot, the “arms” face the switch to help maintain outward pressure to retain the bezel.

The window in the clip receives the tab on each side of the switch bezel. I recommend you practice assembling and releasing the bezel a couple times before reinstalling the door panel.

To release the bezel, you insert a flat tool through the window in the bezel and push the clip inward.

No the back ones have a plate and two screws that hold everything together the passenger side is different from the drivers as ide and rear

Those are not the clips that hold the chrome I show the clips in my pictures those are for holding switches on the drivers side

The clips I showed are correct for 1969 and early 1970. You have the 1971 and newer clips but they all install like Hemikiller showed. I know they changed things up sometime during 1970 production.

1 Like

Thanks but I did try that but it doesn’t hold they keep falling out so does the switch cover plate this is what I was sold by west coast classic cougars but I’m starting to think these aren’t the right clips and I’ve asked them this same question and instead of showing me exactly how it goes together with all their knowledge using these pieces I have they sent me to the forum

Yeah, I don’t think you have the right combination of clip, bezel, and switch for a 1970. The passenger front should be identical to what you have at the two rear windows.

The bezel should either be this one in early 70 using the clips I linked to earlier:

Bezel - Power Window Switch - Grade A - Used ~ 1969 - 1970 Mercury Cougar ( 1969 Mercury Cougar, 1970 Mercury Cougar ) at West Coast Classic Cougar :: The Definitive 1967 - 1973 Mercury Cougar Parts Source

Your connector looks to be the late 70 version, so that would go with this bezel for late 70:

https://secure.cougarpartscatalog.com/bbezx170.html

which uses this clip:

https://secure.cougarpartscatalog.com/71pwrwndwclp.html

No mine was built spring of 70 I followed the directions you sent but maybe I’m just not doing it right it would be nice if Don at WCCC had a diagram or picture to help

Spring of 70 was later in the 70 production schedule. But you seem to have the 71 setup and so I do think you have the proper clips.

https://secure.cougarpartscatalog.com/20040/34322/clip-power-window-switch-bezel-pair-nos-1971-1972-mercury-cougar-1971-1972-ford-mustang.html

Here is the picture showing installation.

Don is the one that sold me these clips and these are for the 70 XR7 with power window

Yeah, I finally realized you had the bezel that works with those clips that you pictured. Hopefully the picture in my last post helps show what Hemikiller was describing. They don’t look very easy to install or remove.

Make a quick n dirty video on the clip and bezel installation. sorry for the sub-par production quality.

2 Likes

Thanks for the video I did do this as shown but for some reason mine just doesn’t want to click it just keeps pushing back off the clips you can feel it on the clips but it won’t stay and the clips are new I’ll try it a couple more times thanks again for your help :smiling_face_with_sunglasses: