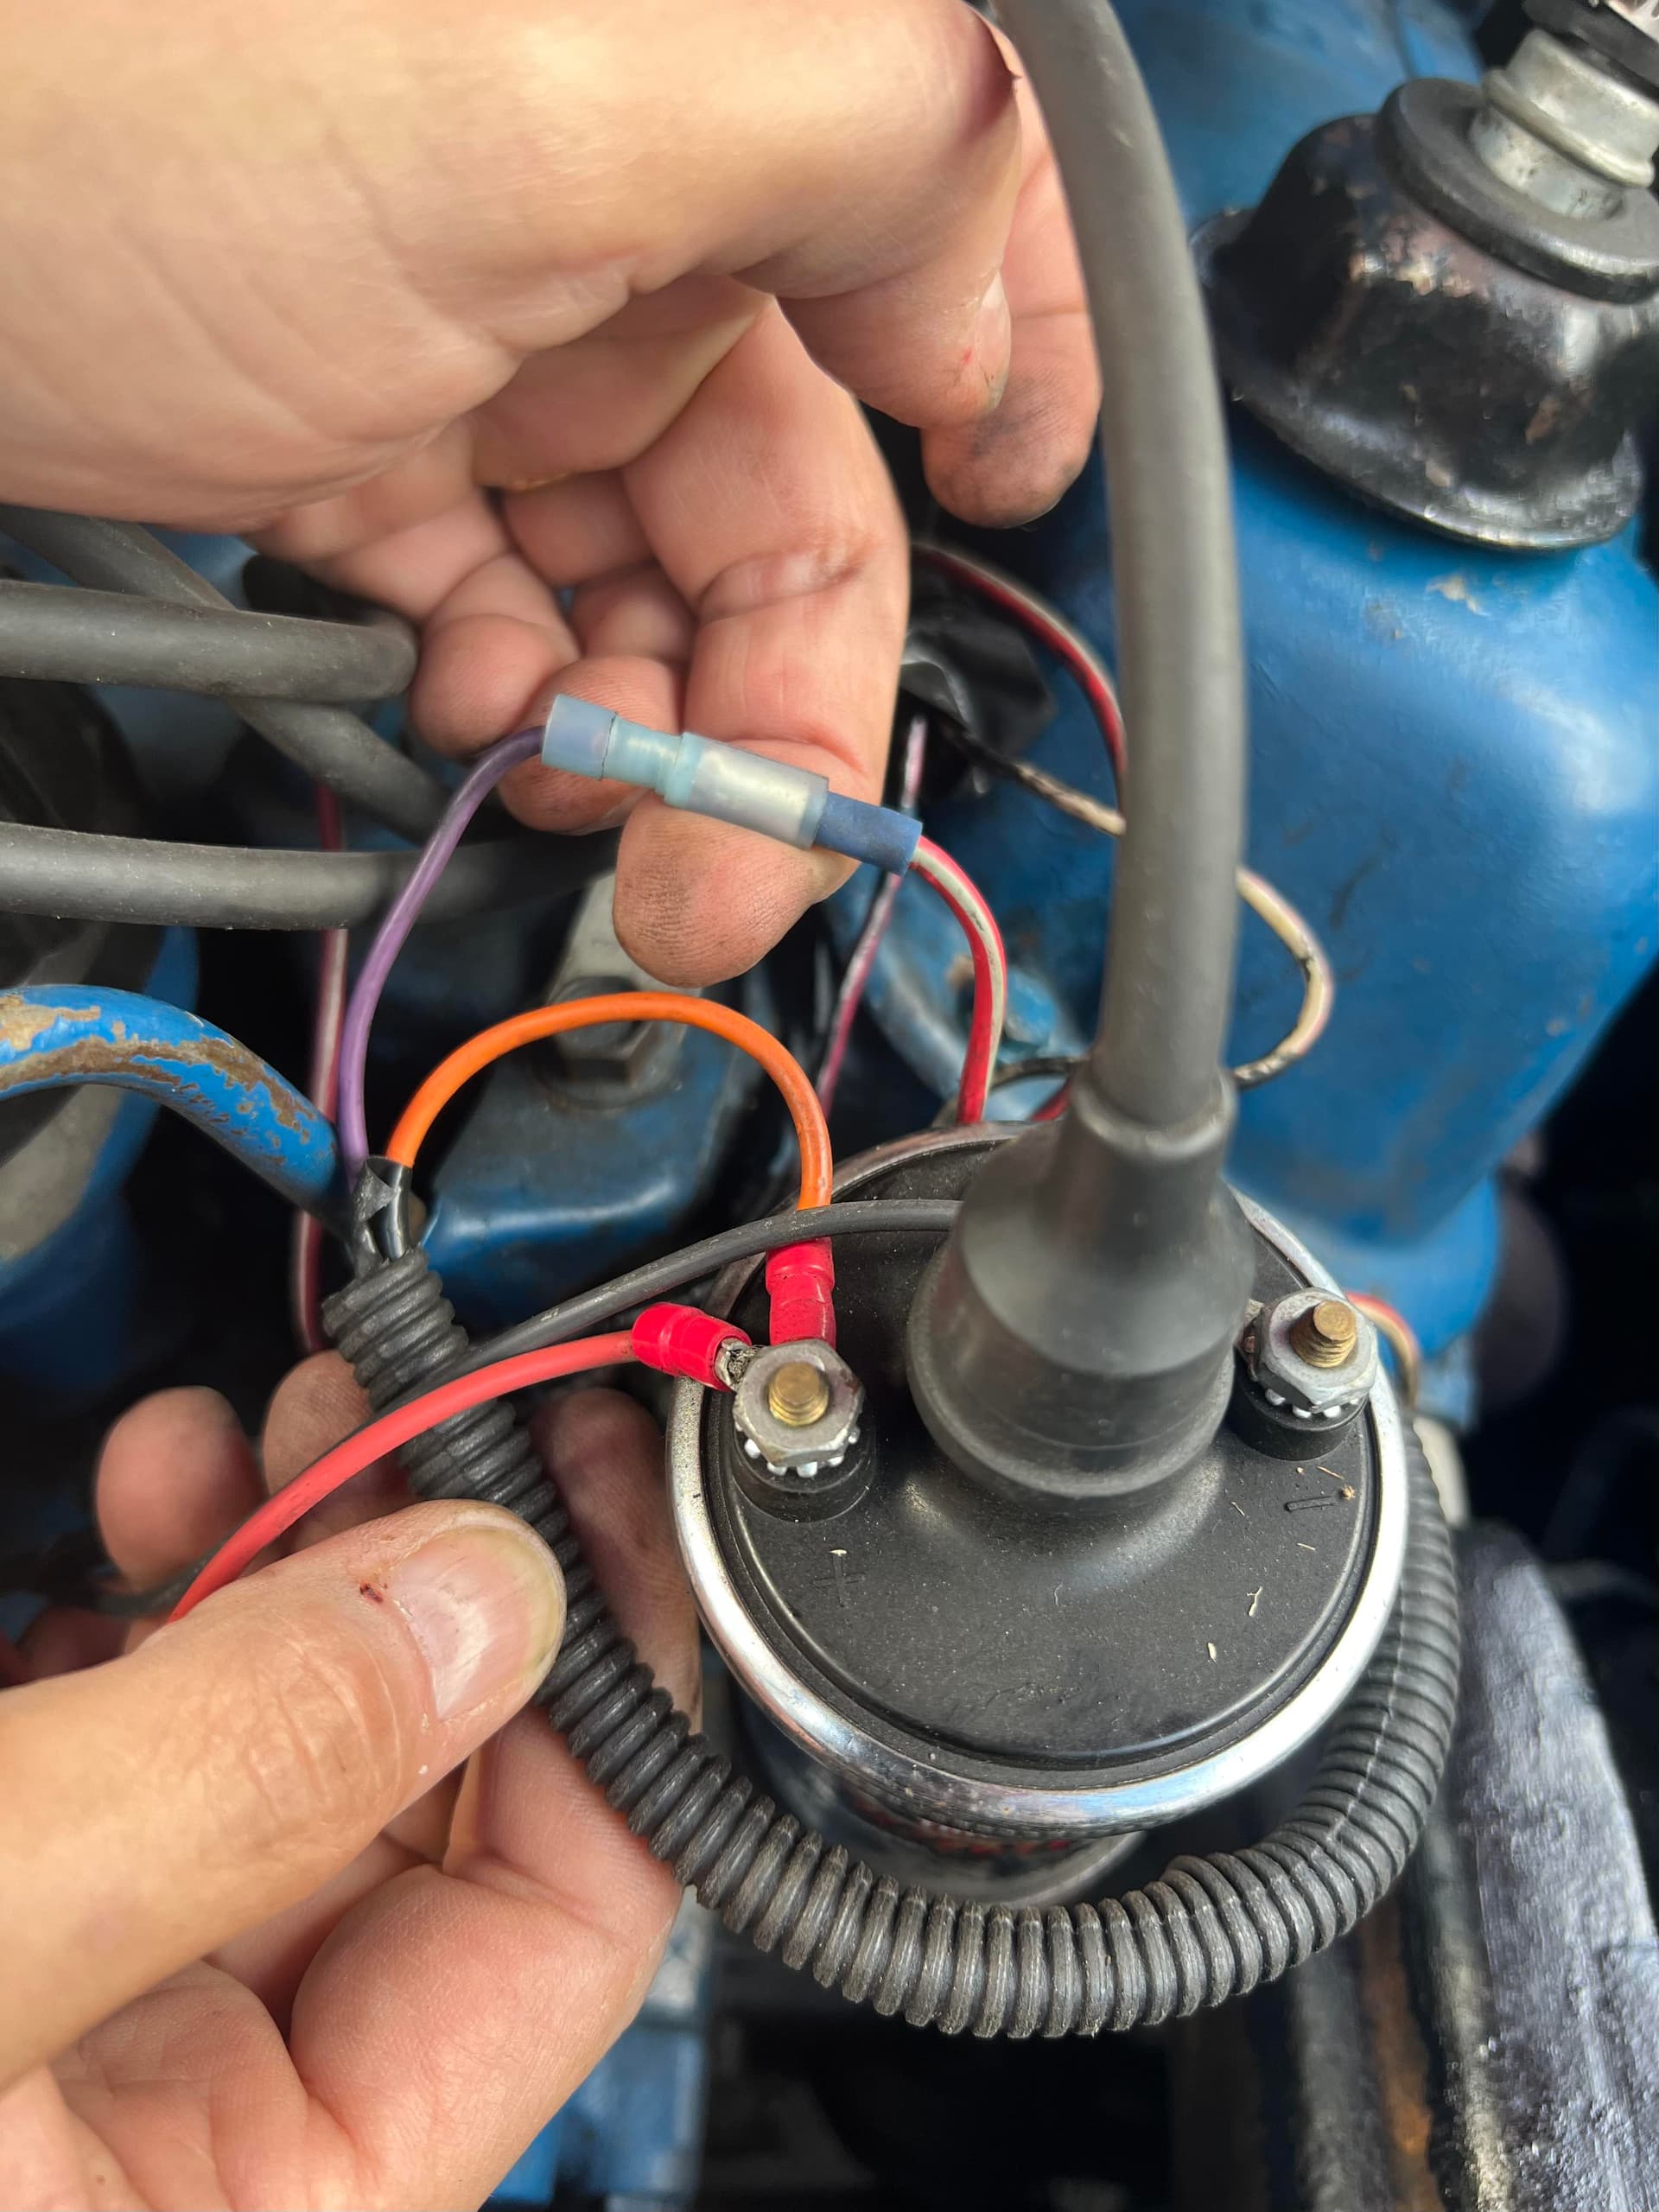
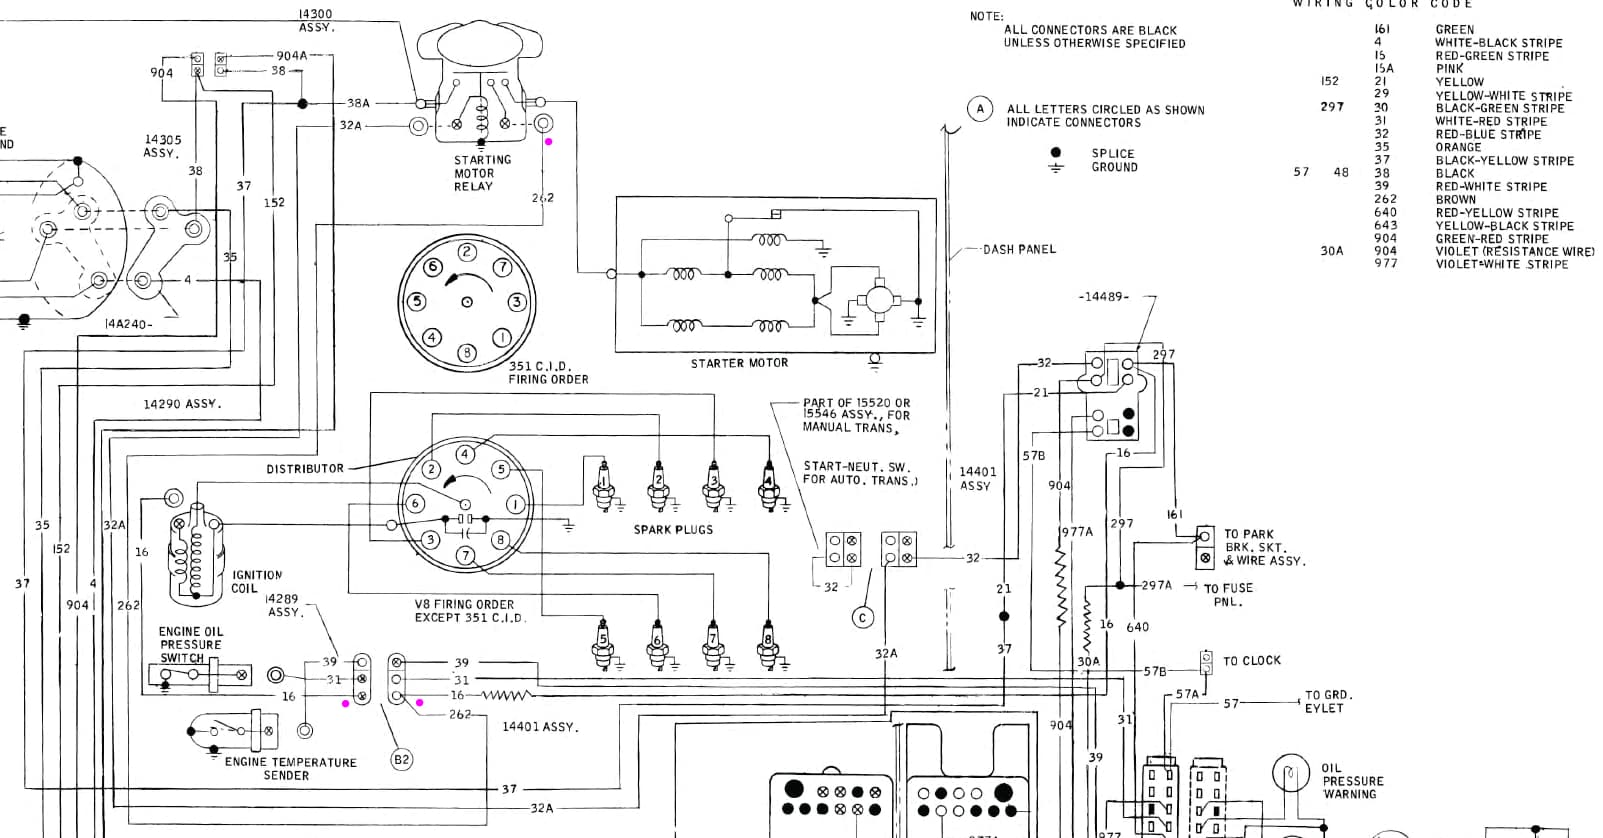
All of my gauges work fine except the tach and I am guessing that it is a wiring issue with the Pertronix Ignition system. Someone else posted that they eliminated their issue by hooking up the red/green tach wire (in the left hand in the pic below) to the “+” side of the coil and the tach and all electricals worked just fine. ???
Like theirs, mine is currently running into a harness that ends up (through the purple wire) at the Pertronix Relay under the Alternator Regulator on the firewall near the battery. Question is if I attach the red/green tach wire to the positive coil where does the other end of the harness/purple wire now go…and what is that for???
I did not install/wire so sorry if this is unclear but just looking to get the tach working again!
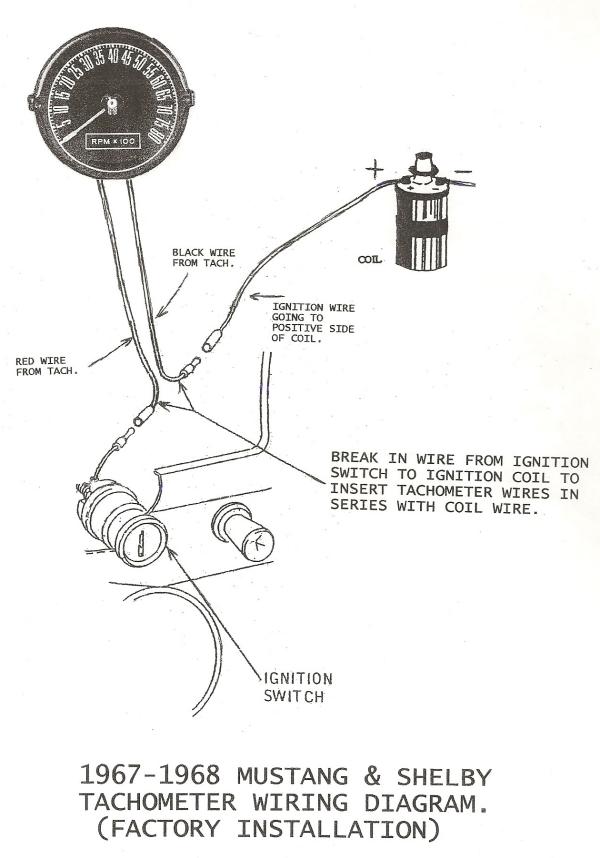
Ford wired the tachometer in line between the ignition switch and the positive terminal on the coil. The stock tachometer will not work unless it is connected to the coil. The ignition wire runs through a coil/transformer in the tachometer that transfers the pulses from the ignition coil into the tachometer electronics, no pulse no tachometer.
The Pertronix works best when it has a full 12V supplied to it. It looks like whomever installed yours did use the relay that Pertronix suggests, but they’re also powering the coil with it. I would remove the Pertonix module(+) wire and the power wire from the relay. Connect them together with a machine screw w a nut and insulate. Re-connect only the factory Red w/Lt Green Stripe wire to the Coil(+) and see if your tach is functional.
The other option is to have Rocketman convert your tachometer so it operates like aftermarket tachometers and connects to the Coil(-) terminal.
Just to be clear…in the first pic…which (colors) are the “Pertronix module (+) wire” and the “power wire”? Are you basically saying to remove the relay out of the coil/system altogether by connecting the purple and orange (which is now on the coil) wires together and then attaching the red/green tach wire to the “+” of the coil???
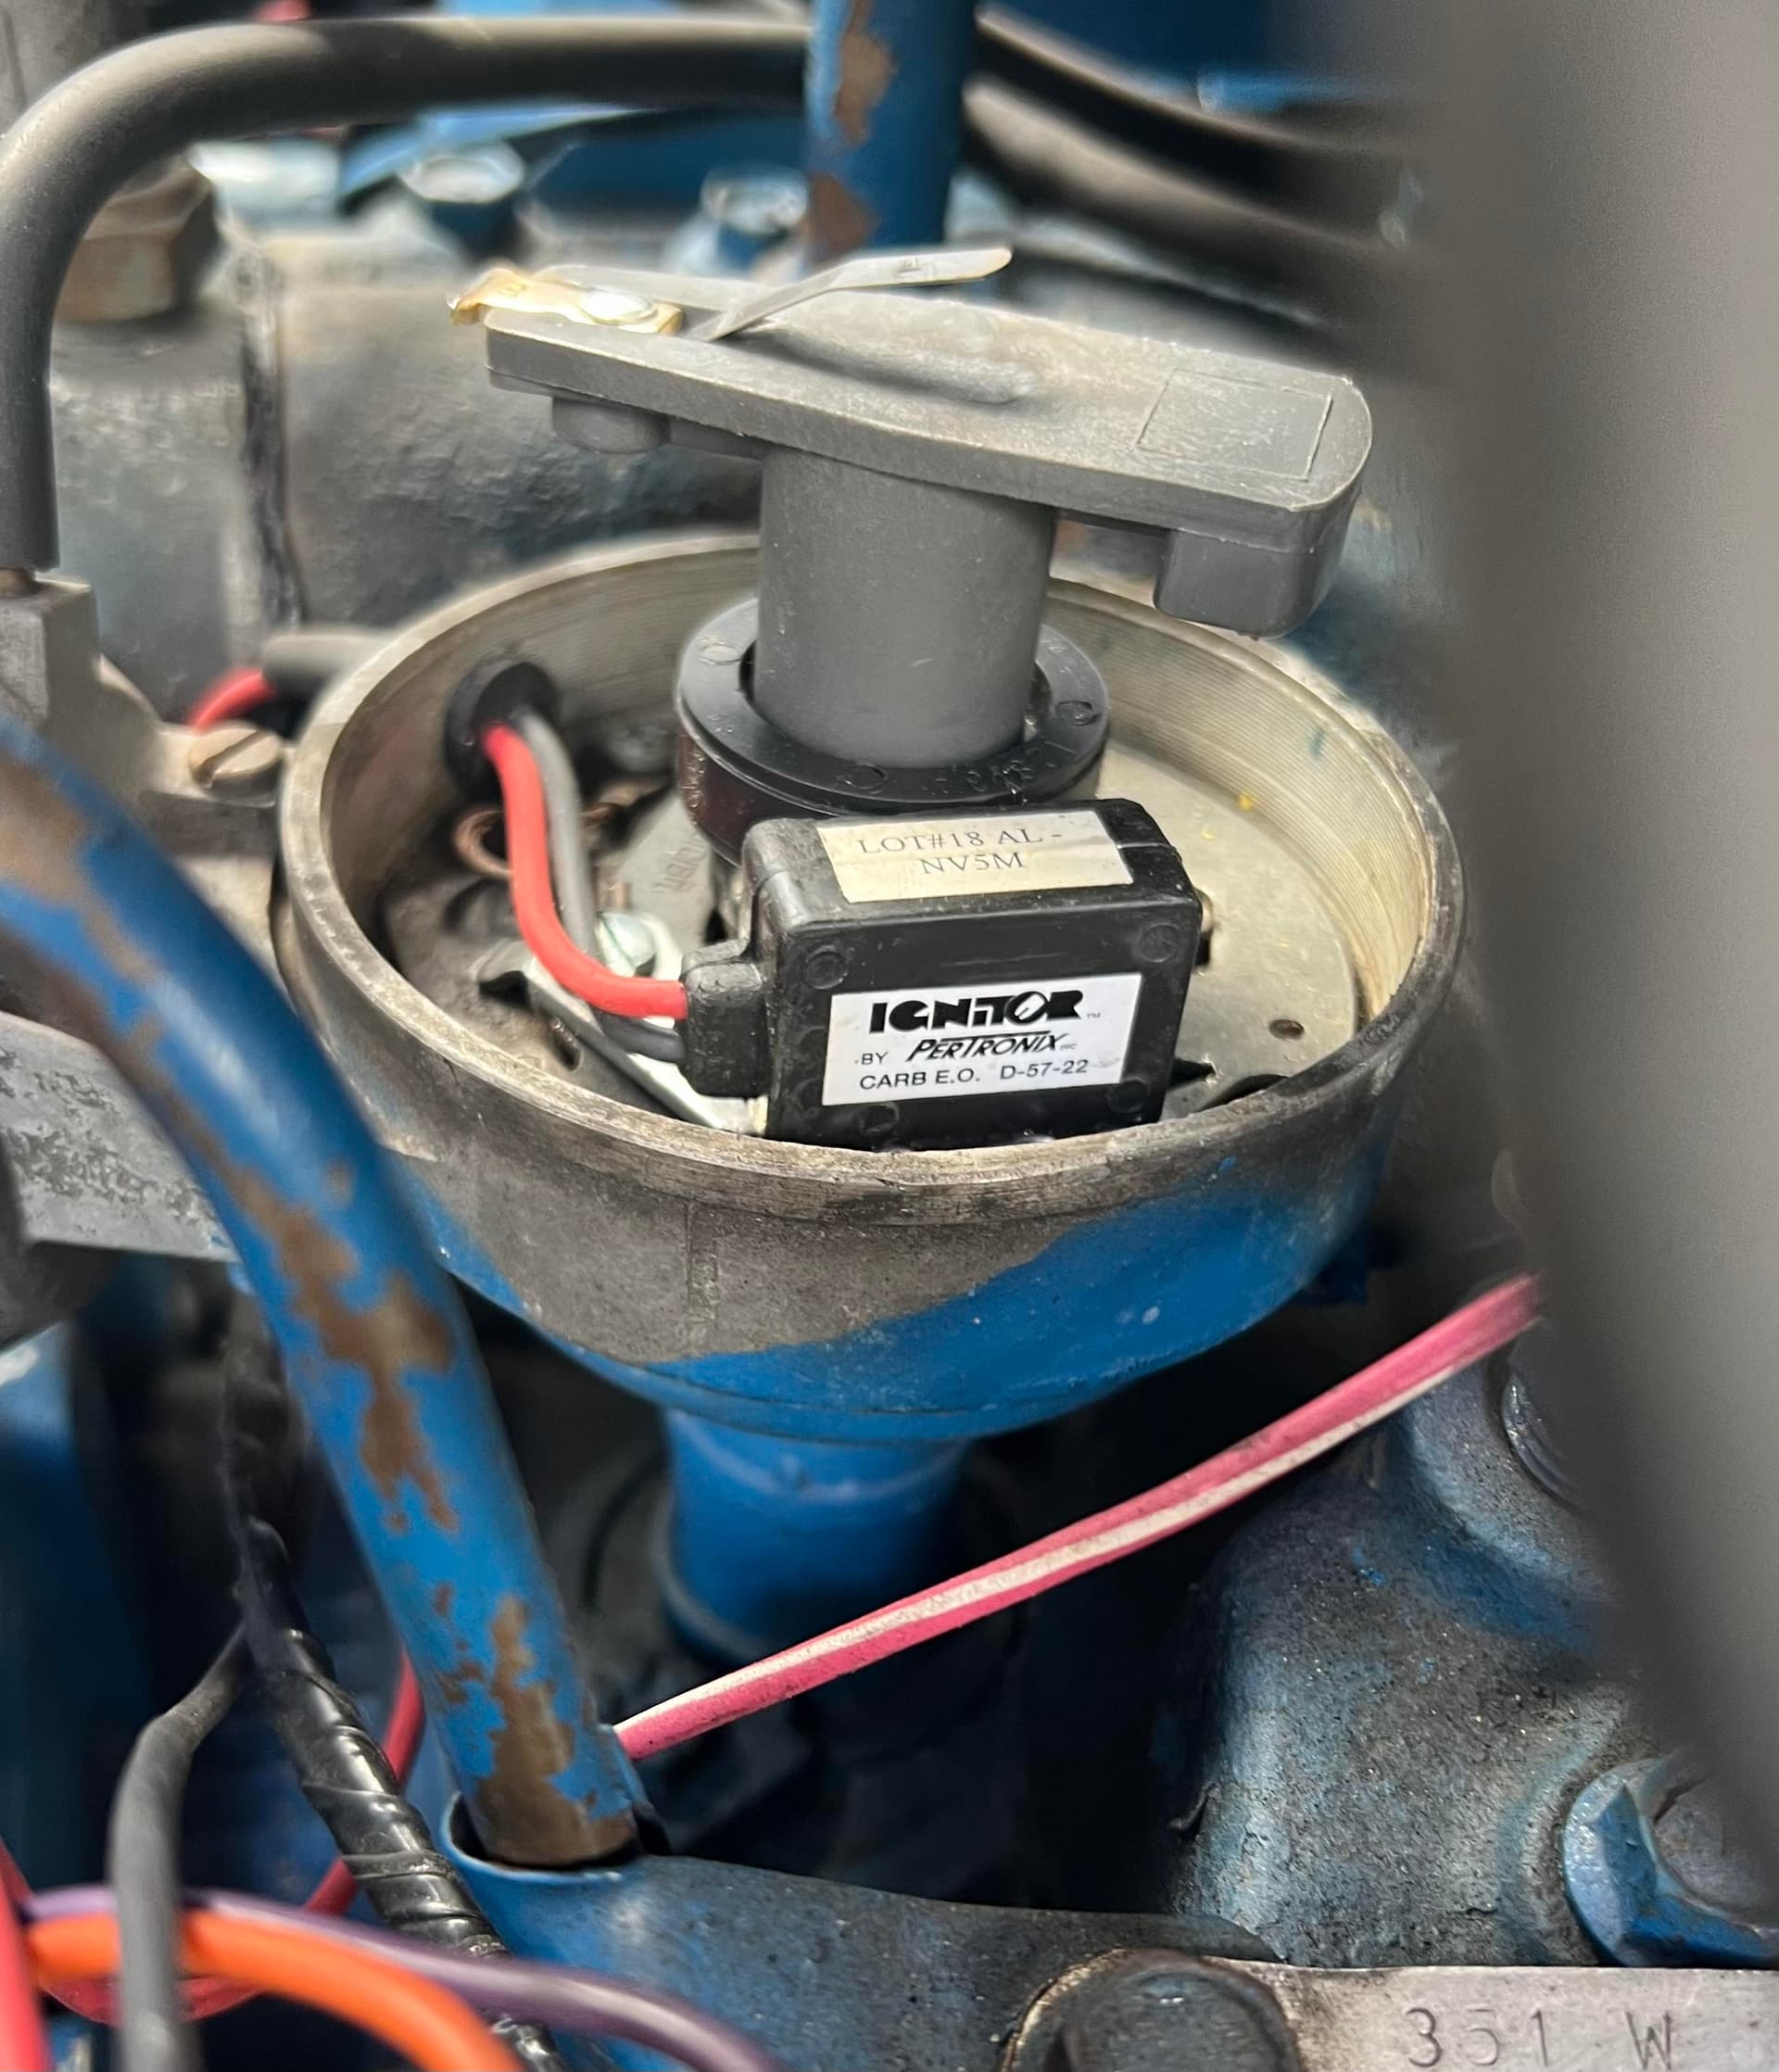
Pertonix module has an Orange and Black wire. Orange is 12v (+), the Black is for Coil(-). Orange needs to come off the coil, the Black stays.
The relay has a Red wire that supplies 12v, and a purple wire that is triggered by the OE Coil (+) wire. Remove the Red wire from the coil, connect it to the Orange from the module. Connect the Purple and the OE Red w/Lt Green stripe to the Coil (+) terminal.
This will connect your factory tach back into the circuit. If it functions, then we need to determine which coil you have.
@TheRktmn thank you very much…this is slowly starting to sink in…so the (factory BTW) tach essentially needs to stay “out” of the relay/Pertronix loop itself and needs to stay focused on the coil. Almost as if the Pertronix is not there.
So, in the pic below orange and red wires (which need to come off the coil) get connected together and the red/green wire for the tach and the purple wire go to the “+” on the coil?
The “tach” wire to the coil is the factory coil feed wire (Red w/Lt Green Stripe wire to the Coil +) Then the way your car is set up the small purple going to the relay will also hook up to the + terminal on the coil. I agree with Rocketman that the solenoid I terminal would be my choice but the wires are already in the area of the coil.
Use the relay to power the Ignitor. (Orange wire on relay to Red wire on Ignitor)
@xr7g428 thanks! Everything else works absolutely fine…starts like a champ every time…just don’t have a working tach…I am likely going to leave everything else as is and make the changes discussed above (red/green and purple to “+”). Thanks!
Whether you hook the purple wire to the Red w/Lt Green stripe or the Brown wire on the “I” terminal of the starter solenoid, it won’t matter. It’s the same circuit. The “I” terminal provides battery voltage only during cranking and is spliced into the Red w/ Green stripe wire at the engine gauge feed connector.
@TheRktmn@Hemikiller@xr7g428 thank you all very much for your help…I now have tach (video would not upload)! Connected the red and orange wires together after taking them off the “+” on the coil and then attached the purple and tach feed to the "+’ on the coil and voila…tach!