I’m just about finished installing a complete Hotchkis Sport suspension on my '68, complete with the Shelby/Arning drop and Open Tracker Racing roller perches. I’m wondering how much I want to dial in the negative camber. It’s not for track or autocross or anything. I just wanted to make it a better driver’s car for the streets and the road.
Hotchkis recommends -1.5 degrees. It’s a pretty big departure from the zero to slightly positive Ford originally specified. The Hotchkis upper arms move the ball to the rear for increased positive caster and inward for more negative camber. The inward movement may have been pointless since you can move the lower arm all over the place for camber. But that’s what it is.
And there are a bunch of people who did the Shelby drop with the stock suspension.
What kind of camber setting is everyone else using?
Mine is lowered 2 7/8". It’s not as much as it may sound like, the starting point was that 60’s stinkbug look with the back end low and the front looking like a plane on takeoff. I cut 1 1/4 coils off the stock springs and got it where I really like it.
-1.5 sounds like a lot. I plan on asking my alignment guy before I bring him the car. I’m lucky to have access to a really good specialty shop. I’m going to try to get it at least drivable, hopefully pretty close to a good setting before I get there. I still have the question of when to install the camber lock plates I have for this project. I plan on using the eccentric bolts until it’s sorted out.
I remember looking at that Hotchkis kit when it came out. Don’t really remember the details about it but, if you can replace the spring perches with the roller bearings ones, do it.
Go to Open Tracker Racing Tech Info for their recommended specs.
I’m about -1.5 on camber IIRC. I use all Street or Track front end components (UCA, LCA, inverted coil overs, adjustable strut bars, R&P steering, brakes) along with 245/45-17 front tires.
Trying to be diplomatic here - -1.5 or -1.75 negative camber is quite extreme other than for a street car that’s running on race tracks with crappy geometry. Yes, our original '67 - '68 suspension was quite crappy, but it was improved quite a bit with the Shelby ‘drop’. I would hope that your upgraded Hotchkis suspension is better than OEM, which essentially means that as your suspension is compressed, it changes geometry to keep the tires in good camber. In other words, you need to bias your camber less than the extreme negative since it is of good design.
Simply stated, unless you are driving EXTREME road racing circuits AND the Hotchkis is crappy geometry, IMHO you’ll wear the inner edges of the tires rather rapidly with -1.5 degrees negative camber.
Take this suggestion from someone over 65 who’s been autocrossing and road racing all of my adult life dating back to when I went to engineering shool at Georgia Tech with the brainchild of the Mazda Miata - Norman Garrett.
As a point of interest, I run -.5 to -.75 degrees of negative camber on all my cars, even my Fox body Mustang in the day with a geometry that had little camber change with suspension compression (modified McPhereson Stuts).
I moved the car today for the first time since mid-February when I started the suspension swap. I drove the car straight back about 30 feet, intending to drive it up on the ramps I always use. They wouldn’t fit under the valence. I had expected the changes I made to lower the car about a quarter of an inch, give or take. It was a lot lower than that. I put my electronic angle finder across the center caps of the wheels for a quick and dirty camber check. Holy heck, negative 5 degrees.
I rotated the eccentric bolts all the way inboard and got it to about negative 2.5 degrees. It got late so I put the car away. The Hotchkis lower arms have their bushings installed in a rod end with 3/4-16 threads. I measured the steering knuckles from ball joint to ball joint and reckon they’re 8 5/8 tall. A little trig tells me I can expect a 0.415 degree camber change for each full turn of the rod end. So, my next session on the car I’m going to shorten the lower arms enough to get to the recommended negative 1.5 degrees with the eccentric bolts in the middle of their range.
After I moved the car around and did several back and fill maneuvers to get it back in the garage the height of the car changed to something much closer to what I expected. I had measured the height after changing the settings and putting the car back on the ground without rolling it any. For a few minutes there I thought I would be shopping for new springs this evening. The prospect of new springs isn’t a heartbreak, but I’d like to get the car drivable without throwing more money at it. Those suspension parts didn’t come cheap. And I removed and replaced a coil spring 4 times already on this job - it’s getting old. One extra time was to grind a little off the roller perch where it interfered with the Hotchkis upper arm, and one extra time was because one of the upper control arm bolts stripped while I was torquing it.
The beauty of adjustable suspension components is that they’re capable of a wide range of adjustments. The painful part of adjustable suspension components is that they’re capable of a wide range of adjustments. Cuts both ways.
I understand your reluctance to pull stuff apart, adjust and reinstall full well as I went through that as well with my Street or Track stuff after the initial install. It wasn’t too painful as fasteners were fresh and threads clean but I pulled my UCA’s off, turned the rod ends in and reinstalled everything before tweaking the strut rods then doing my very first alignment after reinstalling the steering rack.
You got this!!!
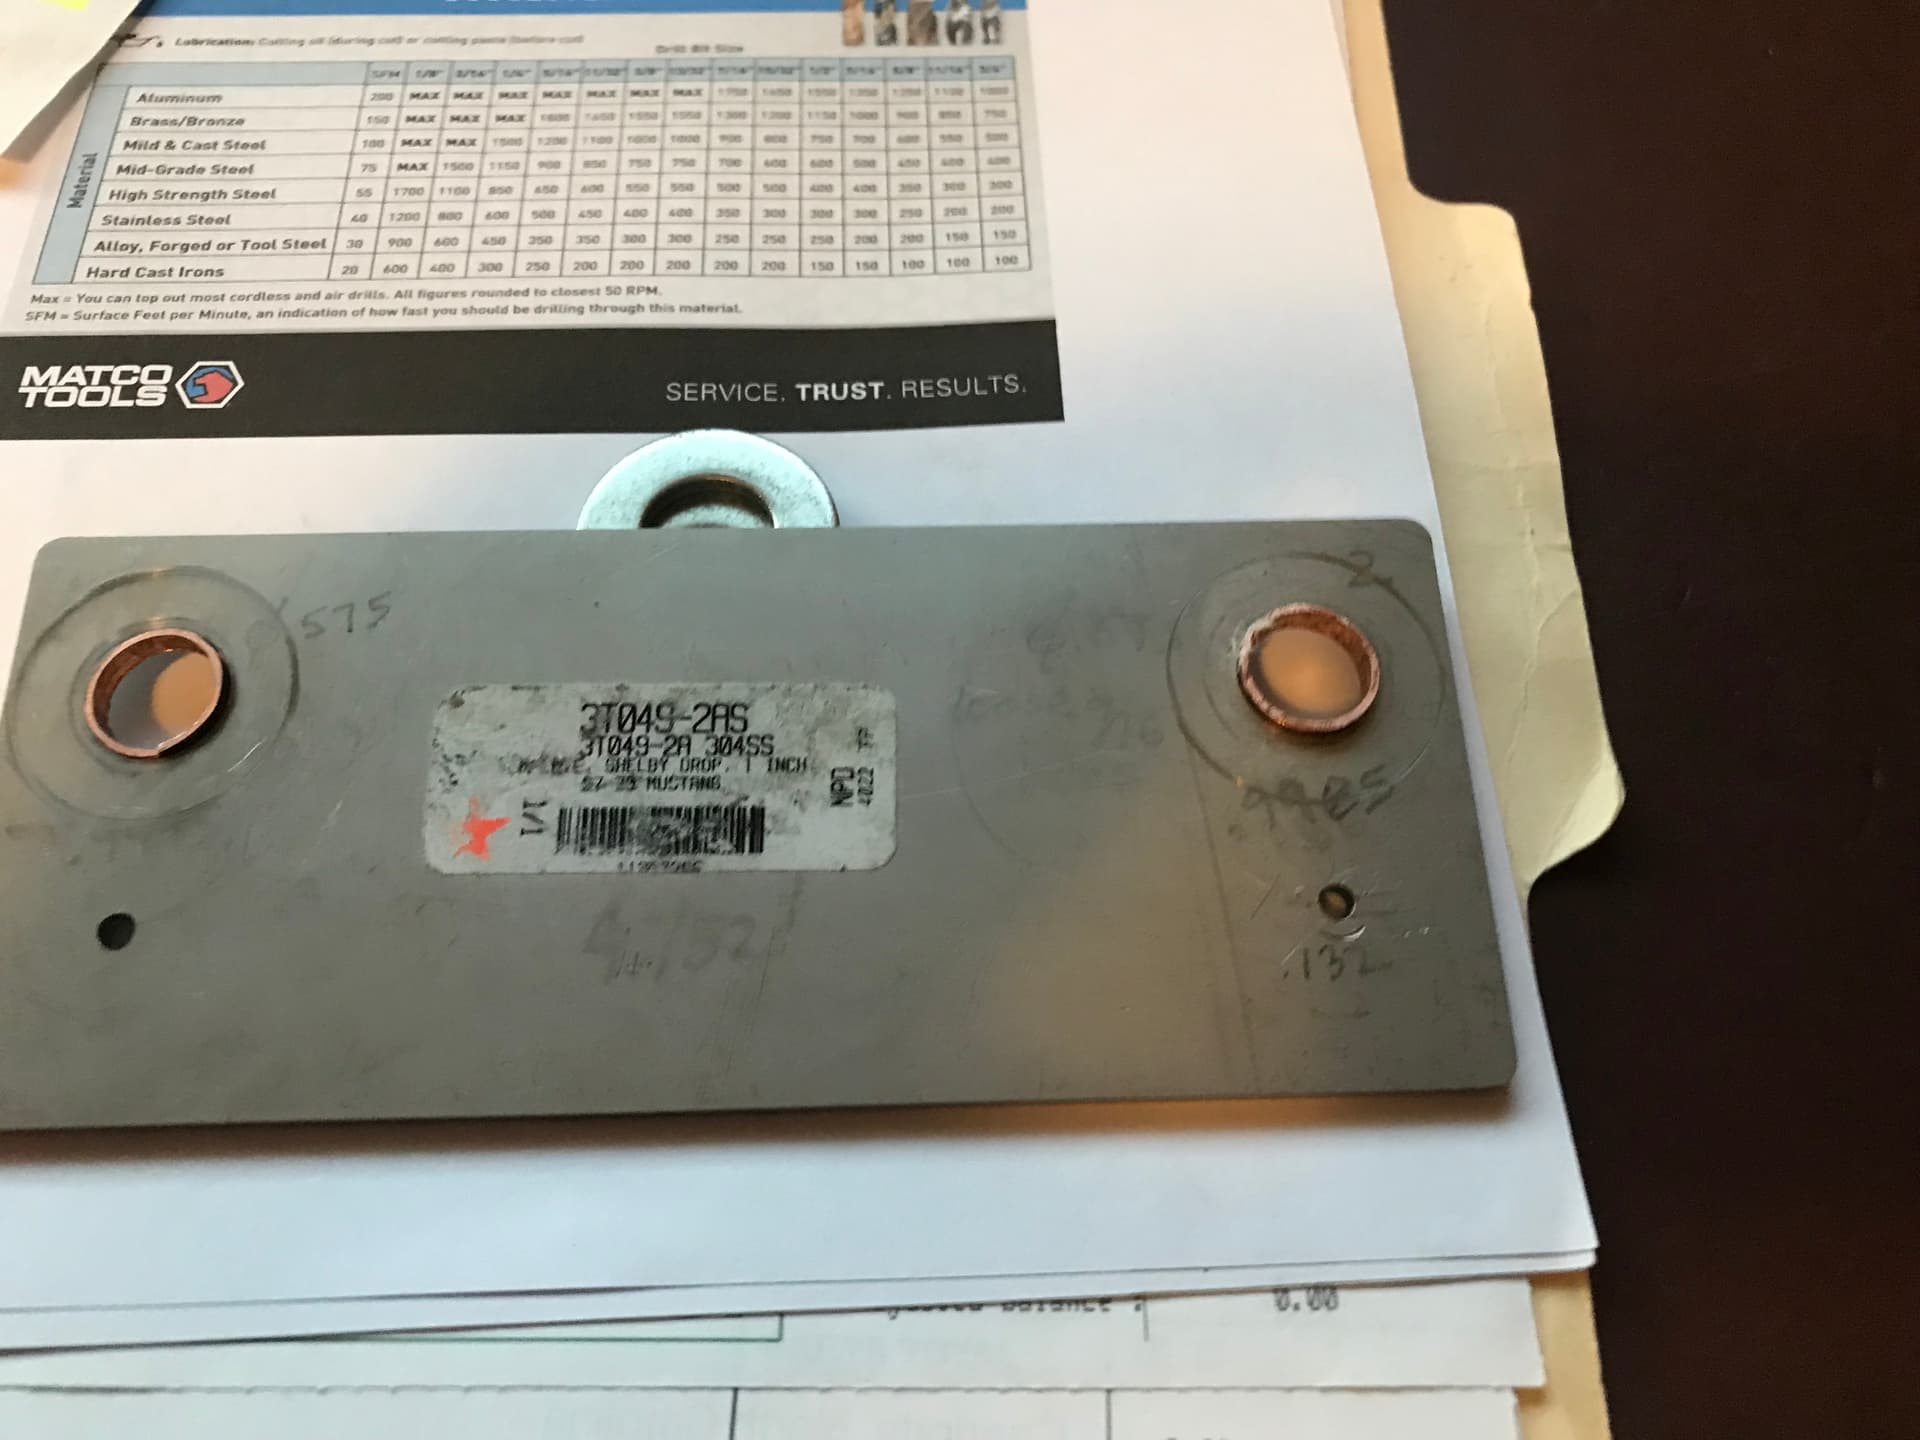
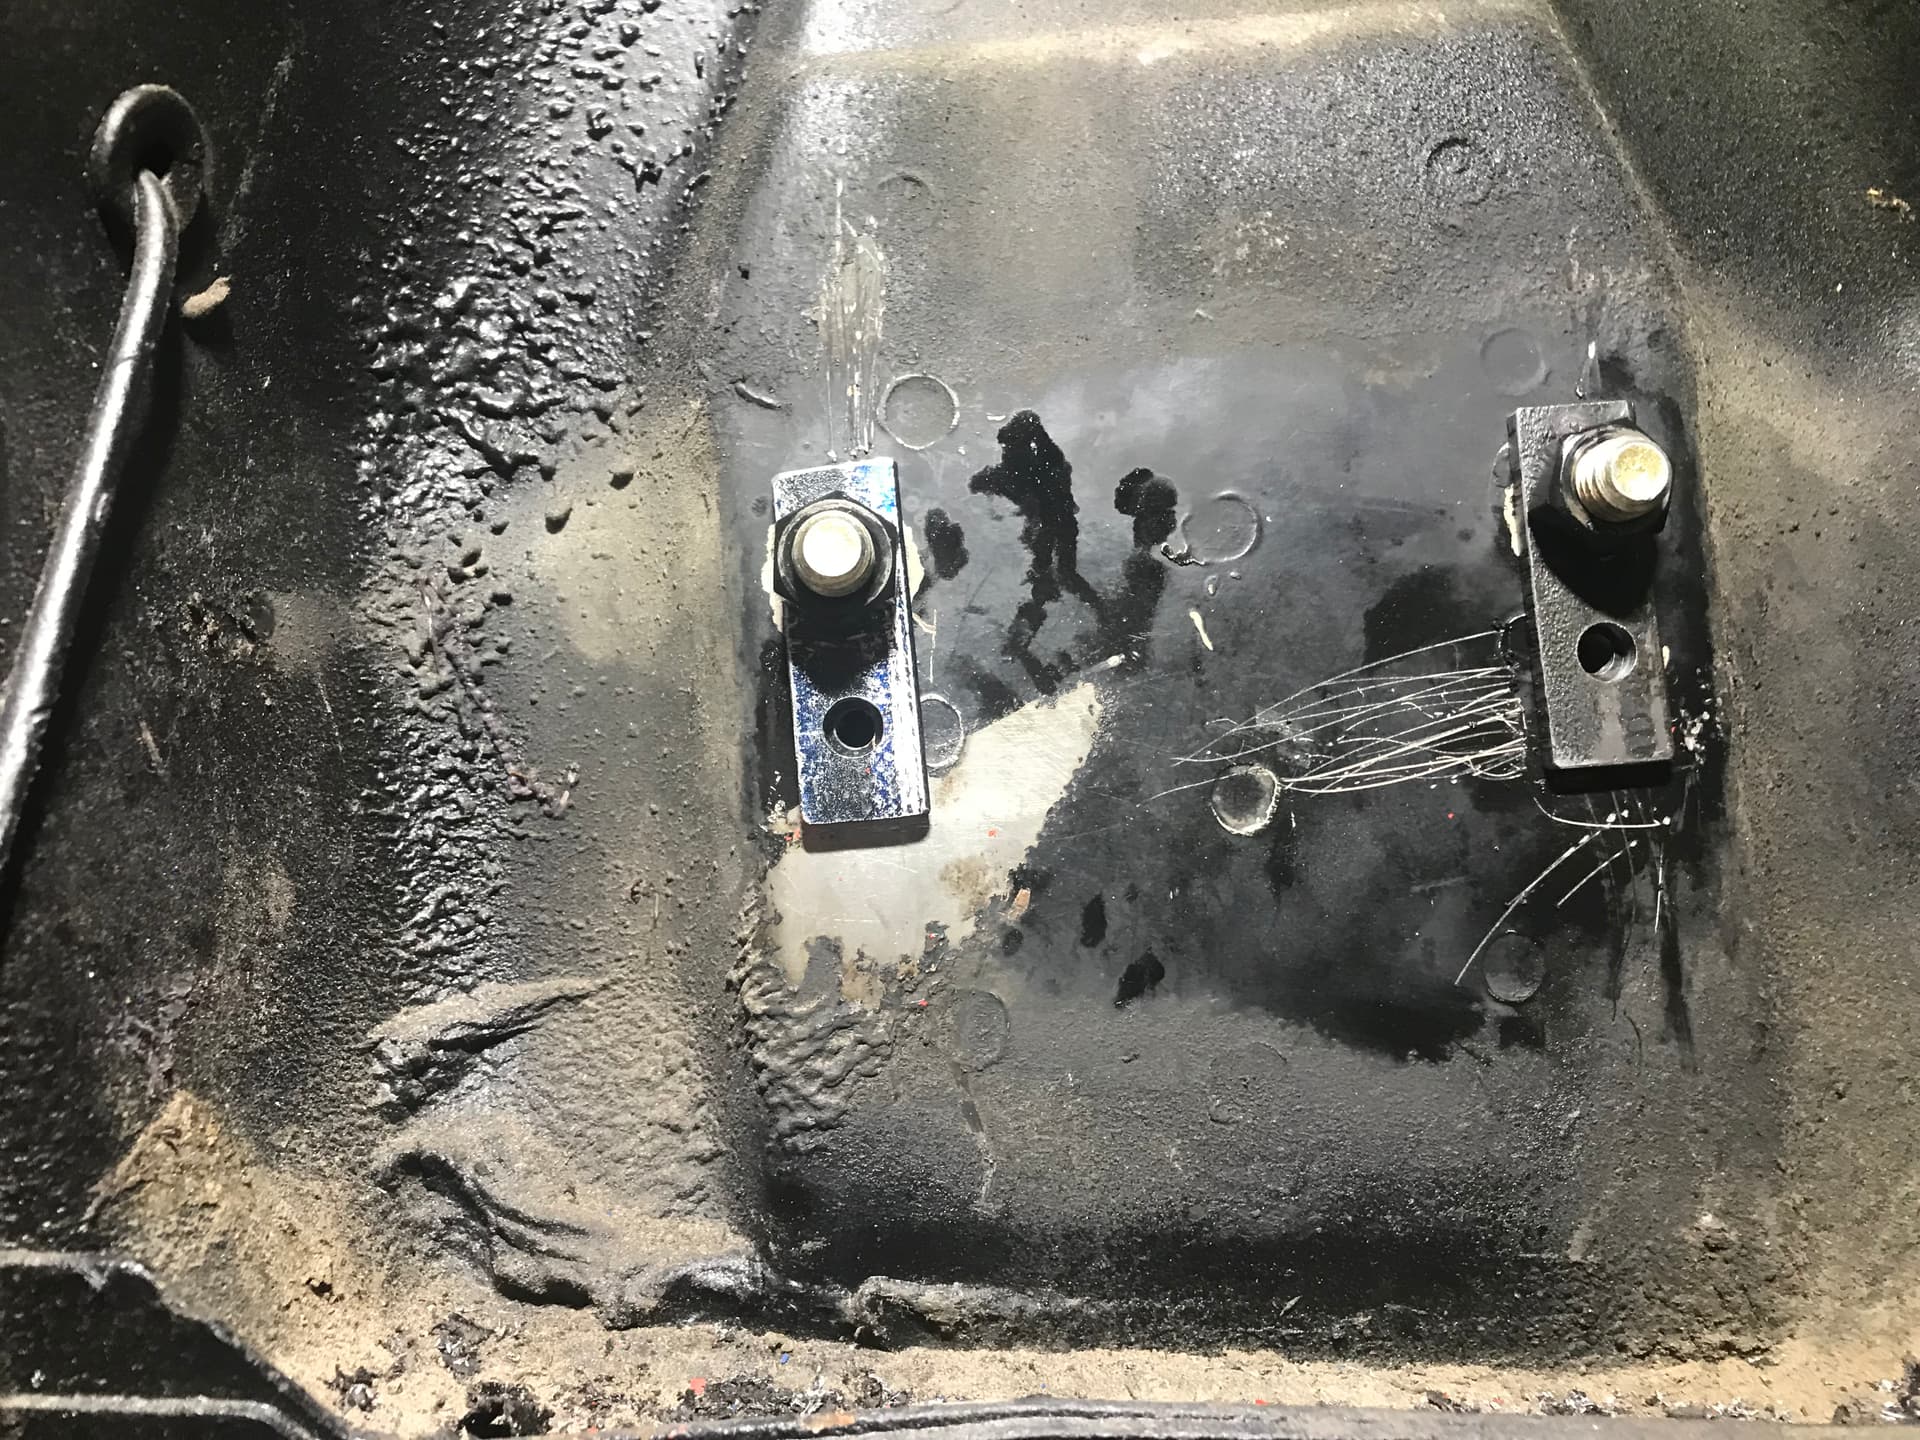
I’m not reluctant, but there’s only so many hours in a day. At this stage I think it will only take 2 or 3 hours to adjust the overall length of the lower arms and from there I’ll be back to making quicker adjustments with the eccentric bolts. The nuts and bolts are easy. Drilling the holes for the Shelby/Arning drop was the only part of the job that gave me any concerns. I can take the suspension apart and put it back together as many times as needed to get everything just right, but you only get one chance to drill a good hole.
I used the drill template from NPD. I found the hole locations on the plates to be about as perfectly located as can be
, but the hole diameters were ridiculously oversized. I was able to put a 9/16 bolt through the attach holes. I ended up making sleeve bushings out of .032 copper sheet to bush the plates for better precision. I also bought various thicknesses of brass shim stock and similarly bushed the body of the car with bushings from (IIRC) .012 sheet. I also fashioned drill tools that I used for every intermediate hole from the 1/8 pilot hole up to the final 1/2 holes. I know the guidance is to finish with 17/32 holes, but when I was done the bolt plates fit up with no filing necessary.
I’m running the SPC upper control arms, which have the Shelby drop built-in and add a bit of caster. I think I’m running around -0.75 to -1 degrees of camber. I think that’s about as far as I could go before the wheel/tire would contact the upper ball joint.