With apologies to both CopyCat and Catvert owners, I couldn’t think of a better name for my project. (I’m open to suggestions, though). In any event, I plan to use this thread to post a sort of photo history of my first generation convertible conversion project. To start out, here’s a brief overview of the project:
The Car: My augusta green/nugget gold 1968 Cougar XR7, J-code, acquired from Don Rush back in 2004 and faithfully daily driven ever since.
The Goal: To make a good-looking, fully functional, daily driver convertible as inexpensively as possible, with as little bodywork as possible, and without substantial down-time (wife gets angry look in eyes when I need to use the van to go to work).
Start Date: Began planning in Fall of 2010. Acquired parts car and top frame in the spring of 2011. Frame mods made and Roof cut off early summer. Point of no return.
Present Status: Can drive in rain without getting wet.
Future Plans: Clean up some body issues created by carelessness during roof removal. Add extra padding in corners of the top to help shape things a bit better. Add extra sound deadener. Make a removable insulated headliner for winter. Finish well moldings. Add Luggage Rack???
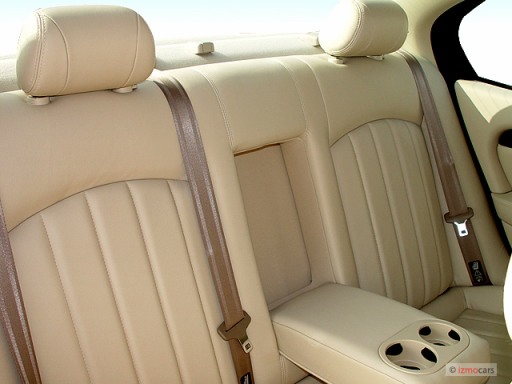
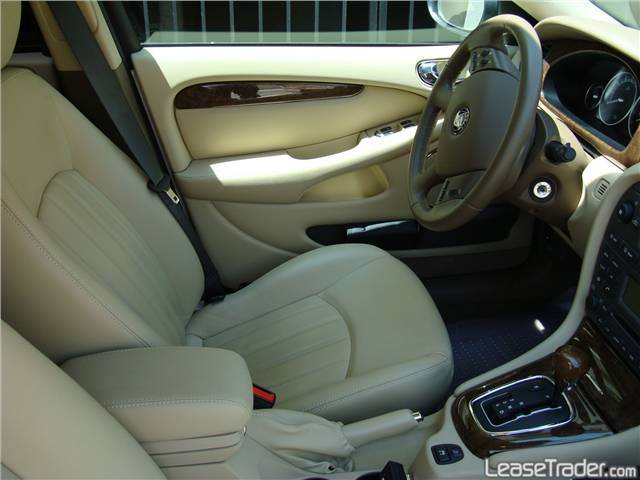
One big disadvantage of a convertible is that your ratty interior is exposed for all the world to see. I really didn’t think mine was that bad until I saw it with the top down. For the past month or so I’ve been weighing my options. Ideally, restoring my existing seats in repop leather from WCCC or John’s would be the way to go. Unfortunately, the cost of doing that is more than my small wallet . Going with repop vinyl doesn’t help either as I would still need to order new seat foam and pay for installation. So, like any good cheapskate would do, I startled googling around the interwebs hoping to find some sort of DIY universal leather covers and foam that I could massage into looking good. No such luck. Then I got to thinking… my vert conversion pretty much killed off whatever “original-ness” my car had, so why be so concerned about the seats. It struck me that just about every car built in the last ten years has some sort of tan leather interior, so why not scrounge for something “close enough” from a salvage vehicle. Thanks to google, I found what I believe is the closest thing to the 67-68 XR7 seat pattern: 2002-2003 Jaguar X-type. As luck (or fate) would have it, one of my clients just happens to have an X type so after some quick measurements, I went ahead and ordered a set from a local salvage company. Total cost: $500.00. Will they fit? Who knows. Can they be made to fit? I don’t see why not. At least I’m going to give it a try. Stay tuned.
Nice - looks like it should be easy for a trimmer to reduce the width of the rear seat
I had problems getting new front sports seats to fit on my 69 vert because of the intrusion of the inner frame rail. Managed to find a narrow set from a Japanese car. You might need some work on the lower frame to get them to sit low enough
I agree that is a good looking set of seats. I think you should be able to make them work. Seat height might be something that has to be worked out. I saw pictures of a G car with Porsche seats and they looked good.
Steven
you may have to remove the seat risers and do something different , ronts shouldnt be too big a issue but your back seat is. i would start by stripping your back seat once you have the new to you seats. then take the jag frames off and see how far apart your frames are. then mark accordingly and then take to local guy to modify! just my opnion
I’m sure the rear seat bottom will require a major rework. My car doesn’t utilize inner rocker panels so the front seats should have plenty of room. Because my car is registered as a collector vehicle, she has to go into mothballs for the month of January (crazy Wisconsin law). That should give me plenty of time to work on the seats. Of course, I’ve got a years worth of accumulated mechanical issues to deal with first, including replacing the power steering control valve, new shocks on all four corners and replacing a squeaking front u-joint. Daily driving sure takes its toll on these old beasts.
I am from Wisconsin also. I don’t want to be a spoil sport but with your collector plate the car is supposed to be stock. You may have to change to a hobbist (sp) plate I think that is for a moddified car. Should be a cool car when done.
Randy Feuillerat
Beloit WI
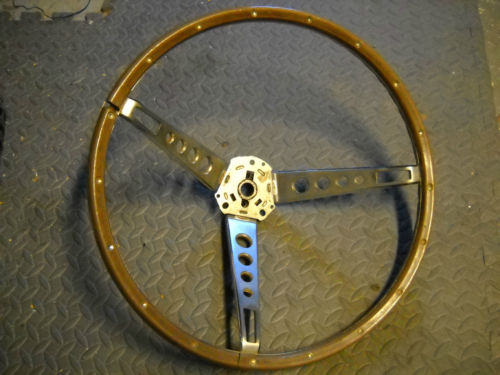
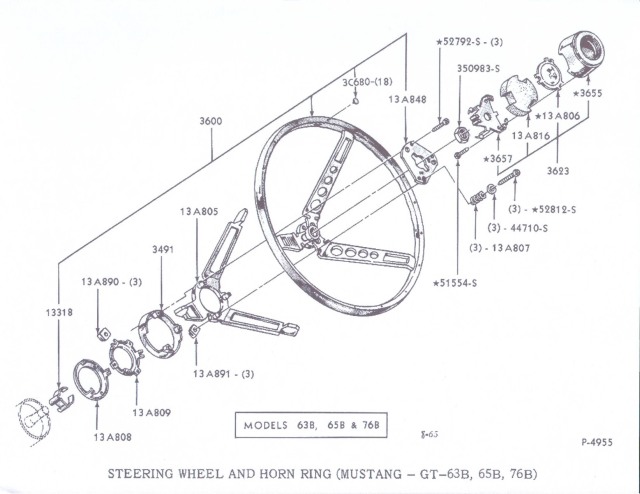
That’s a lot of parts to get. I know that a 67 has a different column than a 68 Cougar. I think it is in the diameter. Did the 67 and 68 Mustang have this same difference? Just wanted to make you aware.
Steven
1967 S code is correct. I tried to use the reproduction version of this wheel on a '68 car with tilt and the column was much larger in diameter than the '67. You might want to check this out before you buy the parts you need. I also understand the reproduction parts will fit the original wheel so that might be a way to get the parts you need if you decide to go farther with the install.