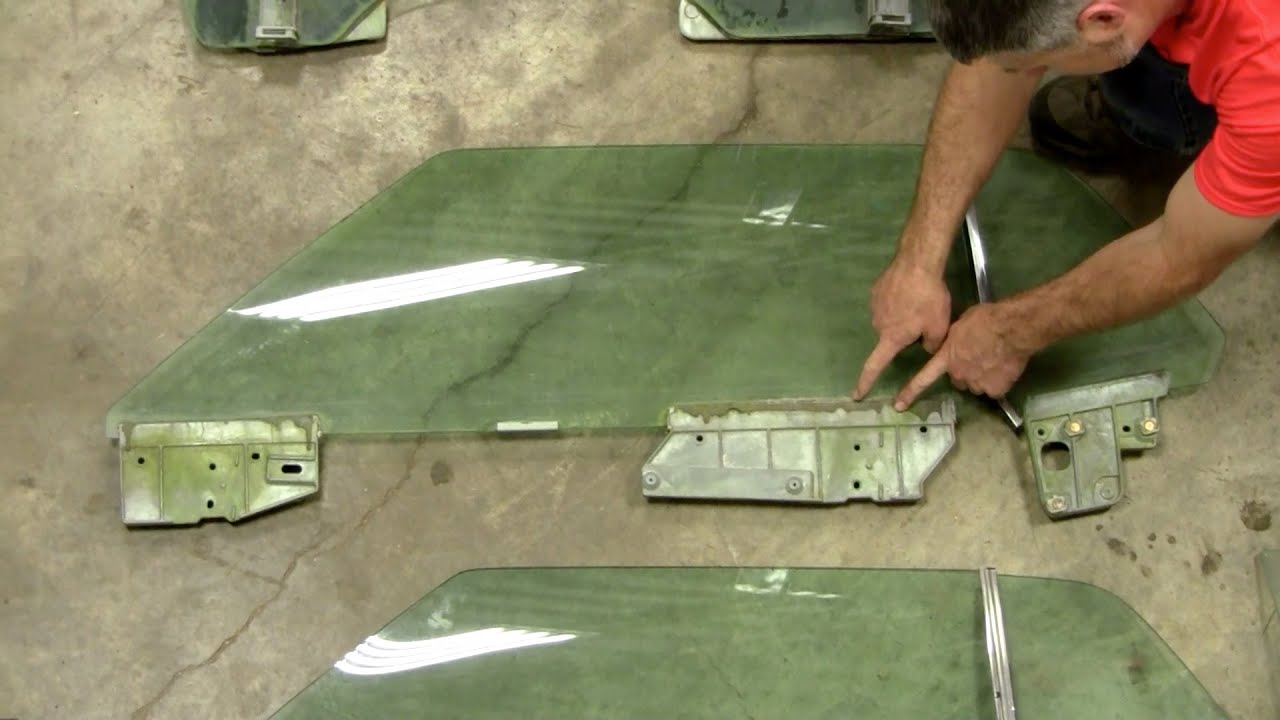
I have a 1969 Cougar Coupe Decor and re are in process of restoring it. I’m putting everything back together and am in need of a diagram for the 1970 bolt-in window hardware. I only have a 1969 shop manual and it does not have anything close to what I need. Please help if possible.
They are very close to 69 as you know. 70 brackets bolt thru glass , and 69 was glue in channel as you and many others know.
Im sure thats why your doing conversion.
Brackets go to the inside, big roundrwashers on the outside. Glides run with opening toward the rear. Tubes are different side to side (L&R) Other than that ask or post pics for furter help!
Don’t forget, when using 1970 bolt in side glass, you also need the 1970 quarter glass with vertical chrome trim on the quarter glass.
1969 and 1970 quarter glass is still all glued in, but 1970 quarter glass is slightly smaller.
In all the videos I’ve seen, they said the opening should be towards the front. Was that a mistake in the video from Don?
I have those. What epoxy should I use? Thanks.
I was told the window can drop into the door in an accident?? I believe they are “keyed” so they cannot be installed wrong. I thought they had a bump/post for correct orientation
I use 3M channel bond
3M Products Channel Bonding and Sidelite Adhesive 7000119888
Summit racing
Another trick. Use vice to squeeze the glide opening. Use Vermeer caliper as a guide.
Test on tube/run at top & bottom ( where its worn a bit from door slamming). It try to get it tight in middle & hopefully not loose at top. Other wise the glass will move, rattle & be difficult to align (wind noise). Best to put all new plastic glides in each one (8 total per door). New runs are avail if yours are too bad.
What is the alignment of the quarter glass in the bracket with the epoxy? 1" from the sides of the groove or fill the groove with epoxy, put the glass in and roll the window up tight?
The alignment in the channel is critical. Best to leave the old factory glue in place. I use a angle grinder w/ a coarse wheel & clean inside the channel to allow new glue space. Leave glued glass overnite. Then reinstall.
If you removed all orig glue (or previous repairs did so) , best to use alignment rubber blocks. spacing even distance both sides. You will also need an extra 3M kit…
I use same “whiz wheel” to rough up glass, spread glue on glass b4 installing in channel
Is there a certain way to align it in the channel? I did clean it out completely and the channel is wider than the glass. Is the alignment 1" on both sides or even on both sides? I took the driver side mechanism completely out to clean all the parts. Should I put it back together and then glue the glass and roll the window up all the way into the seal and let it dry completely in place or should I glue it in while I have it out of the car? If so, how can I get it aligned correctly? Thanks.
At this time , find rubber blocks. Usually glass installers have them for this application. I would use 4 per glass. This will space the glass in the channel equally. As stated best to do this out of the car. Correct spacing from the end is also critical.
I’m surprised thus far in this ‘thread’ that no one has posted the link to the West Coast Classic Cougar video on the complete bonded glass repair ! This includes the measurements for the die-cast ‘lugs’ that are bonded to the glass.
Thank you. I have watched this video many times. Unfortunately, I did take all the glue out of the first track. There seemed to be a black rubber piece that was in the track. Does the get glued to the glass as well as the track and also, where can I find the rubber inserts? Thanks for your help.
The rubber inserts were indeed part of the bonding ‘system’. They were designed to center the glass in the channel, so their thickness is critical to keep the glass in the middle of channel while the adhesive cures. Here is the adhesive ( 3M 08641 ) that WCCC sells:
https://secure.cougarpartscatalog.com/10022242.html
The rubber pieces were almost like inner tube material - as they weren’t very thick, and they didn’t extend the entire length of the channel. Seems to me ( if I recall correctly ) that there were two pieces for each of the cast metal channels, and that they were about 1 to 2 inches wide and didn’t come up to the top of the channel. In other words, once the bonding adhesive was applied / set, you couldn’t actually see the rubber spacing material for the bead of adhesive that ran the entire length of the cast metal channel.
I would check with an automotive glass installer about these rubber spacers.
Hope this is of help with your task.
I ended up using the pieces of the rubber mat used to keep tools from sliding around in your tool chest drawers. I recall doubling them up to center the glass in the channel.
Thank you very much for the great information. I did check with one glass place but they had stopped doing automotive glass but he was familiar with the process.
Thanks. I will try something like that if I am unable to get the rubber blocks from an auto glass facility.
