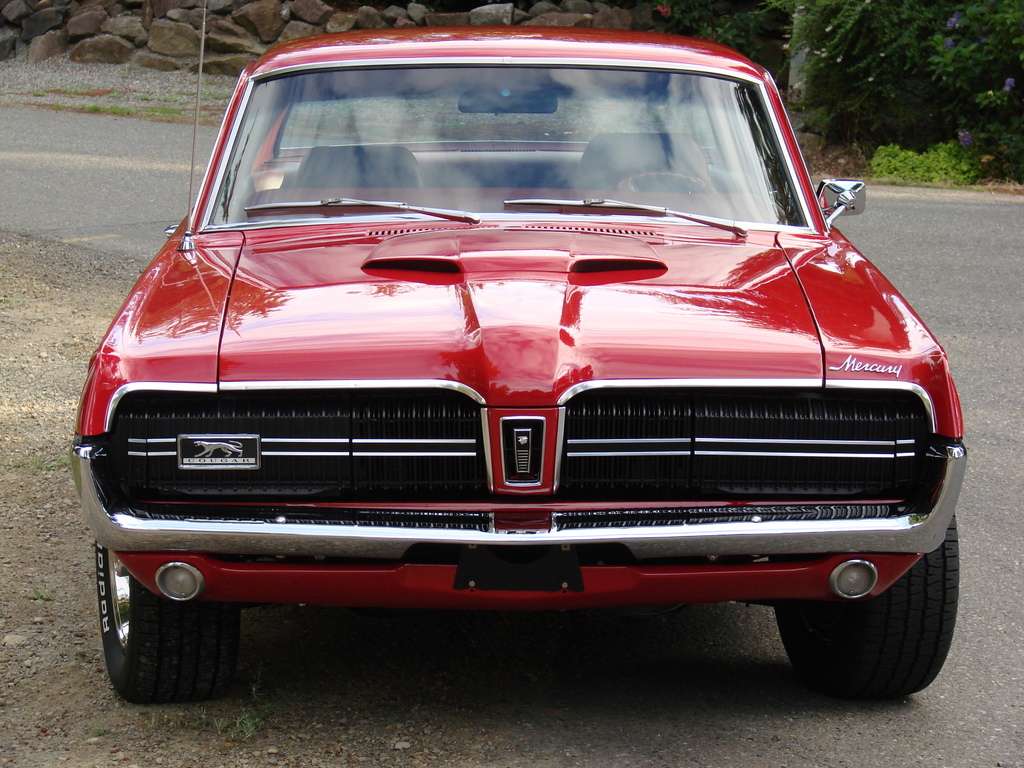
Father/Son project....sadly, without the Father.

thanks for all the support everyone!

coug67: i never thought about the vacuum issues, that’s probably going to be somewhat of a factor, i may end up with a radical cam.


UPDATES:
–i found a 700 double pumper carb in my mom’s garge that i plan on turning into a 750! :smiley:
–pictures soon, i just have to put them on photobucket
–the check i’m waiting on should be here something like Friday or Monday, so as soon as i get that i’ll have the car in my posession.

–a man came into my work and offered to help out with the body work (he had a GLEAMING and PERFECT '96 Ford F150 that he restored HIMSELF)… i told him i didn’t have any money to pay him and he said “just bring me some Bud Light”…you gotcherself a deal mister. hahaha.


i’d say things are going good :slight_smile:

No hood scoops were available in '67.

In 68 only available on the GT-E and the XR7-G.

Why not an Eliminator scoop? They look great on a 67- 68.


Pretty sure I’m going with eliminator scoop. So damn sexy!

i’ve thought about that too. if i do add on things like that i want to make them things that were available in or AFTER 1968, so it looks like people just added to it over the years, such as the Boss motor, and the Eliminator scoop.
going to go get the car here soon! today i may not be able to bring her home but i’m going to bring most of her bits and pieces that are in boxes, home!

pictures to follow either late in the evening tonight or tomorrow! stay tuned!

On a 67/8 I don’t really think the Eliminator type hood scoops look right. They are more angular and boxy and don’t tie in to the curviness of the hood. The XR7-G and GT-E scoops, being specifically designed for the first-gen body style and hood, look much better IMO. Of course, they aren’t functional.

It kind of reminds me of Cougar nostrils, haha.

i can agree with all of this.
and that’s a really nice car. haha.

went and paid the final amount on the car today!
going to setup a pickup for the car!
took most of the parts home… my apartment looks like a home from Hoarders!!! haha. pictures soon of these parts, i need some opinions on whether a couple things are fixable or not (time is no object) or whether they are junk.

there are some things i think i’m missing as well, i’ll try to get a list of what i have posted so maybe you guys can help me figure out what i’m missing?

i used an online VIN decoder to reveal this info, she is a:
1968
XR7, hardtop
born in the Dearborn, Michigan plant
302 2v was under the hood
i have a feeling the original color was Saxony.
from what i could tell looking at the rear end she’s got a 8" under her… disappointing…but oh well.


also, if anyone lives close enough to me and is versed in wiring these cars up, please contact me, as this car seems to be a wiring nightmare (lots of snipped harnesses in multiple places, etc…it’s not TERRIBLE but i’d like to make sure everything is correct and in good shape)

Put your location in your profile, that may help with the last bit…“if anyone lives close to me”…

You can get nice rear end gear sections/pigs for the 8 inch that are just as strong they say, as the 9 inch these days.

that would be great, because if i can get away with an 8" that is just as strong for less than a new 9" then i’ll do that.

I did search through many of my mags and went on line and couldn’t find the manufacturer of the newer stronger 8 in rear. I may have been dreaming, so I have to retract what i said about the 8 inch.
here is some info I found on it’s capabilities, some of which I copy and pasted here.

If you want to see the pictures and the rest of the thread on the subject, Here is the link. Only the pictures will show up on the original thread.
http://www.allfordmustangs.com/forums/classic-tech/148797-how-strong-8-inch-rear.html


The 8-inch rear end came out in 1962 [1962-1980]. The 8-inch 3rd members from '62-'66 are the weakest versions. Starting in '67-up, the 8-inch 3rd member case was revised [C7OW casting] to include more vertical and cross-webbing on the face of the case to strengthen it.

There are claims of people running these 8-inch rears with 400 hp, and they may be getting away with it, but these rear ends were not engineered to reliably handle that much power and torque --at least not without a lot of beefing up with [expensive] aftermarket parts.

All early V-8 Mustangs came with 8-inch rears except for the HiPo 289s --they came with 9-inch rears. The HiPo 289s were rated at 271 hp [Shelby 289s were rated at 306 hp].

The HiPo 289 carried over into the '67 model Mustangs. Even though the 8-inch 3rd member case had been revised by '67, Ford still did not use the revised 8-inch in the HiPo 289 Mustangs --they used the 9-inch.

Manual transmissions and sticky tires with lots of traction are not the only things that will kill an 8-inch. Most Mustangs suffer from wheel-hop, and this can also kill an 8-inch, even with regular street tires.

There are a few common failure points for an 8-inch; one is in the area of the input driving pinion support on the front of the 3rd member casting. The other is in the area of the pinion [spider] gears inside the differential, or with the differential main caps/bolts.

An example of a driving pinion support failure on an 8-inch [revised case] 3rd member:

http://img387.imageshack.us/img387/7...dmemberrq7.jpg


An example of the main caps and main cap bolts breaking that lead to this disaster on this 8-inch [revised case] 3rd member:

  1. http://img387.imageshack.us/img387/2...n8inchclq1.jpg

  2. http://img383.imageshack.us/img383/6...n8inchaas3.jpg

  3. http://img362.imageshack.us/img362/6...en8inchru7.jpg

  4. http://img387.imageshack.us/img387/1...n8inchbvn9.jpg

I suspect the reason why so many people run 8-inch rears, in applications it wasn’t really designed to reliably handle, is because a [wrecking yard] 8-inch is much easier to find in the right width for an early Mustang than a 9-inch of like parameters. It’s your car and your money, so only you can make the decision of running a rear end that might last, or to run one that will give you no worries.

An 8-inch, beefed up with expensive aftermarket parts, is only as strong as your base-model, stock-configured, run-of-the-mill wrecking yard 9-inch rear.

8-inch rear ends only came with differentials that had 2 pinion gears inside. A 9-inch could have either a 2-pinion differential, or a much stronger 4-pinion differential to distribute the force over a greater surface area.


http://forums.mustangandfords.com/70/8354548/mustang-fords-drivetrains/finding-strength-in-fords-8-inch-rearend-article-i/index.html

haha holy crap that was a lot of info but i thank you for sharing it, so i can get a feel for what an 8" is like. now that i read that though, i realize that this motor i’m building is going to crush that 8"…so i should probably just sell it.

well, there will be PICTURES soon if i can get my phone to upload them to Photobucket sometime soon…for some reason sending picture mail on my phone is about as good as printing them off and sending them snail mail!!! GRR!

does anyone know where i can get quality sheet metal pieces?

does the WCCC store sell OEM gauge metal pieces? or are they thinner?
I called Mustangs Unlimited about their apron pieces and the guy really couldn’t tell me anything about it, but referred me to someone that’s more into Cougars and could tell me a great deal more. waiting on a call from him.

but i’m looking for the front and rear aprons for both sides…the only major rust is the battery tray area but unfortunately all the fender bolt holes are rusted out a great deal bigger. so yeah. there goes that. haha.

edit: the only major rust in the front… haha. overall, it is the worst of the rust, but there are some spots that are close seconds. haha.

PICTURES PICTURES PICTURES!!! i finally broke down and bought a Mini SD disc adapter for my phone’s memory card… so as long as my computer will cooperate, there will be plenty of pictures from now on! :slight_smile:

first… here’s the carb i found in my mom’s garage… someone thought it was cool to paint it black, but i cleaned it up later…:

found a nail holding a piece of the linkage together, lol

goin’ bowlless.


annnd i know this isn’t really Cougar related, but this is just one of the reasons i like working at a parts store… people bring in their rides and toys…this one is a MG model B GT replica, with a Rover aluminum V8 in it. can you say ZOOM ZOOM??? All in one day i saw this MG, an Alpha Romeo Spider, a Dodge Viper, an older Corvette Stingray, and then the next day i saw one of those Cobra’s, you know the two seater roadster? sick.

anyway, on to the important stuff, COUGARS!!!

here’s the passenger headlight assembly/grille as it sits:

cleaned up the “walking cat” emblem. not bad for a 44 year old piece. i think for now i’ll leave it the way it is, cleaned up. prolly touch up some of the black if i can with some Mar-Hyde trim black.

**a little before and after action on the chrome grille slats:[/b

all shined up… the black parts could use some cleaning though.

**

i plan on restoring the grilles, i just wanted to test my polish out a bit, by the way, if anyone wants to know what i’m using in the following bits (pictures i’m going to post soon), here’s a supplies list:

Blue Magic metal polish
PB Blaster
straight concentrated Purple Power cleaner
toothbrush
600 grit wet-or-dry sandpaper
1500 grit wet-or-dry sandpaper
2000 grit wet-or-dry sandpaper
Viking multi-purpose microfiber cloths (O’Reilly Auto Parts, possibly other auto parts stores)
Viking multi-purpose spa towels (O’Reilly Auto Parts, possibly other auto parts stores)
Dico Jeweler’s Rouge (found at ACE Hardware)
gonna try some Porter Cable level 5 Polishing Compound (found at Lowe’s)
Dico 60 (soft) polishing wheel
Dico drill arbor adapter
Black & Decker 7.2v cordless drill (has a slower rpm range, good for polishing)

so here we go, here’s the fun part. i decided since i don’t have the car and i can’t really go spend money on parts for the bodywork until next month, i figured i’d go ahead and polish out the aluminum trim that’s straight, as well as the little chrome bits for the interior and such. a few of the items polished out really nice just using some Blue Magic Metal Polish and the Viking microfiber towels, and lots and lots of elbow grease! like the grille emblem…by the way, does anyone have a Mercury Man they could send me or i could buy off them per chance? mine has a little gash in his helmet:

not bad for a 44 year old piece eh? next i moved on to the “Cougar” script emblems. a bit of Blue Magic took care of them too, pretty decent.

then i decided to jump over to the plastic lenses, getting those restored.
for this i used Purple Power and a toothbrush to clean them up, then followed up with a good scrubbing on the outer (the part that faces out, not the inside difuser part) with some Blue Magic and a cloth…i didn’t know if the Blue Magic would work, so i just decided to try it, and it yielded these results:

BEFORE:

AFTER: