So I hi-jacked the suspension topic for a 68.
You’ve seen a few photos in that thread, and can repost them if requested.
My goal for my project is to create a car that will handle extremely well, offer acceleration that will be exhilarating, stop as well as it goes, and offer more safety than the original provided.
The car is getting 3 point seat belts, 2018 power buckets out of a Mustang that offer lumbar support. (Good for an old back🙁). In order to secure the upper seat belt mount, in conjunction with the buckets, and to keep the shoulder part of the belt from attempting to cut off my neck, we installed a roll bar to attach the upper belt mount. Roll bar is painted matt black.
So back to the topic…
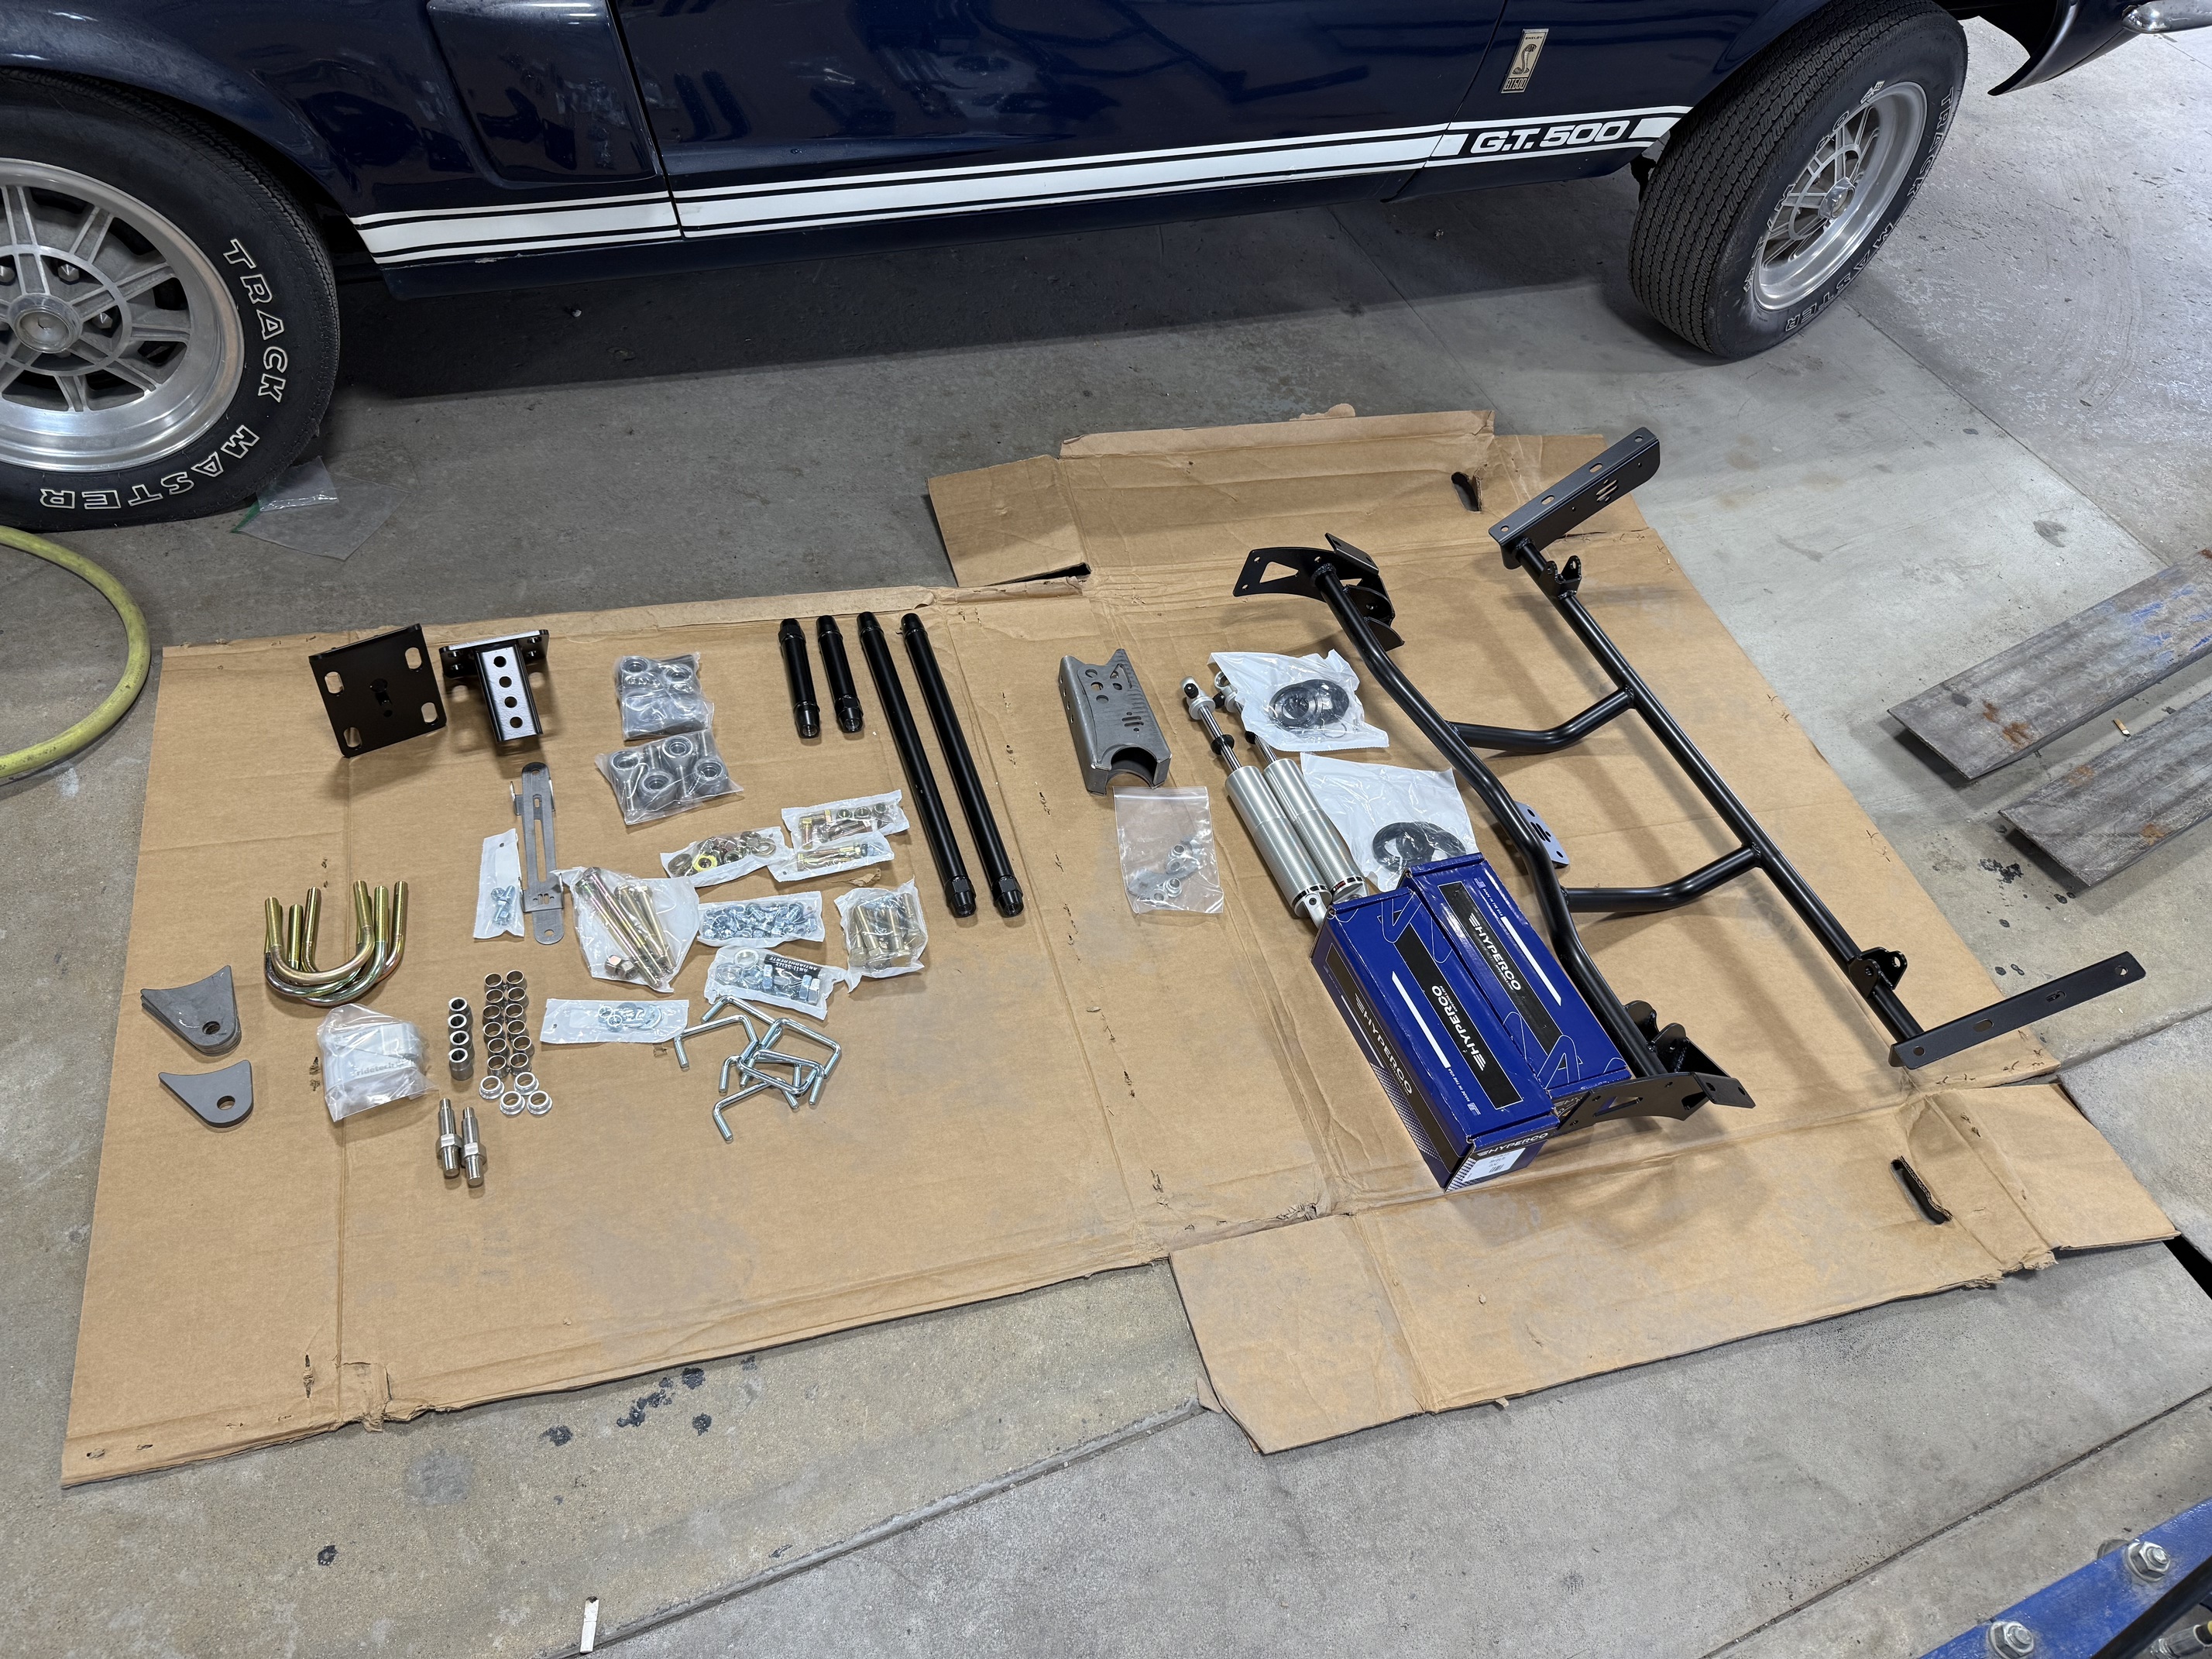
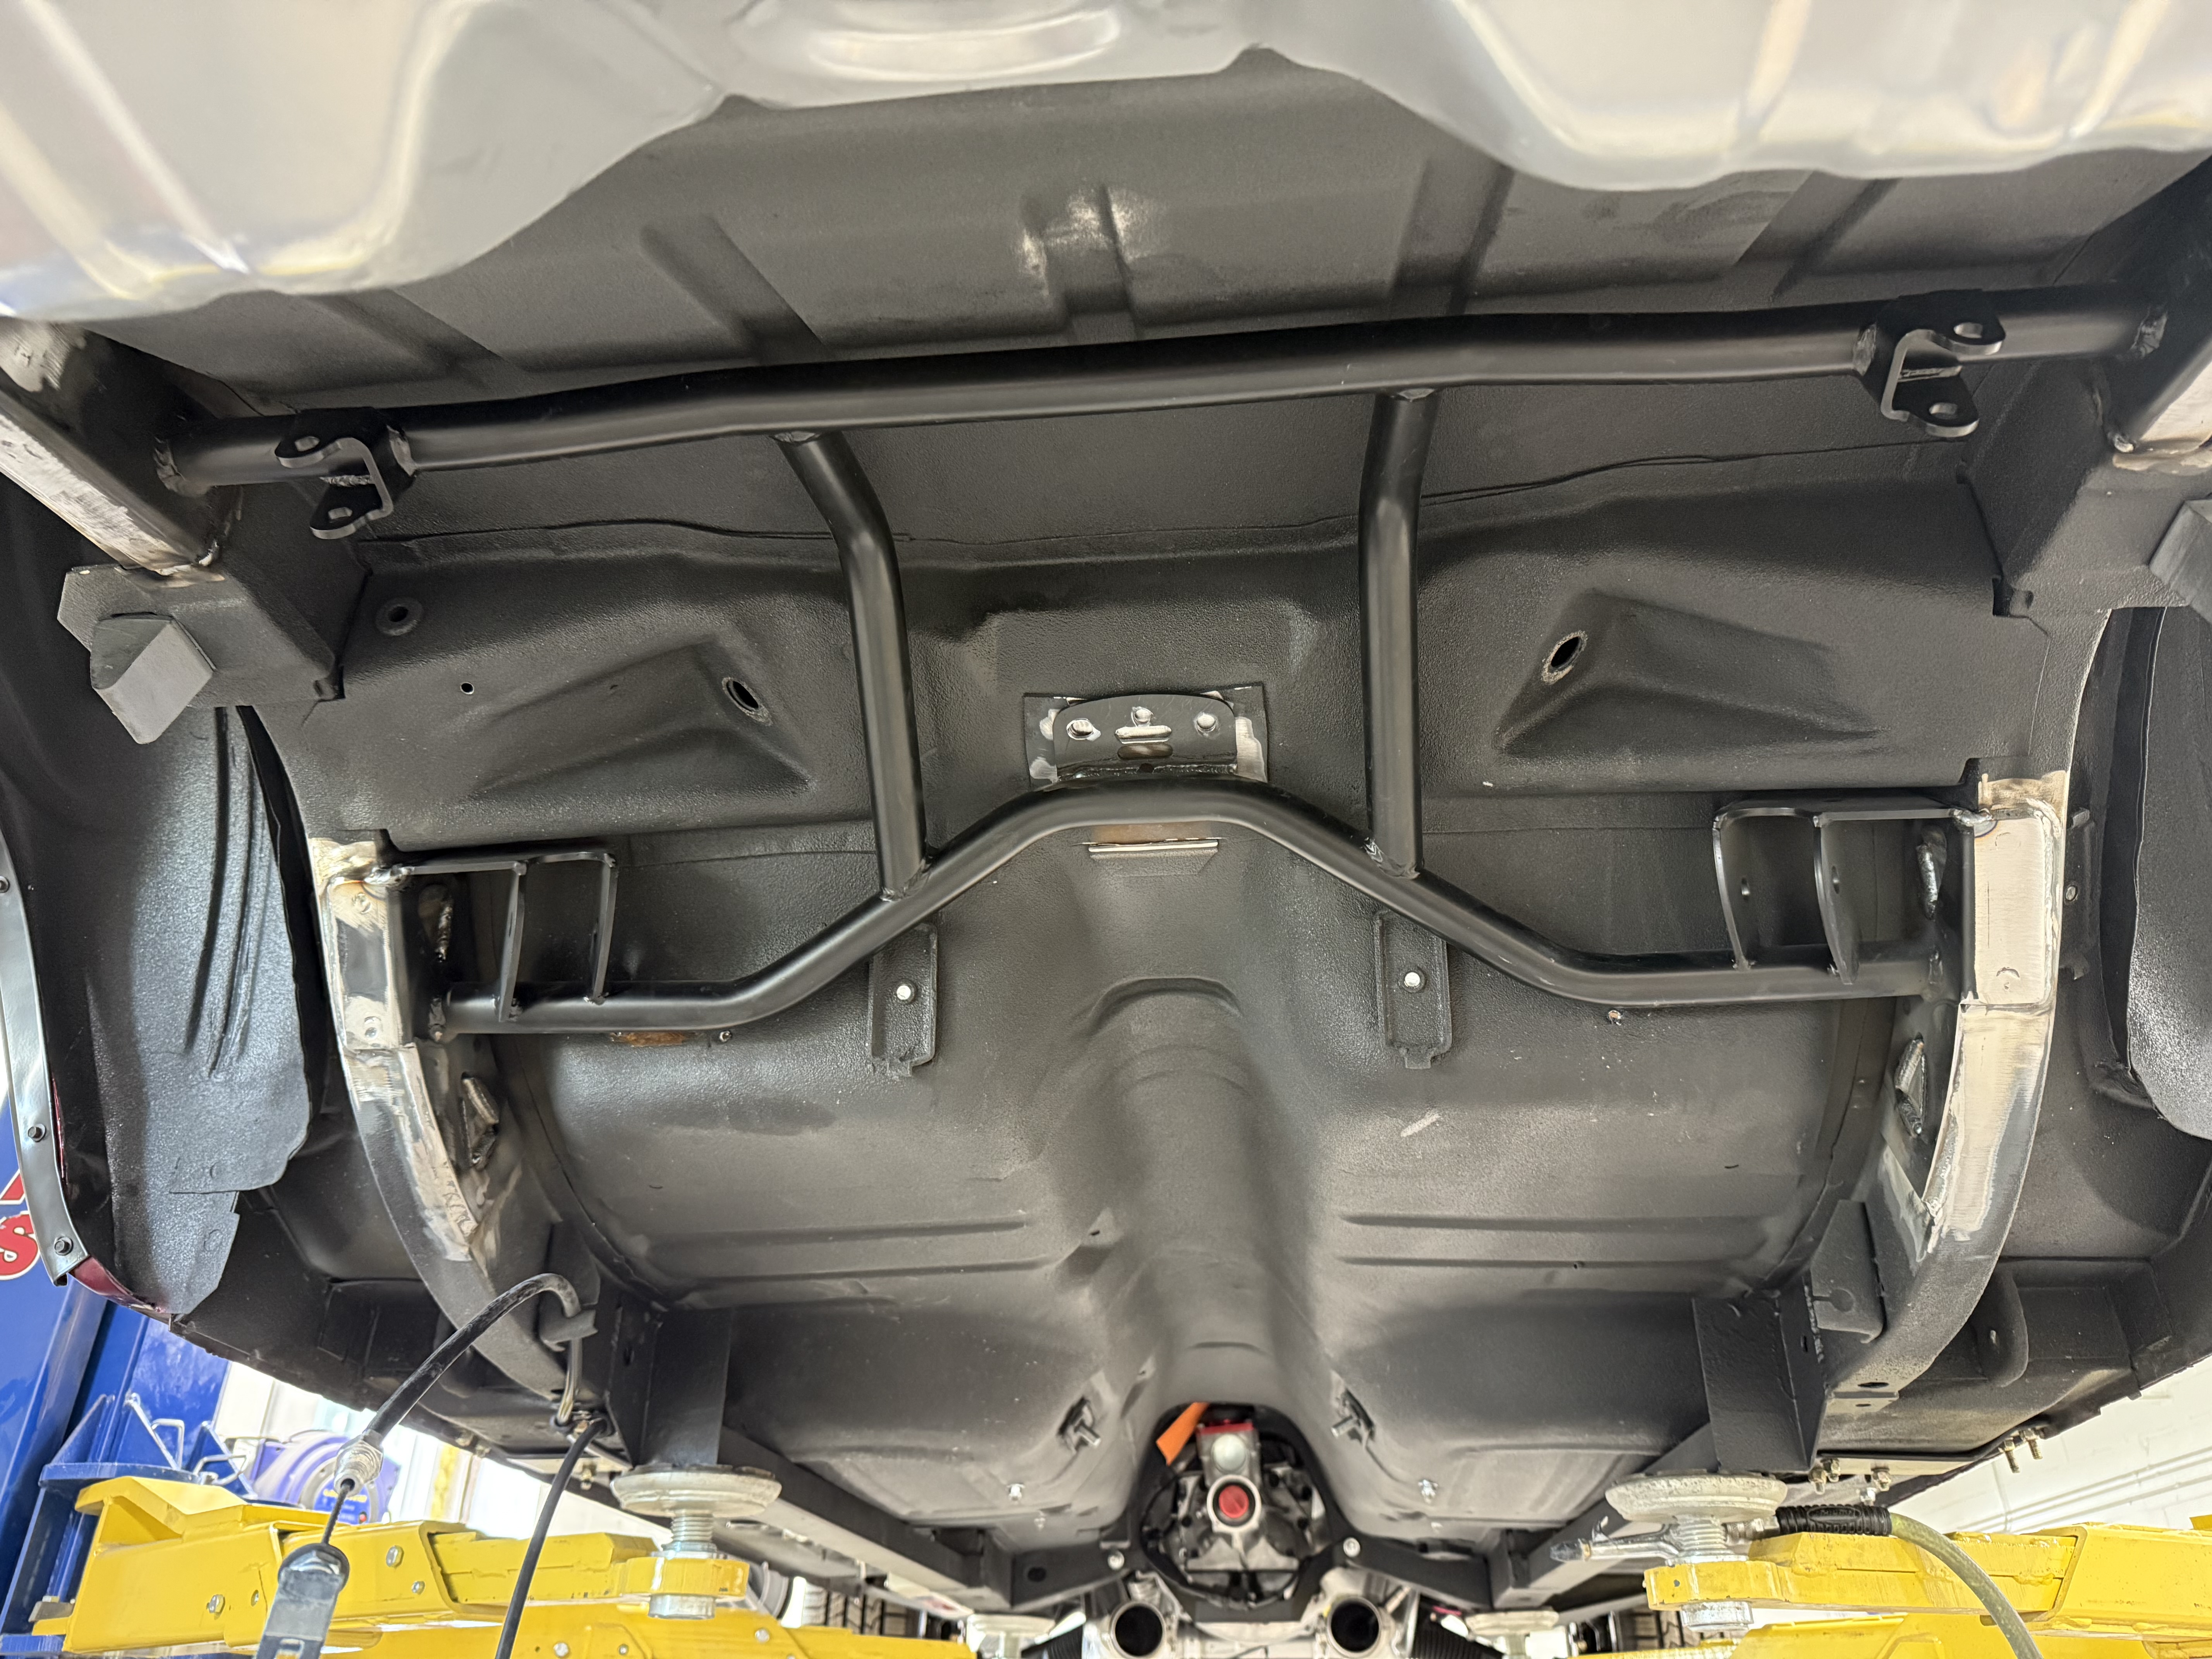
I wanted a better handling car than what I had with my 68 XR7 302 2V 4speed that I owned for 2 1/2 yrs 1970 -1972. To that end, we went with the Shelby drop, Mike Maier tubular upper A arms & lower control arms, 1 1/8” front sway bar (based on their recommendation), 1” shorter springs, roller spring perch. (Which sit on top of the upper A arm instead of sitting down as in the factory arm)
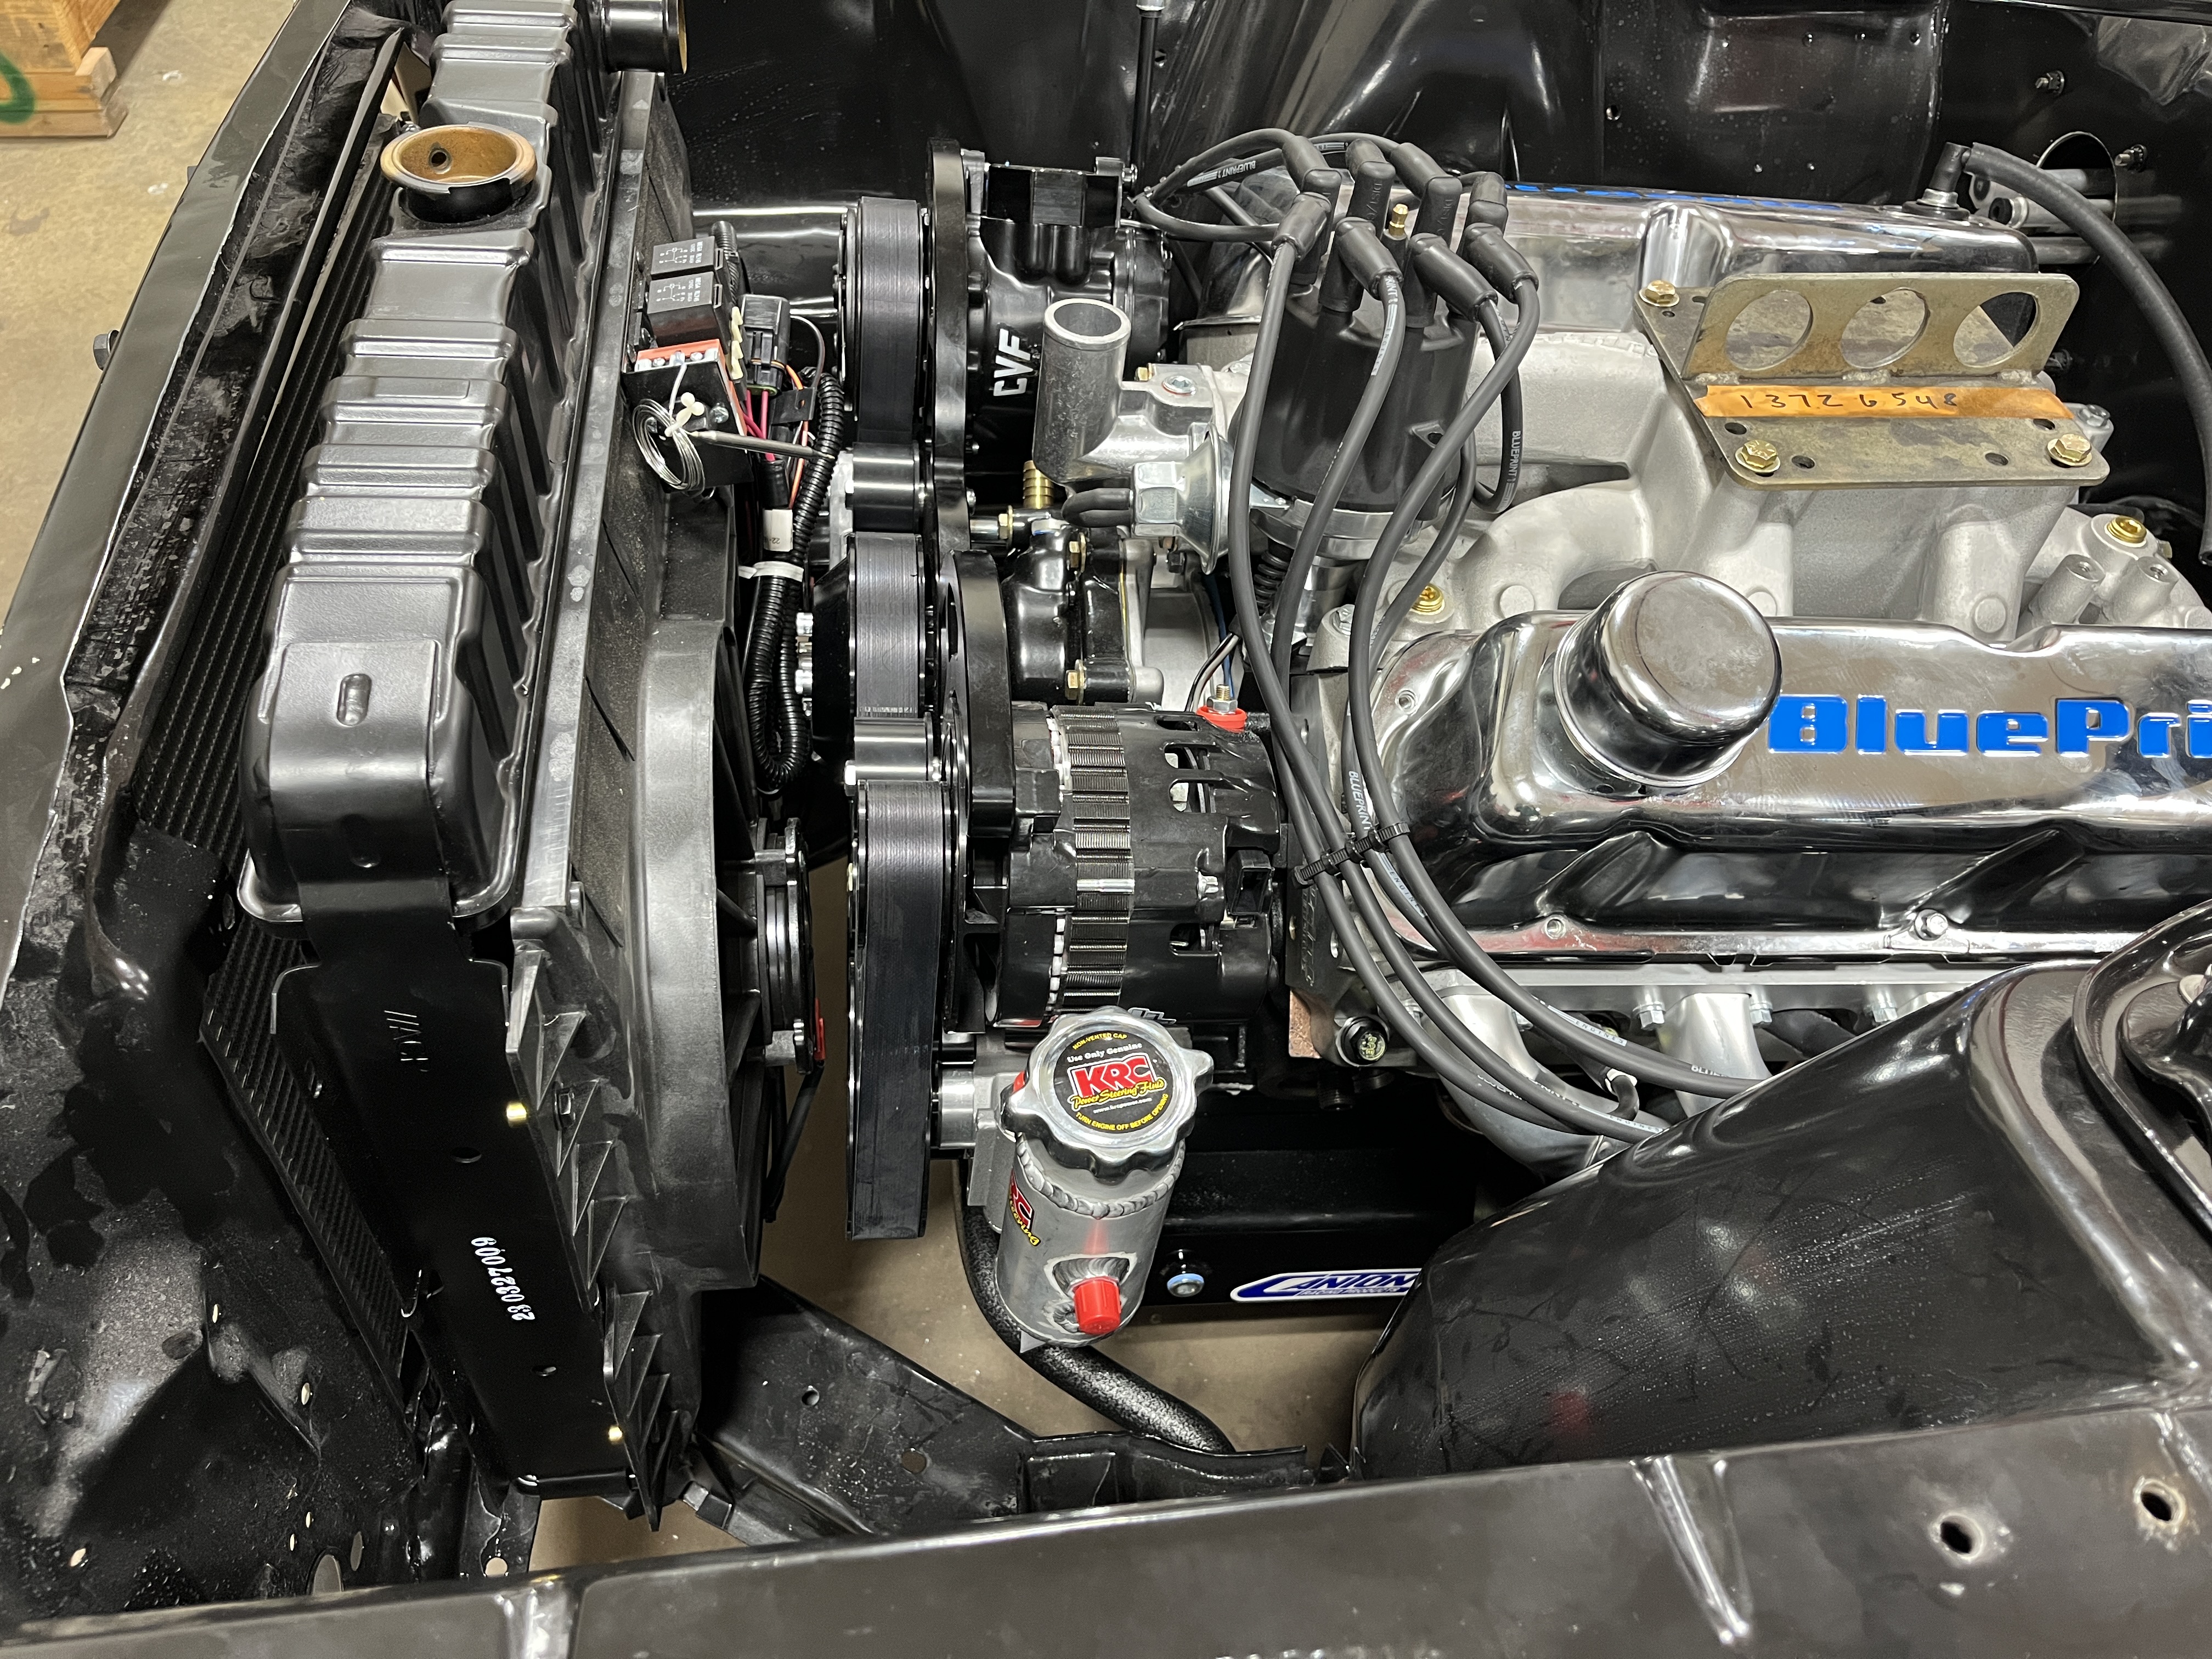
After the new 347 & 5 speed were installed, we quickly figured out the springs will need to be cut some. This will be done next week and will be looking for a slight rake, about 3/4 to 1”.
The RideTech 4 link is being delivered tomorrow, and will be installed next week. The photos show various parts of the project.
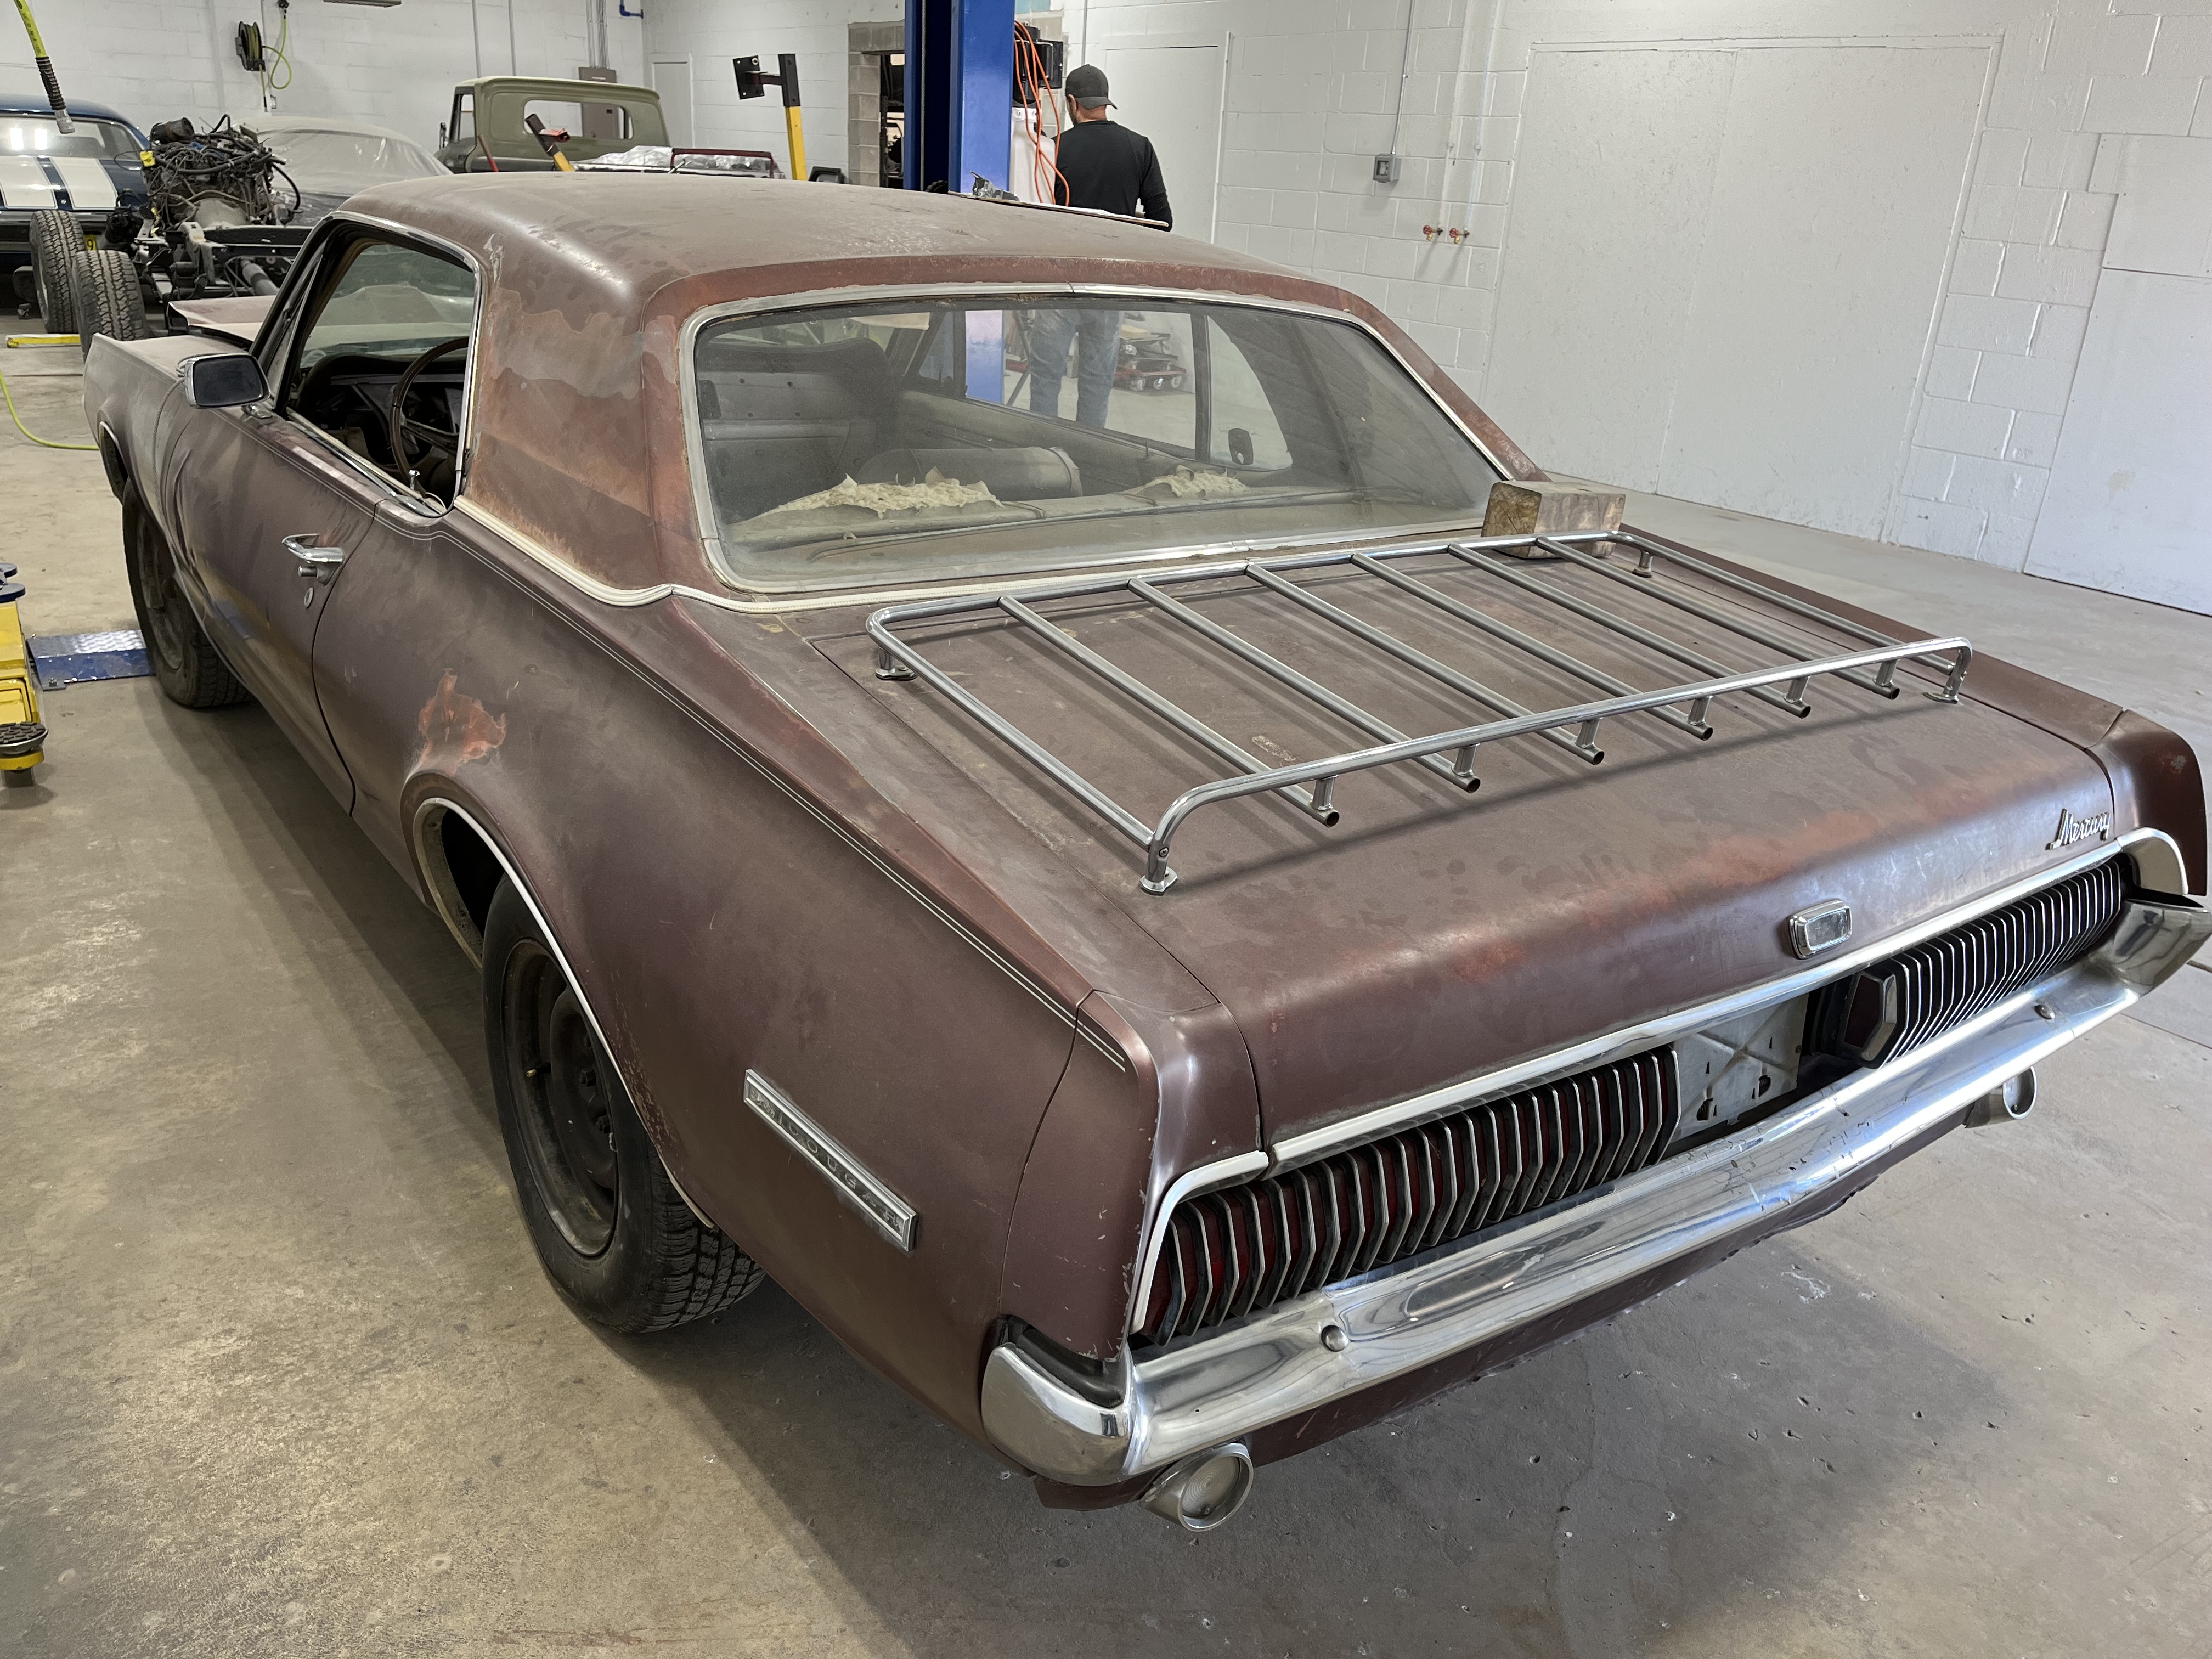
For the record, originally 289 4V, 4spd, PS, PdB, vinyl roof (not being reinstalled). There was some some minor rust in the usual places that was/were excised.
Ron

I like it. What’s the battery location plan?
In the trunk.
Ron
I was hoping.
Wow, that’s off to a great start! Factory 4 speed to start though? Those are kind of hard to find…
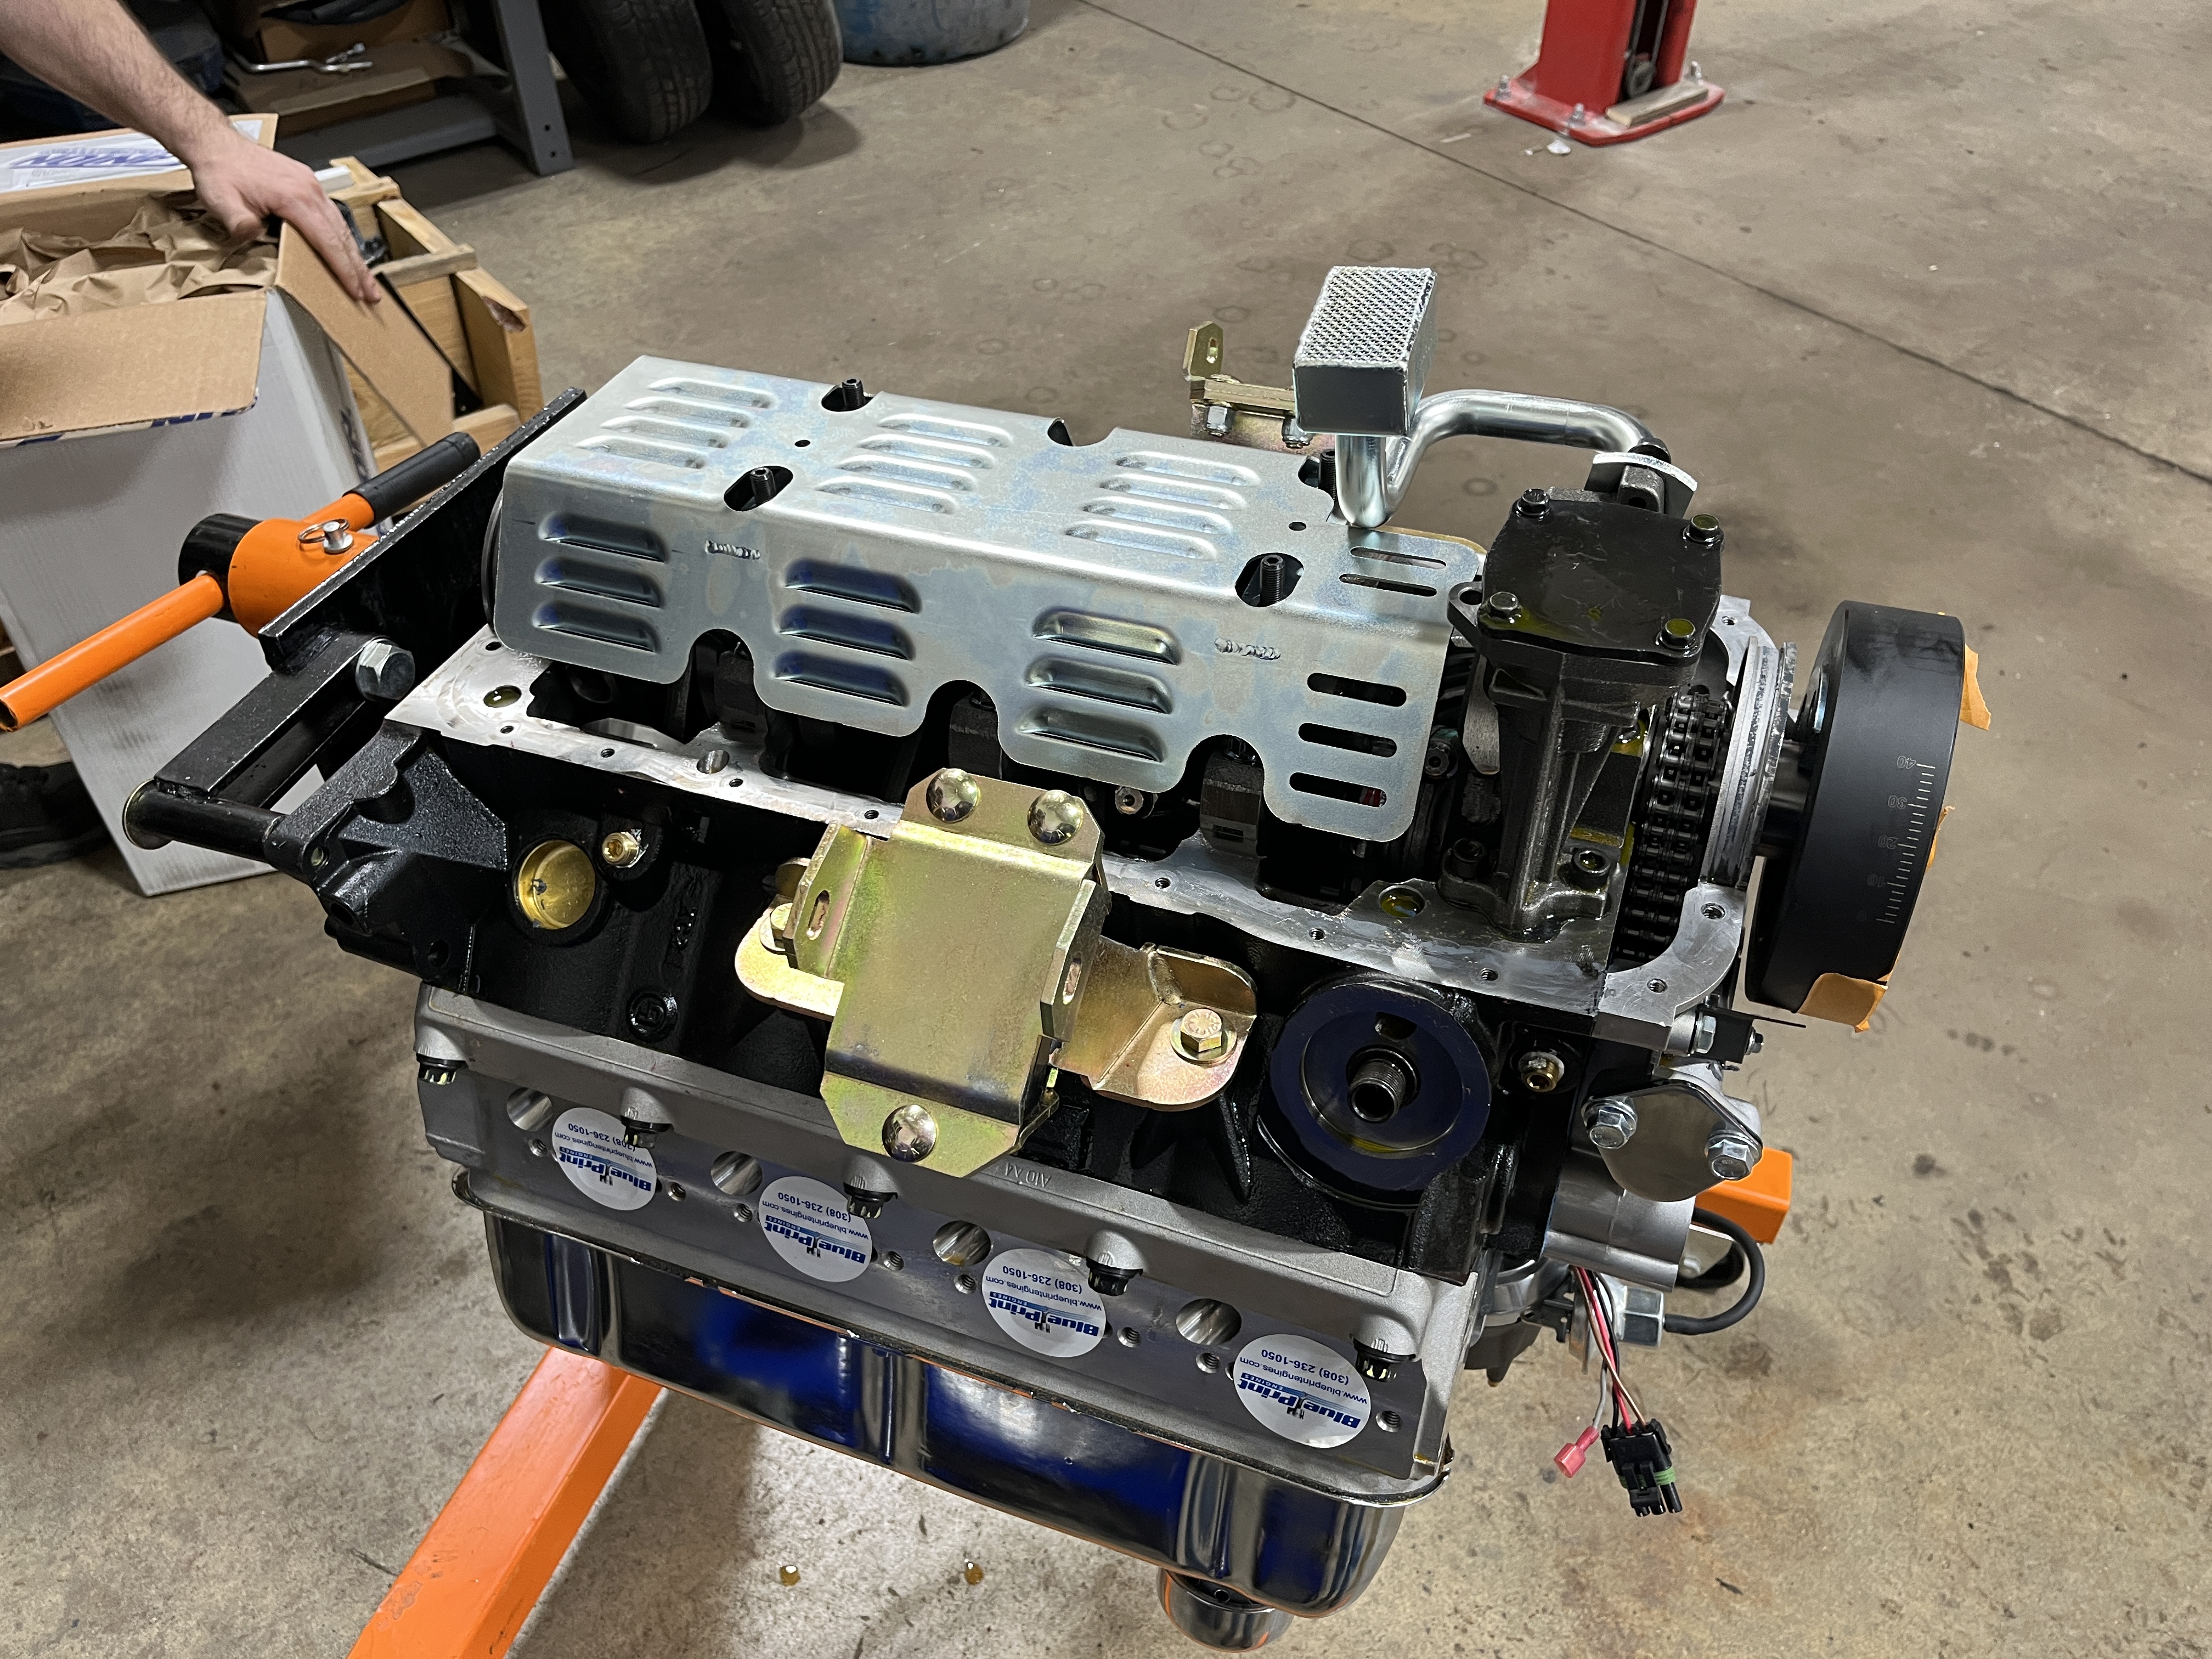
Yes, I know, but there were several issues that presented. The 289 while it did run, was very tired, either 107 or 207K. It was cheaper to acquire the crate Fuel injected mill than to have the 289 rebuilt, if I could find a rebuilder in Wisconsin, (which I was not successful), and lastly, was not sure the top loader could handle the HP of the 347, and definitely without being rebuilt. Hence the decision to upgrade to the Tremec and a 9” 3.73 rear end.
This thing is looking great. What did you do for the bright work? Really nice touch whatever it is. Is there a build thread for this?
Thanks for the input!
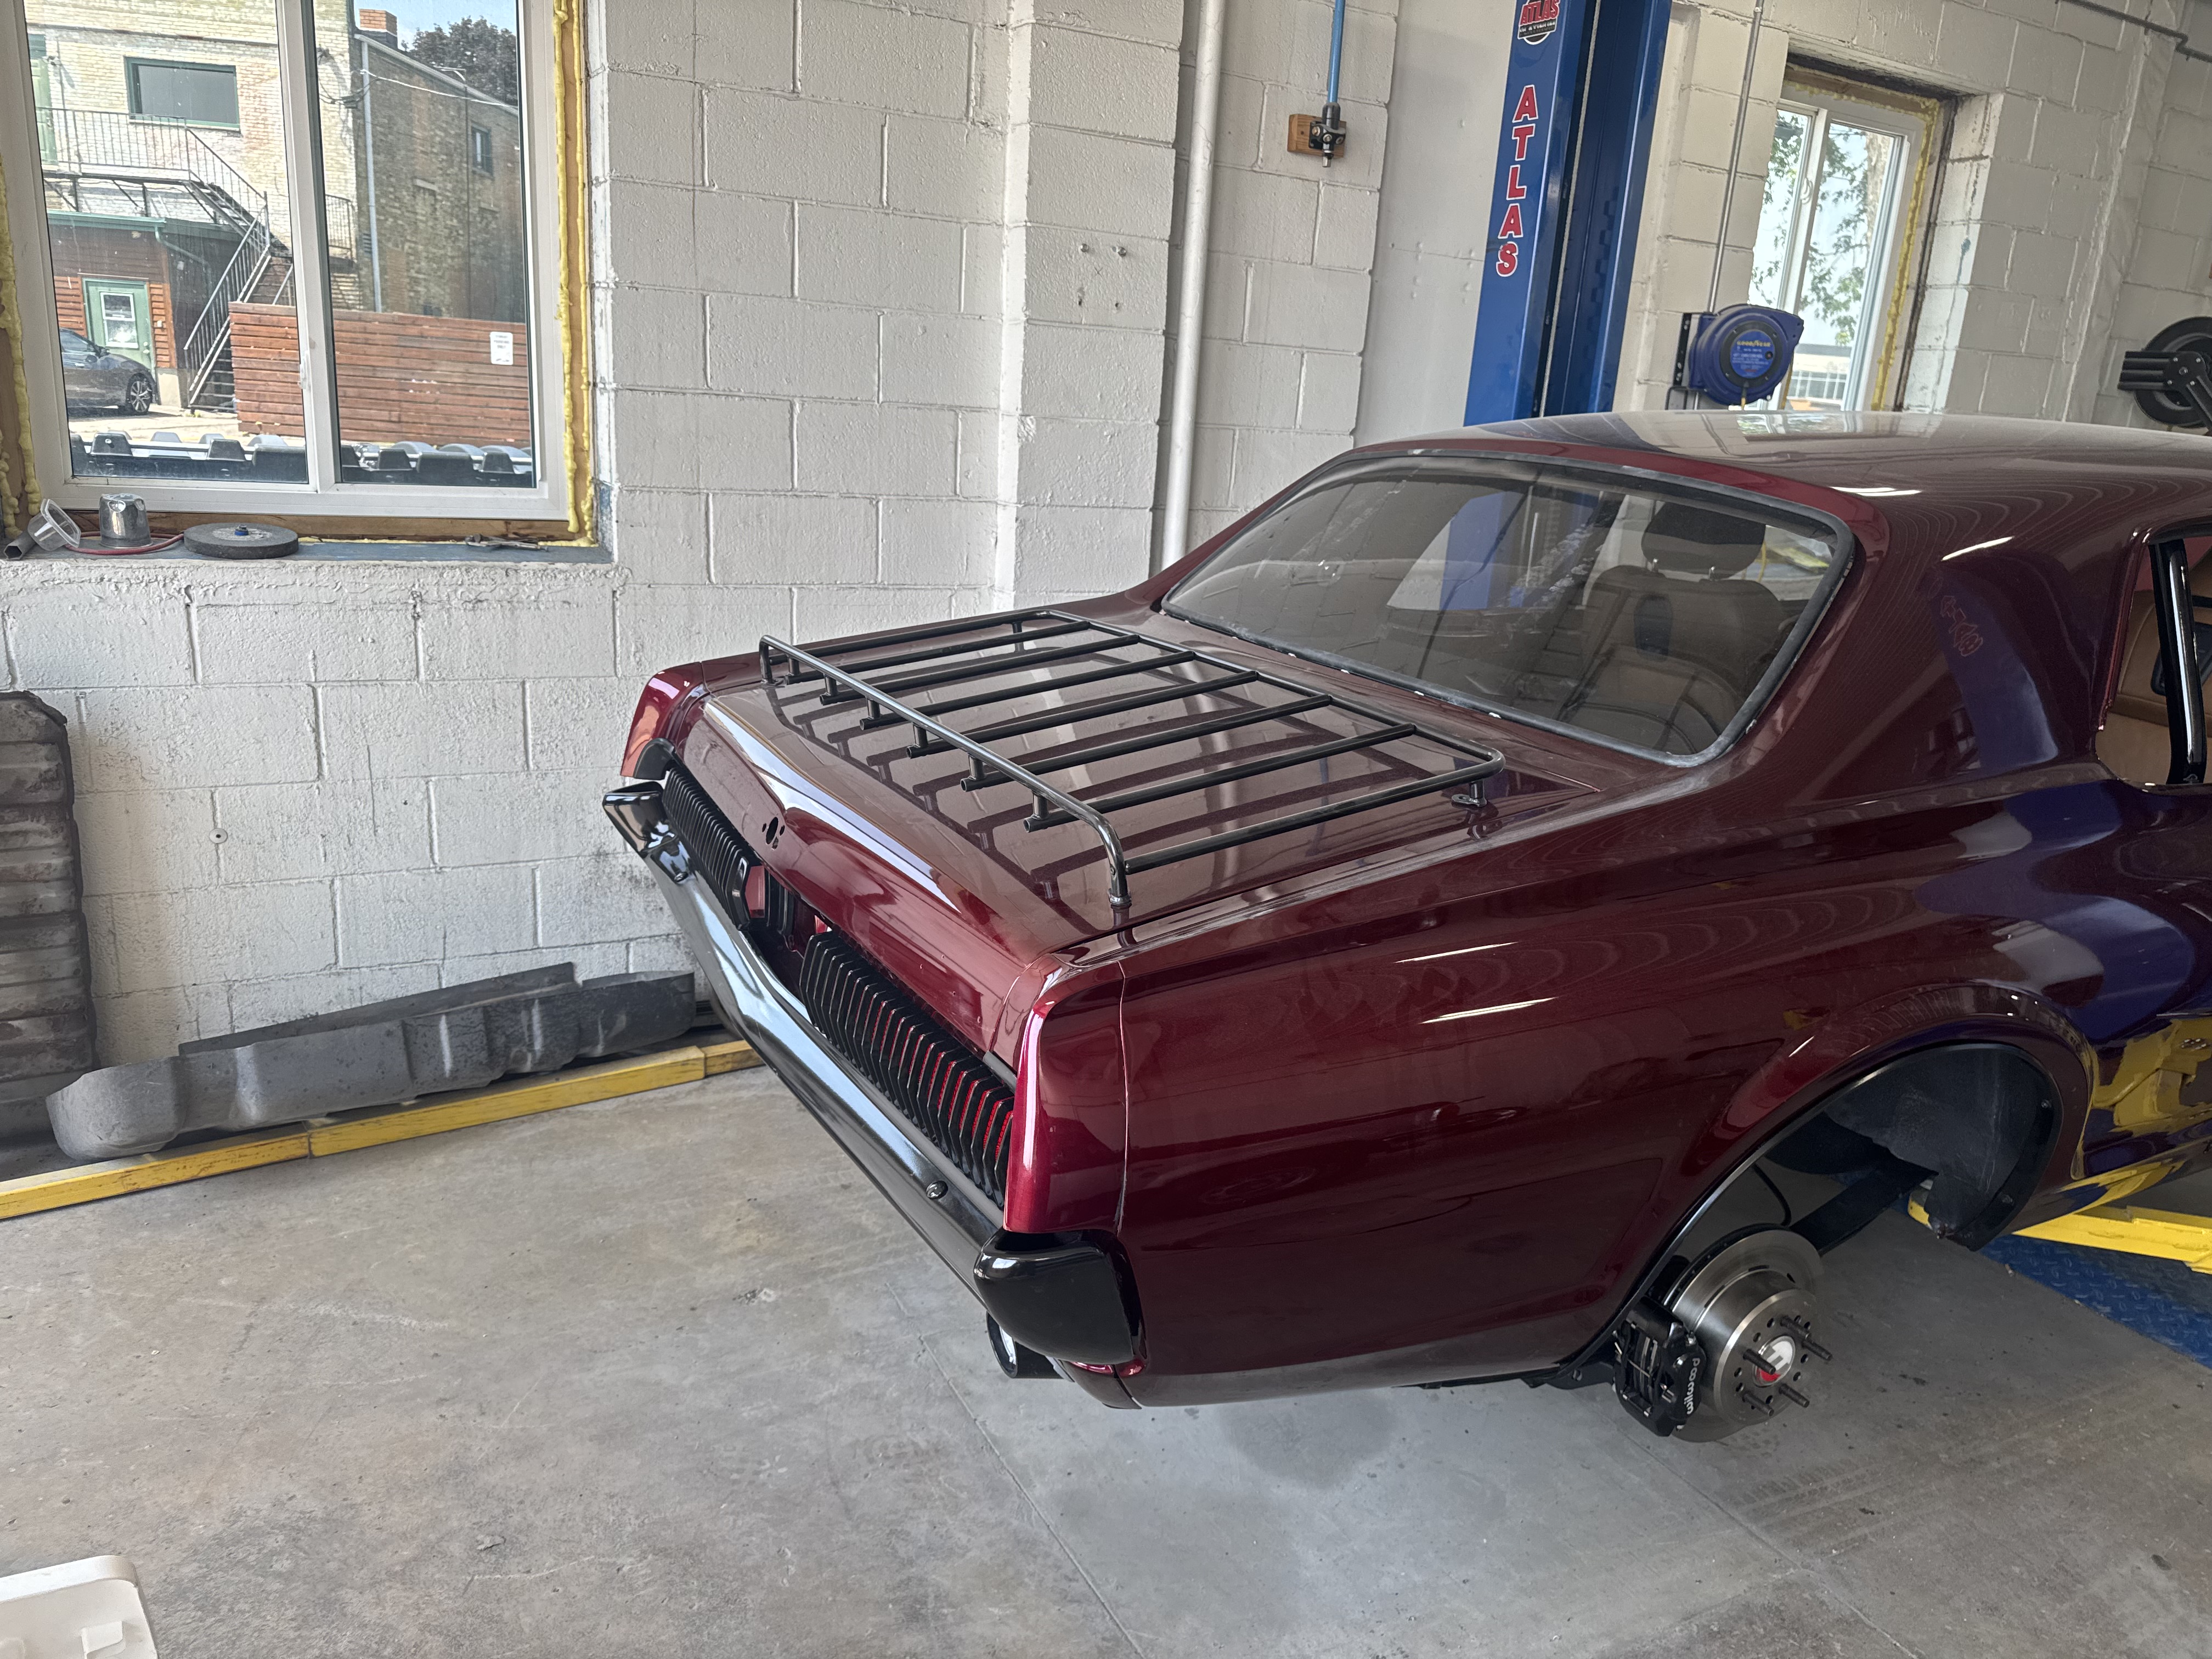
All exterior chrome is either painted (large pieces such as bumpers) or powder coated satin black. the luggage rack is factory.
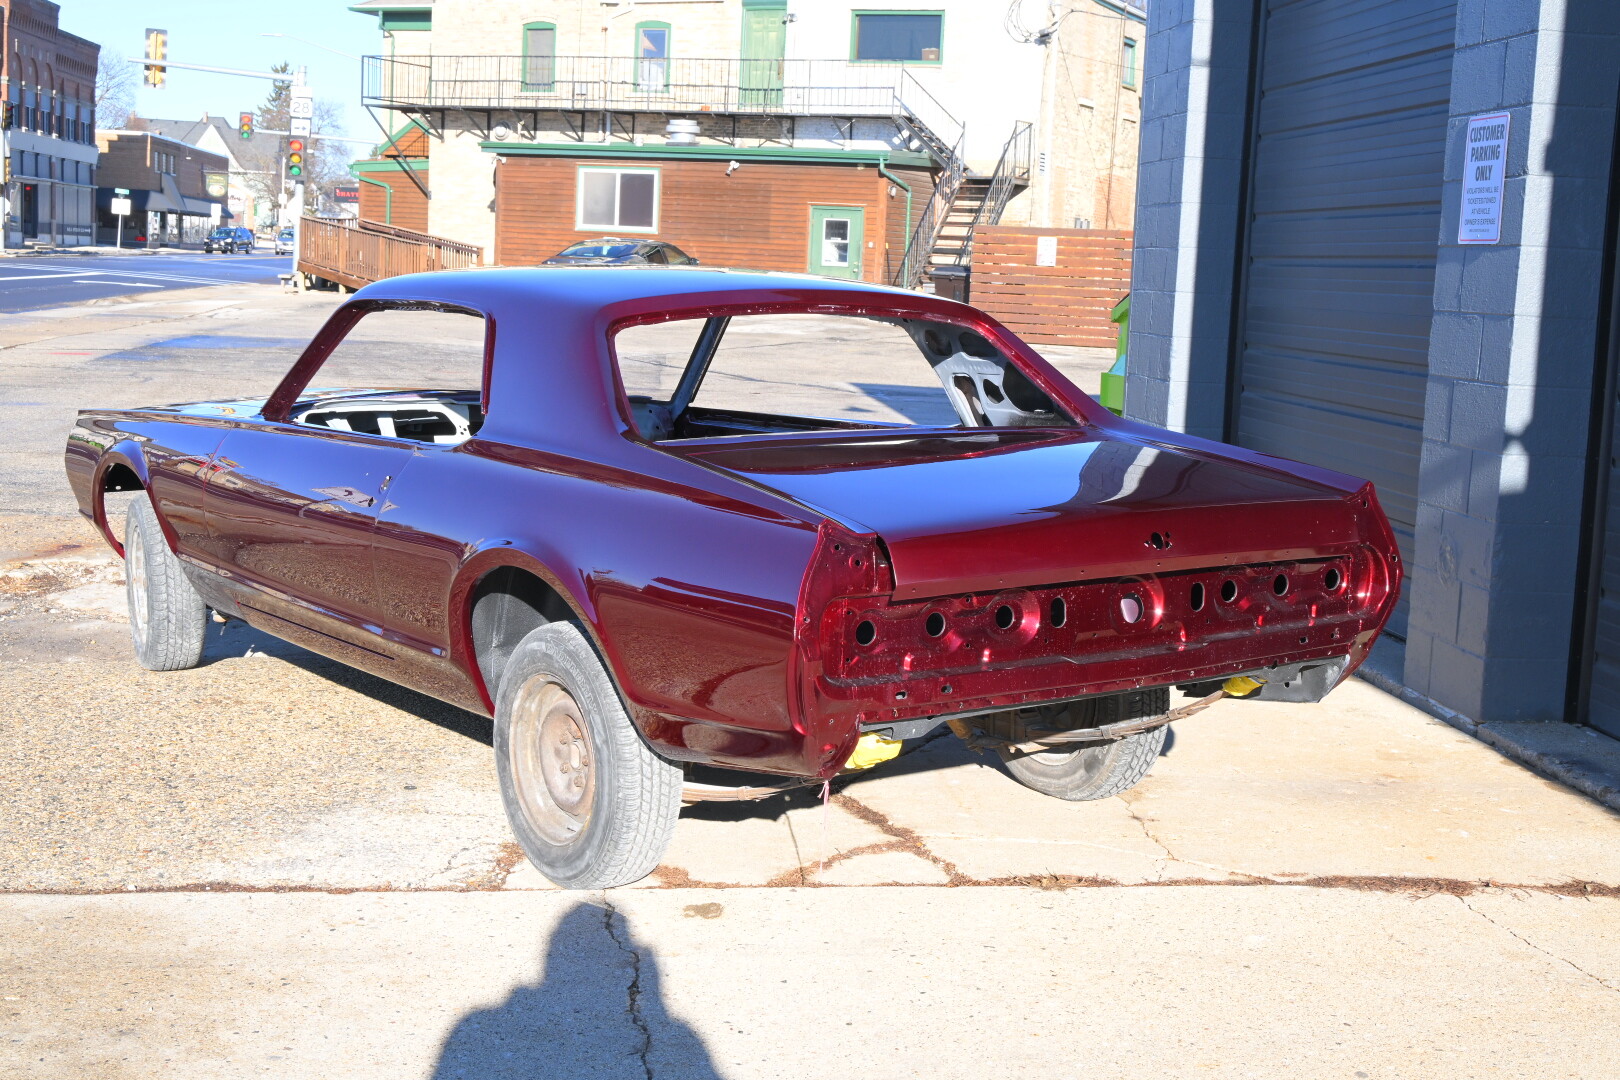
The color, Wildberry, is the closest I could get to the factory color, X 1632-A in a Tri Coat. The original interior, UD, has been replaced by a Saddle interior. Power Windows & Power door locks, with remote. Car will not start without remote. New Tinted Glass.
The dash will be an XR7 install, but, since it’s not an XR7, the dash will also be satin black to replace the wood grain/tone. I am installing Old Air Products A/C.
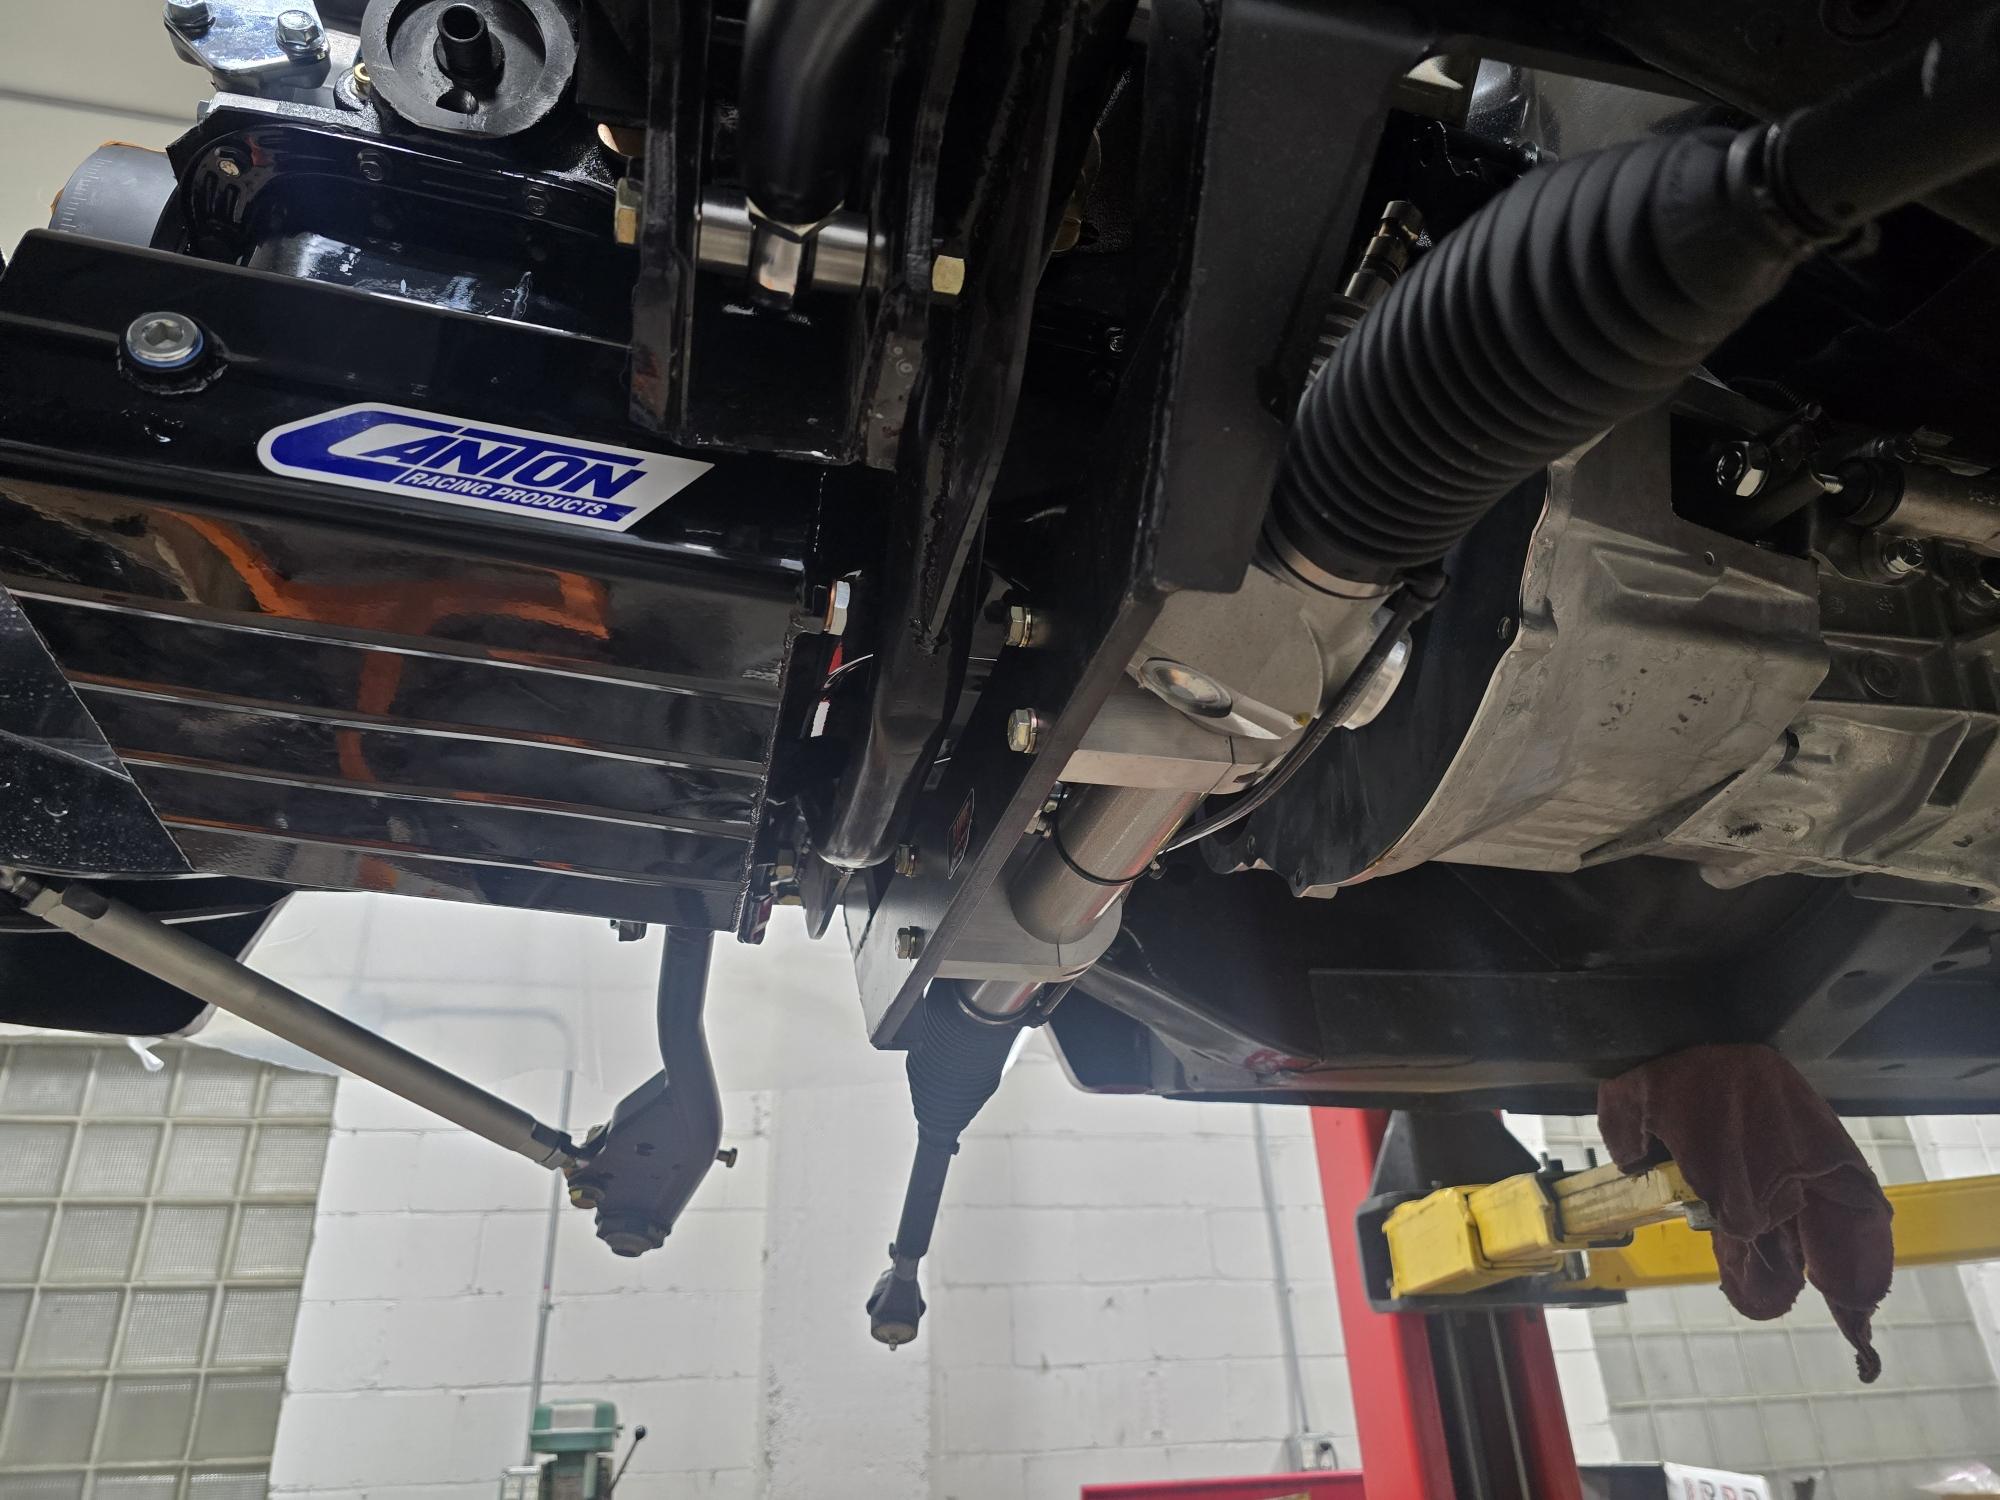
Mechanically, the old steering box & components have been replaced by a Flaming River Rack & Pinion unit. We are using Sweeting power hydraulic brake components, which will supply power to Wilwood brakes and steering. Will eliminate the vacuum boost. Ceramic headers are also from Flaming River. Blueprint engines recommended Ultimate Headers for the engine, but a tube would not clear the steering shaft input. Steering shaft is from flaming river, tilt and the High beam control is on the column.
I had straightened out the front eyelids/headlight buckets so that there was no friction upon opening or closing. The shop sent the headlight buckets out for powder coating, not realizing the pieces were of pot metal. Melting temp 450 degrees. Powder coating baking temp, 350 degrees. Bottom line, don’t bake your headlight buckets!
Electric Eyelids.
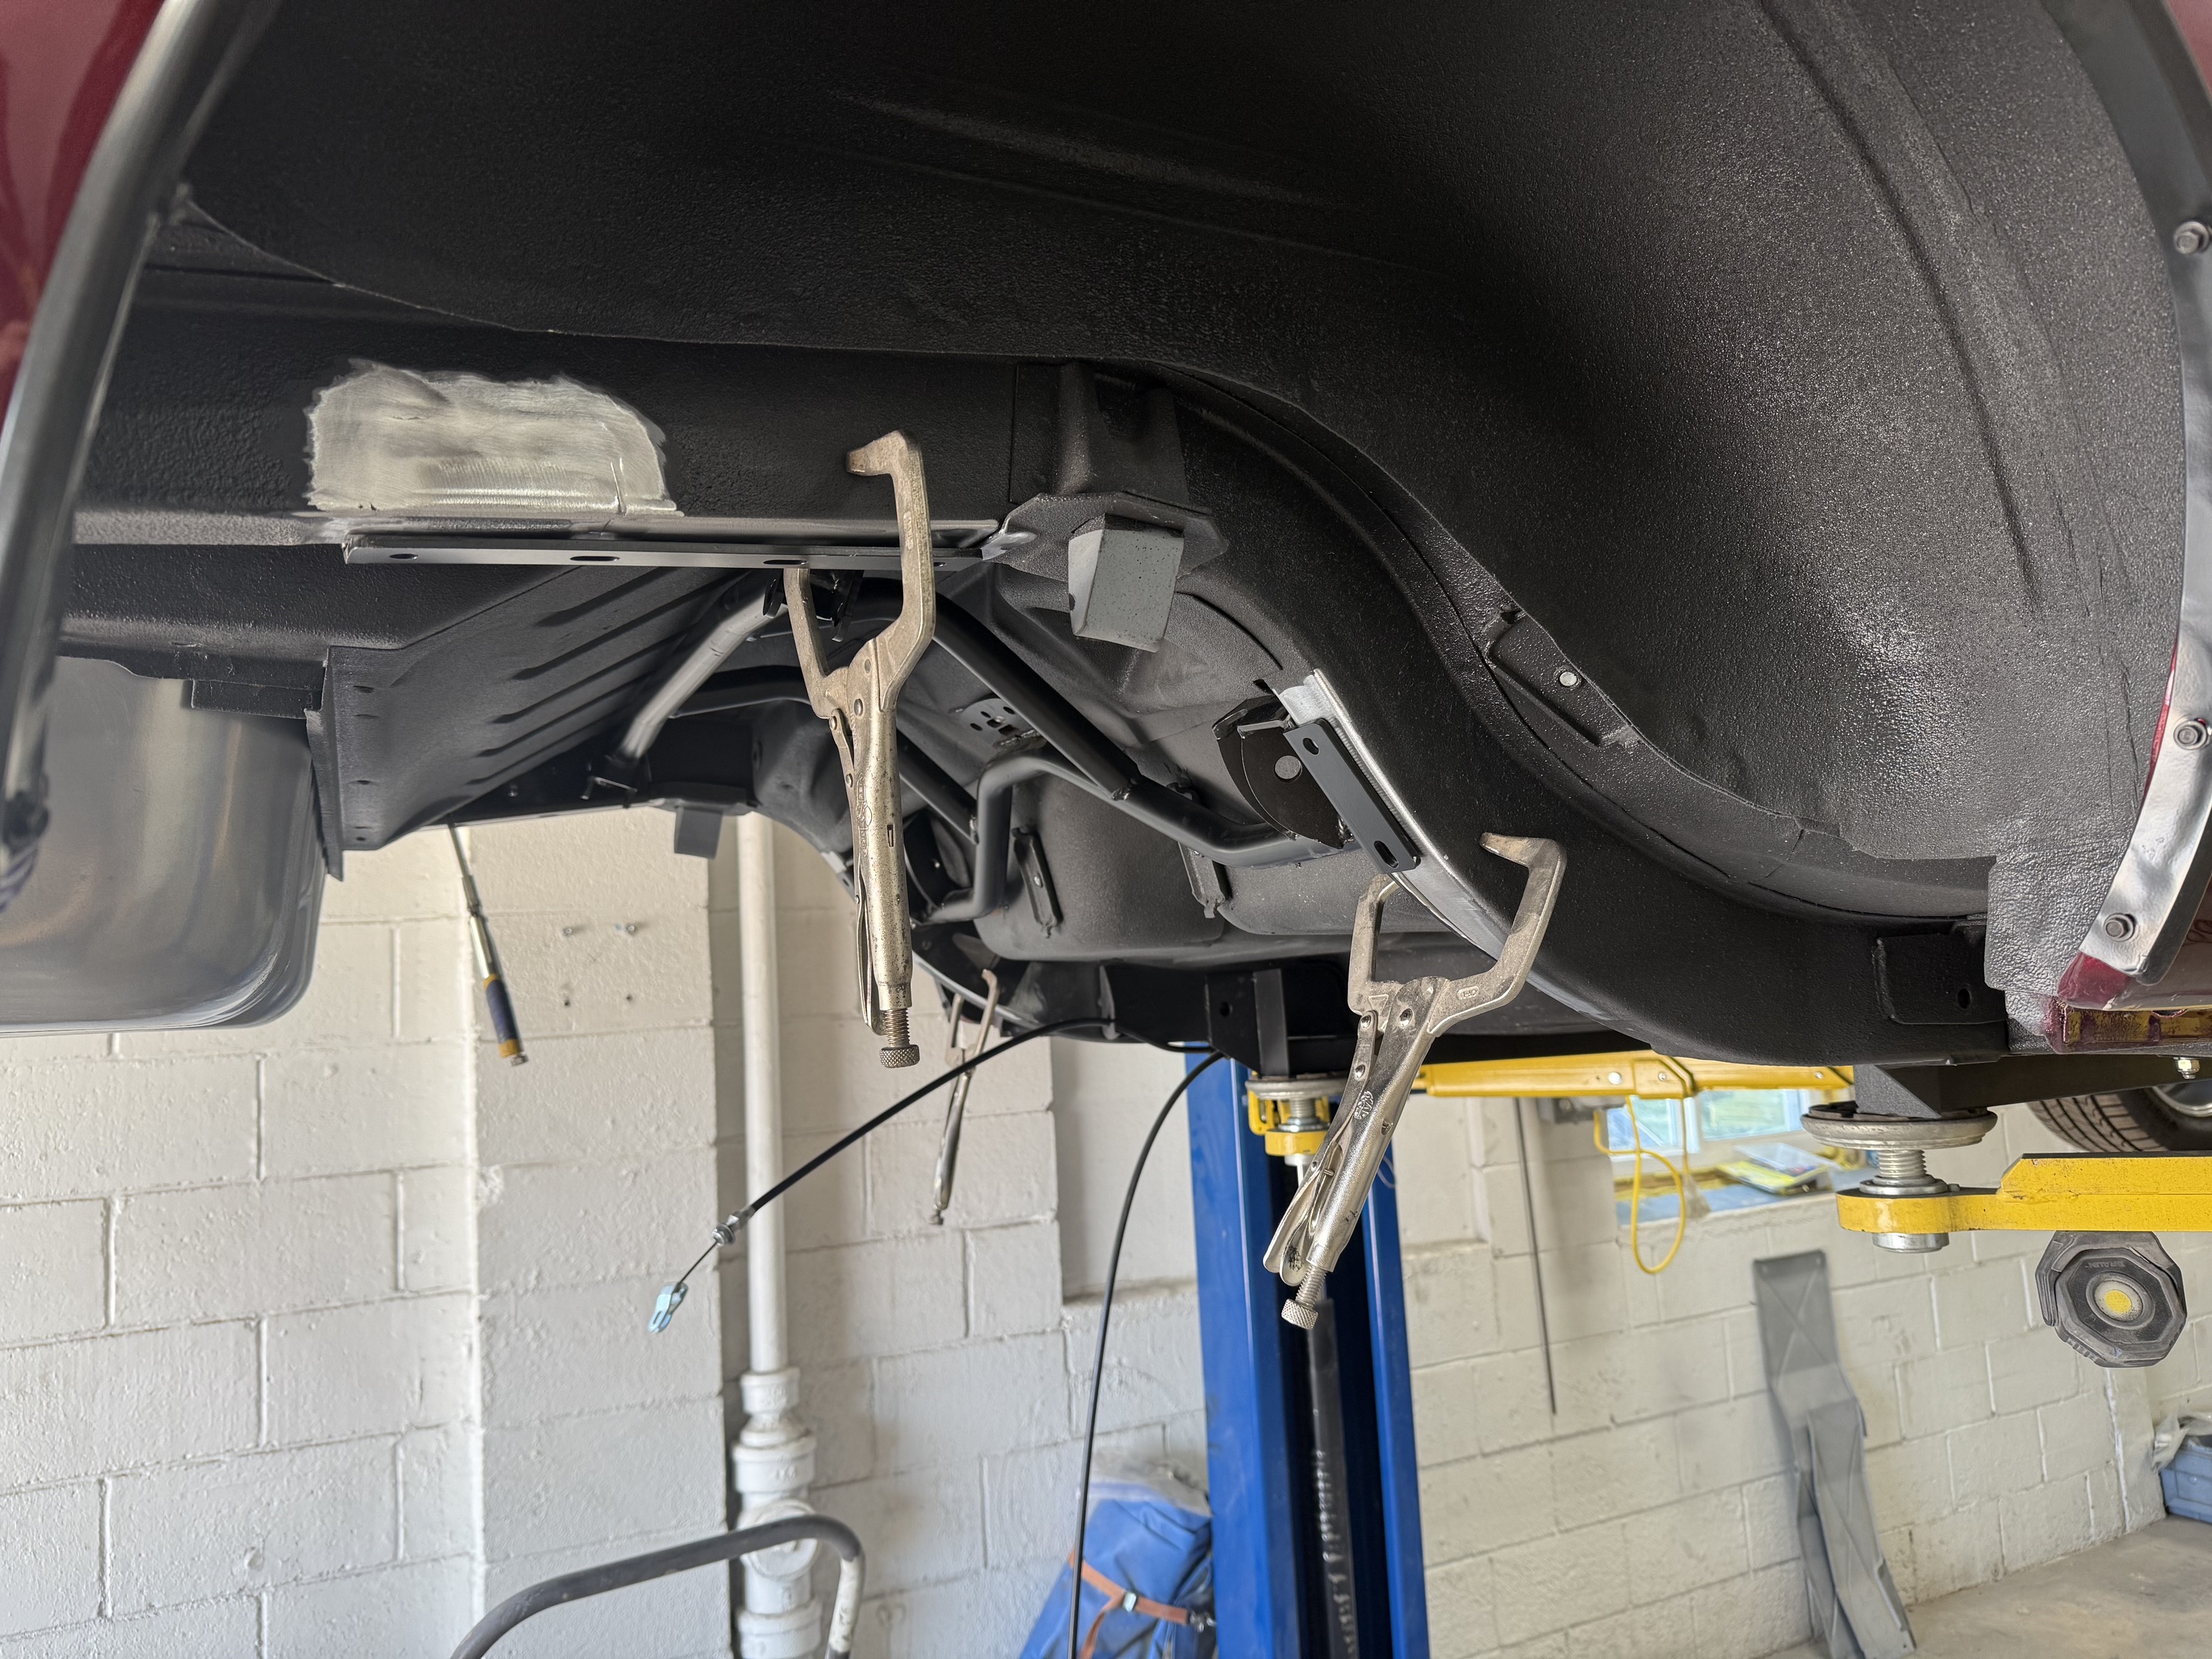
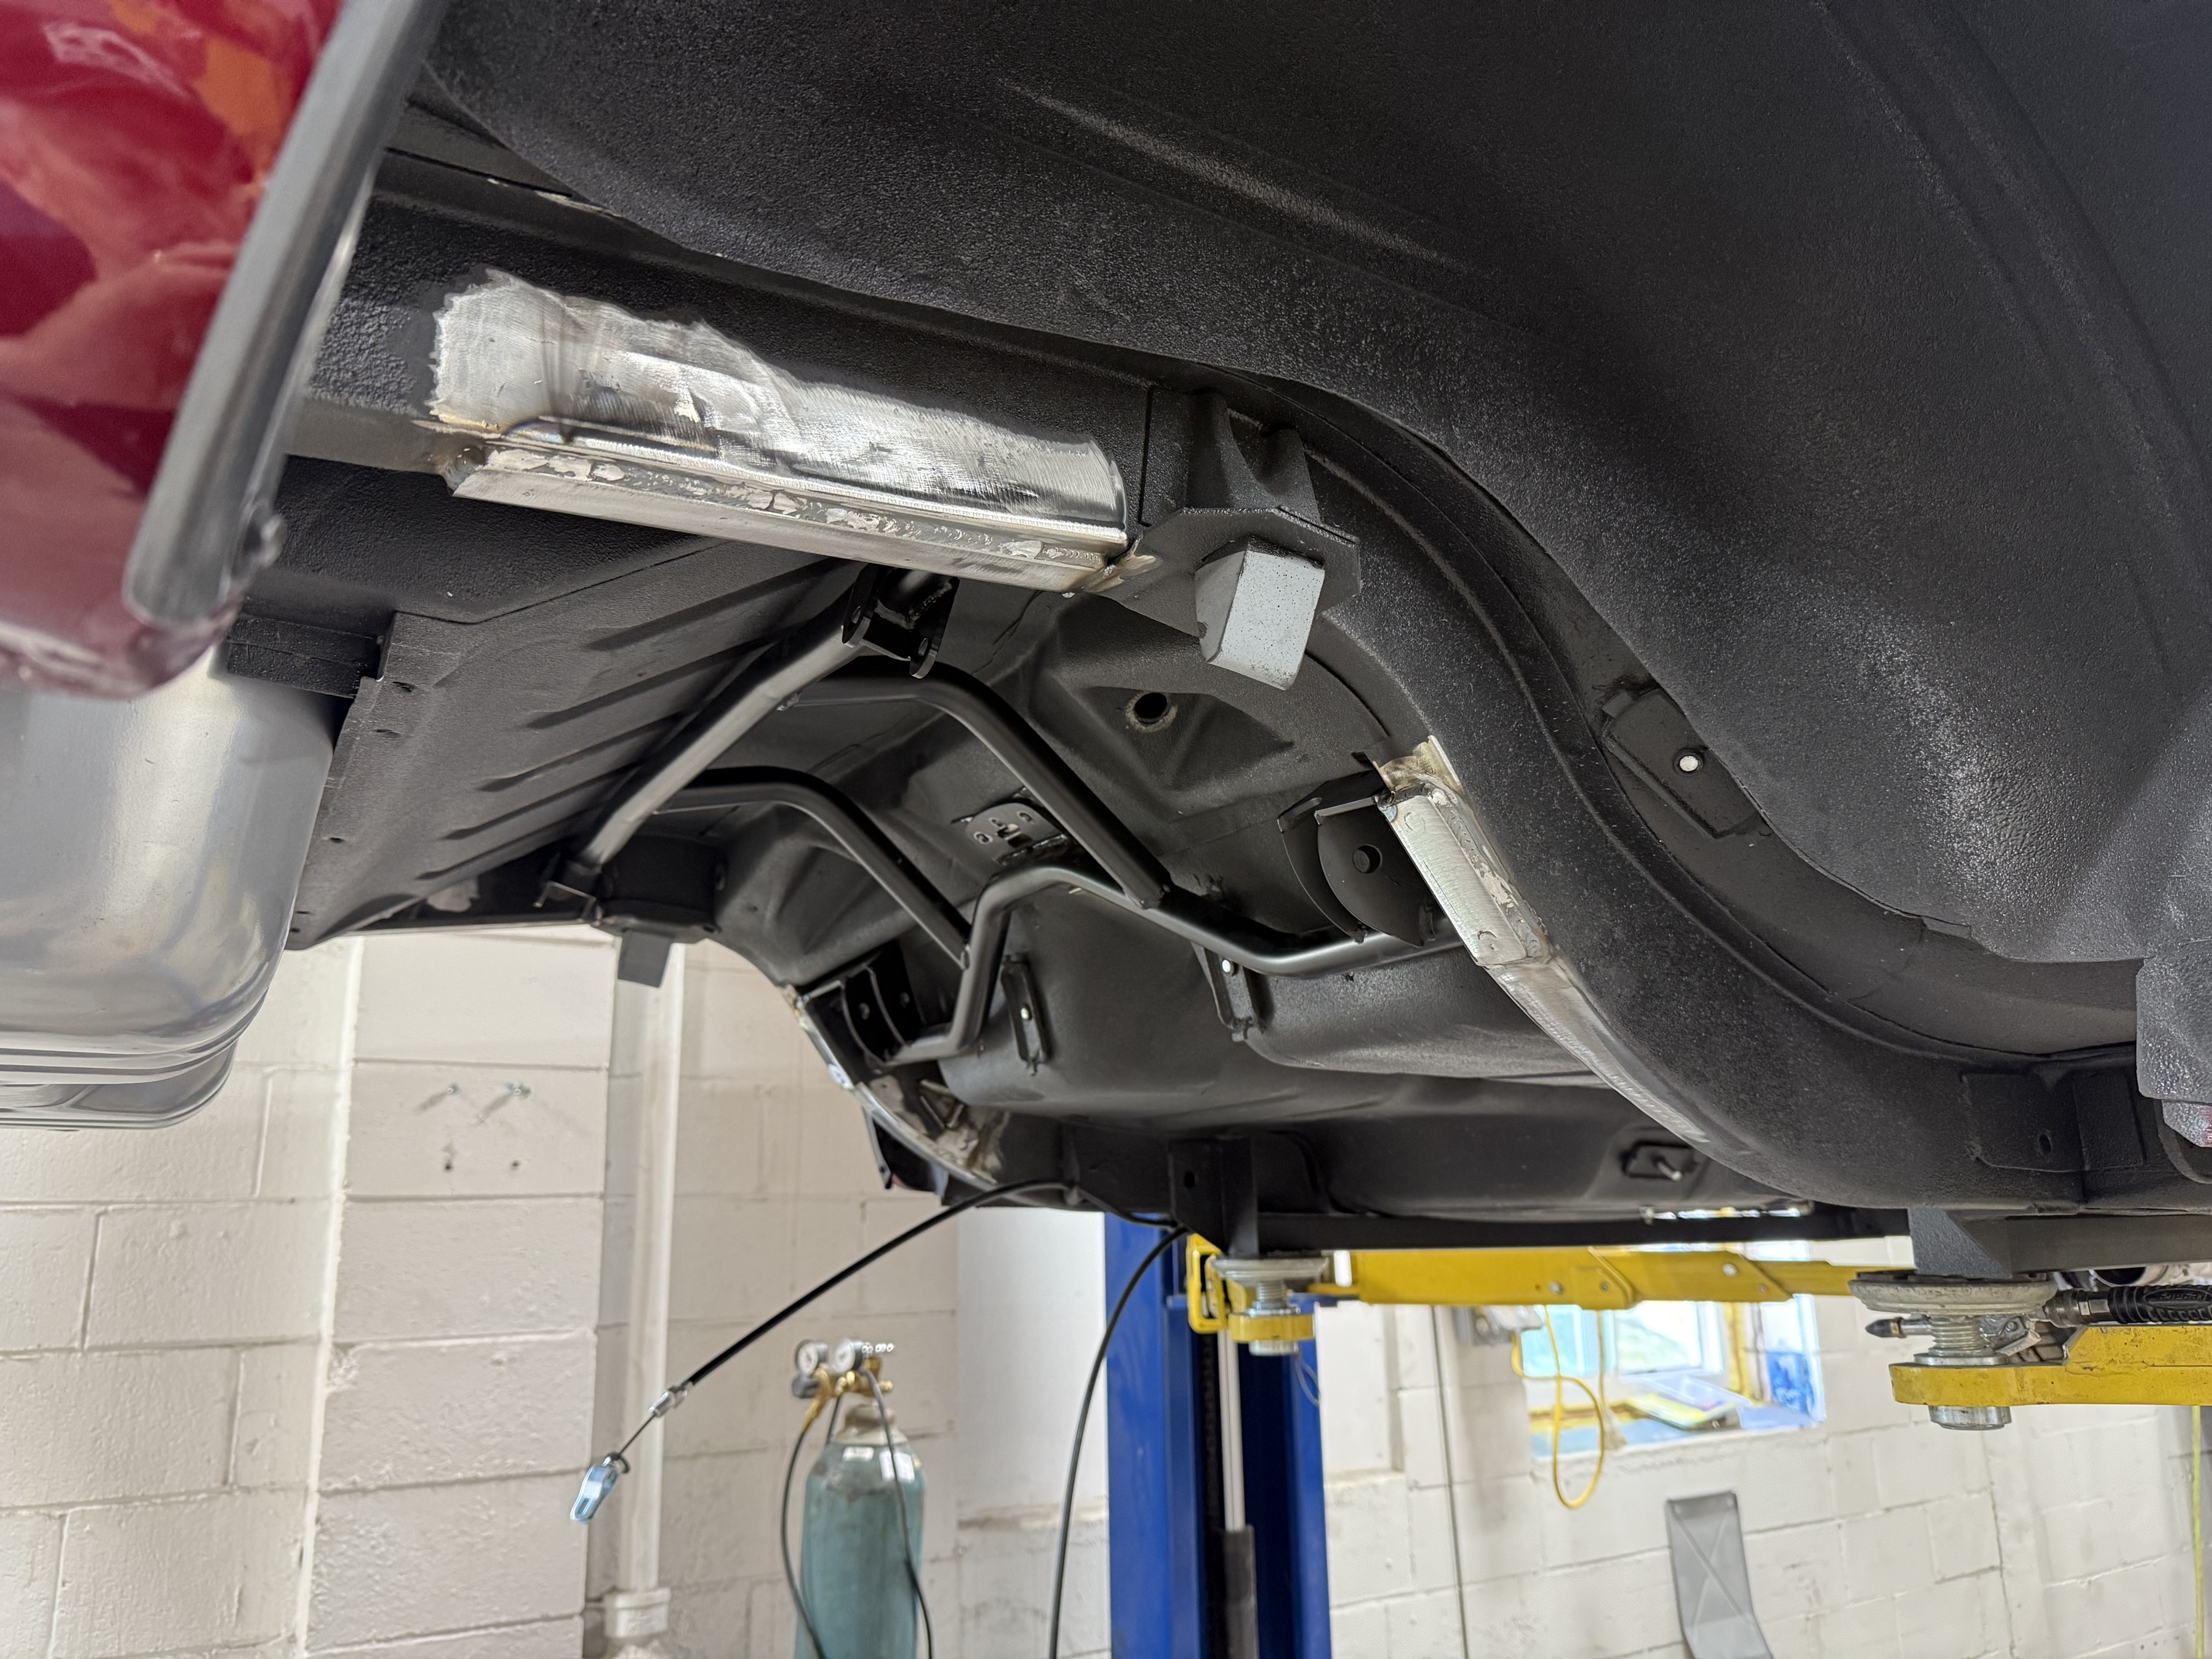
Surprises? A few. When taking the tail light assemblies apart, passenger side literally fell in pieces. Hidden cracks in both the tail light grill and directly under in the lens portion. Another was the fact that there was not a Torque box on the passenger side of the car. Learning curve. Corrected.
This is a brief rundown of the project. My parts acquisition lists run to 11 pages, single spaced.
I need to give a shout out to West Coast Classic Cougar for all their expertise and assistance. Most helpful in suggesting the proper parts for my desired outcome.
Ron
In the surprise column: when installing the motor, would not sit down on the mounts. Cause? Oil pan did not clear the R&P. Had to get a Canton double sump 8 qt pan. Well then, as long as we’re getting a new pan, perfect chance to put in a windage tray as well as a set of Scorpion Roller tipped roller rocker arms.

Thanks for the detail. I’ve regretted selling my 1967 for 30 years now But I’m back in a 1968. I’m not going to replace the vinyl roof either. Do you have any tips for filling the trim holes?
Holes were welded closed, then ground flat to contour.
Good luck
Ron