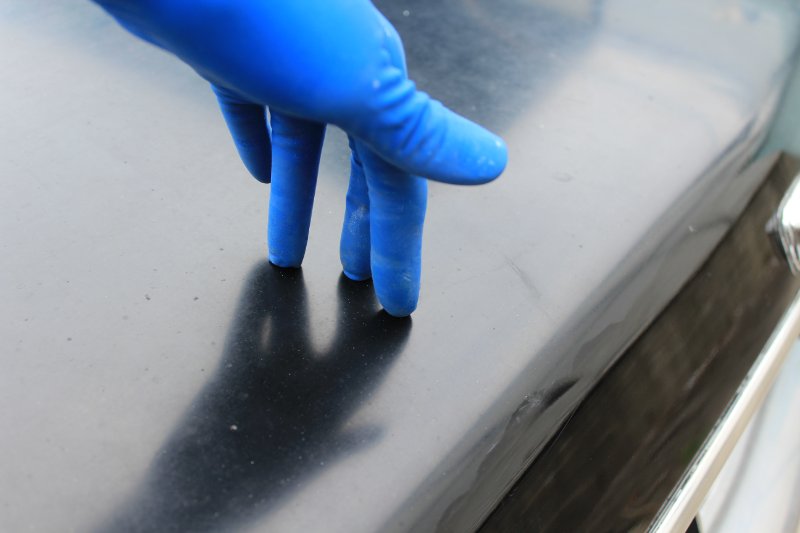
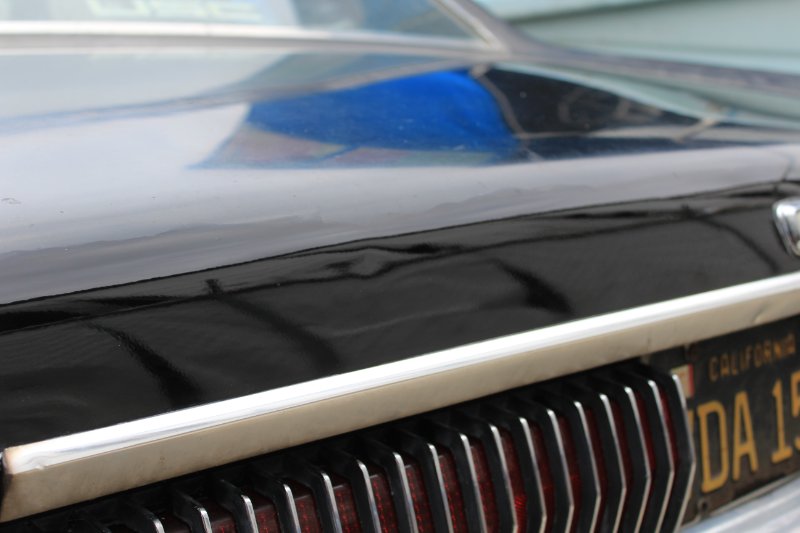
Over time dirt, particles and other contaminants become embedded into the paint. This is especially the case if the finish hasn’t been properly maintained. I think that is a large degree my own fault as I don’t get the opportunity often as I should. In my defense the surface oxidation may provide a barrier contributing to the longevity of the acrylic enamel beneath the weathered surface. When you feel the surface of the paint after washing, the tactile senses of rough, granular feeling paint some correction is necessary. A good way to remove these embedded debris out of the paint is by use of a clay bar and some soapy water. Simply wet the surface to provide lubrication for the clay and run it in a crosshatch pattern over the surface of a panel. The clay is an abrasive that will extract these unwanted particles while smoothing the surface of the paint. It will not restore luster to the paint as that will come in the latter steps of compounding then polishing. Here is a shot of the deck lid on the 1967 that I’m doing a sympathetic restoration to. Above the galvanized trim is a 1/2" that has only been washed, above that is after having been washed and clayed.
I wish I had more time to clay bar along with the compound, polish and waxing with an orbital to all my vehicles. The results are worth the time to do it. My superduty for example is hours worth of work and with it not being able to get in the shade of the garage its gets hot too quickly to properly detail. At least with the paint on my cougar and being parked in the garage I shouldnt have to do that one much
Continue to post your steps, I don’t think Ive seen a thread here talking too much about things you can do to bring back the paint on your car or simply things you can do to keep it looking its best.
Time literally cost me money as I can only work on my 67, whom a friend of mine named Raven, when the budget allows. Since the start of this journey, Raven has been at a local Do-it yourself garage in which there is a monthly storage fee and the hourly working rate for members is about 22 dollars. With access to lifts, tools, parts washers and other resources it’s a very good compromise to be had for the price. One thing I like to do is get an hour in each Saturday as little progression is better than none and there is a key goal to accomplish for that day. Whatever time that can be afforded may be used for peripheral pursuits. Claying her entire exterior is an entire day, so I think it prudent to work in small, manageable sections. I’ll take photographs documenting the procedure as it continues. From the looks of it she’s wearing her original, factory paint. Progress images and descriptions will be posted in this thread as both budget and weather allow. The uploads may not be consistent, but I’ll do my best to mitigate that much as possible.
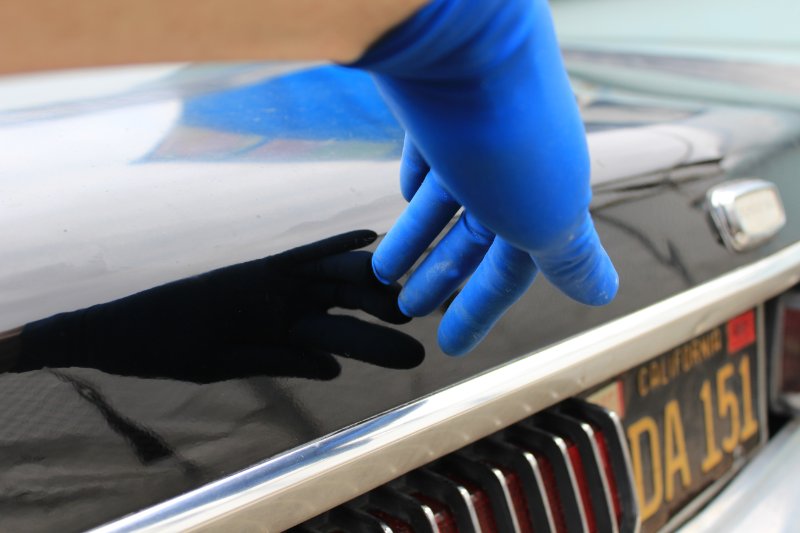
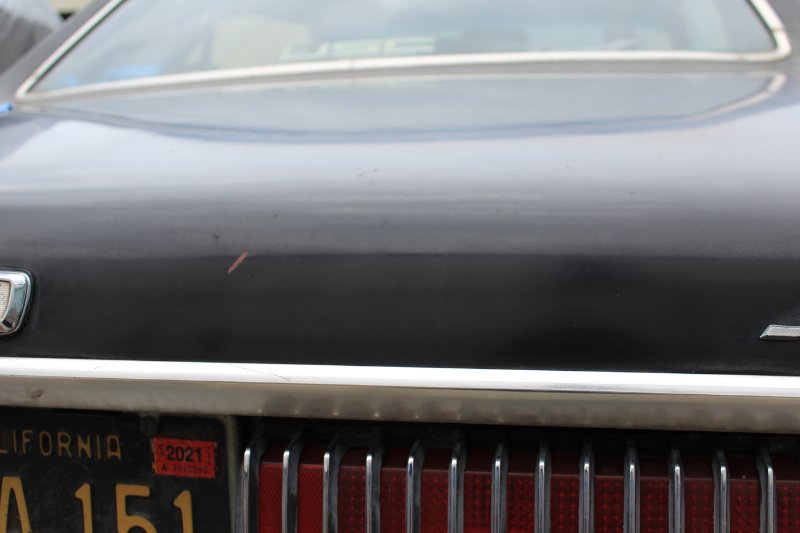
A week after the initial decontamination with the clay I washed the trunk lid panel with dishwashing soap and cool water. While it is not prudent to use dish detergent as it will strip any waxes and sealers that serve to protect the paint, these lipids will only serve to hinder the restoration process by acting as a barrier to the underlying finish. After having washed/rinsed the panel I refilled the bucket with some fresh soapy water as a lubricant and clayed the section just above the trim that had been missed the previous week, although it provided an admirable example of the admirable example of ‘before/after’ the clay it is necessary the panel be free of contaminants prior to the next step. Just work the clay back and forth using very light pressure and be sure to use very minimal amount of downwards pressure.
After the panel has been cleaned, rinsed and dry test a small area to determine the state of the finish to see if the compound you are using has the adequate cut or it is necessary to go with a higher/lower abrasive. As I do not have a paint gauge tester to check thickness in mills it is best to err on the side of caution and do the work by hand. This takes significantly more time than using a machine polisher, but not knowing what there is to work with is like being a surgeon without a CAT scan or MRI and the last thing you want to do is run the paint too thin or - worse yet - burn through. For this step I’m using a towel and Meguiars’ 105 Ultra-Cut compound. The product was worked in a initial area of 4" x 6" in small, circular motions using moderate pressure. It was then wiped off with a clean part of the towel once the product started to become chalky in consistency. Weather was overcast with the temperature being in the mid 60’s. Do not work on clear days with the average 70 or above if you’re working outside.

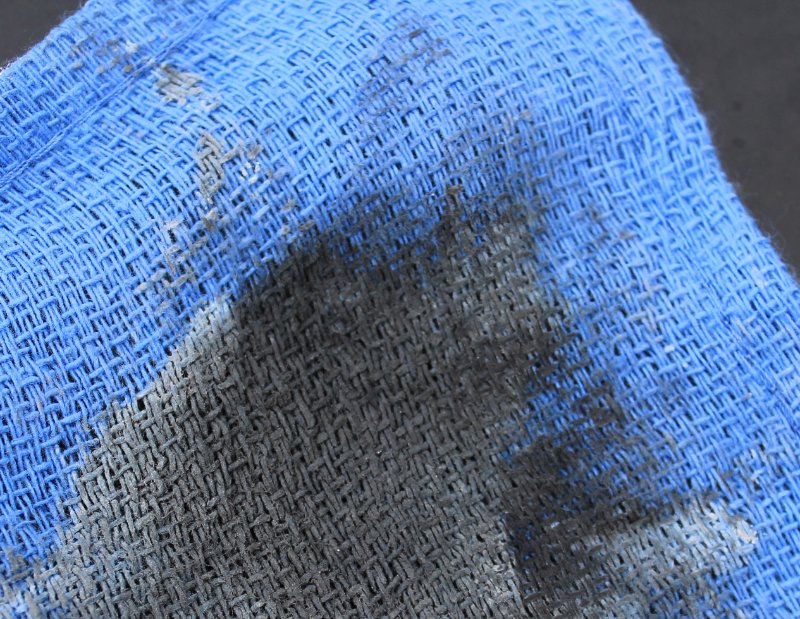
Terrycloth for the compound application and microfiber to remove the hazed material after buffing is most often preferred. I’m actually using surgical towels for this. Here is the old, dead paint that has been lifted during this exfoliation process too known as a ‘mow-down procedure’.
Satisfied with the result a larger section of the panel from the trunk lock to the drivers’ side edge was done by hand. Again, in circular motions with moderate pressure. Once chalky the compound is removed with a clean part of the towel.
The passenger side for comparison.
After the 3rd application, buff and wipe down the paint is really starting to regain its’ luster. Try to keep dust and debris to a minimum by blowing off the surface between applications as to minimize the introduction of new scratches or surface defects.
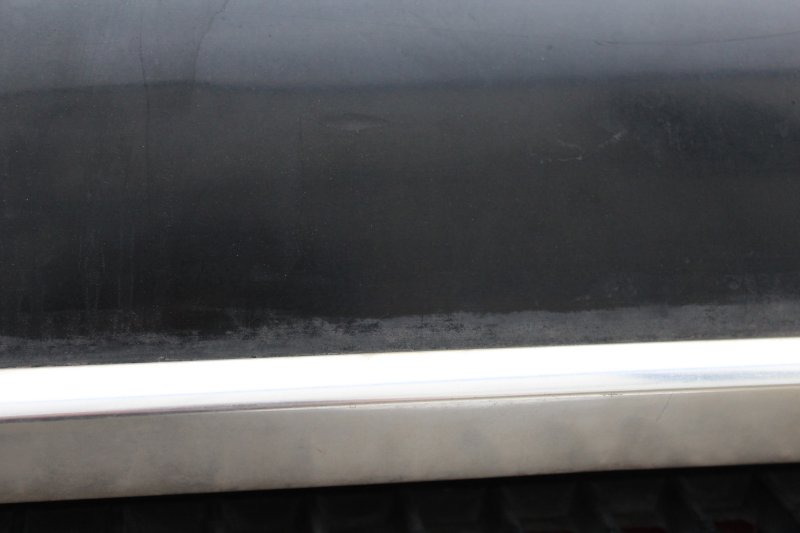
Here is a section that hasn’t yet received this step verses the portion that has been done thus far. Notice the difference in reflection