It happens to the best of us, Its an experience you will never forget and will become a better wrench because of it too. Sometimes we just need a reminder to cover our butts.
I was guessing it had something to do with a fuel line leak, It seems that little hose gets missed more then you think. Even without EFI those hoses do not like the current fuel blends and break down pretty quick. Its one of the things I check frequently and mine are due to be replaced again soon but plan to go EFI before that. I have all new hardline and EFI rated rubber hose and connections to install.
I really do want to find a compact fire extinguisher that I can carry in the car just in case. I have been carrying a dry chemical one but hate it as I know how much worse they make everything after a fire. I need to invest in a halon or similar.
Great thread! I need to check my fuel lines, does anyone have a photo of which hose I should be checking? Sorry, I’m not very savvy with engines but I’m trying to learn. Also, any recommendations what fire extinguisher we should carry in our vehicles? Thank you.
Just start at the tank sender unit, follow it forward and replace all the little sections. I think you will find 4 or 5 sections from the tank to the carb.
Rubber section 1 runs from the fuel tank sender (driver’s side bottom of the tank) to the steel fuel line bolted to the frame rail
Rubber section 2 is located directly under the driver’s side hood hinge and runs from the fender apron to the rear of the shock tower
Rubber section 3 comes out of the driver’s fender apron near the bottom front and runs to the fuel pump inlet
Check them all. If you aren’t a practiced mechanic, do NOT cut or remove section 1 without the tank being empty. A LOT of fuel will gush out otherwise.
Section 2 is often old and overlooked, and usually in bad shape from heat. This one can be replaced without a lot of fuel spillage.
DO NOT, under ANY circumstances use a hose designed for vacuum. Use a FUEL rated hose and always use new hose clamps.
Do the 28 and 31 spline axles use the same differential housing? I have a 31 spline nodular center section that I’d like to install in the Cougar with a new set of axles.
Current differential is a 28 spline.
Will my housing work with the 31 spline axles and related wheel bearings?
Thanks to everyone who replied. I never even thought about checking my fuel Iines now have an idea where to look. I purchased the 73 shop manuals when I bought the car and will go through them also.
A bit different as mentioned but hoped it would provide some help. OP can basically trace the line from gas sender forward an inspect the flex lines for this and the vapor return line
Nice work! What will you recoat with? I know how bad that job is after tackling it on my car last summer. Mine had been undercoated when new (factory fresh paint underneath) and was really hanging on tight. So I gave up long before you did. Settled for scraping off only what would come off, cleaning and wire brushing for adhesion, and then lightly recoating with 3M rubberized undercoating.
I’m leaving as much of the factory paint as possible. It’s well adhered and should be good to topcoat over. Plan to prime and repaint the floor in body color, replicating the factory patterns. May re-apply undercoat in certain places (panel seams, etc)
Probably another couple of days to get the underbody clean however. Not looking forward to it.
What color did you find the floors were painted with for this particular car? Looks to be one of the dark gray mixtures is that correct?
Besides the body color overspray along the outer areas of the floors, further in around the rear end area and the rear wheel wells don’t forget the pinch weld black out and the overspray pattern it produced along the same area behind/inward of the rockers and quarter panel drops
Car is a code C dark green poly, and the entire underbody from trunk to trans tunnel is body color. Not just misted green from overspray, but painted that way.
The insides of the rear wheel houses are red oxide and body color with undercoating over. The trunk crossmembers and the sides of the rear frame rails are a grayish color.
Never seen that much body color on the underside of any of my Fords…
That’s the stuff of nightmares! One of the scariest moments is hooking up the battery for the first time. I feel your pain! Good luck with your project!
Thanks Sounds like the often found gray batch color. Red oxide was also used during some of the production period Some times the batch color is similar to the exterior and owners assume its all body color while other times the two are very different. Red body with a green floor for example. Not sure how body color could have fully coated the floor given the process and where the painters stood and walked while painting the exteriors at Dearborn but good luck with your project.
I’ve got an old Ford ad from 1969 showing how they dipped the lower half of the body in electrically charged red oxide primer. There is a Lincoln Mark III getting dipped in the photo. Is this how red oxide got applied on Mustang/Cougars too, or was the dip only done on Lincolns and full sized models?
Yes one of the challenges in figuring out how things were done since different lines (building different models) did things differently.
Guess your asking about the undercarriage the rest of the preparation of the uni-body is a different process with a couple of different primer/sealer and primer applications
Mustangs and Cougars were built cheaper so they didn’t get some of the same treatment top of the line models did. For classic Mustangs and Cougars the floors were painted by passing the body over jets mounted below the moving body that were tripped to spray when the jets were about where the bottom of the firewall bends rearward. At a later station a painter in a pit would spray and cover the bottom of the forward frame and other related panels with a spray gun.
So no dipping for the unibodys for our cars though engineers kept the floor panel design features the same as those that were dipped. Guess it helped with the reinforcement of those thin panels.
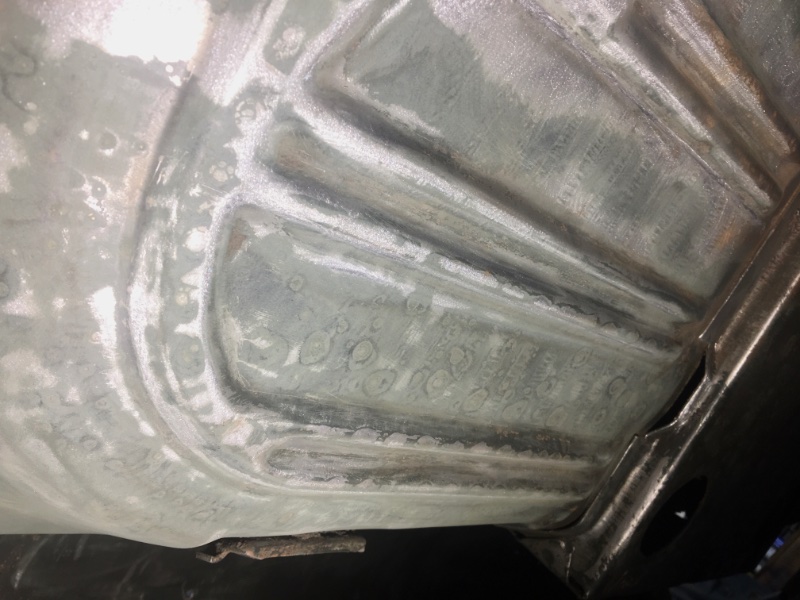
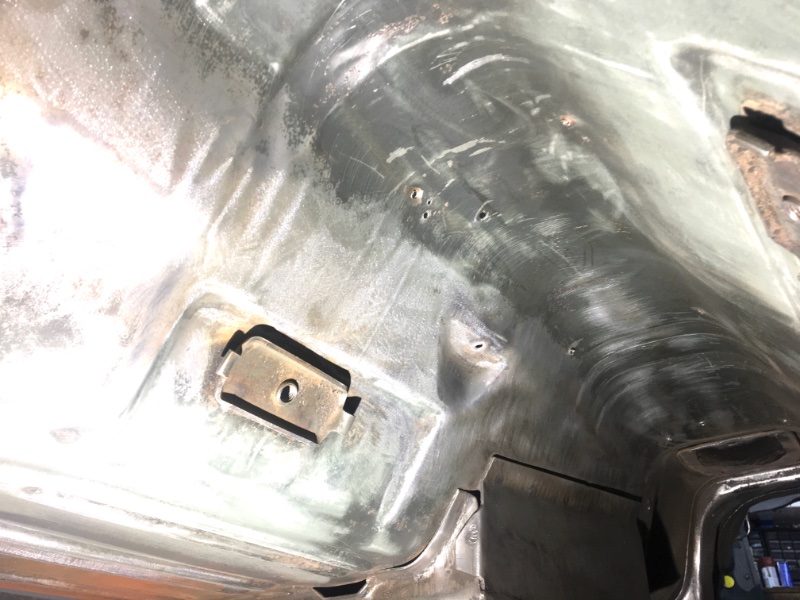
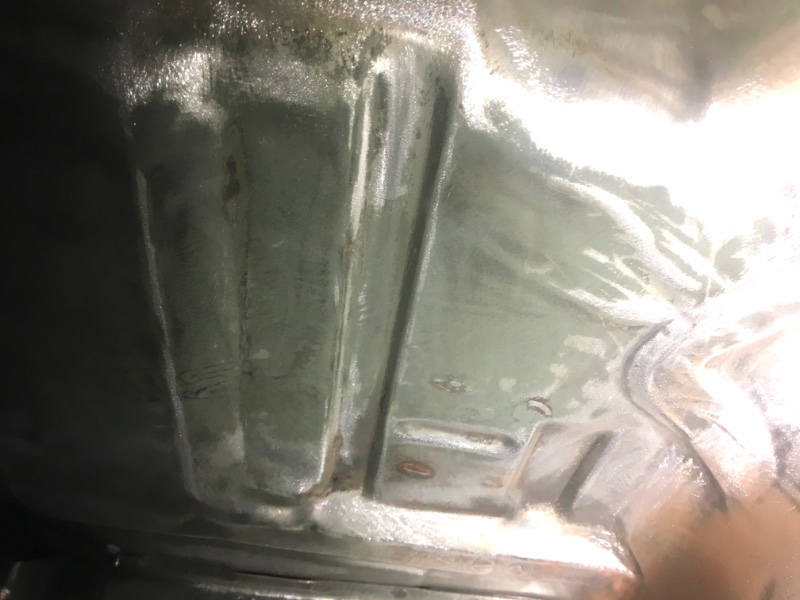
I’ll take some photos. It was a surprise to see how thoroughly the underbody is painted in the body color. I expected to see traces of body color as overspray from the paint process, but the bottom of the car(from the trans hump to trunk floor) is almost entirely and methodically painted in code C dark green. The sides of the frame rails look like galvanized coating, with body color only on the bottom of the rails.
Here are some underbody pictures. Lighting isn’t ideal, but the color is not gray. It is absolutely, 100% positively Code C Dark Green Poly. It covers the entire transmission/driveshaft tunnel, rear floors, convertible braces, trunk floor, frame rails.
The crossmember for the staggered shocks is however a very dark gray on top of galvanized.
There is ZERO question that someone painted the undercarriage after the car was built. This undercarriage is untouched since it left Dearborn.