There is NOTHING like the reassembly of fresh parts.
So satisfying!
Two thumbs up!
Thank you! Of course, all this hard work is going to get dusty as hell once the bodywork starts. Going to get creative at masking off and protecting the aprons once the sanding and blocking starts…
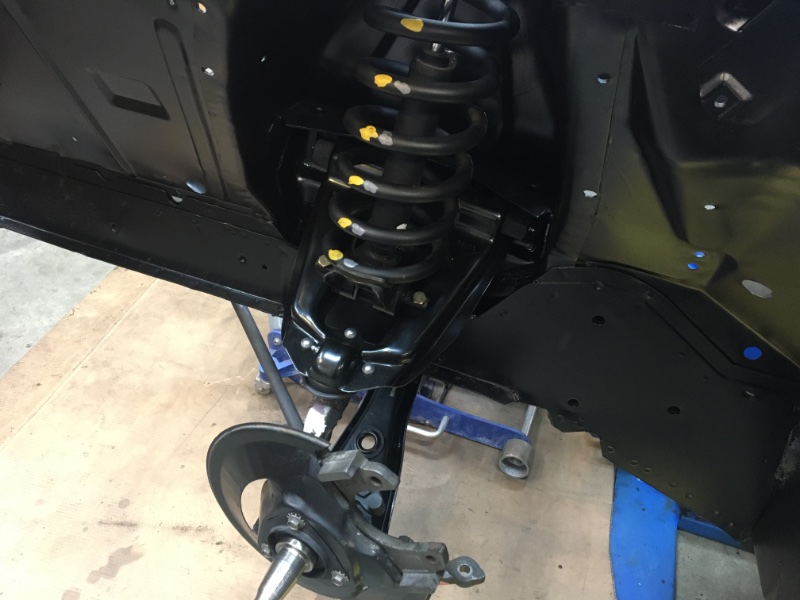
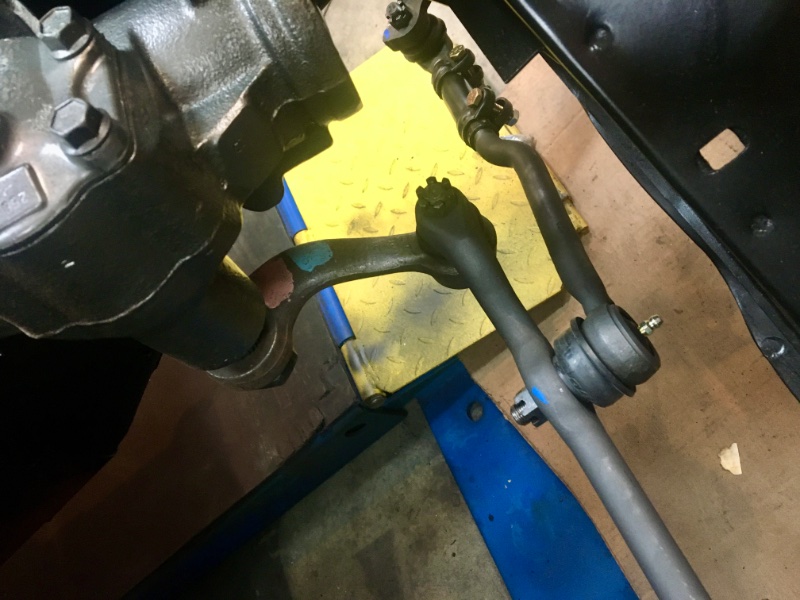
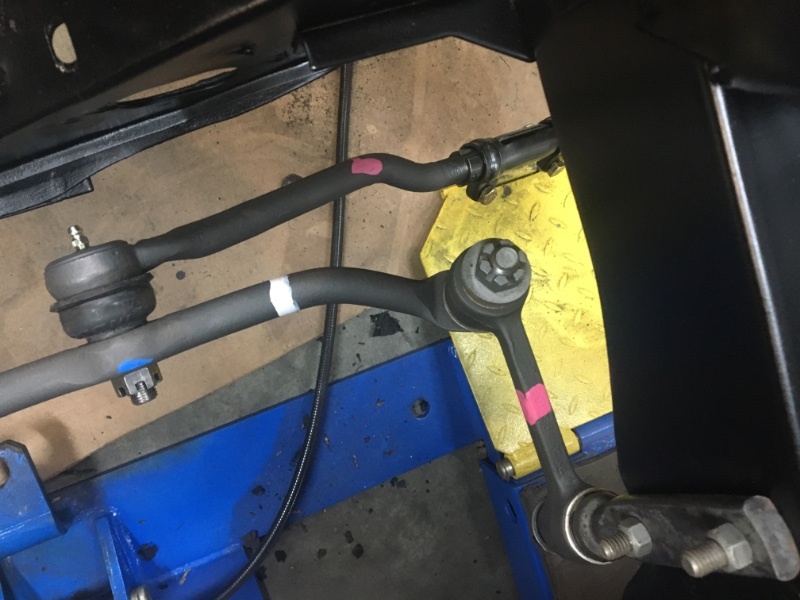
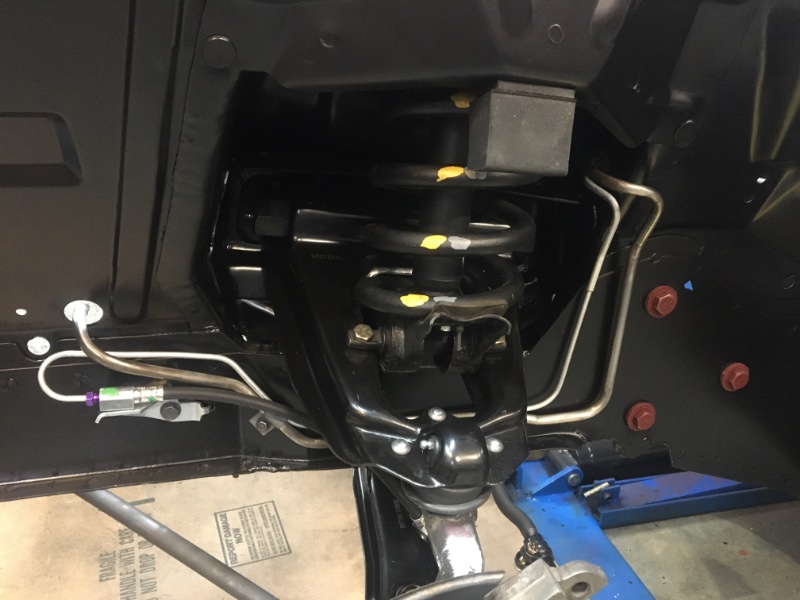
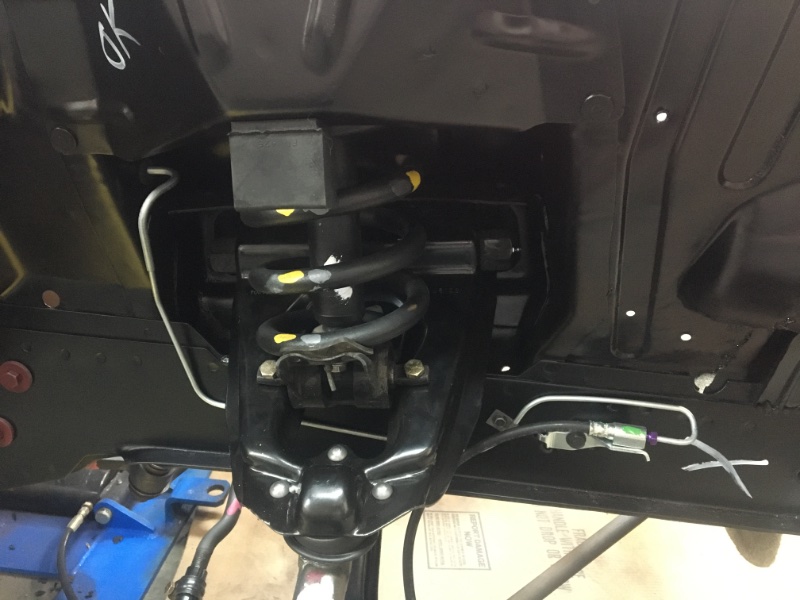
More progress on suspension, steering, fuel, brake lines.
Documented all hardware, clips, bolt head markings, and locations. All original hardware tumbled, cleaned.
Suspension and steering parts are mostly Moog service replacements, aside from the idler and pitman arms. Those are NOS Ford.
Paint marks replicated where observed or where documented by other trustworthy sources. Found a large “X” on the RH frame rail, and an OK mark in white paint on the spring cover. Both the steering box and idler arm bolts were dyed red, so this was also duplicated.
All fasteners torqued to spec, cotter pins not yet installed.
Having a great time with this!
That is going to be too pretty to drive…
Nah, we’ll drive the wheels off it. ![]()
Provided we stay out of rain and off the dirt /gravel roads common to rural NH, it’ll stay presentable.
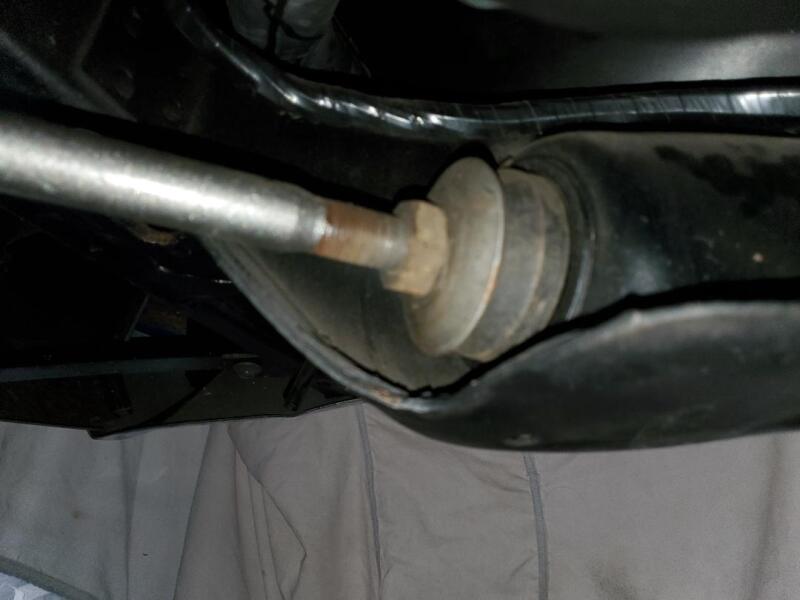
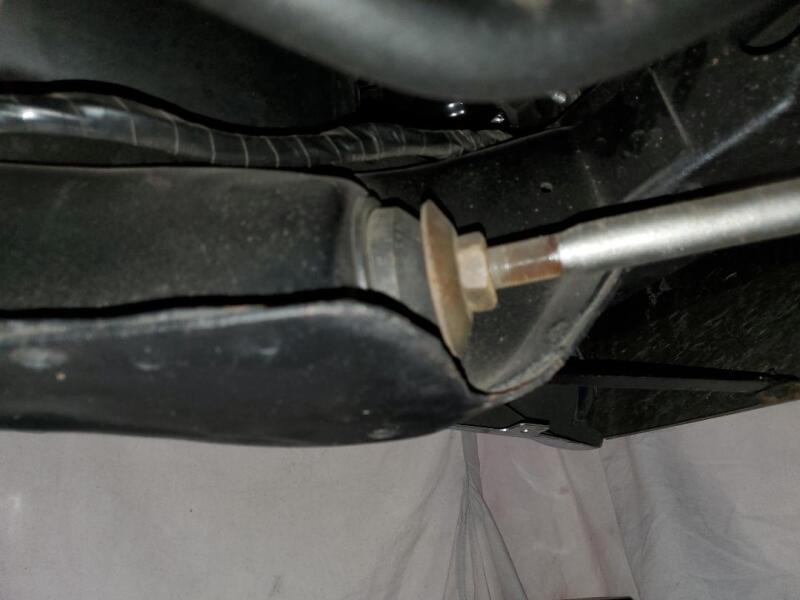
Can someone post a photo of 71-73 strut rod bushings installed? I have a modern replacement set, but not at all happy with the fit and appearance. Want to make sure I have them installed properly.
They are the same for 68-73. Please use good ones only 4 pieces, not the "show’ ones.
QUICK STEER K8157 from Rock auto (Moog & quick steer are same )
Use sink tailpiece to repair bushing if missing.
When I did my 71 I did not like the replacement washers, so I cleaned up the originals and reused them. I put everything back in the factory orientation. I have seen earlier years that the washer is reversed of how they were on this Cougar.
LH front
LH Rear
RH front
RH Rear
Thanks Bill,
I have the metal sleeves and they’re in great shape. I bought an AC Delco bushing kit, but don’t like the design of the rubber. Will order a Moog kit. That’s what I get for buying Ford parts from GM. ![]()
Thank you Neal, very helpful.
Thanks to feedback from Cougar Bill, Neal, Royce, and others - the strut rods are installed and torqued. The Moog K8157 bushing kit is a very high quality part indeed. Perfect fit. Thanks guys!
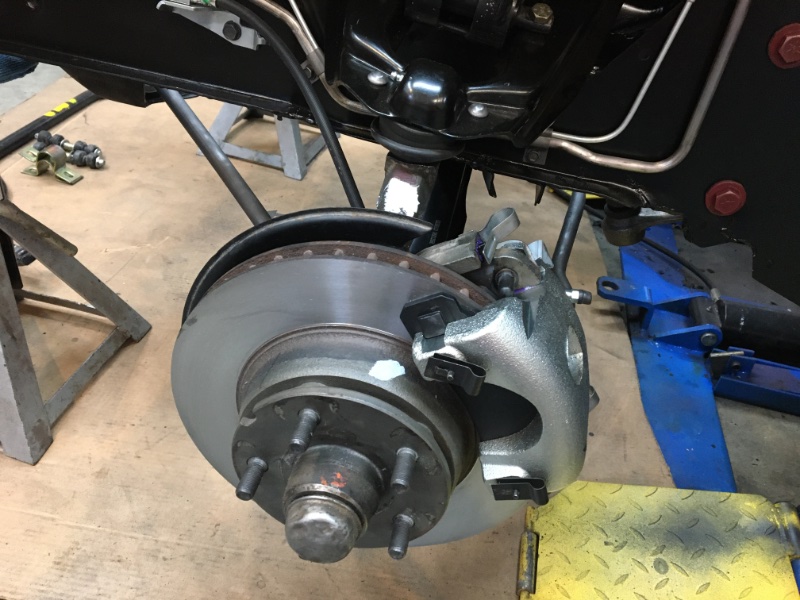
My car has the factory original rotors, and they measured out with thickness to spare. Had them cut just enough to eliminate the rust and pits that formed after 5 years off the road. New bearings, races, seals, calipers, brake pads and hardware. The calipers are Cardone select new units, and they seem to be pretty high quality.
I wanted to rebuild my original FoMoCo castings, but when I removed the pistons, the inside of the bore was badly pitted and the chrome was flaking off the piston. Didn’t make sense to rebuild them…
The brake pads are from Dynamic Friction. My son installed their pads and rotors on his Civic Si, and I was super impressed with the quality, price and performance of their parts.
Soon I’ll be ready to tackle the bodywork, priming and paint.
Next phase of the project has begun.
Epoxy Sealer to seal the bare metal from moisture and provide the base for later bodywork (including that tiny dent in the hood edge. ![]() )
)
Nice gun!
And I’m not talking about the one that has paint in it…
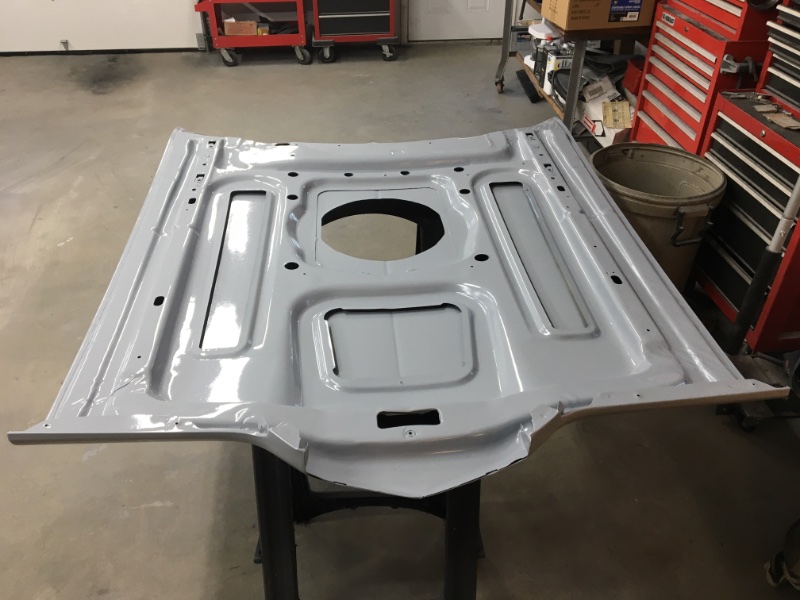
Finished up epoxy sealing the hood bottom today.
Next week we’ll seal the door shells and NOS fenders.
Then body work can begin.
The crappy stamping quality on some of these panels baffles me. Either the dies were breaking down, or they weren’t well designed in the first place. The factory wrinkles on the hood bottom are obscene.
Toyota executives must have looked at this pathetic Ford quality control, shook their heads and laughed.
![]()
![]()
Remnants (along with probable brain damage) of a former life as a linebacker and wrestler.
Hey folks,
Pulled the storage bag off the 351C to re-fog the cylinders with oil, spin the motor by hand, and re-prime the oiling system (I use an old distributor with the gear and breaker plate removed - and chuck the upper shaft into a 1/2" electric drill)
The retainer clip on the oil pump driveshaft has slid down the pump shaft (probably when I last pulled the distributor) allowing the shaft to rise up enough to disengage from the oil pump. Using a 5/16" socket and long 1/4" drive extension, I was able to wiggle the shaft around a bit and re-engage the pump.
I DON’T like the idea of stabbing the distributor back in and driving it like that.
I DO know with the oil pump shaft seated in the pump and also engaged in the distributor shaft that the pump shaft can’t really go anywhere.
I DO worry about the the retaining clip falling off entirely and chewing up something expensive.
I DO worry about the shaft falling into the oil pan sometime later when the motor is back in the car and I have to pull the distributor.
I DO worry that in the back of my mind will be a little voice forever saying “You dumbass, why didn’t you just drop the oil pan while the motor’s on the stand and fix it properly?”
Are the nagging little voices right?
Am I being too nit-picky?
Would YOU drop the oil pan just to re-position the oil pump shaft retainer clip? Maybe two hours work and the cost of a pan gasket set. Small price to pay?
No input?
Listen to the voices. It will always bother you. And you’re the one that matters most.
I’m with Al. You’ll want to.fix it before installing the engine anyway, so might as well do it now while your primer cures. That’s my .02 and not worth much more than that.