Thanks! Not much free time for car stuff these days with a 1yr old crawling around, but I get out to the garage when I can ![]()
Made some good progress over the past week, got the front suspension pulled out. I ended up using a bolt-in spring compressor, made spring removal a cinch. I definitely recommend that for anyone else doing this job. Once I get the spindles cleaned up I’ll be doing new control arms, strut rod bushings, spring cradles and probably the 1" lowering springs. I’m hoping the lowering springs will level out the stance, this car had some serious reverse rake going on.

Cougar is definitely starting to come together. Got the entire front suspension/steering/brakes bolted in, bled and aligned close enough to drive to the the shop. Just need to get a set of front shocks. I really wanted to get this car on the road this summer and maybe to Carlisle, so I had to forego the power disc conversion. I bolted the drums back on for now, and will tackle the brake conversion next winter. This car had really bad reverse rake, but now it sits perfectly level with the 1" lowering springs. My one concern now is the wheels that came on the car don’t have enough backspacing, on the front they seem to stick out too far. I’m worried if the contact between the tire and fender lip is going to get worse with the lowering springs. They might have to go sooner than planned (which is fine, I hate the way they look anyway).
Here’s some pics of the process:


Nice progress, looks you have a decent starting point. My '67 is the same color.
She lives!!!
Had a few days off from work so I was able to knock out a bunch of stuff. Got the aluminum radiator painted black and installed along with the shroud, fan, belts and radiator hoses. Filled all the fluids, poured in some gas and fired her up! No leaks so far and the motor runs pretty smooth. I did have some trouble with the trans cooler lines on the radiator side, they were contacting the crank pulley out of the box. Took quite a bit of bending to get them to clear.
https://www.youtube.com/watch?v=vVm-bQgmrbw


1 Like
Sounds great!
1 step forward, two steps back…
Just got the car home from the shop. Had an alignment done, new axle seals and they got the drums cut and adjusted really well. Went for a drive, everything was going good. When I got home, noticed coolant leaking. Lost the heater core…
Pulled the seat and console out so I could clean up the mess under the carpet and let it dry out. I was planning to take the cougar to carlisle this year, definitely no time or budget to do a new heater box/core/evaporator in time. I will probably bypass the heater core for now and tackle it over the winter.

Not a good weekend for the Cougar. Got stranded due to an ignition problem, had to get towed home. Went from running perfectly to stumbling/stalling like the flip of a switch. Motor would run normally if I let the car sit for a few minutes, but then it would stumble shortly after. I suspect it’s either the Pertronix module or the coil (which is a new Pertronix Flamethrower). Going to replace both and see if that takes care of it.

I keep a spare iginition module in the car, I also have been stranded once due to a failing module. I was able to get home though, after letting it sit for a while and then restarting I was able to get going again a few times till I got home.
Installed a new Pertronix ignitor and coil. Took the car for a long drive, ran smoother than it ever has. Engine temps also stayed much cooler. I think the old Pertronix was not holding timing well.
Hanver I think I’ll take your advice and keep a spare one in the car just in case. Cheap insurance.
Did you run a dedicated 12 volt supply wire to the Pertronix?
I did run 12V, but when I bought the car the Pertronix was powered by the resistor wire. That may have shortened it’s lifespan.
Been a while since my last update because the Cougar had some drivability issues towards the end of summer, so it’s been parked for a while. After all the problems I’ve had with the carburetor and pertronix I decided to pull the trigger on converting to EFI. I had planned to do this conversion at some point anyway, so figured why not tackle it this winter. My plan is to go with the Holley Sniper system and use their matching distributor and CD ignition box. When using all 3 together you get pretty much plug and play timing control.
I started from the back of the car and worked my way forward, tackling the fuel system first. I decided to go with a Spectra classic EFI tank with the 255lph in-tank pump. All the other EFI tanks for classic Mustangs/Cougars have the fuel line connections coming off the top of the tank, requiring you to drill holes and run fuel lines into the trunk area. I didn’t like the possible mess/danger of having a fuel leak inside the trunk compartment, so I ruled those out. The Spectra tank has the fuel connections in the same place as the OEM sending unit location under the car.
Here’s the fuel hookups on the Spectra tank. It also comes with a harness w/pigtail for the pump and sender wiring:

I found a nifty siphon tool with a bulb that made draining the fuel (still had about 1/2 tank) an easy job:

Old tank out, new tank in. Ran the wiring for the pump & sender through the hole in the trunk meant for the original sender wire:

Installed a new stainless 3/8" hard line:

Normally the EFI unit would need a separate return line, which I noticed on a unibody car is hard to do without drilling holes through structural sheet metal or getting too close to the exhaust. Holley has a filter/regulator unit meant to be mounted in the rear of the car near the tank, so you only need a supply line. It’s preset to 58 PSI, same as the one on the Sniper unit. I later learned (after I bought it unfortunately) that you can use a stock filter/regulator from a C5 Corvette (also set to 58 PSI) to do the same thing for cheaper.
I mounted the regulator on the trunk floor near the sending unit. I used 3/8" Earls vaporguard hose for the supply lines and some 5/16" EFI hose I had lying around for the return:


Don’t have the Sniper EFI yet, but that will be coming soon hopefully. To be continued…
Very cool, I like what you’re doing with that EFI setup. It’s great that those tanks are available. The filter / regulator is interesting, I didn’t know that was a thing. I always assumed you needed a return from the throttle body. Nice!
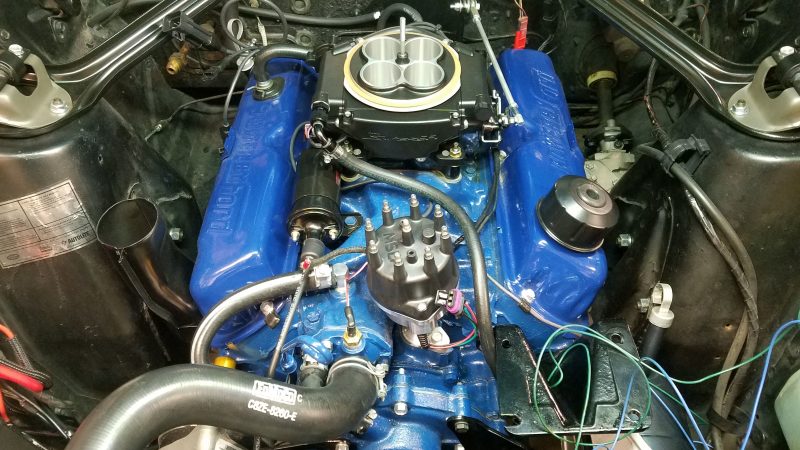
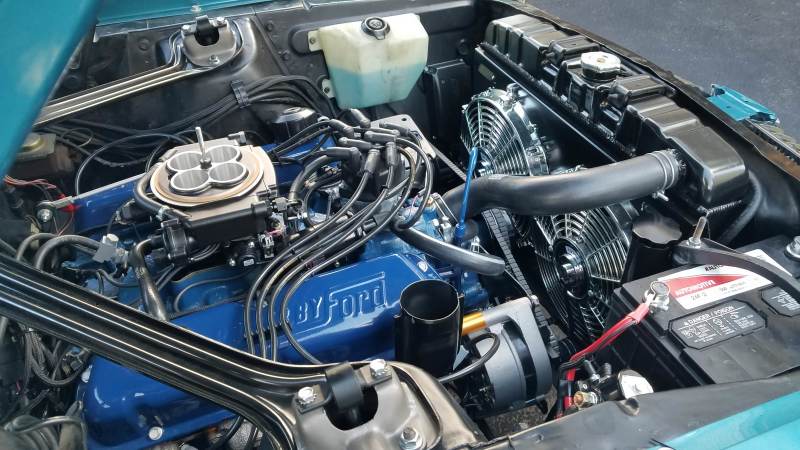
Everything just arrived a few days ago so I started getting to work on the EFI. I wanted to retain the factory air cleaner and heat riser, so I kept the 1" spacer I was using with the old carb. The sniper TBI is about the same height as an edelbrock carb so everything fit well. Even though the air cleaner base drops down there was just enough clearance to use the fuel port on the front pass. side. The air cleaner really conceals the throttle body from sight, just looks like a carb under there which is perfect. The ignition coil was a really tight fit, when mounted on the manifold there’s barely enough room between the water elbow and the TBI.


I had to modify the throttle rod slightly, I used a quick disconnect ball stud fitting. The linkage on the sniper hangs out a good bit further than the edelbrock, so the throttle rod is definitely at more of an angle. So far it seems to work OK, but I might try to find a more elegant solution in the future. Also the built-in return spring on the TBI is fairly stiff, so much so that I had to ditch the double return spring and go with a single.
Because the fuel hose was coming up the front of the motor it wasn’t practical to use the rear fuel port. I found the front passenger side was the cleanest choice as it cleared the spark plug wires best. I wanted a way to check fuel pressure, but I wasn’t crazy about leaving an underhood gauge permanently installed. All the fuel ports on the sniper are -6AN o-ring fittings, so I found a -6 plug with a 1/8NPT port. I combined this with a 1/8NPT schrader valve into the rear port on the sniper. With this I can use a fuel pressure tester for first run/troubleshooting. I also plugged the return port since I’m not running a return line. Once the fuel fittings were done I ran the fuel pump off a jump box to verify I had a leak-free constant 60PSI, so far so good.


Lots more to do yet, hopefully will get some garage time over the next couple days.
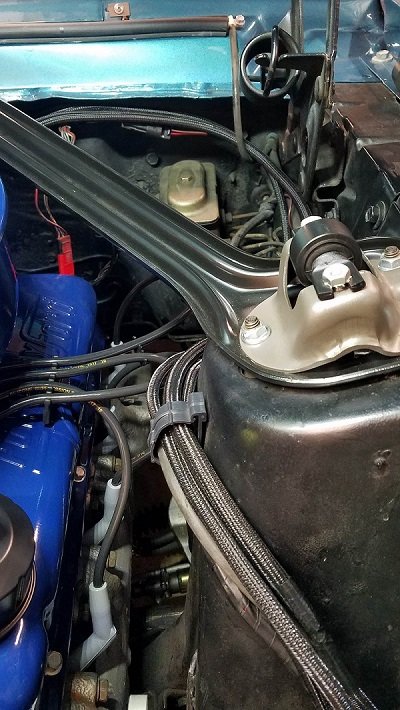
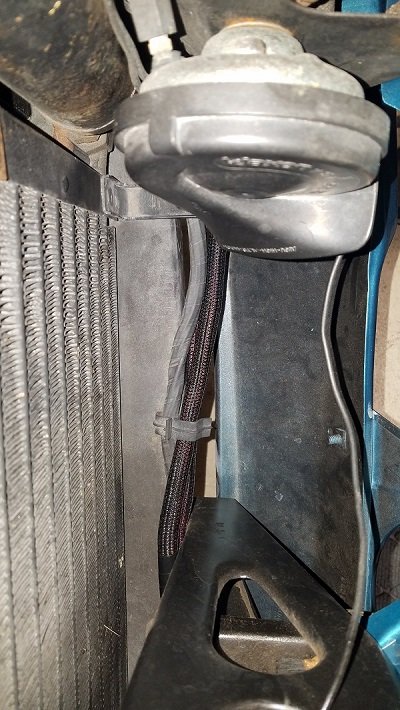
To go along with the EFI install I switched from the engine driven fan to dual 12" electric fans. I was having some temp issues last summer in stop & go driving, so I figured I’d give electric fans a shot and see if they help. The sniper can control 2 fans independently so I wired them separately to take advantage of that. I wired each one with a separate relay and hooked the ground for each relay to the appropriate output on the EFI harness. I was able to hide the power wires pretty well across the front of the rad support and under the battery tray, used the braided loom as it seems to blend in better on classic cars than the corrugated style.
I’m not too crazy about the fans themselves or the fake plastic chrome, but they came with the shroud I bought. I’ll see how they work over the summer, if they prove inadequate I may be replacing them with different fans anyway.


I dig it!
Nice work
Thanks! I was able to finish up and start the motor this weekend. Couple small issues to work out but overall the system works really well. Will post more details shortly.
Ok so finished up the install this weekend and made a couple small tweaks today, was able to get about 25 miles of driving done. Car is running fantastic. Don’t want to bash carburetors, but there’s no way I could get one running this well. Full throttle power actually feels about the same as the old Edelbrock carb, but it’s everything else like the idle quality and drivability that’s so much better. Here’s how the rest of the install went:
First step after getting the sniper TBI unit setup and plumbed was to install the coolant temp sensor. I used the intake manifold port for the gauge sender, which I moved to the thermostat housing. The gauge will be less accurate there, but the LCD screen for the sniper will give me coolant temp readout so I can live with that. Draining about 1/2 gallon of coolant beforehand makes your life easier.
The Hyperspark distributor goes in next. It’s mostly plug and play with the sniper and will allow it to control ignition timing. To install you bring the motor to TDC on the compression stroke of the #1 cylinder. Then you drop the distributor in, and they give you a plastic cap that fits over the rotor and shows you where the post for the #1 spark plug wire needs to be. You make a reference mark on the housing and put the distributor cap on. I had to reposition the distributor a couple times to get the #1 post in the back where it should be. This worked better than I expected, when I set the timing after first start I found it was only off by 7 degrees. The instructions are picky about the distributor gear. They tell you to make sure it’s compatible with your camshaft, and they give you assembly lube to apply. They also want you to run non-synthetic oil for the break-in period. I thought this was a bit overkill on a worn-in engine, but I went ahead and drained out my almost brand new synthetic oil ![]() and refilled with conventional 10W-40 and a break-in additive for good measure.
and refilled with conventional 10W-40 and a break-in additive for good measure.
Final thing to note: this cap has the HEI/TFI style male connectors, not the female sockets so you’ll need a different wireset. Didn’t realize this until the last minute, so I had to scour the local auto parts stores to find a set that fit. Autozone had them for a '79 5.0l Mustang that worked and came with both a short and long coil wire.
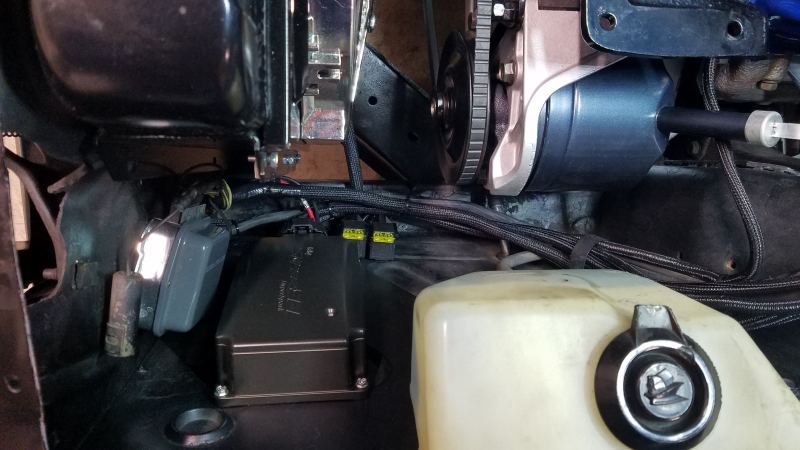
Next step was the Hyperspark CD box. This again is mostly plug and play with the sniper. The sniper base kit does include a coil driver module, so that’s an option if you don’t want to run the CD box. I installed on the drivers side next to the washer bottle. It’s black and it’s tucked away pretty well there so it’s not really noticable at first glance. I also figured that when I get A/C installed at some point the lines will run above it and shield it from view as well. You can see in the pic the two relays underneath it for the electric fans. In hindsight I should have used waterproof relays, but we’ll see how those hold up.
Now to the wiring. Even though a lot of this was plug and play, it still took a while to finish. I bought a bunch of extra braided loom and covered all the wiring with it. The sniper comes with a pre-made “harness” with a relay and fuse pre-wired. I mounted these on the firewall using the extra thread from the heater box studs. I then ran all the wiring over to the drivers side and along the shock tower, following the path the existing harness and vacuum lines take. All the pre-terminated connections on the sniper are way too long in my opinion, but I was able to tuck them fairly neatly around the back of the motor. Once the air cleaner is on you don’t really see them anyway. There were a few wires that had to be routed to the interior, namely the fuel pump wire, touchscreen cable, as well as tach signal and digital gauge output wires (for possible future use). I used the existing holes in the firewall for a non-A/C heater core and found a grommet that fit. Running the fuel pump wire to the trunk involved taking a lot of interior pieces off, but was pretty routine.
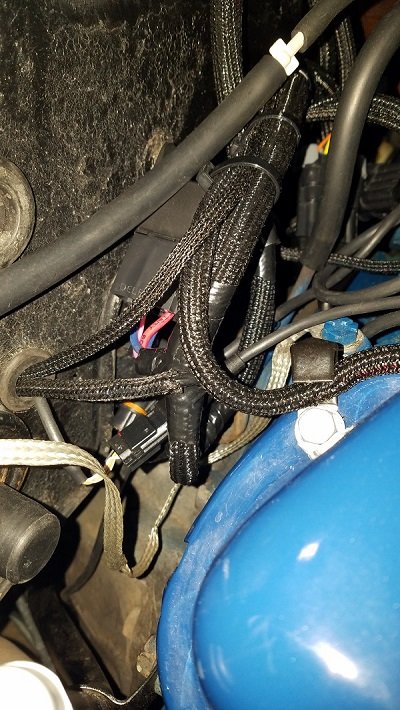
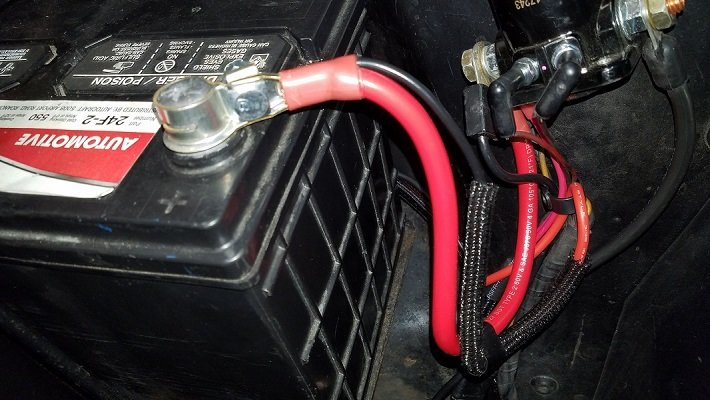
I ran the power/ground for the sniper and CD box across the front of the rad support and under the battery tray. The instructions make a very big deal about running both the EFI and CD box directly to the battery terminals…not a starter solenoid, junction box or anything else. I found some battery cables that have a 12 gauge power tap pre-crimped into the battery terminal. They’re more of a modern-style cable, but I figured this would look neater than hanging wires off the original style cables with ring terminals. I hooked the power taps to a 12 gauge waterproof connector, and soldered the EFI/CD box wiring to the other side of the connector. This will allow me to easily disconnect the harness if need be. I also installed a 30-amp inline fuse on the CD box power wire. Instructions didn’t call for it, but I don’t like the idea of an un-fused positive wire running across the front of the car.
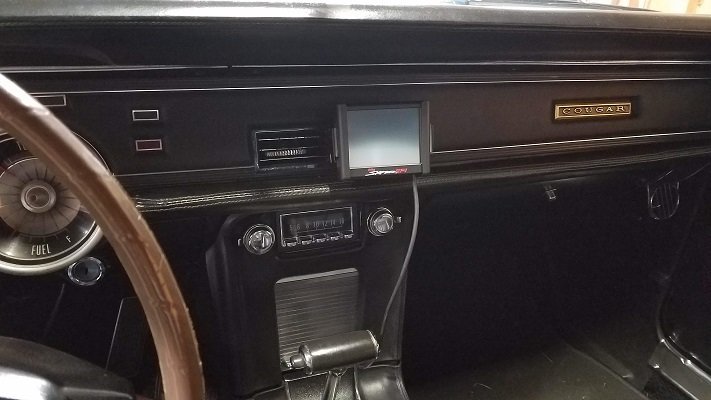
The rest of the wiring was hooking up the electric fan ground triggers, tying off the unused wires and finishing up the ignition wiring. This wasn’t too bad, and the instructions have clear diagrams that show exactly how each component should be wired together. I ran the cable for the touchscreen into the cubby in the center console. I left the excess wire bundled up in here so I have enough slack for it to reach the driver side fender, this comes in handy for setting up the idle.
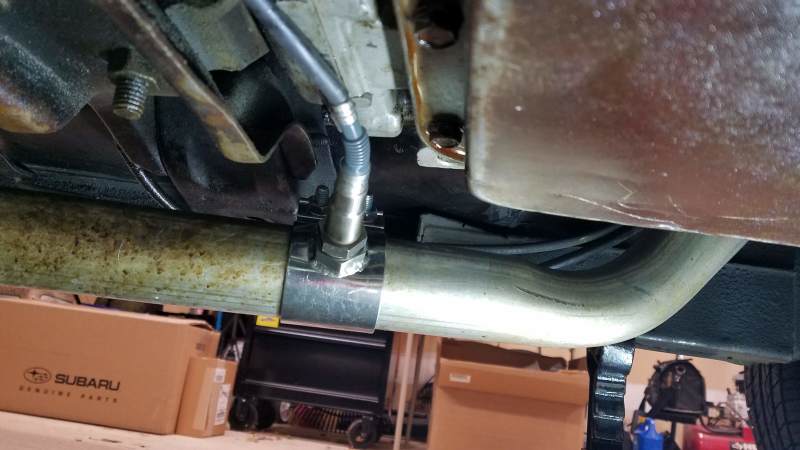
Now onto the most PITA part, the O2 sensor. If you can, I highly recommend you just get a bung welded into your exhaust beforehand (just make sure to account for the length of the sensor and the not-very-flexible wiring harness coming out the back). In my case the car was undriveable, so I went with the no-weld kit. Unfortunately the one that comes with the sniper is too big to fit on a 2" pipe (I think it’s meant for 2.5"), so I ended up using this one. I used a step bit and a right angle drill to make a 7/8" hole for the mount, I chose a spot inbetween the trans crossmember and pan. It’s important to drill the hole at a slight upward angle, this prevents moisture from collecting on the sensor and damaging it.
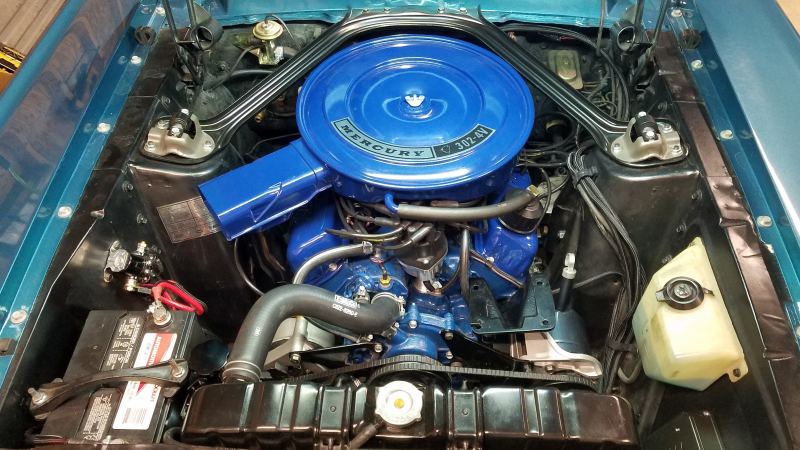
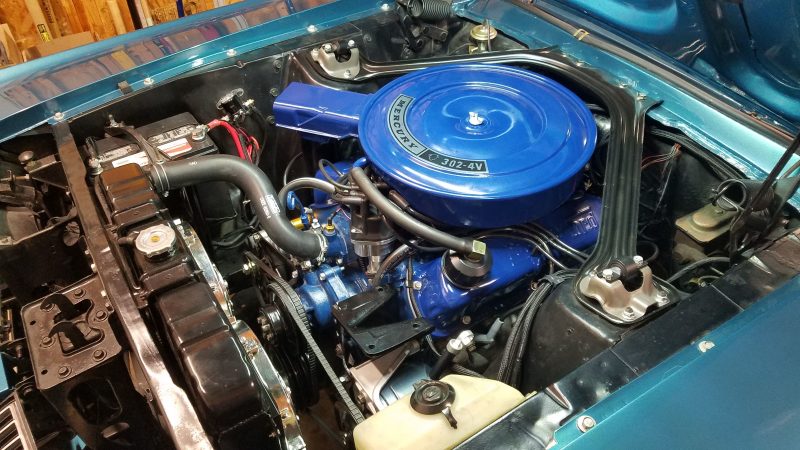
The finished product, looks almost stock with the air cleaner on…

The first start went no problem, fired up straight away. The sniper runs the fuel pump and does a prime shot of fuel into the manifold 2.5 seconds after you turn the ignition on, so ideally you want to wait about 5 seconds before cranking. Here’s a quick video I took shortly after the first start:

Nice work! Im going this route (not sure which EFI yet) in the future but have alot of other things to do first.