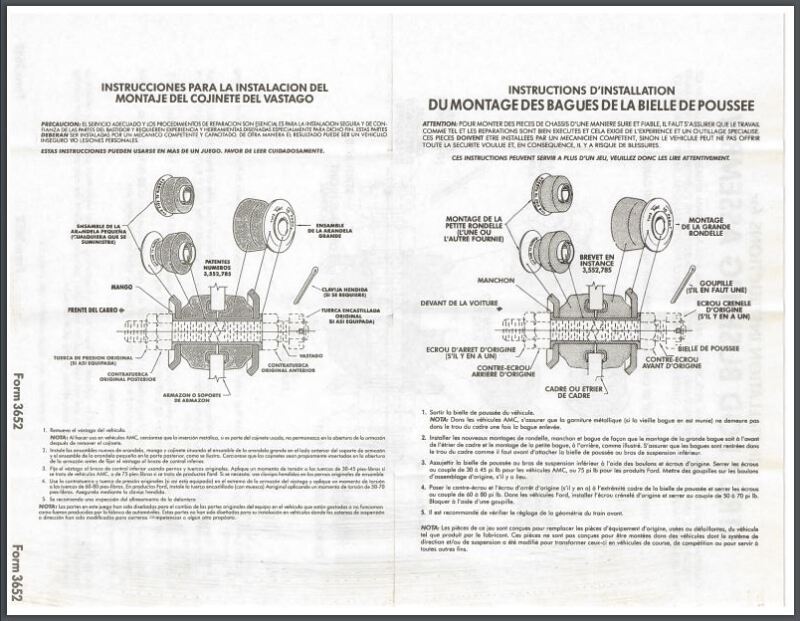
I’ve had questions about this topic & though I would share the details.
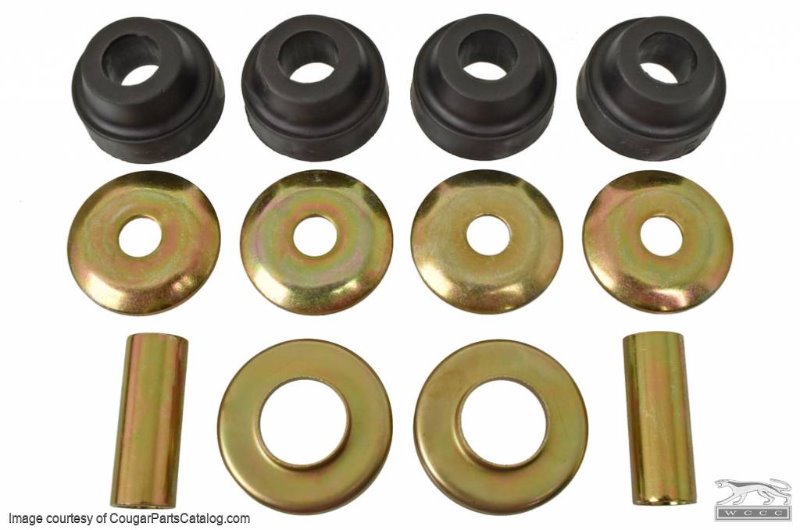
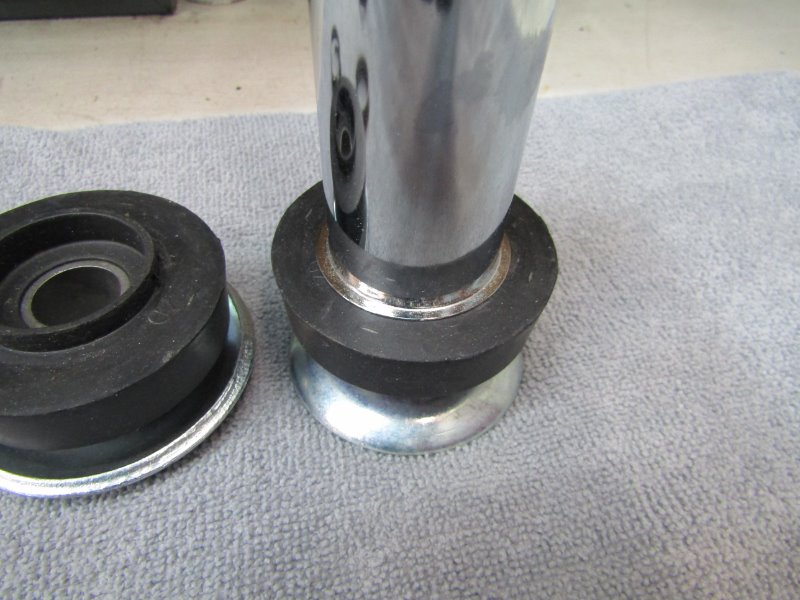
There are 2 basic types of strut rod bushings avail. The “original type” or as I refer to as “for show only” or “junk rod bushings”
are this type
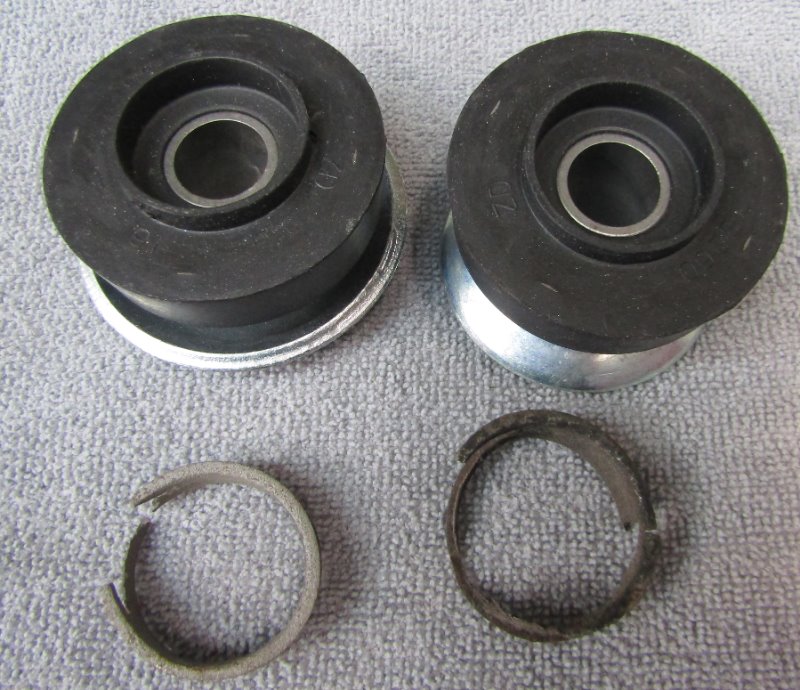
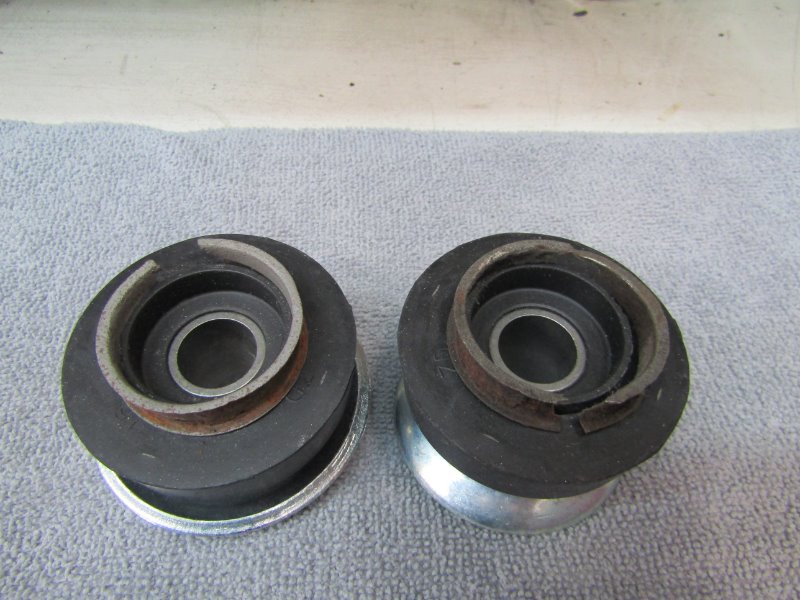
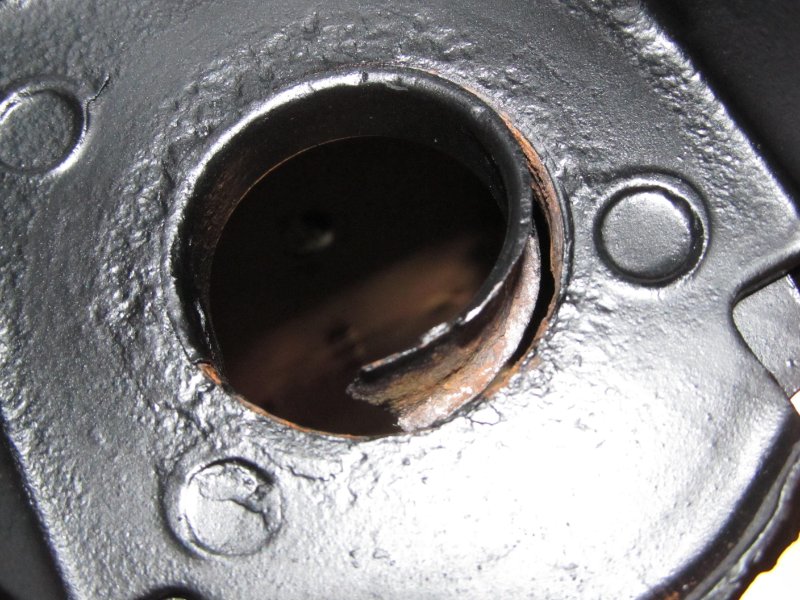
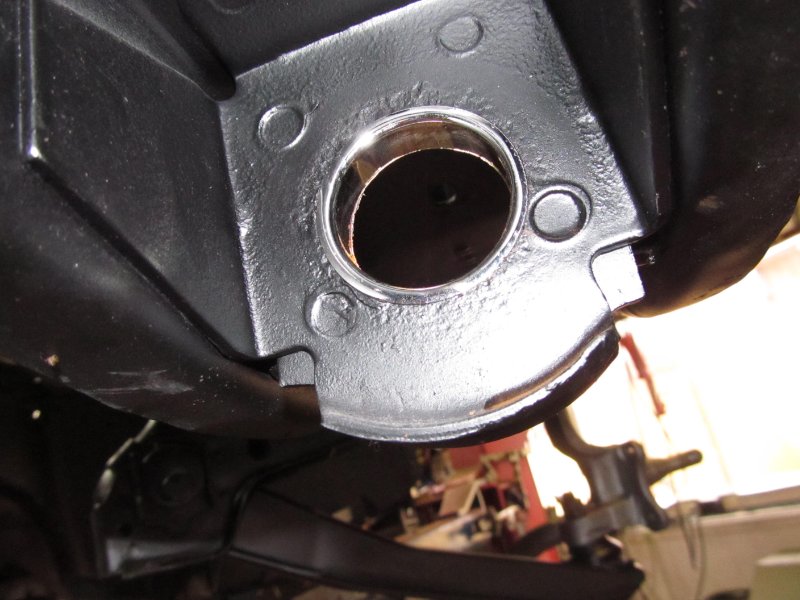
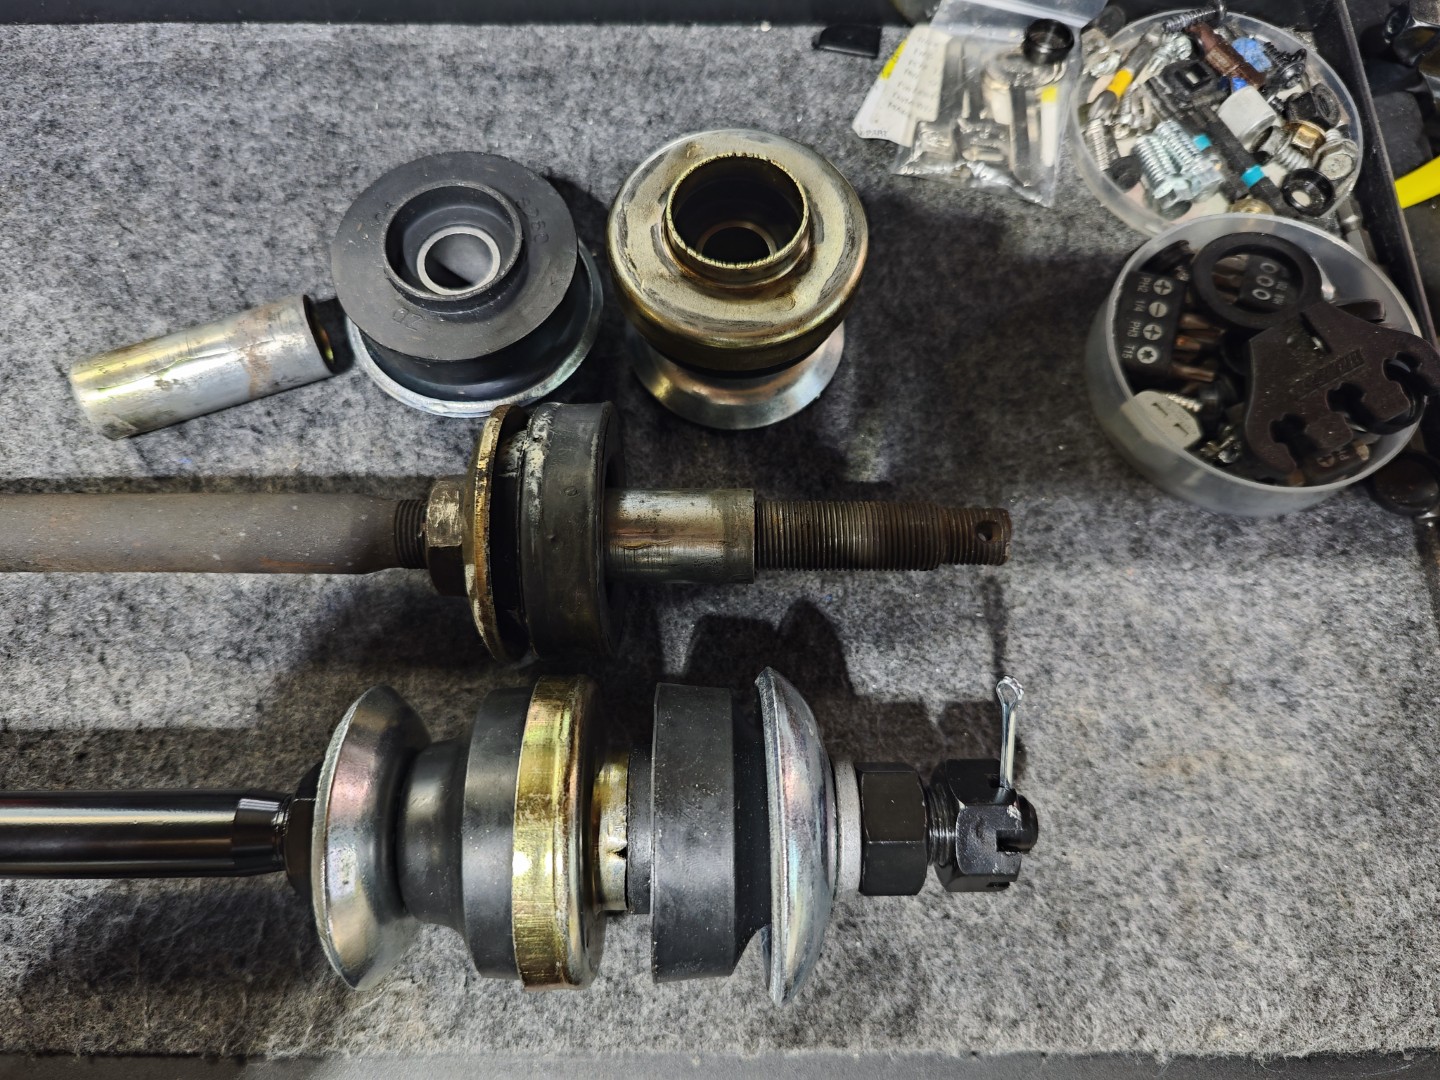
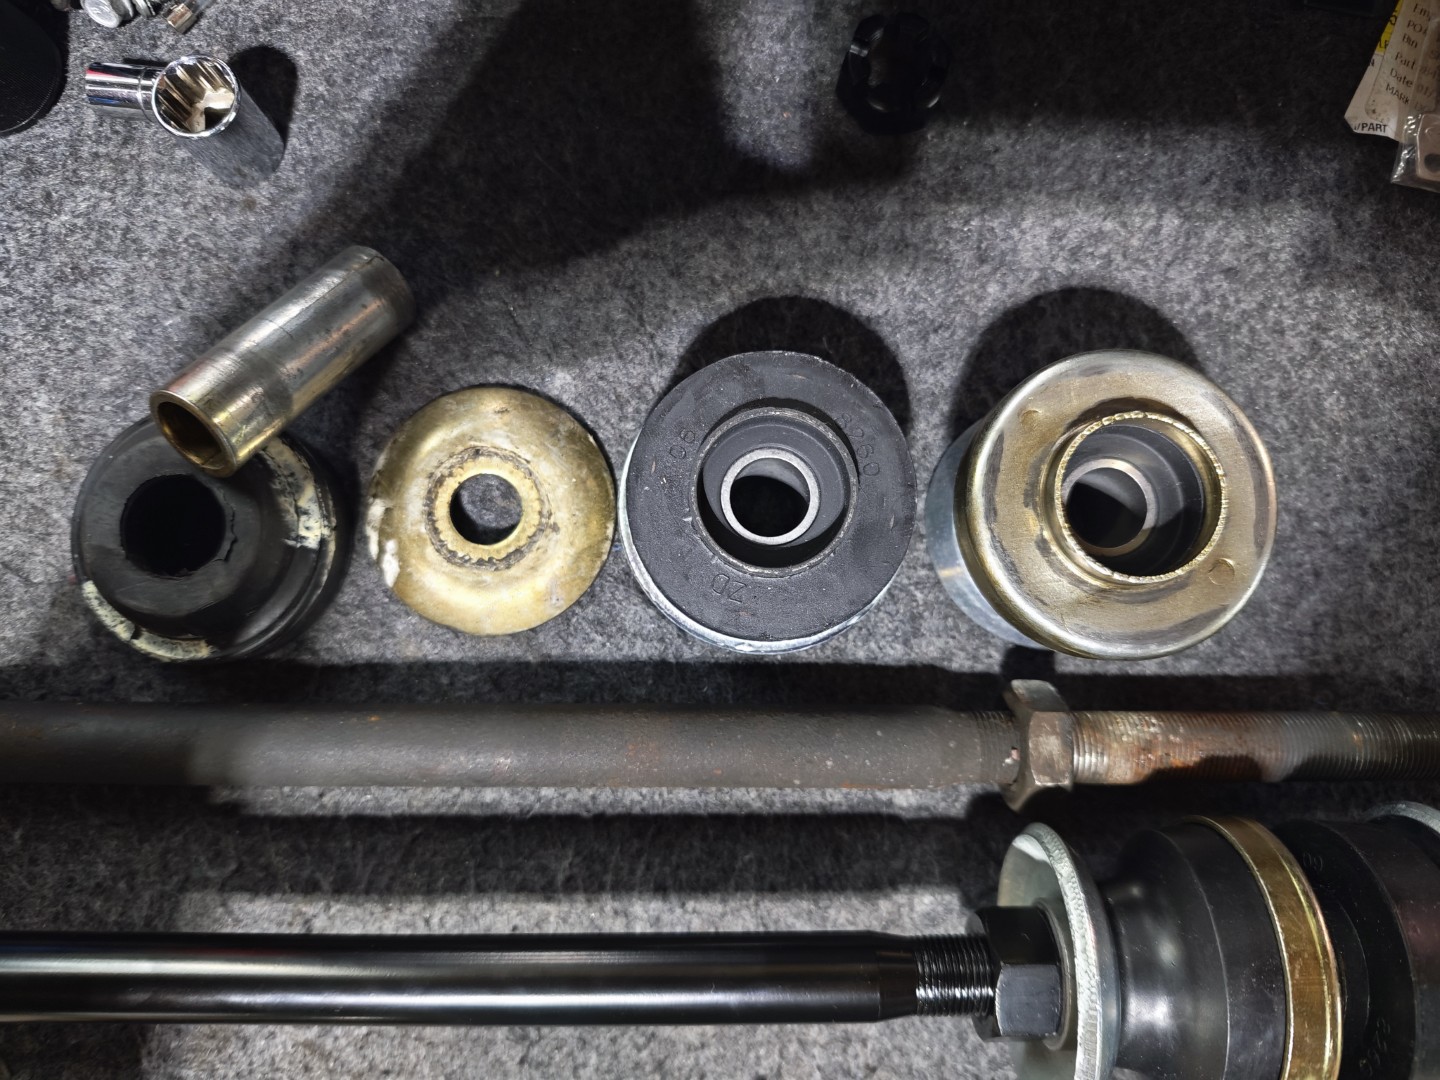
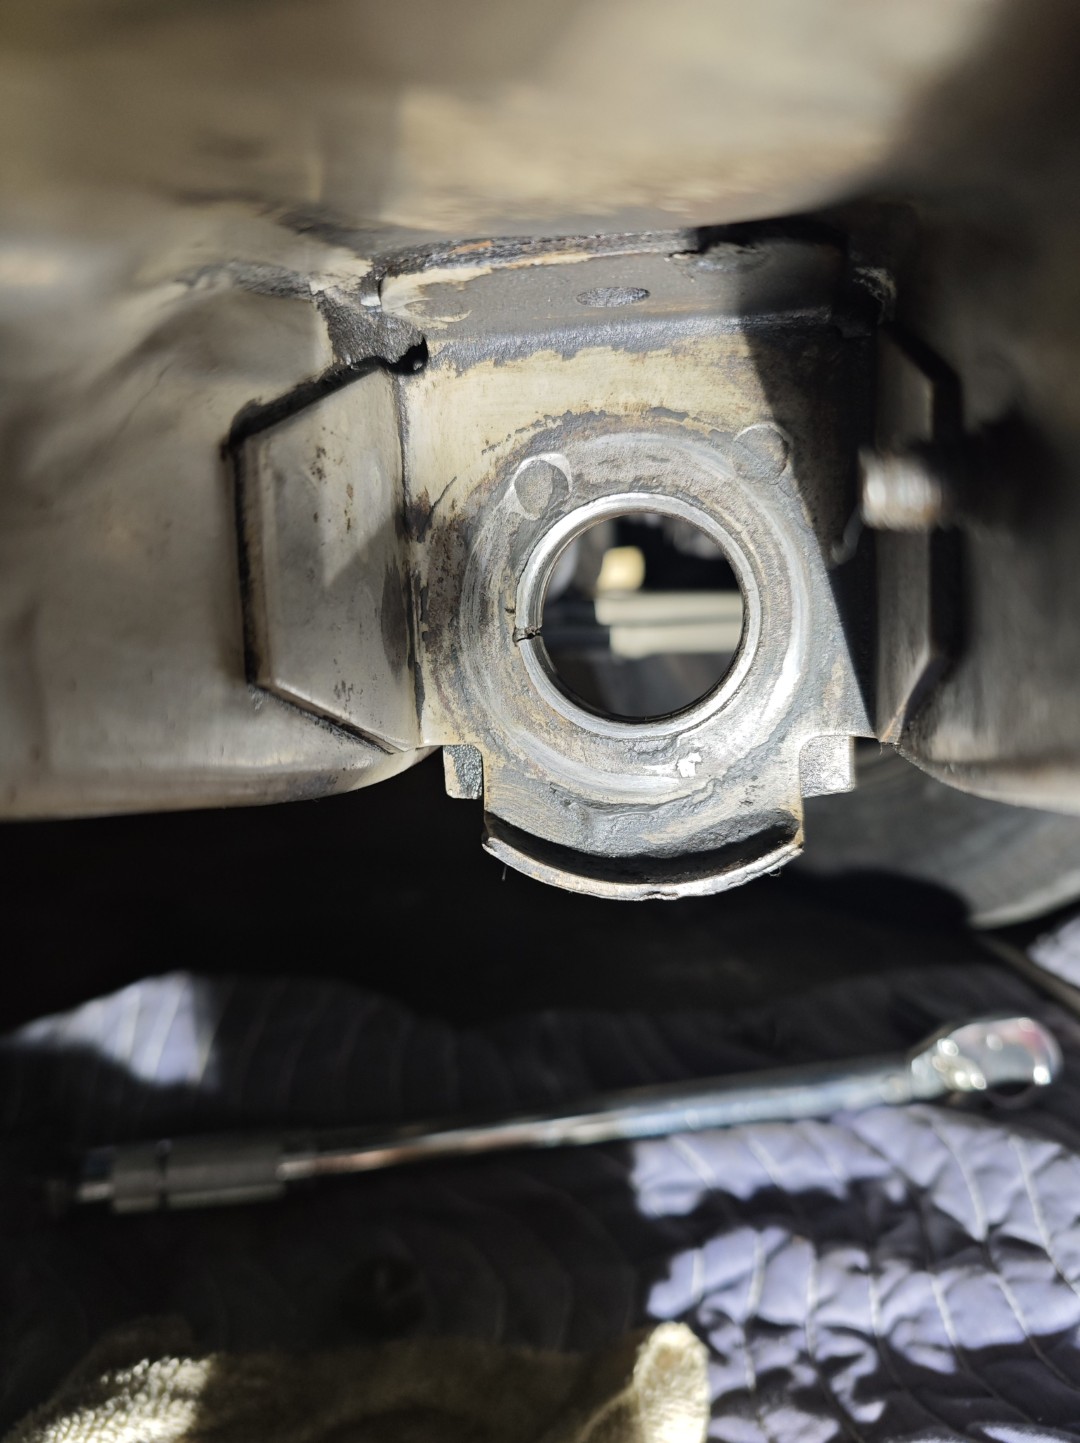
As seen in these picture are the body steel sleeve/bushing from the factory that are usually missing or damaged by rust or by using the "junk rod bushings in the 1st picture.
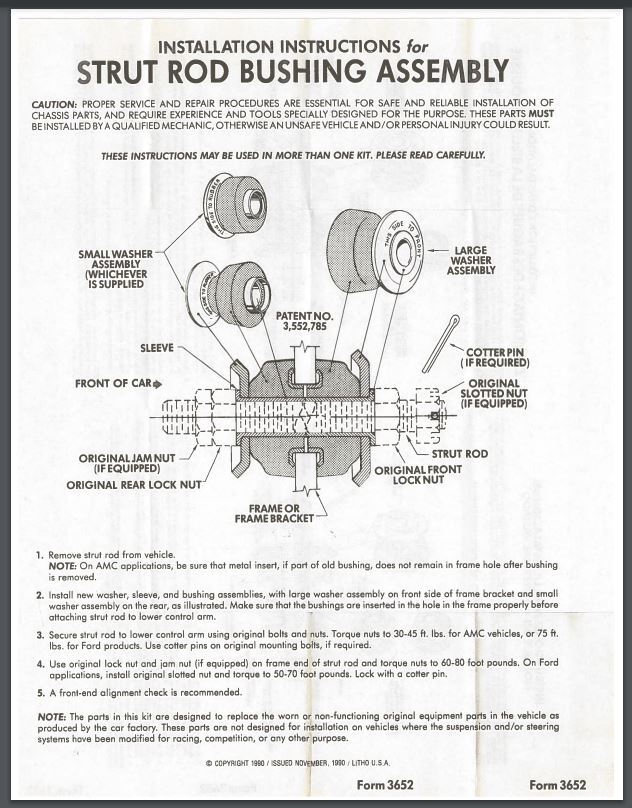
Then install the bushings & tighten the nuts.
The reason you want to pay attention is w/ out this “repair” the strut rod will move around & make a lot of noise & could cause alignment issues. By using the “junk” ones the rubber moves around & destroys the sleeve in the housing. Please don’t make this mistake! Do it once… the right way!
Available at Rockauto $12.19 for a complete set! 1969 MERCURY COUGAR 5.8L 351cid V8 Strut Rod Bushing | RockAuto
Hope this helps!
Did the sleeve install today. Slight variation from op’s method.
I did not like the idea of having the edge of the cut end being driven into the rubber portion of the bushing. When I cut the pipe I left it 2-3mm to long. I tapped the lip over a small bit with a body hammer, I than placed a few washes on each end of the sleeve and passed a bolt through it. Torqued it down and the edge flattened on the other side of the hole in the frame.
This topic could not have been more timely. (Was it meant for me? LOL) I initially purchased the “original type” Cougar Bill has pictured, and had started to disassemble the originals on the car.
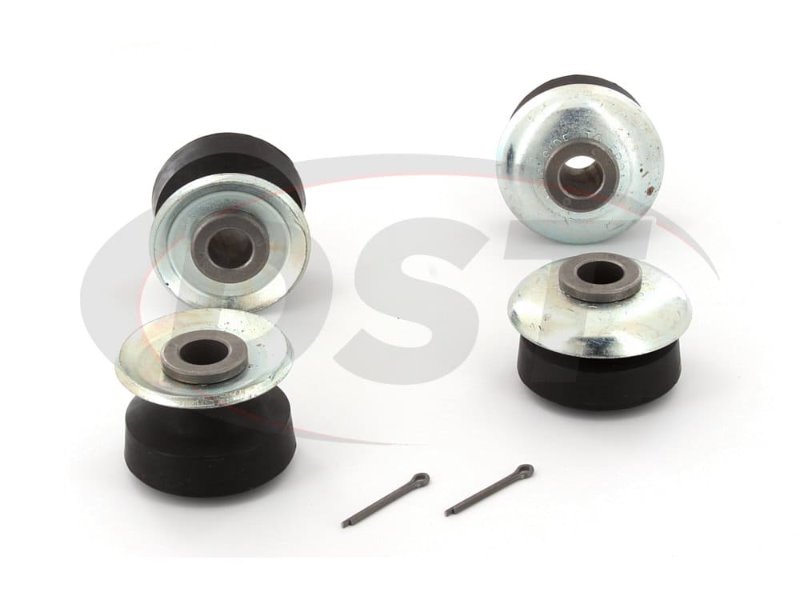
Based on the recommendation of this topic, and my own concerns with the “original type” having a single sleeve shard by a bushing pair, I switched gears and picked up a set of the Moog bushings P/N K8157 for my 68 XR7. Based on how they are constructed, what a night-and-day difference. I also had an ah-ha moment when it finally clicked about the use of the sink tail pipe. I’ll definitely install them, as well as use the tip to roll back the cut edge using the washers and bolt.
THANK YOU Bill for starting this topic and those who added replies. You’ve helped with my restoration quality.
Hey there guys, chose this thread as it referenced the work on the strut rod & bushing replacement today, and please remember Im a GM/import lifer so the Ford-specific stuff is new to me.
I had a hard clunk/knock sound coming from the front pass side and now know exactly what was causing it (slack in the opening with metal to metal contact) Anyhow before posting here i used the system search and read thru several historical posts you all contributed to (really such a valuable asset) and from those reads, gained a complete understanding of the whole system and/or any problems related to these parts. thought i was good to go to continue and complete the work, but now it’s a bit strange so I thought to share with you for input because I do not want to assume or experiment when it comes to critical steering/suspension parts.
In reading about the sink tail pipe bushing-shim repair I expected to find rusted damaged or missing insert ring and figured it would be what i need to do, but then when disassembled on my ‘68 (36K CA car with no invasive rot/rust underneath at all) the original insert piece was 100% intact, zero rust or rot, but obviously worn away inside enough to cause quite a bit of slack and the knocking sound. My concern now is this: the slack rn with original insert and new parts is shifting around in the opening and i can duplicate the bad sound, so if i remove that piece and its thickness from the overall diameter and then insert the new tail piece mod, how will that resolve this, as those tail pipe pieces have not even 1/16” thickness, the slack may now even increase? am i to find a way to leave the original in place and then try and force in some added piece to reduce the opening’s ID size? or should i remove the original and use a PVC section which would be much thicker than the steel tail pipe extension? i could verify fitment by bringing the bushing to HD and testing the PVC section.
Sharing some photos so you can see the original bushing insert along with rod bushings. And a related question on the project… I purchased the Moog Kit that Royce suggested everyone use and it looks & feels way higher quality than what i found on the car, of which they replaced bushings with low-grade and did nothing to resolve the slack issue. now just to confirm because again, these type parts are all new to me… the original style had a thick metal tube sleeve that rod the center of the rod and sunk into either side’s bushings. Now I see pressed in section on the Moog bushings all built as an single assembly unit and there is no room for that sleeve to be part of the equation any longer and it would never work. so it seems obvious & am assuming that means I just eliminate the original tube as shown here in my mocked up assembled unit because Moog built it in, is this all correct?
Could you guys please confirm on the center sleeve tube elimination with Moog and also, given what i explained above regarding the current insert’s condition and slack against the new parts, what route you think i should take with this more unique loose-play situation. Thanks much!