The new storyline for Cougar 7F91A553948 - ASA'S CAT

Greetings all,

I am the new owner of the Cougar formerly owned by Ed Lind. This is a 1967 Base model with a Maaco repaint at some point in it’s life after an accident. We now have the Cougar safely in my shop deep in an undisclosed underground bunker location. … and my son and I are starting work on it.

The Cougar was driveable but had issues. Knowing this, we brought it home on my car trailer behind my 1994 Ford F250 7.3L Powerstroke. Photos later, I’m typing this as a quick break before heading out to the shop again. There -is- a quick video on the WCCC facebook page. (I don’t do facebook but my son does)

After performing an engine degrease underneath, we put it up on 6-ton jack stands (higher lift). So far here is a list of work planned for this summer:

  • Rebuild Power Steering pump (leaking)
  • Rebuild Power Steering Control Valve (leaking/worn badly)
  • Rebuild Power Steering Power Cylinder (leaking, needs new boot)
  • All new Power Steering hoses (some have road damage and are leaking)
  • Remove oil pan
    • Replace rear main seal (leaking)
    • Replace rod and main bearings (125,000 miles… why not; I’m in there)
    • New one piece reinforced oil pan gasket (after straightening the oil pan rails)
  • Remove Valve Covers (leaking)
    • Replace gaskets
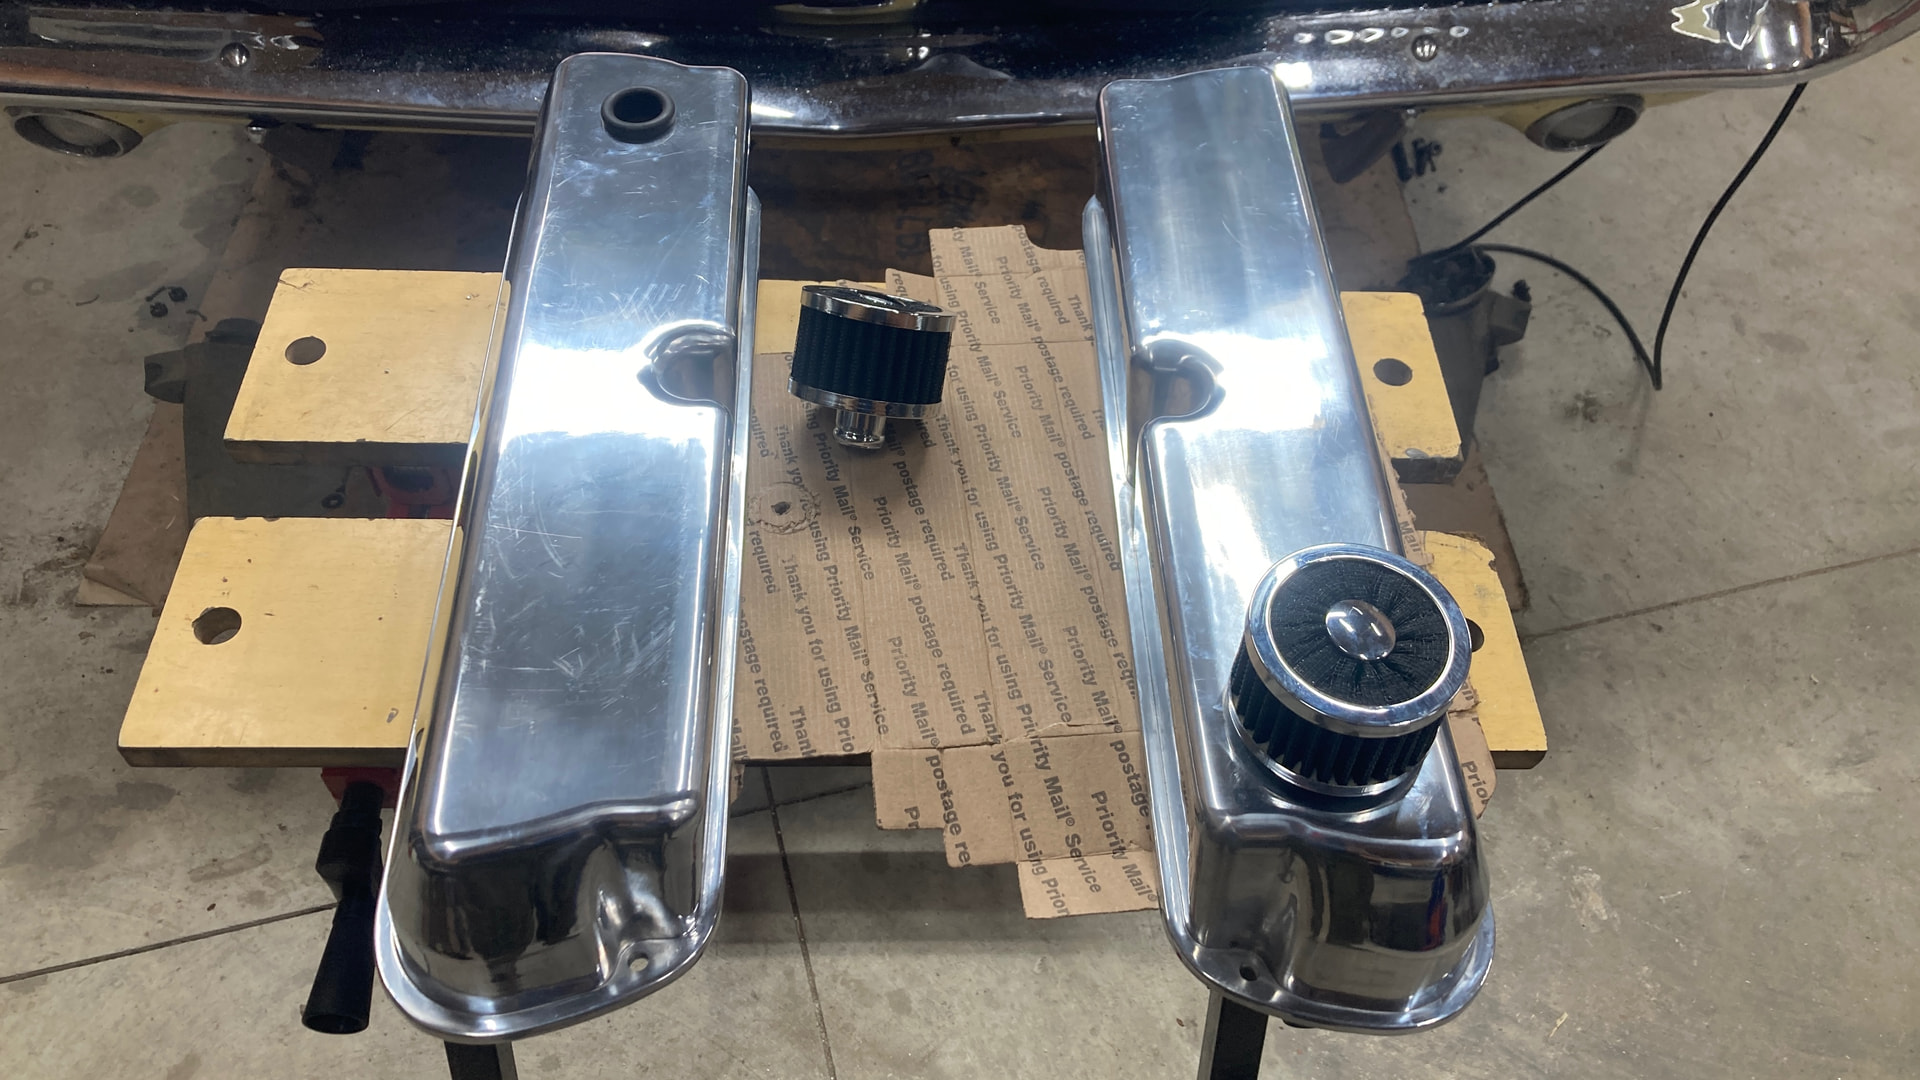
    • We’re also putting different -cast- covers on in place of the stamped steel
  • Remove and replace Water Pump (leaking at shaft seal and timing cover)
    • Replacing with a high volume model
  • Removing broken bolt in timing cover for AC bracket (surprise! no, we didn’t break it, it came that way)
  • Replace exhaust donuts on manifold to pipe flanges (leaking, badly on one side)
  • Replace Brake Master Cylinder
    • Replacing with a Wilwood with a smaller bore (easier braking)
    • Future plans call for a front disc conversion
    • All the brakes look great, having had new spring kits installed and it looks like maybe new wheel cylinders as well; shoes have plenty of meat left
  • Replace C4 transmission shifter shaft seal (leaking)
  • Rebuild the carb (mostly “just because”)
  • Adjust the driver’s door so it closes “on plane” and doesn’t droop
  • Adjust (or replace) driver’s door latch (it’s very difficult to press the button and the lock knob gets hung up
  • Paintless dent removal (bodywork without the holes)
  • New Windshield
  • Address the electrical gremlins in the dash (rear signals work but dash does not; yes, I have the docs from WCCC) :wink:
  • “Shelby drop” the upper control arms
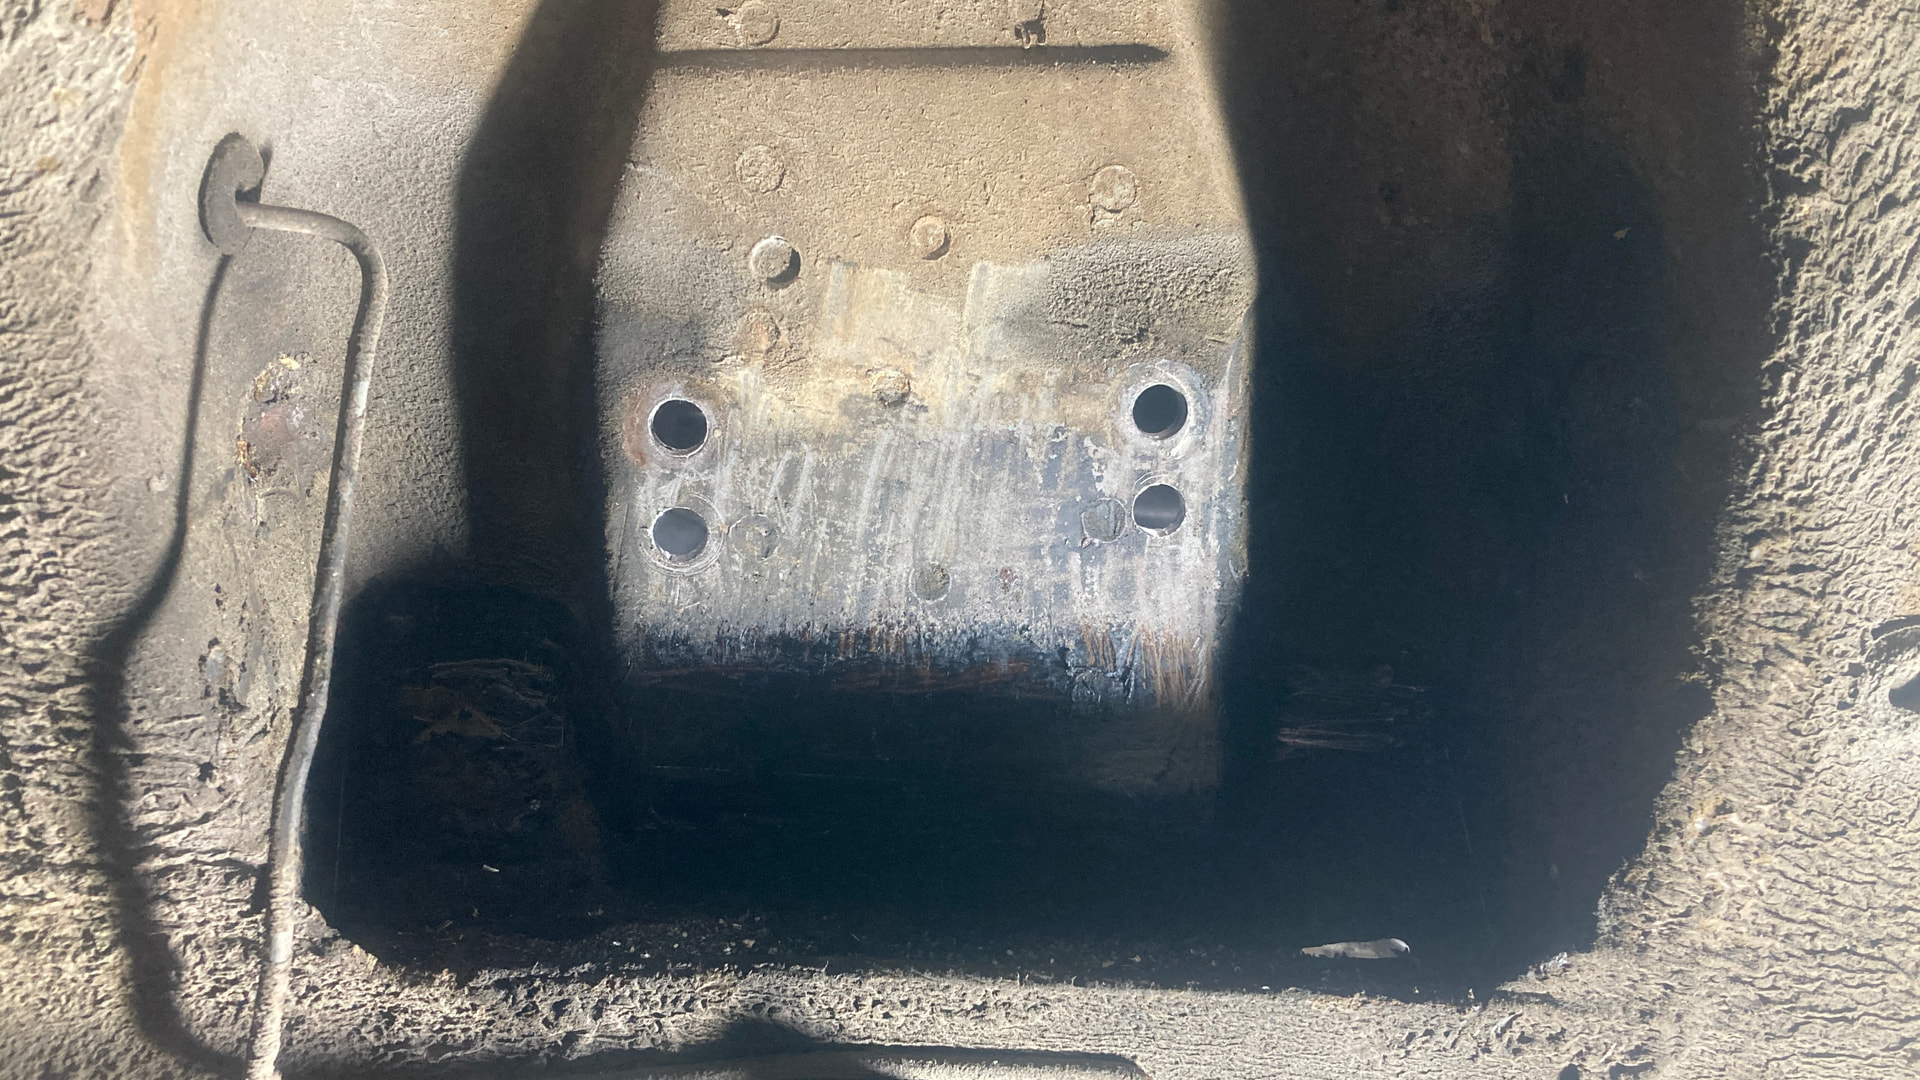
  • Weld in shock tower supports
  • Install Export Brace
  • Install Pertronix Ignitor III module and coil

There is a plethora of other items I’m not revealing yet and are lower priority. The primary goal is to get all the mechanics sorted first, then move on to cosmetics and the custom stuff I’m planning.

Sorry, no photos yet. My son and I have been pretty busy just taking things apart.

Stay tuned.

5 Likes

A drooping door is usually a result of a worn out door hinge.

Randy Goodling

CCOA #95

1 Like

That’s a lot of leaks. Normally they don’t leak that much. The Autolite 4V carburetor is a bad player you might think about replacing it.

Agreed; I’ve not examined it yet to know if it’s the hinge or not.

The carb is already an aftermarket Holley vacuum secondary.

And all the leaks? It’s old, well used and a bit needy. I don’t wish to make it out like it was oiling the roads as it drove along. A couple of major leaks, yes, causing it to need constant attention. Most others were “weeping” a bit of oil. Best to fix them all while I’m in there.

1 Like

Sounds like you’ve got a great Father/Son project. What a great way to bond that will be a fantastic memory for both of you in the future.

Not sure if this is your 1st project or 10th! If it’s your “umpteenth” car, then my advice is not required, I’m assuming it’s not as mentioned a Shelby drop, however if it is your 1st, read on.

Ideas + Dreams = MONEY.
You can buy anything, if you have the means. But you can’t buy TIME, so “invest” your time wisely.

It’s a project, so you’re about to open the proverbial can of worms of where do I stip and call it done.

Here’s my take on some things, again it’s your car, but to save you some stress and time below are a few ideas, do what you wish! :wink:

I understand why you may want to do the Shelby drop, but the question would be why? It’s more than lowering the control arms an inch, and is really needed? If it’s a nice everday driver I wouldn’t bother.

Welding to stiffen up the front and adding an export brace? I doubt your putting a FE in it, so that’s a time and money thing. In my opinion, unless your making a Trans-Am clone or “going racing” I’d pass.

You never mentioned the brakes, I’d invest $ in replacing or updating to aluminum cross drilled rotors 1st. Again not sure if it is something you’ve considered.

Suspension? Bushings? Steering box? Replace anything in there thats sloppy, bushings for sure, Box? Probably worn a bit. Can be adjusted to some degree, but ive had more than one person say that buy a new box made such a HUGE difference the feel regarding driveability.

Adjust doors? It most likely needs 4 new pins and bushings. The doors weigh a lot, so be prepared for more weight than you expected. When they’re unbolted, Inspect the hinge holes to see if the pins bushings were long gone and the holes are now oblonged, if thats the case, then you’ll need new hinges, hopefully not

Seals? I’d pull the 289, tear it apart and inspect it for mechanical wear, heads camshaft etc all the expensive stuff & address that, then re-assemble/re-seal and paint it the correct FORD blue.

While its out, might as well de-grease the engine bay, scuff it and respray it. Good time to detail it. Check the main harness. I unwrap everone Ive had and re-wrap it so you know its good to go.

Perhaps give the tranny to a reputable shop and have them go through it before just putting in seals only to find band issues etc. That saves you time pulling it out, install, issues come up, pulling it back out again, do the above suggestion, put it back in etc.

Lots if ways to go, but also be honest with how much money are you have to invest in it.

Stick to that budget, then price out parts from WCCC, NPD, etc, and outside services that you can’t do yourself with confidence that it will be fixed, but also safe.

Attach pics of the car!

Again Congrats.

2 Likes

@Ramairguy

Spot on sir and yes, not my first rodeo. All is great advice and I do appreciate you posting it for both my benefit and others reading it. Much of it is revealing year two plans though not quite exactly. :wink:

Year one goals are limited by time and budget. And I may yet run out for this year’s plans. More to come, photos forthcoming.

For a sneak peek at what’s inside my head, visit here:

https://teampanteraracing.com/gallery3/asajay

Ignitor 3 is a bad idea. Use the Ignitor 2 and hook it up to 12 volts and it will do everything you need.

2 Likes

And since I’ve had no problems with Ignitor III in the past, can you help me understand why you make the recommendation for the Ignitor II?

The 3 requires a coil that pulls over 30 amps. Which means the device itself is switching 30 amps. That in itself is a recipe for failure. This might be worth while if it made an improvement in performance. No one has been able to demonstrate any improvement in a street vehicle. None. I could go into the limitations of the rotor and distributor cap but that would be piling on

2 Likes

Wow - the 3 ought to generate a spark hot enough to ignite water vapor. Maybe that’s the advantage - lol!

1 Like

@xr7g428 is correct in that the Ignitor 3 is best run with an appropriate coil which requires more amps (nearly 40A), and doesn’t really buy you anything except more load on the alternator…

…unless you’re looking for the built in rev-limiter. Been there, done that and I have one of the bent 2” diameter (351C, other car) intake valves on my desk reminding me.

:grin:

Most users would be just fine keeping good old fashioned points or if desired a Pertronix Ignitor II. I’ll still be carrying a set of points in the case the Pertronix fails, just as I would these days if I keep a set of points in the Distributor.

My “use case” is different and I’ve chosen the Ignitor III and Flame Thrower coil 60103. But @xr7g428 is correct.

1 Like

Sounds like we’ve dove down the same rabbit hole. My new to me one owner 1967 base model C code with the three speed manual. Looked cherry when I bought it on the Hemmings auction site. Had it hauled to the same shop that had serviced it since new to make sure it started, stopped and had good antifreeze for the trip to the far north via a car transport and 20 foot shipping container. They drained the gas, changed to oil, flushed and refilled the cooling system. Ran like a top when I started it the first time at 12 degrees. The starter made a hell of a racket. Drove from Anchorage to Soldotna at night. Had 4.56 gears in it and it was all over the place. Good thing there was not traffic! Someone would have called the troopers to report a drunk driver. I average about 40 miles per hour using ForeFlight and the GPS on my iPhone.
First was the tires, they looked new, thing is the date code had them manufactured in either 1979, 1989 or 1999. Knew I needed to check the cam gear out to make sure it didn’t still have the nylon teeth on the cam gear. The drum brakes absolutely sucked, the right rear would lock up and the front brakes pulled to the left. Made a list. I’ve probably made 10-15 different orders from West Coast Classic cougars. Converted to power disc brakes with the Shelby four piston front calipers. Single piston rear disc.. that kit came in today. Replaced the entire front suspension. Pulled the differential and ordered a good used set of 2.79 gears. Yukon locking diff now. Good thing I did, the damn rear end is full of metal, looks like anti seize all the way out to the axle shaft seals. Still waiting on the master rebuild kit from Yukon to reassemble the rear differential. Now dumb me wanted to install the big block radiator, clutch fan and fan shroud. I knew the lower radiator outlet was on the drivers side and not the passenger side. I figured I’d hit up a bone yard and buy the front off of a 1970 through 1977 or so 302. That would get me the brackets and everything I needed to convert the 289 over to the drivers side water pump inlet. Guess what. One bone yard in the Soldotna area. They didn’t have chit. So… I went with a CVF serpentine belt system.. sure is purdy. The kit sucks. Wrong fasteners, optional shims that didn’t come with the kit. Supposed to use two belts the same size. Not! A couple days ago I machined some bushings from 4140 the for all of the counter bore bolt hole to create a larger grip area to prevent moshing the aluminum. Still need to shave 0.062” off of three spacers to perfectly align the power steering belt pulleys. Had to purchase a new front cover, MSD timing pointer, new harmonic balancer with the timing marks on the passengers side of the front cover. Bought a set of Shelby duplicate wheels and a set Goodyear eagle 225/60 VR 15’s. Those turned out to be unbalanceable, even using a road force balancing machine. Wound up buying a set of HR rated Uniroyals. Thing is I want the option of installing a Cleveland in this thing. I did my last Cougar. It was an absolute screamer of a road car. It would bring the speedometer all the way around to the stop peg… ahem… not that I ever did…cough cough. Replaced the window regulator on the drivers door, all of the rubber gaskets on that side. Will start on the passenger side tomorrow. Replaced all of the dash and courtesy lights with LED’s. Need to identify the amp gauge idiot light wire. I’m installing a1 wire 100 amp alternator and using an 11 volt warning light and will tie it into the dash idiot light. Hopefully the rear differential bearing kit comes in tomorrow. I need to get the car out of my daughters garage and fly home before the king salmon and red run is kaput. I wanted to have all of this work done by Father’s Day but… I keep finding little things that need attention because they’re just not right. That and getting the correct replacement parts from everyone except West Coast Classic Cougar has been extremely…umm..challenging err disappointing. Jeg’s and Summit Racing have been great too even though they shipped the wrong parts a few times. Local parts houses…with the exception of O Riley’s have been horrible. I also need to drop a valve on number one to use a mag base dial indicator to identify TDC so I can set the timing pointer accurately.. oh…and the 289, turns out it’s not original. Don’t have a clue how many miles are on it, or if it was stuffed with any goodies. Doesn’t matter for now. I’ll build and engine at home..Platinum Alaska…. Stuff it into my airplane and fly it to Soldotna….someday.

1 Like

Surprised to hear of your dissatisfaction of WCCC. EVERYTHING I’ve purchased or had questions on has been great for me. But just keep moving forward. Greeny has been arduousat times as well. Just HAVE to overcome!!!

I think you misread his comment. He’s had trouble with everyone -except- WCCC. That means he’s had no problems with them.

This Cougar has a lot of little things to overcome as well, but not all at once.

The previous owner did put a three-row radiator in with the inlet and outlet on the proper side. I think he said it was sourced from WCCC. It’s beefy and was bolt-in; hard to beat that.

I’ve nearly got all the power steering stuff rebuilt and repainted. Today I’m tackling the oil pan, rear main seal, bearings, and putting a stock replacement oil pump in. If I have time left over from all that, then the water pump gets replaced before I put it all back together.

Well, that didn’t go as expected but hasn’t dampened my goals.

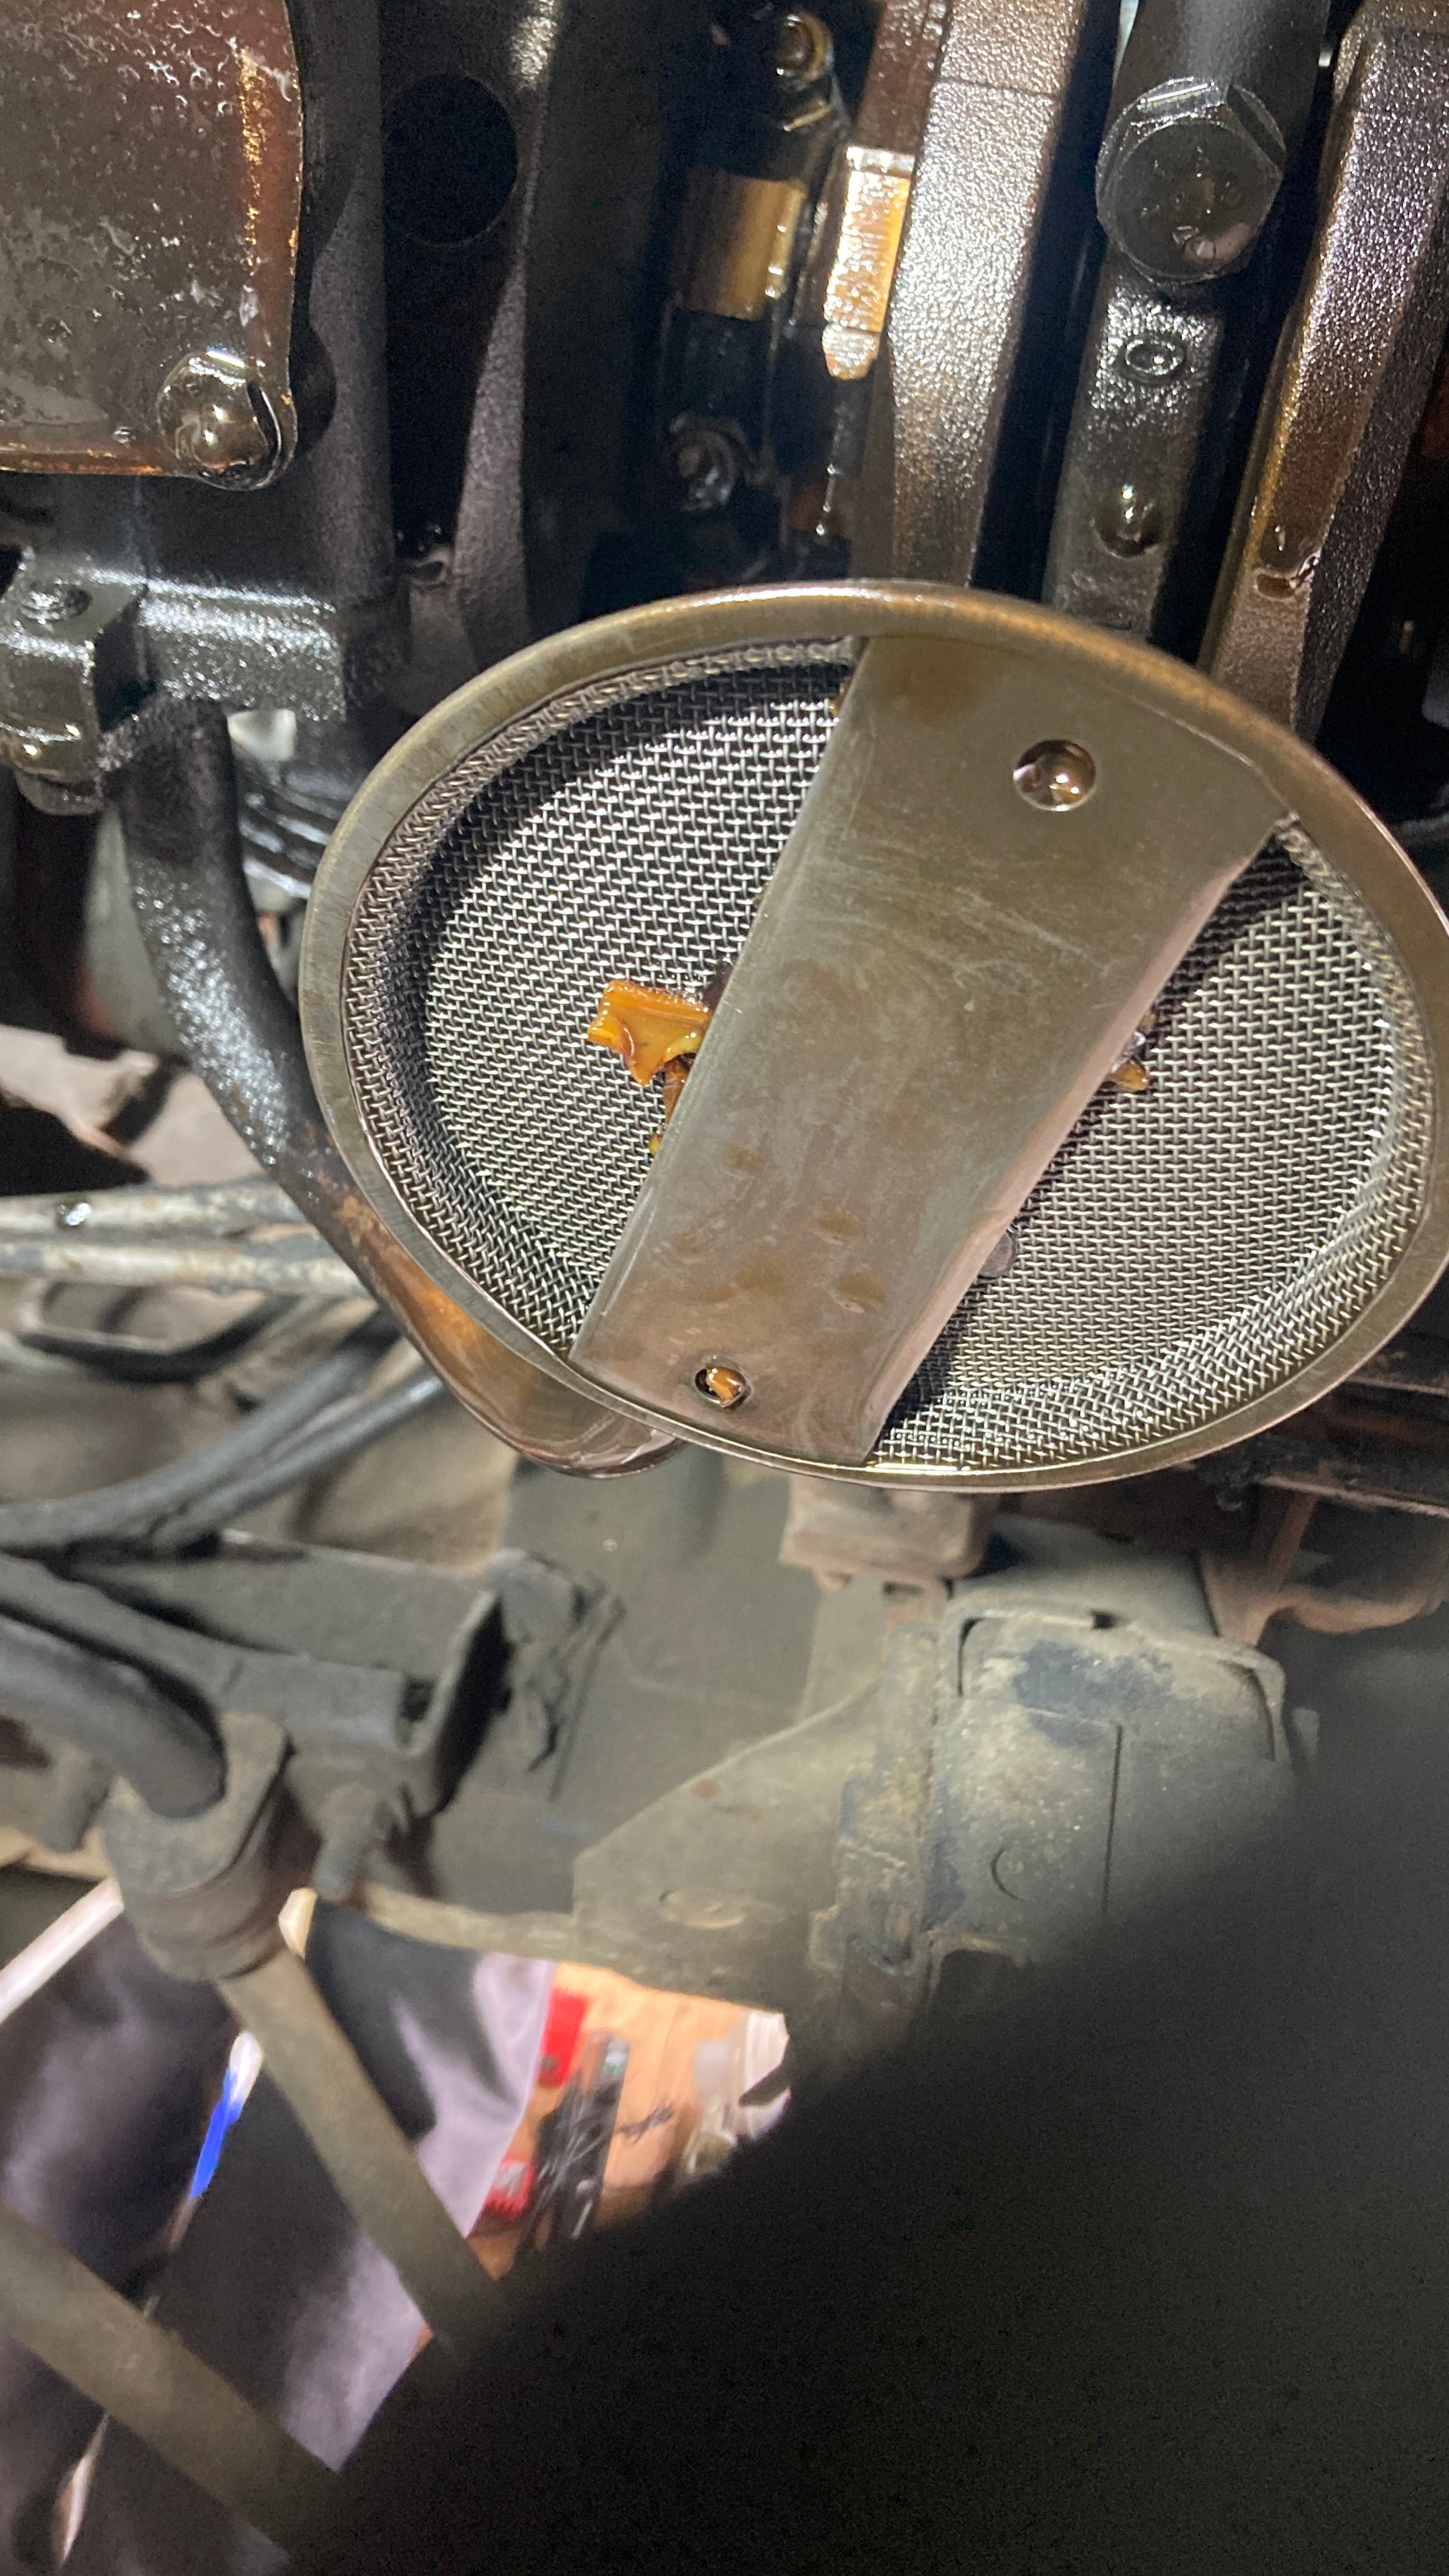
The pan came off and I had plastic bits in it. Thats usually the cam gear overmold.

The link belt appeared to have excess play so we made the decision to pull the engine. We were nearly at that point anyway.

I’m glad I did. Two water pump bolts snapped off with little pressure, leaving me three broken bolts in the timing cover.

I did get them out with heat and Kroil. And now the timing cover is off.

Timing chain deflection is right at 0.500” (max). And there is -no- plastic missing. This means the gear set and link belt were replaced sometime in the past and the oil pan was not removed to clear the debris.

I’ll be installing a full double roller gear and chain set in its place. I may be replacing the timing cover as well. I need to get it cleaned up and inspected. My biggest concern are the three bolt holes and threads where the broken bolt were.

Plenty left to do and time is ticking.

1 Like

Quick update.

New double-roller timing set has been installed. New front cover has arrived and is coming up on the list to install. The oil pan gasket was paper thin and baked to a crisp.

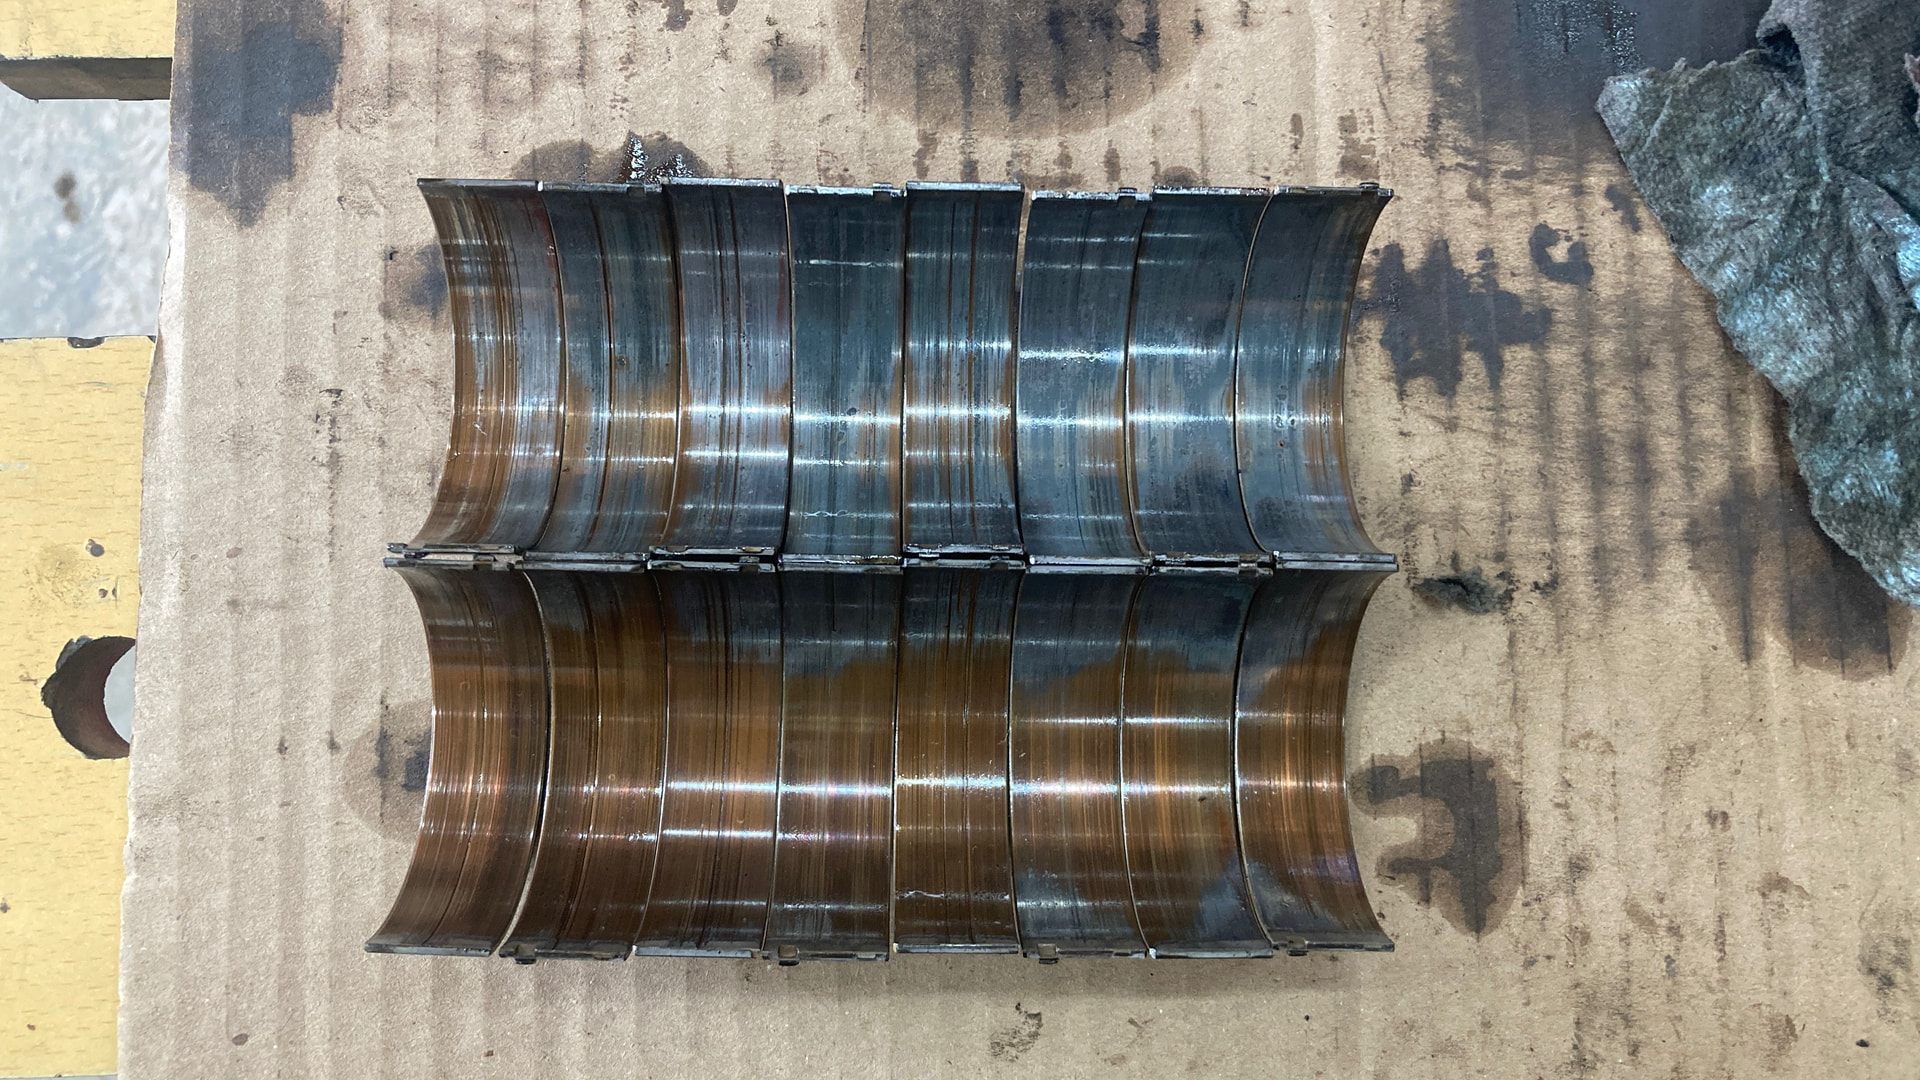
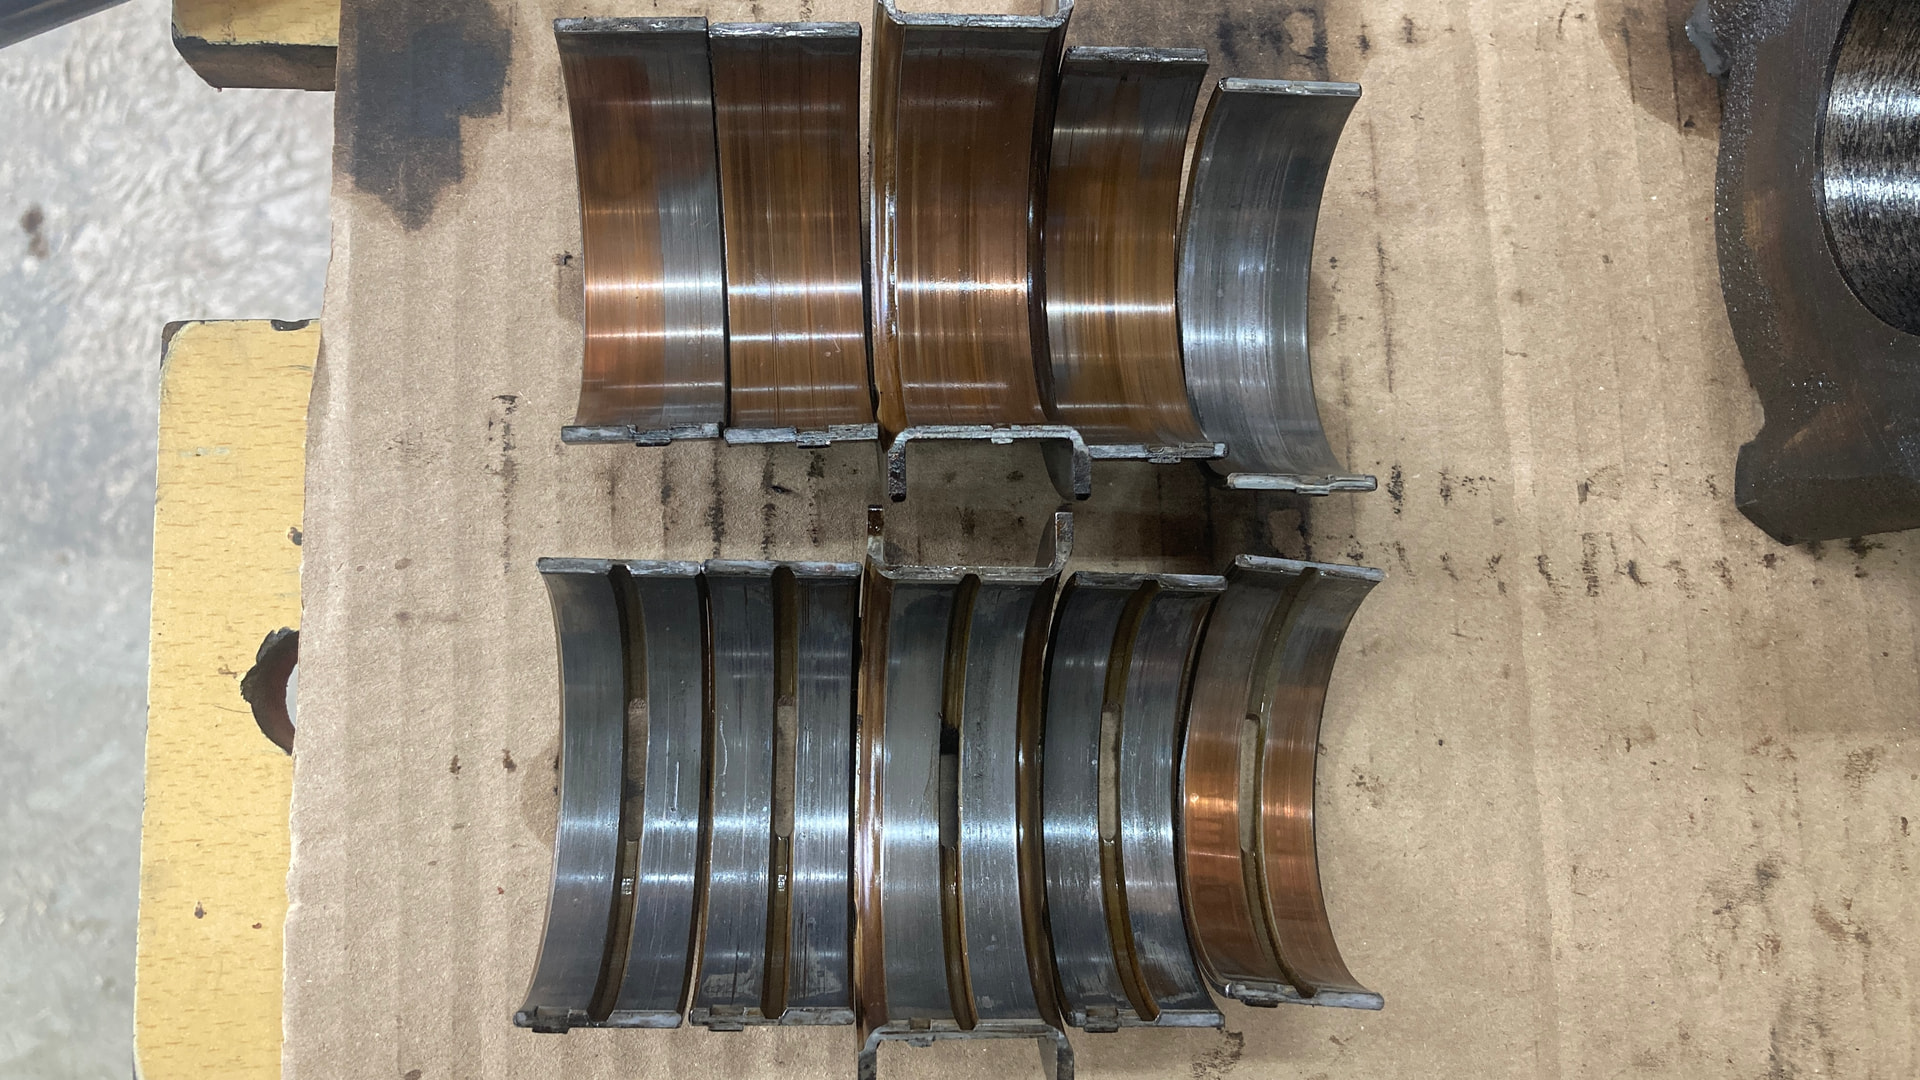
I pulled the main caps to replace bearings and later the rod bearings. This engine has been run low on oil sometime in its past life. Copper was showing on all bearings.

Since I plan to replace this with a 351C next year, I simply replaced all the bearings. A new oil pump (standard) is also going in. I did replace the rear main seal while there. It has the original rope seal… also baked to a crisp. It will be getting a new oil pan since the old one is pretty beat up and a different drain plug has been brazed to it and really doesn’t look solid.

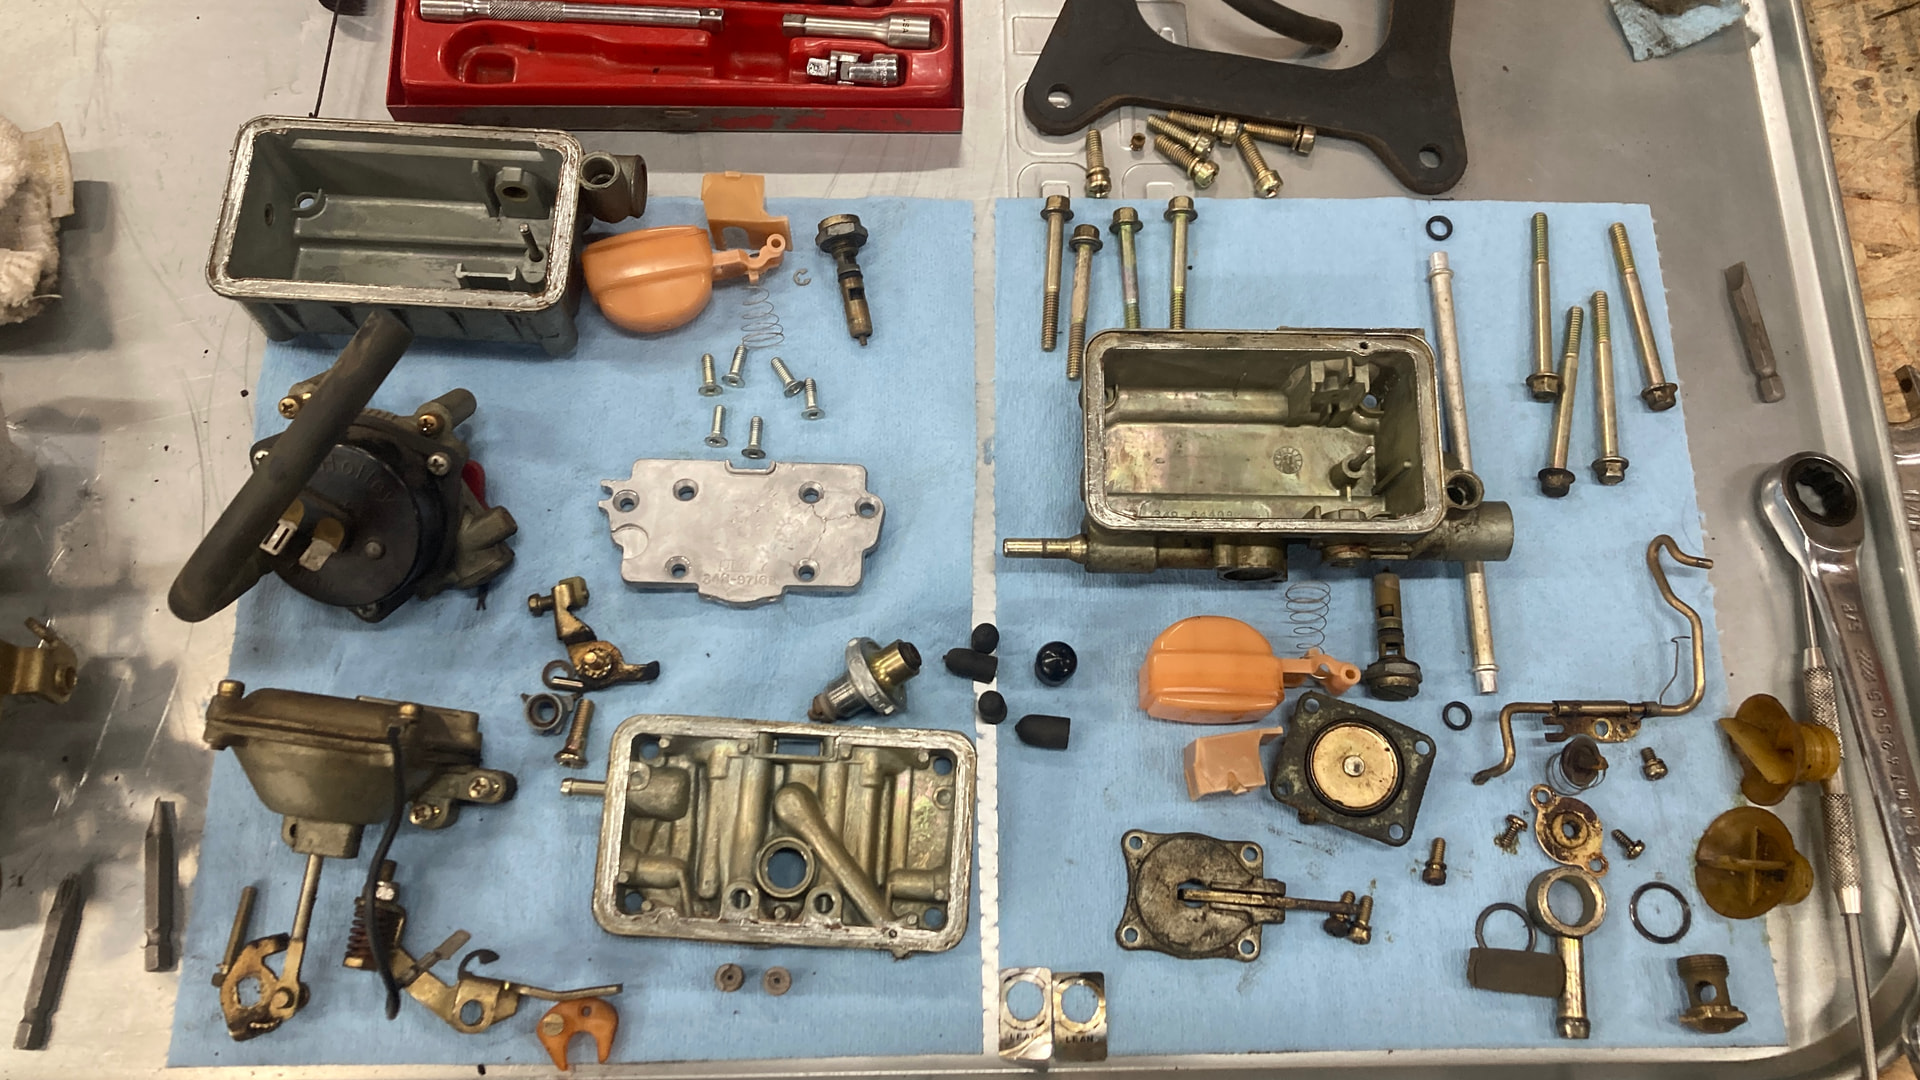
The carb has been completely rebuilt. I’m surprised it wasn’t leaking badly considering how loose most of the screws were.

New valve covers have been drilled for breather grommets (Moroso cast without holes). I need to install the valve cover studs in the heads using red loctite and later the covers.

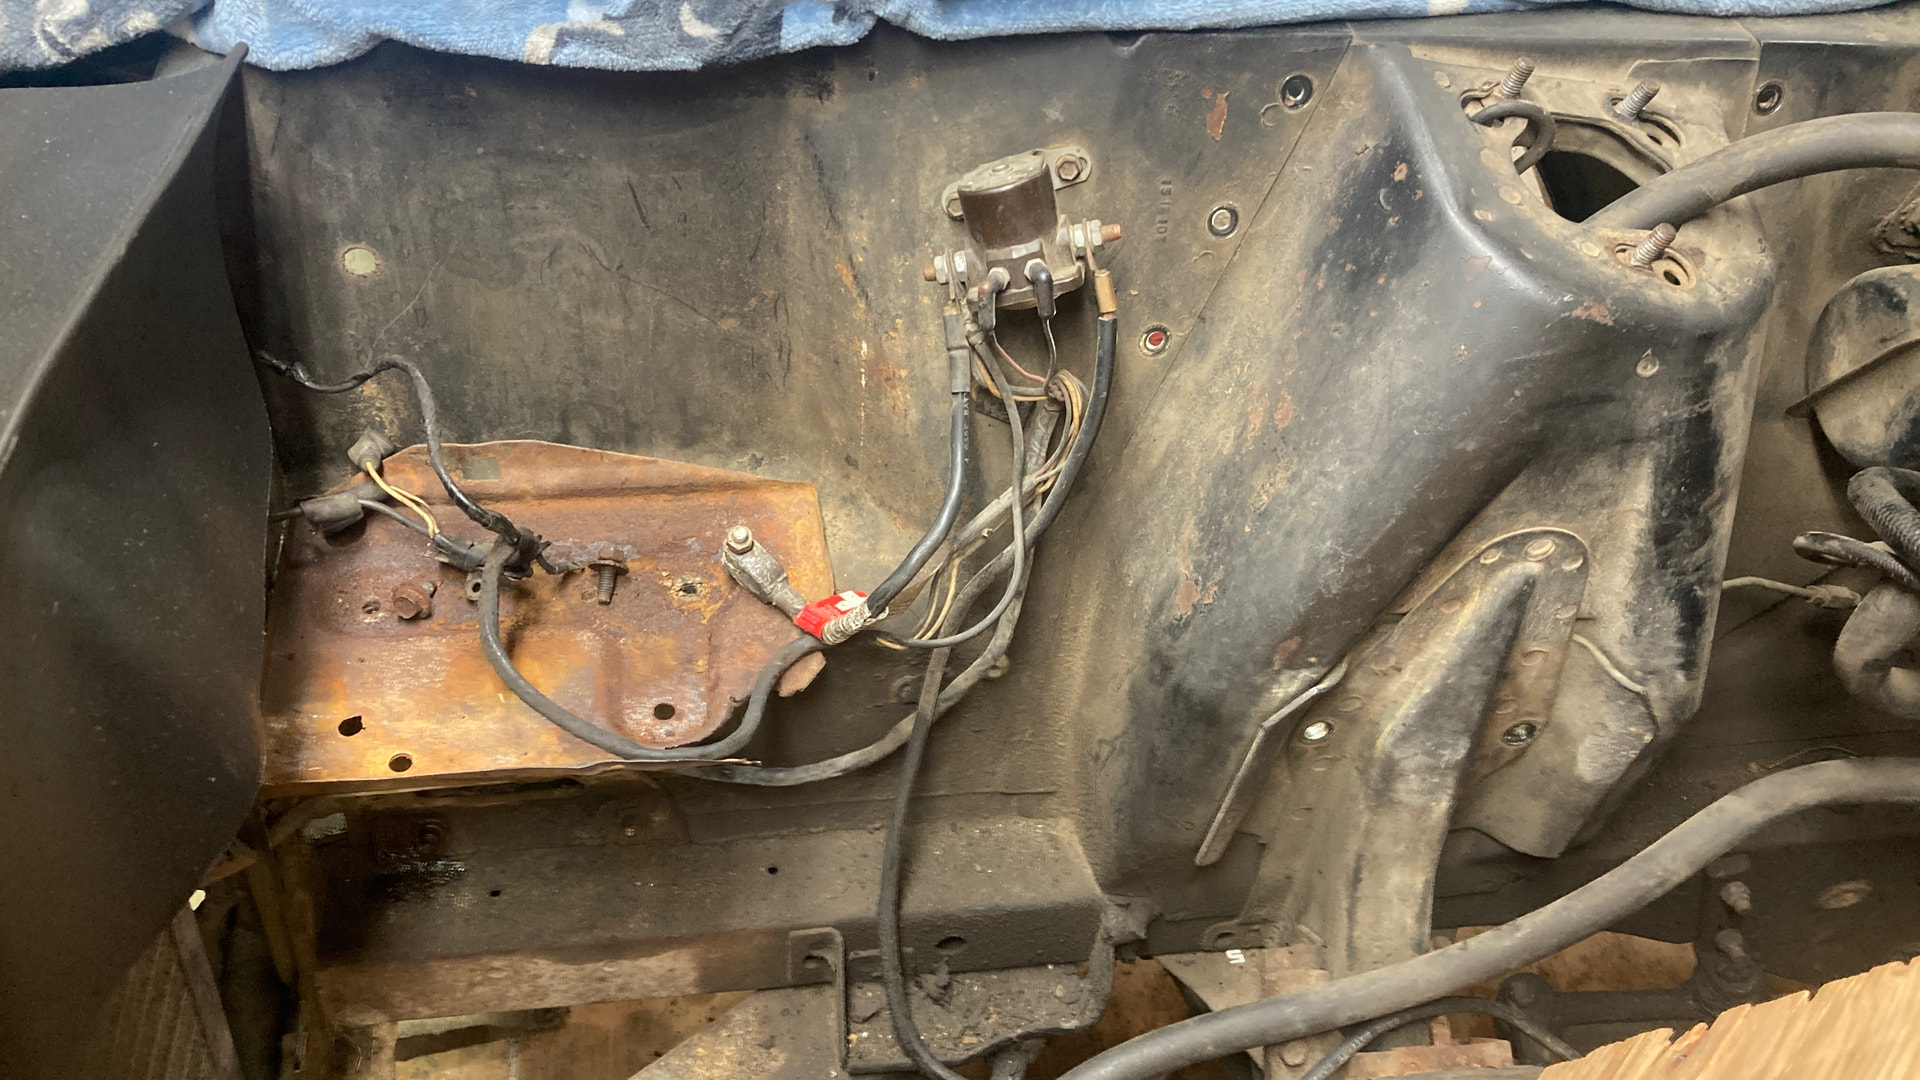
I pulled the rusty battery tray out and we’ll be cleaning up the engine compartment before reinstalling the engine.

Things kinda slowed down but there is still a lot to do.

2 Likes

And PS… reading back through I forgot to mention, all the Power Steering items are re-sealed with new seal kits, put back together, cleaned, primed and painted. Ready to re-install once I get the engine back in. All new hoses too. Okay… back to it.

2 Likes

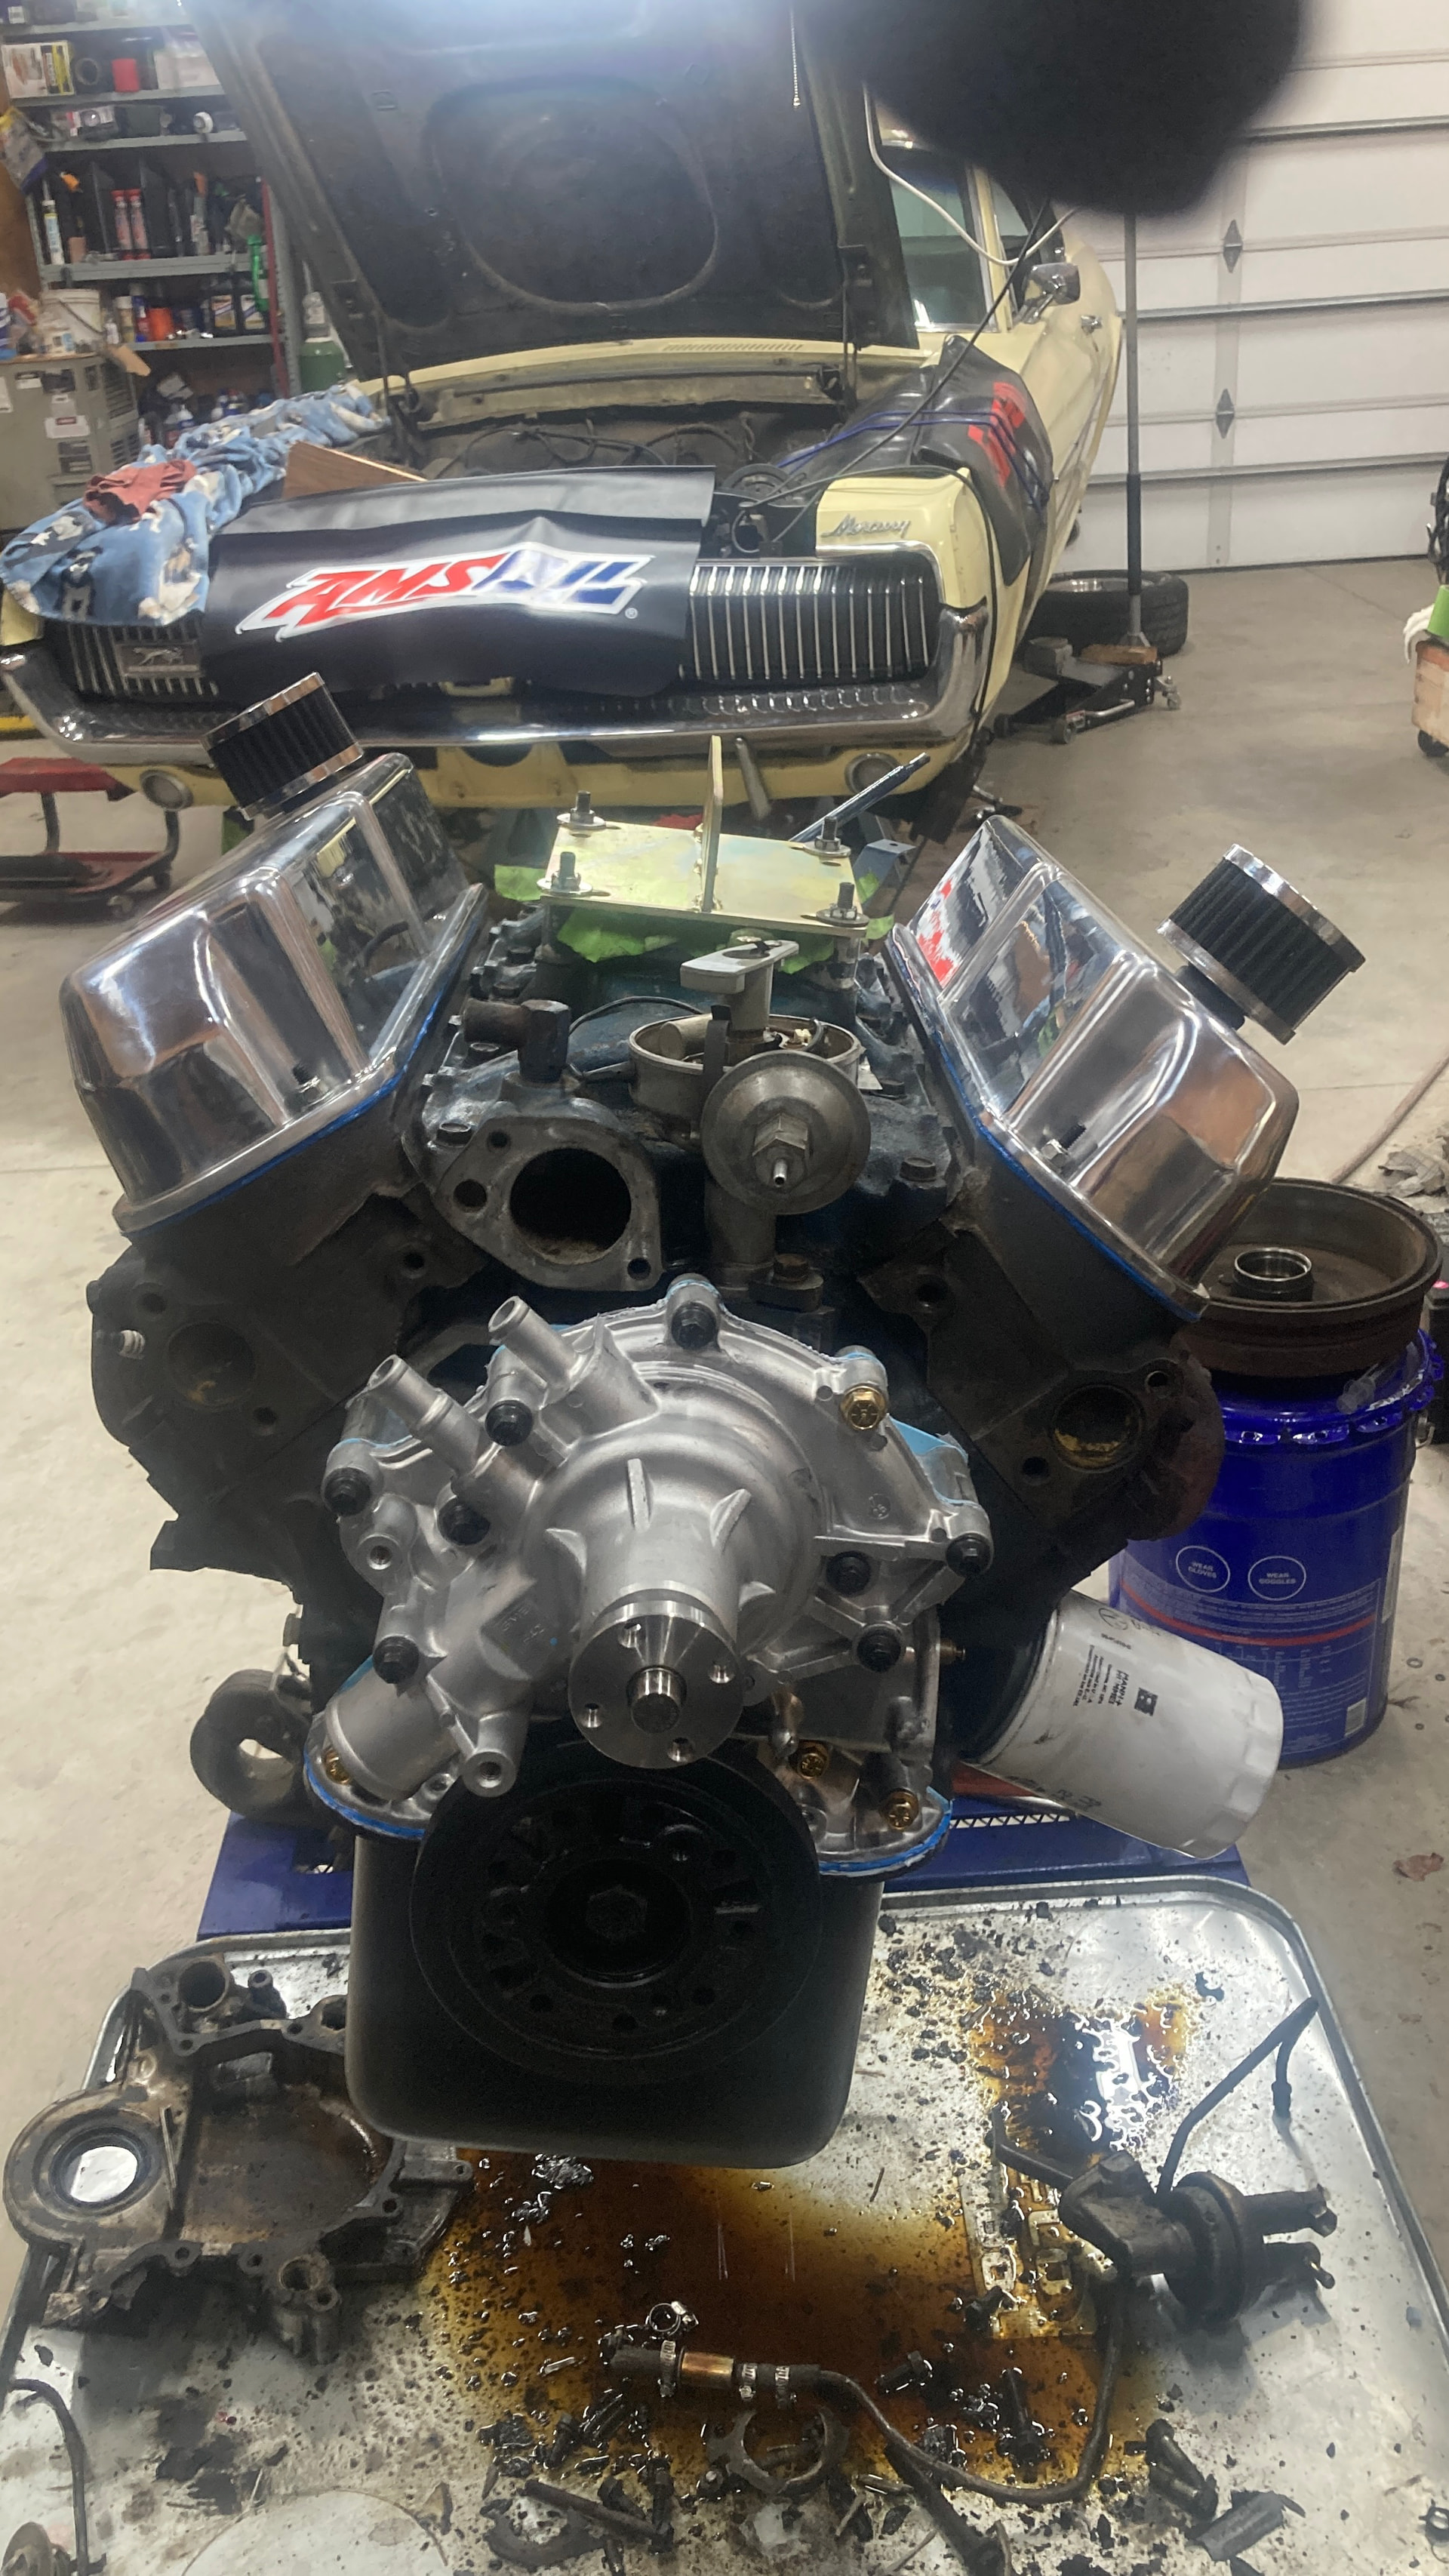
New double roller timing gear and chain set, new timing cover, new oil pump, new oil pan, new valve covers. The engine is ready to go back in.

We sand blasted all the pulleys and brackets then gave them a fresh coat of paint. The final project I’d probably powder coat but this is interim work.

Before the engine goes back in we’re doing the upper control arm drop.

Gads does this car have a ton of undercoating that has to be removed. Which we have to do for the weld in shock tower supports. And while I was cleaning what I thought was years of dirt and junk from around the right lower ball joint….. I found the boot has been wide open on that side and whoever has been greasing them has just been pushing more grease out that side building up a huge layer of semi-hard grease and dirt. So…… original riveted in ball joints call for new lower control arms. Already on the way, and yes, they are the -correct- for 1967. The full suspension upgrade (to the tune of about $3,500) is for next year.

Good times, hopefully in another couple of weeks it’ll be moving under its own power again.

2 Likes

Asa.

Thank you for taking it to the next level.

I was just a care taker from the previous owners.

Ed