Unless you are an absolute Cougar junkie you will probably want to skip this. But for those of you that want to hear the rest of the story, and have too much time on your hands read on.
More than a decade ago Cleve Helm was working at West Coast Classic Cougar as the purchasing guy. Cleve was getting lots of calls for grade A dash bezels for '67 and '68 Cougars both XR7 and Standard. But there really weren’t any. The plastic was brittle and warped. The hollow plastic mounting tubes on the back were frequently broken and every single one needed to be re-chromed. He tried every conceivable way to restore the cores he could find and the results were not good. In frustration he called me about developing reproductions. I was standing in Costco contemplating how it always costs a couple of hundred to get out of there when he called. He explained the differences between the standard and XR7 and even between the different years. Ford had at least 4 different versions of the dash bezels. It seemed impossible. Fast forward to 2022.
A new problem had cropped up. As the old plastic aged it was turning into powder. Even if the bezel was all there you couldn’t get a new chrome finish to stick. If you put a piece of masking tape on it it would come right off. You could ruin it just trying to install it. And it was expensive. It was only going to get worse. Cars in Arizona, where I live were suffering the most and since I have six of said Cougars this was getting personal.
When ever Don Rush and I have a conversation it inevitably comes around to what parts are becoming too scarce. Nothing stood out quite like the dash bezels. Just getting cores re-chromed was hovering in the $700 range. The only restored bezels on the market were selling (asking?) $1800 plus a $600 core charge. that’s bout what a parts car should sell for. Don thought they could sell really well but only if there were realistically priced. At the time we thought that was in the $500 to $600 range.
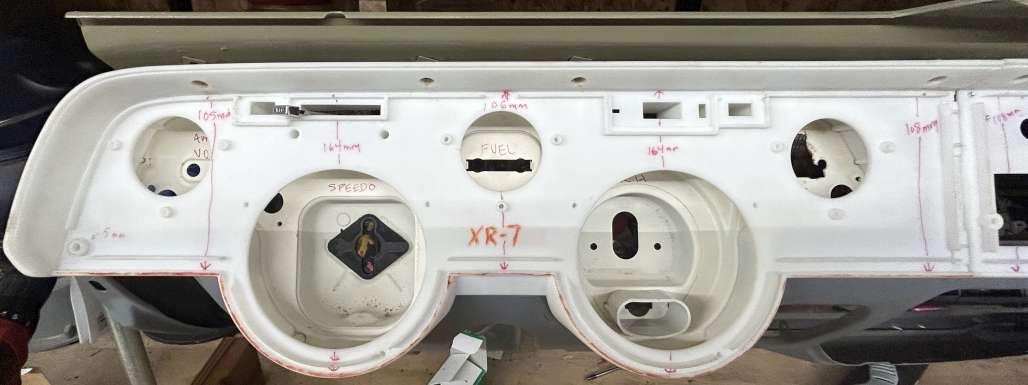
How hard could it be? It seemed like if we could do two versions, Standard and XR7 that could cover both '67 and '68 it might work. The first step was determining exactly how many variations Mercury had created and to identify the differences and see if we could indeed create the one size fits all versions. I had a number of XR7 dash bezels and Don was able to supply several different standard versions. After documenting the differences they were sent of to be digitized. Our first indication of trouble ahead was when we discovered that every sample scanned with different dimensions. Ugh. We would have to create entirely new drawings and straighten out all of the crooked parts.
Once we had the drawings we began the process picking out the best aspects of each version of the dash. One easy choice was using the '67 style lower trim across the entire dash. If you have a '68 go out and look at your dash bezel. Look at the bottom edge to the left of the speedometer. Then look at the lower edge to the right of the tach… In '67 the entire lower edge was the same as the left side all the way across. Mercury mistakenly believed they would be required to install a pad above the glove box to meet the new for '68 safety standards. Turns out that they did not need that but they did have to add shoulder belts… Only cars built prior to January 1st 1968 got the bolster. In test fitting we discovered that the bolster could be applied even with the lower trim. It was a tight fit but worth the effort.
Another choice that most people won’t notice is that right above the steering column there is a small trim section that comes downward. In '68 that made it a little shorter. That was done to make it easier to install the dash during assembly. We chose the easy way.
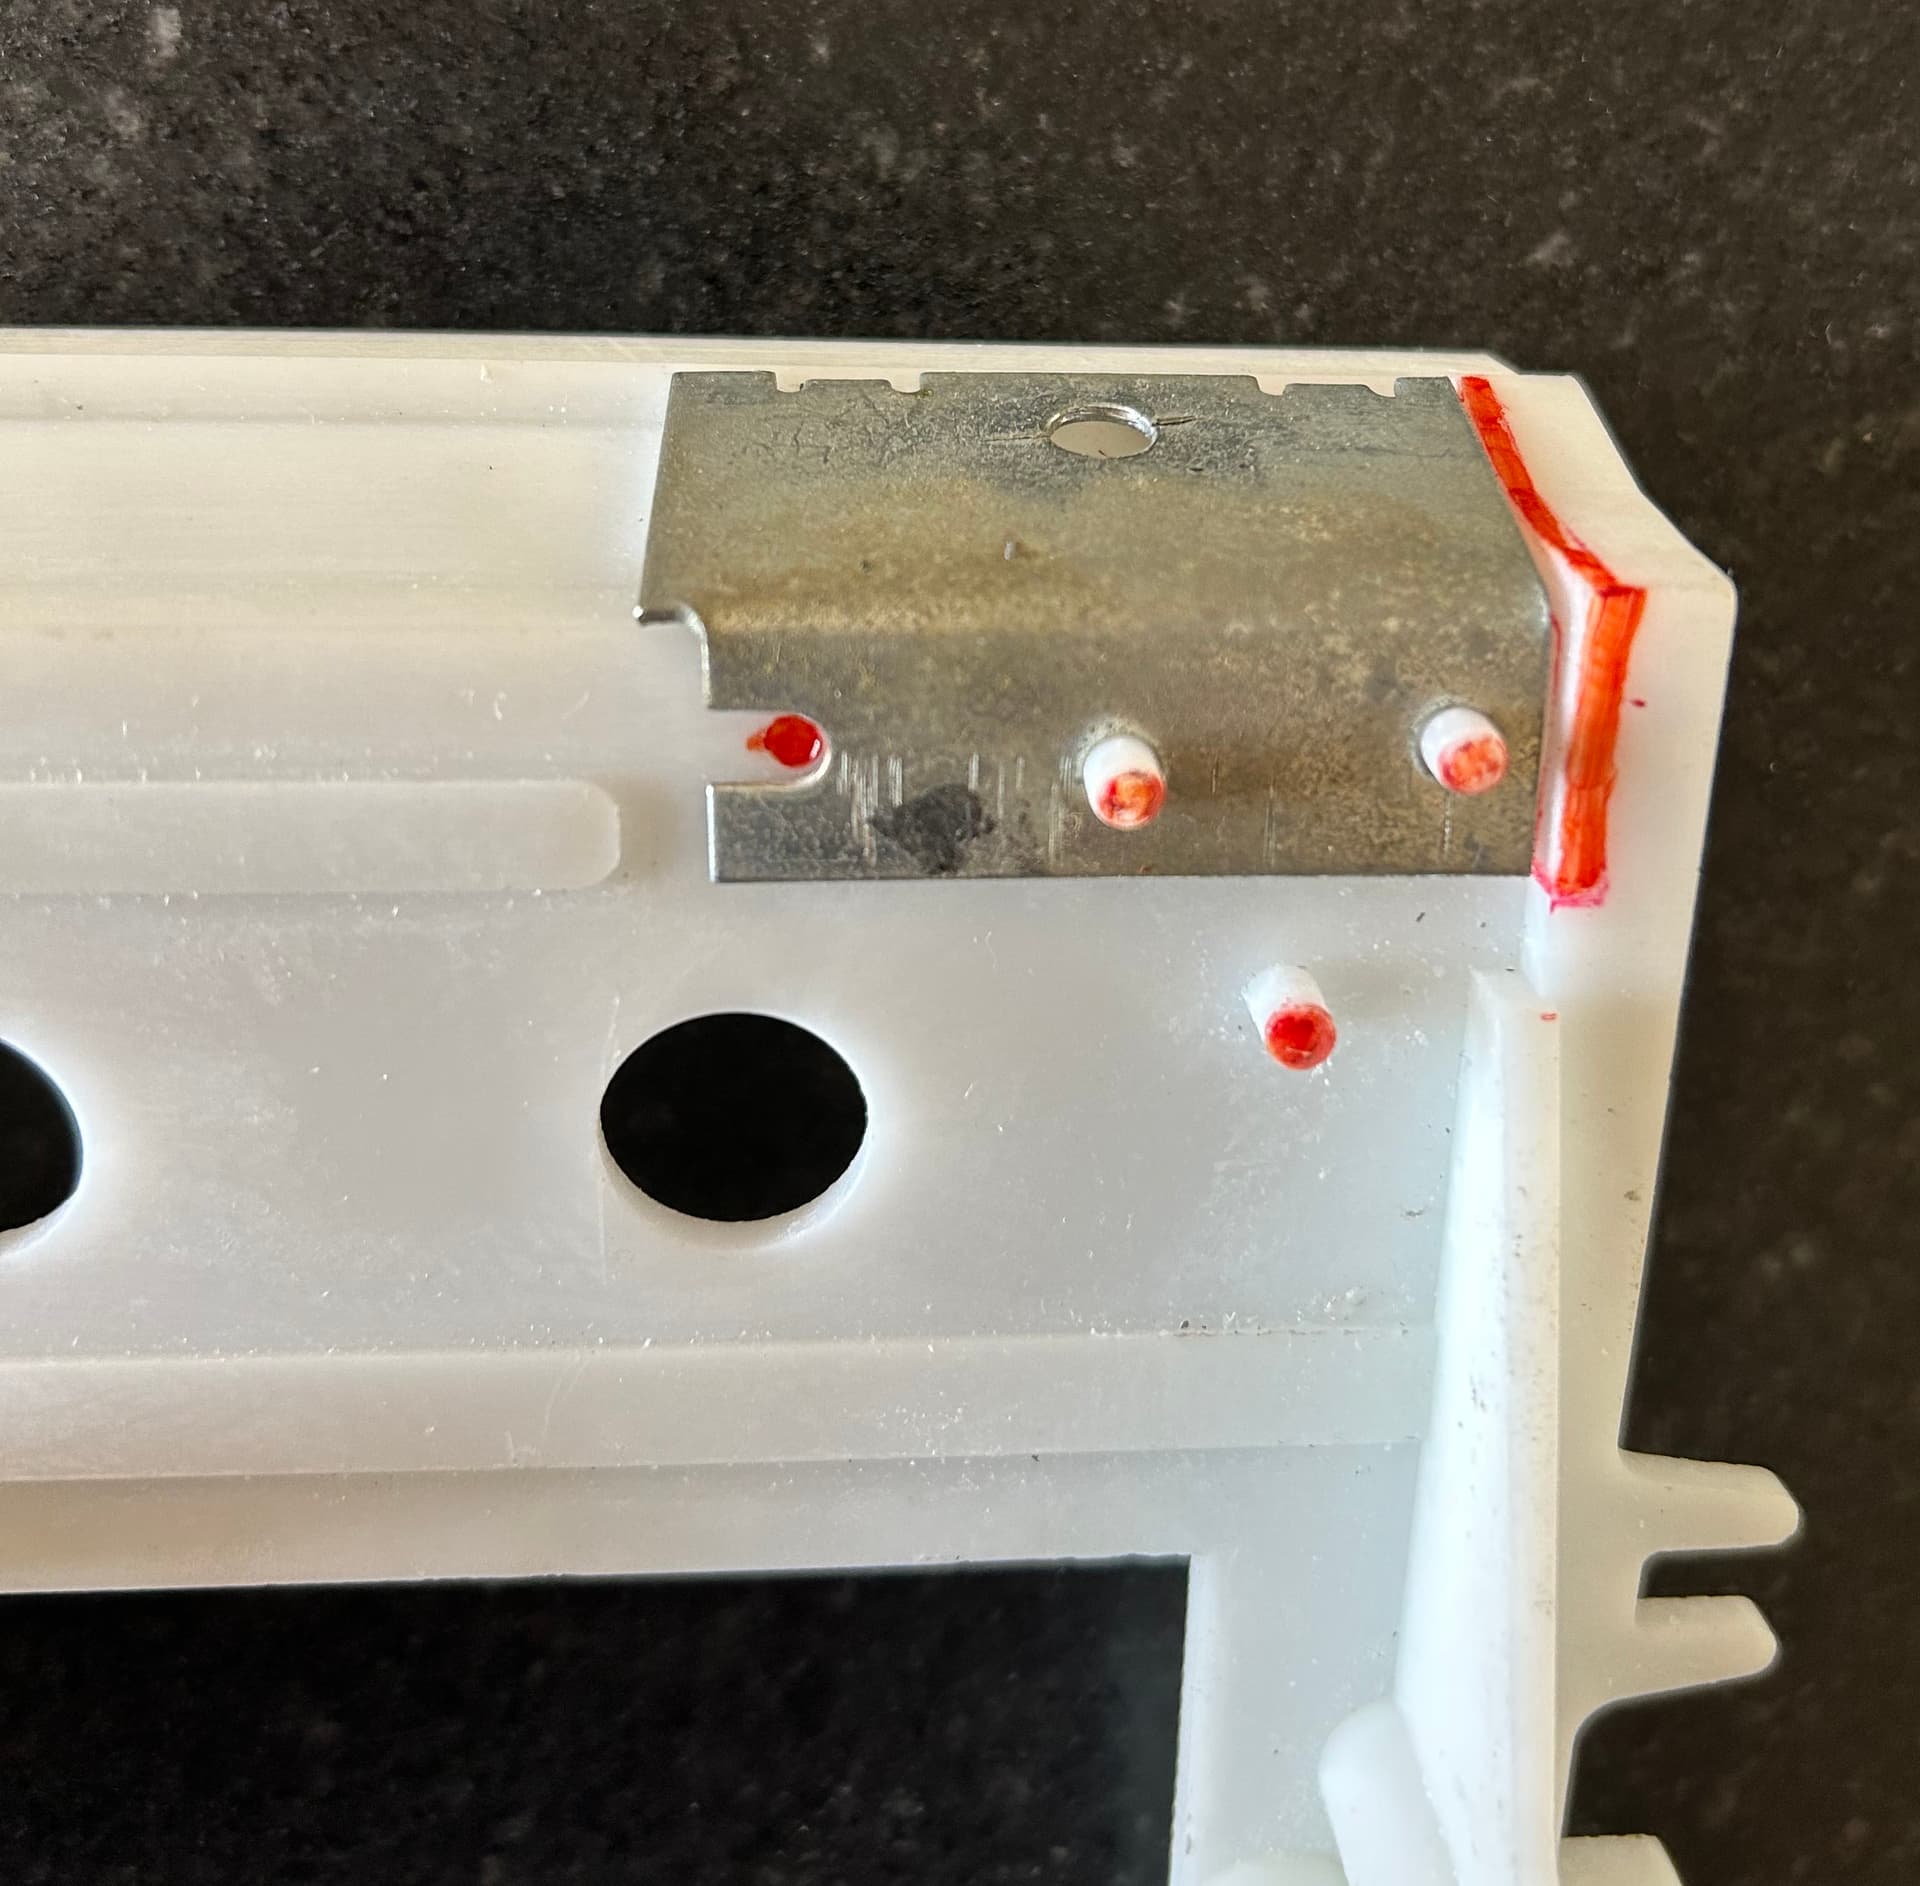
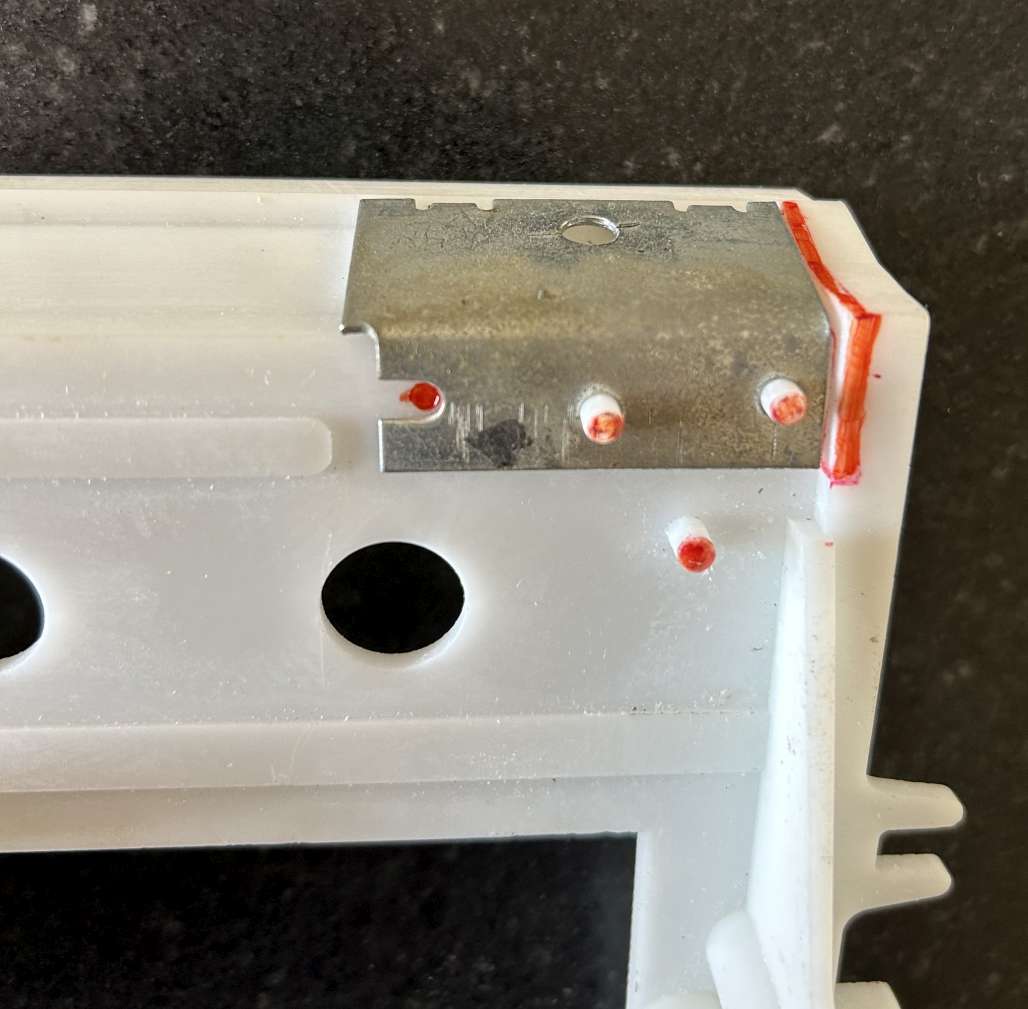
Things got a lot more difficult after that. Mercury could not decide how to attach the passenger side dash panel to the steel dash. They ended up developing at least three different bracket designs. The one thing they all had in common was they used a melted plastic stud that extended through holes in the steel bracket. The other thing we found was the vast majority of the brackets had broken loose years ago when the melted and now brittle plastic popped loose.
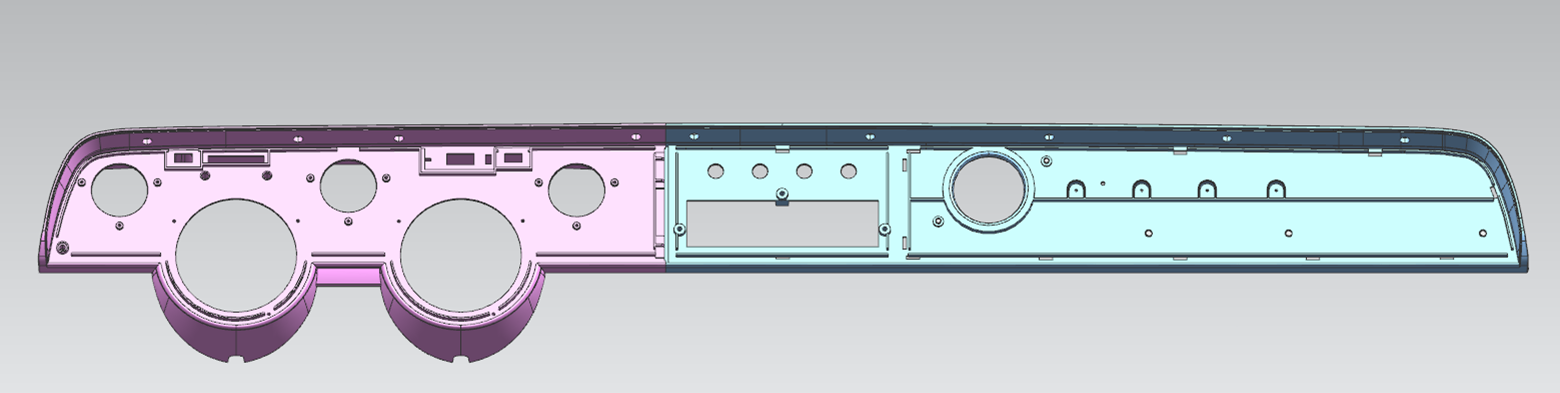
Once we had good drawings with all of the warp taken out and what we thought would be good dimensional accuracy we decided to create solid models using stereo lithography. This is not 3D printing with a filament. Instead a laser is used to cure liquid polymer resin building up parts layer by layer. It produces much more accurate parts that 3D filament printing. It is not cheap.
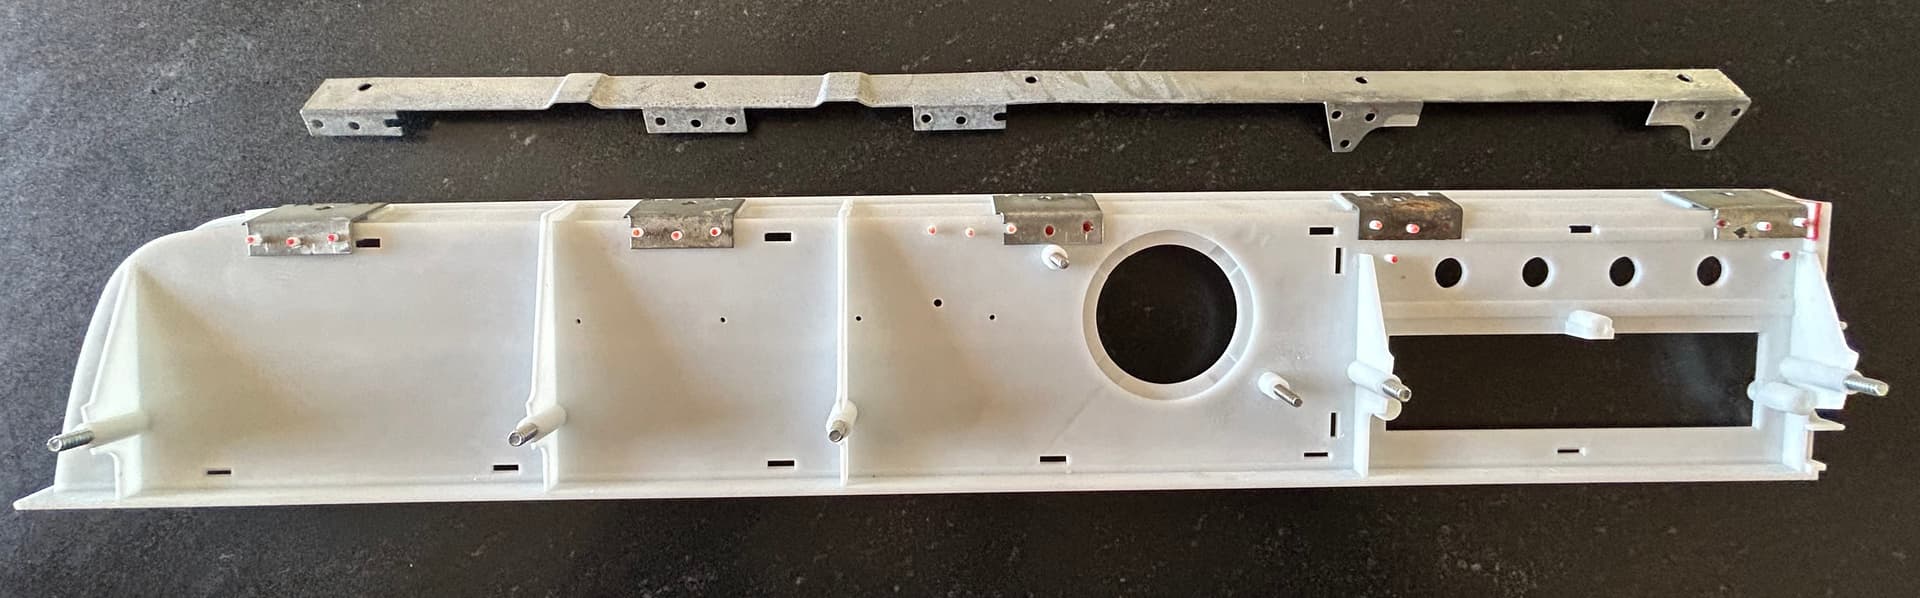
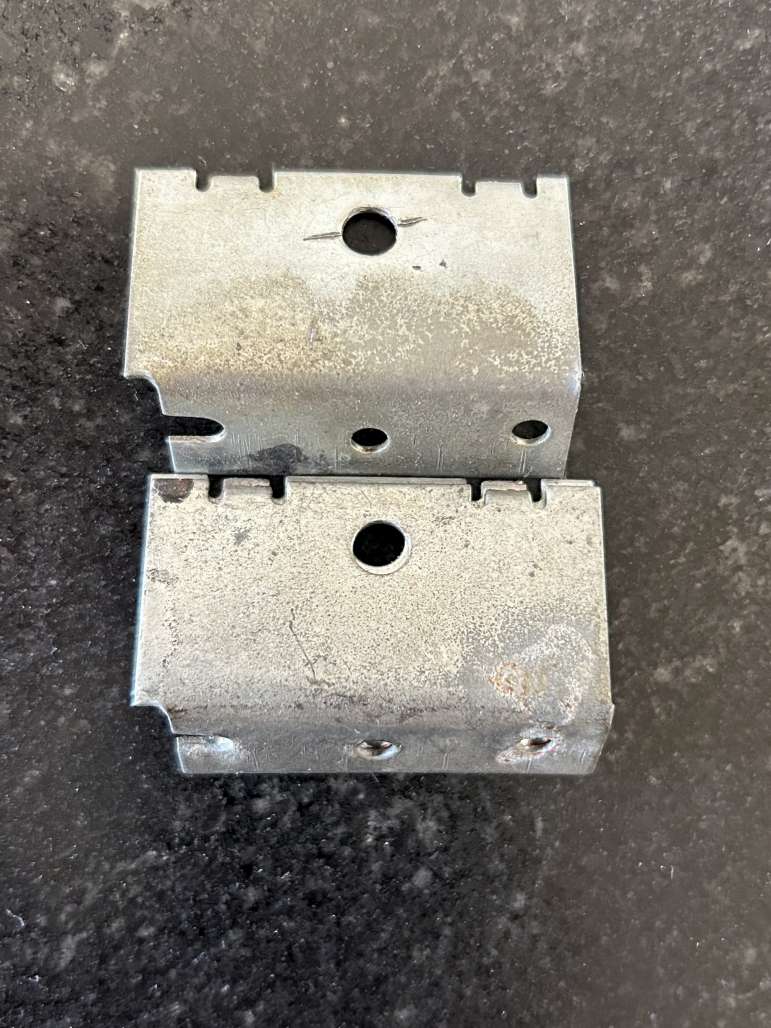
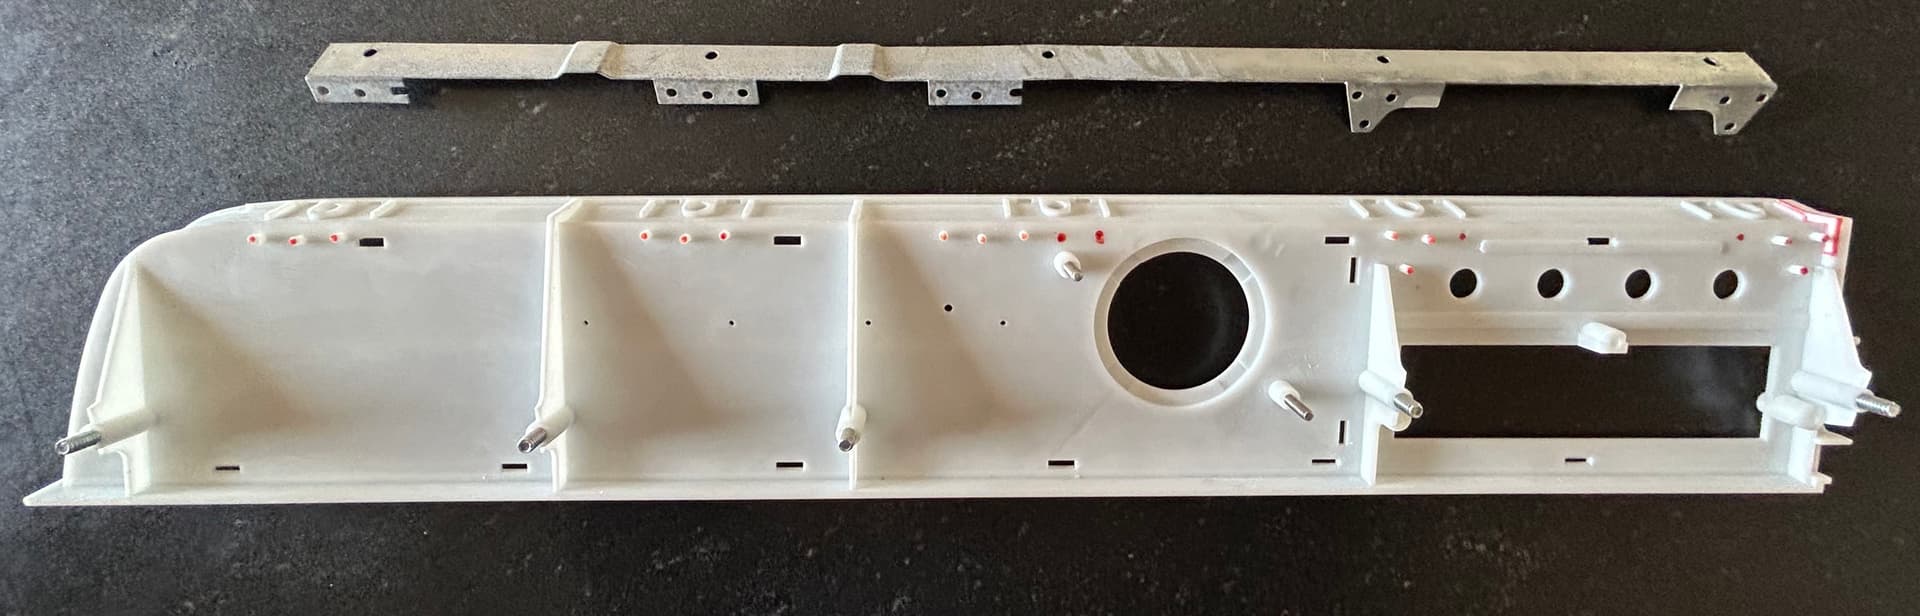
At this point we can start checking fit. The final version of the passenger side dash bracket was a one piece design. The earlier designs used five individual brackets.
The one piece is pictured above the individual brackets. If you look closely you can see that they mounting studs were in different locations for the two designs.
And then we discovered that there were actually two different versions of the individual brackets. in one case four of the brackets were the same, but the most inboard bracket was narrower. In the other case all five were the same size.
The melted stud mounting system made no sense and we knew that you would hate us for it so we determined that we could use special plastic thread cutting screws to get the job done. The studs would be replaced with holes. One advantage of the studs is that they provided registration of the bracket to the bezel. We noticed that we could leave one stud per mounting location with the improved holding power of the screws. You can also see where we have replaced the hollow, always broken mounting tubes with threaded steel studs. This was not as simple as it sounds. The tubes pass through fairly large round openings in the steel dash and help register the location of the bezel to the dash. We had to allow those tubes to protrude a bit to maintain that registration. That required that we source a nut that would have and open space on the back side to allow for the tube. Mercury for some reason did not bring the tubes through the steel dash at a right angle. That means that one side of the nut engages the steel panel first. We could have “fixed” this but we believe they may have done this intentionally to “encourge” the upper part of the bezel to line up with the bottom of the dash pad.
Then we made one of the more surprising discoveries. Some XR7 wood grain fascia panels were slightly larger than others. This was not good news. It meant that we needed to lower the bottom edge of the bezels all the way across to accommodate the larger fascia. We also need to make sure that it did not impact any other area of the panel including the extremely complicated back side of the panel.
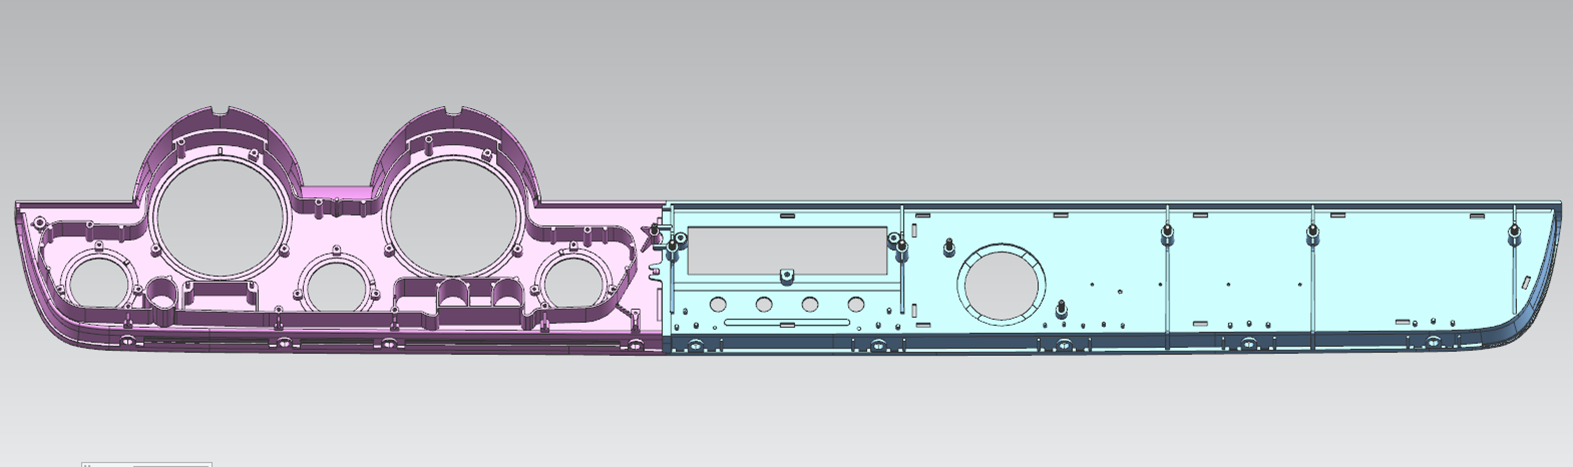
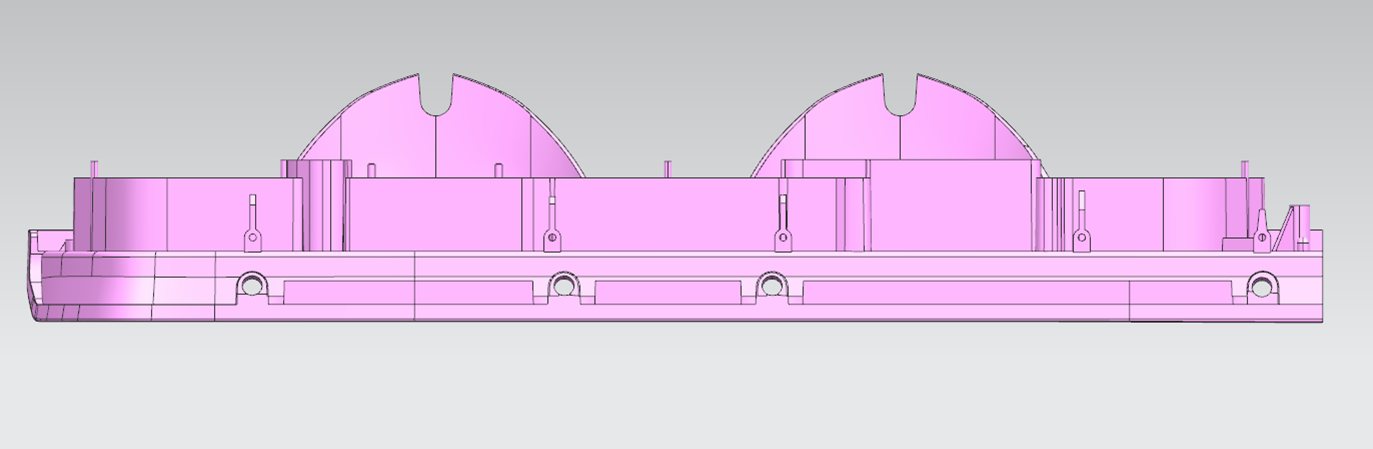
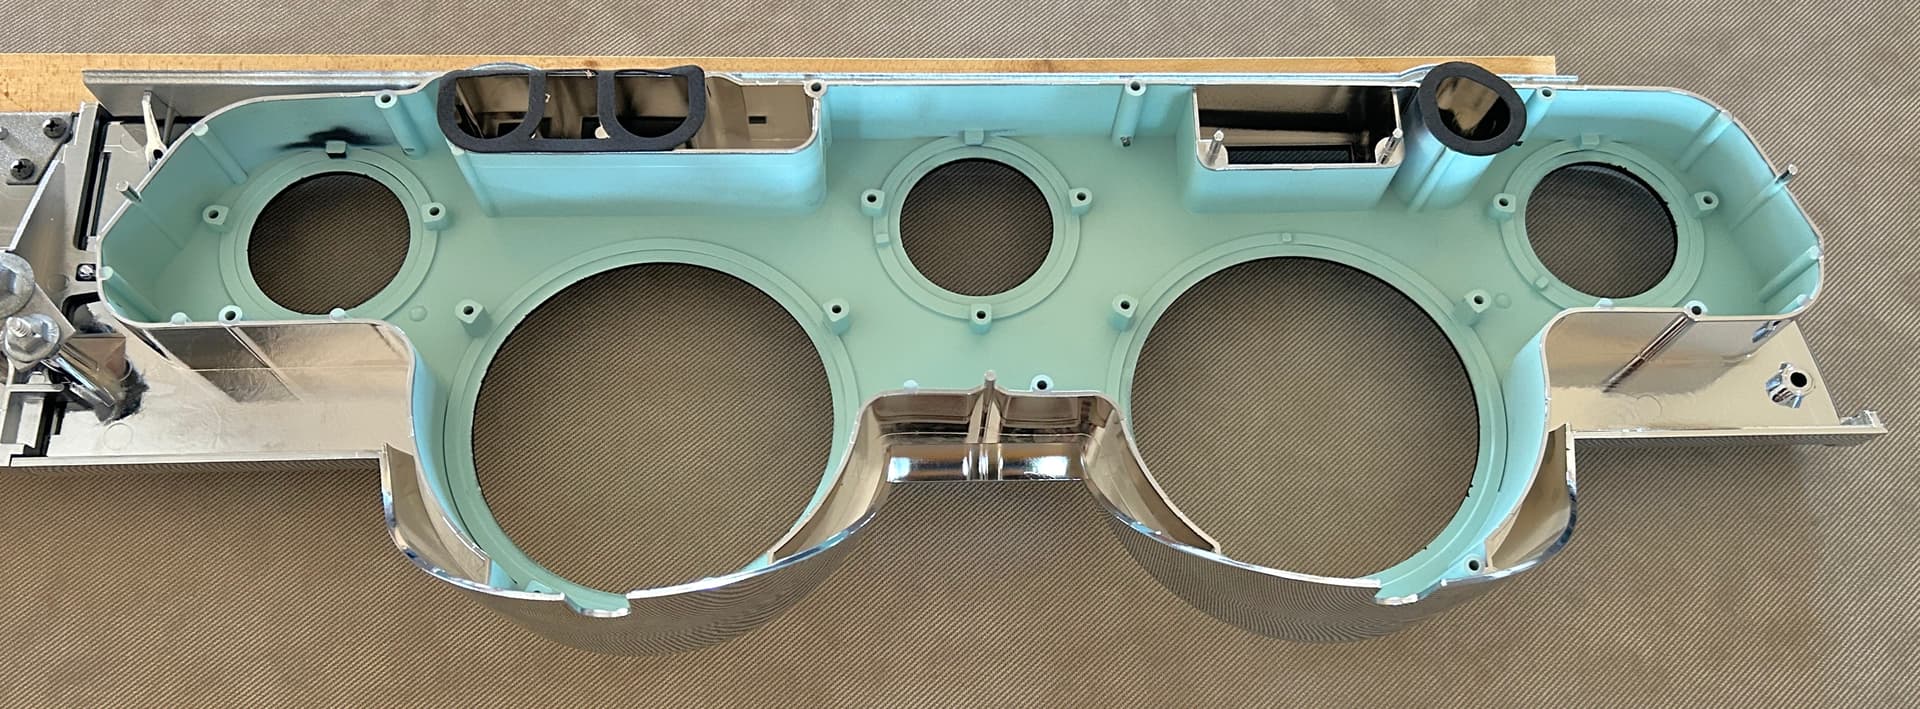
Given the large number of changes a second round of SLA samples was ordered. The back side of the dash is very complicated. The walls of the instrument cluster mounting are very tall and all of the original dash samples were badly warped in this area. There were also issues where the screw mounting bosses were not well supported. this is where reproduction parts can really shine. We get to look at what failed based on the part being in the field for over fifty years. We can add gussets and thicken up webs and do a hundred little things to fix problems the original engineers had no way of anticipating. And we can fix a few of our own screw ups while we are at it. In the end we added an additional half millimeter to the fascia opening. move a few alignment pins and for the first time we had a dimensionally correct functional part.
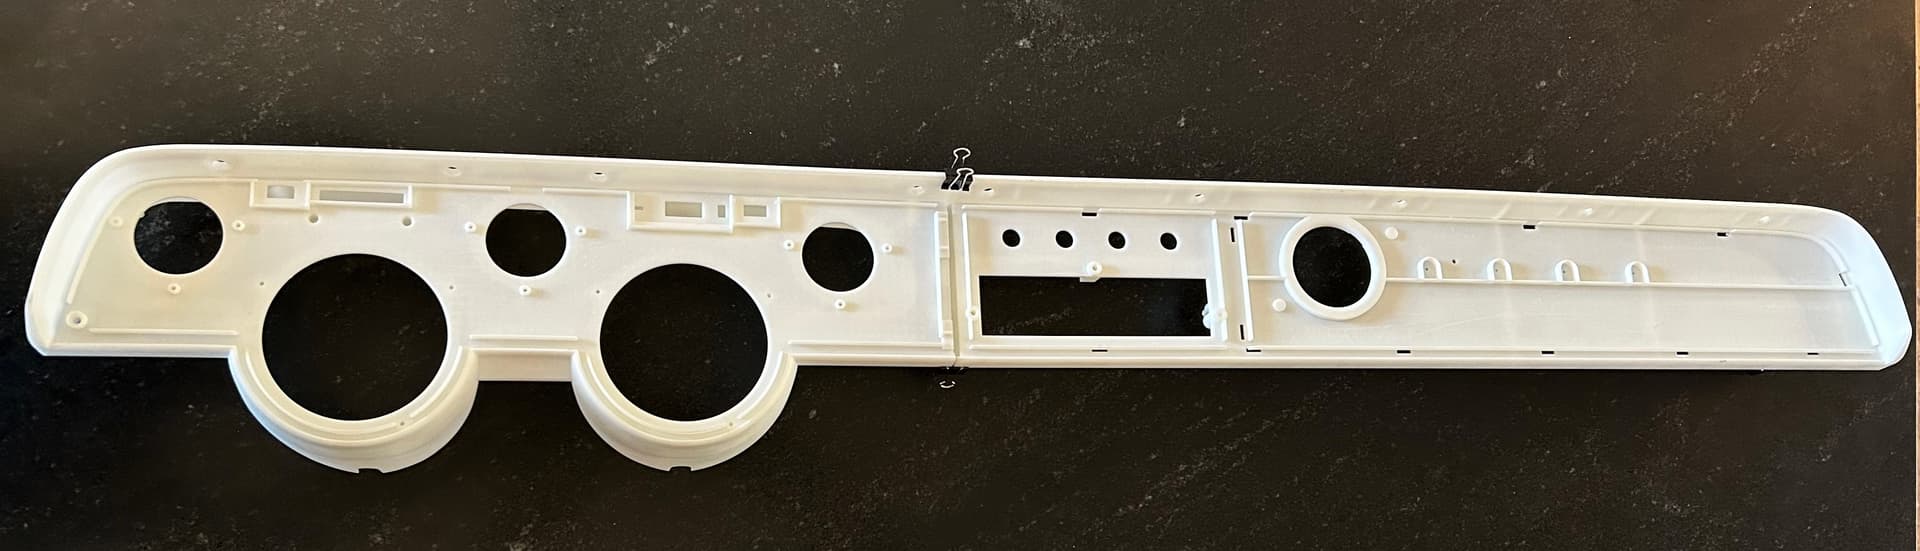
At this point it is time to cut tool steel. I use hardened steel tools. They cost more but they will not wear out any time while I am still alive! They also require more skill. As it turns out large plastic parts with a high level of detail on both sides are not an every day deal. The challenge is to get the molten plastic to fill all of the space in the tool and that it be hot enough to not show a line or knit mark where two streams of plastic meet. Then it needs to be cool enough when it comes out of the tool to maintain its shape but not so cool that is has shrunk too much and gets stuck. It’s worth iut to look back and realize the guys that built these cars almost 60 years ago were incredibly good at the art. These are difficult parts to make today they must have been almost magic back then.
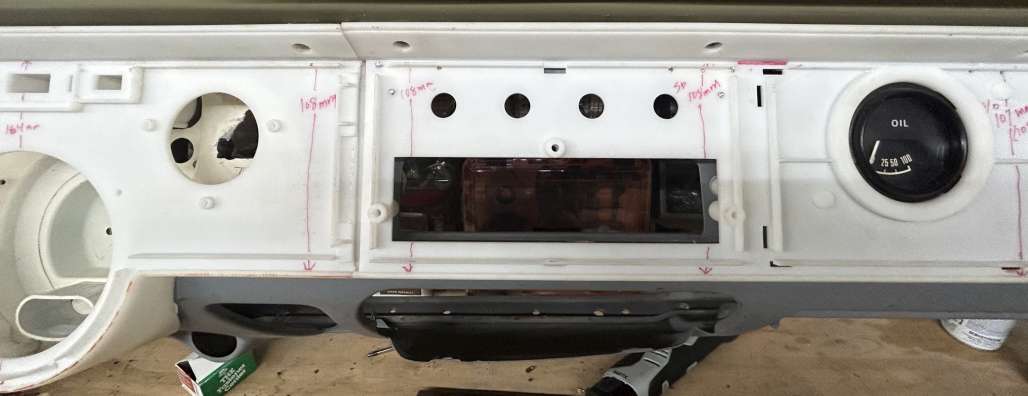
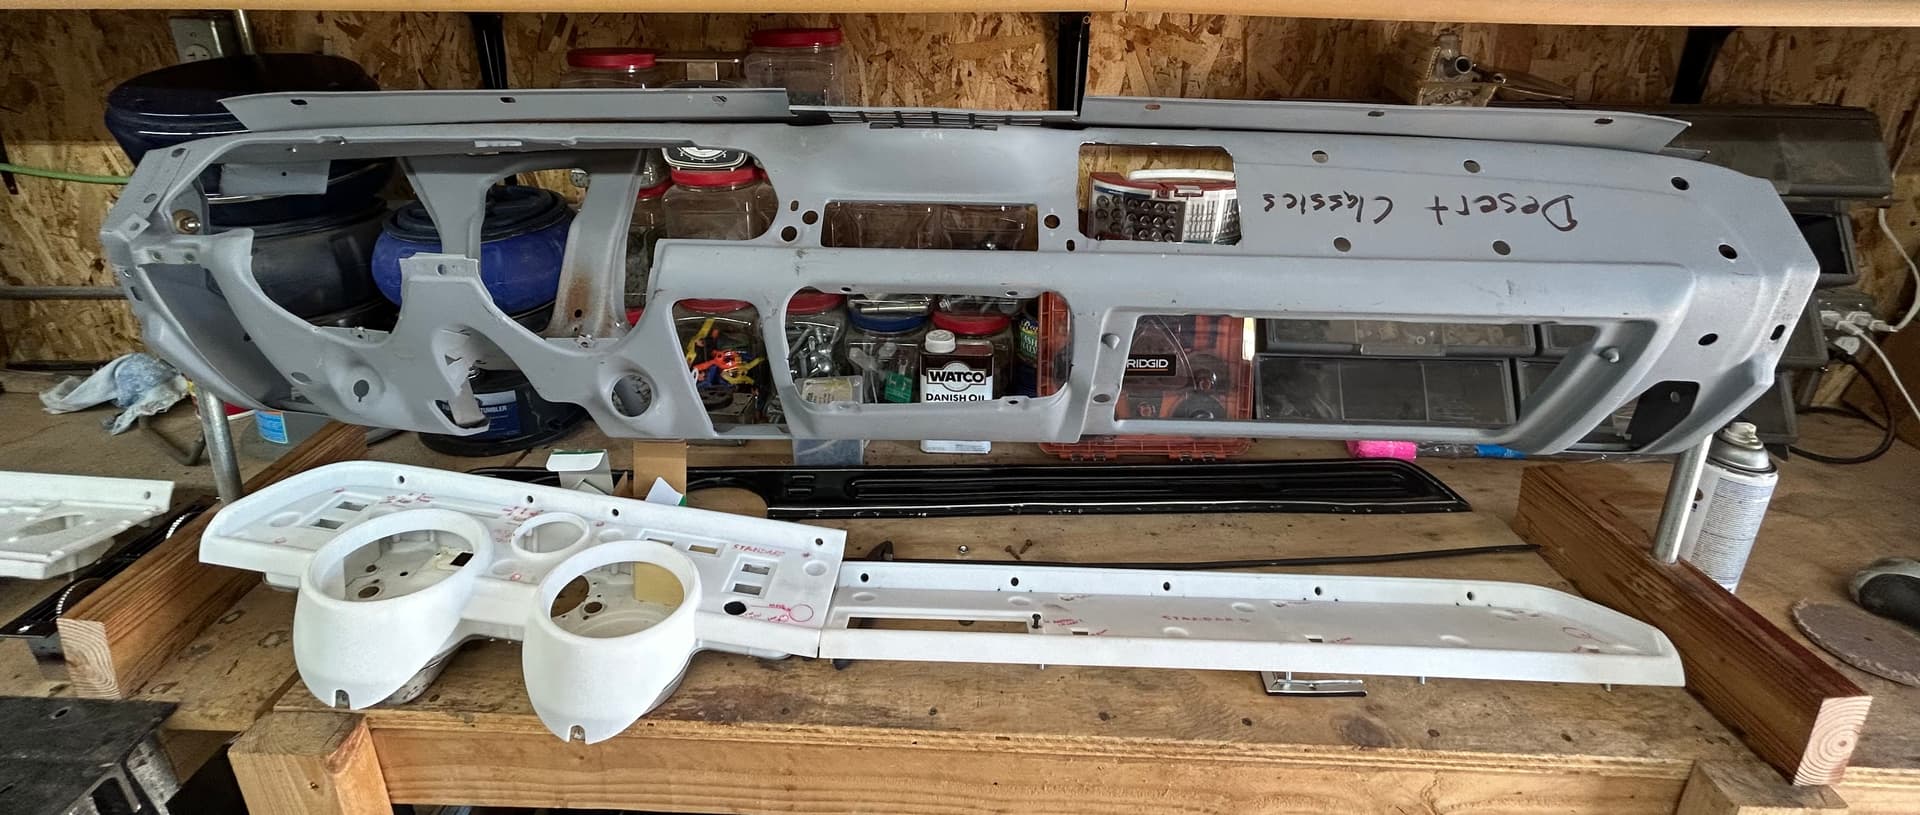
Some gave all. Some where a standard Cougar gave it’s life in the pursuit of reproduction parts. This dash frame has had so many test fittings it feels like a rented mule.
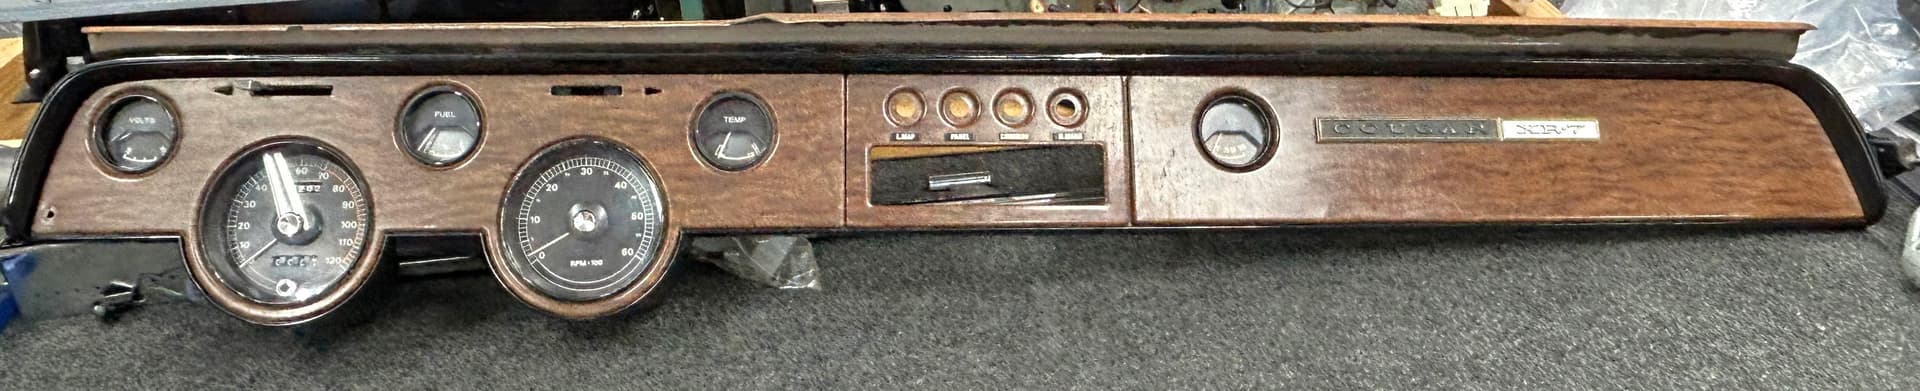
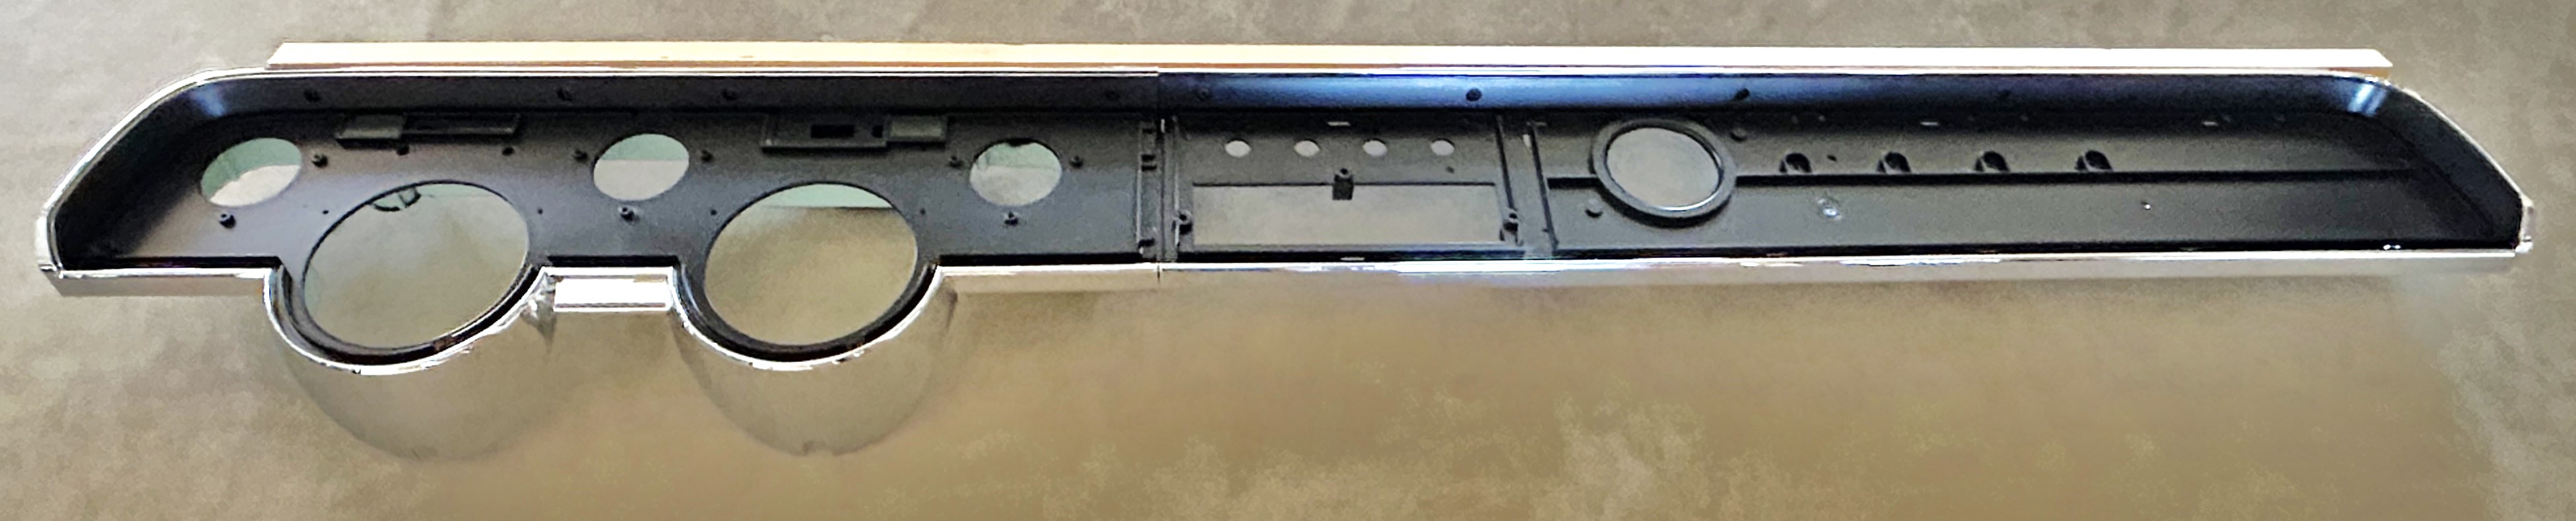
Once we have verified the fit of the first off tool parts the tools have to be polished to a mirror finish everywhere chrome is to be applied. The perfected and polished off tool parts then head to the finishing house to see what has to happen to make them beautiful.
Initially we planned to do vacuum plating for the chrome like finish. In this process aluminum is heated until it is molten in a vacuum chamber. The vacuum is used to lower the boiling point of the aluminum. The aluminum vapor then condenses on the surface of the part. A top coat of clear finishes and protects the metalized layer. This process is much easier and less toxic than actual chrome plating. But you know… it just didn’t pop like we wanted and it wasn’t quite as durable…
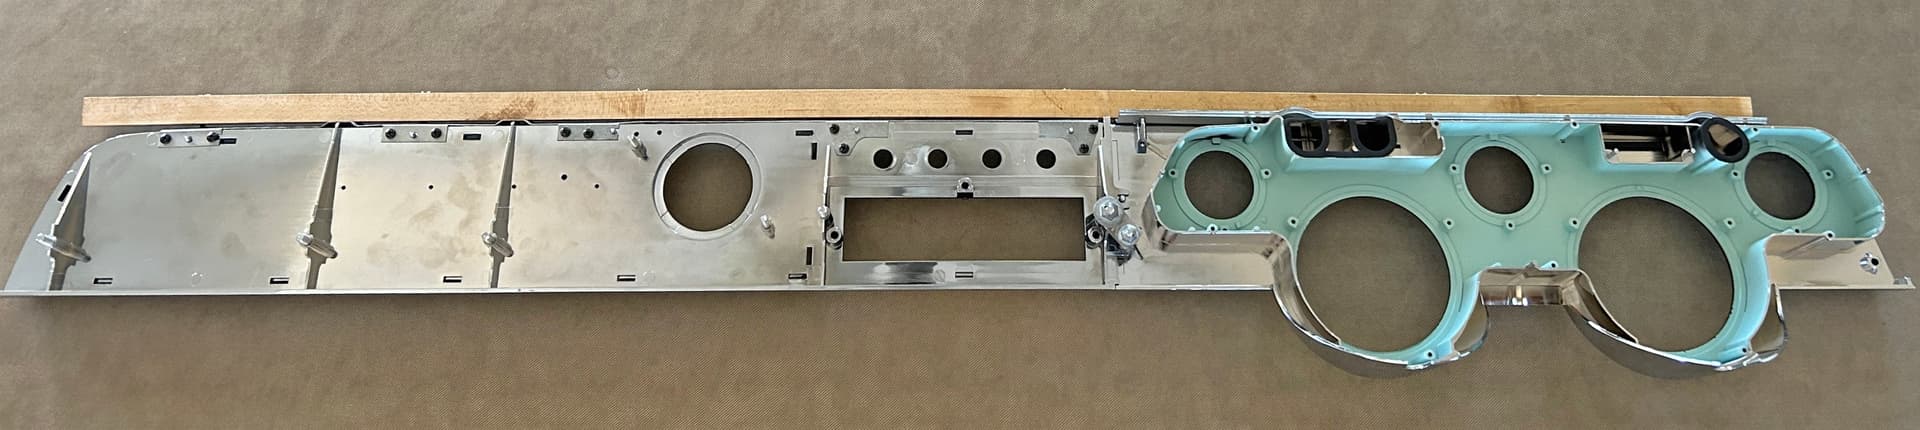
So what we ended up doing is using a process called electro-less plating to put a layer of copper on the plastic and then we could do standard chrome electro plating. It is actually a five step process but the end result is worth it. This is why when you look at the back side of the dash panels they too are chromed.
But this process has it’s challenges. When the parts are removed from the chrome immersion it is very hard to predict how the runoff will effect the part. It is also difficult to gauge the effectiveness of the earlier plating process on a very complex shape. There is a good deal of trial and error that goes into perfecting the jigs and fixtures used to hold the parts.
The next step is to develop the process for masking and painting the parts. The masks are made of copper and formed to fit very precisely on the part to keep paint exactly where you want it and no place else. As it turns out this was one of the most difficult steps.
In the back ground comes the packaging design. The purpose of the packing is to get the product safely to the end consumer in an undamaged condition. We decided to double box the bezels. Our original intent was to use foam die cut shapes to hold the panels but the vendor closed operations due to the tariffs and we had to regroup. In the end we decided to go with out three layer system of tissue paper, foam envelope and bubble wrap. We have shipped thousands of products with great results but that foam sure is classy.
I AM a Cougar ‘junkie’ / I DIDN’T skip reading this entry and it really doesn’t take that long to read ( maybe because I’m already a ‘captive audience’ for such automobile techno-details. ) It is absolutely ‘riveting’ and fascinating. I had a general idea of what might be entailed in producing a reproduction ( high quality and highly detailed ) dash part, but this was still an eye opener. Bill, many thanks for going to the trouble to enlighten all of us with the steps encountered and involved in the reproduction of the 1967 and 1968 dash panel bezel. This is a most remarkable endeavor with an amazing outcome and product.
I read it all and enjoyed the reverse engineering aspects. My business is selling injection molding equipment to the automotive suppliers in Detroit. Prior to that I worked in the materials side of the plastics industry and before that I was plant manager for an injection molding company. In between those jobs I got my degree in Plastics Engineering Technology from Ferris State University. I’ve been in this industry almost my entire professional career. The changes over the years have been remarkable. The changes that occurred between the mid 1960’s to when I began my career in the mid 1980’s I’m sure was significant as well. The pace of progress is amazing and determines which companies will grow and excel and which will slow and wither.
Thanks Bill for sharing that fascinating story, and for delivering a better-than-original product at such a reasonable price! It’s really pretty amazing they were able to accomplish molding that entire dash panel as well as they did back in the 60’s. Here’s another vote for a reproduction 69-70 dash pad for your next project!
When these finally arrived it seemed like it had taken way too long. I really enjoy the challenge of creating a product, but this one was really something. The dash fascia panels, particularly for the standards, are next. I needed to get some money out of these so I could start putting it in the next set of tools.
Many thanks Bill for your hard work in producing these very much needed dash pieces, and also the detailed explanation. I had tried a complicated painting process which looked good until it went through this past winter of single digit temps, and now has stated turning a not no nice color fade. So now I’m in need of your repros. I just checked on WCCC’s site and they’re still listed as not available, do you have an ETA on these yet?
Thanks for the detailed workup of some of the challenges you had to endure to build these parts, Im sure it enlightens some to what it takes to do it right. I dont think most people know what goes into making a high quality reproduction part like this and the reason we dont see more of these kinds of projects is its a net negative rather then positive. One will never recoup time and money invested in a project like this. I know you do these things for the love of the hobby and the personal challenge not for your wallet and for that we all need to be grateful!!
I would put these panels right up there with reproduction sheet metal. It will be the reason we see more cougars being pulled out from hiding and getting restored
Very cool to know where and how your parts are coming from, puts a personal connection to everything rather then some corporation trying to make a quick buck on the next hot repop part
I think the typical process is to just scan a sample and then copy it warts and all. That is why I titled the thread the way I did. I am not complaining, I really like doing these parts. This one took far too long. In the corporate world I would have to fire myself.
The difference Bill is that you want to make a quality item that is at least as good as the original. Compare this attitude to for example Scott Drake - their quality is just good enough.