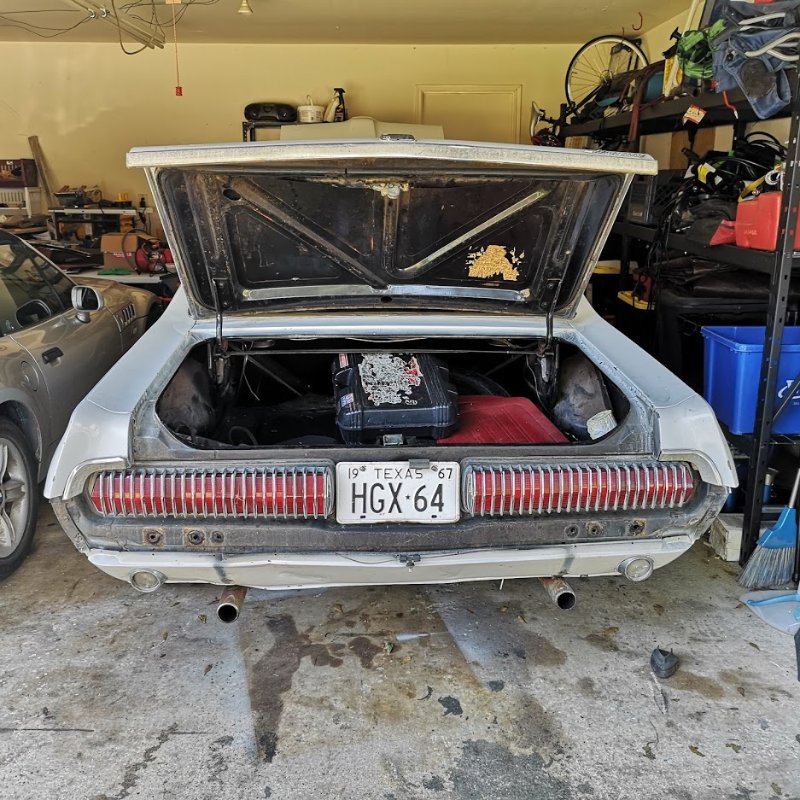
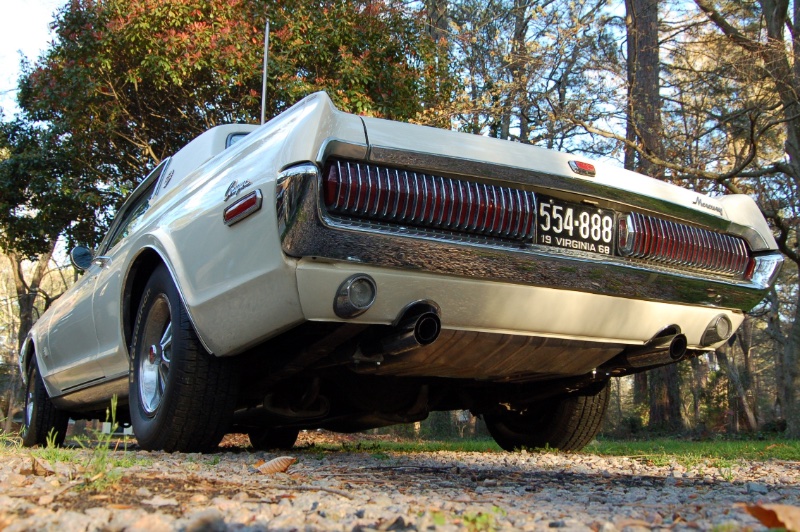
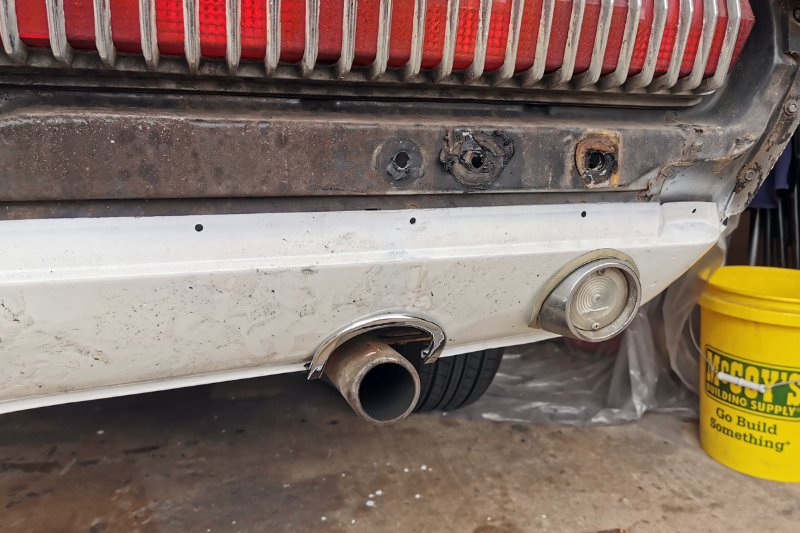
I’m starting the body work on my 67 standard, and I’d really like to dress up the rear end by adding the XR7-G exhaust cut-outs and trim in the rear valance.
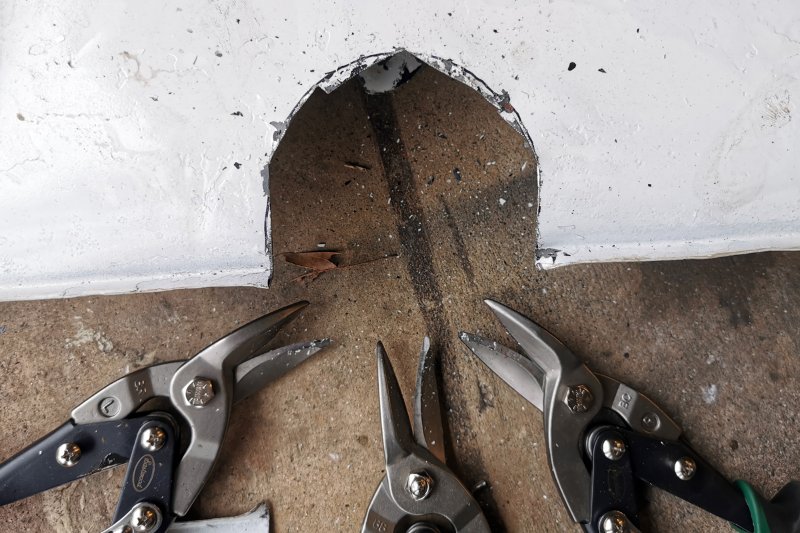
A couple questions to those who have done this before. How did you cut the radius curve at the top? I’m worried my rotary cutter won’t do the curve clean, so I wasn’t sure if I should try a hack saw for that part or what exactly. Any tips are appreciated.
Second question, can I just shorten the exhaust hangers in the rear to raise the exhaust tips up into the cutouts or will I need to completely replace the exhaust pipes from the mufflers back?
By the way, when I finally pulled off the rear bumper I found the missing bumper filler rubber piece inside it, the remains of an air shock system and the evidence that whoever painted the car last didn’t bother to remove the bumperettes when they did it.
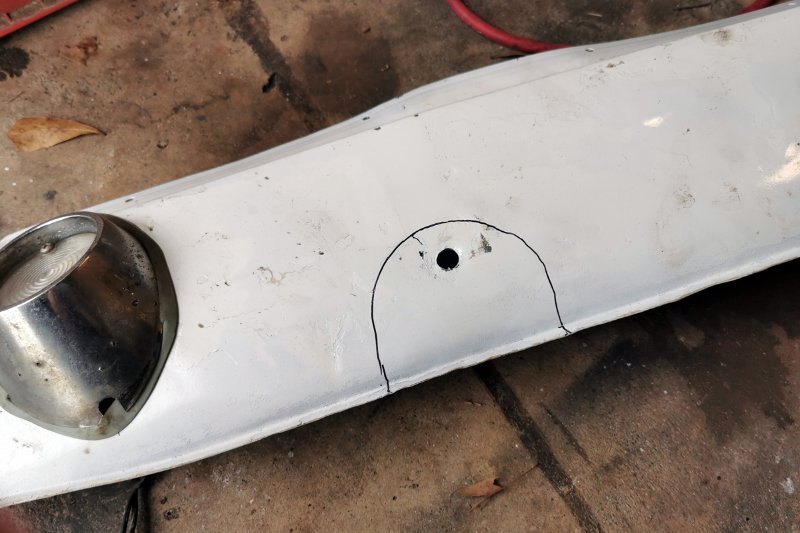
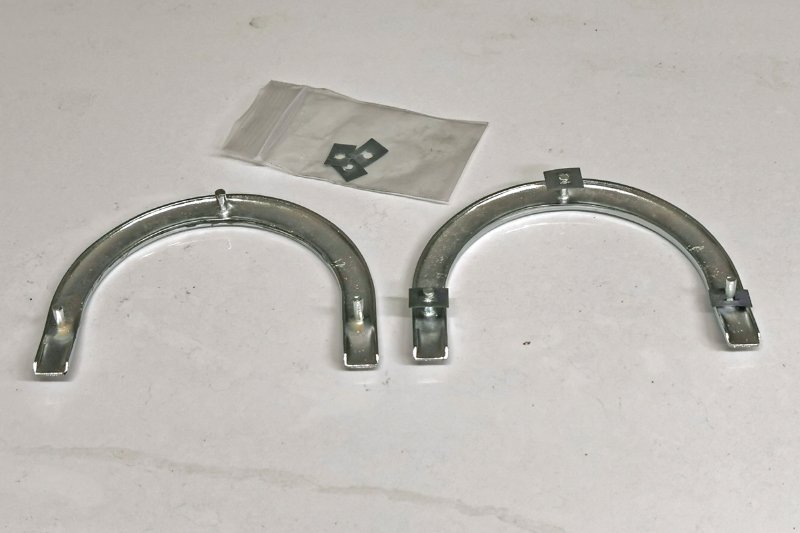
I think between the Dremel and the aviation snips I can probably make it look pretty clean. Next step is to order the trim rings and find some measurements or a template.
The one strange quirk about the reproduction bezels from WCCC is that with pegs facing up, the right peg is one size smaller than the center and left peg. It was the same on both of mine, so I assume that all of them are being produced that way. The flat spring nuts supplied with them are tight on the center and left posts, but slide freely over the right posts. I’ll have to go pick up a smaller size to actually mount them.
I centered them off the top mounting hole for the bumper guard since my exhaust was centered under the bumper guards.
Thanks for the great write-up, pics and helpful info. I’ve got one question: Is there sufficient room for the bumper guards to be placed at different locations of the originals holes where the exhaust rings are now placed (and look good)?