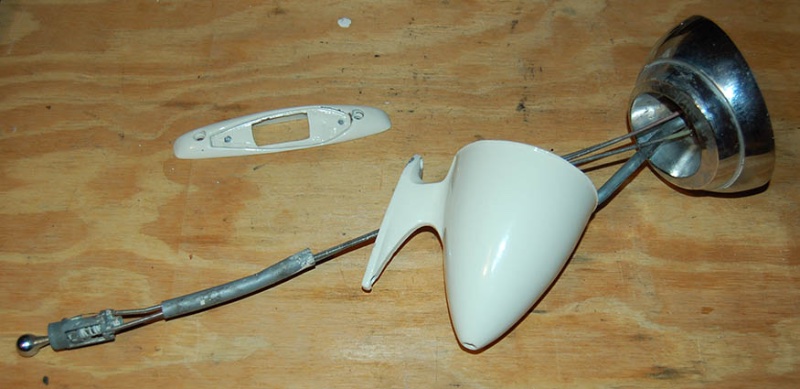
So I have the door cards off of my XR7-G to install new door handles and also take apart and spruce up my G mirror.
I bought a beautiful brand new repro of the chrome section from Don, but boy, it looks like a major undertaking to take everything apart so that that part can be replaced.
Anybody done this?
I’m thinking some major polishing and retaining the original may be the way to go.
Also, while all of these cables are exposed, is there anything I can do? Lubrication, etc.?
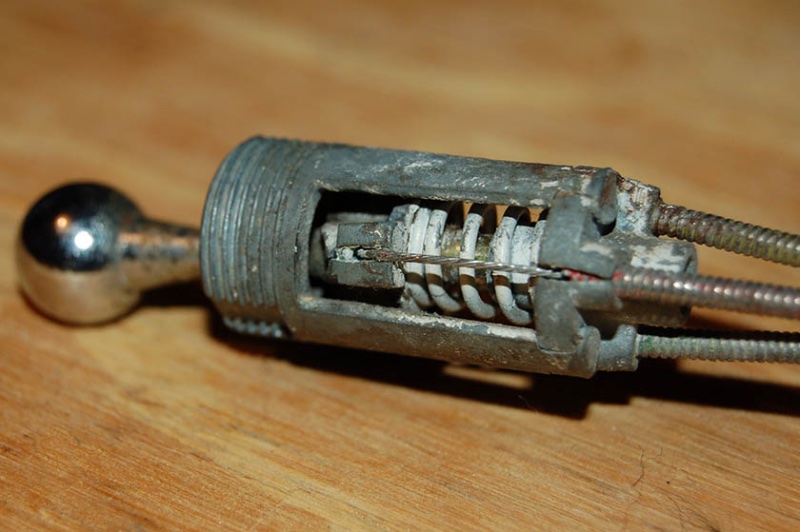
On the remote handle end you have to un pinch the cable by spreading the tab apart. Than pinch it back together to reassemble. Color code each cable so it goes back in the same spot.
What Brian said. I have done it a few times for various reasons including to replace the cable using a new reproduction. It’s not complicated and it can be done once or twice.
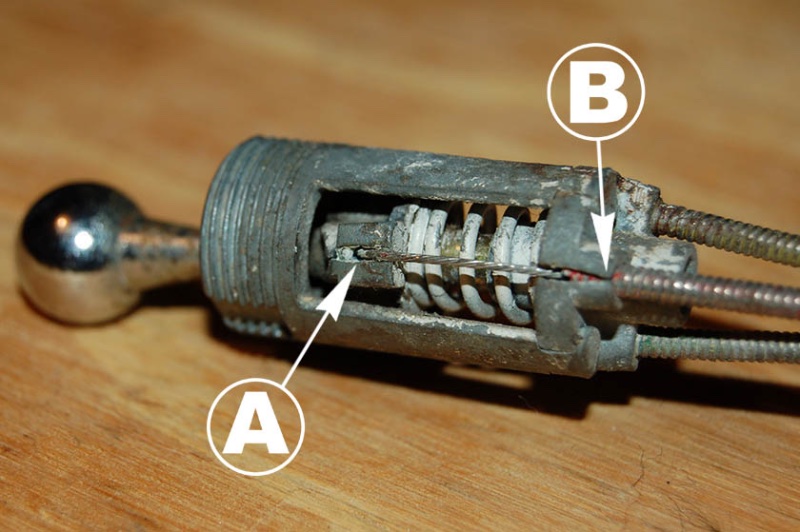
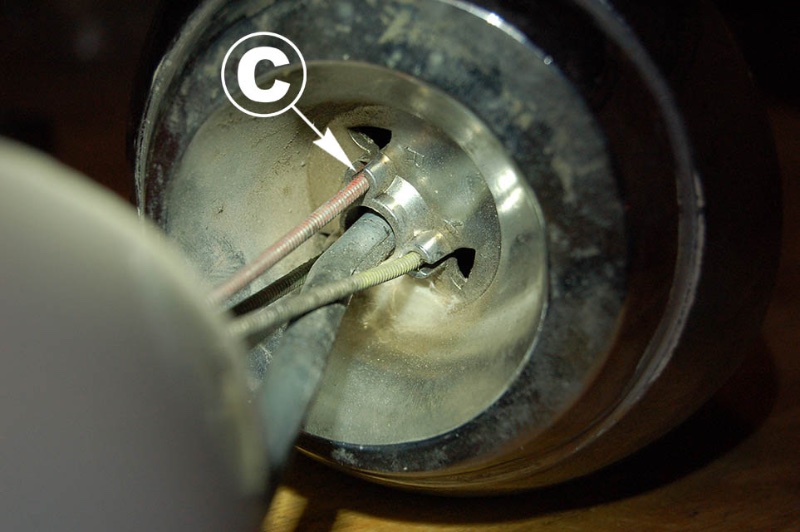
I assume you are talking about “un-pinching” the cables where they go into the remote handle (labeled B on my photo)?
Wouldn’t I also need to unhook the cable wires at A? Seems that would need to be done in order to free the remote handle/knob as that would not fit up through the two painted mirror bases.
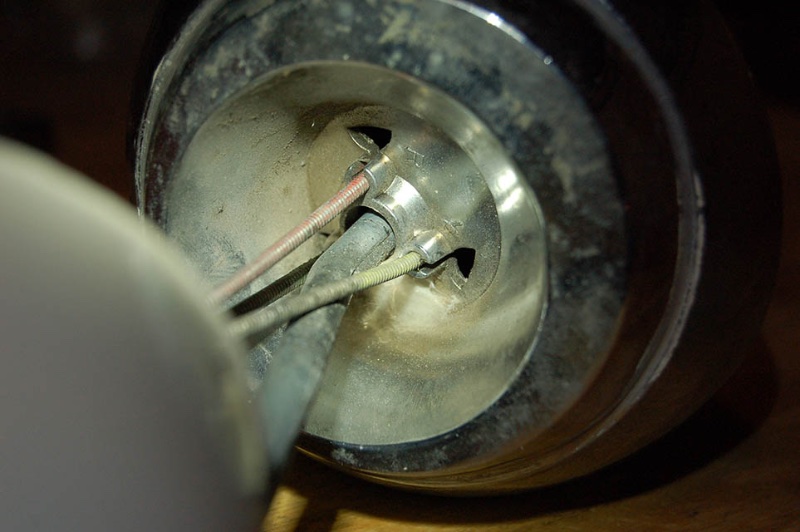
Then, where they go through the chrome bezel at C - once the remote handle/knob is removed, do I just pull the cables (with mirror) through the chrome bezel separating the mirror and cables from the bezel? Feels like the cables are also held tight where they pass through the bezel.
Also, I notice that the cables are color coded Red, Yellow and Green from the factory (though faded) and that the original bezel is marked “R”, “Y” and “G” at each corresponding slot. The repopped bezel is not marked.
I did B first and only opened it enough to let the cable slip through with a small flat head screw driver, it’s very brittle and very well may break, I then did A pushing and wiggling until the brass crimp comes out the top, C last , the cables will remain with the aluminum backing of the mirror it has brass crimps also, I use model paint dabs to keep tracking of locations
Phillip, the cable sheaths are kind of spring loaded. When you loosen off the cables at “A”, you will be able to take the whole thing apart reasonably easy. Don has a good suggestion in having a new remote end at the ready as the pot metal will likely break in at least one point either taking it apart or squeezing it back together.
Line up the cables (re-mark the colours if needed) and also line up the new remote end and mark that in the appropriate colour to match the cables.
I did this when I rebuilt my G mirror on my old Augusta green G (missing the proper mirror when I bought the car). It was a lot of work, mostly because it was a long time ago and not the kind of help we have in this forum. I got it working on my second remote end, as I buggered up the first one.
Good luck and take your time.