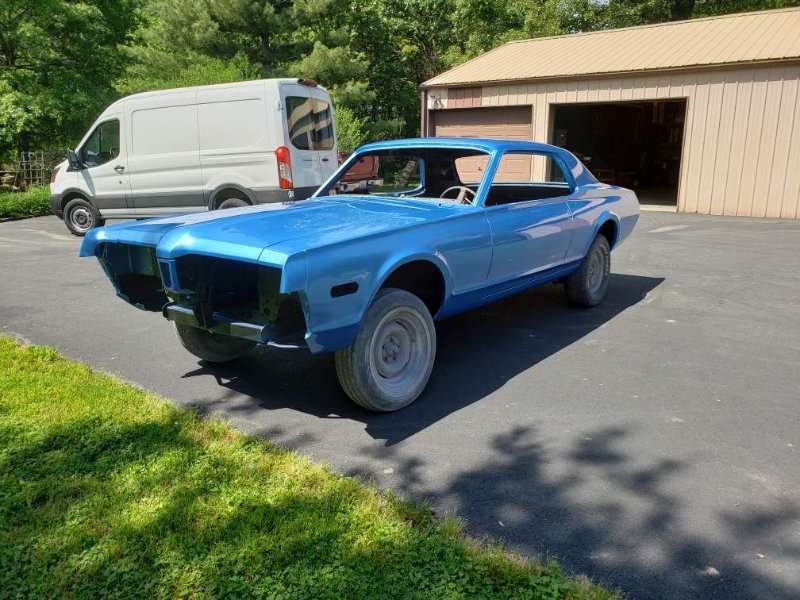
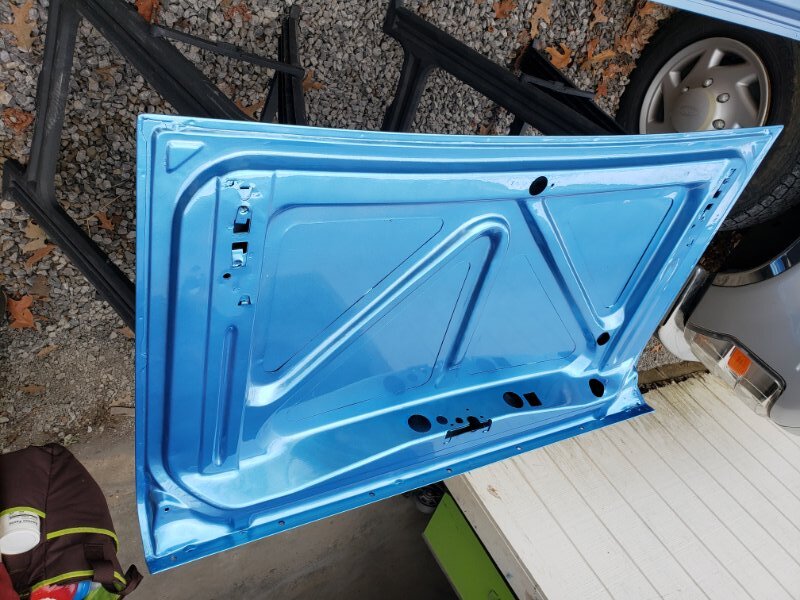
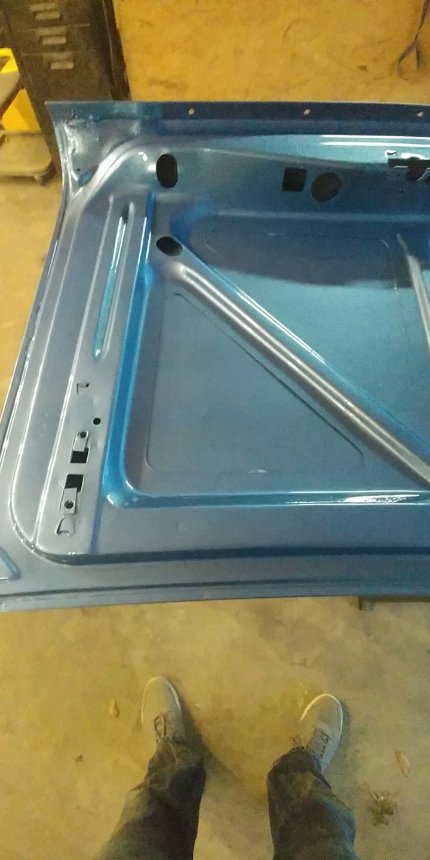
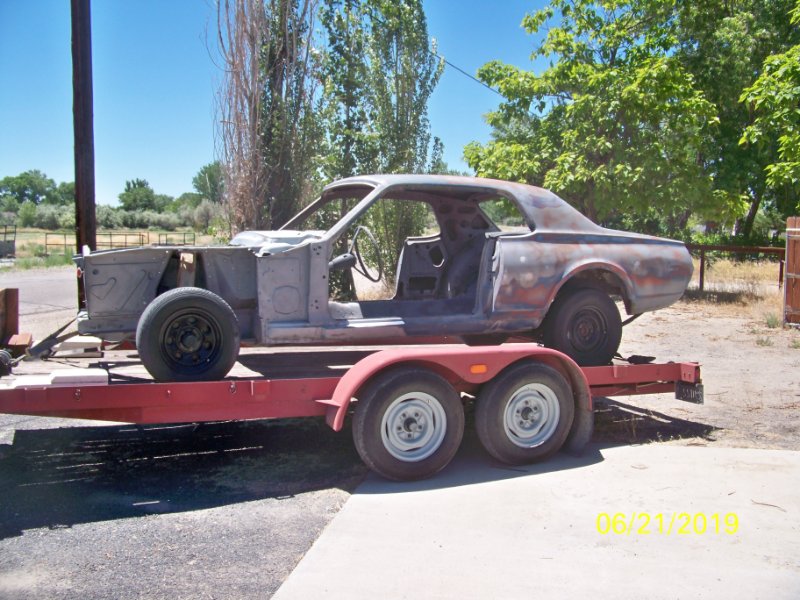
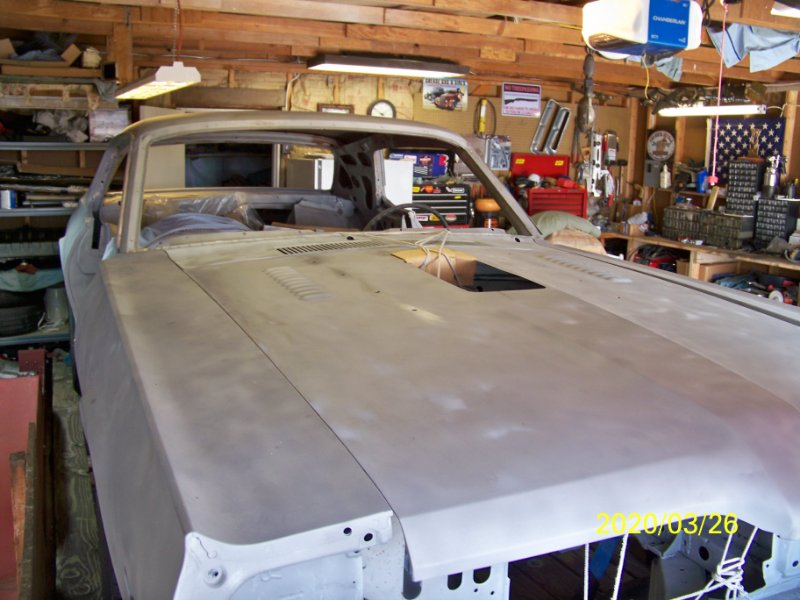
Got my Cougar back from the body shop a few months ago. I originally had it at a body shop that was recommended to me by a good friend, however the guy kept jerking me around promising he was going to finish it year after year until about 7 years passed by. I got fed up with him and picked it up. Luckily I had a neighbor move in from Northern Illinois that is an excellent body man and painter. He finished it up in less than 6 months. I’m very happy with his work. I chose a Dodge color of blue that you see on a lot of new Challengers and Chargers, Surf Blue Pearl (PQD). What do you think?
Congratulations! Putting them back together is the fun part.
Cool to see another 68 being restored. Enjoy the project! What powertrain is going in?
Nice choice! See how many Cougar nuts think it’s Madras Blue…
Very nice, your body shop story is not alone, I could never have that much patience getting jerked around.
Cool color choice!
Gangster, thinking about either a 5.0L crate engine or a late model 5.0L out of a 1985 to 1995 vehicle with an automatic overdrive.
Thanks R.B. Phillips and DieselD. Was thinking about the Nordic Blue that was so popular for that era, however after we compared it with the surf blue, there was no comparison.
6 years waiting for the painter…And that is why people use Maaco!
I’ve had the same problem with my Cougar. I took it to a shop and I took back the car in pieces. My car was totally disassembled, they broke my grille, the quarter panel doesn’t line up and they wrecked all my glass from sparks from welding and grinding. This shop was recommended too. Bunch of hacks! My car was better before it went there.
Paint shops paint. When they try to take stuff apart or try to put it together the results are predictable. Stuff they take off gets damaged, lost, or both.
Best bet: Take the car to the paint shop with everything disassembled and no glass, rubber, or chrome on the car. That way they won’t lose anything or tear it up.
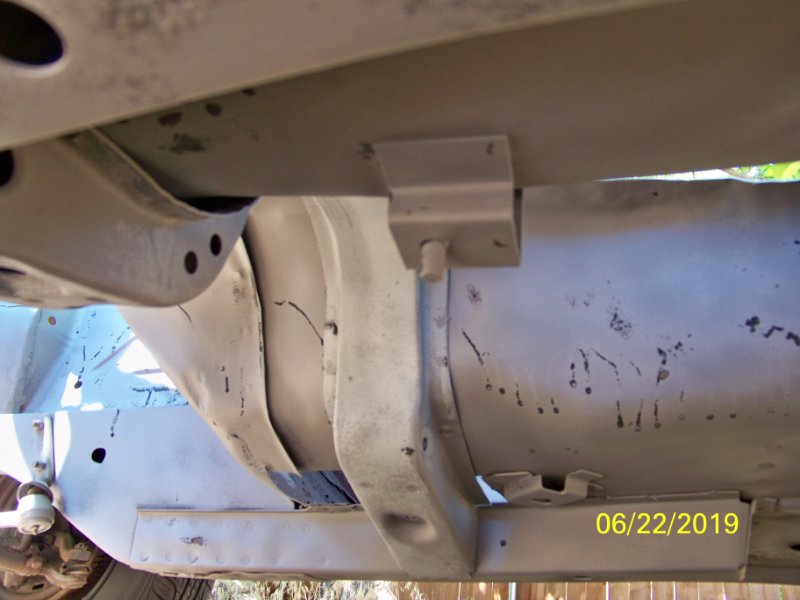
Sand blasting is the only way. But the sand never gets out of every corner but it does make it easier to work on. This Cat is in the second shop. First one didn’t even touch it after 6 months setting outside.
But I know your pain. Did a 66 Stang 12 years ago. It took 3 years of kicking his butt and then we had to go to court to get it back.
Looking good Rickyracer1983.
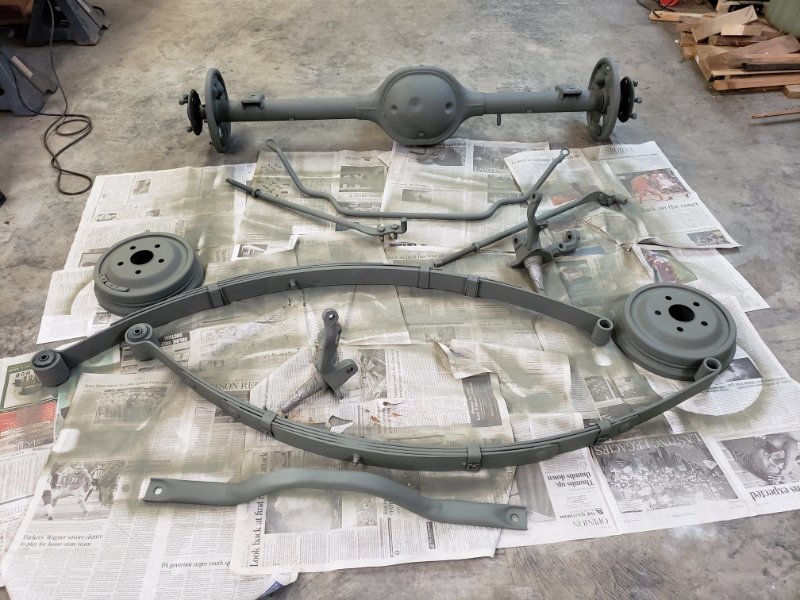
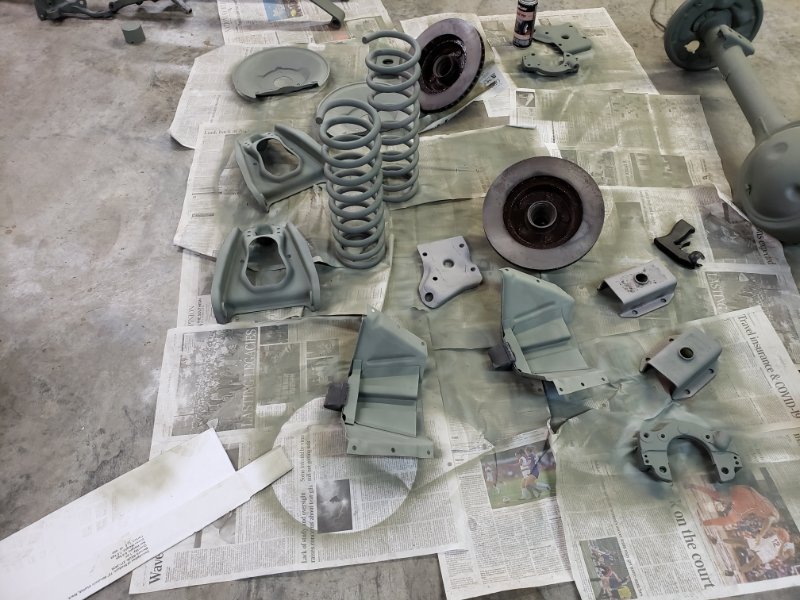
I’ve got a few questions everyone. I’ve got all of my front and rear suspension removed and blasted. Just looking for some ideas on paint. Should I paint it all black or offset some of the components with other colors? Not worried about it being concours. Show me some pics if you have.
Putting all new brake lines on. I purchased the standard lines and I am wondering if I should paint them or clear coat them or just leave them the way they are?
Wondering about the emergency brake cables. Should I replace them, try to clean up the old ones or just do away with them?
Upon inspection of the upper control arms after blasting, I noticed that they both have cracks near the upper ball joint area. Since replacement control arms are not well made from what I have heard, would I be safe to have those cracks welded?
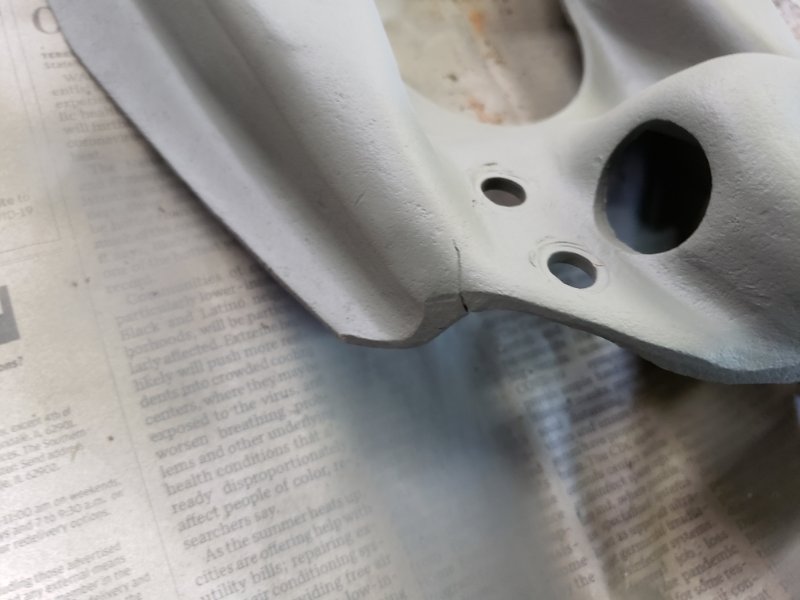
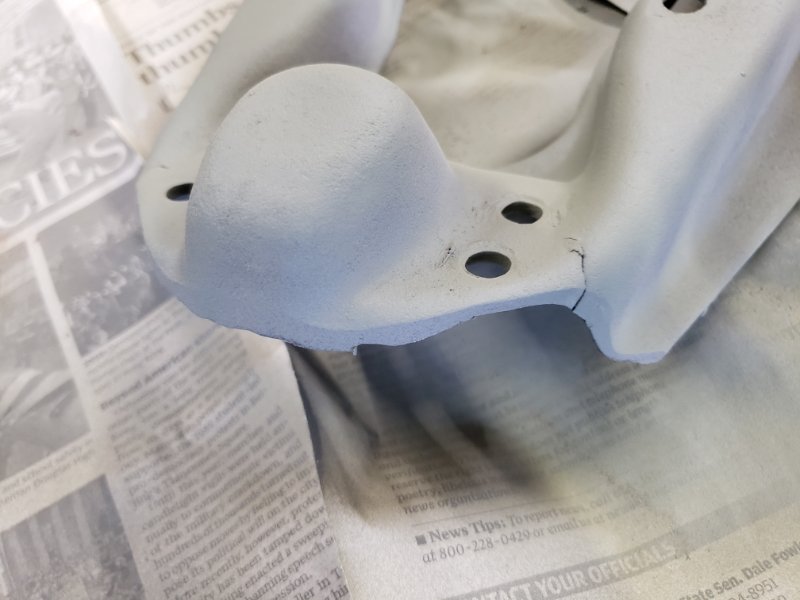
Very high stress areas and the heat can weaker the metal around the weld. Nice wall hangers but I’d replace them.
In a pinch I would weld those but I think your better off replacing them for the simple fact of they have already started cracking and if you weld those it will crack in another area later. I believe NPD has good USA made control arms but they are not cheap. https://www.npdlink.com/product/upper-control-arm/148541?backurl=search%2Fproducts%3Fsearch_terms%3Dcontrol%252Barm%26top_parent%3D210001%26year%3D1968&year=1968
As far as suspension I would go with a semi-flat black. if desired you could offset some parts in gloss finish to add some detail. Use a high quality spray paint such as MRO. The flat version is more of a semi gloss which I prefer over the gloss finish. I use this paint exclusively for projects at work and I can get almost a powdercoat looking finish with it. https://www.amazon.com/Seymour-620-1415-Industrial-Solids-Paint/dp/B0019K9132/ref=sr_1_1_sspa?dchild=1&gclid=CjwKCAjwps75BRAcEiwAEiACMeOpyJsLla2JC-1aqGATJC0W8hZWVkF3F5_egauOxrROajxIfSqrMxoCGNEQAvD_BwE&hvadid=409928348601&hvdev=c&hvlocphy=9029979&hvnetw=g&hvqmt=e&hvrand=7320760524830543256&hvtargid=kwd-125941753494&hydadcr=29527_12005941&keywords=mro+paint&qid=1597244703&sr=8-1-spons&tag=googhydr-20&psc=1&spLa=ZW5jcnlwdGVkUXVhbGlmaWVyPUFBMTVLRkdFMDZXQTkmZW5jcnlwdGVkSWQ9QTA2NTM2NjYzMlpUUzhDTFhBNFZSJmVuY3J5cHRlZEFkSWQ9QTAxNzIyNjUxN01YSjlIWEVKOFBDJndpZGdldE5hbWU9c3BfYXRmJmFjdGlvbj1jbGlja1JlZGlyZWN0JmRvTm90TG9nQ2xpY2s9dHJ1ZQ==
Thanks Guys. Has anyone tried this company? It’s about the cheapest I’ve seen on tubular arms $309 for a pair and pretty reasonable on the whole setup. https://www.classicperform.com/NewProducts/2006/NewFiles/NovaSubFrame.htm
If they come with the ball joints, I think that’s a good deal!
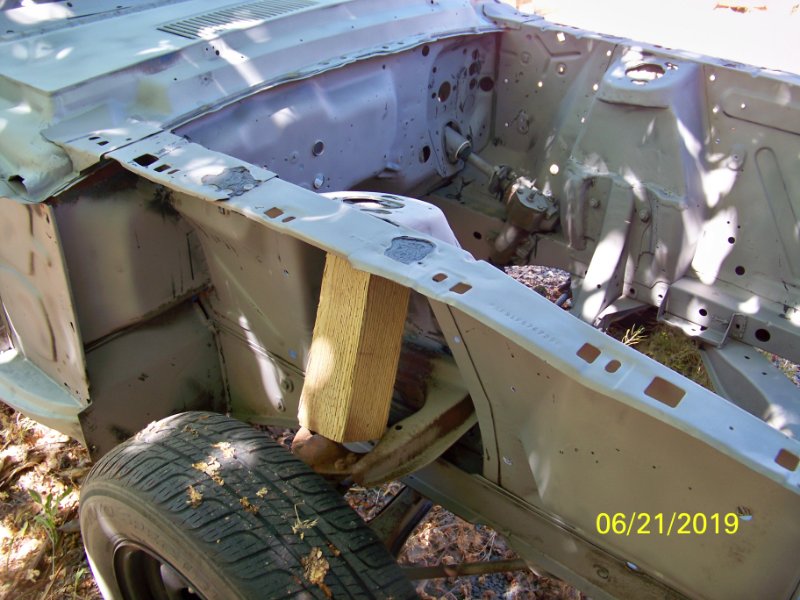
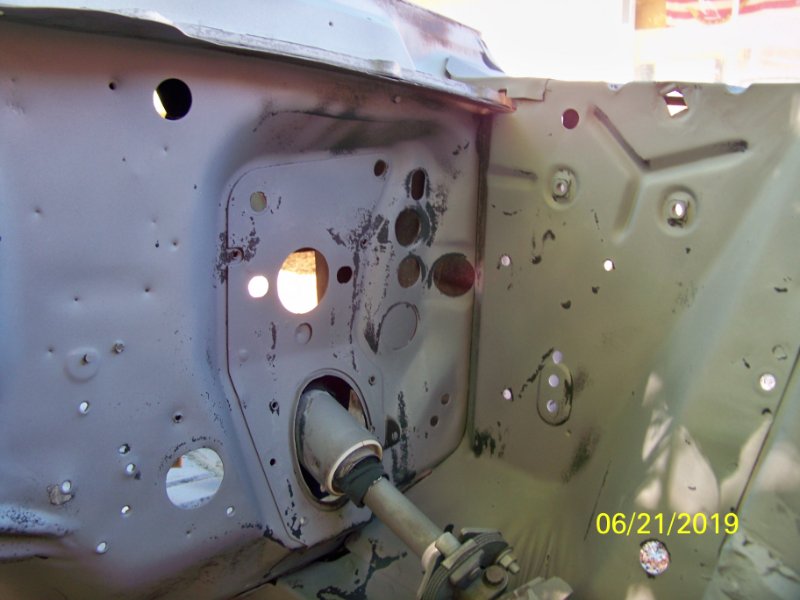
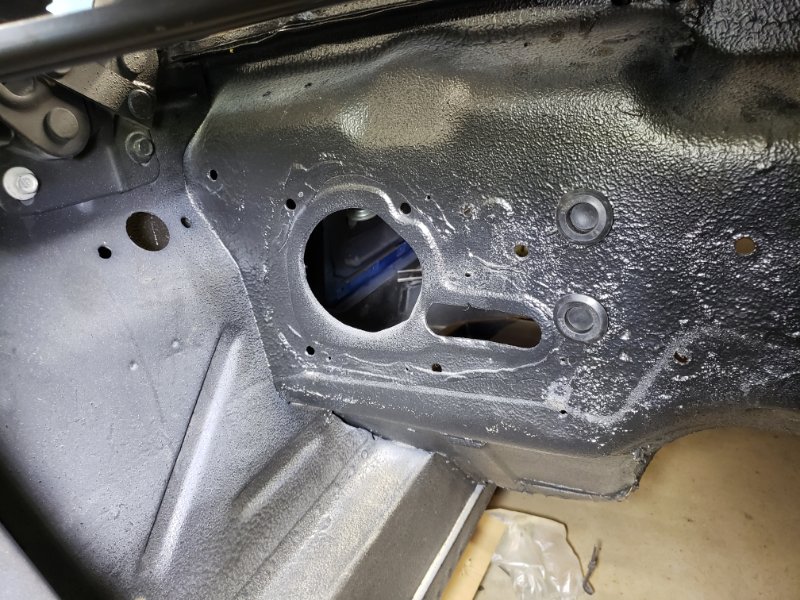
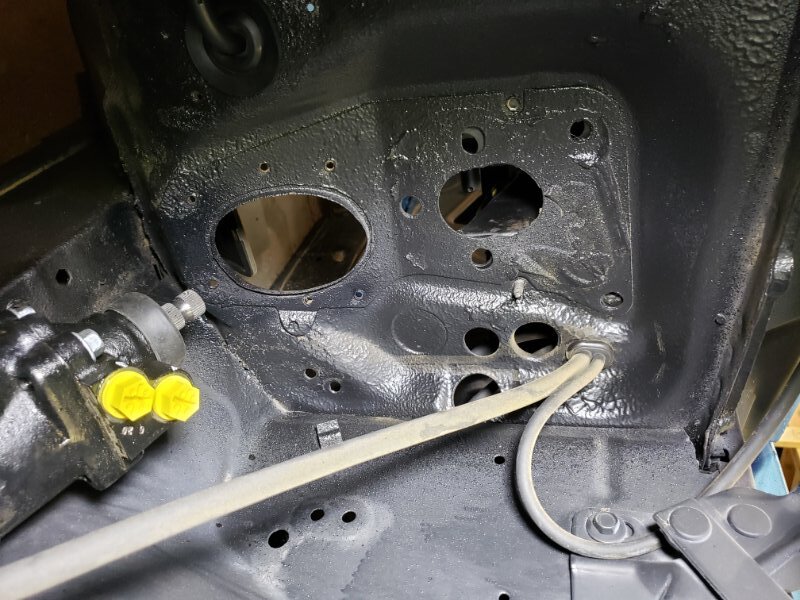
A couple of questions. Anybody got any secrets on how to loosen the bolt up on the gas pedal to the throttle pedal shift assembly? I just can’t to get it to budge. Also, I have attached a couple of pictures of the firewall in the engine compartment. Is there a good source that shows what goes where? I’m aware of the obvious things like the steering column, brake booster/master cylinder and blower motor. However just not sure about some of the other items. Also there are a few openings on the right and left rear fender aprons that I’m sure of either.
Small world, on my Mustang the bolt won’t stay tight. I’ve tried several thread lockers but eventually the pedal goes wobbly and it’s fallen off while driving.
I’ll try identifying the holes. Passenger side apron under the hinge the one large two small are for the A/C vacuum canister that mounts on the outside. The blower motor opening is for the A/C refrigerant hoses to run through with a cover plate and the elongated opening is where the heater hoses go through also with a cover plate. Above the large opening where the firewall meets the cowl are two small holes for the water valve. On the driver side the hole to the left of the washer hoses is where the main wiring harness goes through. The hole below is for the speedo cable. And the hole below that is where the headlight vacuum lines go through to the headlight switch.
The factory shop manual and the assembly manuals are what you need. A DVD of the Master Parts Catalog is also very useful.
The gas pedal bolt typically needs the application of penetrating oil and then use of a screwdriver bit holding socket. From memory I think it’s a #3 Phillips tip. I had one car that was very resistant to that screw turning. I ended up cutting the gas pedal into little pieces so I could clamp the assembly in a vice.