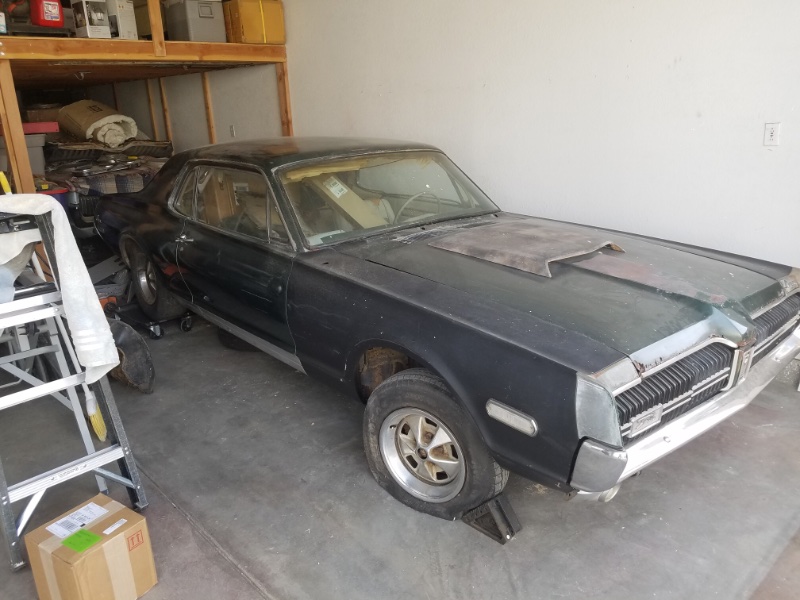
Christmas came a little a little early in December 2019, my 1968 R-code GTE finally made its’ way home. I have to start by saying thank you to; Royce Peterson, Jim Pinkerton, Don Rush, and Al Juraco for answering the millions of questions I had prior to the purchase and continue to ask to ensure this car returns to its’ original beauty.
Life started out for this GTE pretty basic as it appears to have had only one option outside of the GTE package being the Parchment Decor interior.
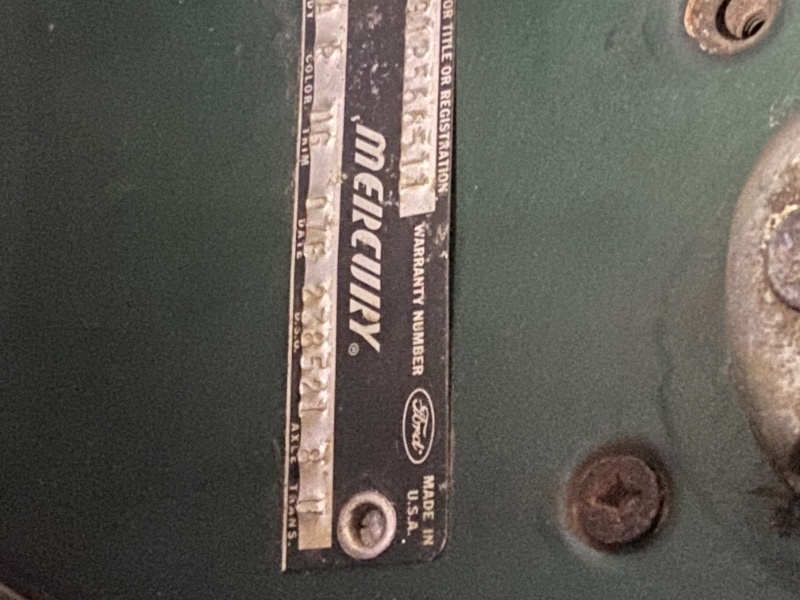
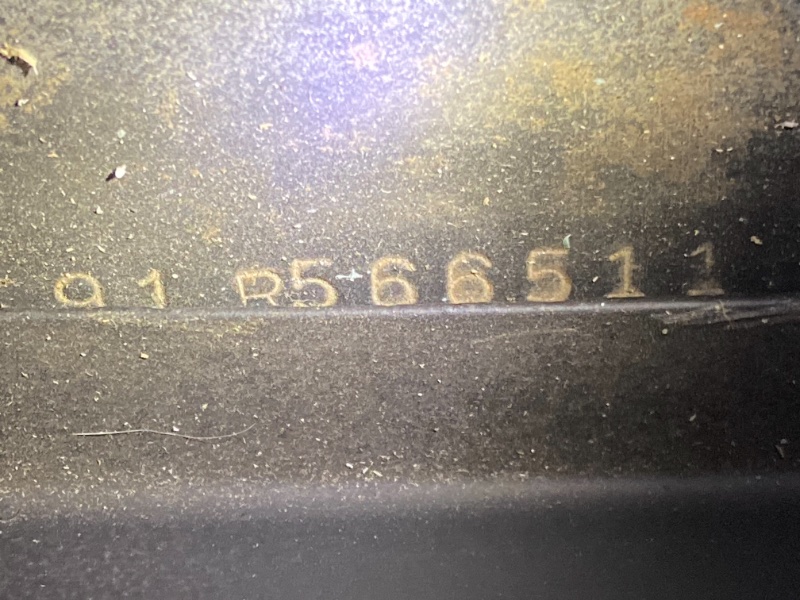
First order of business was a complete inventory of the car to determine what was there, what was original, and then what was needed. The engine and transmission had recently been rebuilt and to my surprise the original vin stamped; cylinder heads, transmission case, dash & door tags, as well as buck tag were all present. Second, was to use Jim’s 428 GTE parts list to determine exactly what was missing and what parts could be restored. Finally, convincing my body guy, wife and myself we were all brave (crazy) enough to take this project on.
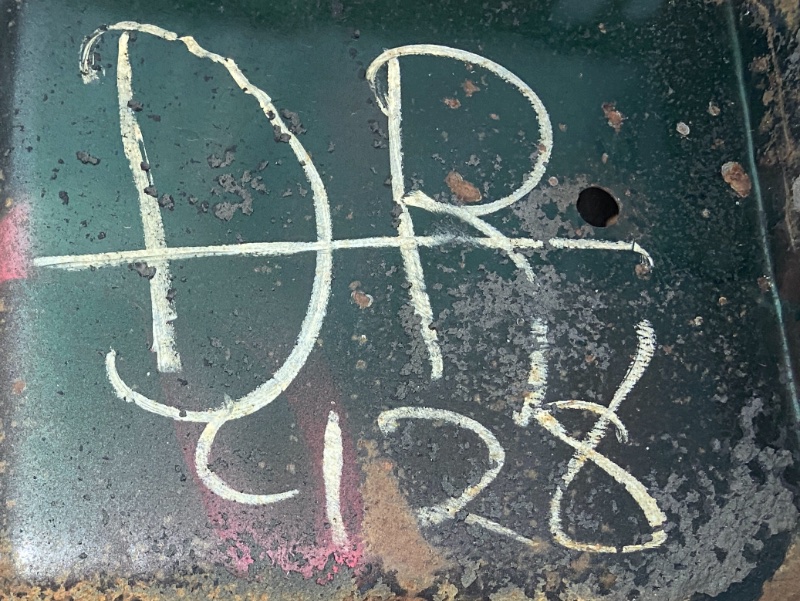
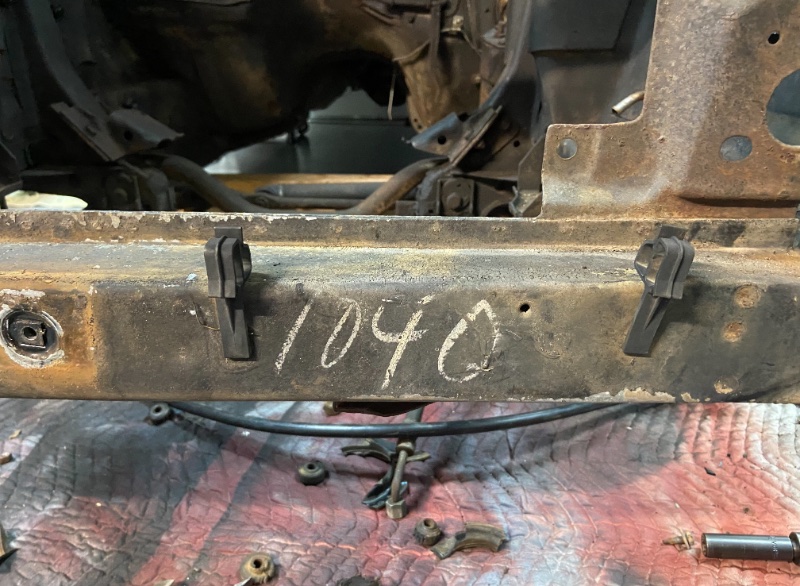
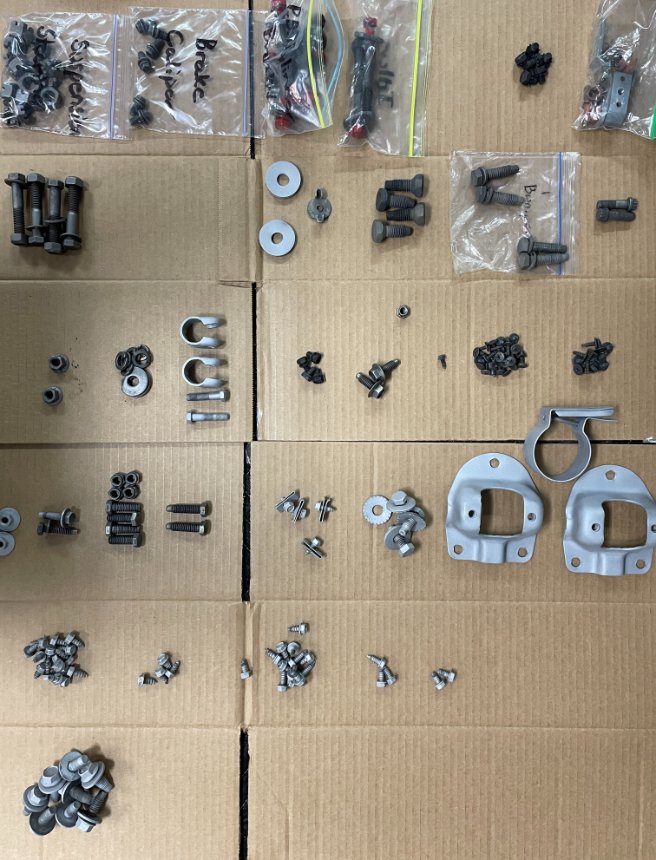
Disassembly, labeling and storage came next. I have learned that ziplock bags and a marker are your best friend on these projects. I should have bought stock in ziplock prior as I’m sure my purchases alone made the share price go up a few dollars. The car was disassembled to a bare rolling shell so that we could evaluate and document; repairs needed, finishes and any factory markings. Pictures are great to capture what the factory markings looked like however duplicating later would be difficult. My wife actually suggested using clear sheet protectors to lay over the markings to create exact duplicates and reference points for the location… brilliant!
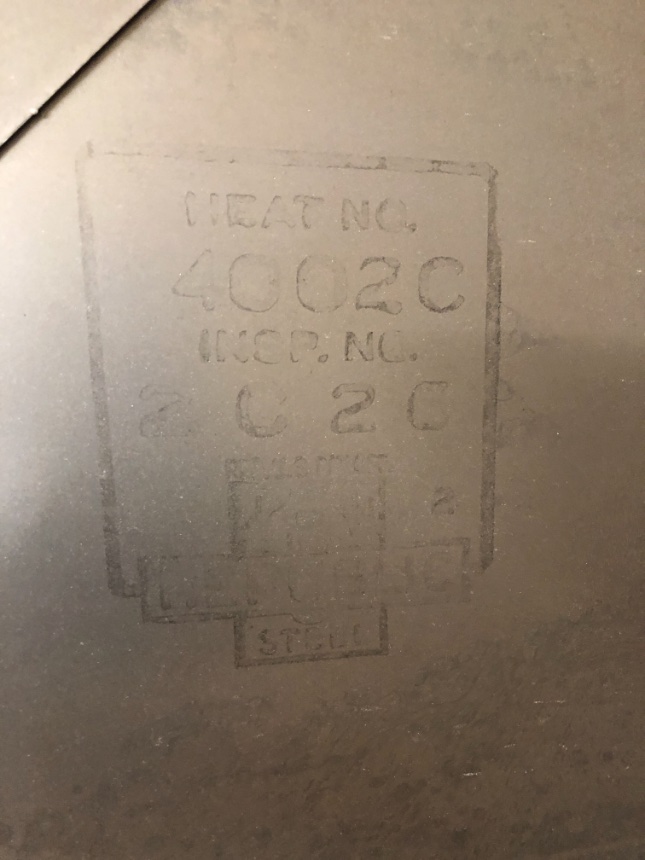
My body guy came by to do a complete evaluation of what would be needed and afterwards we determined that the best starting point would be media blasting outside, inside, and underneath. We contracted a local company here in Charlotte that strips all NASCAR chassis’s prior to rebuilding to complete the blasting. They use a plastic media to blast to avoid heavily etching and warping the sheet metal, the results were amazing. Apparently the trunk lid was stamped from the first piece of metal on the sheet metal roll at the factory as you could still see the sheet metal manufacturer ink stamp in the metal after the blasting.
If I were to go the media blasting route again there would be two things to remember; install a junk set of sill plate moldings to minimize the amount of media that gets in there (it gets in, you can’t get it out!) and tell the person blasting the body to stay away from the drip rail molding (I have spent no less than 10 hours refilling and sanding the drip rails to a point I was pleased with).
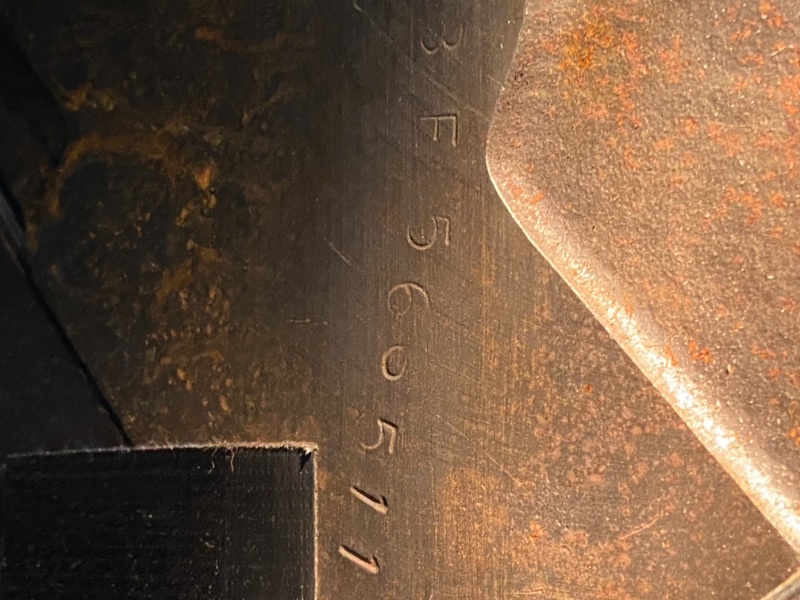
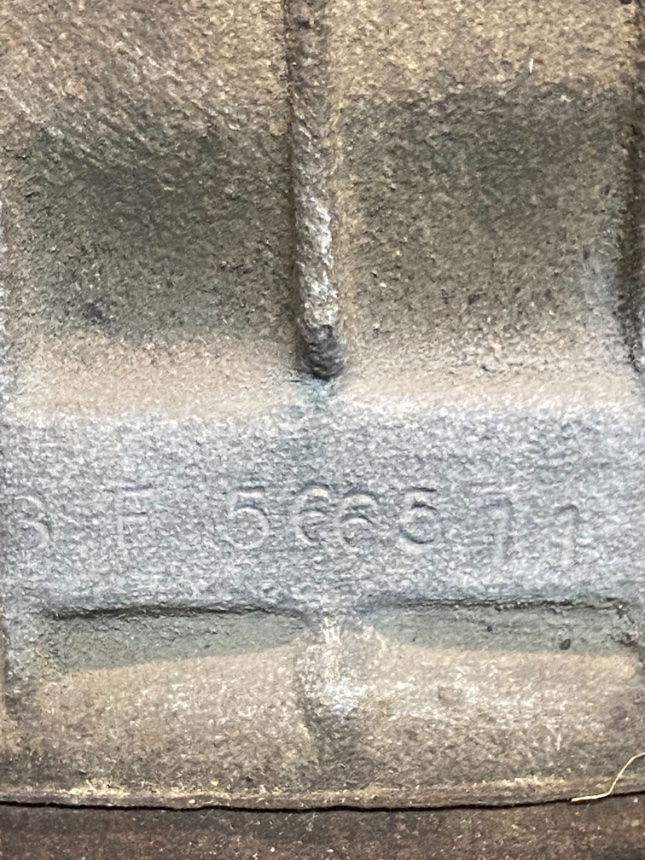
Republic Steel still exists. From its beginnings in the late 1920’s by amalgamation of a number of ( smaller ) other steel manufacturers, it became a major rival to U.S. Steel. The company was still a successful operation into the 1970’s, when imports of cheaper steel, labor costs and other factors caused financial issues throughout the US steel industry. A 1984 merger created LTV Steel which, with additional mergers and acquisitions renamed itself ( once again ) as Republic Steel.
Great find on the Republic Steel information gah. When I first noticed the logo on the decklid metal I stumbled across a picture on the web of a roll of steel with the stamp. I wish I had saved that at that time would be cool to ad to the photo history of the build.
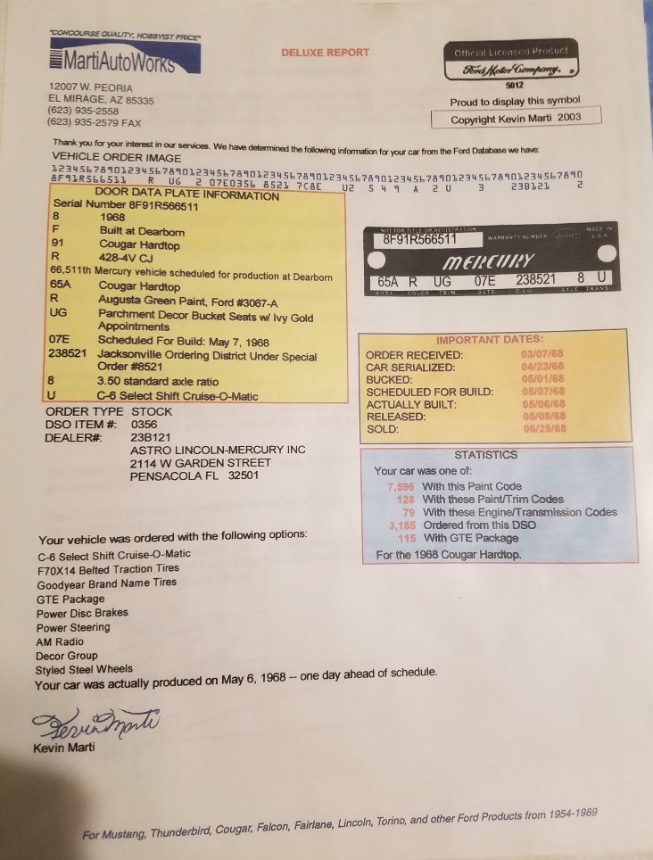
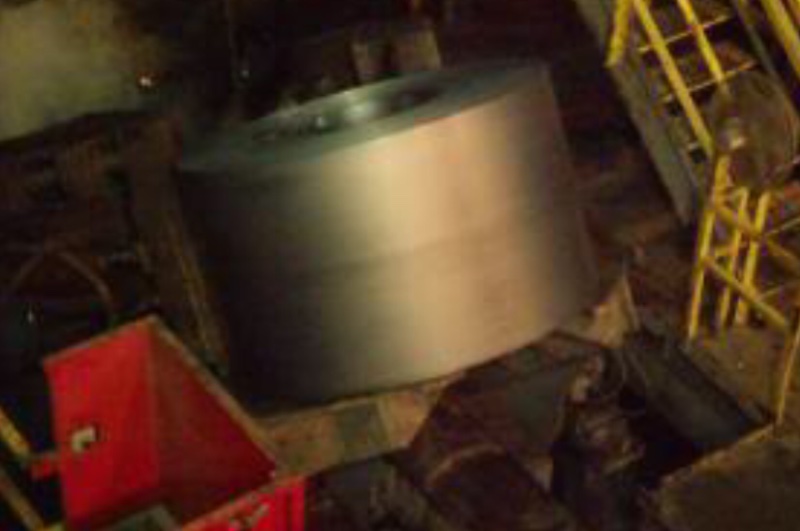
In regards to the special order number pacifica, it has been my understanding that most if not all GTE’s were special order cars. I have attempted to contact Astro Lincoln as it is still in business under the same family ownership however have been unsuccessful at this point. I did stumble across this though. I find it amazing that every one of our cars started out as one of these rolls then cut, stamped and finished into a panels that are part of these incredible machines.
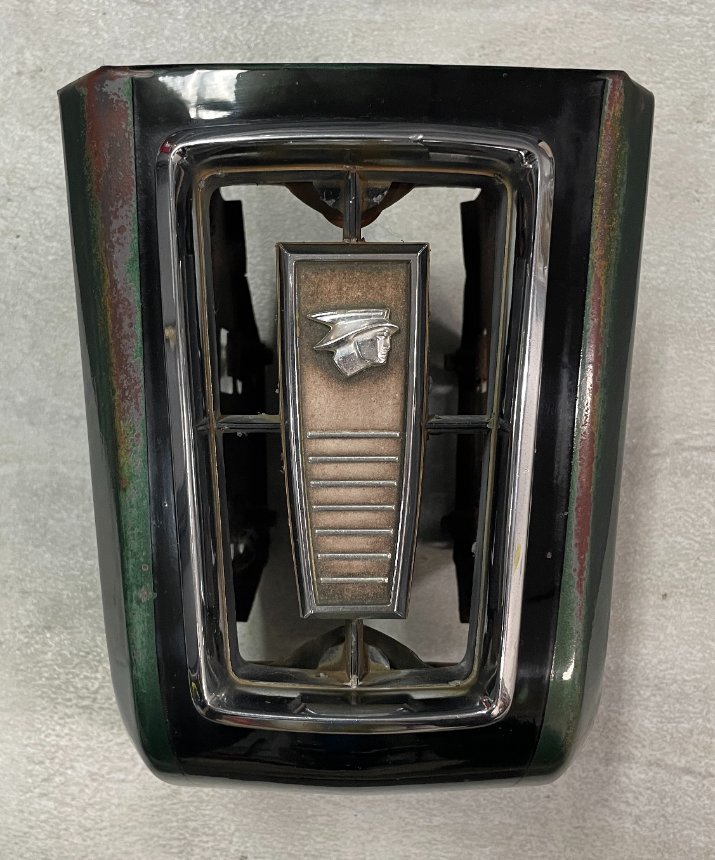
Most of 2020 was spent on the disassembly and inventory of all of the parts that came with the car. Fortunately all of the GTE specific trim was present but in need of refurbishment, the powertrain was a different story though. Outside of having the correct, VIN stamped, cylinder heads and timing cover the remainder of the 428 CJ components were either not there or the date codes were incorrect. Over the course of 2020 I was able to locate the correct date coded; standard bore block, intake, carburetor, distributor, water pump, and smog pump as well as all of the accessory drive pulleys and brackets.
The engine was shipped off to the builder in September 2020 for a complete overhaul.
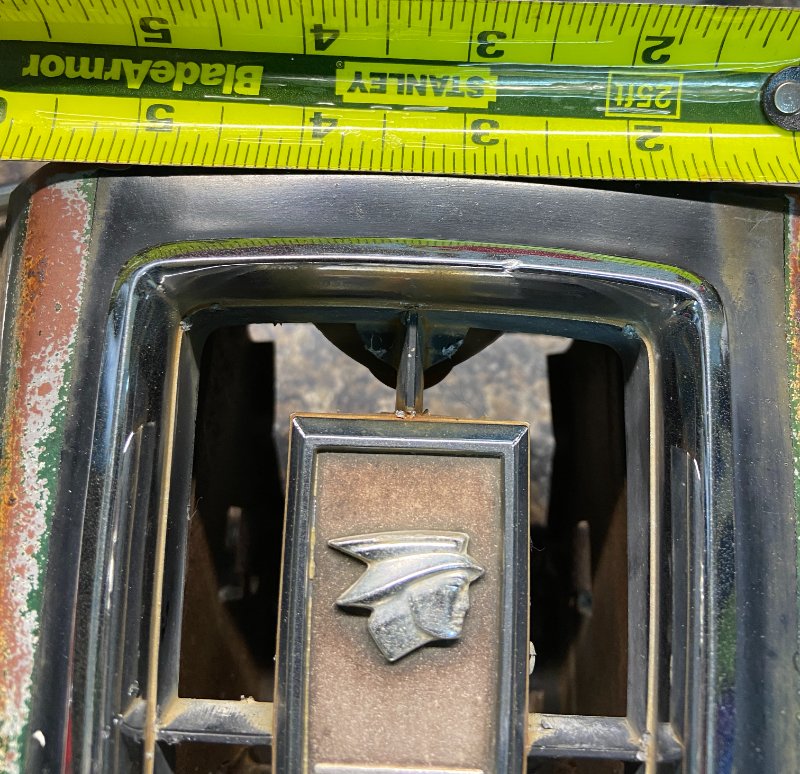
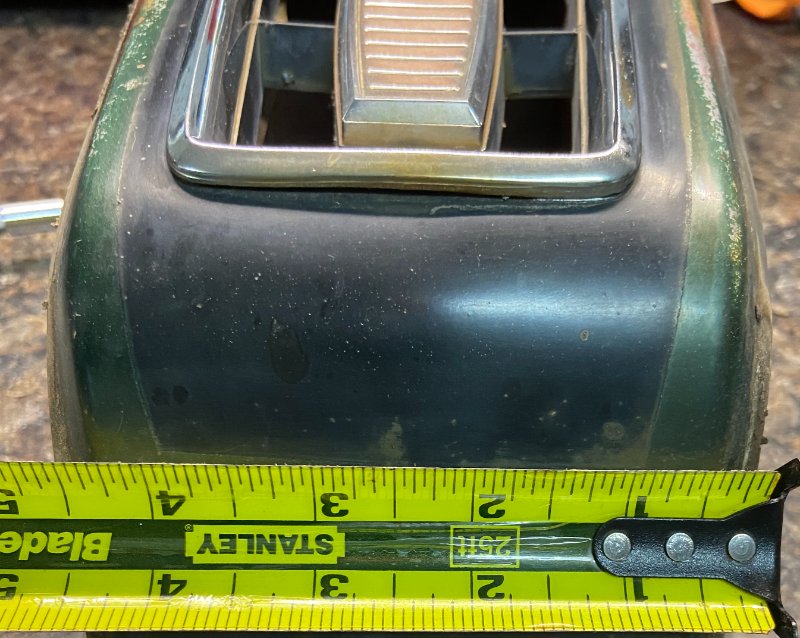
About this same time the body had been completely stripped of every nut, bolt, and screw and installed on a rotisserie to be sent to the media blaster. Before sending the car out we photographed the body and chassis extensively to be able to duplicate the factory finishes and sealant. The factory was not very precise or consistent with their paint work as most of us have probably witnessed in the past. The grill center is a prime example as noted in the photos. We felt that media blasting would be best to give us the true condition of the metal we had to work with as well as the best starting point to build on. The car finished at the media blasting facility and headed off to the body shop.
Now that the garage was cleared out we could start restoring the subassemblies.
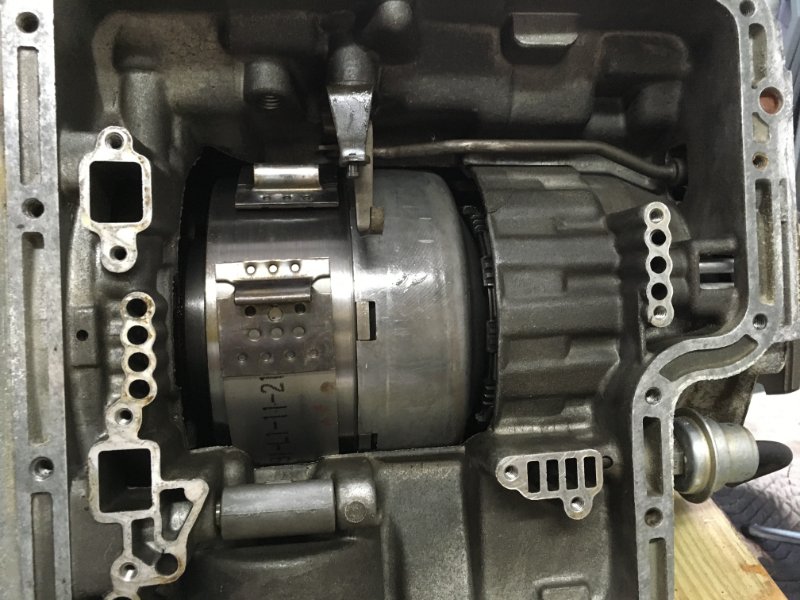
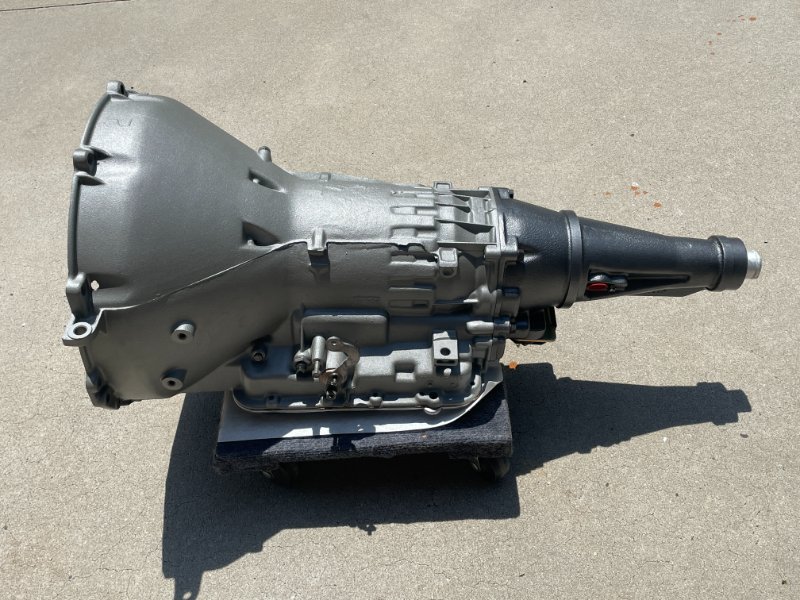
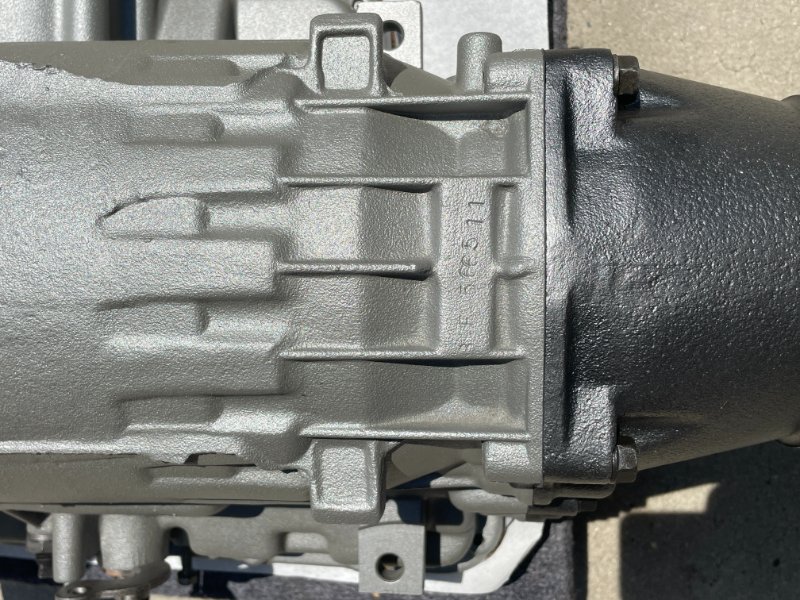
With the body off to the body shop and the engine at the builder I decided to tackle the transmission overhaul. The transmission was the correct VIN stamped transmission and still retained the cast iron tail shaft housing.
Upon removing the transmission pan everything looked bright and clean inside as if it had recently been gone through. The factory service manual does a great job of laying out the step by step disassembly. Digging deeper into the transmission it was evident that it had been recently rebuilt as evidenced by the assembly lube and appeared to be good condition other that a missing reaction plate snap ring on the Reverse/ High clutch. The first run through the gears and it would have come completely apart going into Drive.
The clutch packs were of an unknown manufacturer so I decided to order a complete overhaul kit with seals and clutches. One note, the “R” code transmissions use a unique “R” kickdown band servo, the seals for this servo are not included with the overhaul kit so you will have to source those separately.
If you choose to tackle the transmission yourself again, the service manual lays it all out really well. Some special tools that you will need though will be a transmission spring compressor, dental picks, feeler gauges, transmission assembly lube, a big clean work bench and lots of patience. Two assembly notes that the service manual didn’t mention the rear one-way roller clutch is indexed with an oiling hole, be sure to index it on reinstallation, and do not tap on the governor tubes with a hammer (like the previous builder did) as it crushes the tubes.
I tried to clean the transmission case myself with a variety of chemicals and media however could not get the outside clean enough so I sent it to a local machine shop for cleaning. After soaking the case for close to two days it still looked no cleaner on the outside than it did when I dropped it off. I know that no one would see it but I knew what it looked like and wanted a better solution. I went by to see my local powder coater who is as particular as I am to see what he thought he could do. He had never done a transmission case before but was up to the challenge. We found a couple of powders that were almost dead on for the cast iron and the aluminum, the powder is actually called “Blasted Aluminum”.
While the case was being coated I soaked all of the bolts and external hardware in evapo-rust to get everything fresh for the build.
My powder coater called about a week later, the case was done. The overhaul kit had shown up in the interim so time to put it together.
A couple of considerations when building the transmission if you choose to tackle it yourself. Stack the parts as they come out to assist in reassembly. Be organized and take your time when removing the valvebody valves and springs. Before installing the valve body air pressure test all of the clutch packs and band using low pressure 25-30 psi to ensure no seals were damaged on assembly, it’s easier to tear it back down now. Check your clutch pack clearances to the factory spec in the manual, if they are not correct the top snap ring in each clutch pack comes in different thicknesses to adjust clearance and are readily available through transmission parts suppliers.
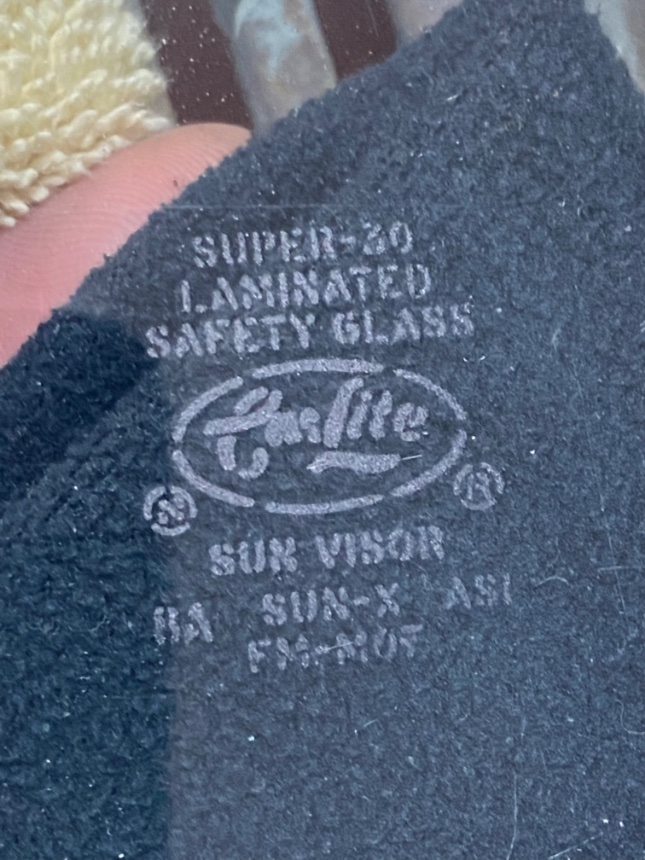
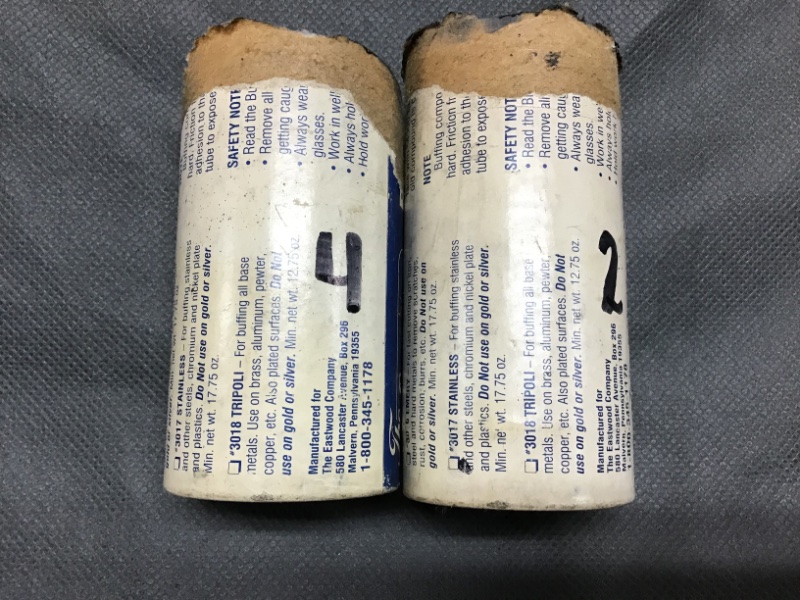
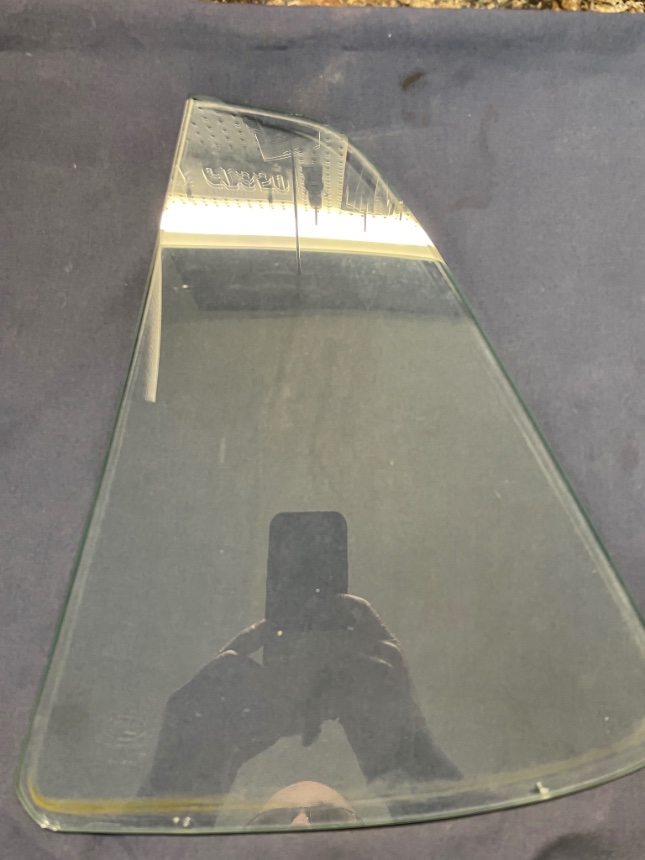
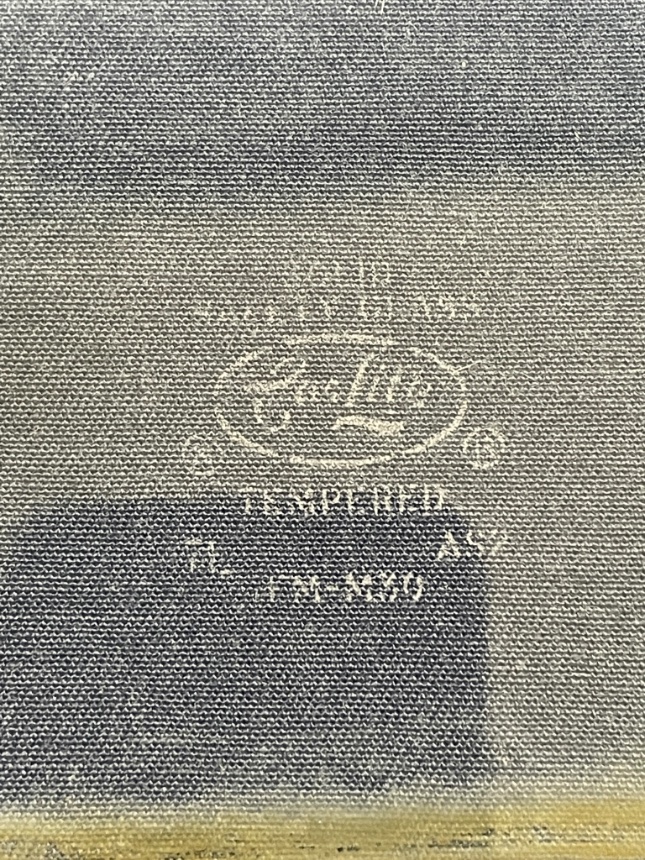
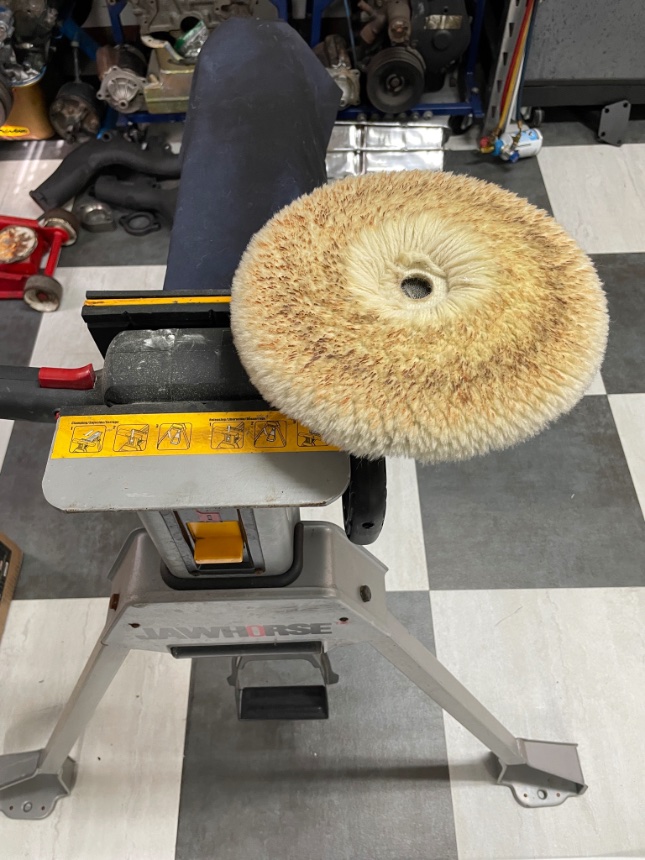
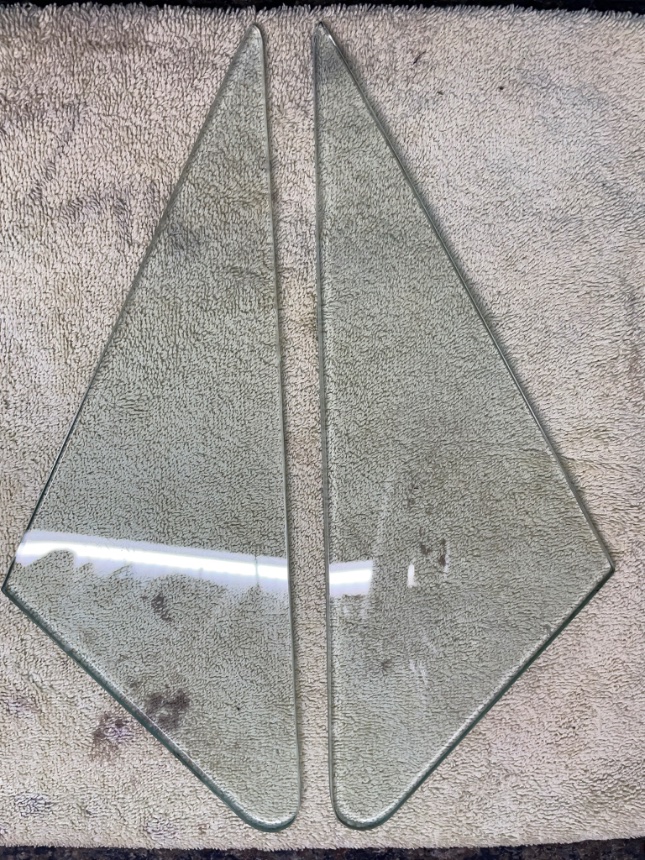
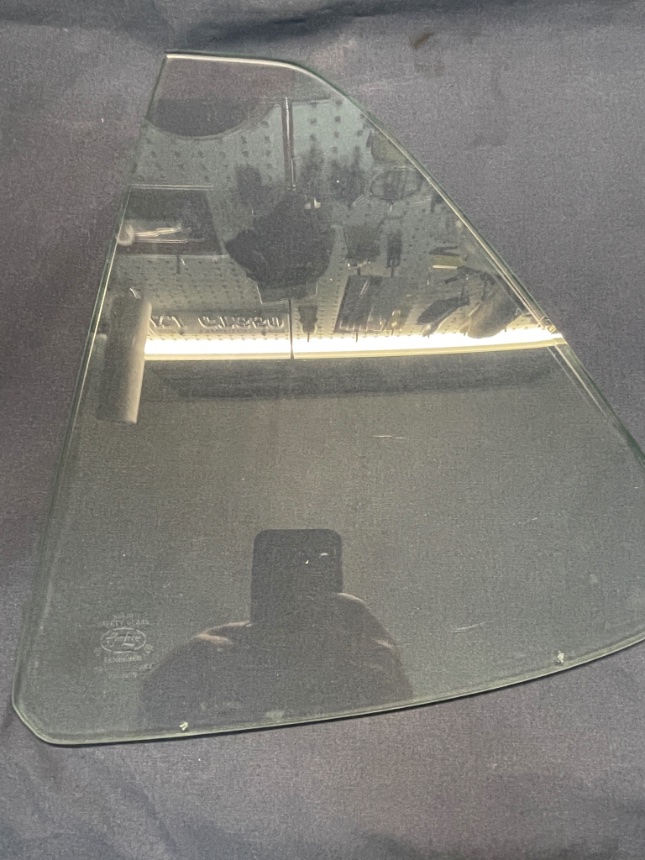
All of the glass in the car was original based on the CarLite etchings and the date codes ranging from 7L to 8B however every piece was heavily water spotted. I have used SOS pads in the past to remove water spotting successfully in the past but it barely touched these spots. I thought I would give it a try with my buffer with some 1000 grit rubbing compound which started making some progress. In the past I have done some trim polishing on these cars using a kit from Eastwood. I applied the “Stainless” compound to the buffer just as I would the polishing wheel and stated buffing… the glass started looking like new again as the spots buffed away. I finished buffing using a “White Rouge”. Buffing the front and rear glass is easiest while still fixed in the car.
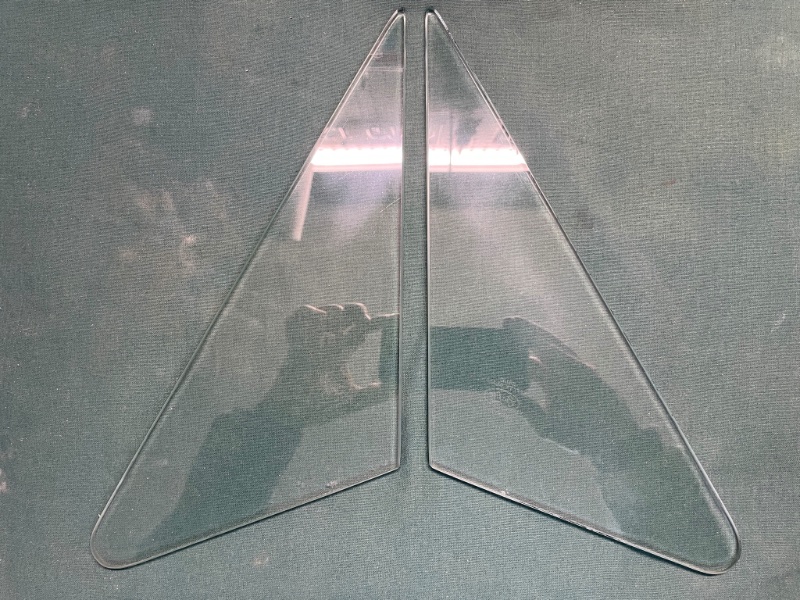
The side glasses would need to be removed from their trim to clean effectively. I was already planning to remove the trim for rechroming as well as replacing the glass tape which holds the glass in the frames and trim was in poor condition. To polish the six side glasses after removing the trim I mounted the buffer in a sawhorse/ vise tool the held the glass to work over the buffer. Fortunately the buffer has a trigger lock once you turn it on. I recommend handling the glass while buffing with heavy leather work gloves in the event an accident occurs.
It’s 1 of 115 GTEs and only 1 of 79 with the 428CJ. It’s a rare bird. If you decide to sell her when done, she’ll bring a pretty penny. Good to see the effort you’re putting into her and time to do it right. Any body shop worth a pooper, would love to be involved in one of these. Not often you get to do a rare vehicle.
I like the idea of rubbing compound on a buffer wheel to clean the glass. I have water spots too and it’s been a pain getting rid of them. Mine is now installed so I can’t use this method but I’m going to try some of the rubbing compound on a micro buffer I have and see it works. I previously had been using wax and walnut hand soap with good success.
Yes, Ricky it is a unique one and well worth the time and effort. The gentleman I have doing the body work has been doing it for over forty years now. His first car was a 69 Mach1 428SCJ so he has an appreciation for these cars, definitively the right guy!
Diesel, the compound works great by hand as well just a lot more of a workout. I have found some small buffing heads that attach to a drill through Harbor Freight that may work for glass already installed. I’ll have to check out the walnut soap, thanks for the info.
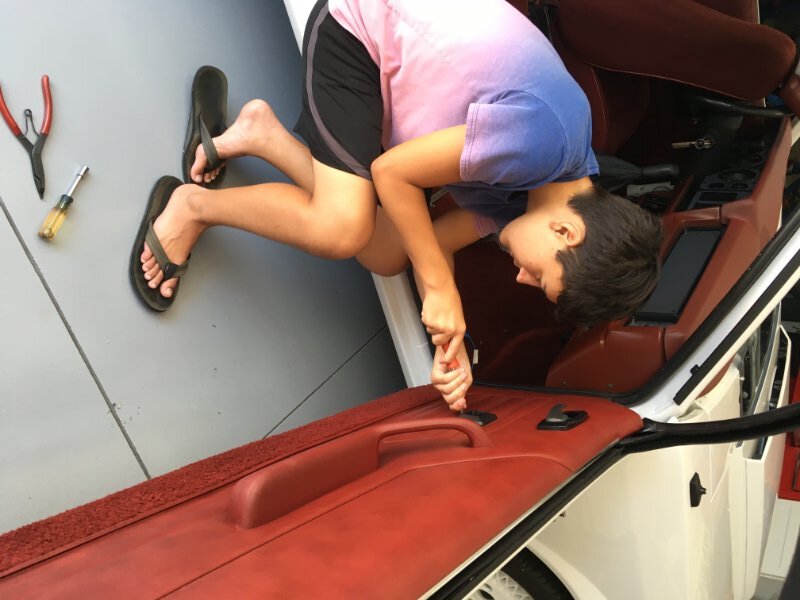
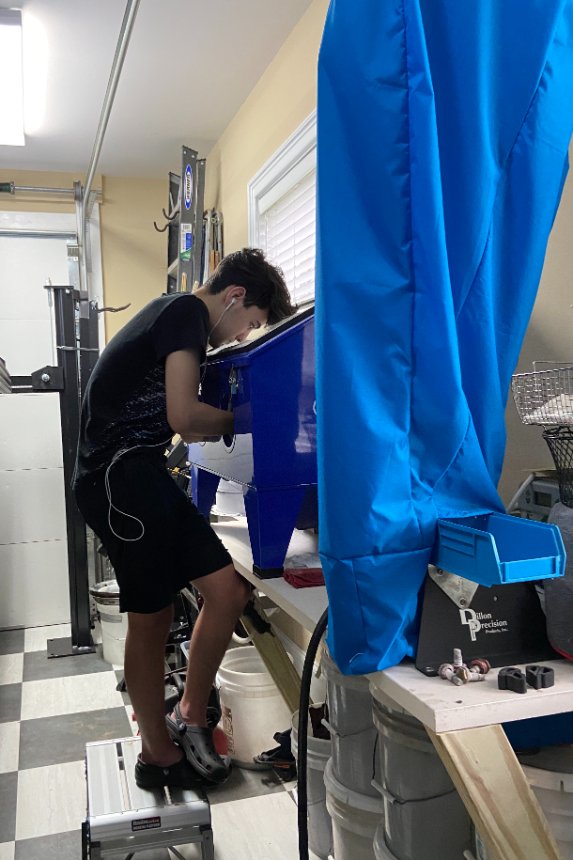
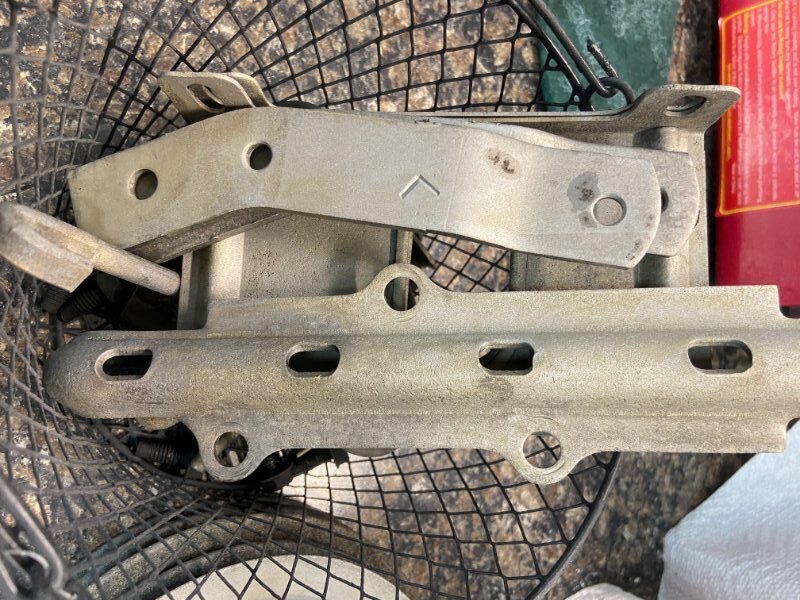
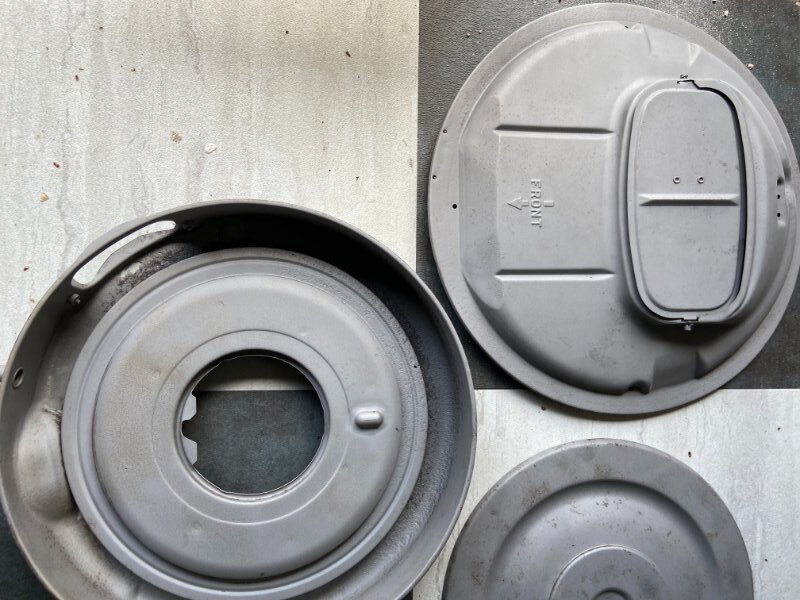
My son has decided to help out with the chore of glass beading most of the components prior to powdercoating. Put on some good tunes to drown out the compressor and vacuum and go to town. He has a great eye for detail and has been pretty excited about the car as well. He and I restored the Mustang I drove in High School a couple of years ago which will be his someday.
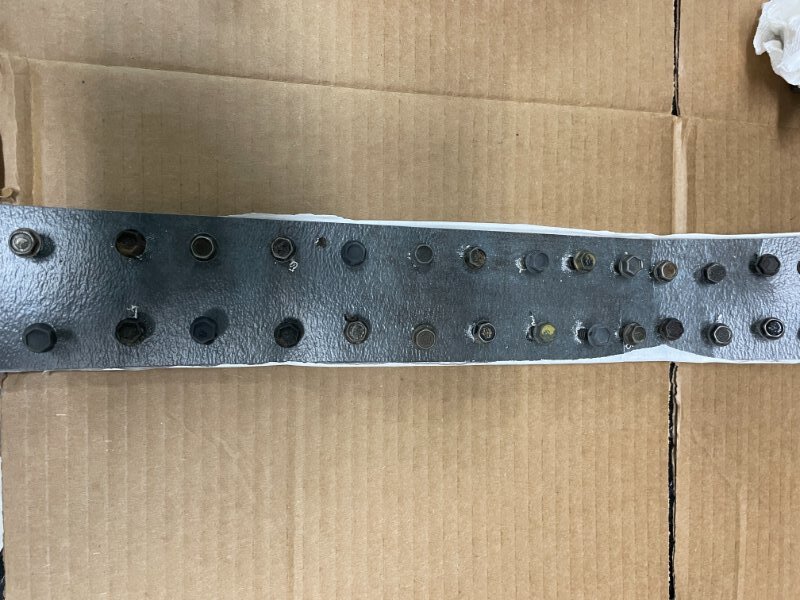
While in the process of glassbeading we have tried to save as much original hardware as possible. After doing some research on the phosphate/ oil process we decided to give it a shot. Preparation and patience are key as with most items to get great results and it doesn’t hurt to have a few test pieces to get comfortable on. The hardware has to be freshly blasted and clean prior to treatment for the best results. Small screws are extremely difficult to blast so I used a trick that my body man uses to paint bolts by punching holes in cardboard to use as a holding fixture. The cardboard doesn’t last long glassbeading so I did the same with a piece of stick down floor tile leftover from a project.
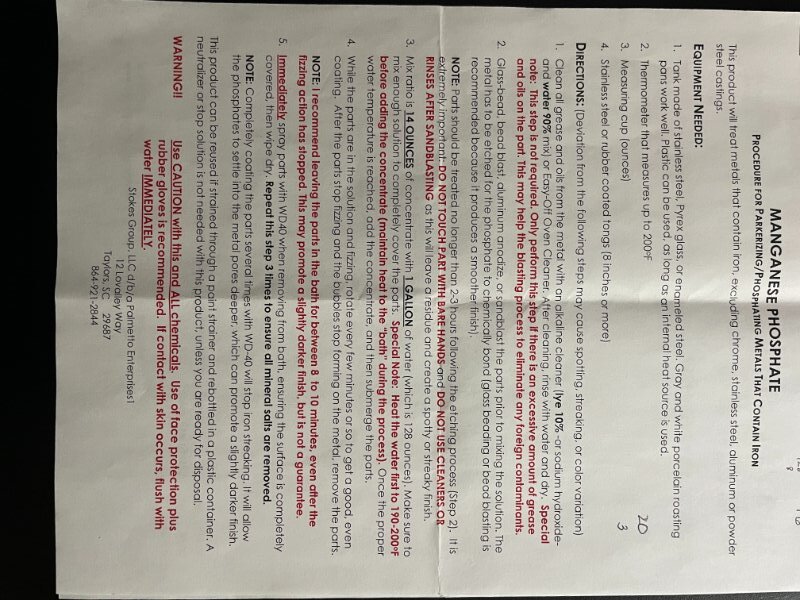
The product you will use is called Manganese Phosphate and is available at Palmetto Enterprises https://www.palmettoenterprisesparkerizing.com/ . Scott does a great job of laying out the instructions for great results.
You’ll need:
A gas grill or Turkey Fryer
I recommend two stainless pots
Stainless grill tongs and a strong magnet helps
Thermometer for up to 200 degrees
Measuring cup
WD-40 and a tray to oil the parts afterwards.
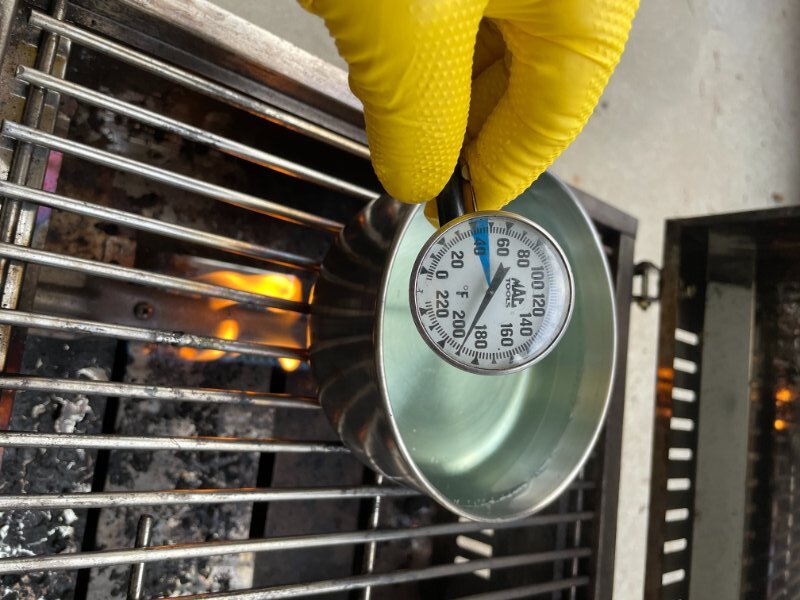
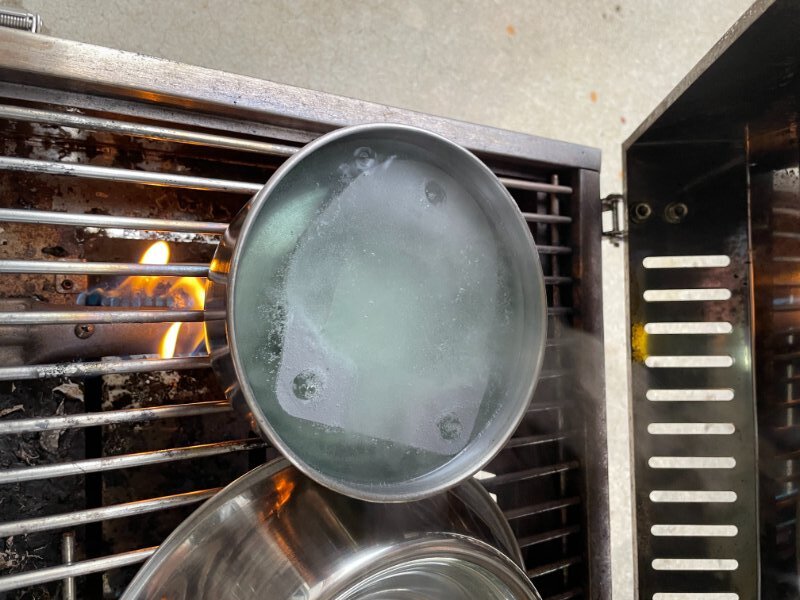
The process starts by heating a measured quantity of water to 190-200 degrees then adding the appropriate amount of Manganese Phosphate. The water has to remain constantly in that temperature range so take time to ensure the grill or fryer setting is just right to maintain the temperature before adding the chemical.
I recommend having a second stainless pot with water heating on the grill for three reasons; first you have to have a clean water rinse before drying and oiling, by rinsing with hot water you can leave some of the treated items in the water as you are blow drying others (the oil seems to take better to warmer parts), finally you will have a lot of evaporation in the chemical pot this way addition water is already at temperature to add to the chemical solution as needed avoiding wait times. Yes, the second one is a dog dish, i couldn’t find mine the day I was treating bolts so I borrowed the pups. She got a fresh new one later that day!