1970 Cougar Passenger Side Sport Mirror Install / Riv-Nut Installation / Riv-Nut Tool Use
I understand that WCCC has a '67/'68 Side Mirror Install that they are finishing up, but I figured that would be different enough from a '69/'70 to warrant a seperate thread.
*Note: all the dings and scratched paint in the pictures was there before I started, as far as you know
Tools & Parts Needed
riv-nut install kit (WCCC Item#: 422298)
replacement riv-nut kit (WCCC Item#: 5370)
5/32 Allen or hex key
3/8 inch wrench
7/16 inch wrench
lubricating oil (put one drop between the washers and nuts on the install tool)
Paper towel or cloth (to protect paint from the tools during work)
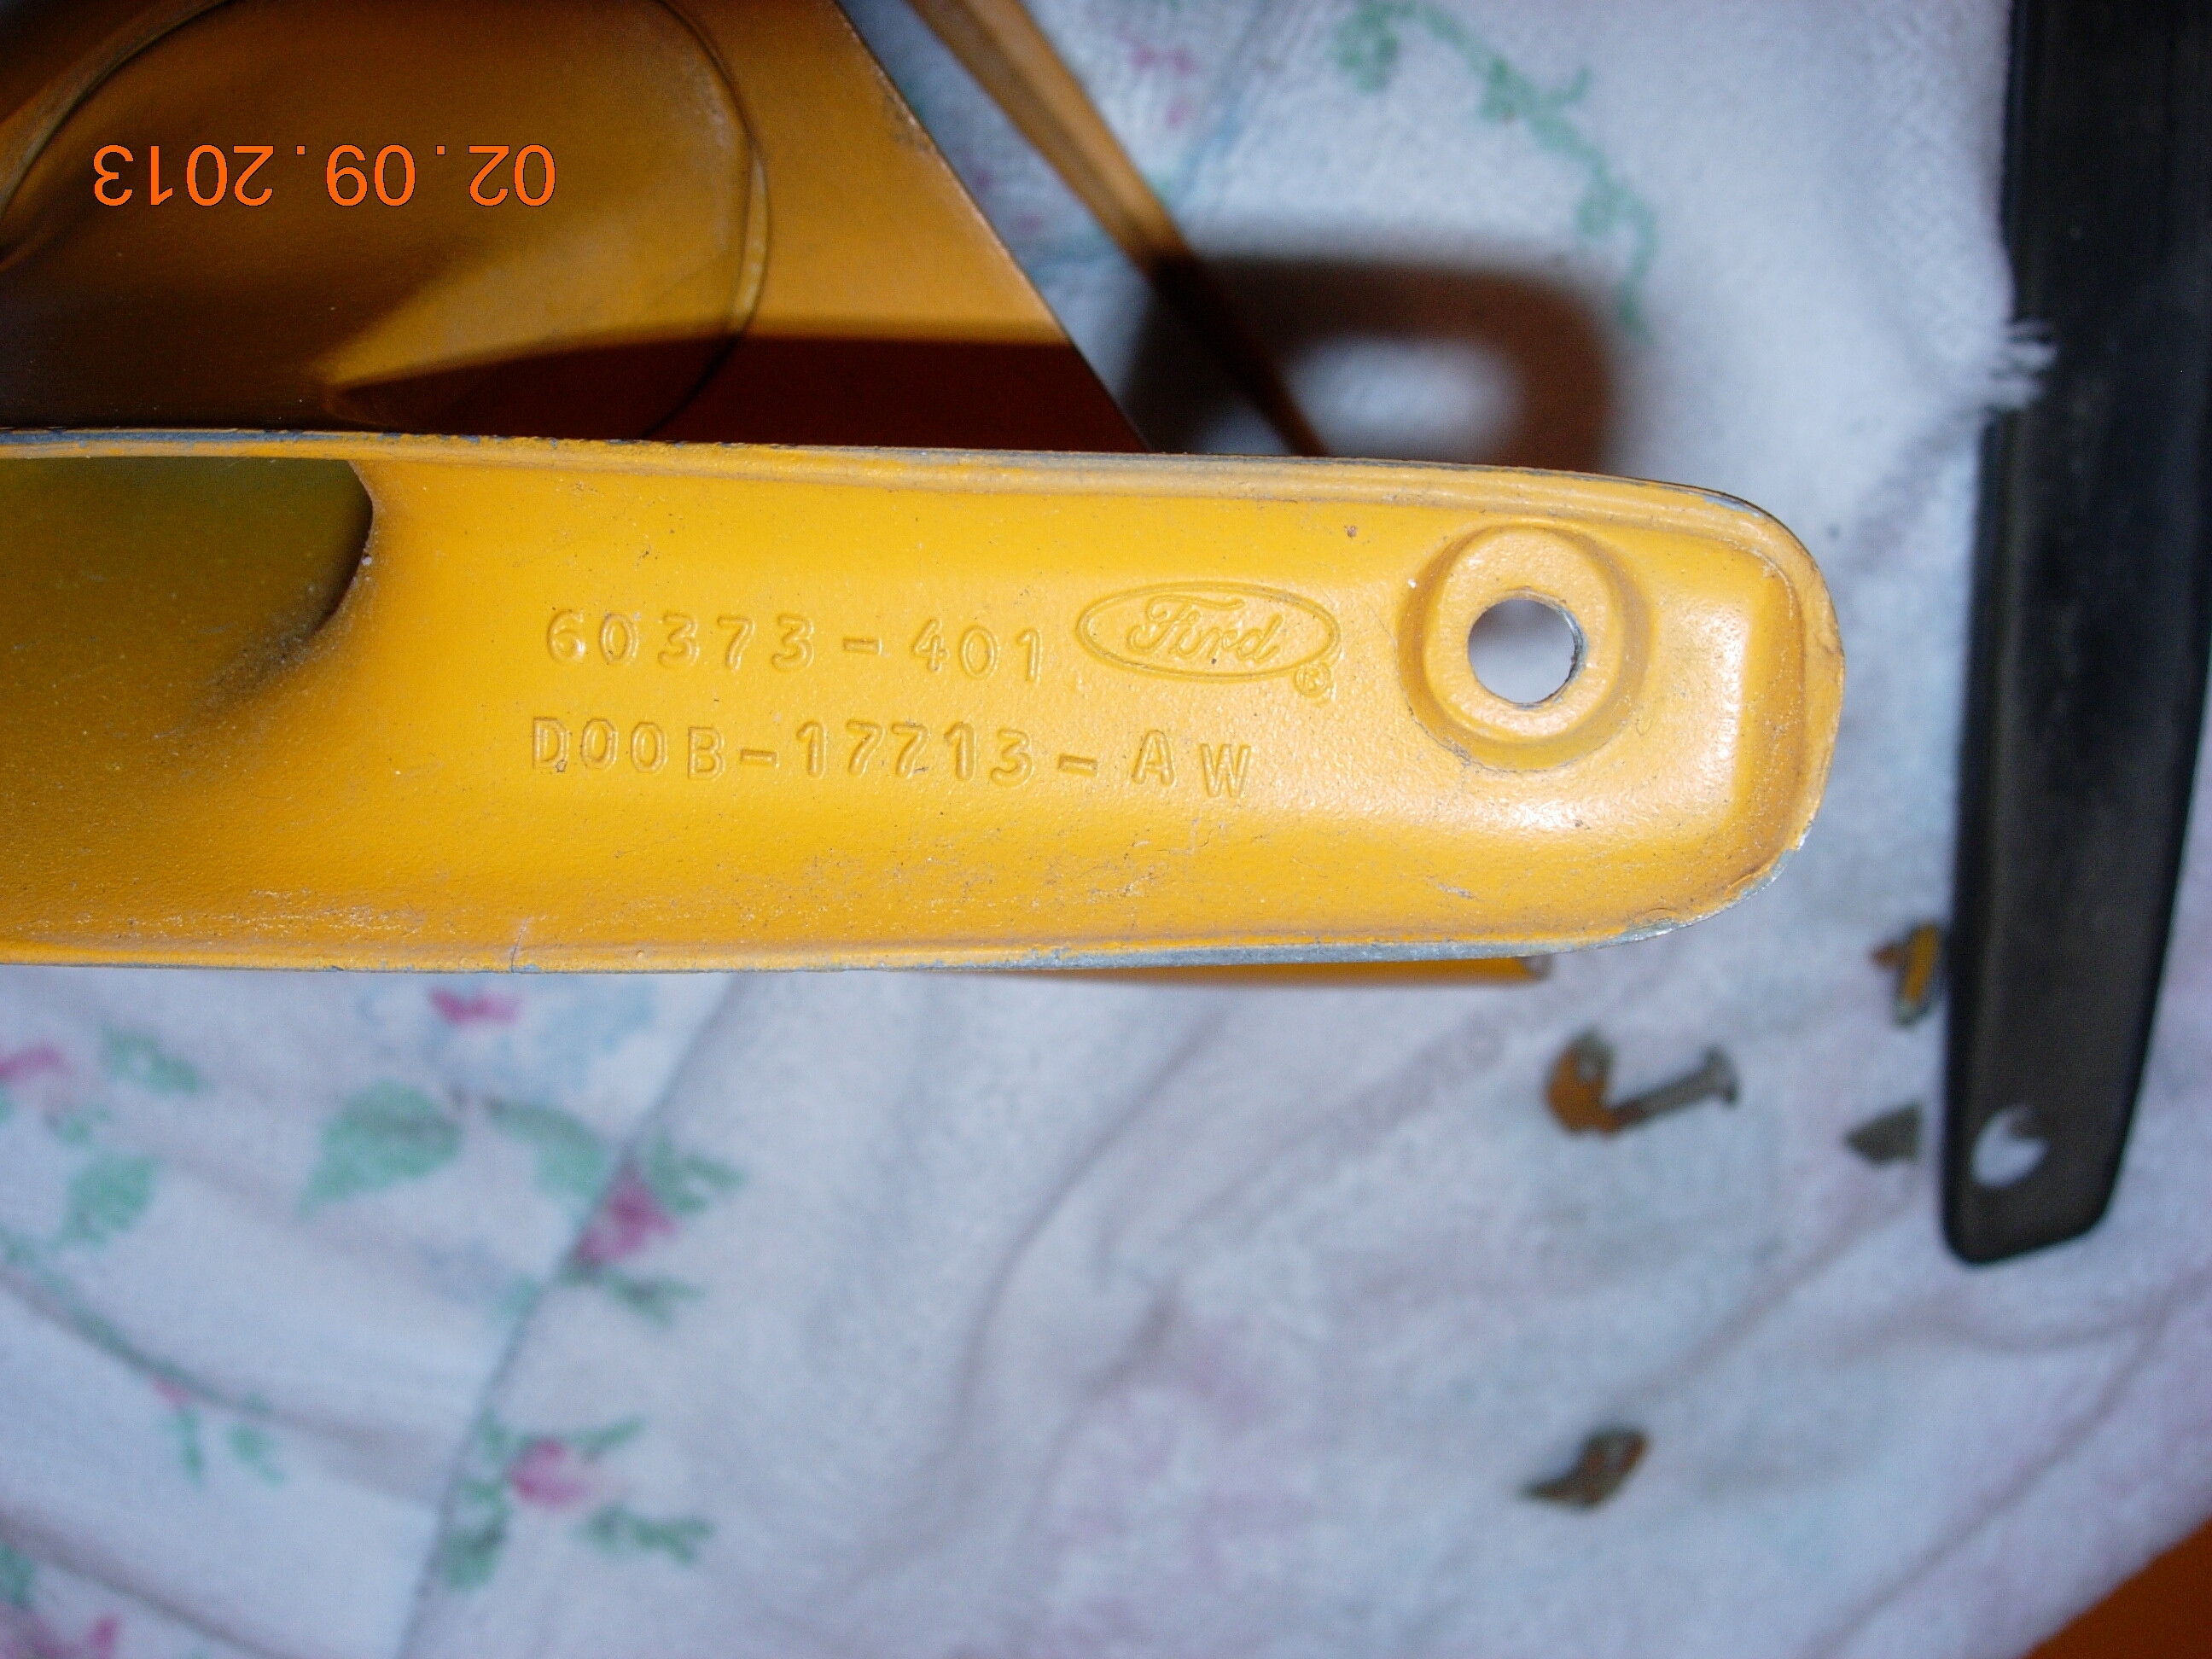
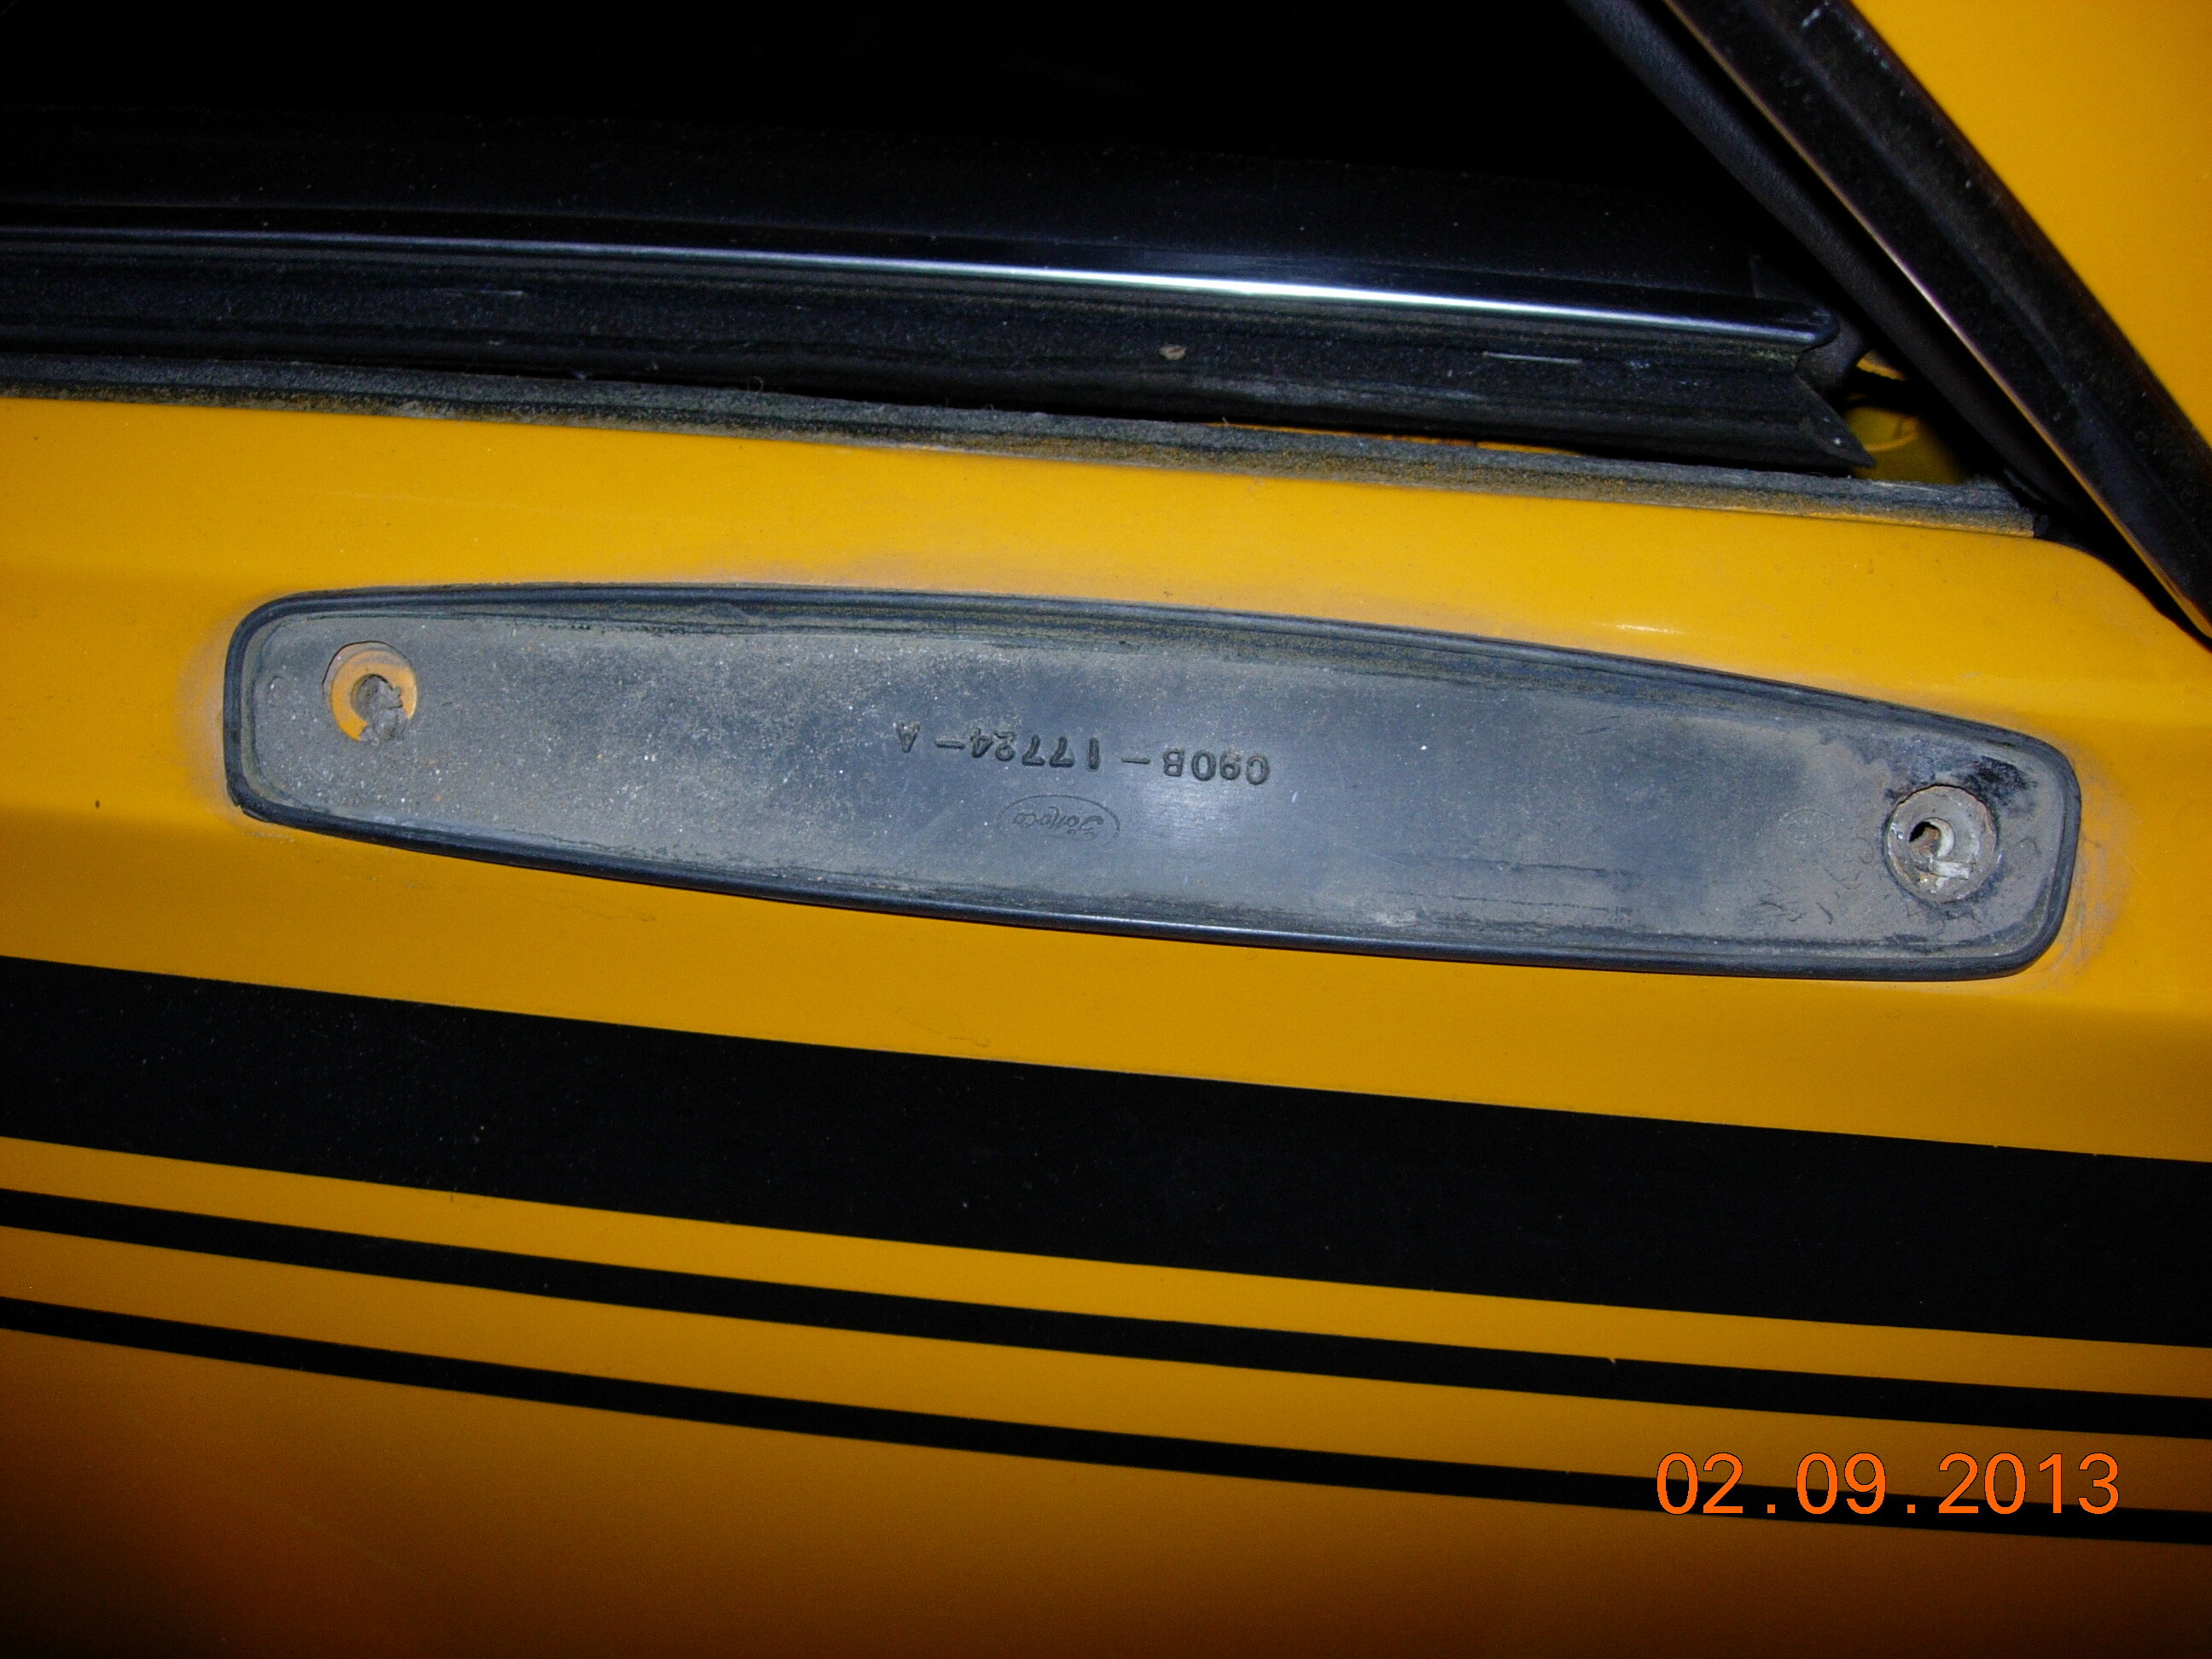
1970 Cougar passenger-side sport mirror base (Part Number: D0OB-17713-AW)
Mirror base gasket (Part Number: C9OB-17724-A)
*If you need to drill the holes in your door skin you will also need the following;
drill
1/4" drill bit
a center punch (to dimple the drill location so the bit does not walk)
Measurements
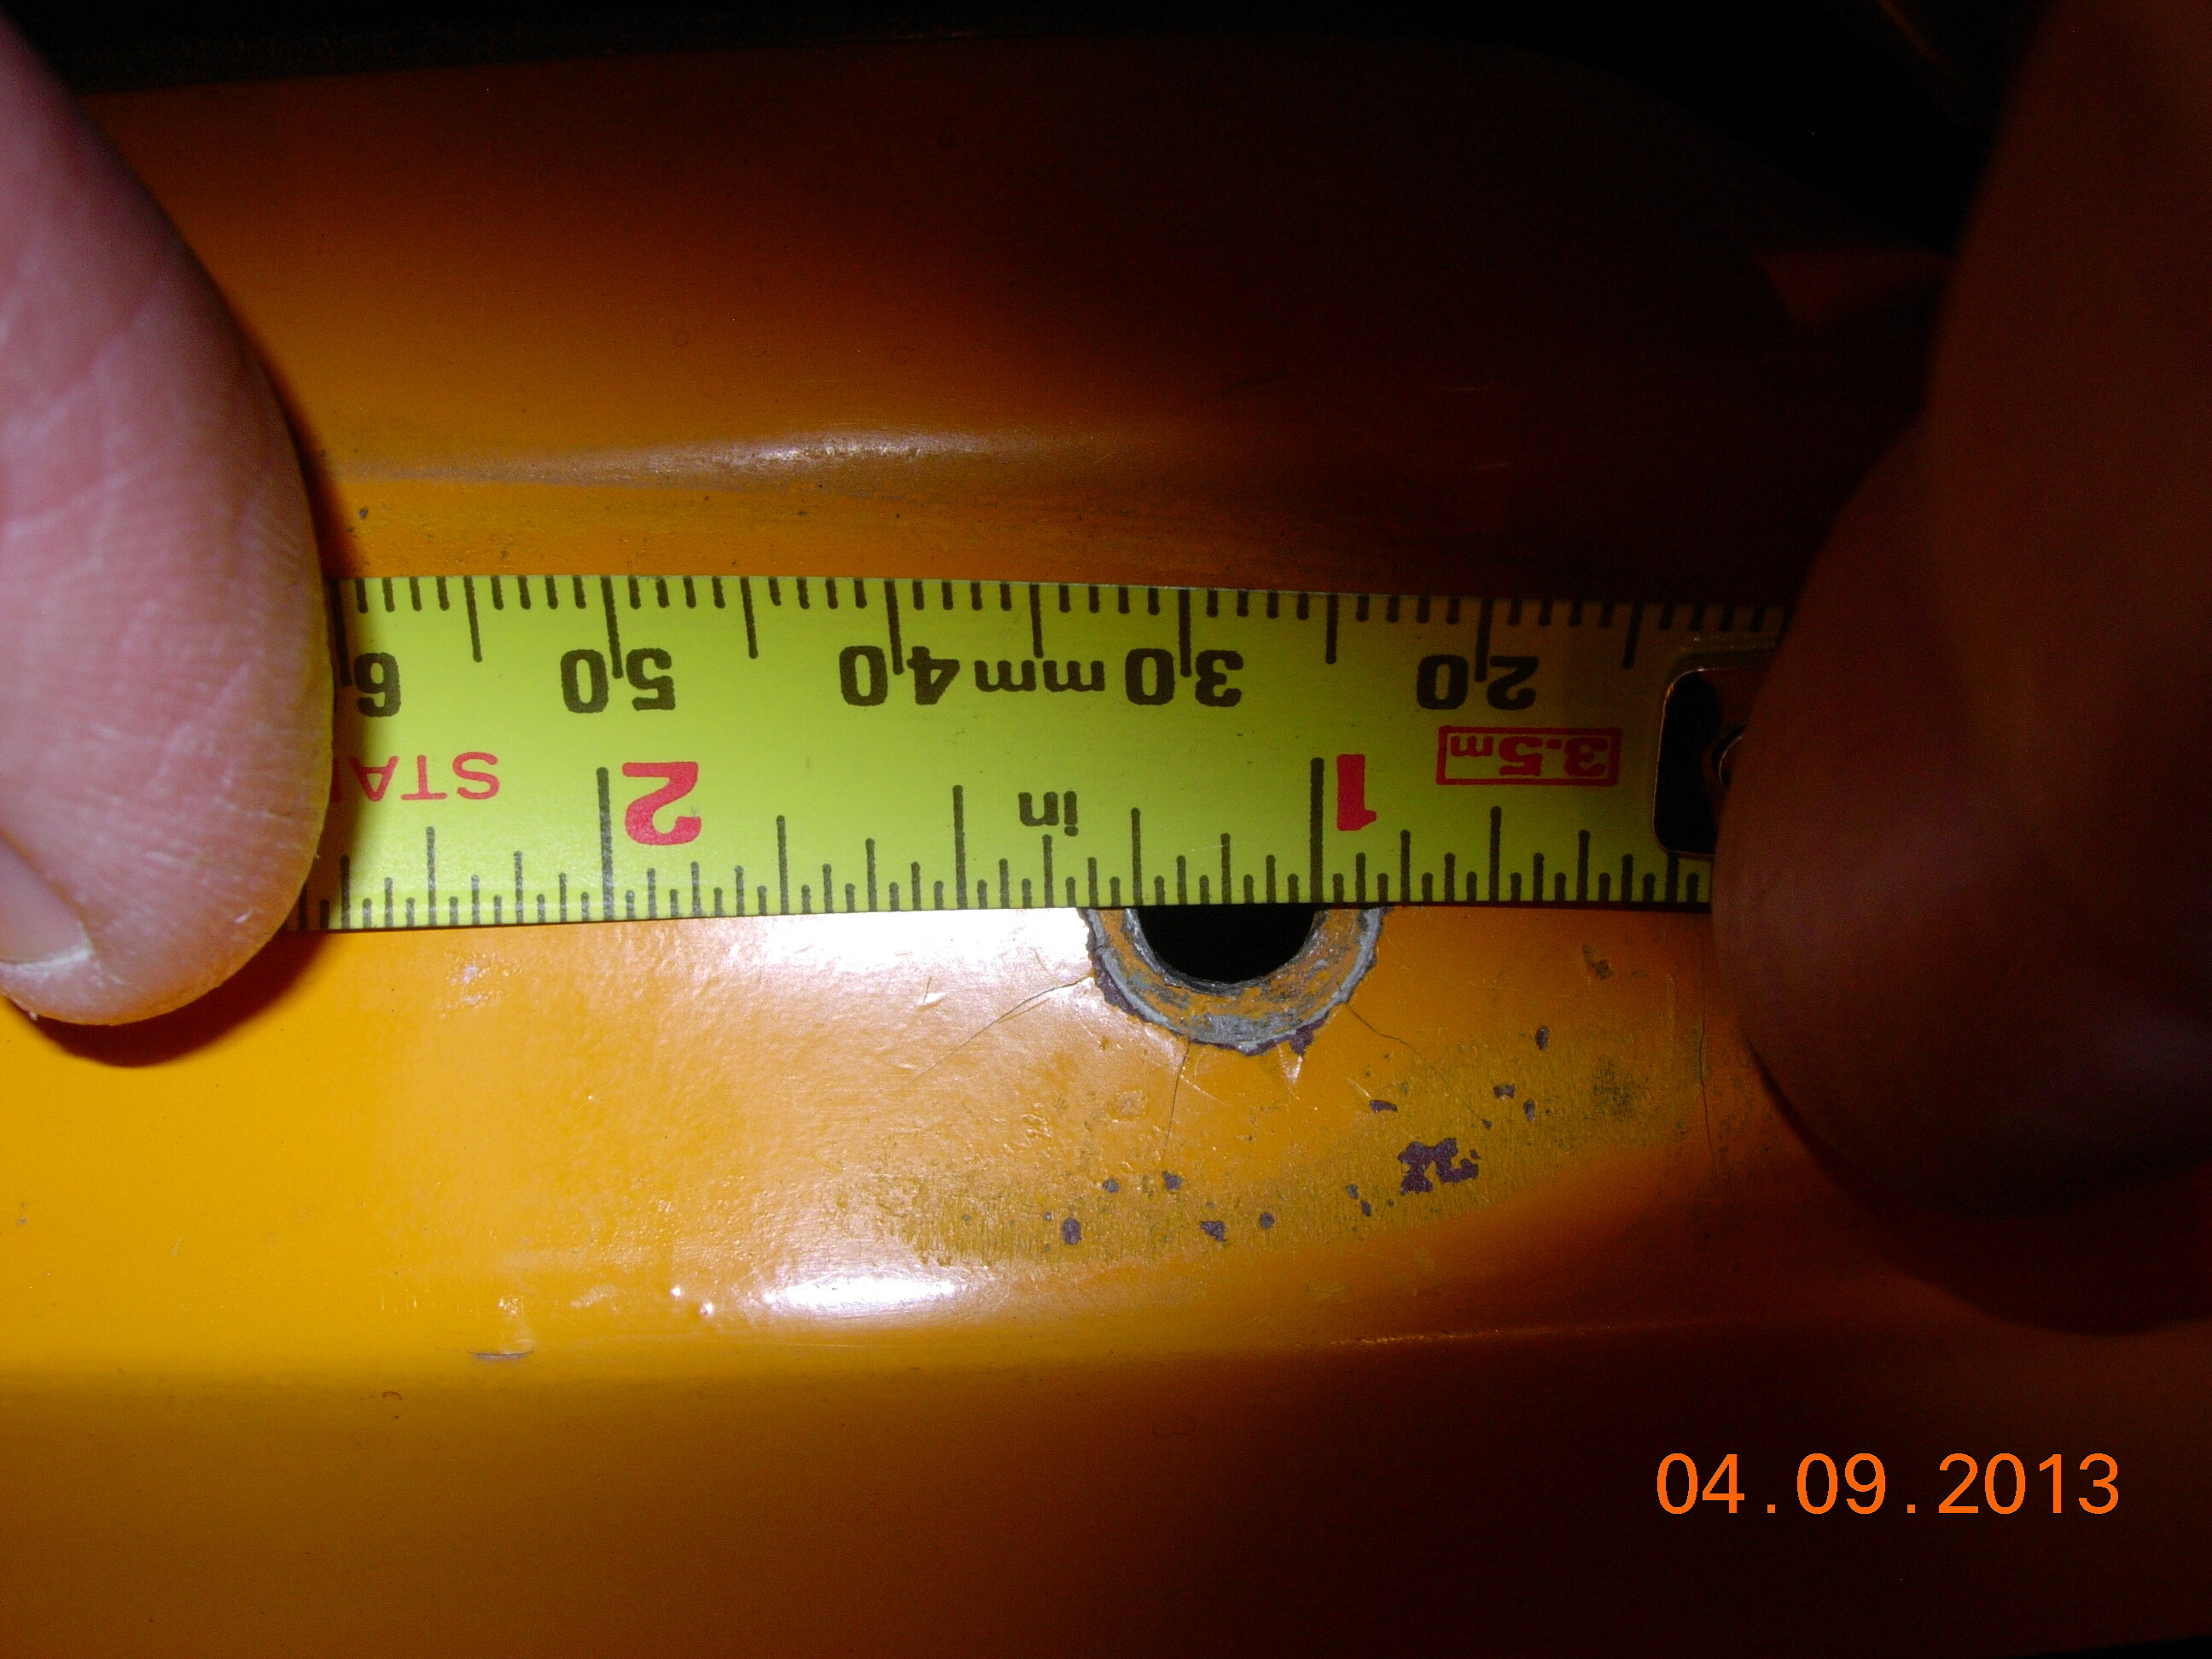
I found it very difficult to measure the location of the holes using the front edge of the door as reference, due to all the curves in the front edge of the door. It was much easier to hook the tape measure to the BACK edge of the door (it is fairly straight there) and lay the tape down along the groove in the top of the door.
*Math says: 36 1/32" (back hole center) + 6 11/16" (center-to-center) = 42 23/32 (very close to 42 3/4" front hole measurement).
If you need to drill holes, start here:
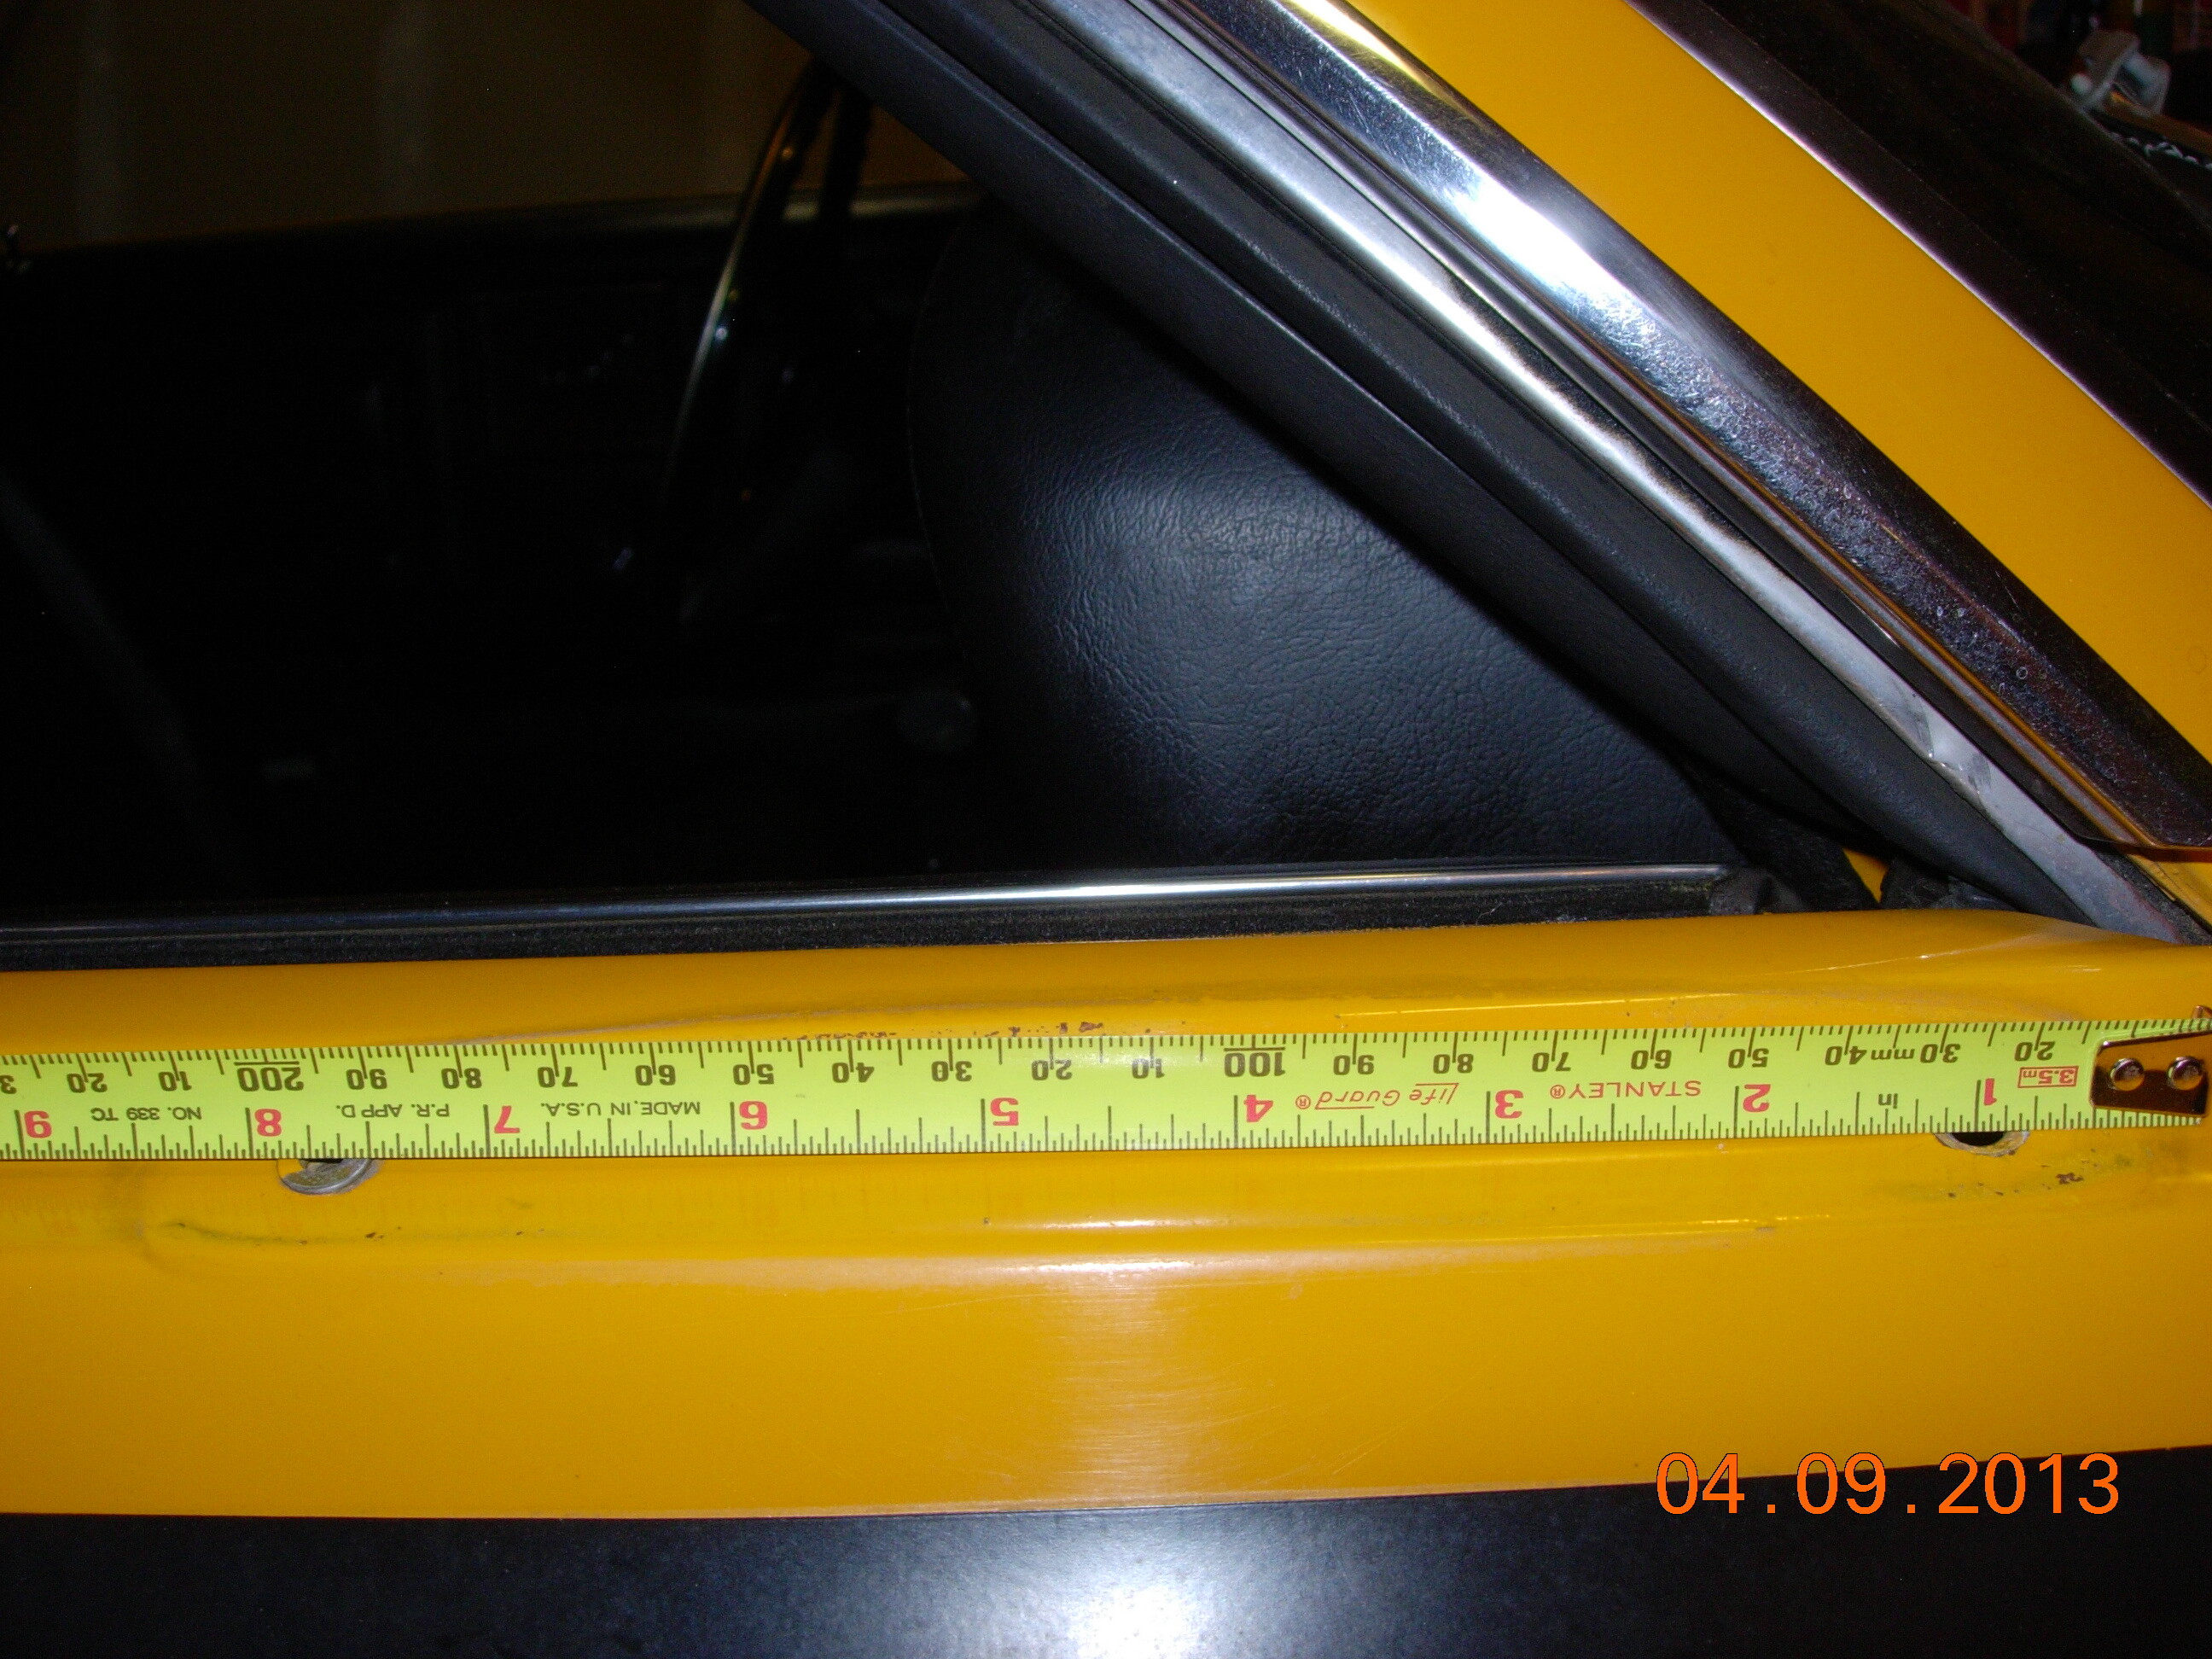
You will want to measure carefully and mark your door panel using the measurements shown above.
Before drilling, place the mirror base in place over your marks to verify space between the holes as well as placement on the door.
After you have confirmed the placement of your mirror, you may wish to use a center punch to score the location for the holes. This will help prevent the drill bit walking across the rest of your paint.
You may also wish to drill a smaller pilot hole.
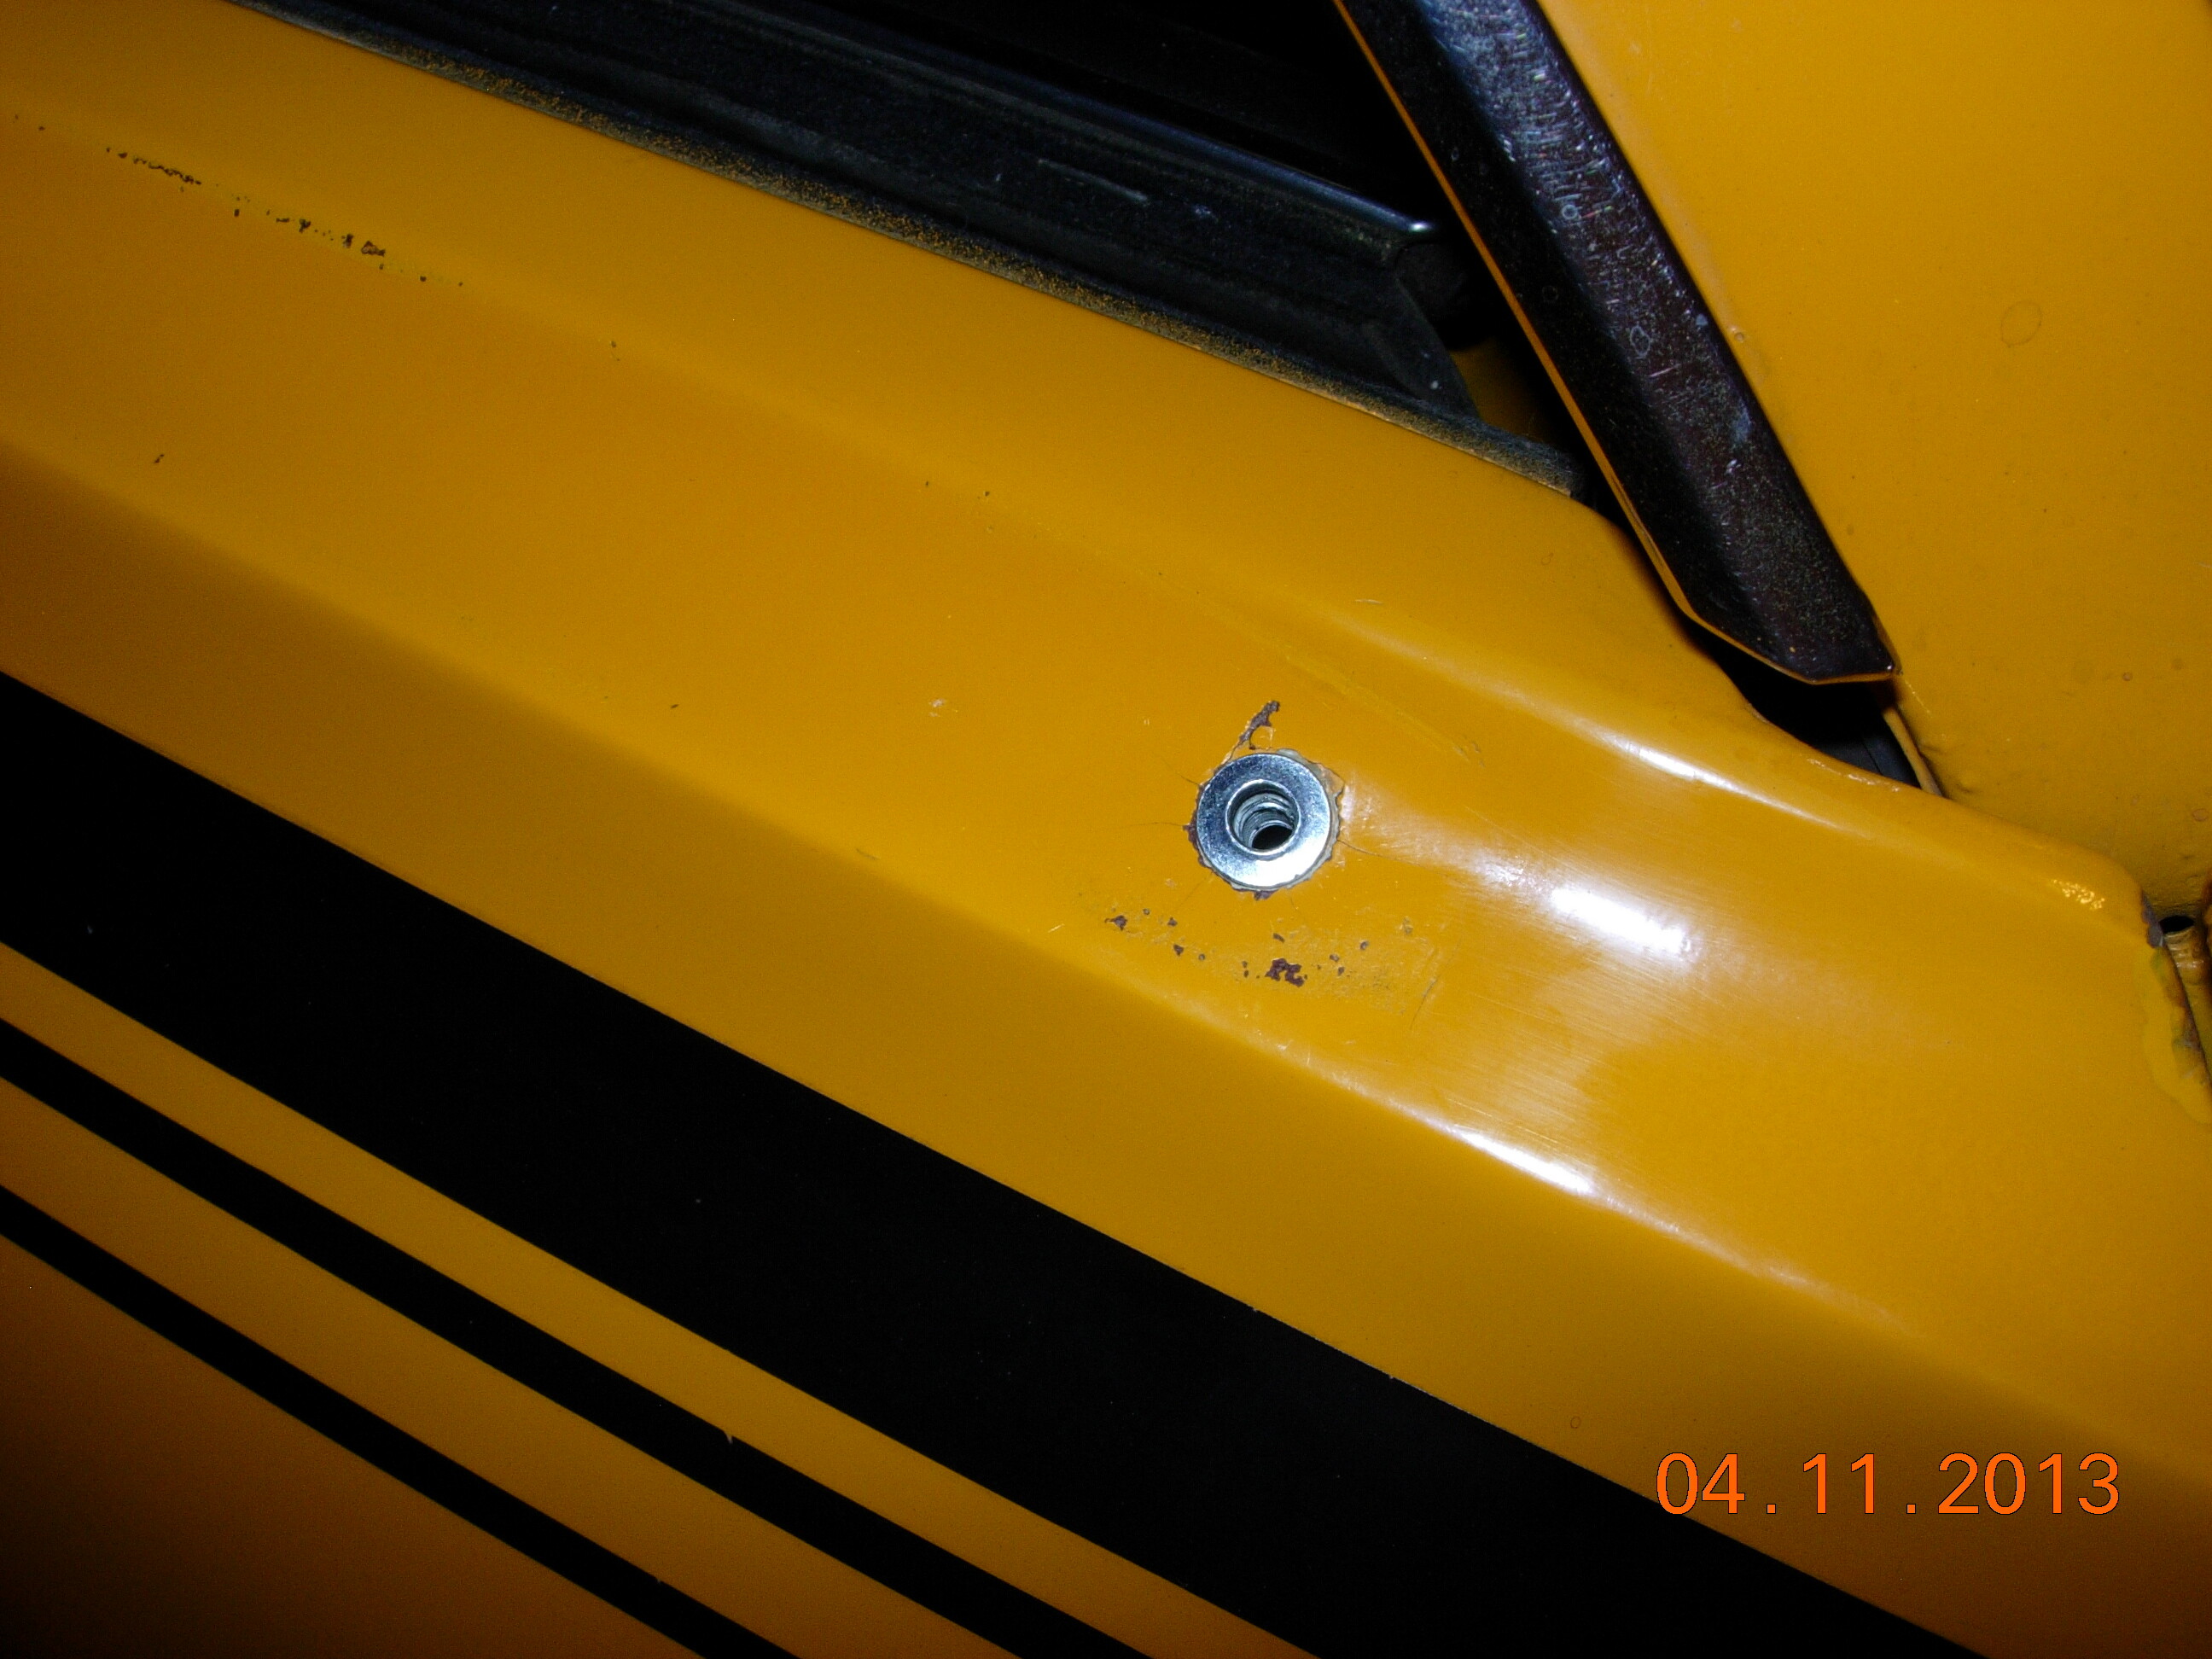
Drill the two 1/4" holes for your passenger side sport mirror.
If you have existing holes, or just drilled your holes, follow these steps for rivnut installation:
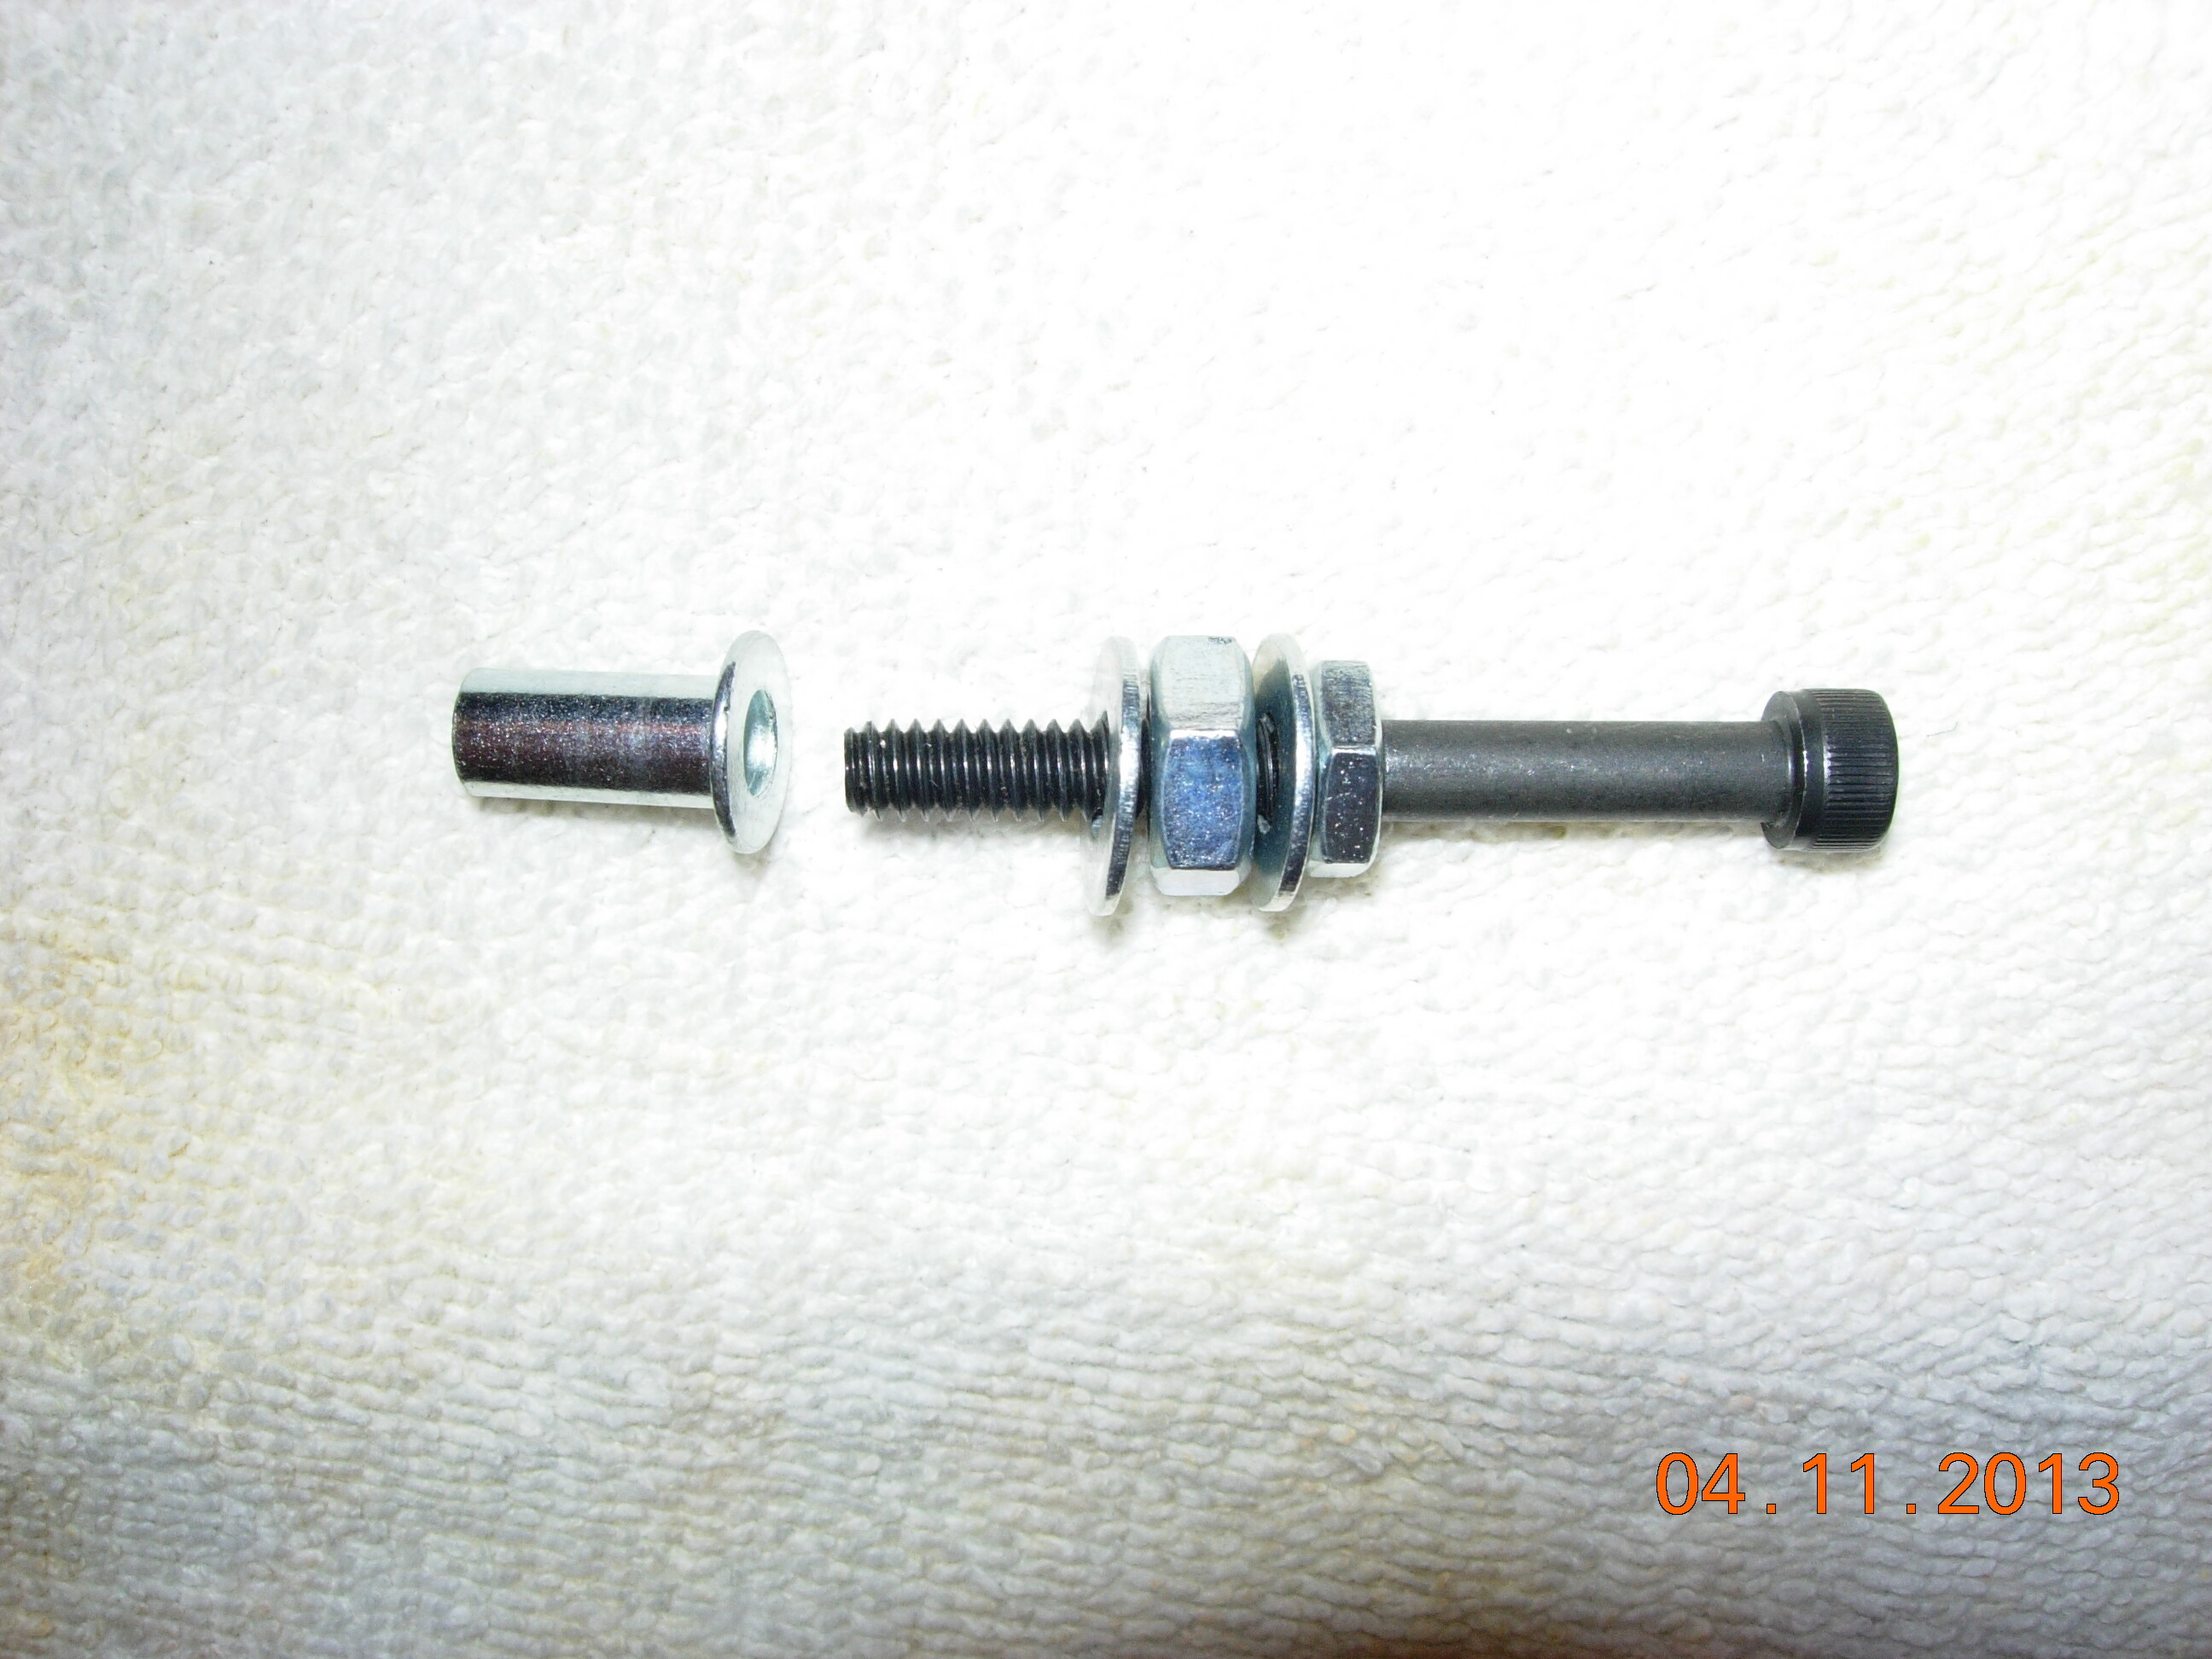
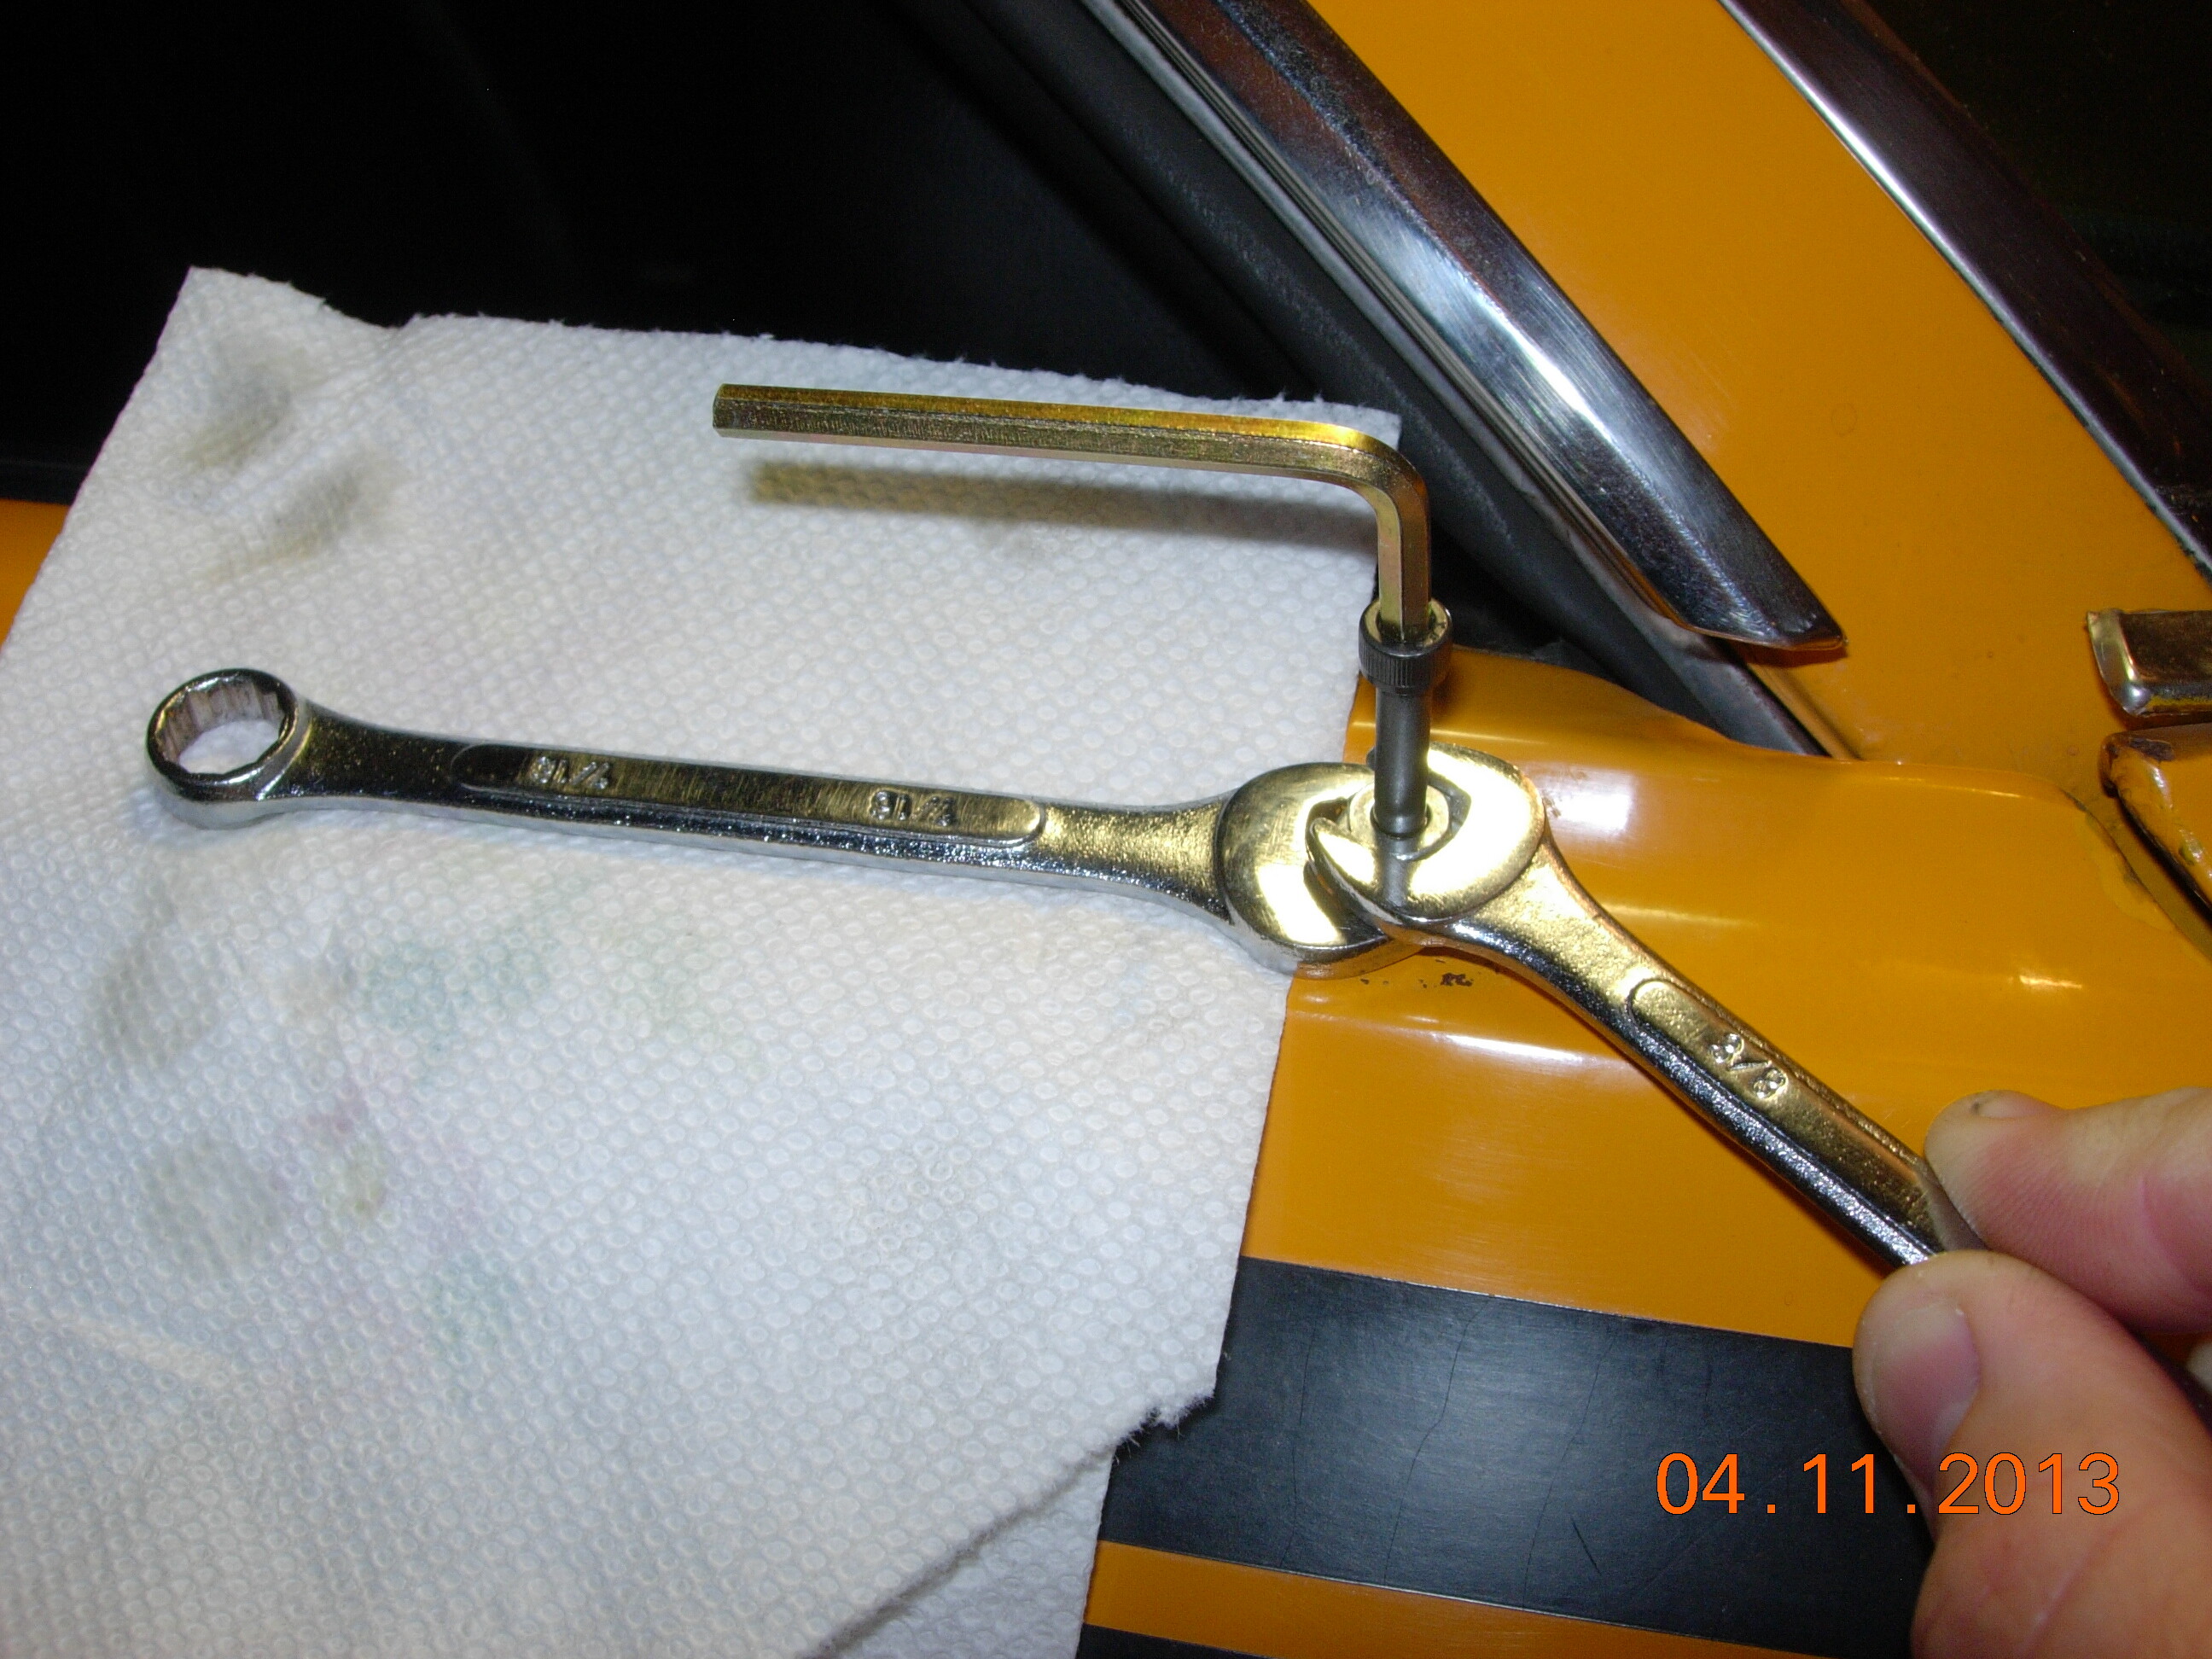
Assemble the riv-nut tool as shown in the picture, adding one drop of oil to the nuts and washers (the tool should be assembled 3/8" nut installed first, then a washer, then 7/16" nut, then washer, and last the riv-nut).
Put the 3/8" nut finger tight all the way down on the bolt, then tighten the riv-nut onto the bolt. The end of the bolt should be right at the end of the bottom of the riv nut.
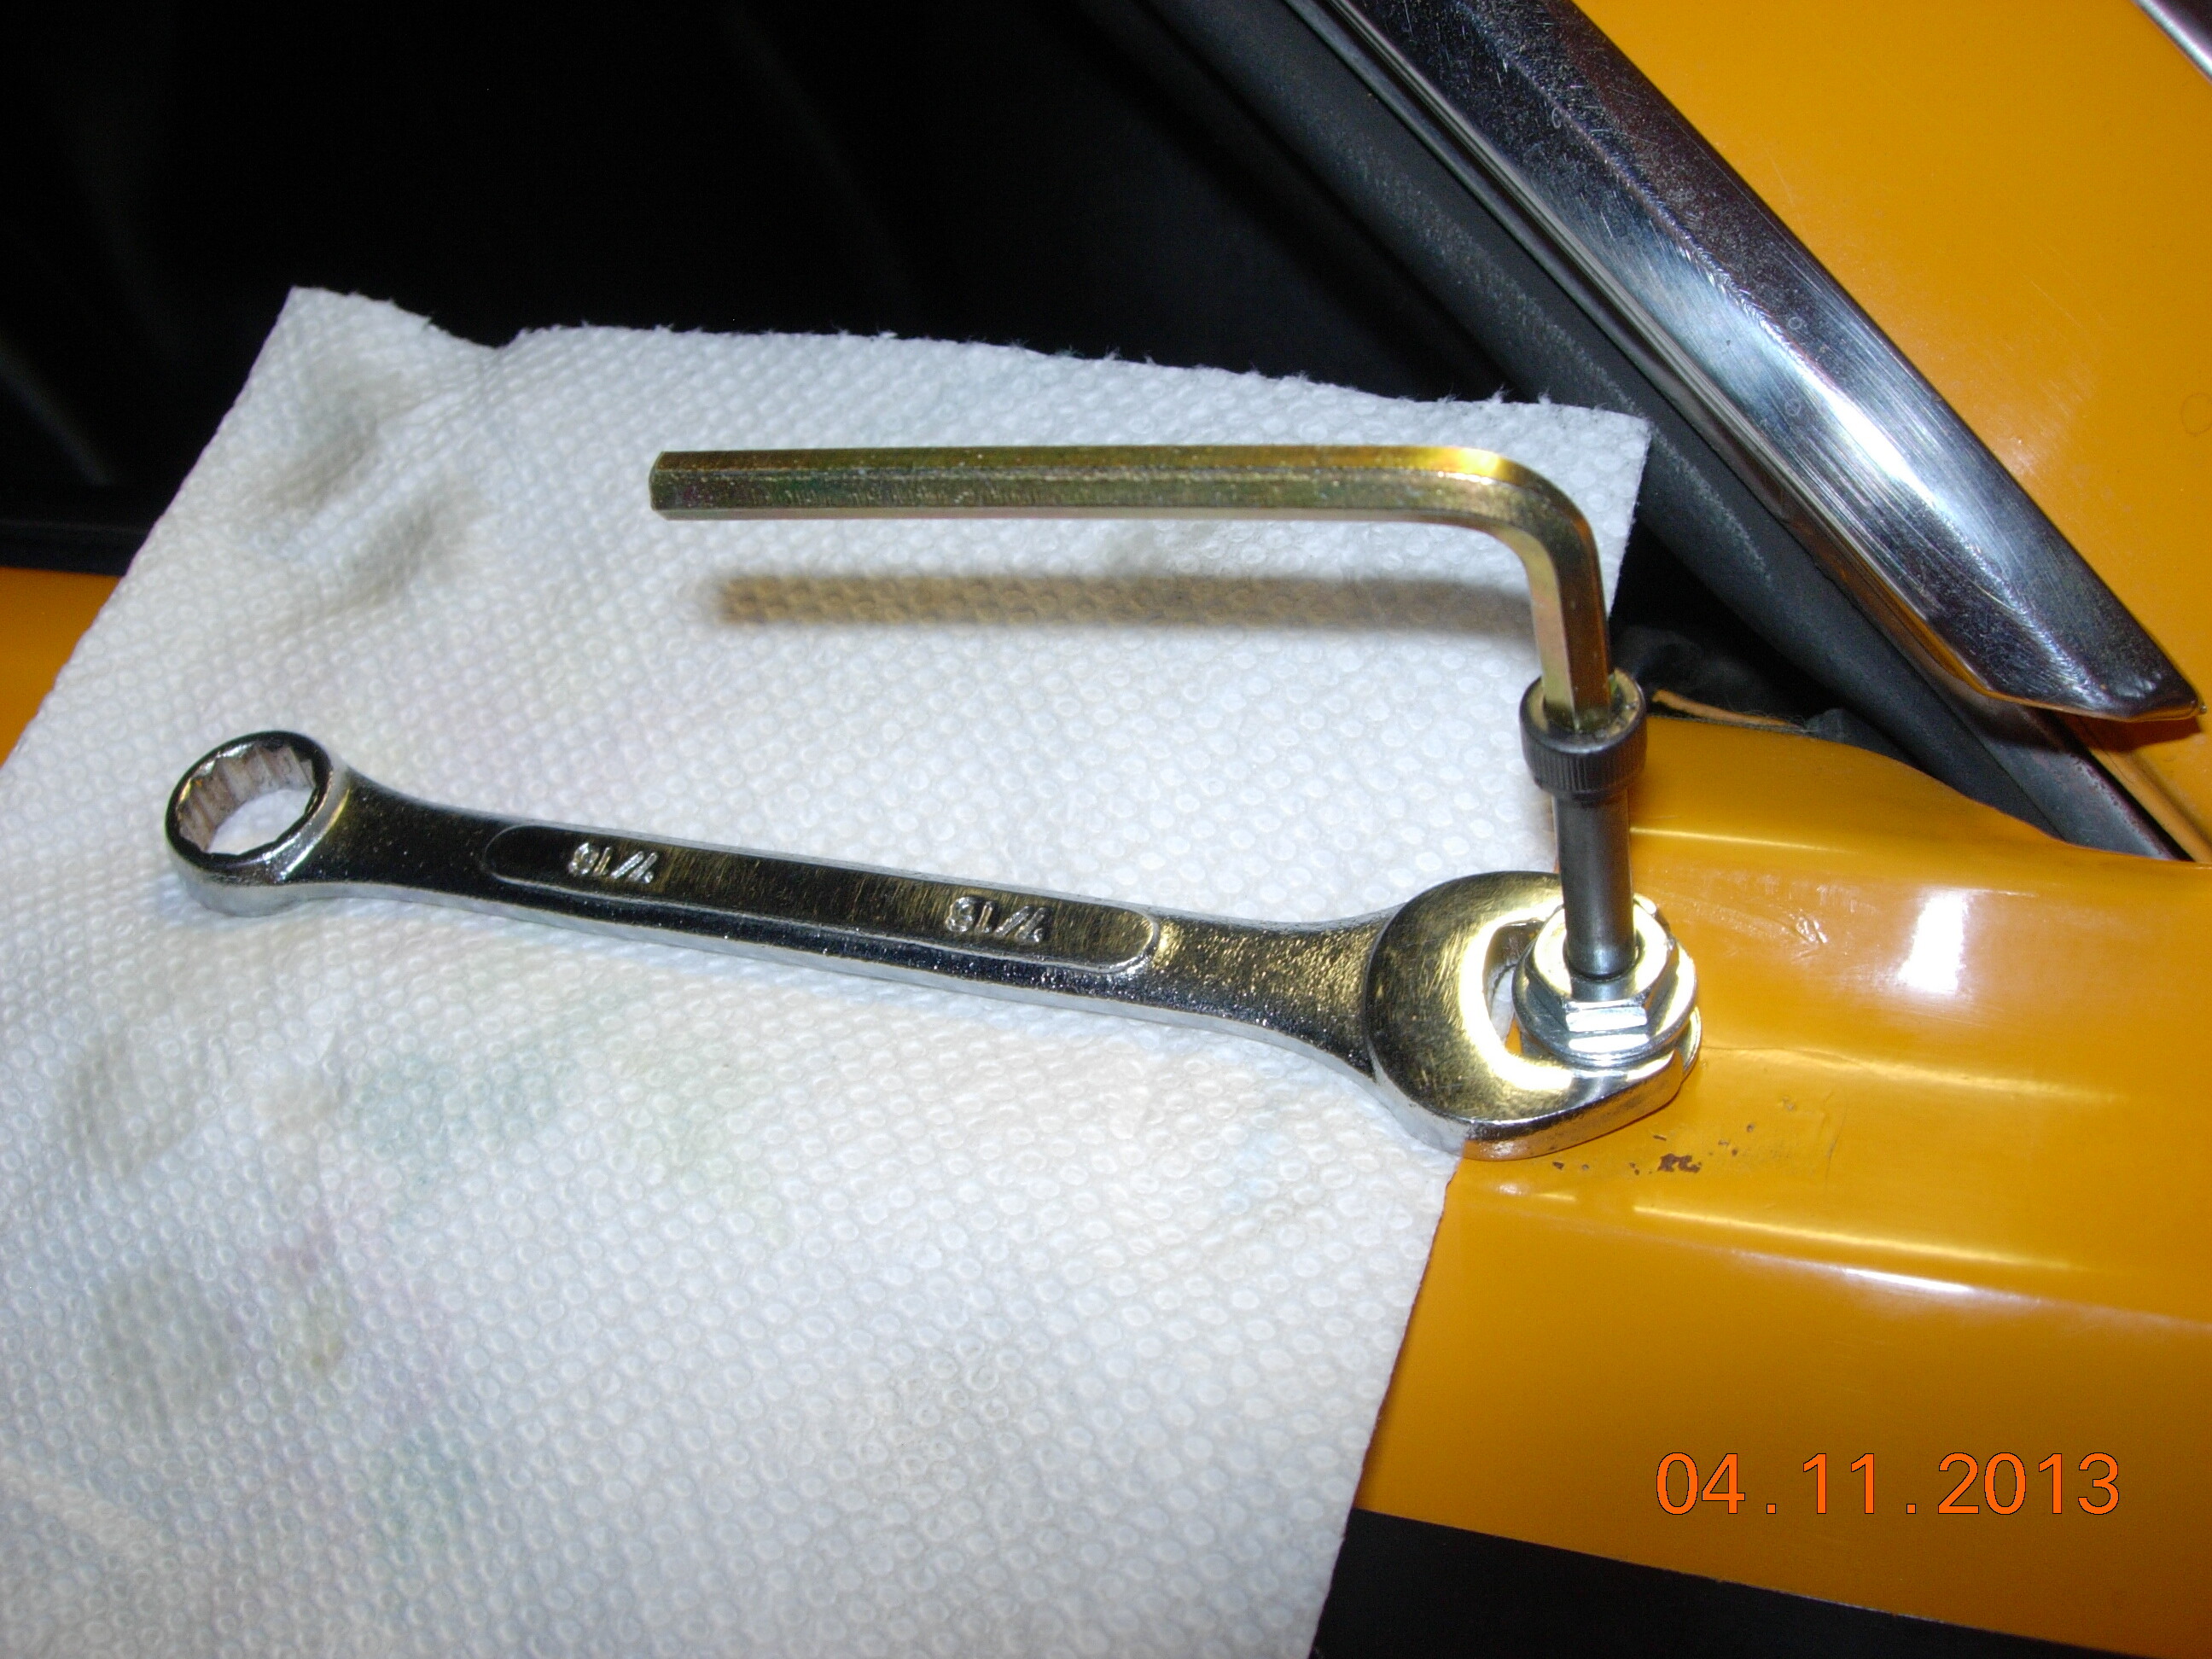
Put a towel down on the door panel near the hole for your riv-nut. This is to protect your paint from the tools while you work.
Hook the 7/16" wrench onto the 7/16" nut.
Stick the riv-nut into the hole on your door panel while laying the 7/16" wrench down on the towel. The wrench should nestle in the groove on the top of the door panel.
Put the allen wrench / hex key into the top of the hex bolt, positioning it so that you will be able to hold both the allen and the 7/16" wrench with one hand.
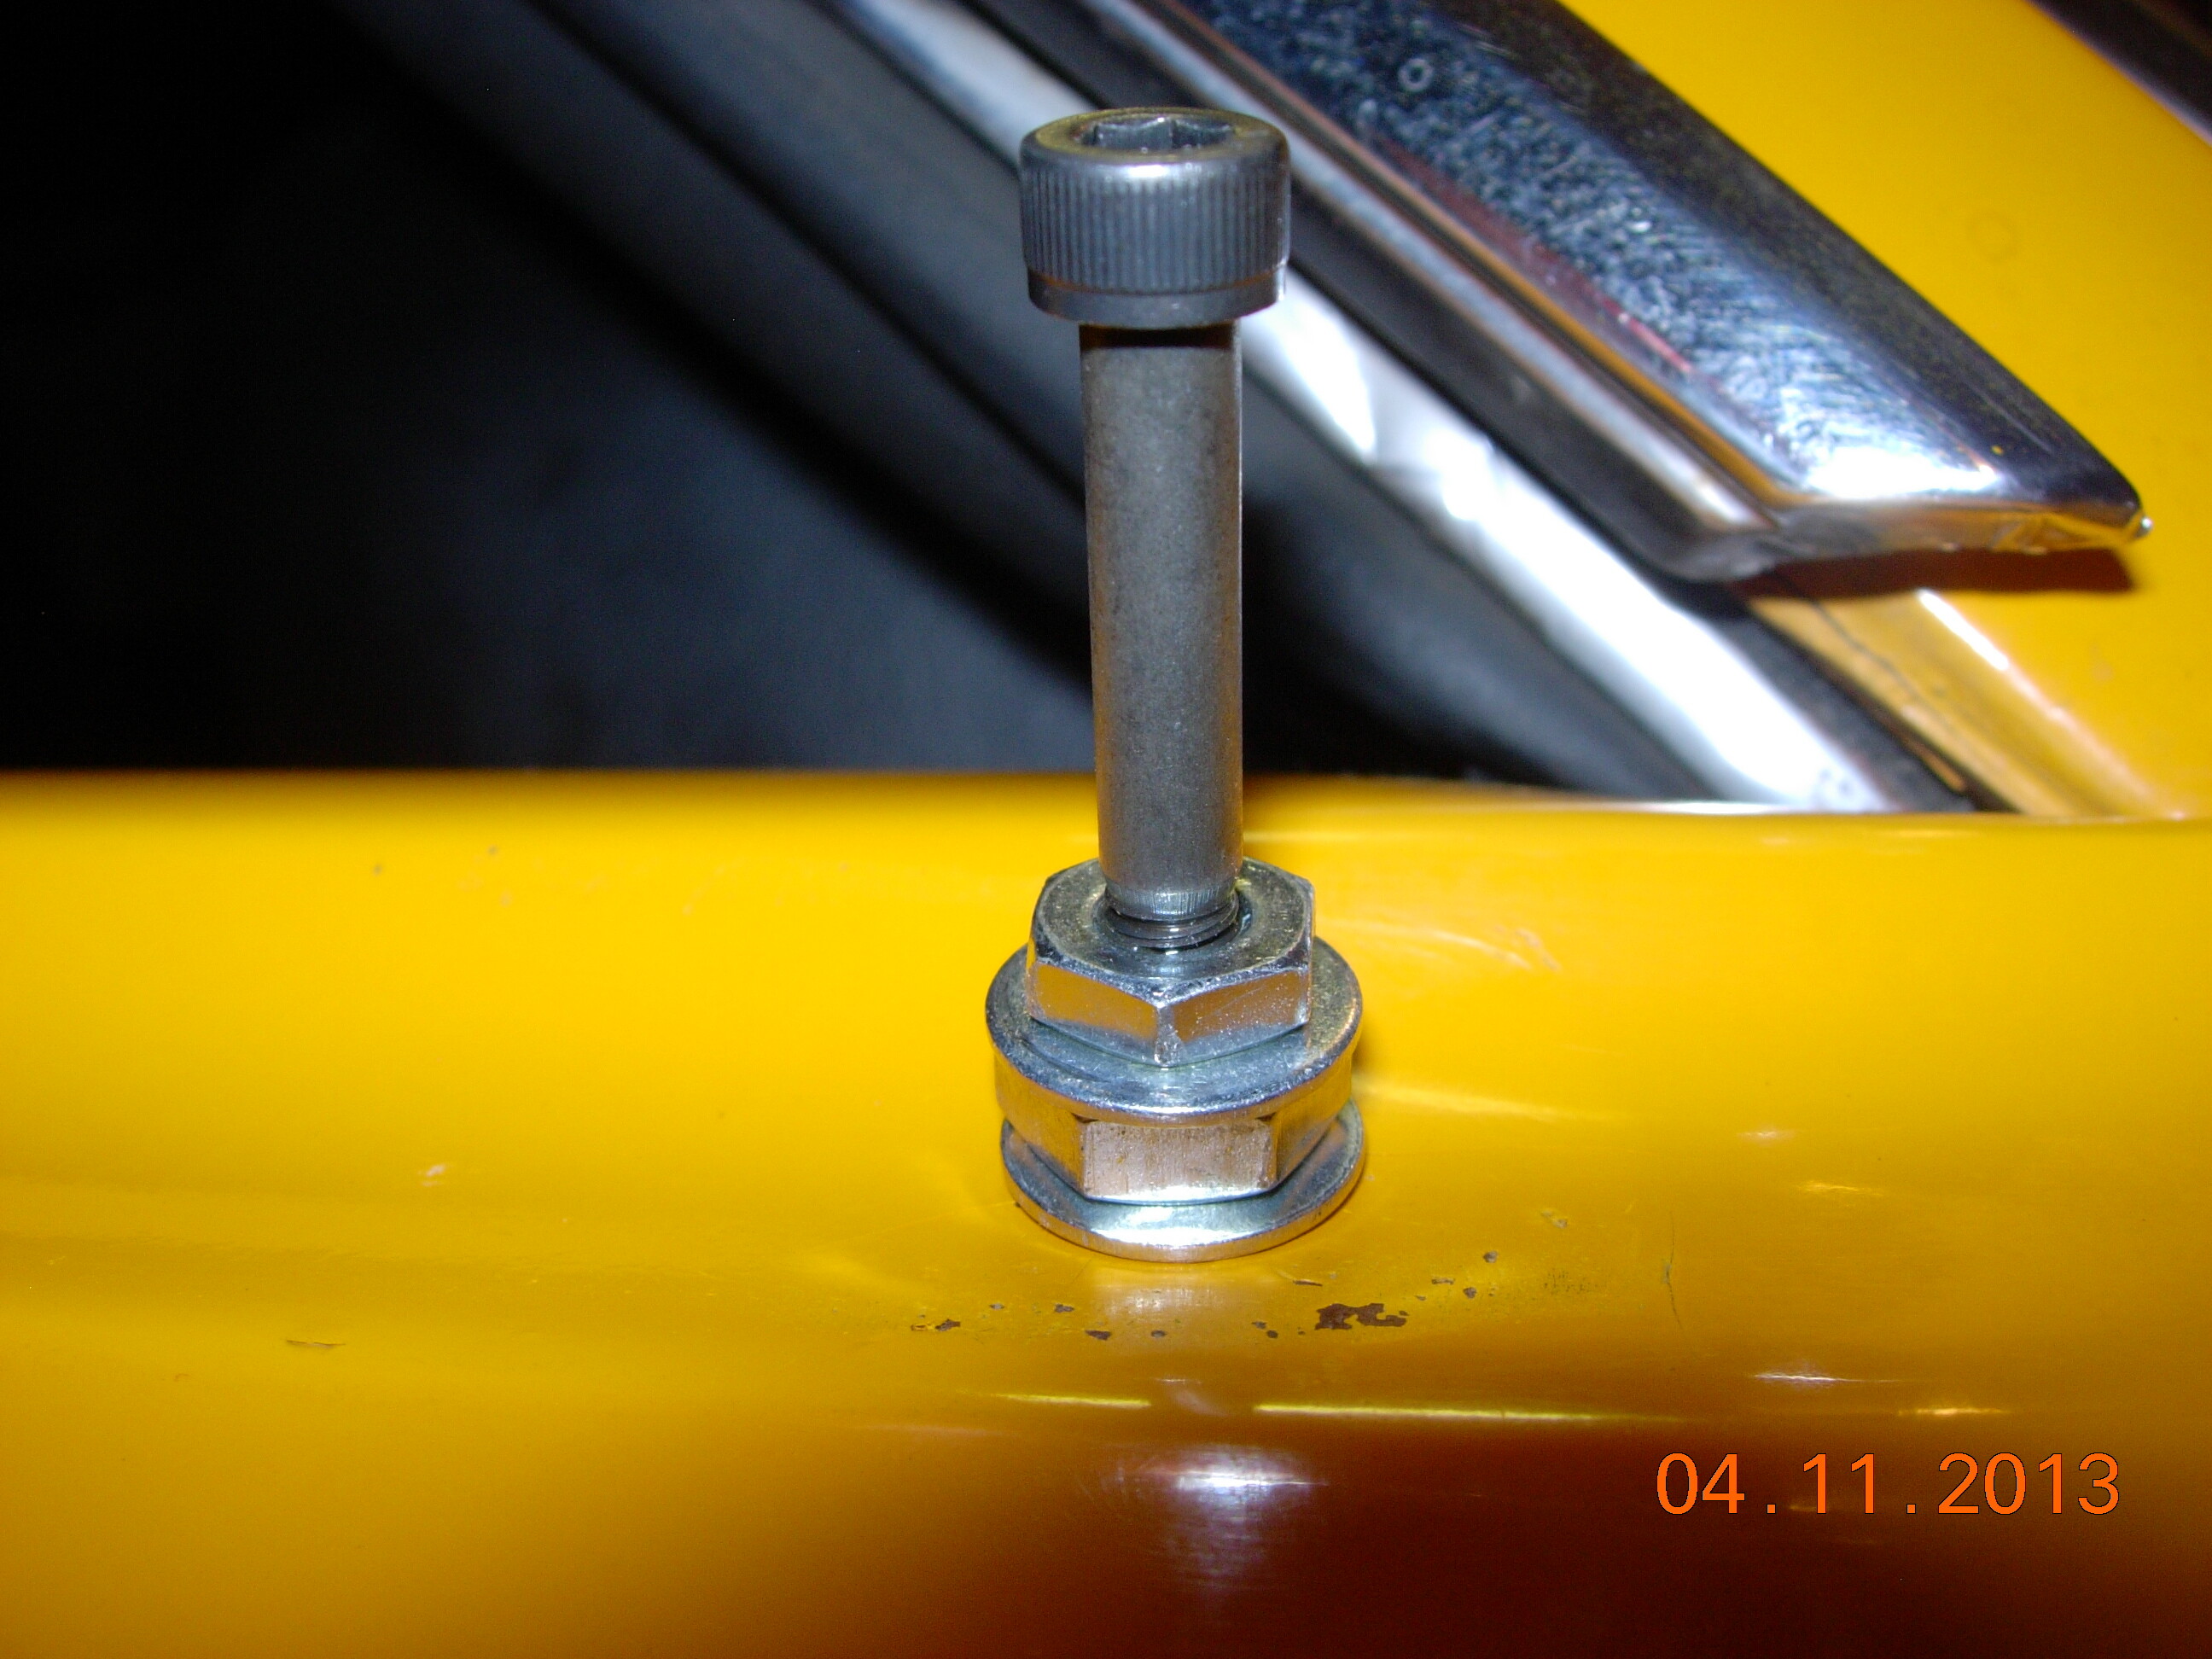
Tighten the 3/8" nut (turn it CLOCKWISE ~ “righty tighty”) while holding the allen and 7/16" wrenches stationary. This will compress the riv-nut inside the door panel.
Tighten the 3/8" nut until the riv-nut is tight within the hole on the door panel and that it does not spin within the hole. Wiggle and twist/turn the hex bolt to determine if the riv-nut is tight enough. If you find later that the riv-nut is not tight enough, you can always install the tool and wrenches again and tighten it some more.
Note: I’m not sure how much torque you need, but I don’t think you need to go crazy tight as you may damage the threads in the riv-nut, or possibly break the riv-nut off / split the riv-nut barrel. My install was “tight enough” with about 3 rows of threads exposed on the hex bolt.
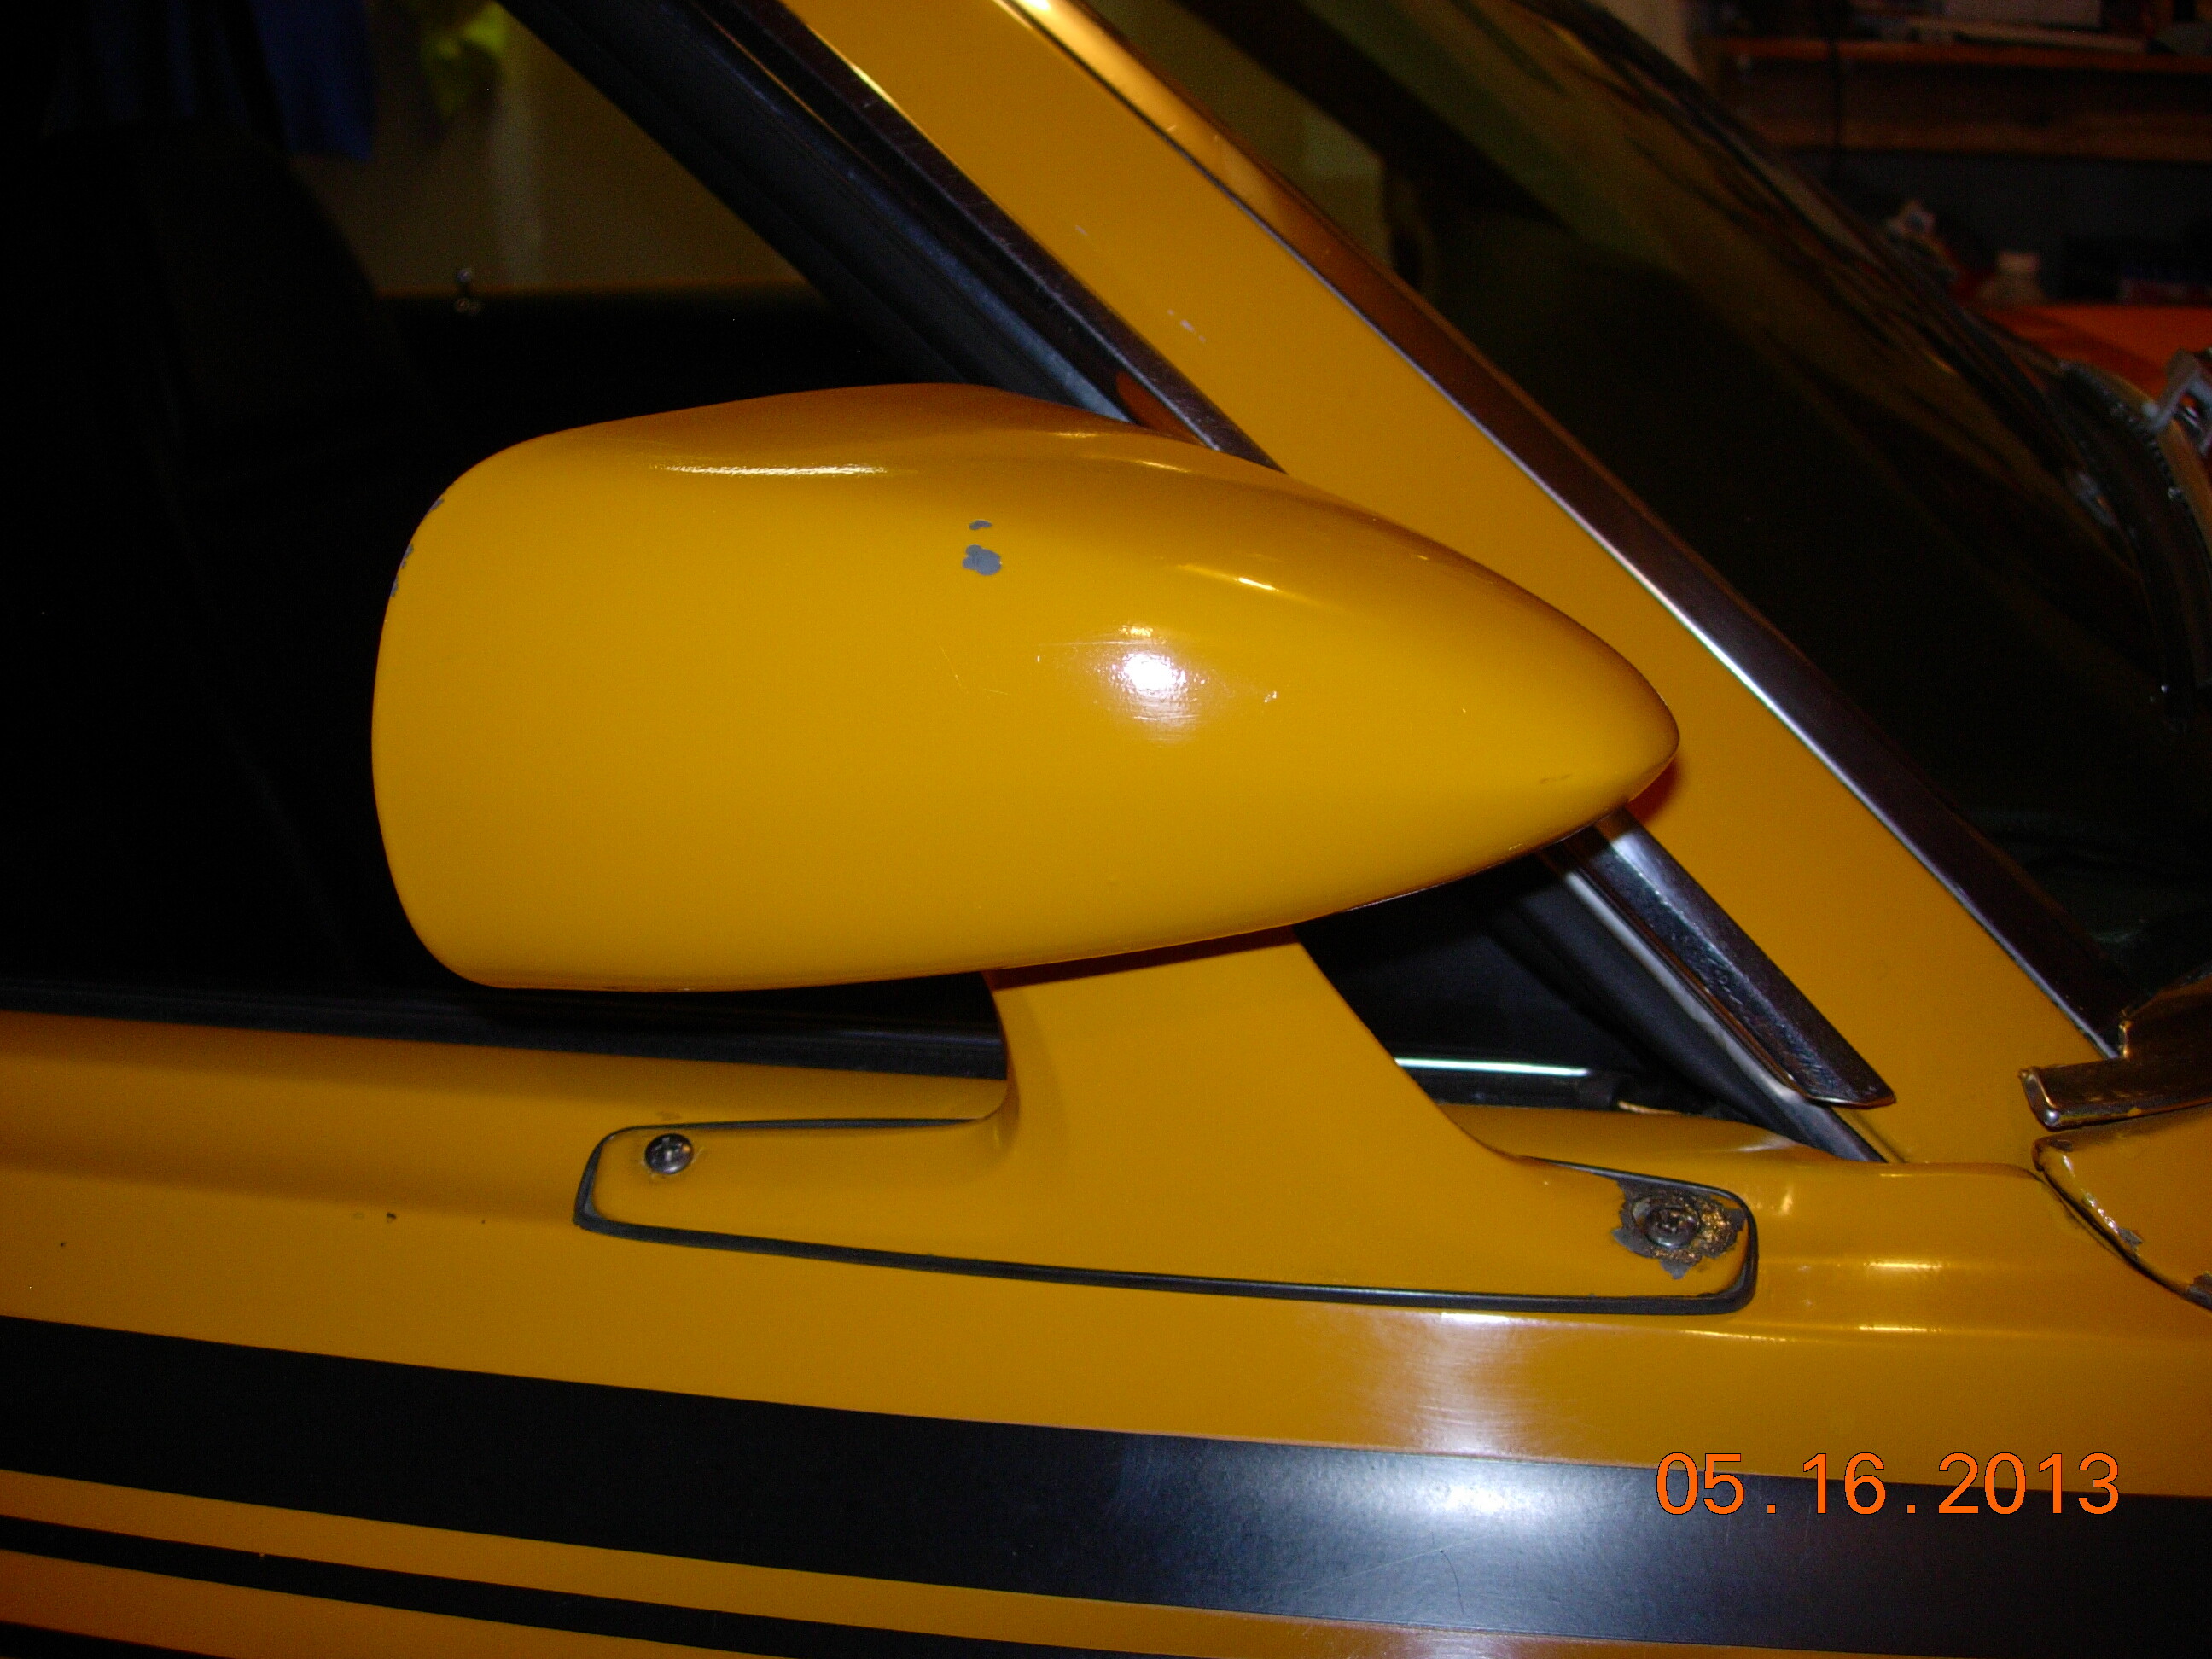
Repeat for the second hole, then install your mirror and rock the cool sport mirror like a pro! (but be sure to clean up and paint your mirror, unless you like “patina”)
A video of the rivnut install, for your reference;
*Please pardon the blurriness of the video. When I do the driver’s side rivnuts I’ll try to get a better video to replace this one.
Now for a little physics (“What? Yuck, physics!”) …
The 7/16" nut is there to act as a spacer, while the washers act as simple bearing surfaces.
When you tighten the 3/8" nut it pushes down on the 7/16" nut.
The 7/16" nut has nowhere to move to, so you end up pulling the hex bolt UP as you turn the 3/8" nut.
As the hex bolt moves up it pulls the riv-nut up into the 7/16" nut, which has no where to go due to the 3/8" nut pushing down on it.
Since the 7/16" nut has no “give” to it, the riv-nut itself begins to compress and deform. This deformation occurs on the inside of your door panel.
The riv-nut becomes too big to fit through the 1/4" hole, and after several more turns on the 3/8" nut, the riv-nut is squashed tight up against the inside of the door panel.
This effectively clamps the sheet metal between the upper flange of the riv-nut and the lower deformed body of the riv-nut.
Nice job on both the doc and the video, but I gotta tell 'ya, I think I saw movement in the rivnut/tooling when you decided it was “set enough” and unscrewed things. Personally, I think you need to retool and crimp that sucker a little more!
Yeah, it probably could have stood another few turns. It felt pretty firm though, and it didn’t spin when I put the mirror on and screwed it down. I guess I’ll really see how I did when it comes time to take the mirror off again
If it didn’t turn when you put the screw in you are probably fine. One thing (I think) I saw that may have something to do with this is with the “tool” used to install the Riv-nut, looks like the outer “washer” of the riv-nut coned upward somewhat as it was crimped, did I see that right? If yes, this is likely why it seemed loose. The collar of a correct tool for these inserts fits very closely to the thread that goes into the nut. Guessing the nut used as a collar does not and it has a sort of chamfer where the threads starts (like most nuts). This makes a concave area and the riv-nut “washer” pulls into it somewhat when crimped.
To people doing this job, I suggest that you put a little seam sealer or some type of caulk at where the barrel meets the “washer” of the riv-nut. This makes the rivnut seal to the door panel and eliminates the possibility of moisture getting into the joint which generally leads to rust.
Here is what I bought/used. I made modifications with other allen heads/sleeves as needed and have used it for at least three different sized riv-nuts/jobs thereby making it more cost effective. Used it for the rear spoiler on my Scion daily driver (M8 I think it was that I bought the tool for), these on the doors (1st mod) and then for the 1/4-20 top well threads (2nd mod) where the convertible top tack strips bolt in.
AWESOME!!! 1000 Cougar bucks will be credited to your account Monday and we will refund your purchase price on the parts you bought to do this well laid out set of instructions. I will also link the products on our site to this thread. I love it! This is what I was hoping would catch on!
Great job Mike! You went into more detail than we did in our video (which is now online here). Measuring from the back of the door is a good idea since it’s more of a square edge. We did it from the front, but that seemed to work fine too.
Also what Bob said is true about the collar of the nut causing the center of the riv nut to poke up a little. You can see that happen pretty clearly in our video too, especially when compared to the actual nut riveting tool.
Was thinking maybe you guys could mitigate this using the same size nut as fits the allen screw and drilling out the threads to the smallest size that the screw threads would go through? Having two of the same size nut might be a pain with wrenches slipping from one to the other though, thinking out loud here. What you need is something you can hold on the outside but fits the threads very closely on the inside and very straight/flat where the riv-nut “washer” would contact. The larger nut, while a good improvisation, has a few shortcomings.
If I paint it then I’ll have to restore the whole car, LOL!
Seriously though, the screw holes in the base are all cracked out and held together with JB Weld. However, I did snag a nice replacement to swap in once I get around to paint work
Thats something I intend to do. I noticed that the driver door is made in a way that there is a"platform" for the mirror to sit on, but none on the right door, is this an issue? I also notice that the mirrors are different on 1969/ 1970/ 1971, am I correct?
Al
No issue with mounting on the passenger door. The mirror base sits nicely in the groove of the door.
Technically, 69’s did not use the passenger side sport mirror from the factory, and in 1970 the passenger side sport mirror was only installed on Eliminators. However, the '70 mirror can be installed on a '69 without issue.
I don’t have any knowledge regarding the 1971 mirrors - sorry!
Thanks for this thread! I started the install process on my '69 tonight. Covered the area with painters tape, laid out the holes and hit them with the center punch. Had plans this evening but will try and finish install and post pics tomorrow.
The installation kit I picked up at NPD (17696-4AK) was different than that shown in the video. It only had a single large nut that went over the threads and the SHCS (bolt) was shorter. I used some black RTV in the hole before setting in the Riv-nut then put the bolt thru the nut with washers on both sides. I put my open end 7/16" on the nut then tightened the SHCS with the provided Allen wrench to compress the Riv-nut. Cleaned up the extra RTV then installed the mirror. I’m happy and on to the next project. I’ll get pics up tonight.