I thought I’d document my swap from the OEM 2V to a Holley 4V on my '70 conv 351C. All of this is available here already but some of it took me some searching prior to my project so hopefully the next guy (or gal) will benefit from my experience.
Note that I have previously changed out the FMX for a T5 so I didn’t have to deal with the kick down lever issues.
My goal in selecting the Edelbrock 2750 Performer and Holley Street Warrior 600 CFM were to improve drive-ability more so than achieve a performance boost but I was presently surprised to get both. Also note my car has the stock exhaust manifolds and dual exhaust with what I would have called glass packs back in the day.
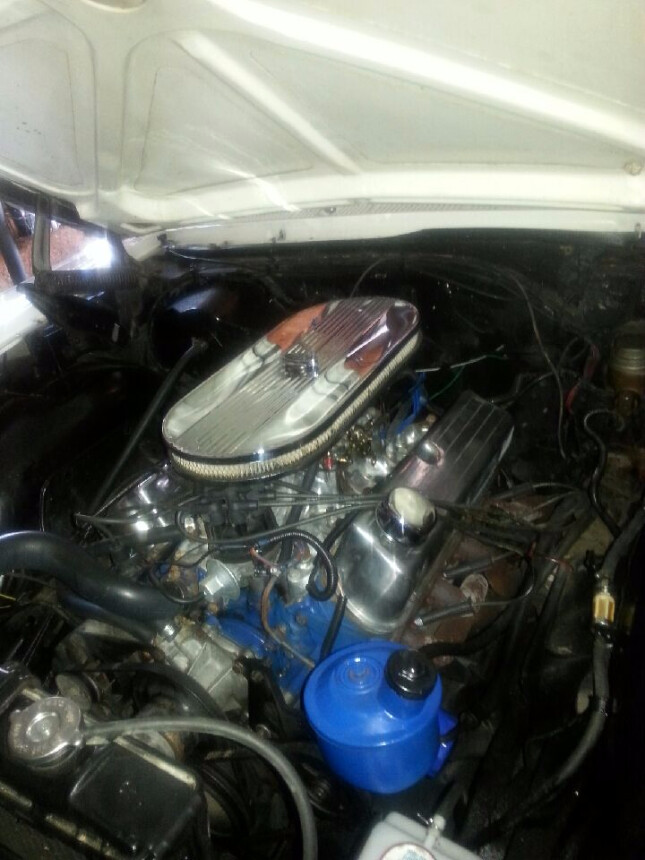
Here’s the starting point:

The Edelbrock Performer 2750 is designed for mild 351C 2V to 4V conversion applications and the Street Warrior is focused on plug-n-play simplicity. Vacuum secondaries and electronic choke greatly reduce the amount of tweaking needed after installation.
Note - I subsequently went with Edelbrock gaskets rather than the Fel-Pro shown above. No real reason other than the fact that I had to pull and re-install the manifold as described later.

Thanks to the genius decision to have a dry manifold on the 351C, this swap is fairly straight forward. I had the old manifold and carb off in about 30 min.
No need to remove the distributor but I recommend pulling the cap and rotor and at least half the plug wires so you can lay the cap to one side. Tape up the cap retaining clips to keep them out of the way too. I would also suggest taping up any wires that cross any part of the manifold as you want as clear a path to straight down from above as possible for installing the new manifold. Ditto for the PCV and vacuum hoses.
I plugged the intake ports in the head with crumpled up newspaper and laid a rag in the valley after pulling the OEM valley pan (which won’t be re-used).
Next up - a good hour of cleaning up the heads and valley ends to make them squeaky clean. Really, really clean.
BTW - Don’t succumb to the temptation to use a power tool that has media that can come off and fly into the motor such as brass wire wheels or scotch pads. Good old fashioned elbow grease with a very thin and flexible scraper is the way to go.
When you’re done, use your shop back to suck up the newspaper out of the intake ports which brings any debris with it. Then carefully remove the rag and vacuum the valley area.
Once you’re ready, lay the intake gaskets on the head. A very thin dab of RTV or spray adhesive will keep them in place. Now set the manifold in place and get a look/feel for the gaps on the end. They’ll be noticeable and they’ll need to be completely filled with RTV when you’re done since you don’t use any gaskets on the valley ends with this intake. My first attempt failed as I underestimated just how much RTV to use and had an oil leak in the back after 50 miles.
Use a really solid 1/4" to 1/2" bead along both ends of the valley. Extend it up onto the gaskets on the heads a bit so there’s some overlap.
Install the manifold STRAIGHT DOWN as much as possible. Any fore/aft movement after it’s in place destroys your chances of a good seal on the ends. Torque per instructions.
Finally, when installing the throttle cable, you’ll need a new bracket. I used the Holley 20-88 which is specific to the 351C application and works perfectly. Be sure to test air cleaner clearance too. The stock air cleaner works on my application and I wanted to retain the look. It sits just about 1/8" higher and slightly forward from before.

Adjustments - I needed very few. From out of the box I moved the electric choke two clicks lean (clockwise) to get it to open sooner. I also reduced fast idle speed slightly. It was 1,700 RPM as advertised but I don’t need it that high.
I hooked up my vacuum gauge to manifold vacuum and adjusted the idle mixture screws slightly. They were close out of the box.
Lessons learned - Use a clamp on the PCV hose to back of carb port. I didn’t have one on the Autolite and the Holly port nozzle is slightly smaller. Big leak on initial startup.
Hook the positive wire for the electronic choke to the STA post on the back of your alternator. That way the choke isn’t getting juice unless the engine is actually running.
Use the manifold port under the front of carb for distributor advance, not the timed port on the side as in my photo above.
The air cleaner post supplied is of a smaller thread size. The OEM wing nut doesn’t fit.
Use a small bead of RTV on the intake bolts about an inch and a half up from the end to seal out oil leaks.
Results - Wow! What a great combo. Starts and runs so much better than the old Autolite. Crisp and light pedal feel, no stumbles anywhere and a nice kick in the seat when you get on it.