About a year after picking up the Cougar, I decided it’s about time to start a project post on it. Better late than never right? As I’ve already posted some of the mini restoration projects I’ve already tackled, I’ll try to keep the documentation brief but enticeful for all you Cougar heads out there.
Here’s the story of the car:
Purchased the car in Jan/Feb of 2021 with the following noticeable conditions
[] Cougar’s previous owner had passed, so his daughter was selling the car. Unfortunately, this meant that I really couldn’t get a history of what the car was put through. Had to go over the car myself ALOT to see what I was getting myself into
[] Clearly, it had some interior/exterior work done at one point in time. Going from Fawn Beige/Saddle to a Red/Red combination
[] Being a SoCal, built in San Jose car, there seemed to be only minimal surface rust here and there. Great news!
[] Paint had chips, cracks in Bondo, and was peeling in certain places. Vinyl top was withered away, cracked and peeling.
[] Engine would start, run rough but stall constantly (Carb issues). 99k Miles
[] Brakes were shot, fluid leaks from master/distro valve. Power steering was rough and leaking as well. Wonky Suspension.
[] Missing bright work pieces
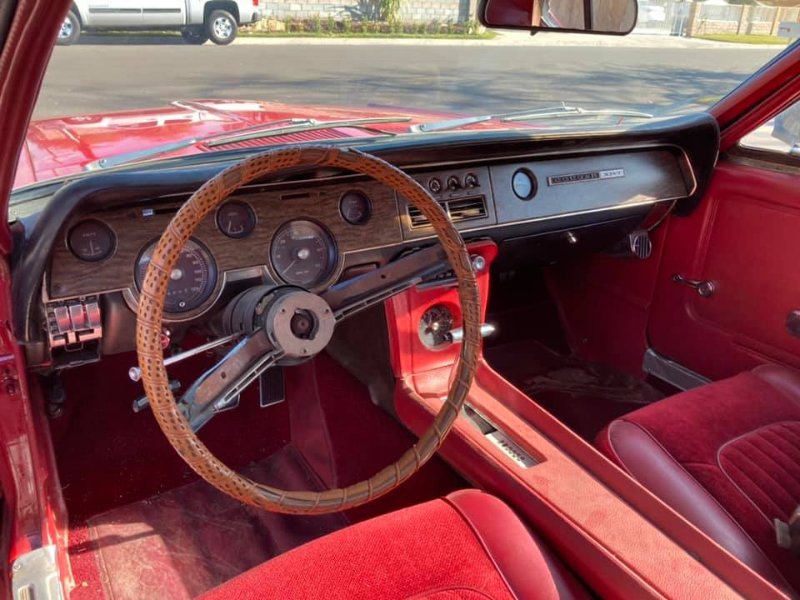
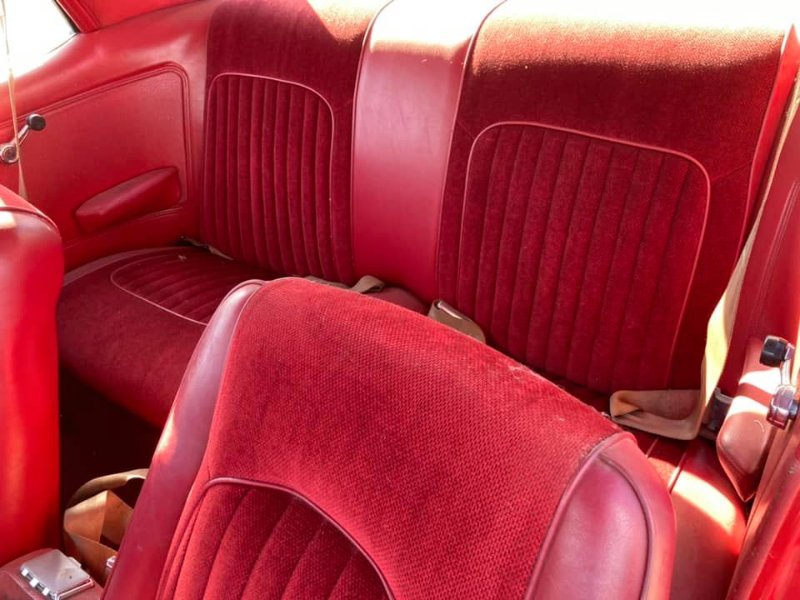
[] Interior upholstery was in good condition, but the dash area was completely neglected. Worn out pad, electrical issues, no interior lights, you name it.
Despite all that, fell in love with the car and it has now become my project.
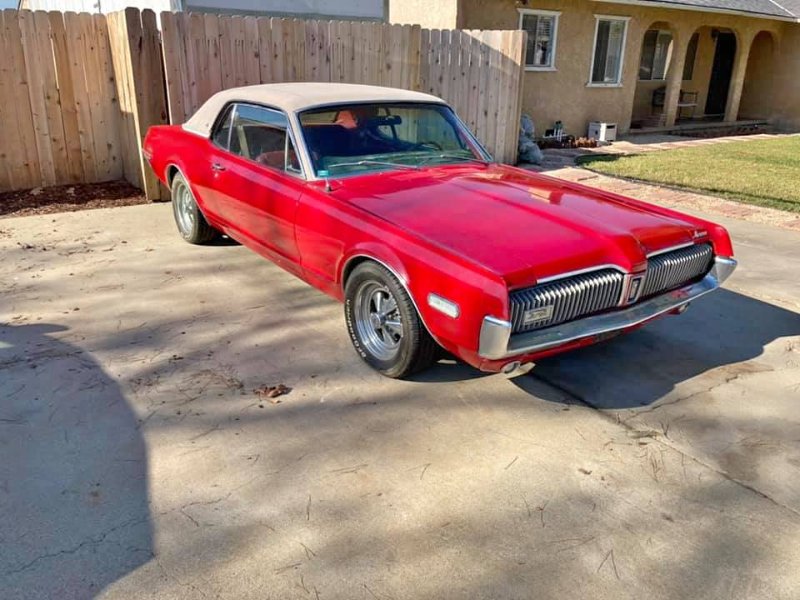
Here is the glorious before pictures, and I will keep this thread updated as I have time.
First order of business, swap out the carb temporarily to get it up and running until I have time to rebuild the original Holley carb. Engine bay also looked exhausted and there was corrosion near the battery tray. Replaced and repaired promptly.
Threw on a Edelbrock Carb, new spark plugs and cables (for good measure) and she started purring.
Compression test across all cylinder read between 180-190. After dialing in the timing, engine had good vacuum. Pertronix Ignition was also installed previously(No points to mess with!). All this lead me to believe the engine was rebuilt at some point, which even if it wasn’t, looked like I had a great running motor.
Rebuilt the distribution block next as it the cylinder inside had seized shut, and had brake fluid leaking all over the inner apron.
There was a lot of helpful info out there on how to rebuild. Thanks to WCCC & Don for the parts and helpful video on this.
Most of the brake line nuts were seized and stripped so I ended up replacing all of the brake lines. Master cylinder was also replaced with the correct original, correctly stamped Bendix unit. YAY SAFETY!
Then, of course the booster went to shit, so replaced that with a rebuilt Bendix with the same casing number.
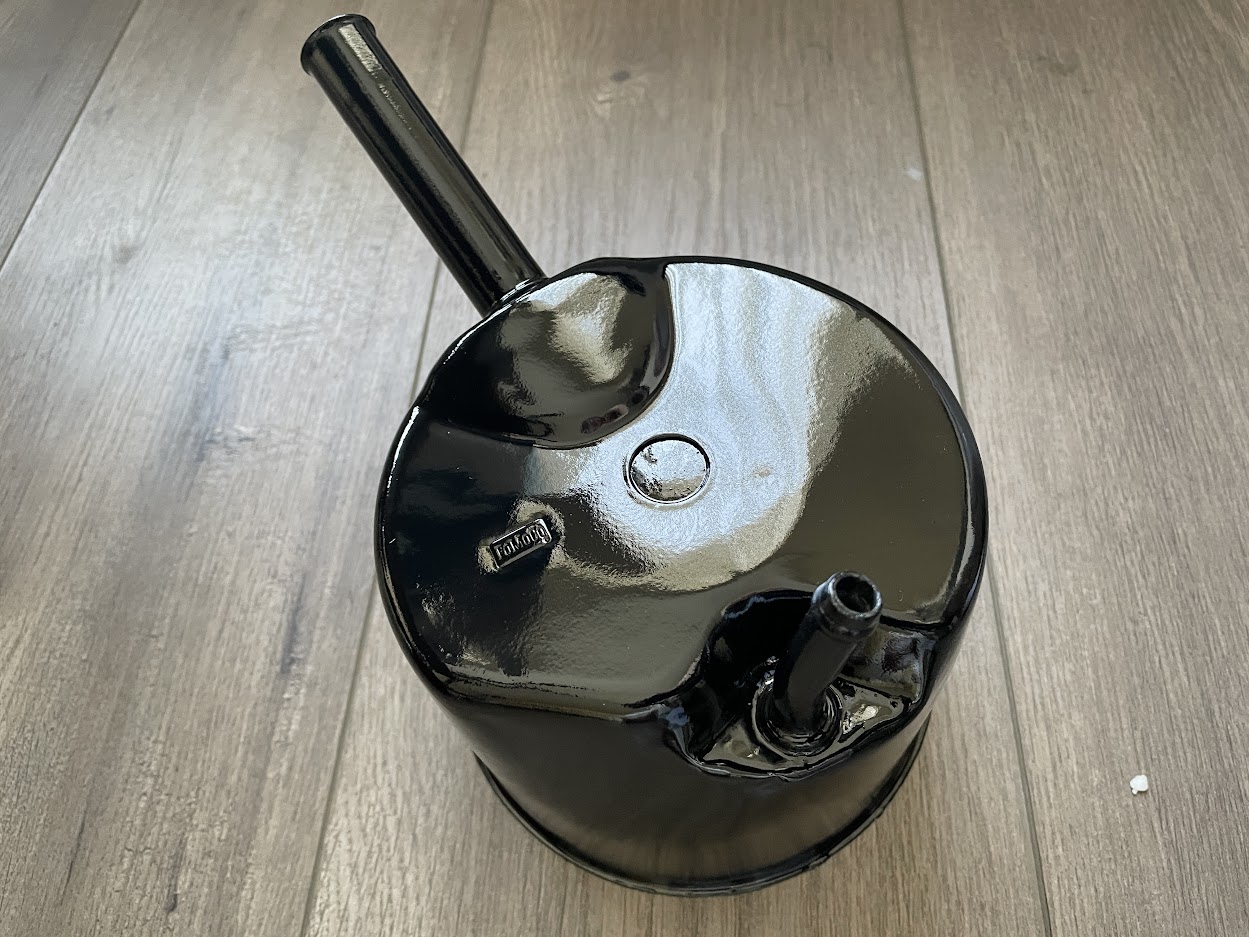
Power steering was up next. The pump was whining and there was a leak from the ram cylinder, so everything was rebuilt.
Not going to lie, I struggled removing the ram cylinder. TIP: ball joint separator worked like a charm, you can pick one up cheap from HF.
There’s a wealth of info out there, including videos, on how to rebuild these so I wont go into the details. Takes patience and time to remove the boot, rings and washer and replace.
Rebuilt and finished with a fresh coat of paint.
Before installing it back on the car, test for leaks by pumping the cylinder with the inlet and outlet holes plugged to make sure it holds pressure. I also dropped in some tranny oil and hung it upside down overnight just to ensure no easily visible leaks through the cylinder. Didn’t take a final picture with the new dust boot on, but that process is pretty elementary.
Cleaned up the power steering pump housing, resprayed and dropped in a Lares power steering pump into the old housing. No regrets, it works great and is super quiet, and retains factory look.
Luckily, the power steering control valve already was clearly rebuilt by PO, tested for leaks and everything checked out. Slapped in new lines/hoses for the new system and buttoned her back up.
Also checked the rag joint at this point. Little to no play, yay!
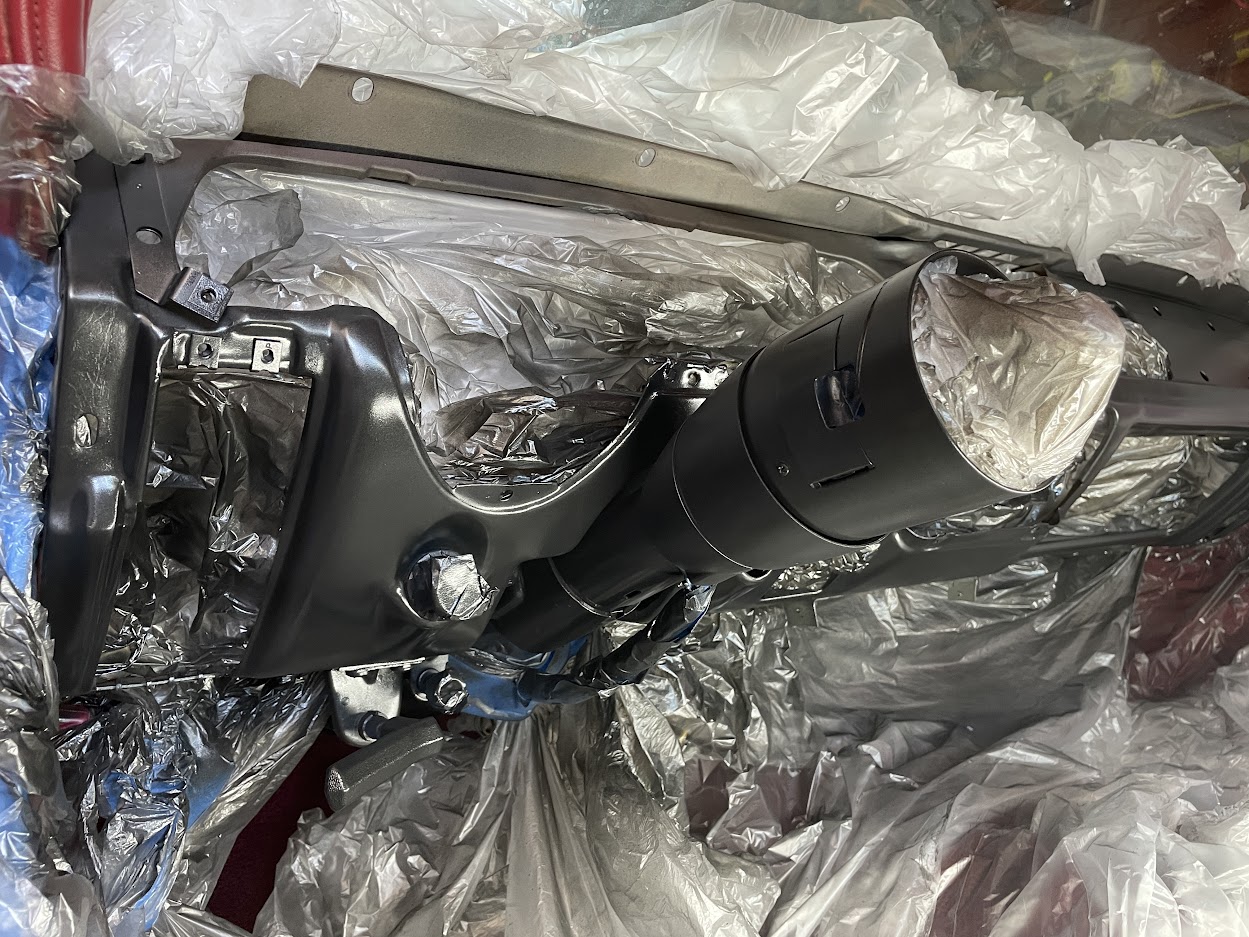
Next up, tackled the suspension and brakes. KYB Shocks, new perches and insulators in the front. Angled zerk fittings were a nice addition to the UCA, greased up the bushings good. Rear got new KYB Shocks for an AMC I believe it was, leaf springs were in great condition. Pads, Rotors, Drums, Shoes, Wheel Cylinders, Brake Lines and leads all serviced/replaced with oem spec parts. Nothing fancy or new to see here, but here are some pics of the process.
Currently cleaning up the dirt and grime in these areas while the front of the car is disassembled for body work. Will have to get some 3M undercoating in the right areas and take final pics before everything is buttoned up.
Only difference here from most other conversions is the PWM module I added the slow down the speed of the headlight door. Wasn’t a fan of the guillotine type action without it.
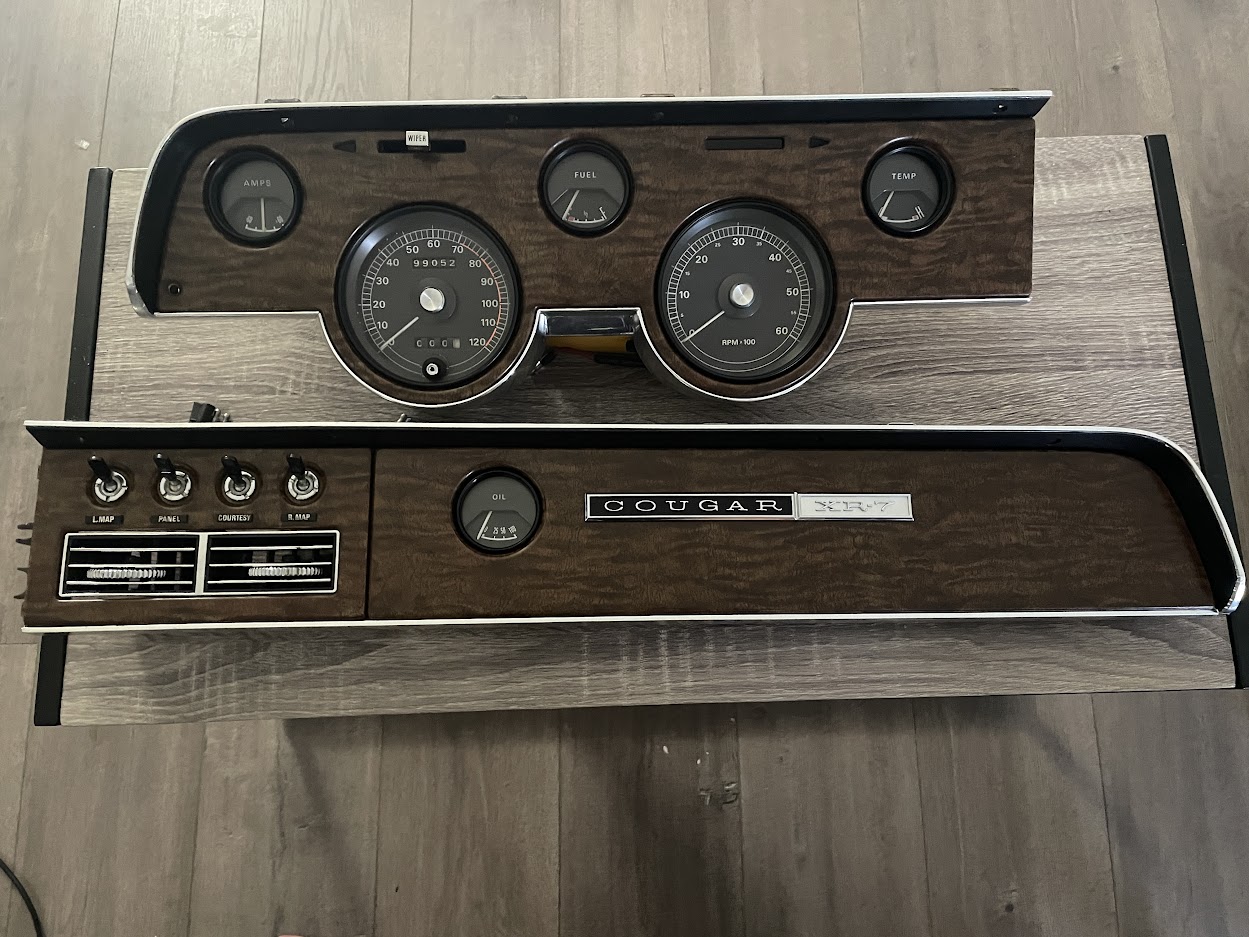
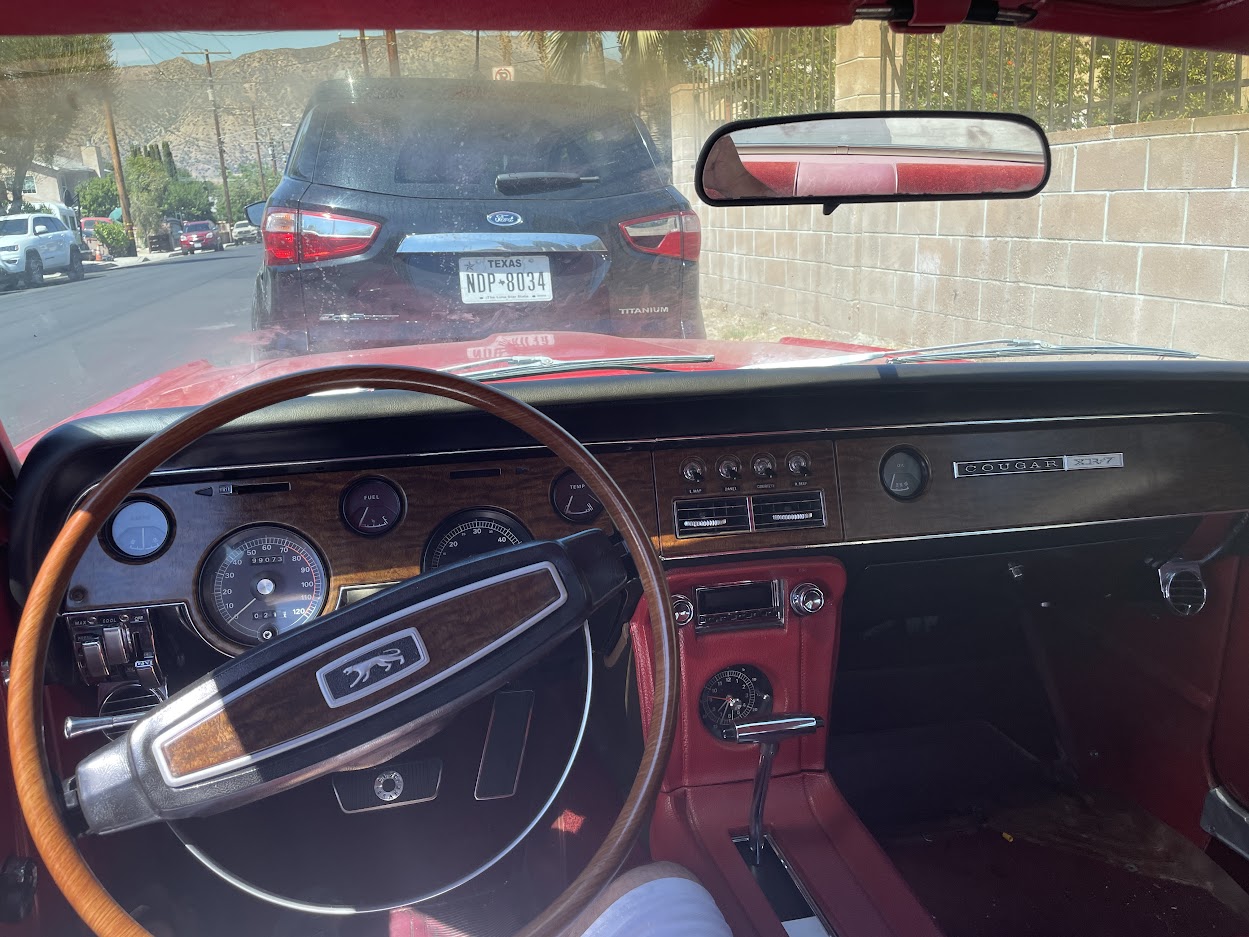
Next up was the dash, this was fun. Being the focal point when you are driving, a restored dash makes all the difference.
You can see the color difference here in the cluster grain. The original darker color revealed under the trim rings.
Bringing back the color with some Kiwi Brown shoe polish (liquid form)
Dunking the panels in ZEP purple cleaner strips off all the paint and chrome without damaging the plastic
Replaced all the blue light diffuser, changed to LED lighting, applied new gauge overlays, polished lenses. Used SEM trim black to repaint all of the black on the dash. Chromed speedo and tach buttons. Thoroughly polished chrome around AC vent and toggle switches. A new Xr7 dash emblem from desert classic parts tied everything together.
Used a chrome vinyl wrap for the cluster rather than sending it out to get rechromed. Think it came out just as good.
Shifter plate had seen better days. Cleaned up entire thing, polished the diffusers, repainted the letters and numbers, and ended up purchasing a new metal trim plate for it. Replaced the cracked selector dust cover.
All said and done, the center console was fully restored as well. Restored clock and lens (have a post with a step by step if you are thinking about tackling that as well), new custom audio radio with original style knobs as well. Replaced dash speaker with 2 speakers on the same style plate.
After a ton of back and forth and consideration, I decided to do my own body work and paint on the Cougar. At the same time, all the components that came of the car, I worked on restoring.
So, I started to slowly disassemble the vehicle, making sure everything was marked and tagged, starting with the rear of the vehicle.
Restoring the taillights, which had seen better days.
Here is the lense cover before repainting with SEM trim black and polishing with 0000 steel wool and some quick glow. Process is tedious but rewarding.
Here you can see a dramatic difference between the restored and unrestored units.
Housing before:
Restored housing: SEM Trim black paint on the frame and Krylon Mirror Chrome Paint on the reflectors. I also opted to buy these amazing quality repro lenses as the old ones had multiple stress cracks.
Glued in new gaskets with weatherstripping adhesive and sealed the units back up
I knew going into this that taking the car down to bare metal was not going to be an easy task, but boy was I for a surprise. I first spent countless hours trying to figure out the best way to accomplish this and quickly realized that the chemical strippers out on the market are pretty much worthless. They were able to remove clear and base after many hours on the car, but had almost 0 effect on primer. In the end I went with stripping wheels on a grinder, wire wheels, dremel accessories and free hand sanding for tight areas/jambs.
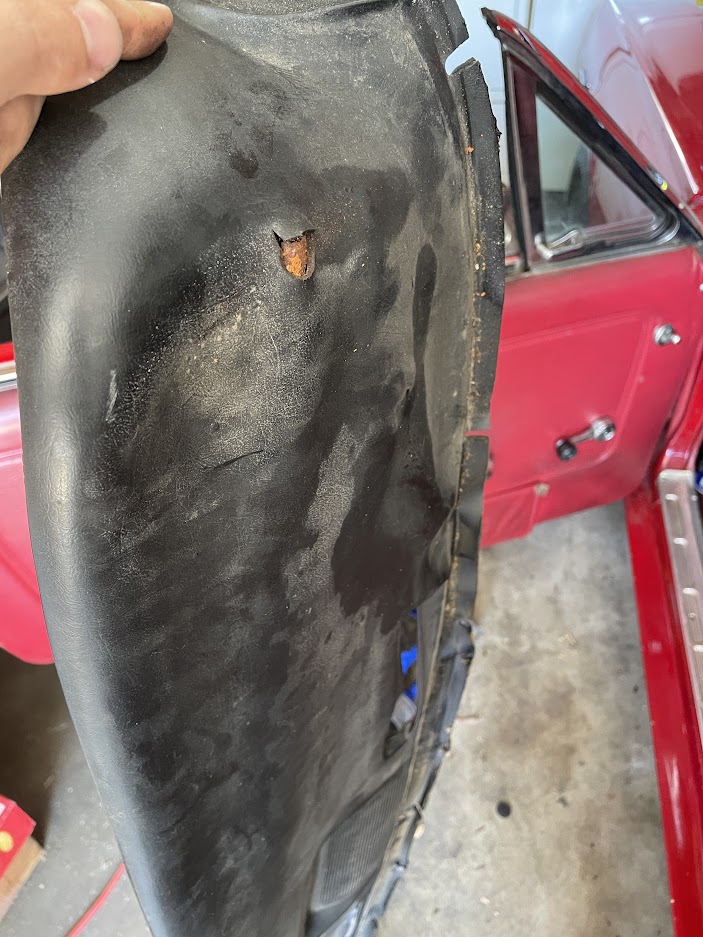
Here is some previous work that was done on the fender. They decided that filler over pull holes was good enough, but I ended up doing the repairs the right way.
Using a torch, weller solder gun and some solid silver solder, I beveled the holes and filled them up. Epoxy primer was then sprayed on both sides of the fender. Much more solid repair IMO.
Some other areas that had dents were just bondo’ed over. I put in the work to straighten the metal instead of globbing on filler.
Your dash turned out great! I have my dash out and have been trying to decide how to proceed with refurbishing it. It appears that you have that figured out. Will you give a little insight on the chrome vinyl wrap and how you installed it?
Thanks,
-Len
You’ll want to cut the film in multiple sections rather than try to wrap it all with one piece.
For reference, on my cluster the wrap took a total of 6 pieces, cut at the seams and corners so they are not visible.
Top and Left side trim
Bottom left straight run
Curve under speedometer
Middle straight run
Curve under the Tach
Bottom right straight run
The right side of the dash can be done in two pieces
Top and Right curve
Bottom straight run
You’ll have to stretch the vinyl over the curves to ensure that there are no kinks or crinkles, but be careful not to overstretch. I know the typical method with vinyl wrapping is to stretch the film tight over the surface, but with chrome vinyl, the more you stretch, the less reflective it becomes.
Use a microfiber towel over your squeegee when applying pressure as to not mar or scratch the chrome.
You’ll need some practice for sure to get it right, so you may need two rolls of the vinyl.
Time to spray some epoxy primer over the prepped panels. I admit, I may have gotten too carried away with my DIY spray booth, but I find myself having a type A personality.
Pop up 10x10 tent with windows for lighting.
Added some LED lighting tubes
More lighting, and built a filtered exhaust with a box fan on the outside to suck air out.
Filtered Intake
Quick Plug for Tamco Epoxy Primer, lays out great.
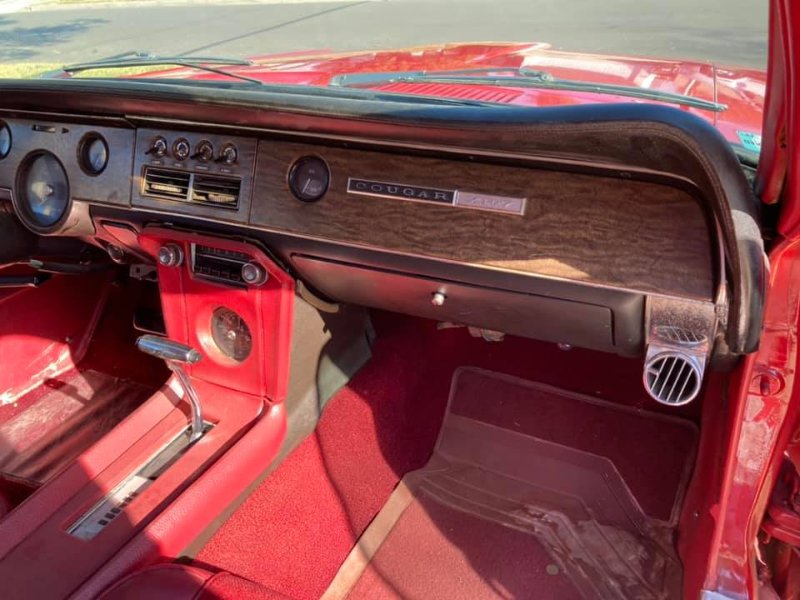
From factory the car used to be Fawn Beige/Saddle interior so it had the black dash pad.
Previous owner went with the red interior, and had left the same dash pad.
My final color scheme will be Ford’s new magnetic metallic grey, black vinyl top, existing/refreshed red interior. When purchasing the new dash pad, I did consider going red, but I love the contrast with the black (specially with a black vinyl top), personally think it pops more. Even now the red on red was just too much red for my eyes.
Also, to be honest, I wasn’t sure if the XR7 trim level all had black dashpads regardless of the color scheme, seemed that was all I was seeing in my research. Maybe you or someone else here would know?
I know what you mean. The XR-7’s did come with red dash pads if the original interior color was red. I too think it looks better with a black dash pad.