Wow the tail lights and chrome look really good with that color. Nice!
This about sums up how it looks! ![]()
Steven
Im waiting to stick anything else on the body until getting through the 90day cure time just in case. The valances and behind all the taillights was done a month or two before the actual body so I figured cant hurt to install those. I ended up doing the trim do since I couldnt resist to see it together.
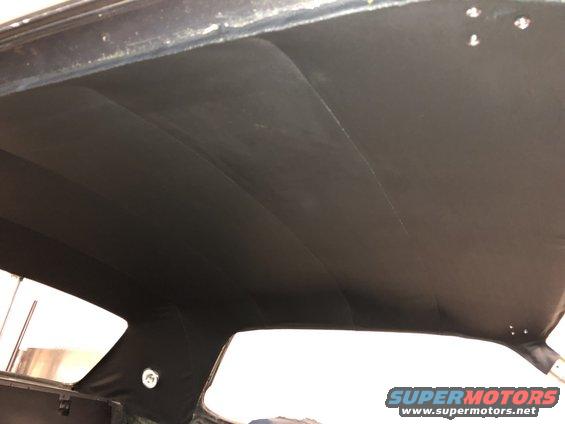
Here is a little sound deadening work on the roof. I have a headliner now and been itching to get time to attempt to stick that thing in so I can get the glass back in it. Never done one so that should be fun!


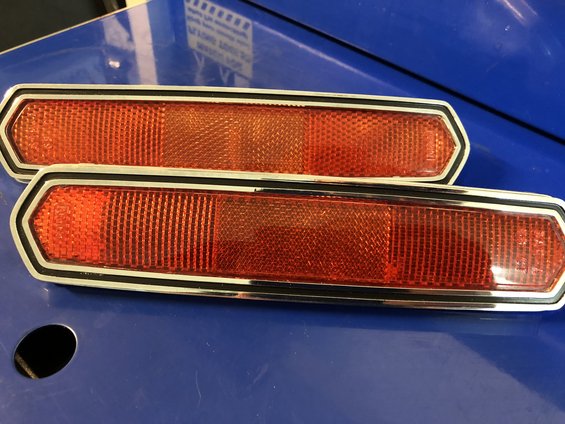
cleaned up the rear reflectors and repainted the black trim line. Was going to buy some repros but couldn’t justify the cost since mine are decent. The red reflector is a bit faded but probably not too noticeable once on the car. Easy enough to replace later if they bug me. During the body work I almost deleted these and the cougar script since I prefer cleaner look of the 67s, However I was not willing to commit to filling in the front fender marker lights. Just couldn’t get the guts to modify the sheet metal that much! I did delete the rocker trim and wheel well trim however.
Nice progress!
Been a little bit since Ive posted some updates. Progress is slow but steady, Not much new but finally the paint has cured for 90 days so I was able to clean it up and get a good coat of wax on it to help keep the dust off of it in the garage. also just got a car cover to help as well.
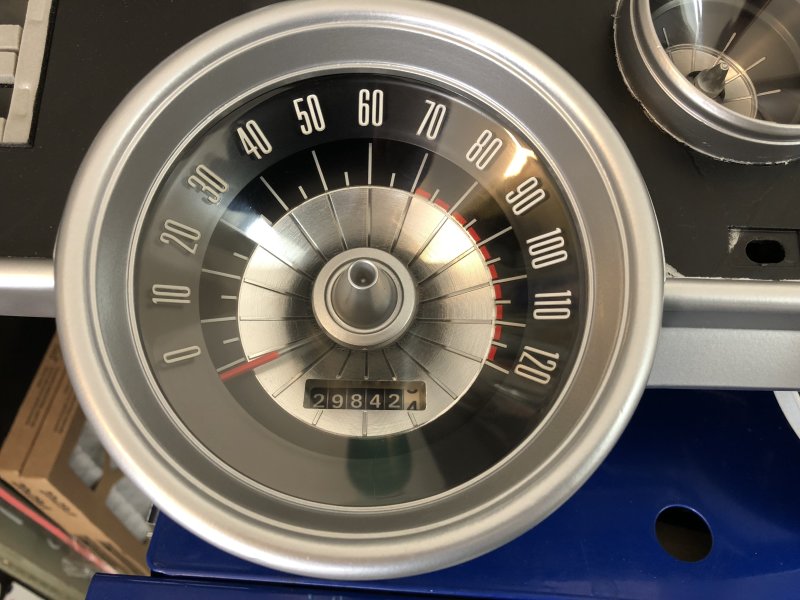
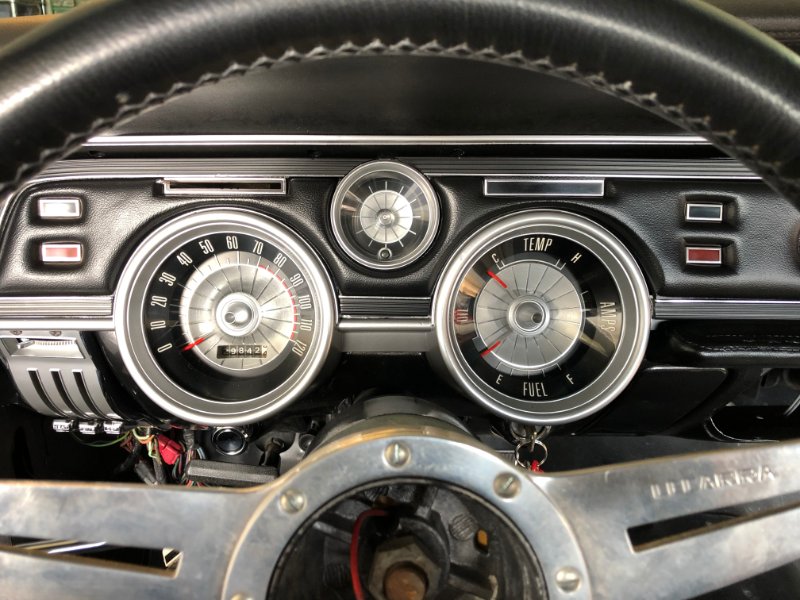
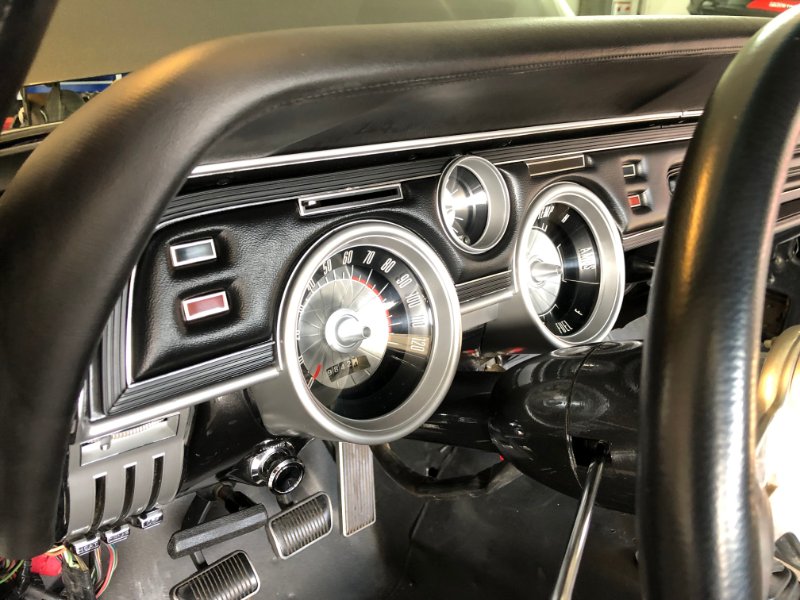
Gauges are cleaned up and repainted. Previous owner had painted the baked chrome black already so I simply decided to paint it argent silver for the time being. I may do something different in the future but this should look fine with my color combo on the interior. Amazing what a little paint and plastic polish can accomplish


First time its been back in the sun since all the rear end was put together. Since this picture I have all the emblems cleaned and back on. Was able to polish all the original emblems well enough to go back on the car instead of buying repros.

Im really happy with the paint color with all the trim and chrome. Really stands off and pictures do not do it justice! The chrome on these WCCC bumpers are impressive.

The looks great! I need to start working on the interior on mine. Your gauges came out awesome. What plastic polish did you use?
Not looking forward to the interior. Out of all the projects on the car thats the only one Im not looking forward to.
This stuff is what Ive been using. Works very well and used to on my taillight lenses too.
https://www.amazon.com/NOVUS-7100-Plastic-Polish-Kit/dp/B002UCYRZU
The front end is coming together nicely. Just need to clean up and install the marker lights.
also think I am going to leave the cougar emblem off of the grill at least for now. Im thinking it looks cleaner without it but Ill leave the holes for now in case I change my mind down the road

Everything is looking great. Your color choice makes the chrome really pop!
Steven
I was worried about that but totally happy how it all goes together. Pictures in the shade in the garage do not do it justice. I know the color choice is not the norm for alot of people but Im digging it and cant wait to get to the wheels and tires to see the whole picture!
I was able to spend some quality time in the garage with the old lady for fathers day! Gotta thank my wife for keeping the kids occupied for the day so I could get some good wrench time.
Got a bunch of tedious stuff like all the wiring at the rear of the car back in, rear quarter windows installed. more sound deadening, some things put back in the doors, and start the head liner install. I simply got it on the bows and hung up roughly to try and let the winkles to start and work out. Ill come back later and start stretching but Im dreading it! It seems like the rear is going to really suck to get to look right. Also getting all the old dried up crusty glue off was not fun! Progress but nothing drastic that really “feels” like progress but its all the small things coming together that complete a project!

That looks really familiar. I just did the same thing a couple of months ago and would agree that the rear area is the trickiest. I still need to finish the area around the package tray. One suggestion would be to make sure you put all of the hardware back in place (such as sun visor screws and seat belt holders) so you don’t have to guess on where to punch holes in it. I bought a gross (144) of the medium sized clips like you’ve got in order to hold things in place. If you end up with gaps between the clips then there will probably be areas where the headliner doesn’t stick to the inside of the sheetmetal seams as well. Good luck!
Glad I could provide a flash back for ya! I wanted to get started on the headliner since so much revolves around it being installed Almost ready for windows but can’t adjust anything until the upper trim is in but gotta have the headliner in first before that happens etc
I do need to track down the visor hardware to get stuck in the holes before gluing. Also good point on more clips to the point of no space in between, I knew I would be short so plan to buy more. Also unsure if I want to run the shoulder belts and clips. Thinking of just sticking with lap belts but undecided.
The nice thing is I can bring a lot of parts into to work to clean up and prep for install before I get to work on the car itself. This at least allows me to keep working on it and have a stash of parts ready to go back on the car when I get a chance to work on it.
Been a little bit since Ive updated, work has been progressing slowly with getting all the wiring routed and hooked up along with repairing a couple small areas of the harness. For the most part everything is hooked up and working as it should. Heater box is cleaned up with new heater core and gaskets so that needs to be installed once Im done with the under dash insulation and firewall pad.
Seems like getting the turn signals to flash is always a big step with these things so thats a step in the right direction. I will convert to solid state soon but for now the old unit is working fine.
I kept dreading the headliner install and keep moving on to other things to keep the ball rolling. Last weekend I took another look at the headliner and just had one of those feelings like I would not be able to make it look right. I could probably get it done but how many headliners would I screw up in the process of learning how to do it right? I got hooked up with a good local guy that made it impossible to try and waste time doing it myself. Now I can move on to windows, other trim and finally the dash pad and dash assembly.
Looks like it came out really good! Yeah getting headliner done is a big step since it holds you up from doing the glass.
Slowly but surely making a little progress. I’m only getting about 2-4hrs a weekend on her so I plan out what I think I can get done in that time so I can make the most of the time I get.
here are a few progress pictures
Windshield and trim

The rear glass is in but still need polish all the trim and seal it in. I did find quite a few scratches on the original glass when I cleaned it up so that’s a bummer but with the cost of the repro I’ll deal until I can find a nice original


Decided to run some led bulbs for the under dash lights and opera lights. I do not care for the cool white variety that WCCC sells so I sourced some natural white bulbs from M4products. I used the elite series(brightest) for the opera lights. Happy with the results and they bring a nice white light rather then the cool white. I run all their bulbs in my toyhauler with great results. http://www.m4products.com/single-contact-round-bases/
As more parts go in I’m making small adjustments to the headliner to take the wrinkles out of the rear sections. The alum strips in the package tray area helped a ton.


Dash pad is in, that was more of a challenge then I expected!

I was missing all of my underdash insulation and as I’m sure you guys know not very many options out there but I did fine a nice precut kit from acoustishield. Wasn’t all that cheap but it fits really nice and saved me time in custom making something.

Thumbs Up
I got the dash to 90% or so this weekend, very tedious finding all the hardware and reassembling everything. I would say it came out ok in the end, not near as classy looking without the chrome but I did not have the chrome plating in this part of the budget. I will probably do something different to run autometer gauges with a classic dash insert in the future but the goal here is to get it put back together and on the road again first. Ignore the steering wheel, wiper knob, and missing cougar badge, still got some work to do there!
One thing that bugs me is the repro dash bad has upward curve to it. No matter what I tried to move and adjust there just isnt anyway around it. I assume that is just how they are and hopefully will settle in the heat a bit. Anyone else have that issue?
Also notice the holes in the passenger footwell? Almost positive those are bullet holes. Cant be sure but they sure look like it!

Yep! That seems to be how they are. My only idea is to put a board on top of it with some weight and let it sit for a while, especially in hot weather. Hopefully it could be “trained” to hold a straighter shape.
Car is looking good! I actually don’t mind the silver painted dash bezels, that works.
I really like what you’re doing here.