'Barn Find' 1968 427 XR7 GT-E Restoration

Guys,

This is the ‘Barn Find’ California car that was sold on ebay back in March 2014. The car shipped out of Vancouver WA in June, along with a mountain of spare parts, and arrived in Brisbane Australia in July. Some hold ups in Customs when it arrived, and I collected it in early August.

I enjoy reading other folks’ restoration stories, so thought I would start one for the GT-E

As you know the car sat for a long time and needed some work to get it going again. It was very difficult to get started and the brake system had a serious vacuum leak. Plus the suspension was clunking.

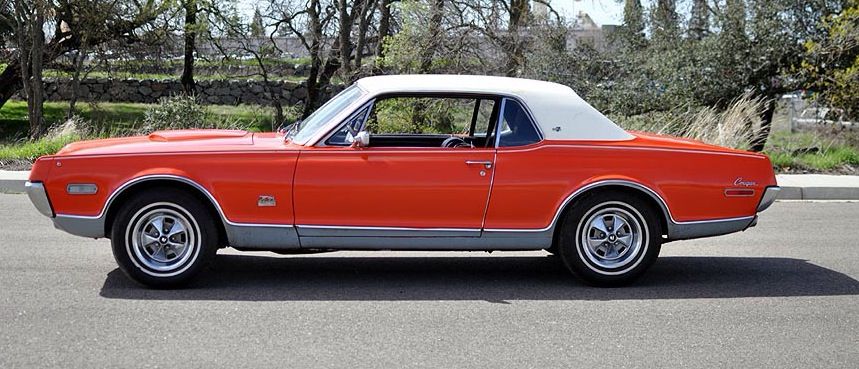
I was impressed by how original the car remained. The original Cardinal Red had been resprayed in that bad orange/coral paintjob, which has to go! The block was a Sep 68 dated dealer replacement. The Holley 4088 carb had been replaced by a 3310-2, with a 1975 date, so I figure that was when it was replaced. The distributor had been replaced by a Sep 67 dated C7MF-G, which appears to be for a 390 4V. The water pump was a replacement. The shock absorbers were Monroe Wylies. The smog tubes and check valves on both banks were replacements.

Other than those specific items, everything else on the car appears to be original as it left the factory. The heads are correct ‘N’ type CJ heads dated 2 Feb and 13 Feb 68, with correct VIN stamp. Correct smog pump, pulley, canister, dated Mar 68. Drivetrain all correct with original tags. Original small-bleeder brake cylinders that will be rebuilt. Almost every panel has a date code, including the hood scoop (3/25/68 handwritten on the underside) and all are around 25-29 Mar 68. The underside is remarkably rust free- the car spent its entire life around the Richmond/Sacramento CA area. This is the first time I had seen a California car like this - basically no rust, and every nut and bolt turns freely, quite amazing. There is surface rust on the roof, but it comes off with a light rub with 240 grit. There is one small patch in front of the right wheel arch where rust has developed. Also, the underhood liner is original- looking ragged now, but I need to figure out a way to repair it and stiffen the material.

The shock towers will need work. Both have had holes cut with a torch to allow access to the UCA zerk fittings (a really dumb idea!). Those holes have been the start point for several cracks. Depending on what I find when I pull the engine, i will either repair the cracks or replace the towers. I have a very nice set of minty towers from WCCC.

So that is the start state for the project.

1968 Mercury Cougar XR7 GT-E, 427, Cardinal Red with Black Leather interior, 3.50 Traction-Lok


Mike

I have been working on the car on the weekends since the car arrived. So far, I have replaced the Brake Booster, Master Cylinder and wheel cylinders, rebuilt the brake distribution block, rebuilt the carburetor, replaced all headlights and interior and exterior globes, instrument panel lighting, rebuilt the turn signal system, fitted new suspension bushings and shock absorbers, rebuilt the distributor, replaced all the tires, restored the smog system components (except the tubes), and replaced the speedometer cable. Compression test ranged from 160-190 on all cylinders, and the bores look nice. The car now drives very nicely and everything works. Making some great power but more potential yet. Still much work to be done to replace and restore components and get the car repainted.

Mike

The 427 GT-E with its cousin, 1968 Shelby GT500KR, in Brisbane Australia

Great stuff Mike - thanks so much for posting and please keep it coming! :beerchug:

  • Phillip

Good details on this GT-E, thanks for sharing with us. It is a great car! Do your horizontal bars on your grill just line up that well or did you do some work on them (except for the far passenger side)?

Chris

Chris, that is how it came out of the ‘barn’. I haven’t touched it yet. It looks like it is very easy to adjust alignment. The good thing is that the headlight vacuum system works perfectly and all the plumbing is original.

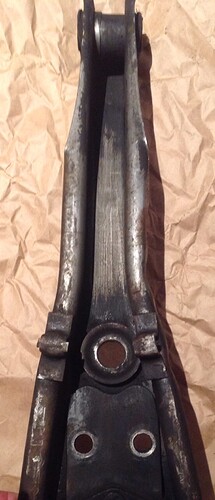
I need some opinions on this passenger side lower control arm.

The dust boot has torn and I managed through great patience to fit a replacement by squeezing the replacement under the retainer plate, without having to remove rivets.

I have now removed it from the car. As you can see, it is in great, rust free condition. Balljoint is tight. Dust boot is replaced. However, the rear side of the arm has some dents along the rolled edge, and that same side is slightly bent under (ie, in the vicinity of the dent, the vertical side is bent under at more than 90 degrees.

Can this dent be repaired - pulled out? Hammered out? Or is a new arm required? I want to conserve original components, so a replacement arm is a last resort.

Mike


Hammer 'em out Mike, that will work just fine.

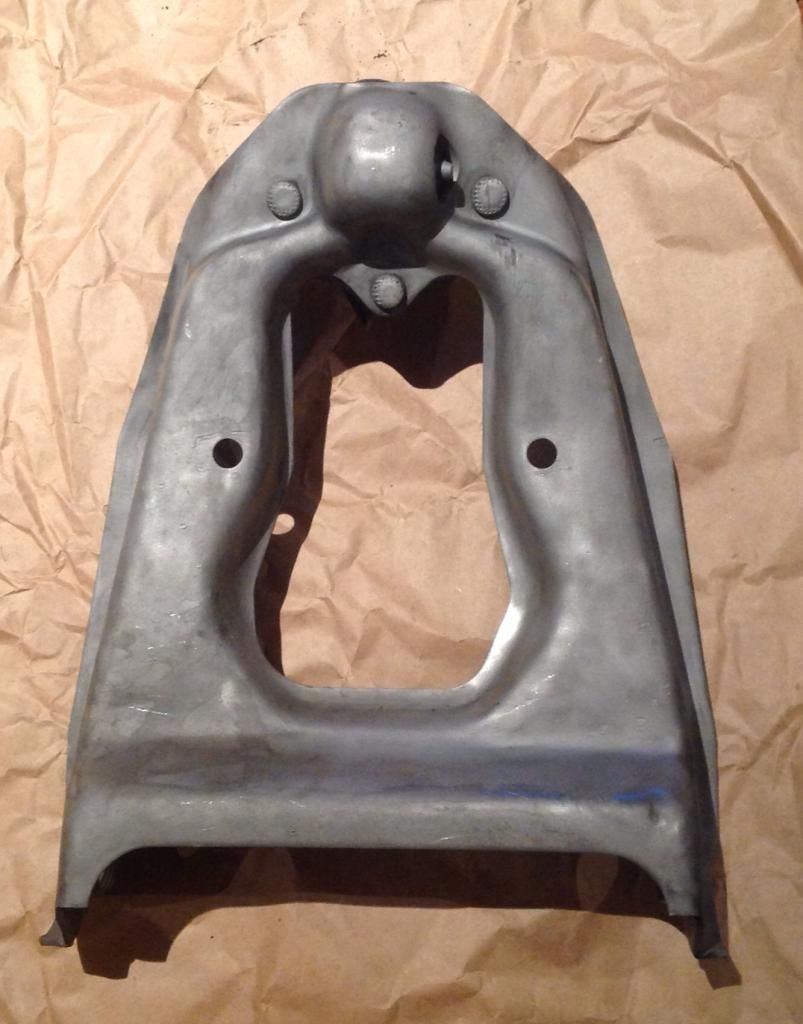
I took that advice. I tapped a log splitter wedge down the center channel, which forced the rear edge back out to a 90 degree bend; very easy. The n I used a hammer and dolly (first time I have done this!) to straighten out the rolled edge. Then media blasted the arm in my blasting cabinet from Super Cheap Auto. Now it looks like new, ready for painting. Also did the UCA and spring perch.

Mike


Mike, I think that your upper control arm is a 1970 or newer design. 99% sure that the 1968 upper control arms had 4 rivets holding the ball joint.

Thanks Scott, it had a Ford Service Item tag on it, so it is a replacement. I will check the other one.

Mike

Scott you are 100% correct. Here is a picture of my 1968 upper control arm and it has four bolt ball joint. The spring perch is bolted on incorrectly in this picture but it has since been corrected.

Mike the media blasting that you did looks great. The parts look like new. :thumbup:
Steven

Steve,

Yes, the parts look like new when blasted- i have done a bunch of parts so far - door hinges, brakes calipers, spindles, control arms, backing plates etc. they all come out looking like brand new parts, the blasting cabinet is just a little hobby unit about 3’ x3’ x x 15", but it does a sensational job with small parts.

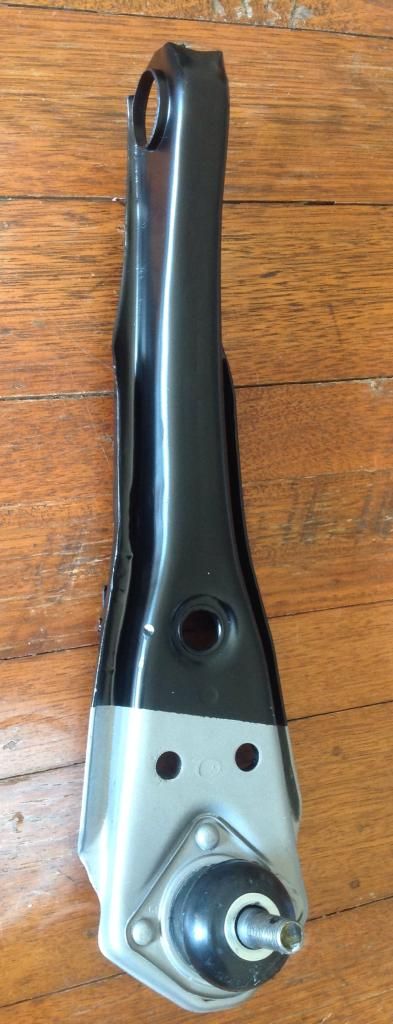
Lower control arm restoration complete, just need to fit new bushing. The black paint dip line matches the original dip line.

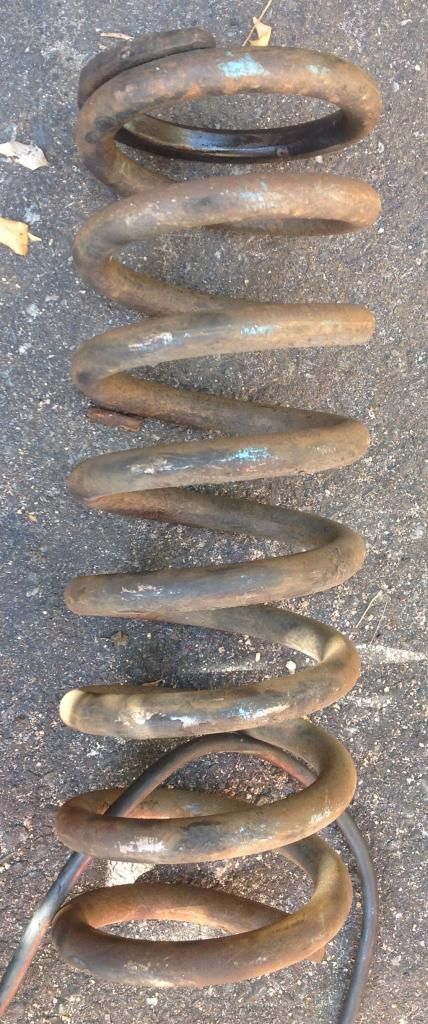
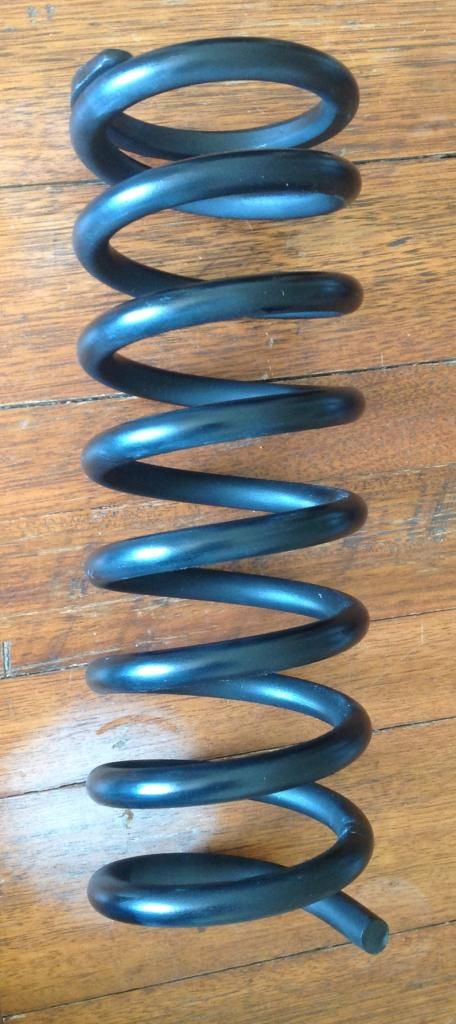
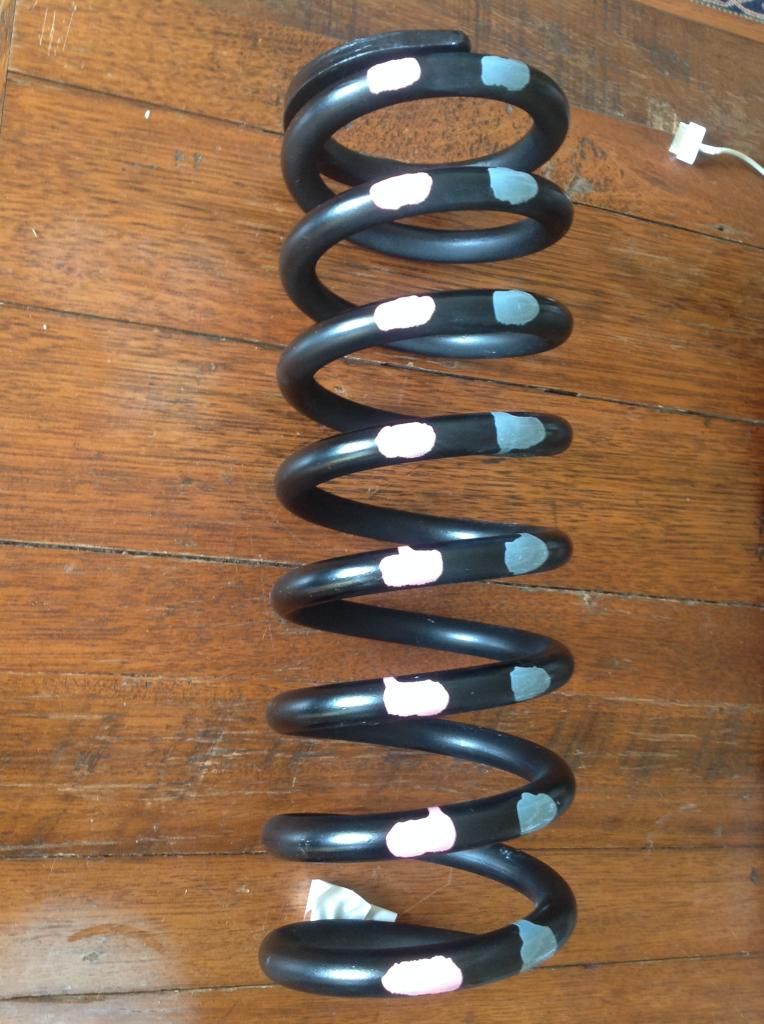
The coil spring also came up nicely after removing 46 years of crud with wire brush and media blasting. The spring paint stripes look like light blue and pink, with a separate white stripe on the other side of the coil.


Mike, how did you get the bushing out of the other end of the LCA? I’m trying to get both of mine out. John

The right way to do this would probably be with a 1" press, but I don’t have one.

I sprayed some WD40 on both sides , let it soak for a while , then tapped the bushing until it went flush with the edge of the flange, then used a large punch to get the bushing just a millimetre below the edge of the flange. After that I was able to put a 1" socket on the bushing and tap it the rest of the way through. You only have to move it 1/2" because the bushing is stepped down in diameter.

Mike

Thank you.

Mike,
Great stuff. I went to Sacramento to look at your car before it sold and will really enjoy watching you restore her to her former glory. I was astounded by how complete the car was as it seemed every trim piece was there! But please, please quickly get rid of the orange!!!

I also saw the car in Vancouver, Wa. prior to the boat trip. I was really shocked to see how nice the car actually was, much better than expected. I think that I would have fun driving the car for a couple of years before I sent it in for paint and body work.

There are actually 2 special paint code GT-E’s that were known to be painted Calypso Coral (orange). One of them may be restored, the second one is well on it’s way to being finished.

For the body guys and welders out there,

Other than the paint job, this is the only significant problem with the car; Cracked shock towers. You can see where somebody in the past has gas-torched holes in the towers to access the UCA zerk fittings. The holes have then weakened the structure and allowed cracking to propagate. These photos are of the passenger side, which is much worse than drivers side. As you can see, other than the cracks, the towers (like the rest of the car) are incredibly well preserved and rust free.

My question is - can these towers be welded & repaired or do they need to be replaced? Any suggested techniques that have worked for you?

Mike