Not sure how they could be welded up to without reinforcing plates, they would still have the surgery scars that would look like crap.
You’ve got a nice pair of replacement shock towers, pull the engine and start drilling out those spot welds. Take a bunch of measurements brace and clamp everything square when you weld.
Holes can always be closed and cracks can be welded / repaired without a trace. Copper can be used to back the holes when welding the holes closed. Here is the thing, this will get old real fast. Every weld has to be done in spots and then left to cool. You could move from your holes to the cracks alternating for cooling time. You time and labor would be better spent replacing the shock towers because the metal looks real thin. Just my thoughts.
Steven
Steven
I would try to get a donor shock tower (not a Repro) and replace it.
It is not that big thing, If there are # you can “move” then ![]()
There is a lot of stress in the material after welding. Maybe it will crack again and again.
Joe
Thanks guys. I do have a very nice pair of towers, i was hoping I wouldnt have to use them!!!
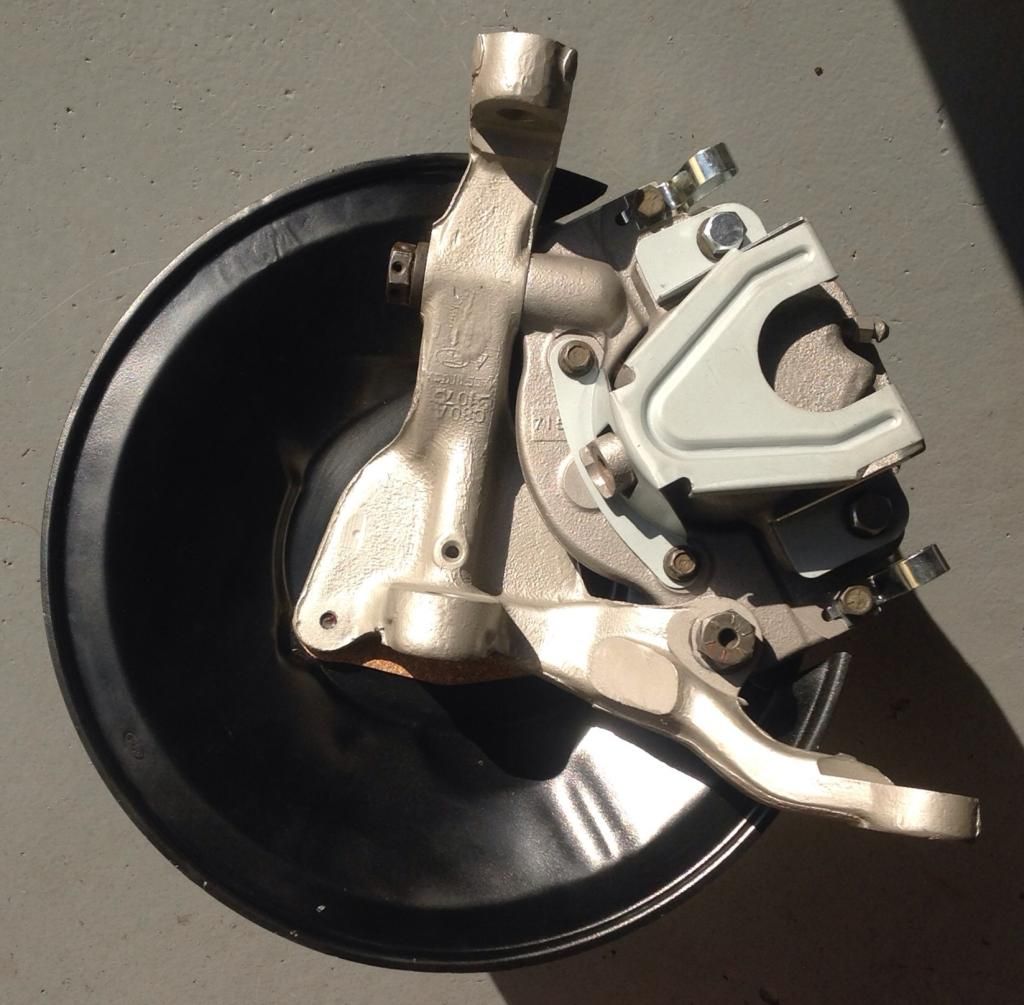
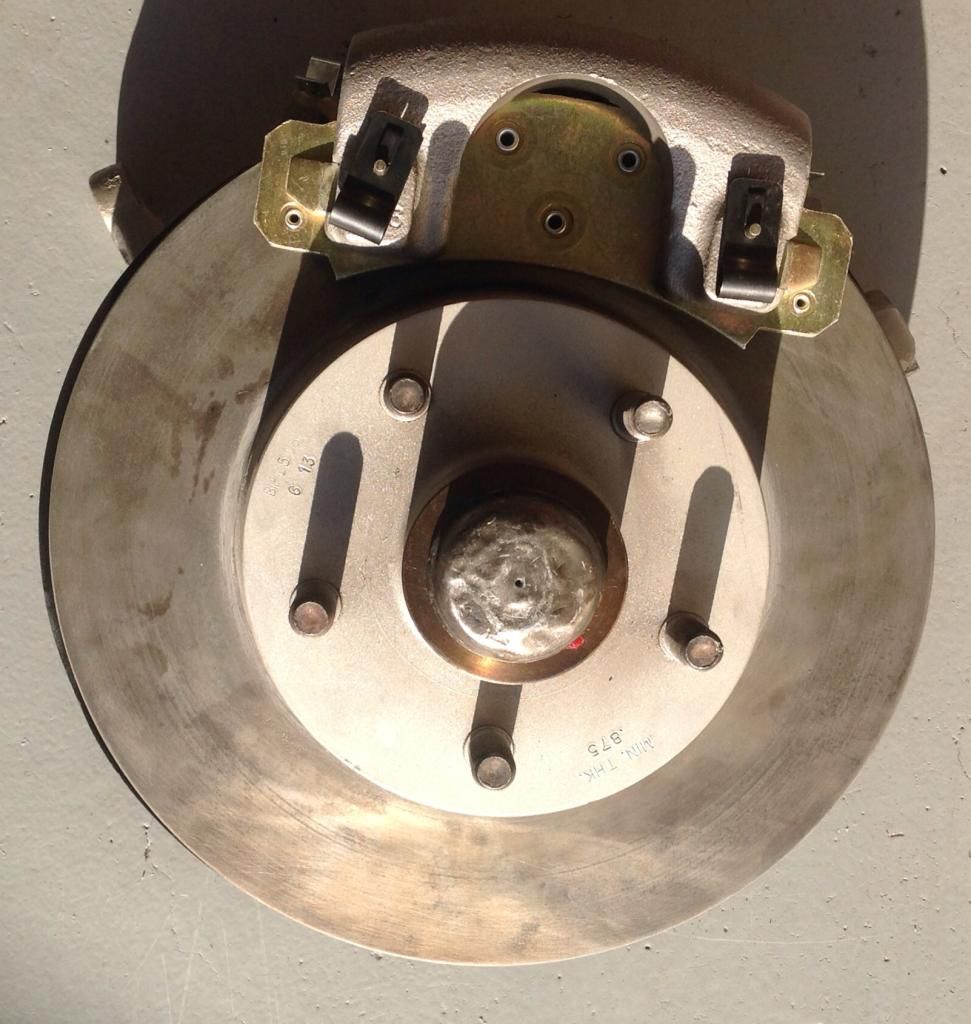
Just completed the front right wheel hub and disc brake assembly. All original components cleaned, sand blasted, painted, baked. Seals, gaskets, bearings and brake pads all replaced. Wheel bearings repacked. Caliper rebuilt. Just need to get a new crease cap!
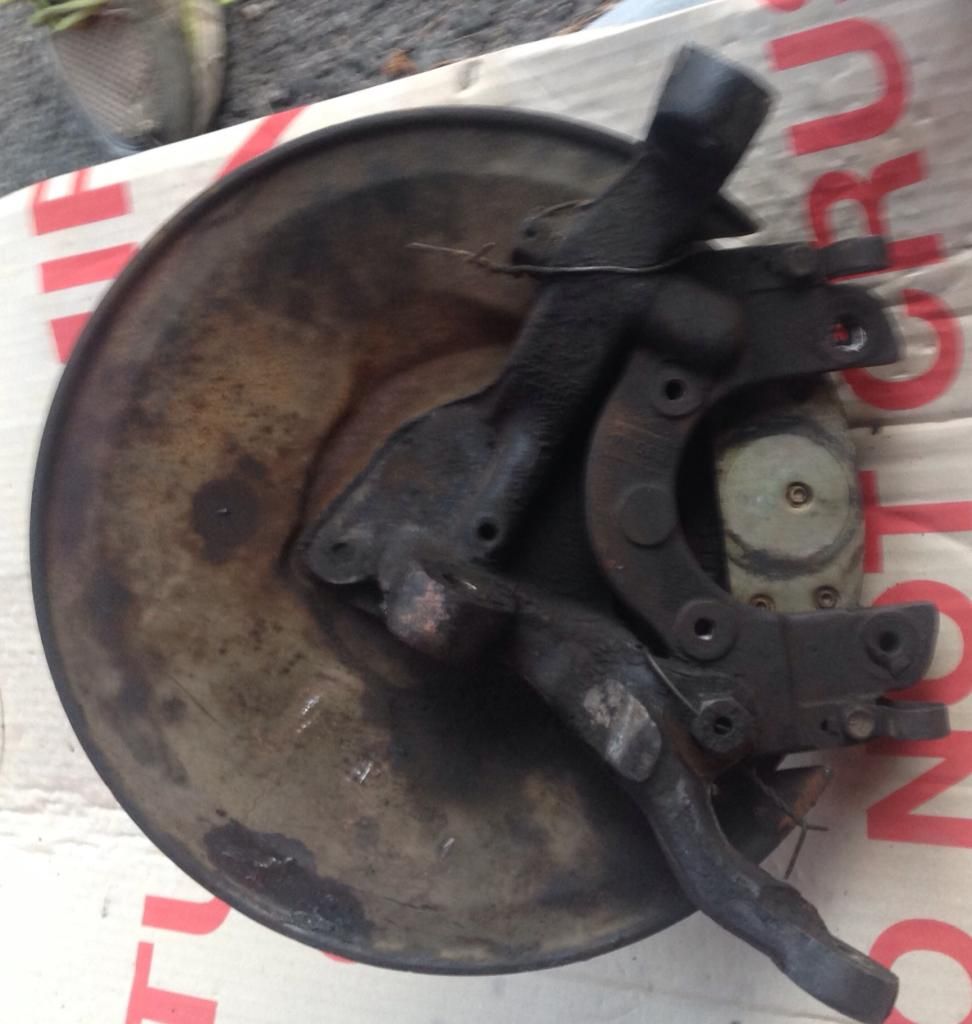
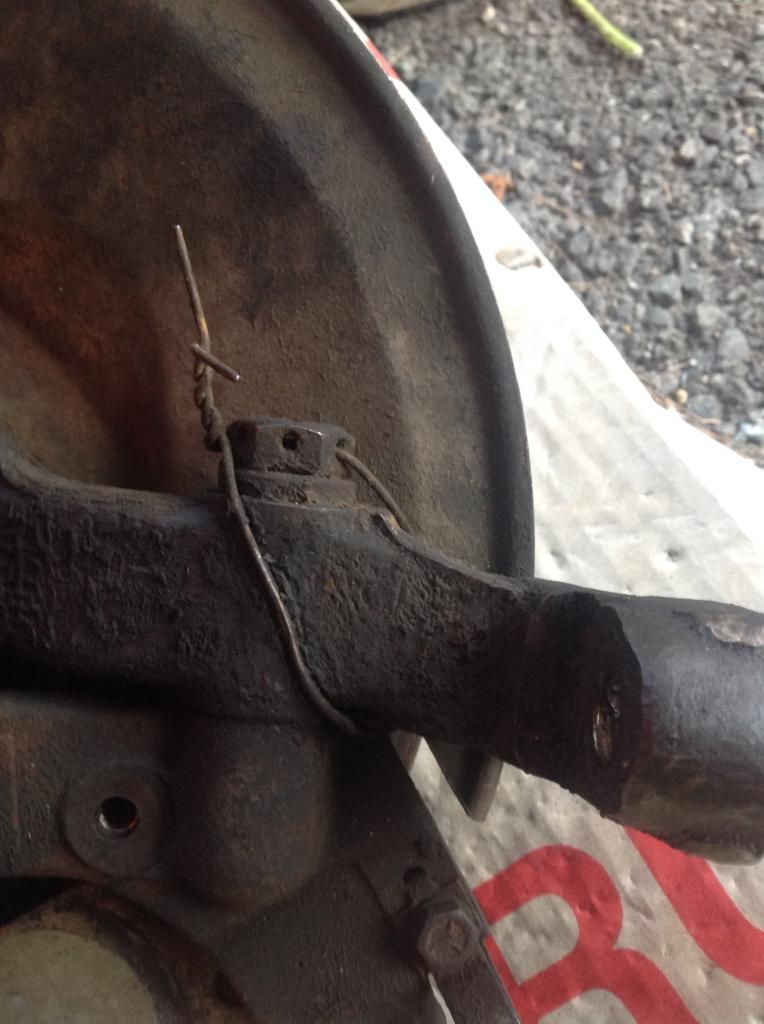
Bolts need safety wire.
Royce, do you have picture showing the correct way to do the safety wire?
Google AC 43.13-1B… It is available as a PDF… Go to page 7-19 through 7-25. (That is chapter seven, section seven, pages 19 through 25 )… There you will see safety wire practices and examples used in aviation…
Here is a link to get you started…
http://www.faa.gov/documentLibrary/media/Advisory_Circular/Chapter_07.pdf
Brian
Brian That is very cool stuff… How to safety wire anything. I am going to keep that as a reference. What I was wondering is what did it look like when the factory did it? Just like over spray, it is one thing to do it right and another to do it the way the factory did it, LOL!
I took close ups of the original factory lockwiring before dismantling. I just need to find the right gauge wire.
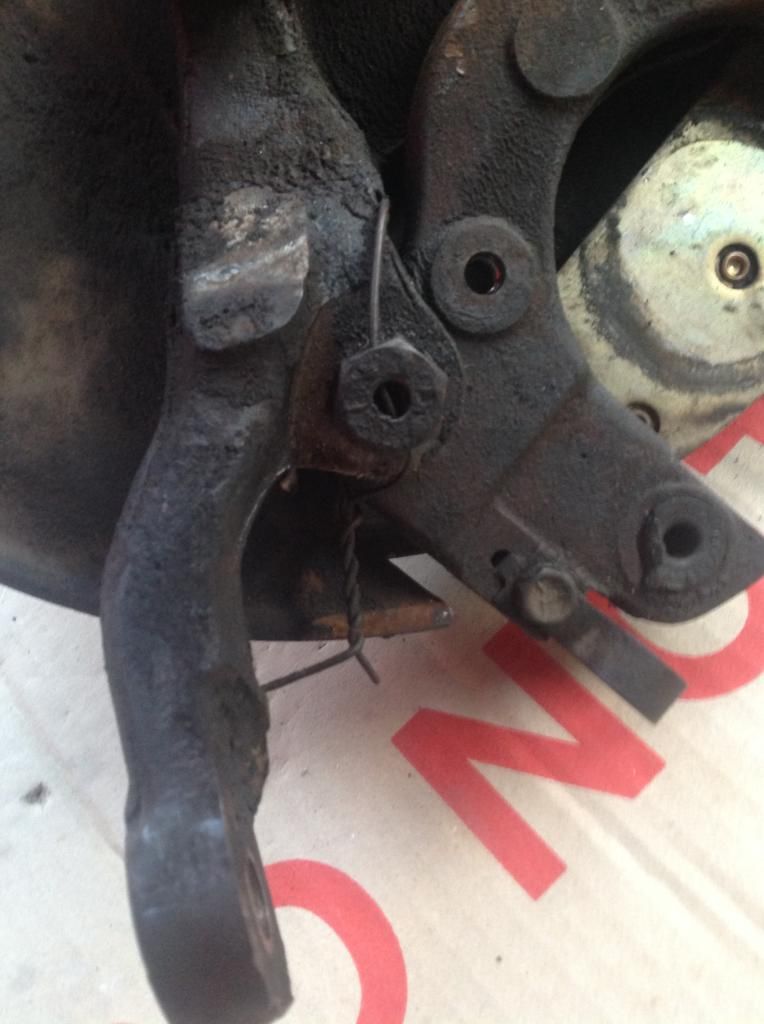

I’m glad to see that Royce brought the safety wire to light. I did not have any on my car. Between the “before” pictures Mike posted and the link listed earlier it’s great reference and I will add it to my car.
Steven
Thanks Royce, the ones on my cars are all different, and none exactly like what you have in the picture. One of them looks like a hostage situation.
The original wire is quite a heavy gauge and has five twists, as per the assembly manual.
The wire in my pictures is .041" stainless aircraft safety wire. The original wire is thicker non - stainless steel.
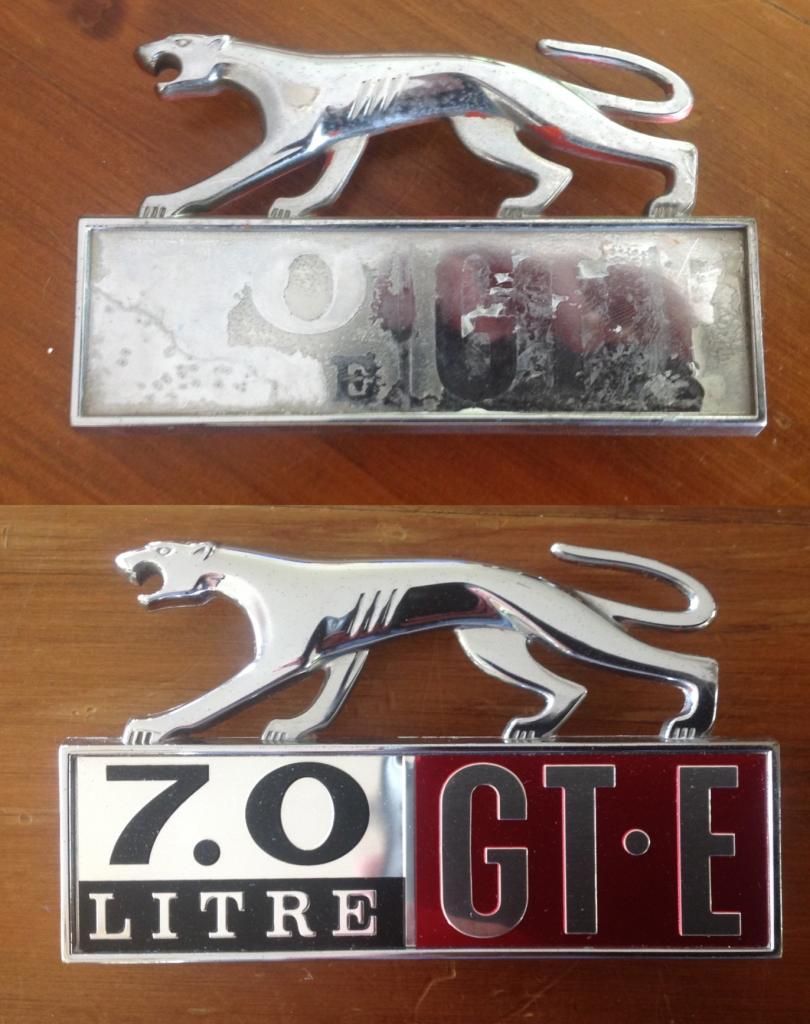
With a little bit of effort to remove paint spots, some metal polish and new decals, the 47 year old fender emblems have restored to basically new condition. Very happy with these
Before and after shots
Mike the fender emblems turned out very nice. What metal polish did you use?
Steven
Steve,
The polish was ‘Autosol’, a German product, comes in a tube. I have also used as the final polish on the stainless windshield trim - they came up like mirrors.
Mike
highly recommended - best metal polish around
The Autosol is okay, will need a good polish over it, as it is only a cleaner, i do like Flitz better, easier to work With, and it cleans faster
