I am installing my original coil springs in my 69 XR7. I am using the WCCC spring compressor. It does not appear that I can get the spring/compressor/spring perch assembly installed with the upper control arm installed due to the spring height. The manual shows removing the upper control arm to insert the spring. Any ideas on how to approach this task would be very helpful. I may be able to slide the assembly over the UC but I think it will tear up the paint and may just get stuck. Looking for a safe solution as I load the bear trap!
Not sure what the WCCC spring compressor looks like, but if it is actually two compressors that attach on the outside of the spring (either side) then no that type will not work well at all. The one you need must be the type that feeds down from the top where the top shock mount area is and goes down through the middle of the spring to compress it.
I made one using two pieces of flat stock with a large diameter all thread rod through them and nuts on each end. You slide the first plate through the bottom of the spring and the second plate through the top coil, insert the all thread with a nut on the bottom and on the top. Turn the nut on the top without letting the plates turn to compress the spring.
I actually welded the c channel plate i used for the bottom with the nut so it would not turn.
I don’t remember having to remove the upper control arm with perch installed to get the old spring back in, but I had cut one coil off the top of the original spring to lower the car a little.
It worked great when I installed my original springs. Now about 8 years later the drivers spring is sagging about an inch and a half more that it did. I got new 1” drop springs from WCCC and I will be installing them in the next few weeks using the same tool I made 8 years ago.
I don’t have pics at the moment, but can take some tomorrow if you need them.
The spring compressor WCCC carries is internal and attaches to the perch spring and a plate, nut, and washer on top of the shock tower. It worked great for removal. Just not enough room to get that assembly started without compressing at an awkward angle until the spring perch slides up the inner edge of the upper control arm. I would also have to rotate the spring end about 3/4" to hit the retainer on spring perch. I am doubting that will be easy with the spring partially compressed.
I just looked at the compressor you are using, and it looks like it mounts like a shock absorber. Once connected to the tower cap and the spring perch, it looks like you compress a bit, remove the upper control arm, and then release the tension and pull out the spring and compressor. Reinstallation would be mounting it back in the shock tower with the new perch attached, compressing it, installing the new upper arm and/or control arm shaft, and then releasing pressure to let the perch down to mount it to the arm.
Maybe you need to leave the wheel on the ground to provide some compression to the spring so it can be attached and then hoist?
I haven’t used one like this (Have used the one 69XR7 Ragtop mentioned several times), so your best bet is to call WCCC and get the instructions from them directly.
Good luck!
The compressors on the market leave a lot to be desired. Ones you can “rent” from auto parts stores have an issue. The hooks are not much of a hook & cause clearance issue. I have used (and worn out) ones made by Brannick see link
https://pic.ebid.net/upload_original/2/1/5/uo_1638893138-15906-12.jpg
This type allow removal of the spring from the car, as others keep the spring up in the tower allowing service of the upper arm.
I strongly suggest if using the Brannick one w/ new springs, use hose clamps to keep the compressor from slipping & scaring the crap out of you! (as in Boo!), but could cut & maime you too!
Treat it like nitroglycerine! Like BOOM!
Removing the UC arm makes sense ( and is what is described in the manual). I have not assembled anything on the spindles yet.
Generally neither the upper or lower are particularly easy to move, but-
If you are installing , then you already have disconnected the upper ball joint. Just pull down on the lower control arm, and slide the assembly up into the tower. Are you putting in new rubbers now too? Anyway-get a floor jack under the lower control arm, and jack under the spring cup, until you can reinstall the ball joint nut. Make sure you keep your flat spring end at the flat end of the control arm spot. With the spindle bolts tight you can remove the compressor and install the shock.
I have one of these and it has served me well.
I have one of these. It works well. I think I have ysed it 5 or 6 times so far.

https://www.ebay.com/itm/264306294293?hash=item3d89e1fe15:g:OpoAAOSwojJhR7lo
It takes a little getting use to how to use it. I got mine from WCCC.
I have one I bought from Summit Racing. It works as advertised.
Ditto what they said. I’ve only ever used this style and it works great on everything I own, Ford and GM.
The WCCC style spring compressor works well for disassembly and reassembly except that lining up the spring perch to the control arm can be difficult. If you are replacing the control arm it may pay to leave the bolts to the body loose until the studs are stabbed.
I finally returned to the coil spring installation.
I removed the upper control arm.
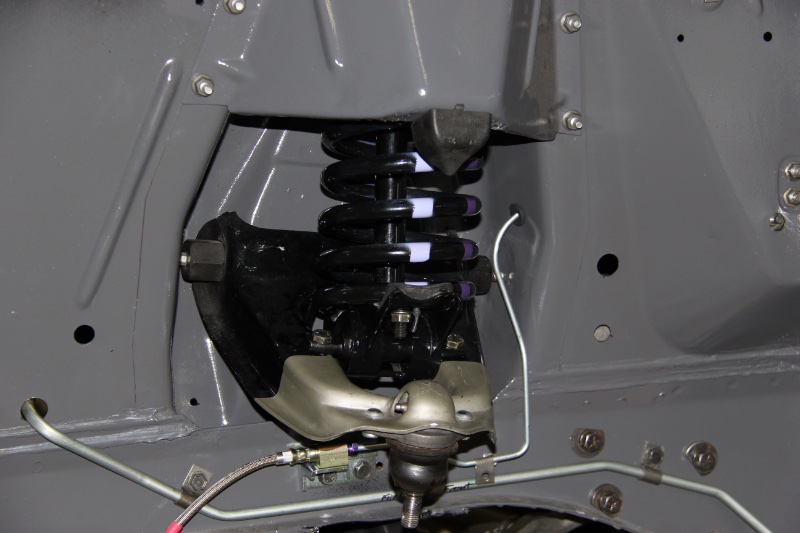
I lined up the spring on the spring perch with the bottom plate on the compressor bolted to the spring perch.
Moved the assembly into the shock tower and locked into place with the nut and plate assembly on top of the shock tower. It required a little wiggling to get the new rubber coil seal to slip over flange in the shock tower.
I compressed the coil until I could slip the upper control arm behind the spring assembly. A little scary I must admit.
I tighten the upper control arm nuts snug but discovered it was easier to get the spring perch bolts installed with the UC arm nuts loose.
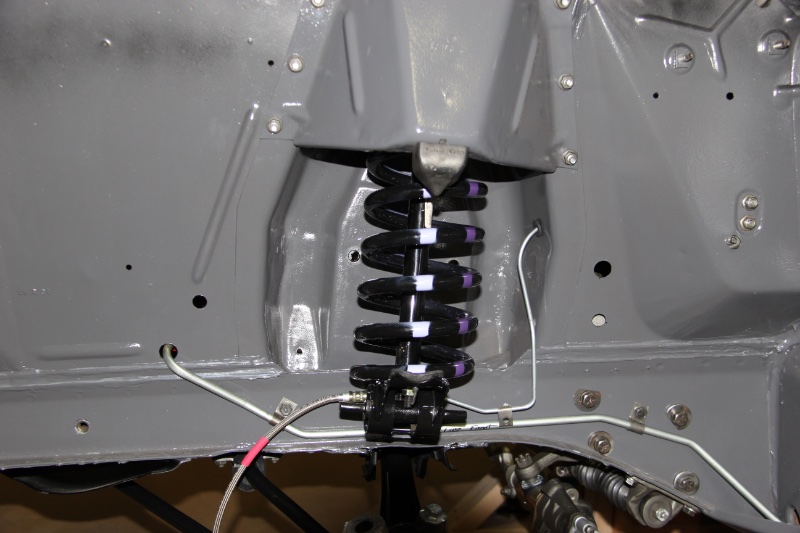
Torqued the upper control arm nuts to 87.5 Ft pounds. Torqued the spring perch nuts to 32.5 Ft pounds.
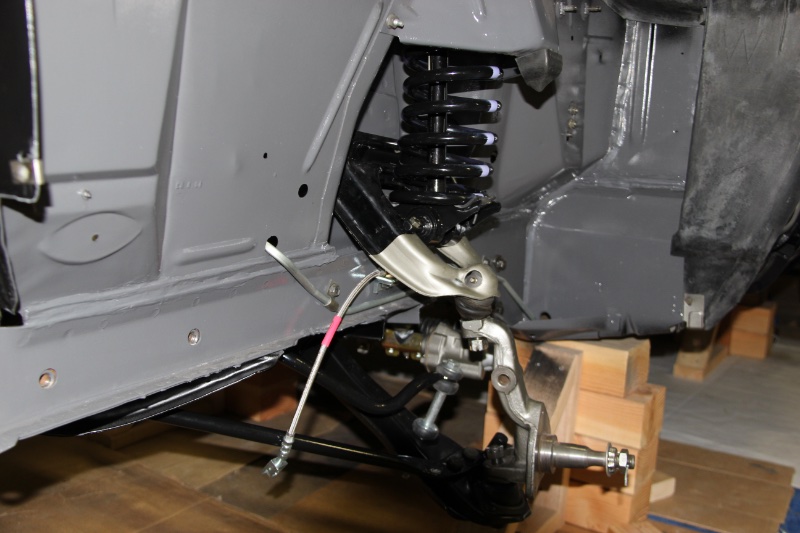
Reattached the spindle to the upper control arm.
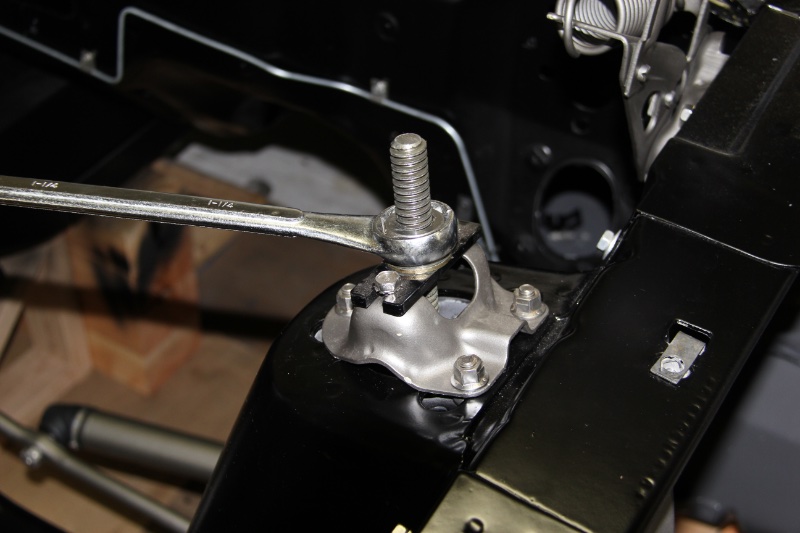
Backed the top nut off the spring compressor until it was moving easy.
Torqued the mounting bolts for the strut arm to 87.5 Ft pounds.
Torqued the mounting bolt for the anti sway bar to 10 Ft pounds.
With the compressor pressure relieved the rear side of the upper control arm is resting about 1/2" from the frame rail. I hope that is about correct!
I removed the compressor tool attaching nuts from under the spring perch so it can be pulled out through the top of the shock tower.
Any advice before I do the other side is welcome!
Looks real nice, I don’t like fooling with those springs either, safety wise.
A guy from my high school days went into auto body work.
Told me he would always wear his motor cycle helmet when doing springs oncars.
Man look out!
That looks way too pretty!! Very nice job!!
My compliments to the “chef”!
Welding gloves help me feel a bit safer!
Advice- Have someone else do the other side!!
Looking good. With the amount of potential energy under compression, the front springs undoubtedly are anxiety provoking. After-all, it’s pretty much a bomb. The last few times I, using a WCCC compressor, put a spring up into the shock tower and then would install the upper control arm. In order to have clearance for placing that upper arm the spring need be compressed pretty significantly. Next time I’m just going to take off the shock tower plates which bolt onto the outer part of the aprons. It would allow for more maneuverability in installing the springs and makes it possible for a good majority of the suspension to be installed with the springs, perches and shocks being the final items of a suspension rebuild.
I will try that on the other side. The spring with the spring perch is very long - it may not slip in above the UC arm even with the tower apron off.
Be carefull I had a NAPA bought compressor that I used about 8 times the threads were wearing and showing signs of use on or about the 8th use the threads let go fortunately it let loose on the floor and no damage. Get the best tool for this job.
The threads on the spring compressor see a lot of load. It’s best to keep them well lubricated with an EP grease, otherwise the thread surfaces start galling and tearing. If you build your own, like I did, Grade 8 (Cr Mo alloy) threaded rod holds up a lot better than plain carbon steel.