Fordblue's 67 Coupe:

So it begins…

By null at 2011-11-09

Luckily, last time, I left the exhaust clamps loose, so that came out on about 5 minutes. The gods of car disassembly were with me today, in a hour, I had all parts out of the way and the transmission ready to drop out. Got the original transmission out, and immediately found the source of my leak. The bolts holding the pump and bell housing to the case were only finger tight. This is why I am no longer letting helpers work on the car when it comes to major projects.

Anyway, swapped the bell housing and the linkages over and amazingly, I guessed right on which way the shafts went in when putting it together.

Okay, I need the Navajo Code Talkers of Ford p/n’s to decode this for me:
And yes, I fixed those leaking valve covers already.

By null at 2011-11-09

Here she is, all purdied up and ready to go in the car:

By null at 2011-11-09

Reassembly went about the same as disassemby. Fairly smooth and uneventful except for when I drove my knee cap into the body seam running under the passenger side of the car. I thought I split in half like a piece of fire wood upon initial impact. Amazingly, no blood loss.

Got the H pipe back on the car and fired it up. let it idle for a minute, put it in gear and… nothing.
Then I remembered I put a 2400 stall converter in the car, revved it a little and it has reverse!!!
Put it in drive, the wheels go forward.

At first, the shifts are pretty harsh and doesn’t want to go into 3rd gear.

After running a while, the shifts soften up and it now runs through all 3 gears on its own, sweet.

I hop in the truck, run to the store, get 4 more quarts of fluid, restart the car.
Pulled the dip stick and can hear a sucking noise from the tube, so I know its low on fluid. Add 2.5 more quarts of fluid, reading right at full on the dipstick and no more sucking noise.

Drop the car in gear and the shift are back to being harsh again, so the pump and shift kit are doing their jobs.

Now, the car is not wanting to shift automatically, I can drop it in 1, run it up to 20 MPH, shift it to 2nd, shifts like a dream, put it into Drive, and no 3rd gear again…

I hope that maybe it just needs to time to sort itself out, so I drop the car off the stands, and decide to go for a quick spin in the rapidly setting sun.

Its driving the same, can shift manually with no problem, but no 3rd gear. It has reverse, low, and 2nd, so all the hard parts are working, I just have maybe a mix of modulator adjustment and valve body glitches.

When I shift from 2nd to D, the car revs like it is over running a clutch. Can a really misadjusted modulator cause this? Or am I pulling the valve body back out?

I put all the check balls, springs, and other mods the shift kit called for in correctly, I made sure of this, I have had the “missing check ball” shift problems before, so I made sure to avoid that this time around.

Of course, between the cross member being right behind the modulator and the exhaust being right along side it, I couldn’t do any adjusting today, as it was dark when I got the car back in the driveway.
Tomorrow it continues…
Okay, I pulled out one side of the exhaust, the cross member, the tail shaft housing and was able to get the governor off the car fairly easily.

It all looked fine, but I did pass some emery cloth over the valves in the governor and polished the bores a little just to make sure. Got it all back together, everything moves freely, and it is still doing the same exact thing!!!

Looks like today will be valve body removal day.

The only thing I can think is that the Trans Go shift kit says to “discard” the spring in the 2-3 valve while doing all the other valve body mods and my 2-3 valve might be stuck in one position now. I didn’t discard the spring, it is just in a bag with all the other springs I replaced, so now I need to figure out which on it is and put it back in and see what happens if nothing else looks obviously wrong.

We shall see, I am getting ready to go crawl under the car again…

Fordblue, it looks like C5AE-6015-E on the block which breaks down as C-Decade for the 1960’s, 5-Suffix for year in decade, so C5 is 1965, A-Carline for Ford (doesn’t mean it’s not correct for your car),E-Engineering group for engine, 6015-Basic # for a block & E-Change level (“A” would be original status, “E” would be 4th, the letter I & L wasn’t used because it could be mistaken for a 1). Above the C5AE is the date code for when the block was casted, looks like 6M19 which would be year,month & day (6-1966,M-Dec & looks like 19 for 19th day). John

Thanks, the car was built in January of 67, so a Dec 66 block sounds right.

As for the transmission, here is the latest:

Okay, pulled the valve body out, put the spring back in to make the 1-2 shift less harsh, polished all the valves in the valve body with emery cloth, double and triple checked that they all go into their bores freely with no hang ups and move freely.

Put it all back together, and it is still doing the same thing.

It gave me false hope, as it did the same thing as the first time.

If the fluid is low and the pump is most likely pumping foam, it shifts through all the gears, no problem, like it should. As soon as I top off the fluid and the pump is building full pressure, all the same glitches come back. Acts like a completely manual valve body and rev free when shifted from 2 to D.

Still has reverse, 1st with compression braking, and 2nd, all working like a charm in full manual.

I am officially lost.

Any clues?

IT LIVES!!!

I’M A MORON!!!

The piston that the modulator valve drives was in backwards…

Guess I should have checked that first.

Oh well, its been test driven, just needs a modulator adjustment now. It wants to shift to 2nd at around 5MPH, so I need to crank it in and give it a little later, harder shifts.

Now I can tell how worn the 8" and front suspension is. Time to start saving for the next projects.

Today’s project: Front shocks and motor mounts.

When I was driving the car up the ramps with the hood up, I watched the divers side of the motor climb up about 4" from the torque.

Just a heads up, the 1967 motor mounts are not reproduced. They are taller than the ones you can buy at the parts store. When you install them, they will be under some tension. Once you get on it, the torque will rip your driver’s side motor mount in half. I went through two pairs (and a couple of upper radiator hoses) before I put in a torque strap.

I purchased a pair of Prothane motor mounts and I struggled to install them. Once I figured out what the real problem was, I picked-up a set of 1968 frame brackets on eBay. Here is a comparison pic of the two frame brackets. The 1967 is on the left and the 1968 is on the right. Notice the position of the outer hole.

https://lh6.googleusercontent.com/-ktxYUoOzE9U/TqmuYY9fesI/AAAAAAAAA74/WtCUi6GlWR8/s640/Frame%252520Brackets.jpg

Thanks for the heads up. I just ordered a set of brackets from WCCC, so today will be shocks only I guess.

Progress abound the last few days!!!

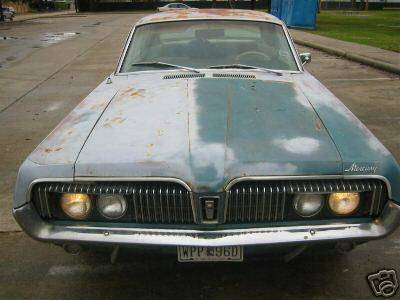
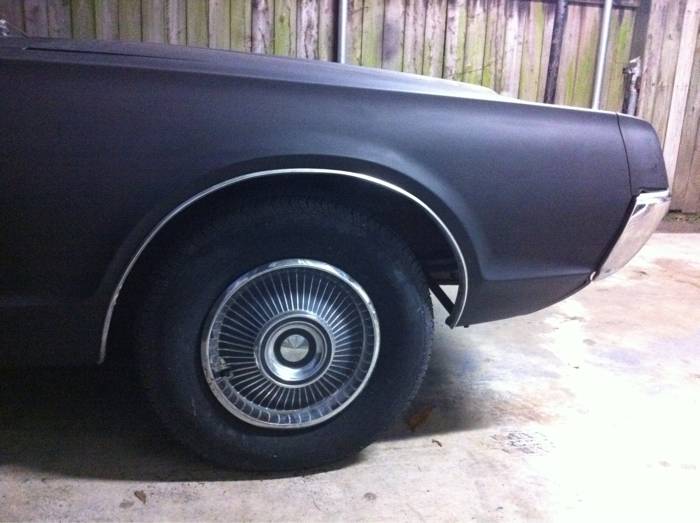
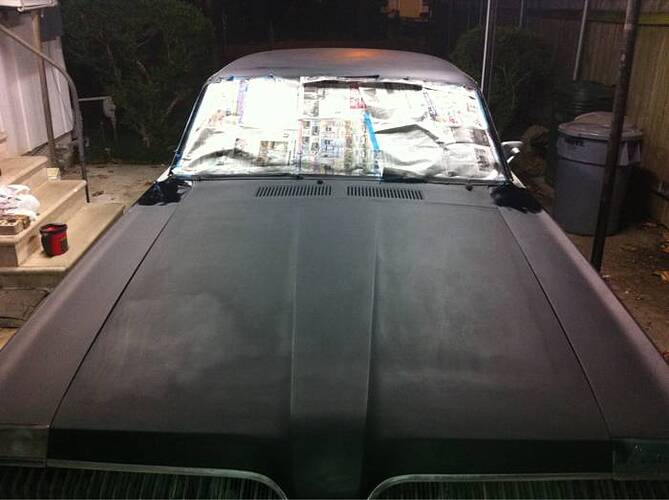
I have become very familiar with aircraft paint stripper, scotchbrite and flat black primer:

By bigredtruck at 2011-11-15

By bigredtruck at 2011-11-15

By bigredtruck at 2011-11-15

By bigredtruck at 2011-10-19

By bigredtruck at 2011-11-15

So far, the only damage I have found is the front lip of the hood behind the trim needs replacing, there are a few spots of bondo that are covering dings and the holes where the vinyl top trim used to be.

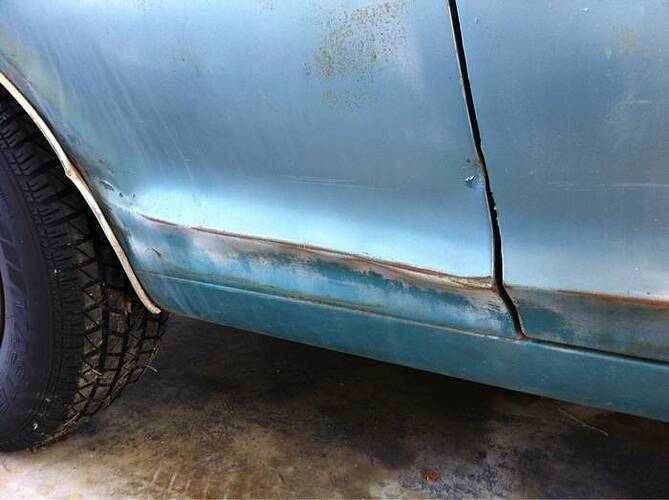
There is no rust anywhere around the wheel wells or the bottom of the doors. I have the one big dent to pull just in front of the passenger rear tire:

By bigredtruck at 2011-10-31

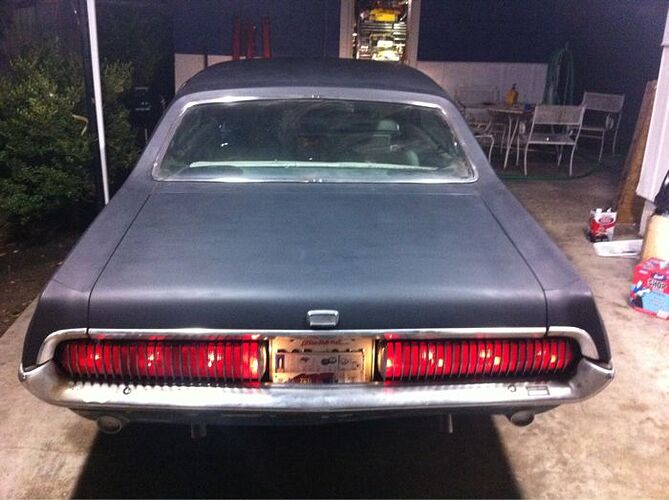
As well as some ding removal and the usual rust repair at the corners of the rear window.

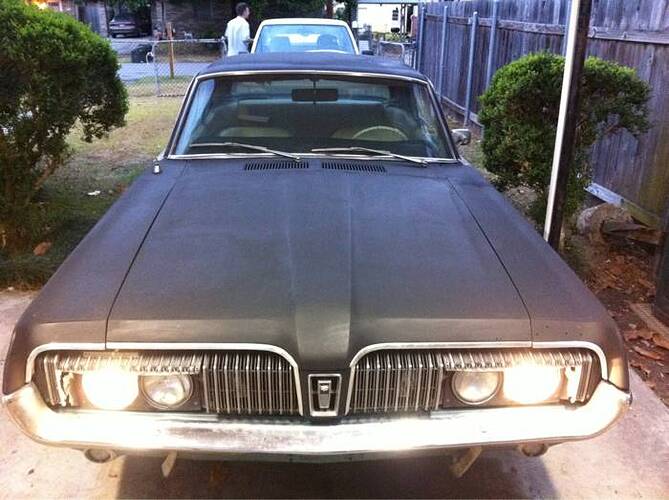
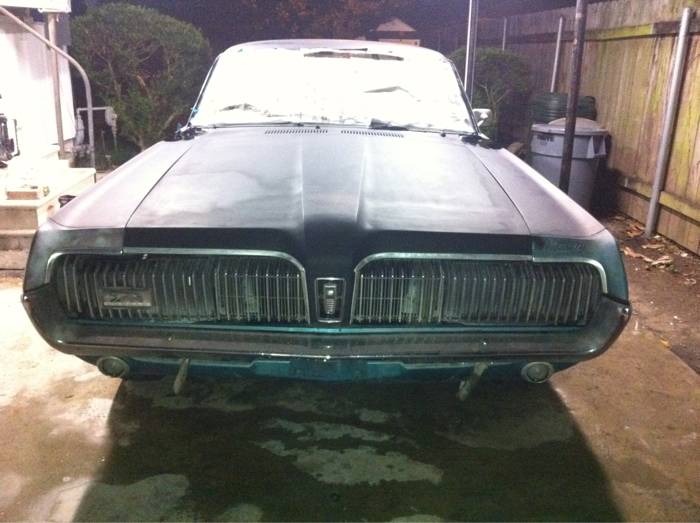
This is just flat black primer on the car for now. I will have the interior removed and get the whole car blasted and painted properly at a later date. Right now I am just doing this as damage assessment. So far, so good. It is a really solid car that was repainted about 4 times from what I can tell by how many applications of paint remover are being needed.

This pics are a little misleading, I still have the doors and rear fenders to do. I just snapped these so I can show off the car to people finally. :smiley: :thumbup:


By bigredtruck at 2011-11-15

By bigredtruck at 2011-11-15

By bigredtruck at 2011-10-19

By bigredtruck at 2011-11-15

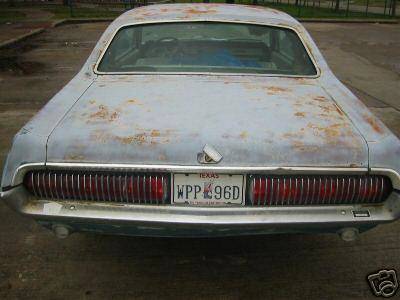
Finally, all cleaned up and one color. It was back half black, front half gray after sanding.

By bigredtruck at 2011-11-17

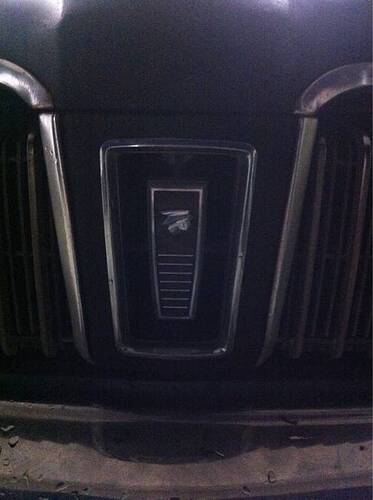
I have the one droopy eye lid on the passenger side. I need to pull that side of the grille, as the outside hinge for the headlight door is broken. I have a spare in the shed that I bought off of ebay a while back.

In an attempt to get rid of some of the boxes I have had building up for car parts, I decided to install my Custom Autosound stereo. It doesn’t have the aux in or anything, but it sounds a lot better than the antique Kenwood head unit with a 5 band EQ mounted in the glove box. I pulled all of that out, along with an extra 30 ft of wiring that was under the dash that was no longer needed.

By bigredtruck at 2011-11-20

By bigredtruck at 2011-11-20

Looks good! What model Kenwood did you take out?

My mistake, it was an Alpine. Here is what came out of the car:

By bigredtruck at 2011-11-20

By bigredtruck at 2011-11-20

Okay, got the motor mounts installed today. All went easily, just a dirty job.

The bucket of 50/50 Purple Power and water I had from the transmission rebuild is still getting used.

I got the brackets for the mounts from WCCC yesterday, so I unpacked them and tossed them into the bucket.

Took them out today, hosed them off and all the grime came off and got them back down to clean metal. So that stuff is staying around for a while until it no longer takes grease and grime off and becomes a grease and grime plating system instead.

The drivers side mount was ripped apart as I suspected, and the passenger mount only had one bolt holding it to the block. So once the rain dies down here, I can drive it again and see what the difference is.

That old Alpine Radio is really not bad, but the Booster Equalizer is junk. The Alpine probably sounds better minus the Kraco…

Took the car for a spin tonight. With proper motor mounts, it now picks up the drivers side of the front end when accelerating instead of the engine just moving around in the bay.

Got an enthusiastic thumbs up from a kid who looked like he just got his license while sitting at a red light.

Everyone seems to love the flat black, full trim and hub caps.

Once I got back home, used a borrowed bore scope and fished it up under the dash by the a/c box. I have cowl repairs to do…

Oh well, I knew it was going to be bad by the results of the garden hose test and seeing when the carpet got wet. I was hoping it would just be door seals.

I’m going to try this method:

https://www.youtube.com/watch?v=dKHn7fFPZoc

I just looked at the video and to be honest, I would never done it this way even if I had a show paint job on the car (I would say especially not when you have a show paint, because then the rest of the car most likely is nice as well). In my opinion this video shows the kind of restoration work that makes it really dangerous to buy restored mustangs as you never knows what kind of work that has been done to the car previously.
One of the problems this method will cause is that it will be impossible to grind and treat the welding seams right to prevent them from starting to rust. Oh, and while I mention welding; welding something from above is fairly easy, welding from below and up is not easy at all, especially not when melted glowing metal is dropping down in your face. :laughing: I know you can probably spot weld it and seal it from the underside, but you should also have in mind that the cowl on a Mustang or Cougar is an essential part of the unibody and when this is not done right it might weaken the body structure.
I would also recommend that after welding the air ducts should be sealed and painted from above to protect them from water. That will be hard or impossible to do when the top of the cowl is in place.
It is a little more work to do it the right way, but well worth it. And then it is challenging and a lot of fun as well. :slight_smile:

Maybe once the weather warms up and I closer to getting the full body work done to the car, I will attack it from above like you did. Right now, I am just so pleased to have the car on the road and be reliable, I am dreading starting a project that will put the car out of commission for a while.

Yesterday’s and today’s project was pulling the bumper, and changing the battery tray and broken passenger headlight door hinge.
I had to grind the acid worn heads off of the bolts that hold the battery tray down from above, then I was able to get the vice grips on the stubs of the bolts sticking down in the wheel well and spin them out the rest of the way. The lower bolts on the diagonal brake needed the bumper pulled to get to, but they at least came out with no fighting.

Then I moved onto to the broken headlight door. Luckily, the old grille I bought off of ebay a while back had horrible rust, but not in any of the pieces I needed to swap over to my car. The grille itself had broken between the headlight door and the outer most piece of fixed grille, so when it was shut, the spring would pull the whole door back into the car and look all messed up.

It is back in, and today is full reassembly day, but I am waiting on headlight adjusting bolts, headlight door bolt bumper stops and other misc parts from WCCC to get the headlights all back together and working correctly.
Amazingly, the grille I bought had one good vacuum motor, and only one of mine was shot, so I might have correctly working headlight doors very soon as soon as I put my experimental vacuum solenoid valve in place.

Normally, it is Home Depot I can’t visit without spending $100, now it is the WCCC site…

Here is what I am trying for a vacuum solenoid. It was $30 with shipping as opposed to $300 for an original part.

I bought this valve on ebay: item # 250538322435

By bigredtruck at 2011-10-16

It is a 4 Way, 5 Port, 2 Position solenoid valve set up for 12VDC.

It has an “in” port, “a” port, “b” port, and 2 “exhaust” ports. Its normally used to actuate a dual action air cylinder, which is basically what the vacuum motors are on the car.

When the headlights are off, the vacuum “in” port is open to the “a” port which will get plumbed to the close side of the motor. The “b” port, which will be plumbed to the open side of the motor will be open to the correct “exhaust” which will be plumbed to a filter and open to atmosphere.

When the headlights are on, the solenoid will pull in, open the “in” signal to the “b” port and open the “a” signal to the other “exhaust” which is plumbed to the same filter open to atmosphere.

It has built in status LED lights, a manual override, and should draw less than 1 amp when engaged.

I have used similar valves at work, and it should all work in theory.

The only drawback is they are supposed to be in a control cabinet out of the elements, so I have to come up with some sort of enclosure for it.