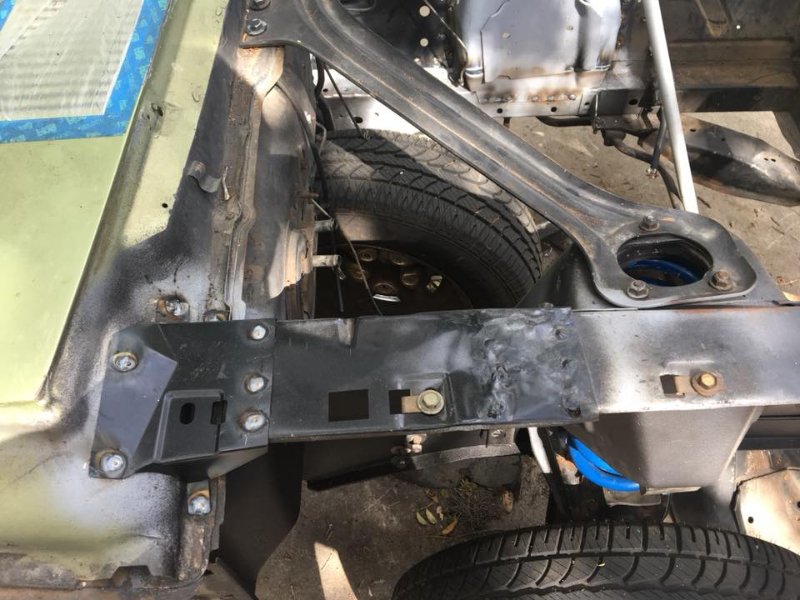
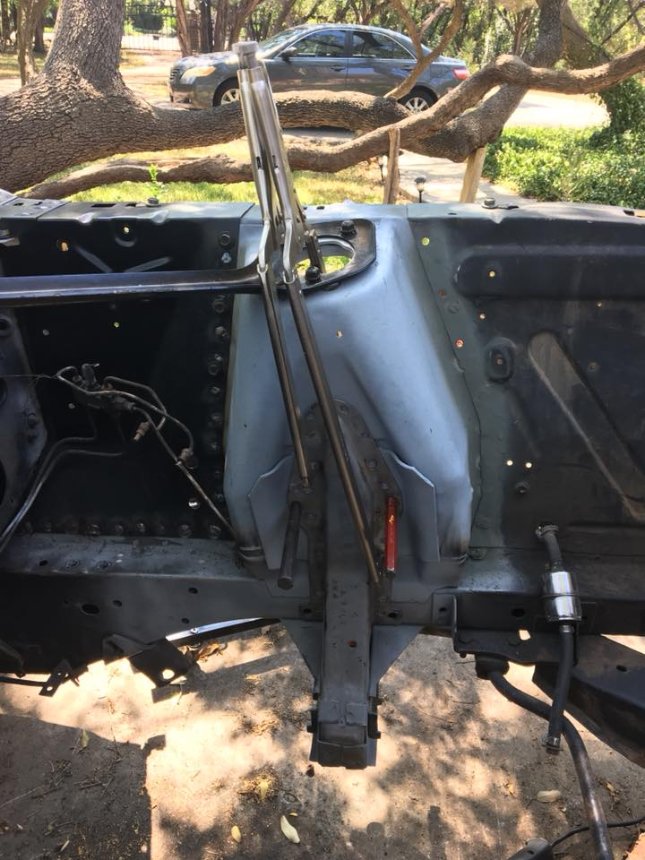
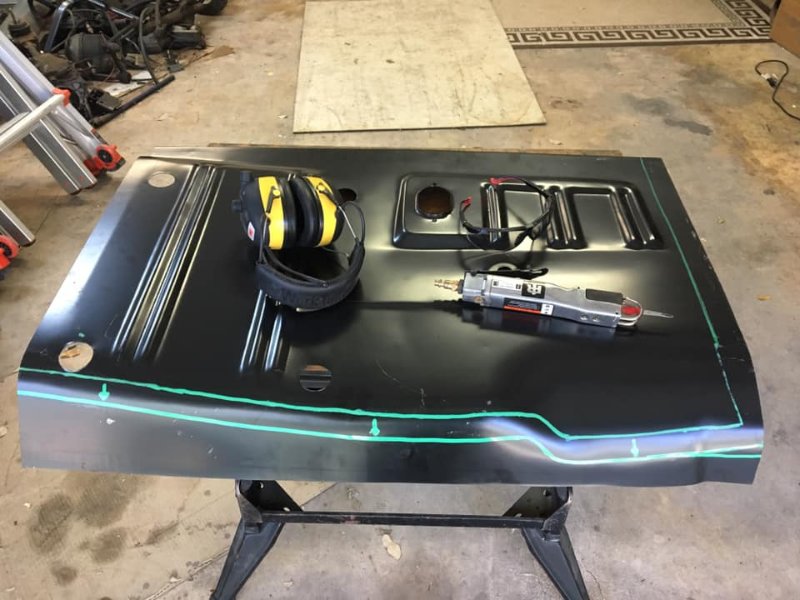
It’s been about a month since I’ve gotten any work done on the car, I’ve been super busy on the weekends plus it’s getting hot here in central Texas. I’ve been tinkering with new(used) valve covers during the week while I’m not working on the car. This past weekend, I got a little welding and sheet metal done. I installed the rear fender extensions and got 75% of the driver side shock tower brace welded then windy weather started rolling in and couldn’t get a decent weld in. Next I need to clean up the driver side motor mount support, weld it in then I’ll be done with engine bay metal work and I can move on to floor pans.
Wow! Not only are you not intimidated by the big stuff, but you are doing some quality work! Thanks for the pictures, this will really encourage others to tackle their projects.
Thanks Don, you’ve certainly helped me out getting the correct parts for this thing. Not looking forward to working with floor pans but I’m up to the challenge.
I agree with Don, you have done some amazing work! I’ve learned a lot about how the front end comes together from the excellent pictures. Keep them coming!
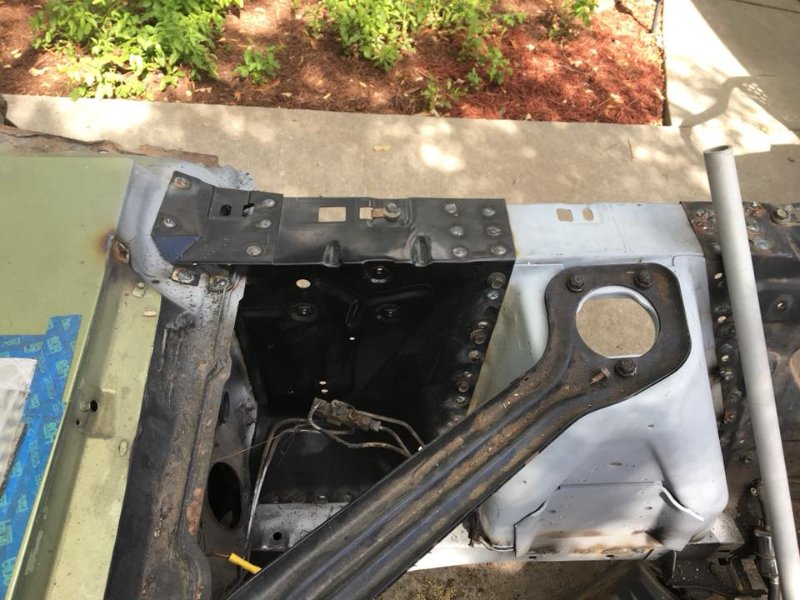
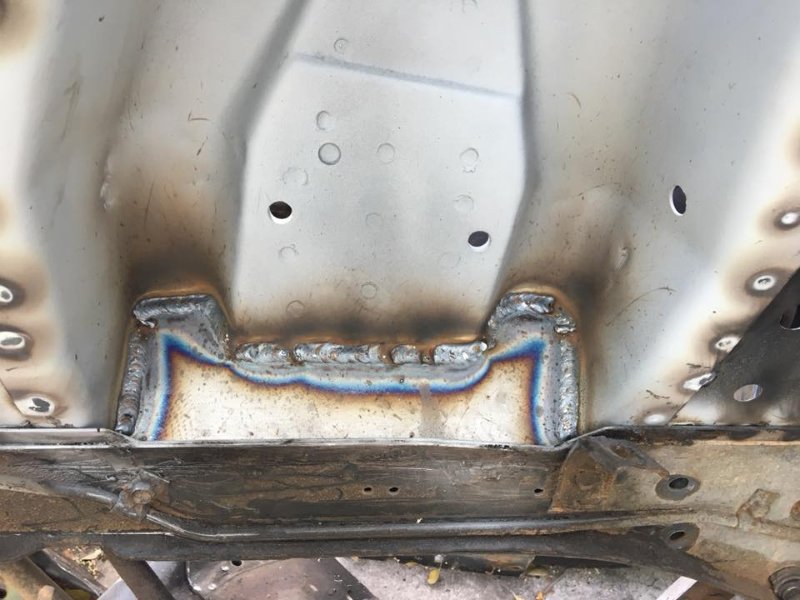
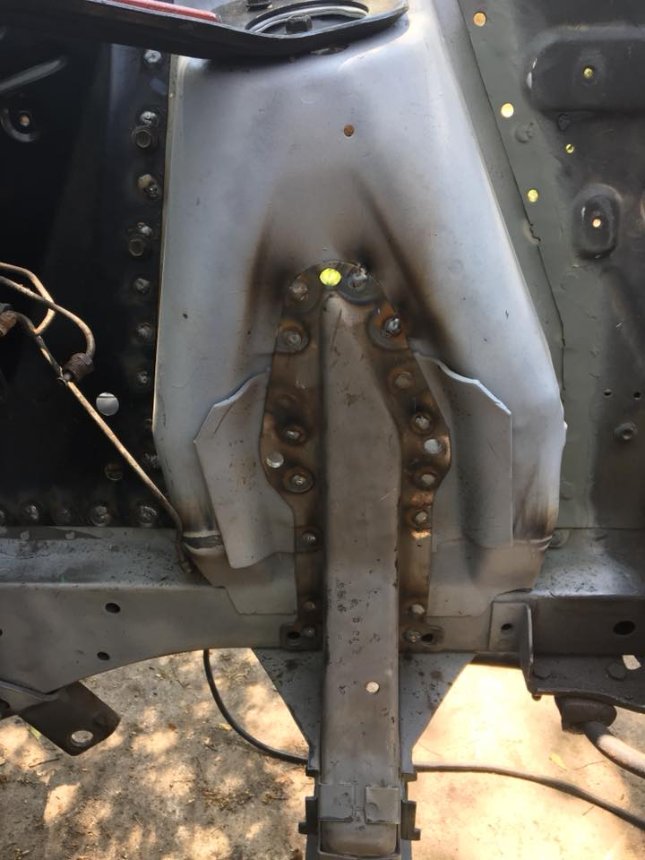
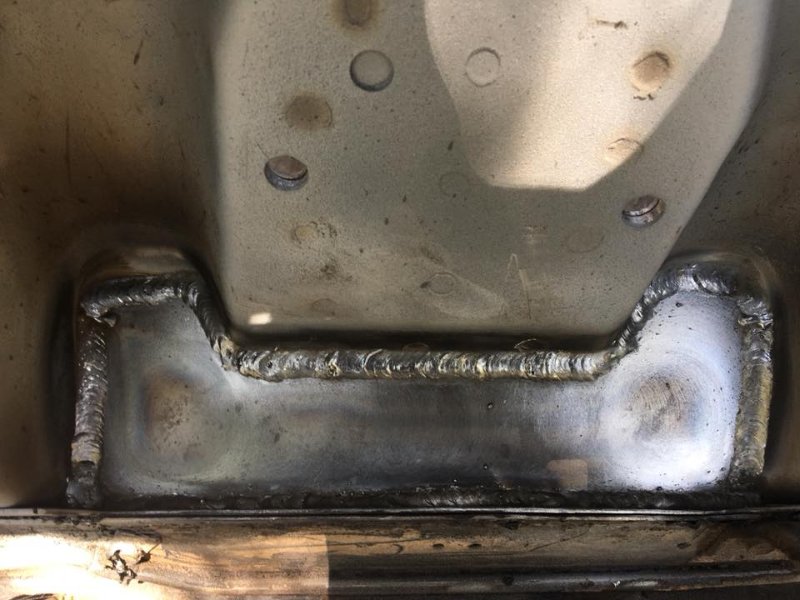
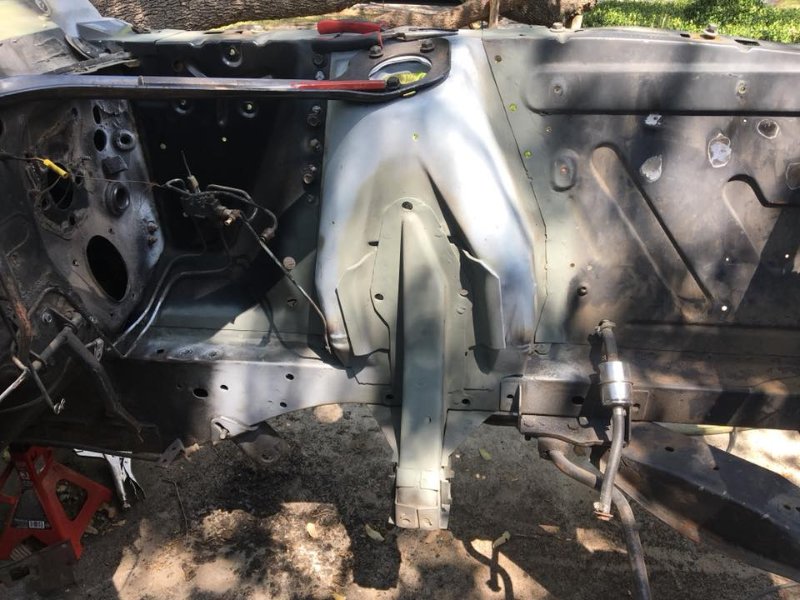
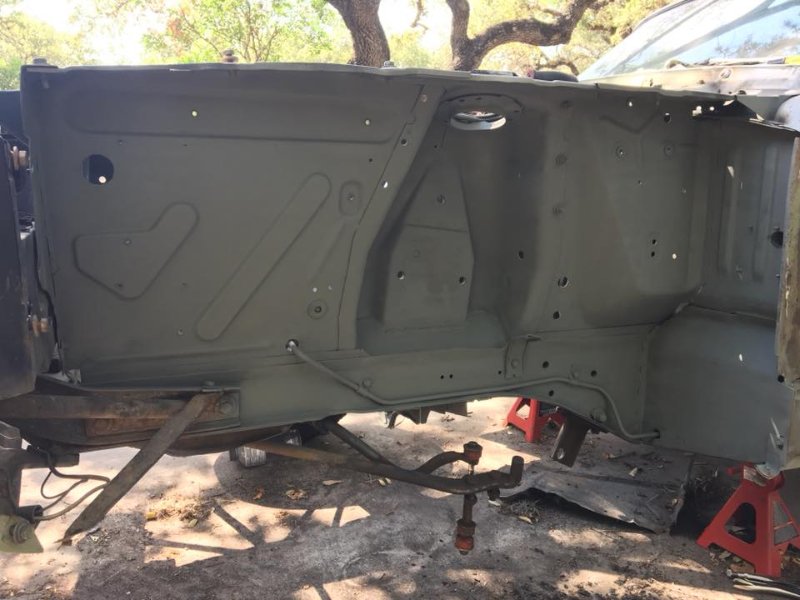
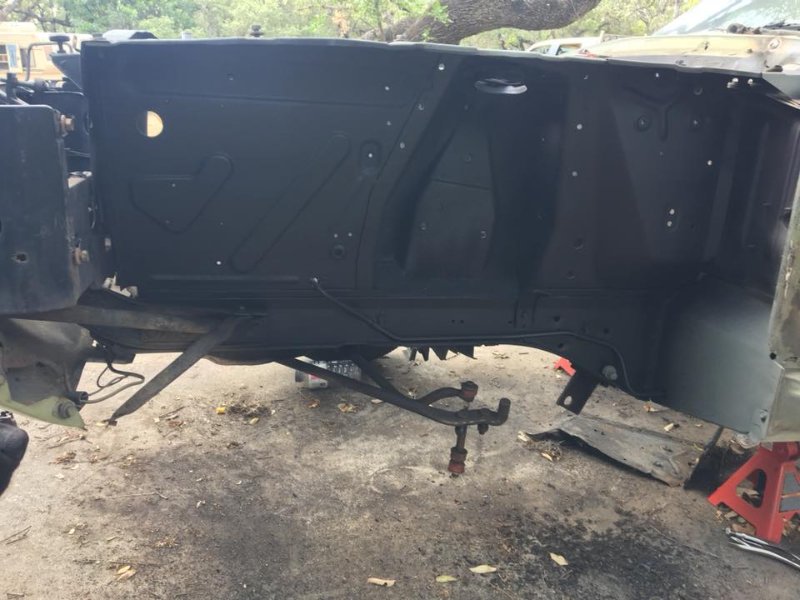
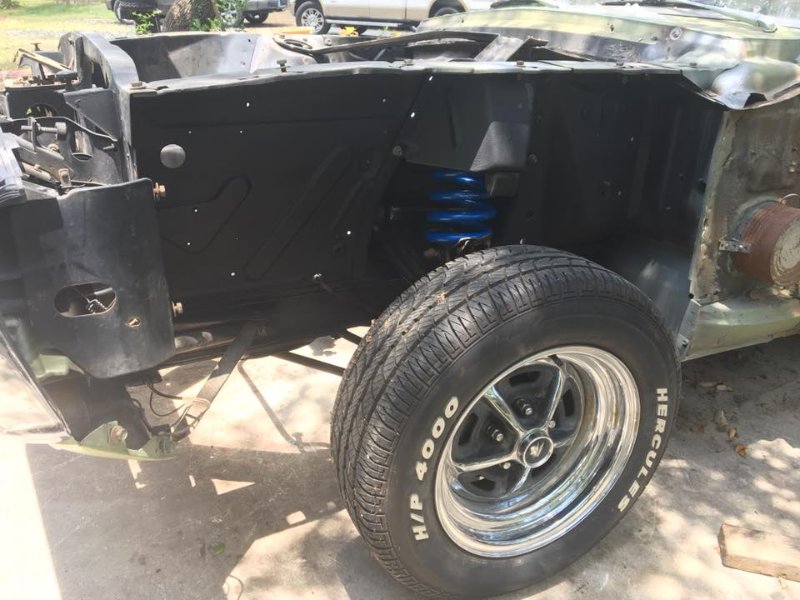
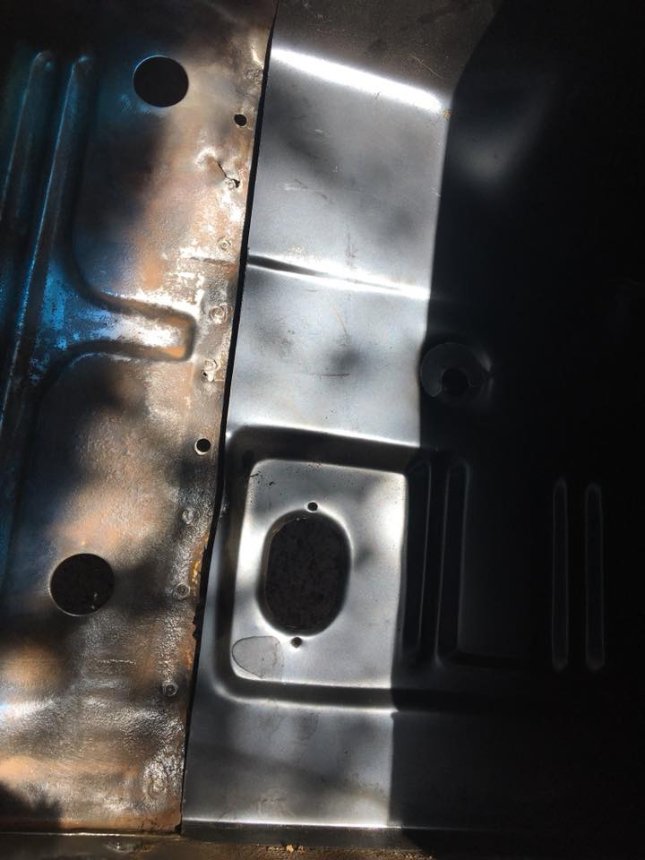
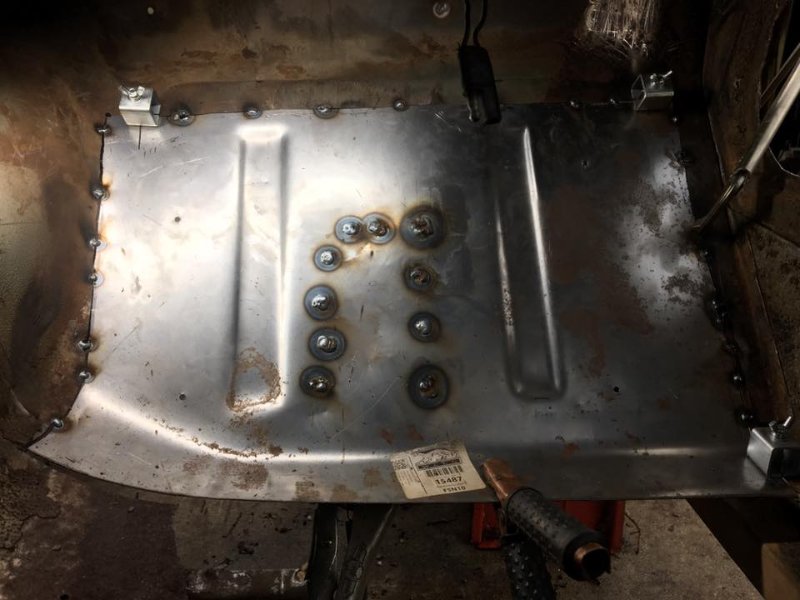
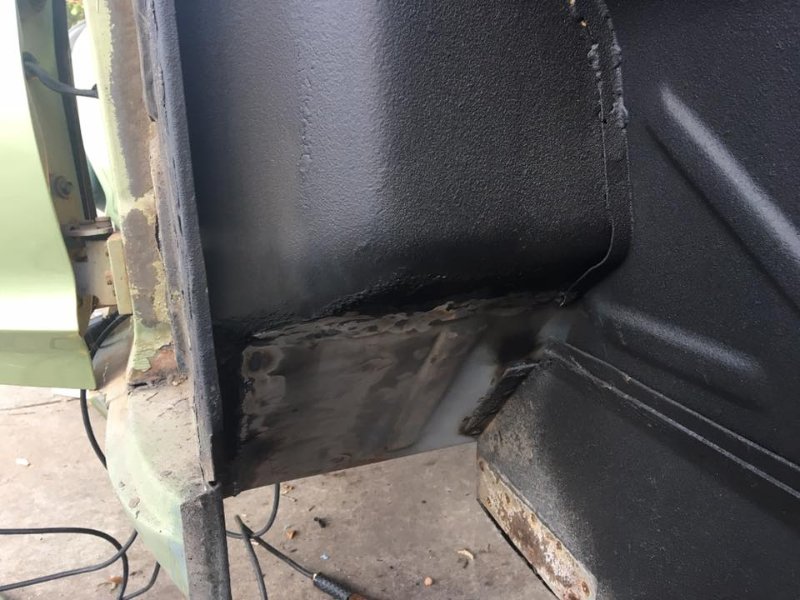
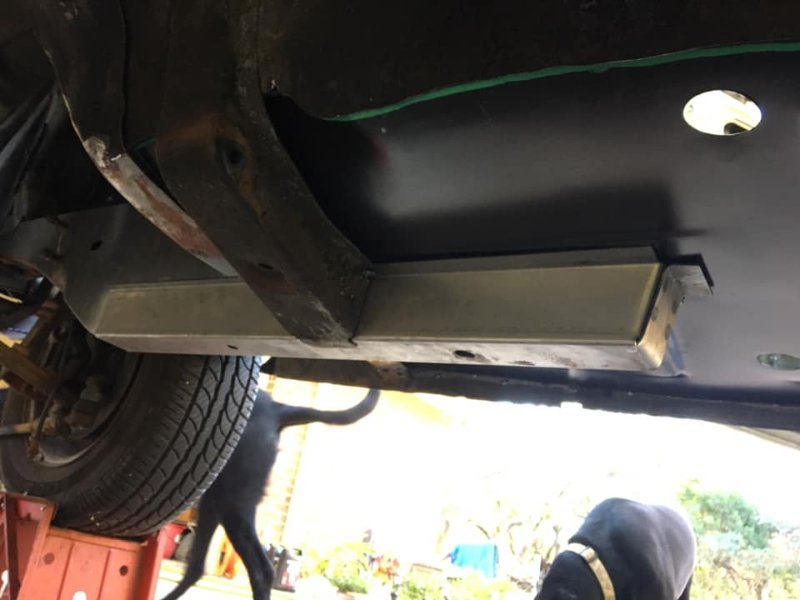
More good progress today. I finished with welding in the drivers side motor support and shock tower support plate. I spent most of my time grinding and smoothing down the spot welds today and even got the exterior side of the drivers side coated with some primer and undercoating. I’ll give it some time to cure before I install suspension next time i work on it. I didn’t paint the torque box because I’m anticipating having to separate the lower half to replace the floor pan support/ front inner frame rails. Also got several unnecessary holes in the one fender apron I preserved filled in. Next on the list is get it a roller again and then prep it for front floor pan replacement next.


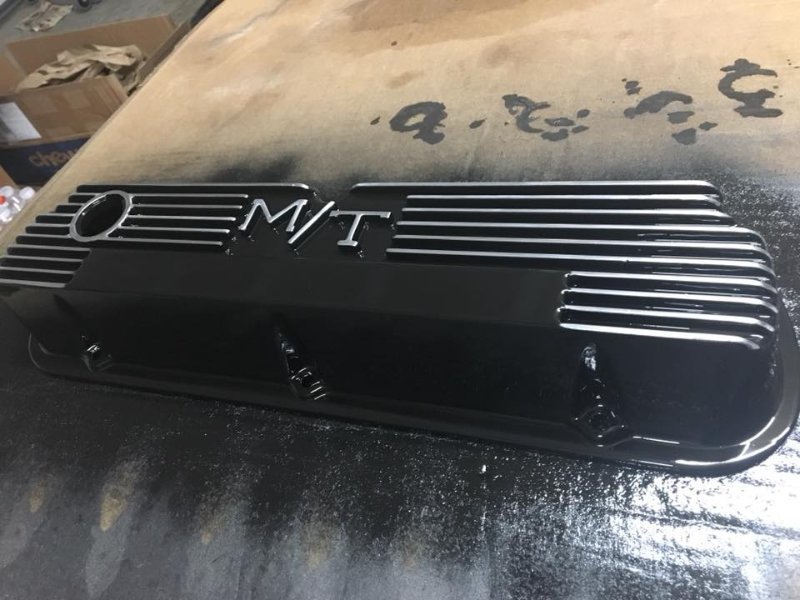
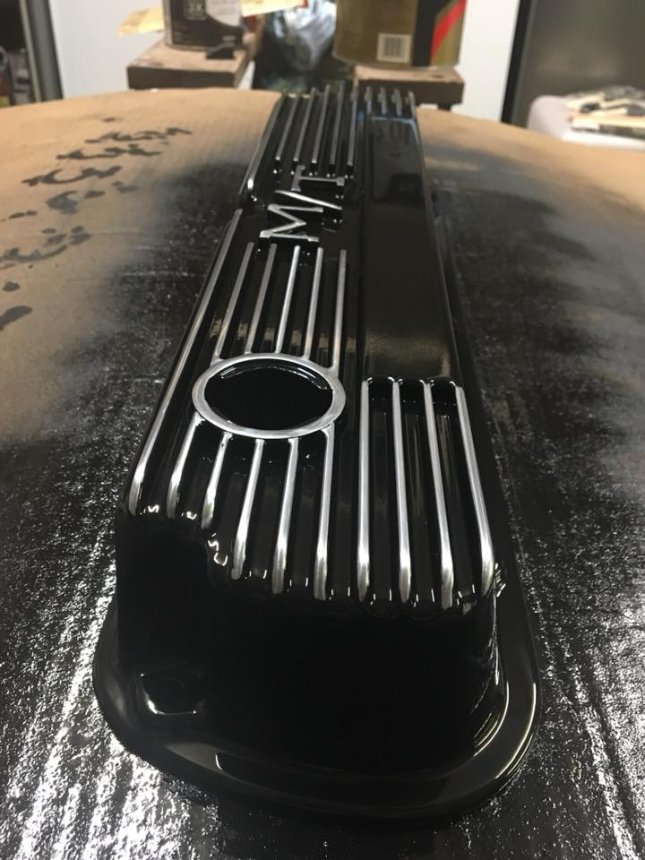
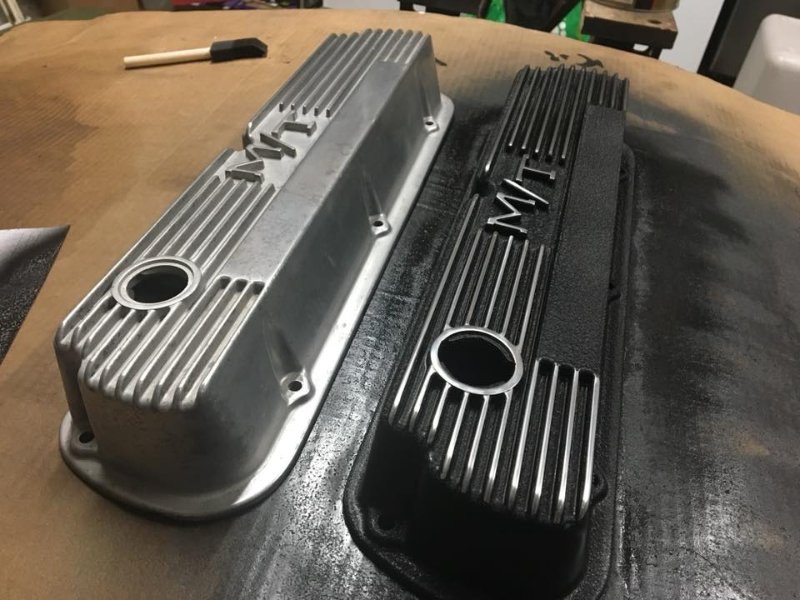
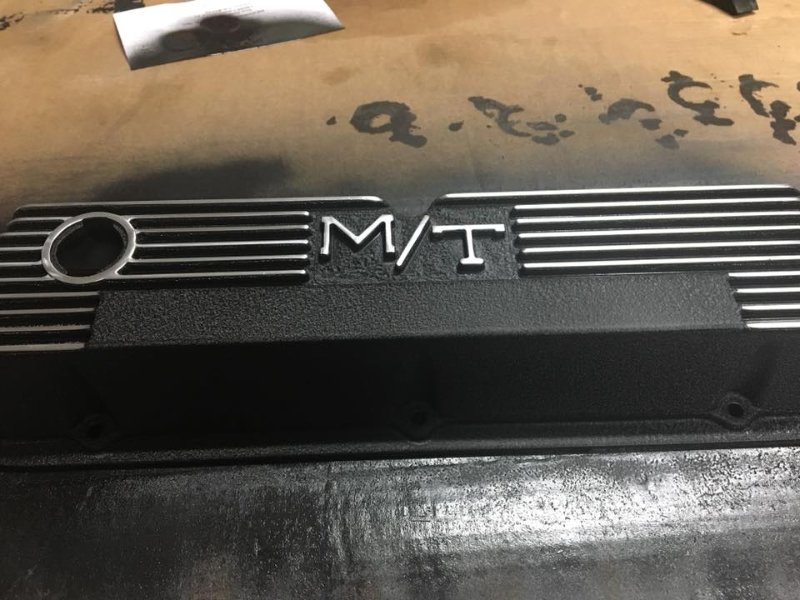
While I take some time away for the next couple of weekends and not working on the car doesn’t mean I can’t acquire a few parts for it in the mean time. I got lucky with getting my hands on this one!
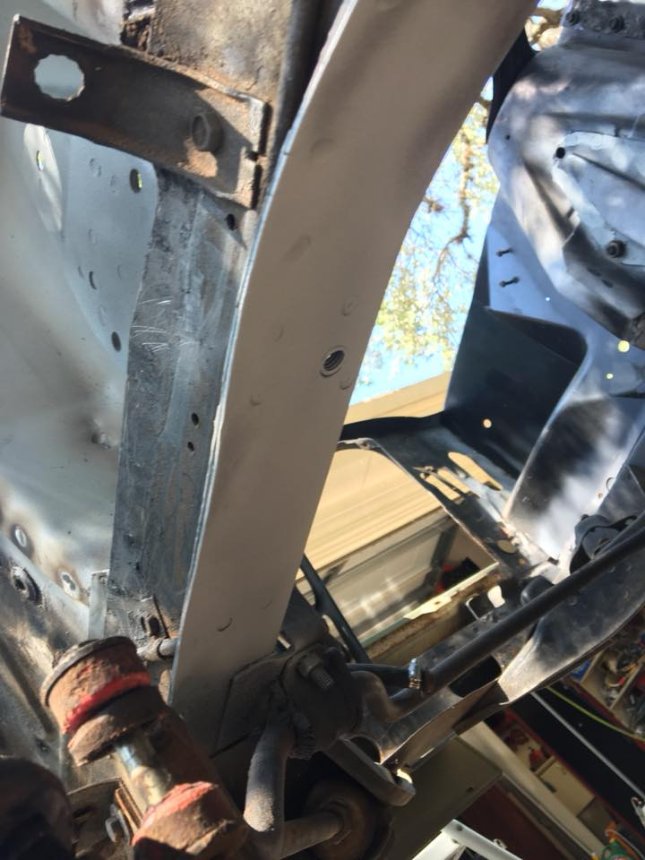
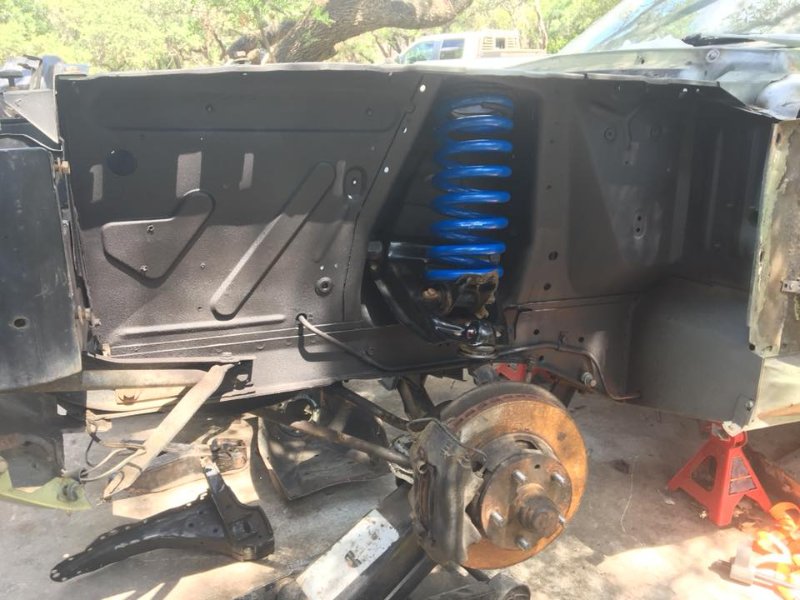
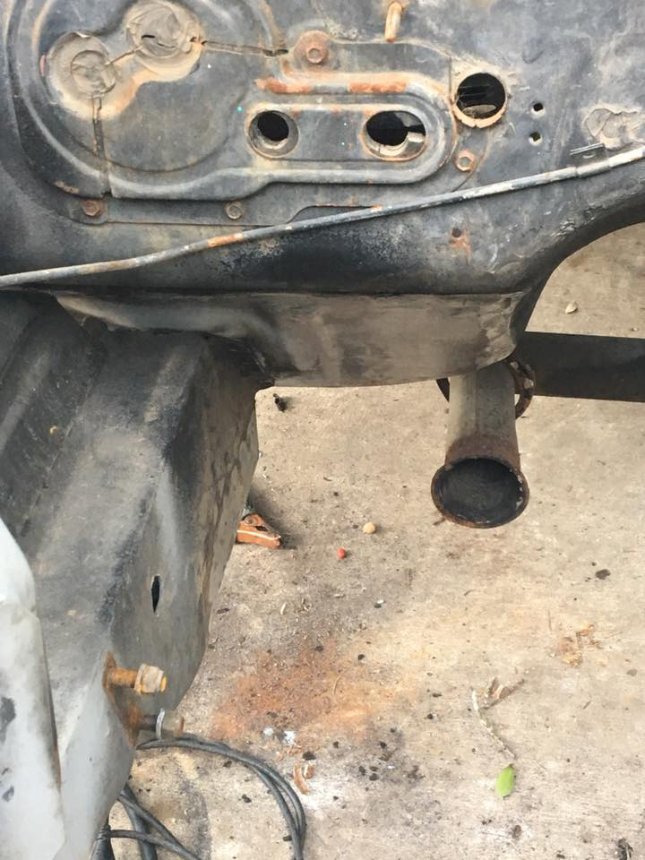
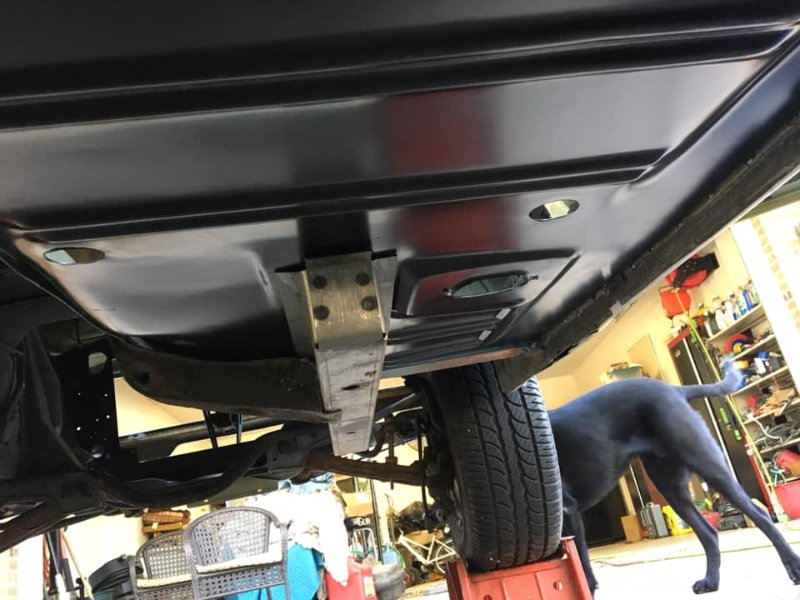
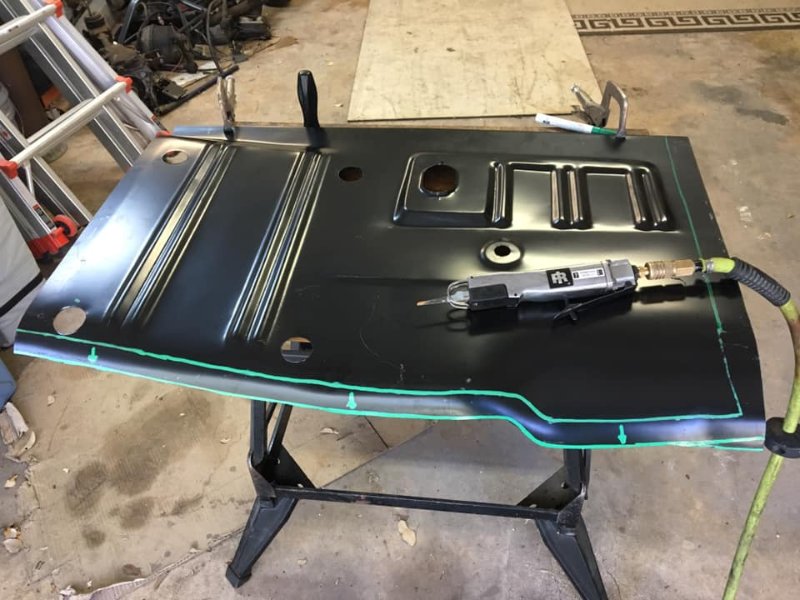
Got all that old New Mexico red dust cleaned off the drivers side suspension and got the cat back on all four tires yesterday. Just needs a little bit of grinding in the engine bay which I couldn’t get done because the switch on the air compressor crapped out on me. Next stop, floor pans! I’m going to start on the passenger side since there is no torque box there so it will be an easier place to start and learn where all the seams are for the floor pans.


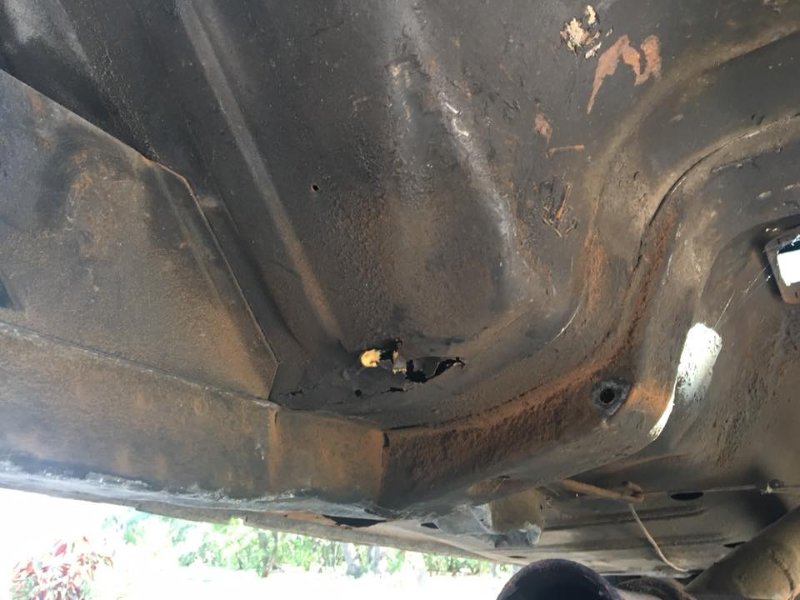
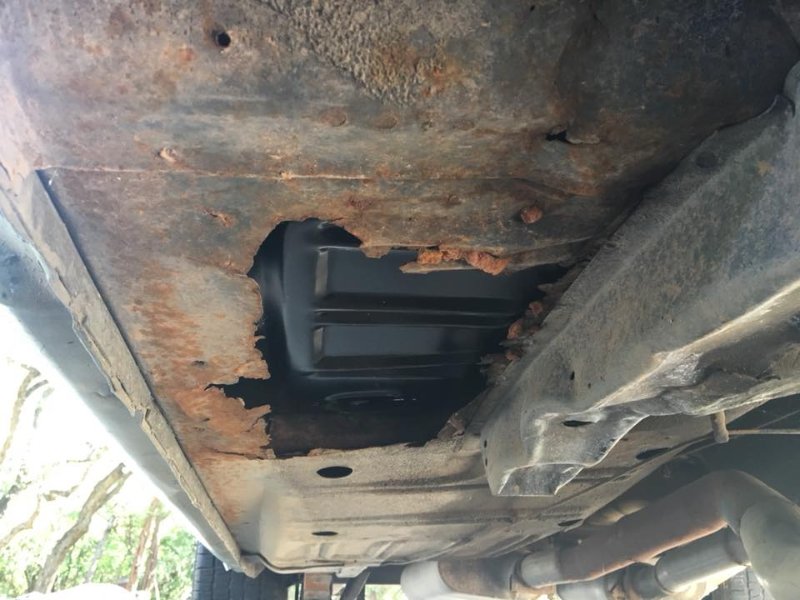
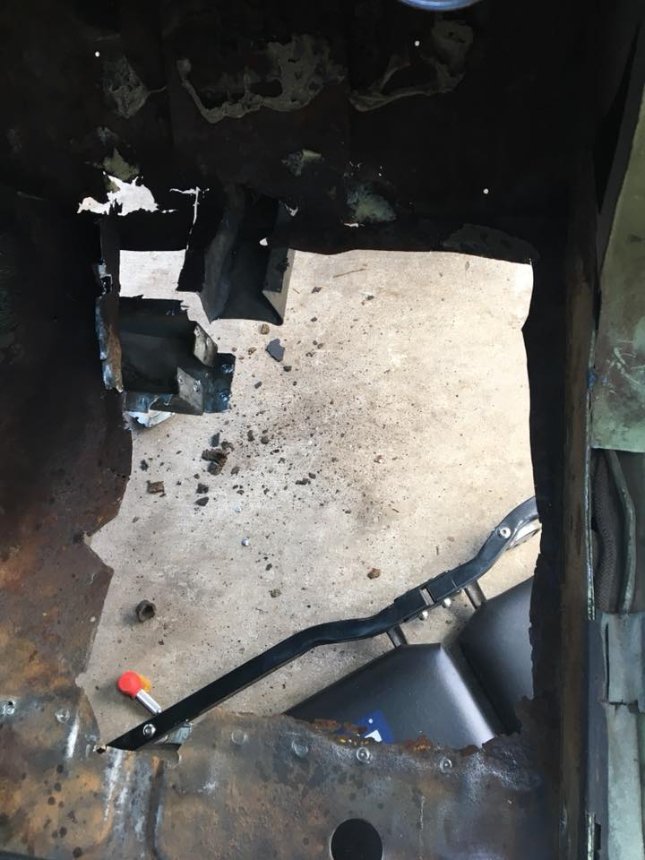
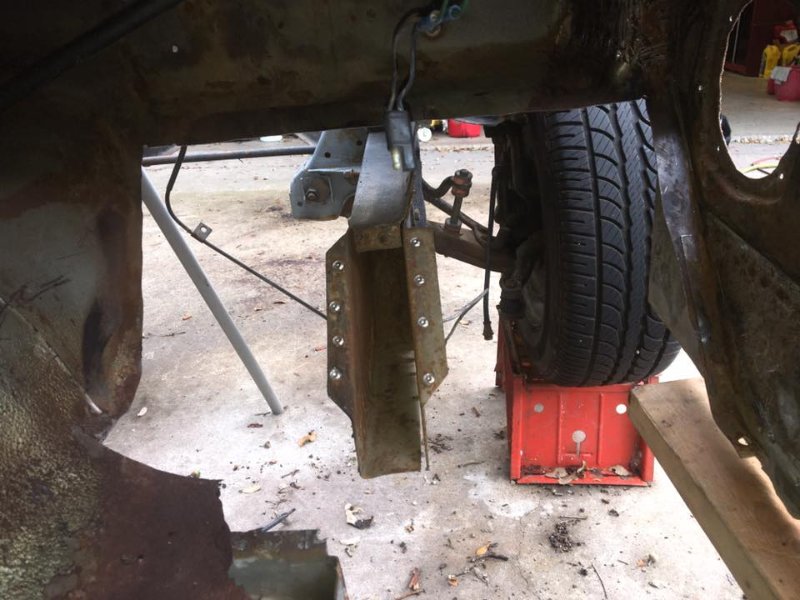
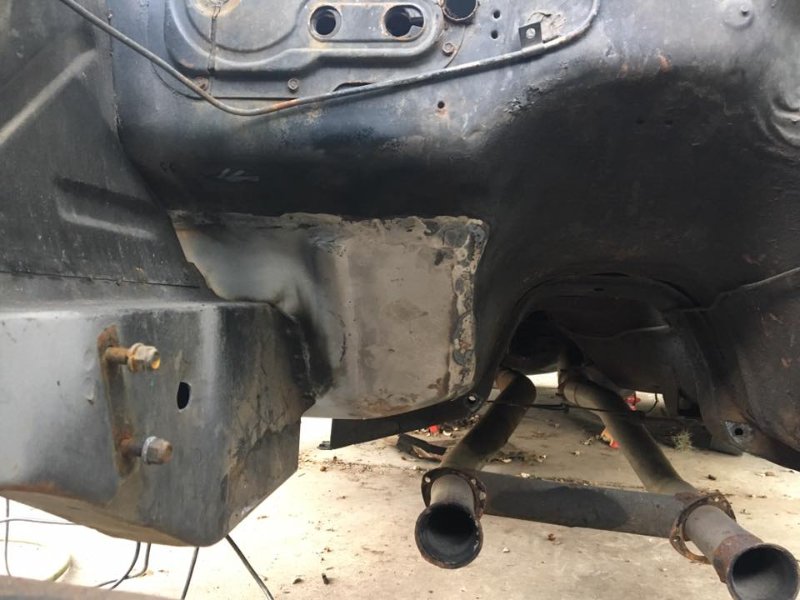
Started hacking at the passenger side floor pan and sub frame floor support. Found out the replacement floor pan I bought isn’t going to cover the extent of the rust so I had to order a pan from NPD that extends to the seat riser area but still not a full length pan. I got the sub frame floor support out so I’m playing the waiting game on parts delivery till I work on it next.

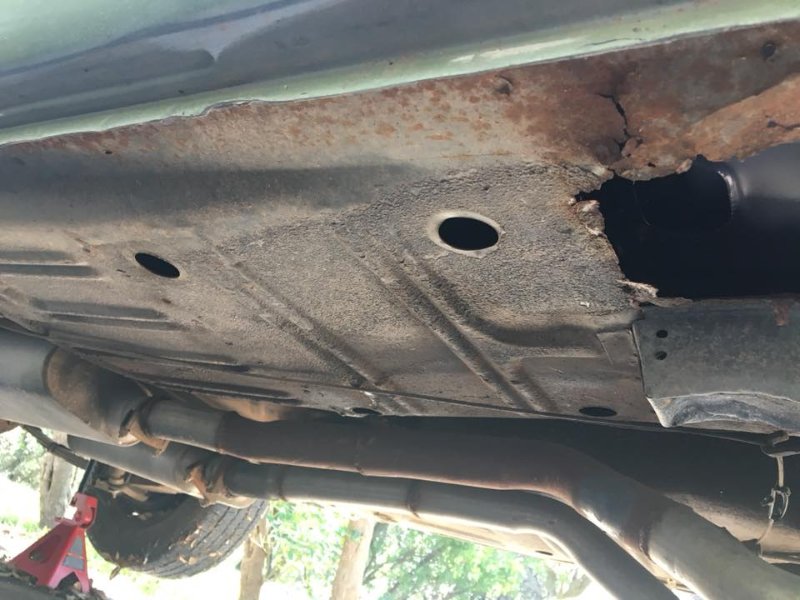
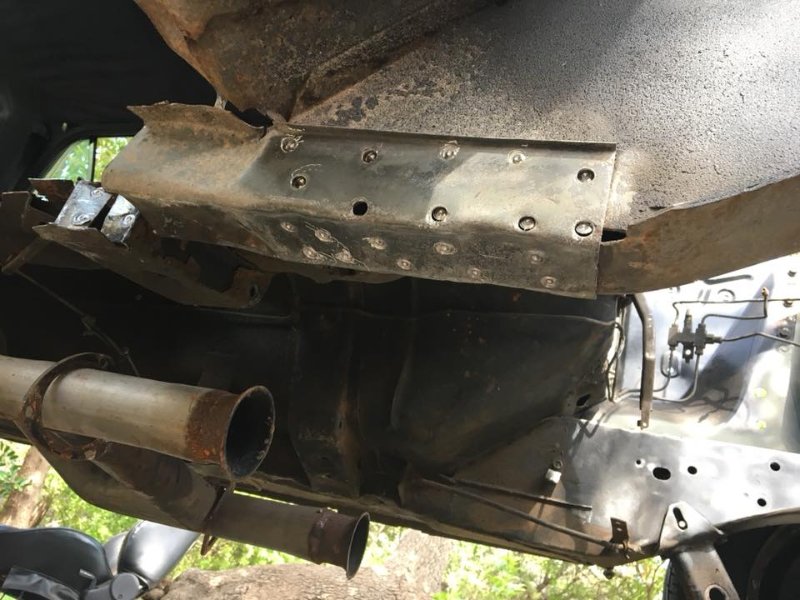
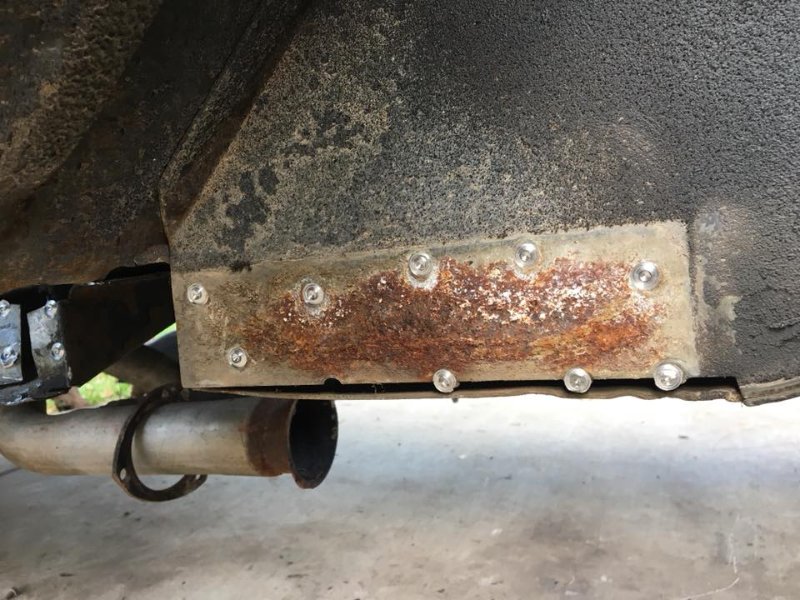
Wow, what happened to that frame rail? Did someone use your car to go rock climbing?
Randy Goodling
CCOA #95
Lol that would be my best guess or someone watched Dukes of Hazard a few too many times.
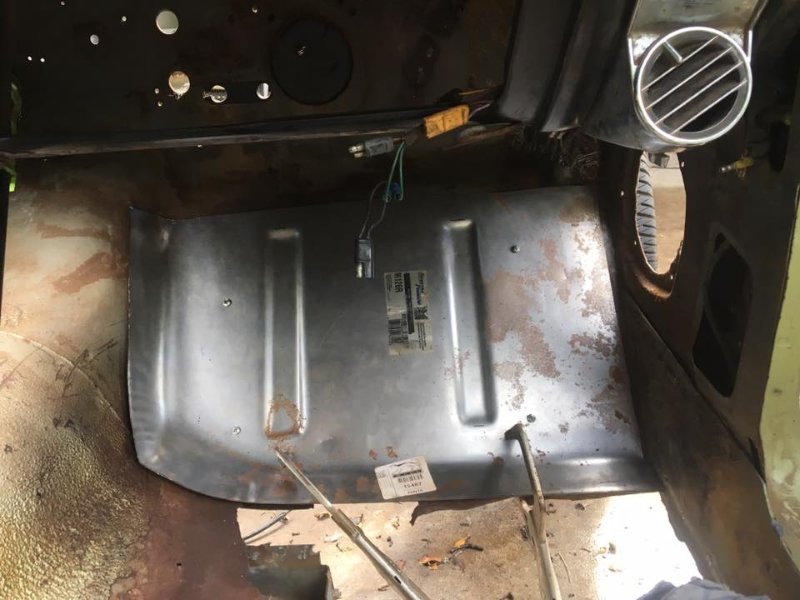
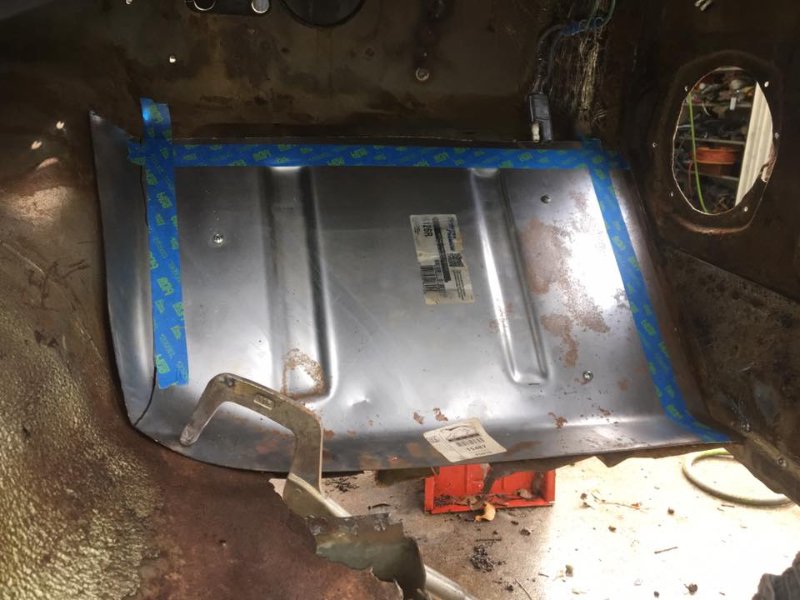
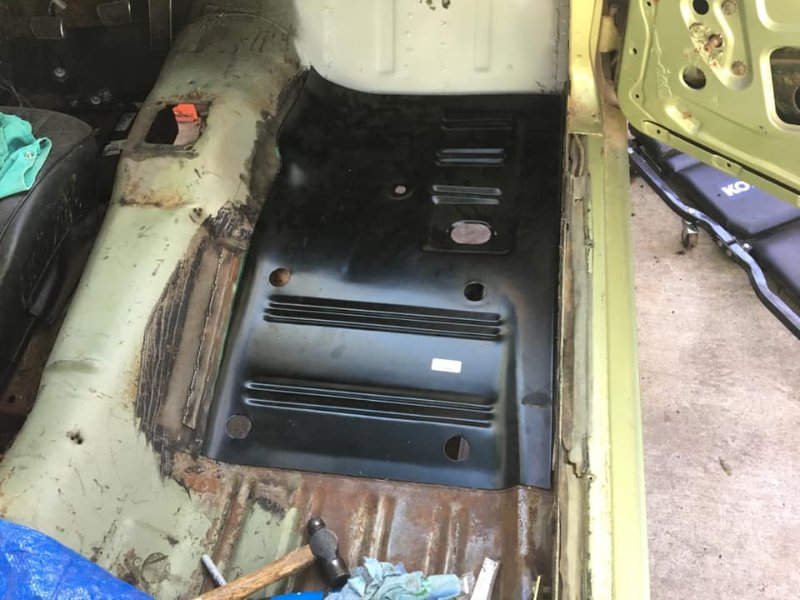
Life has been super busy lately, I haven’t touched the car in two months till this weekend! I started off with removing the heater box and fan motor then all the dash harnesses came out. I’m glad I was able to find a good used and clean XR7 dash harness, this one is been hacked up by previous owners. I then started fitting up the toe pan for the passenger side. Got it fitted up, clamped. had to add a few jacks under the center of the car and the front to get the frame back into alignment but it all is turning out nicely and is now tacked in place.
Wow. Nice!
Ok I may have jumped the gun on order of operations here. If I want to install a passenger side torque box, is it still possible at this point without cutting back out the toe pan? Most of the installs I’ve seen has the toe pans out during installation of the upper half of the box.
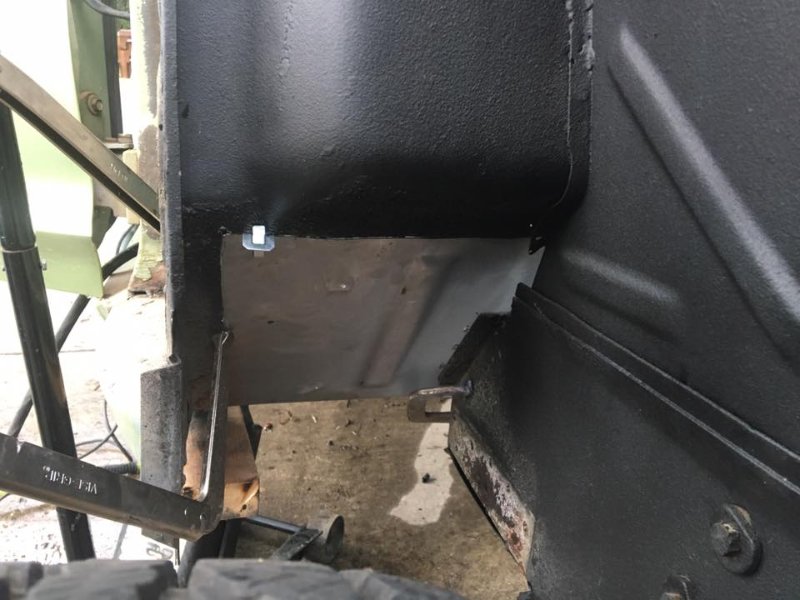
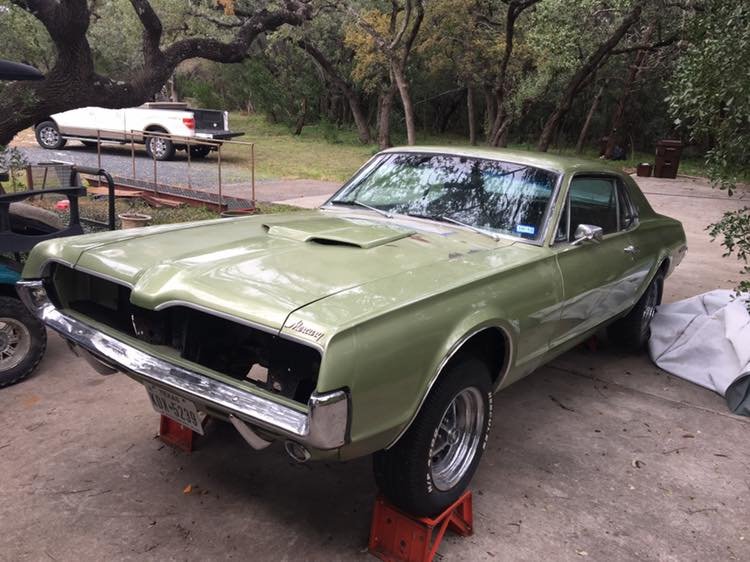
I had some time off work over the holidays and made some nice progress. I got the passenger side toe pan completely welded in and primed inside and then we hung the fenders and hood back on the car. I’ll post some pictures of the rear hood alignment and ask for tips later but the fenders look like they are lined up perfectly with the cowl and doors but the rear of the hood just needs to shift to the drivers side but we seem to be out of adjustment on the hood hinges. Next on the list is to fit and weld the floor support then cut and fit passenger side floor pan. Then on to the driver side!

Nice work!
Sorry I wasn’t more timely with my response, but…
I replaced a bunch of the same sheetmetal on mine, but included the torque box. It would have been easier to add one before you got things welded together, but you could still add one. I ended up notching the tab that fits between the frame rail and floor pan and bent it out of the way to get it in place. Once it was in place I straightened it back out and welded everything back together.
Here’s what it looked like with the tab peeled back:

I did the same bent tab trick on the driver’s side when I put it together. I’m not sure if it’s even possible to get the torque box installed correctly (sandwiched between the frame rail and floor pan) without either doing that or installing the torque box as separate pieces. The torque boxes I got were already welded together, so I thought it was easier to bend the tab.
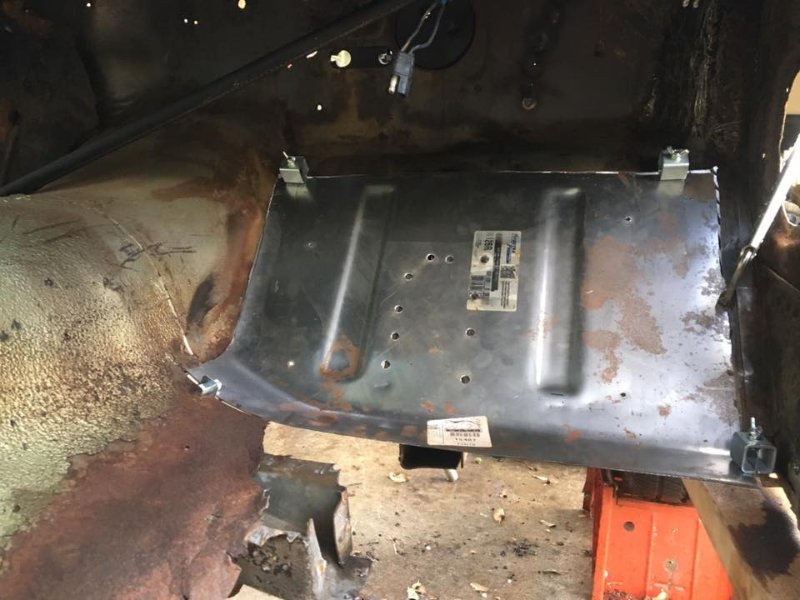
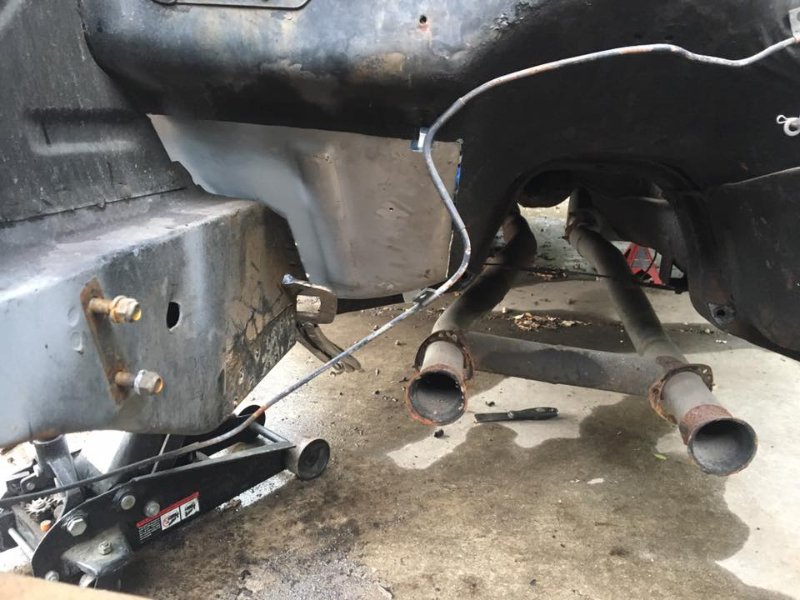
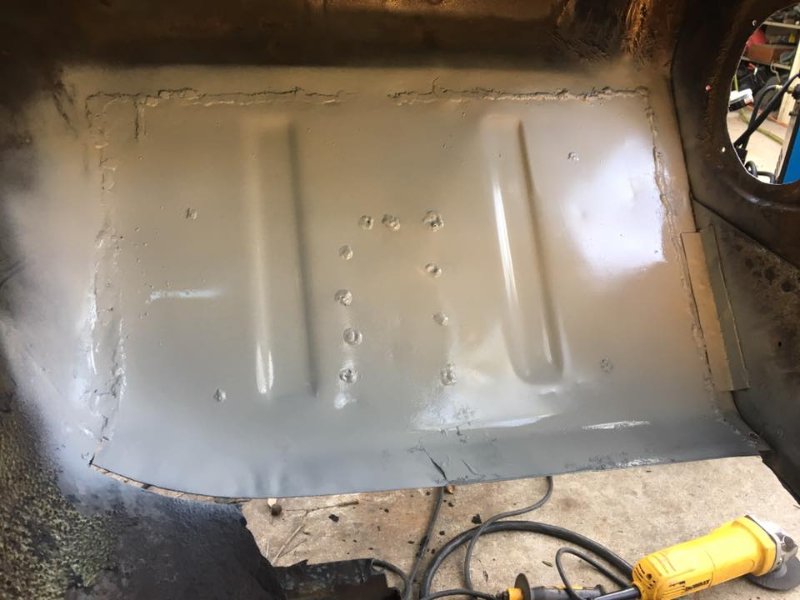
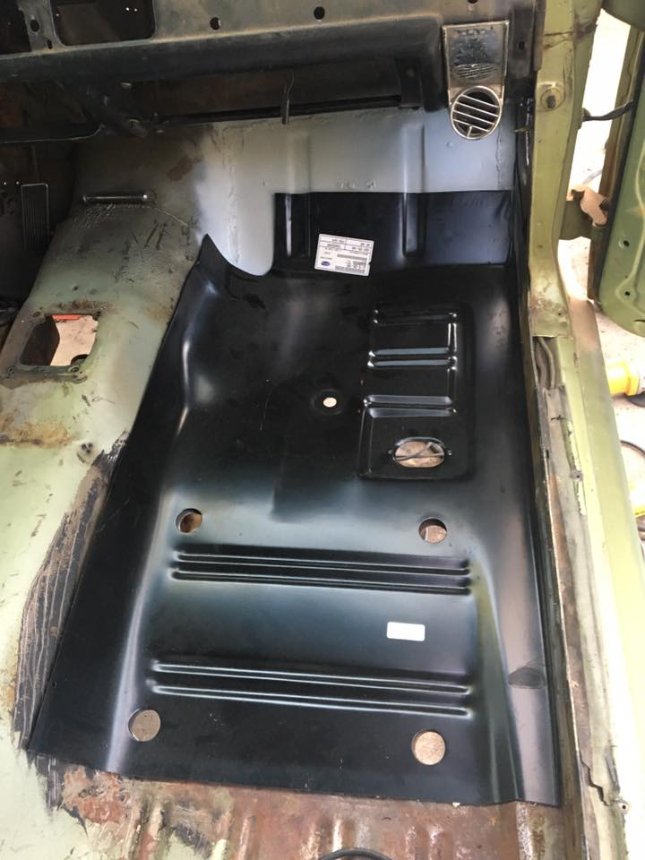
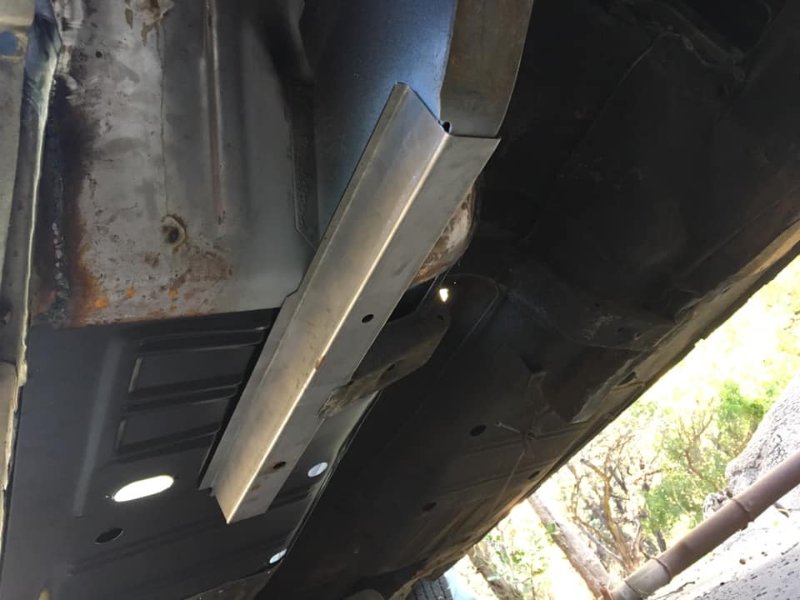
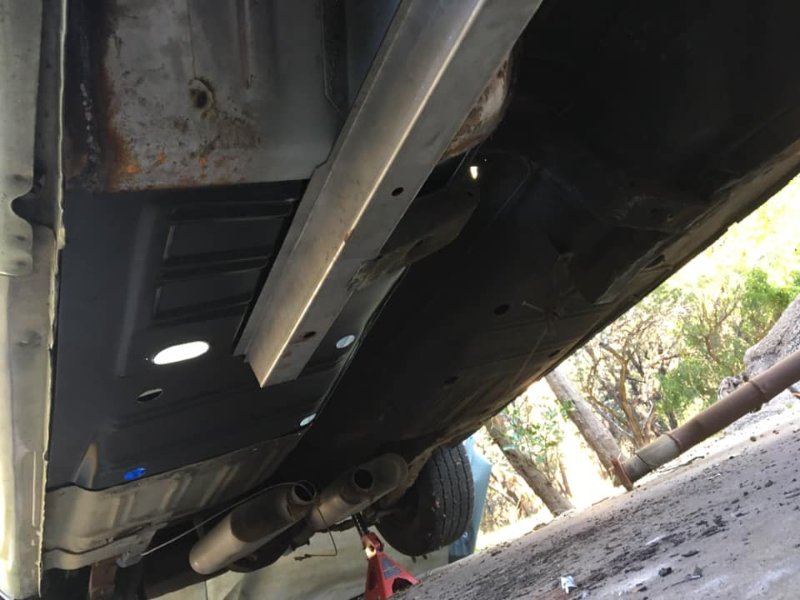
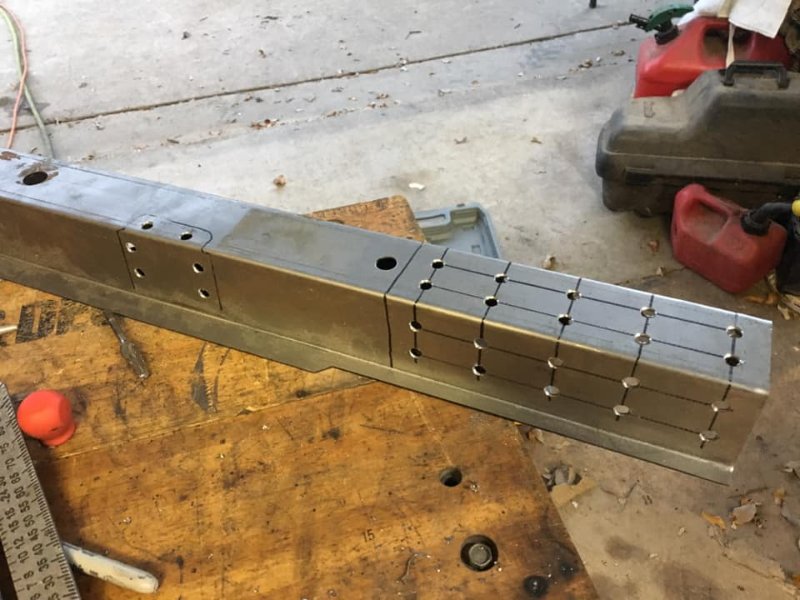
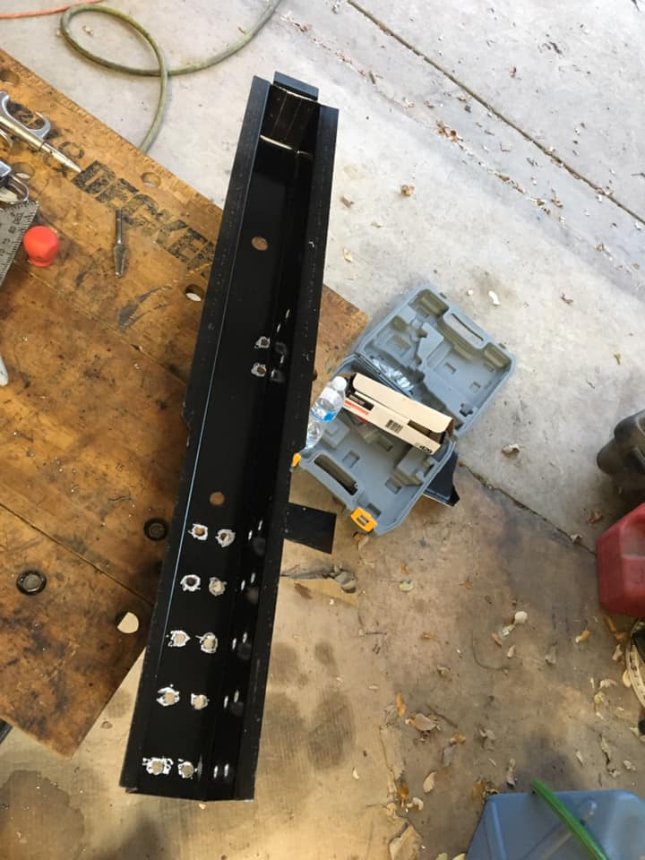
Made some good progress today as I took some time off from work. I got the floor support drilled and painted on the inside so it’s ready to weld in. I got the old rusty floor cut out of the car and the new pan cut to size. Still need to drill the spot weld holes on the outer part which welds to the outer frame rail. I also had to massage the trans tunnel in a few spots to straighten it out so now everything fits nicely together when I mocked it all up. I will be trying to get everything tacked into place tomorrow, weld in the floor support and then begin welding in the pan.

Howde from Laredo, TX. We are practally neighbors as it looks like you are in SA. I read through your posts and may have missed it but did you do anything with your cowl vents yet? Reason I ask is because that water in floor pans may have come from leaking cowl vents.
Have you checked yours for leaks? Just curious
Howdy, you are right we pretty much are neighbors. I have poked my head under the dash and the cowl vent, at least on the passenger side, does not look like it’s rusted through. I haven’t pulled the vent off the drivers side yet to inspect it. I will test it of course by running a hose into the cowl and check for leaks. I suspect though there were a few other sources for the water on the passenger side like the drain hose for the heater box was missing so there was an open hole in the floor plus condensate from the ac/heater system possibly leaking directly on the floor.
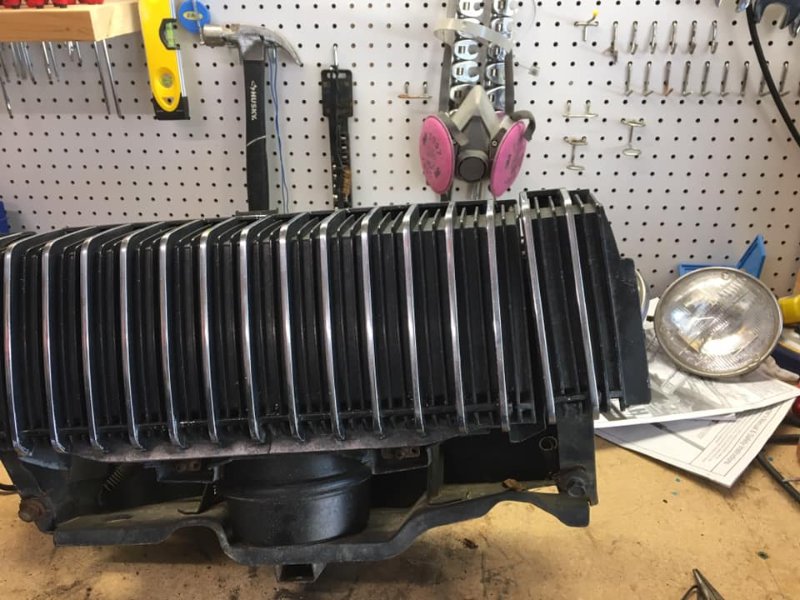
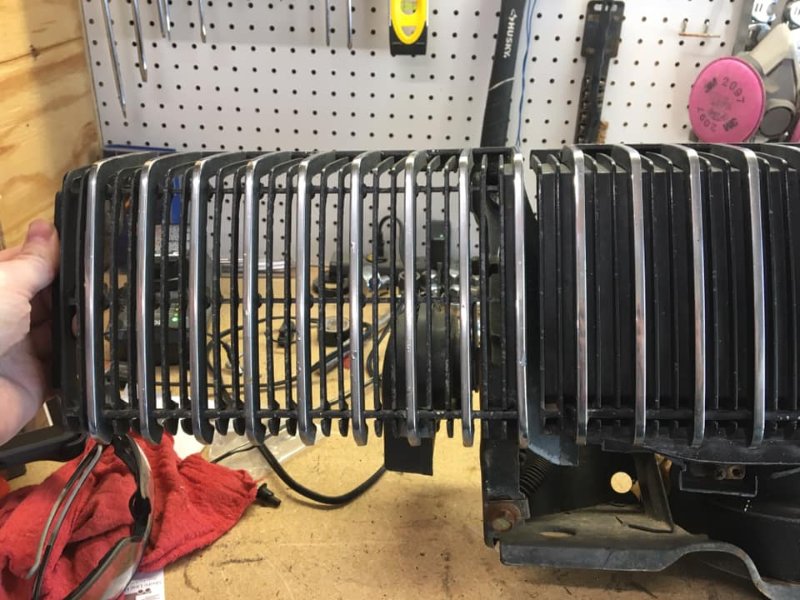
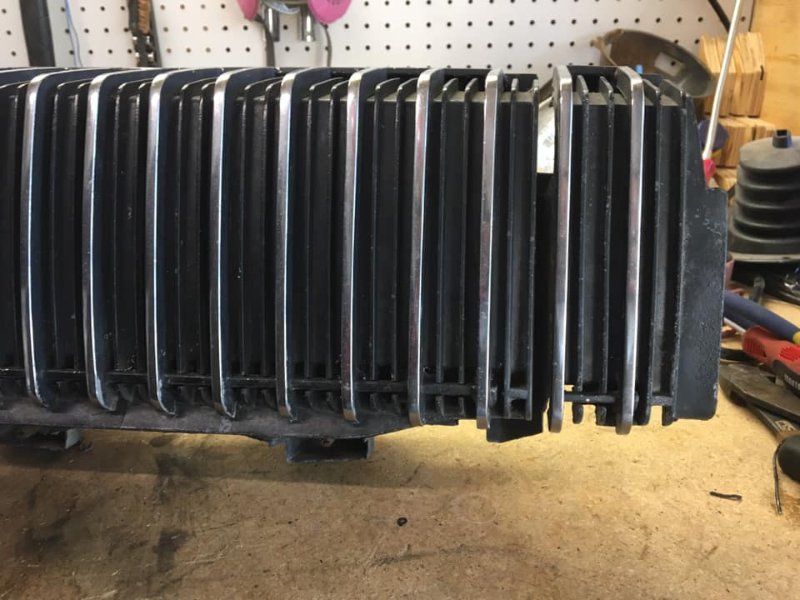
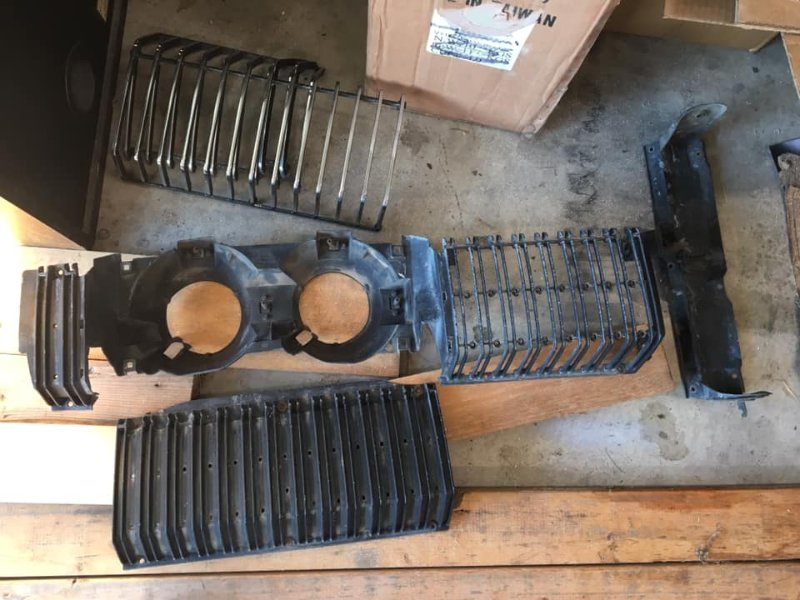
Started on the grill assemblies today. Got the driver side torn down, all chrome pulled off so i can strip all the old paint off and repaint them. I will eventually probably get all new chrome for this since I’m going this far on restoring everything. I got this side straightened out with a heat gun. I will be converting the actuators to electric as well while I have everything torn apart.
Check those over carefully, there’s a couple places where small cracks will form and they’re hard to see.