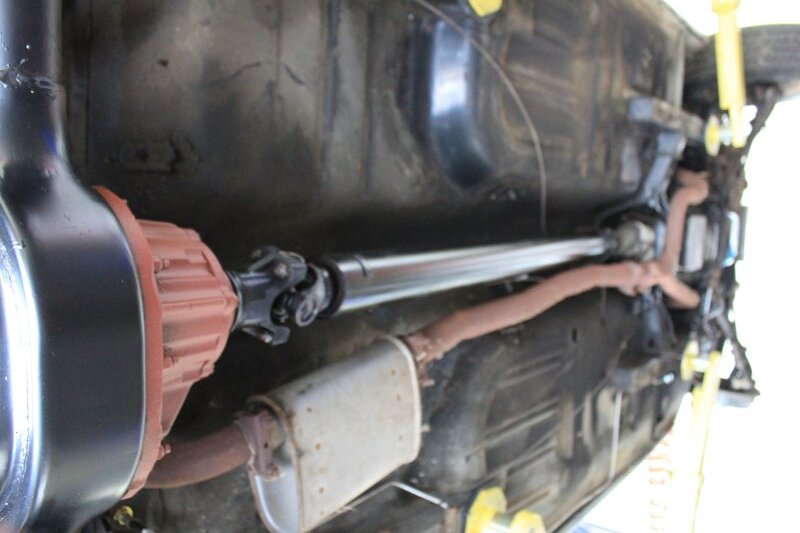
The refurbished assembly reinstalled. the leaf springs are to be refinished at a later date with an acrylic, non-petroleum based, product. Until then the scale will help for the time being. Did not think that the U bolts and nuts were going to rust in the few months they have been on the car as this last submitted set is very recent.

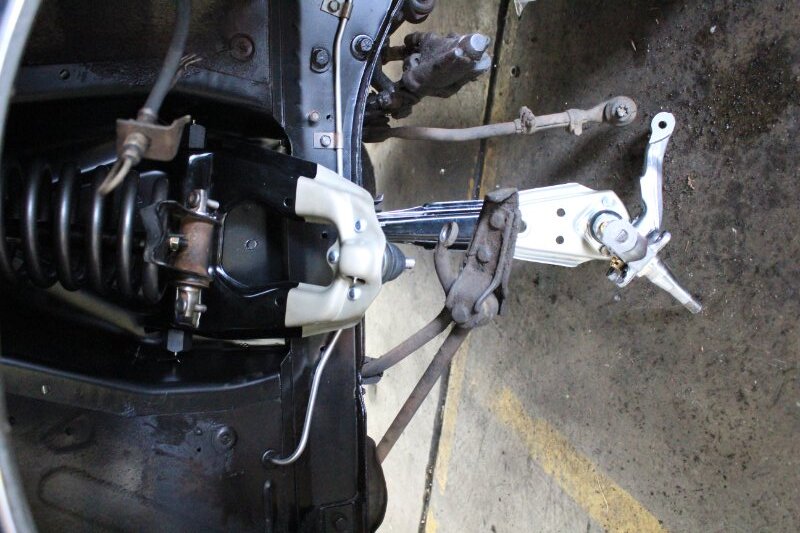
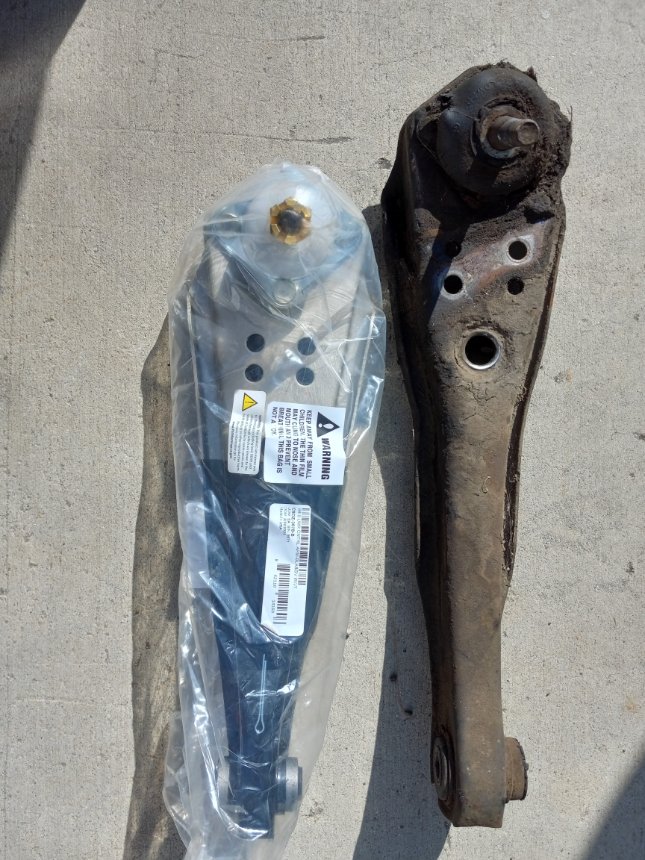
Am currently in the process of doing the front suspension. The original lower control arms had 4 holes drilled for the strut rods. The Scott Drake ones that I have installed have 2 holes as will most reproductions. In order to remedy this minor setback I believe a template made from the original component to locate the additional holes in order to drill those out will be the most pragmatic.
A couple of weeks ago I had started to work on the front suspension, drivers’ side. Doing one side one day then the other another would, in my opinion, make it easier in showing what the job actually entails. Learn from the 1st experience in order to better anticipate the 2nd. For now I have the suspension currently installed, it will be coming back out to address a few items, these being the upper coil spring isolator rings as the originals disintegrated, spring perches and the implementation of the 68’ single piece strut rods as the new lower arms are incompatible with the original design. As for the prior components that can be restored they can and will be then safely stored away. As of right now the focus is to get her running and idling properly.
Ever spend a good amount of time typing up an entry in the hopes that it will be beneficial or somewhat useful to anyone else who may encounter the same or similar, you hit ‘submit’ and rather than that entry being posted you are taken to the ‘log-in’ screen and all your work is gone? That just happened. I’m going to keep this entry brief.
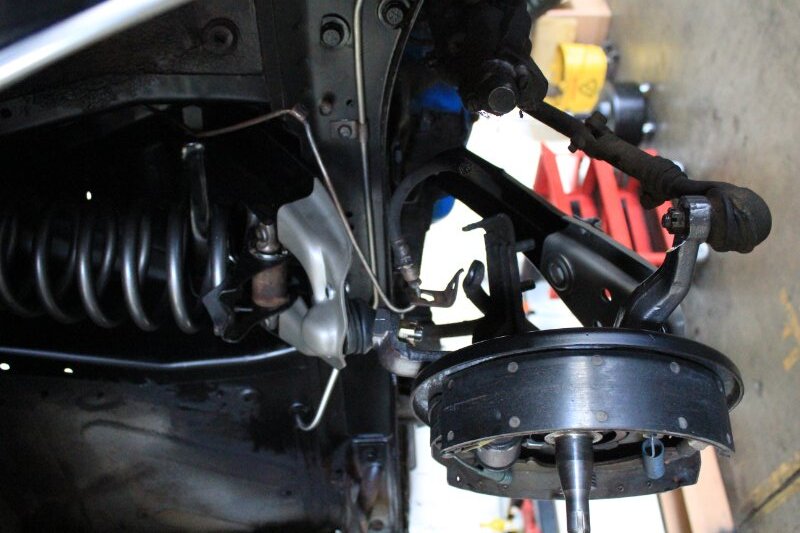
Why won’t the 2 piece strut rods work on the aftermarket, Scott Drake lower arms?
Answer: geometry. It will shorten the amount of real estate you get to work with at the core support along with introducing a point of failure in the front suspension.
On my Cougars’ ignition system cylinders 1,8,5 receive spark, all the rest are dead. Found out the distributor points cam is pretty much rounded out.
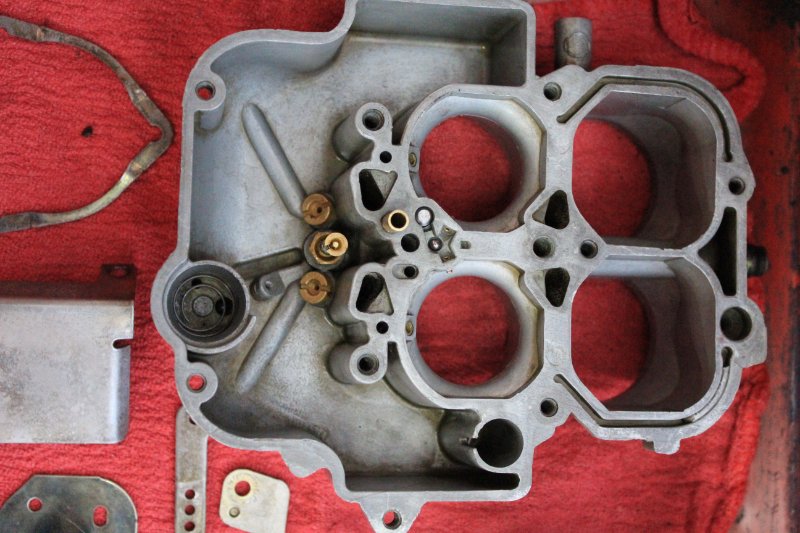
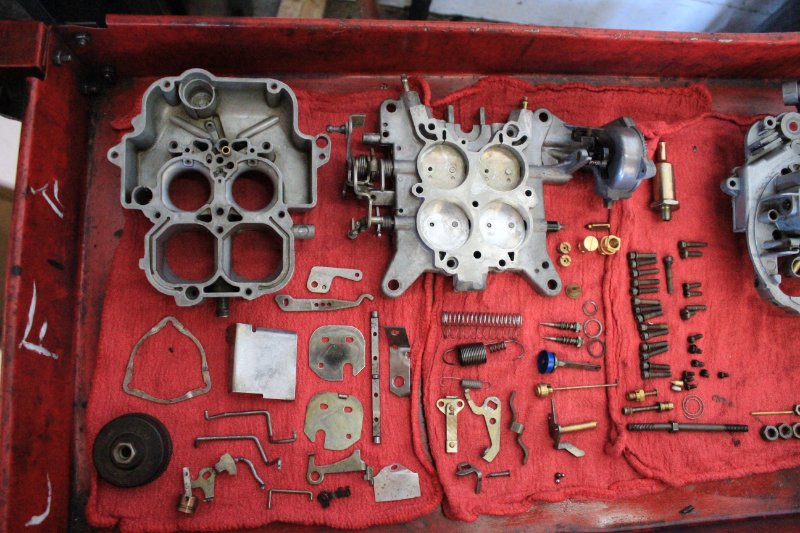
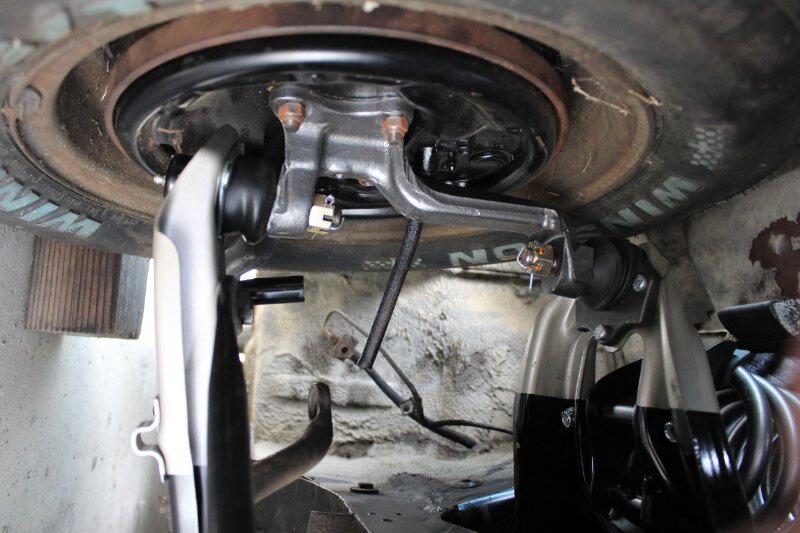
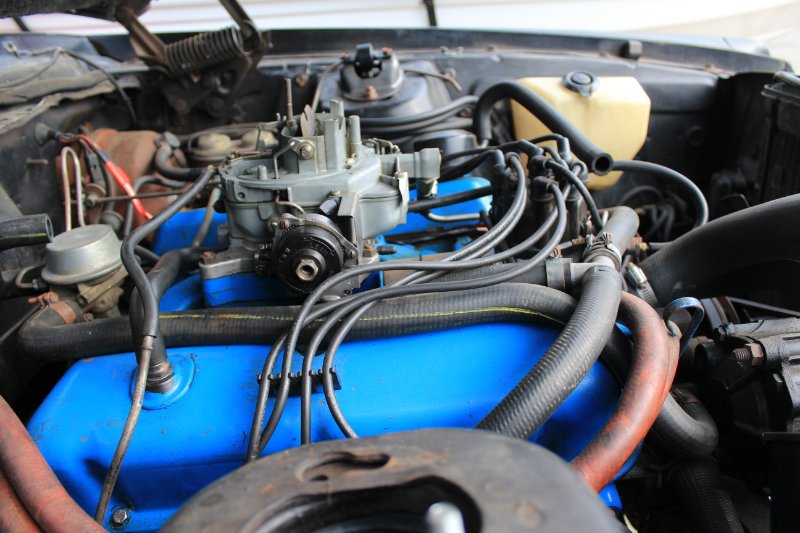
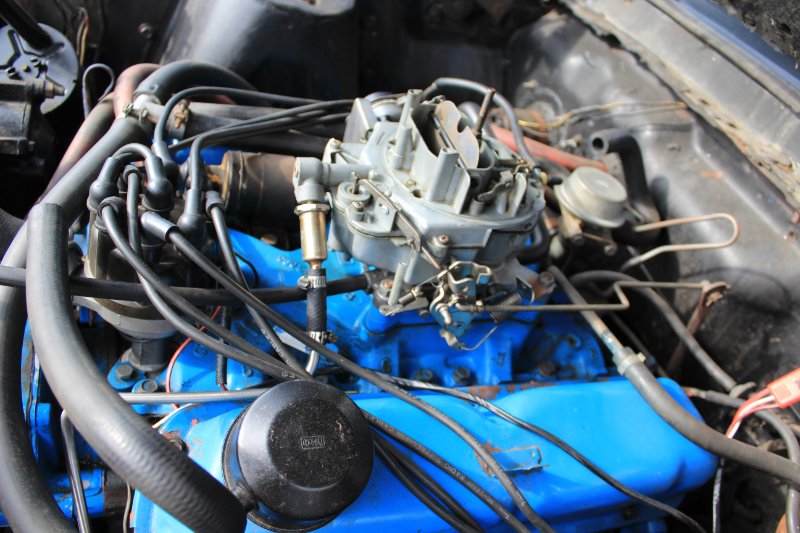
The front, driver side suspension is essentially complete minus a few tweaks and adjustments. Had to remove the coil spring and upper control arms to install the new isolator and perch. Getting the perch to seat into the control arm was a little trying this time around. As to why the question had been a puzzlement during the installation. One contributing factor could be the position of the perch relative to the bolts. With that in mind it may be best to position the direction of the bolts on the new perch to mirror the original when removed along with referencing the amount of spring compression required to remove the upper assembly. Other than that next week is going to consist of a very abundant amount of cleaning as it takes the majority of overall time. Today was a transmission service to which the valuable lesson learned was put in 3 quarts then check the level. Was on the 4th quart when trans fluid started spilling over. The trans is to actually be checked when hot the goal was to get an initial amount in to start with. Other than that mishap am rebuilding the carburetor again after it having sat for longer than I originally intended.

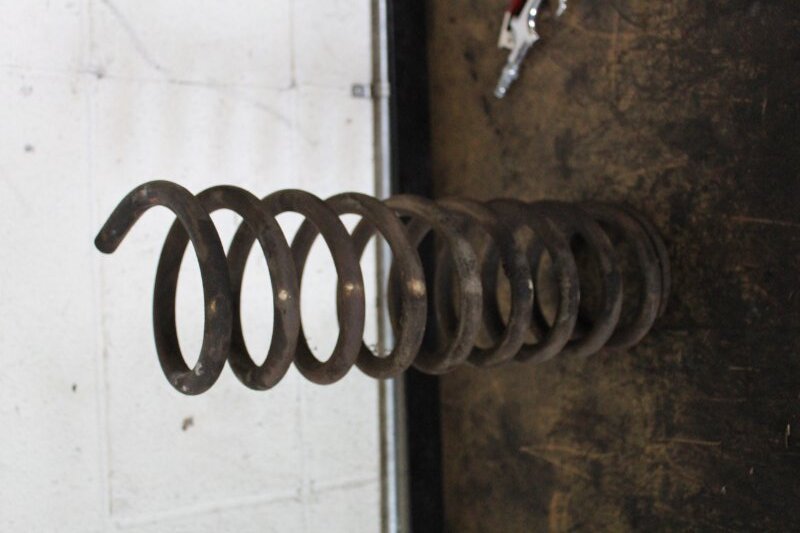
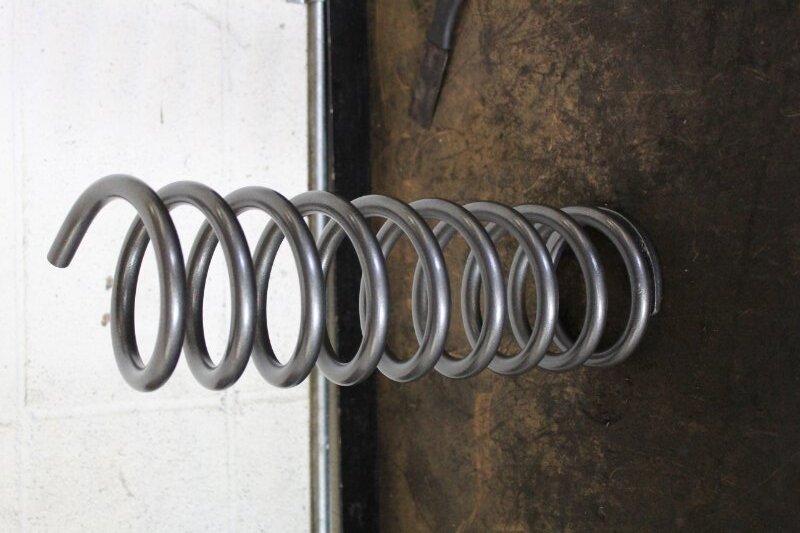
After a long, unplanned, hiatus I had finally got back to work on the front suspension. To be completely honest, I absolutely hate Ford front suspensions. The fact you are pretty much working with a bomb when having to compress the coil spring is not a feeling with-out anxiety. Any portion is subject to fail putting those around you and yourself at risk of injury. The most difficult aspect when in the process is the reinstallation of the spring. It takes about 10" of compression to allow enough space to fit the upper arm. Here is were it gets challenging. Does anyone have a method of fitting the bolts of the spring perches into their registry points on the control arm? When you get these perches new they are so tight that adjusting the angle to match that of the previous one is next to impossible.
I bought one of these compressors from WCCC and will never go back to any other style for the style suspension in our Cougars.
I have done 3 sets of springs so far, including removal of a set of 428CJ springs from my Yellow car. I just got the new suspension, but I have a lot of work to do before installation starts.
That is the exact same compressor I use as well. This tool is wonderful. I just have a really difficult time with getting the perches aligned with the upper arm that the blots pass through.
The suspension components ordered for the driver side worked out fine. I had to get 1968 strut rods as there are no 1967 Cougar reproduction arms available. Being new to this it’s learn as you go. Now off to the driver side. Same part numbers ‘some components being an exception’, same vender, slight issue
She runs… but is needy.
Since I haven’t started on the brakes yet - will do so soon - she hasn’t yet been put into gear and actually driven. Thus far I have replaced the entire fuel system, rebuilt the sending unit and carburetor. The wiring beneath the dash was replaced, still there are some odds and ends to attend to. Her suspension is 90% finished with just the sway bar and front-passenger shock absorber. As for the engine it needs some adjustments on fuel/air ratio’s, idle speeds and ignition timing.
It would be nice to run her for a few minutes a few minutes each day and she runs pretty good when feeling like it. If I let her sit more than 3 days she runs like she’s not getting any fuel. You prime the carb a few times, turn the ignition she starts up and runs for 3-5 seconds and dies. When motivated she could run all day, but I keep under 10 minutes for the time being. Tomorrow I’ll make a few adjustments on the carburetor and ignition timing and start getting the new wheel cylinders in.
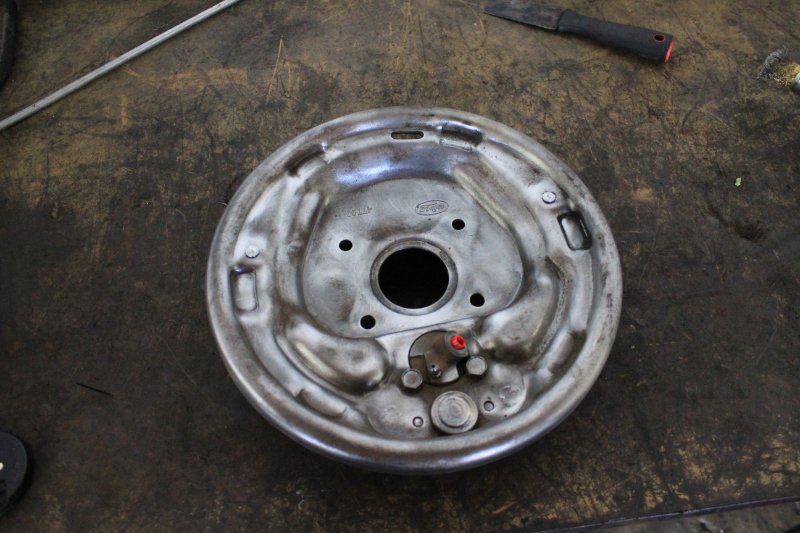
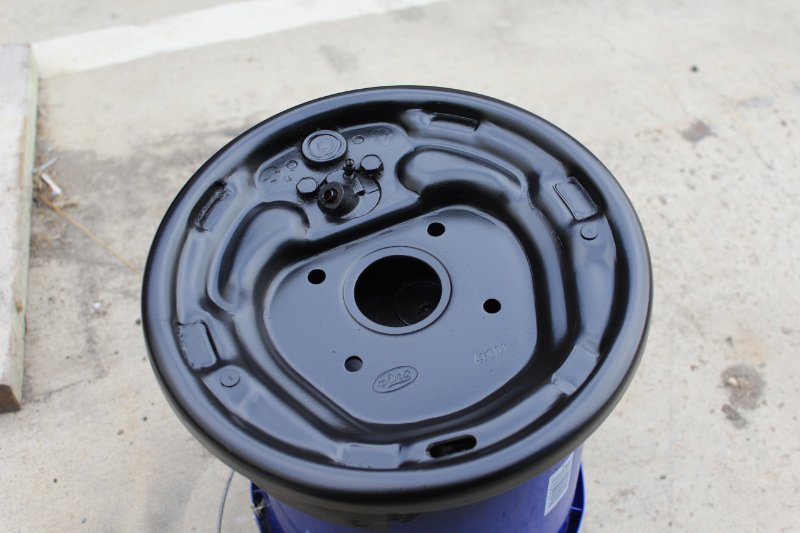
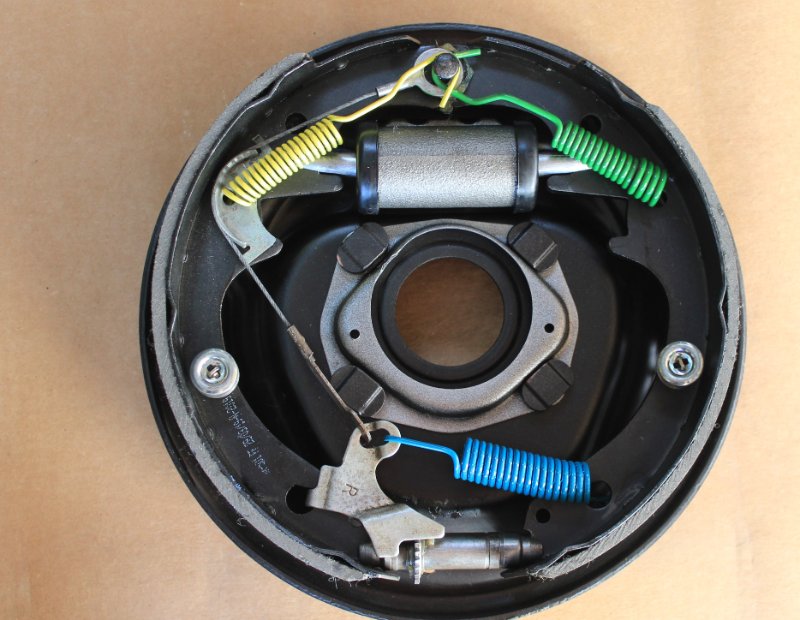
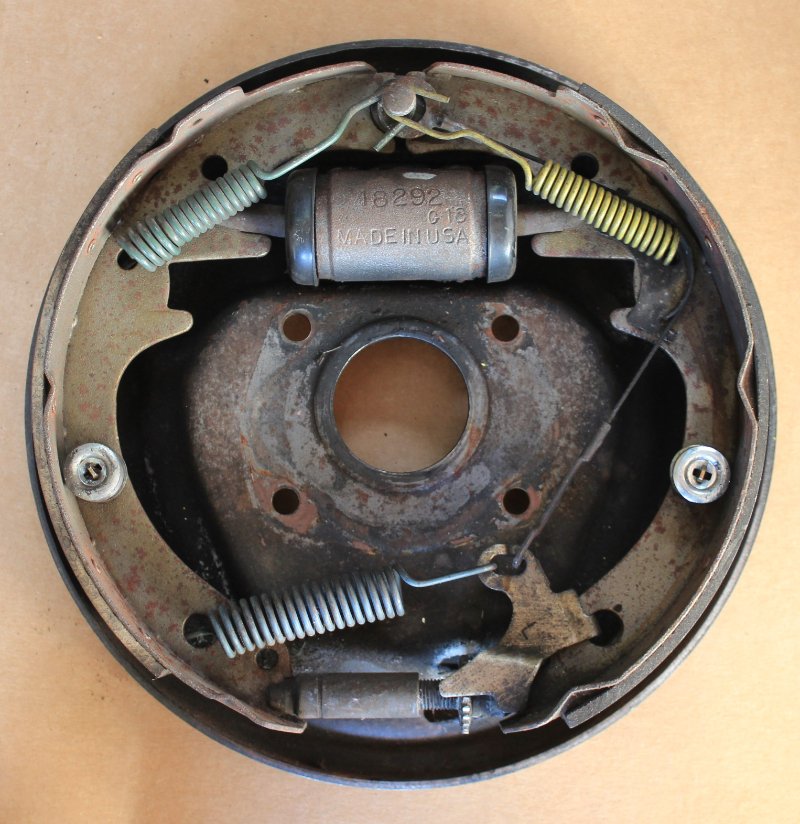
Started on the rear brakes. The driver side drum is being a pain to remove so I decided to focus on the passenger side for the time being. In the interim a brake adjusting tool was purchased in order to retract the shoes in more on the driver side. After coercing the passenger side drum and inspecting it I had decided on replacing both it and the the shoes. For the drum, itself, has been gouged around the inner circumference by 1/16" est. and the shoes have only 20% of material remaining. So, it is best to replace these items. After getting all the hardware off the backing plate the plate was thoroughly cleaned, sanded and resprayed in ‘satin black’ for that is what I had on hand. A new wheel cylinder was installed and all related hardware, springs, retainers and other were cleaned and inspected before being stored away for the time being.
I’m sorry for not posting any images but I’ll take a few shots on the next session.
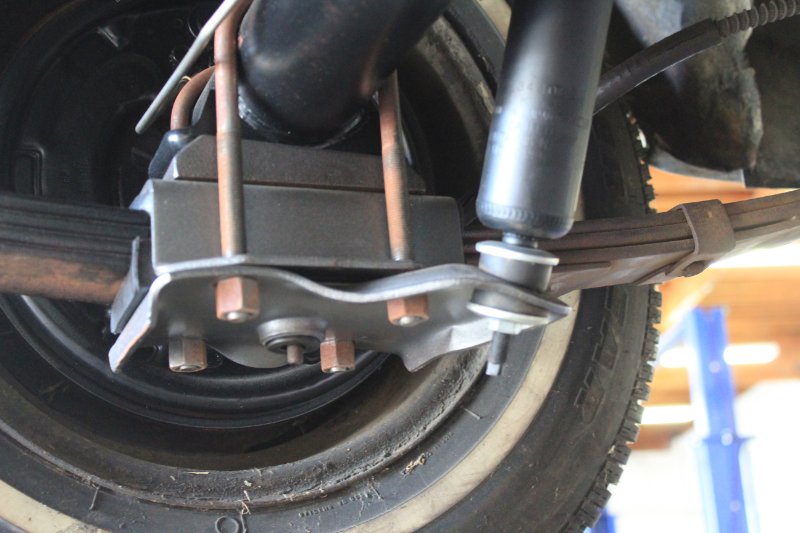
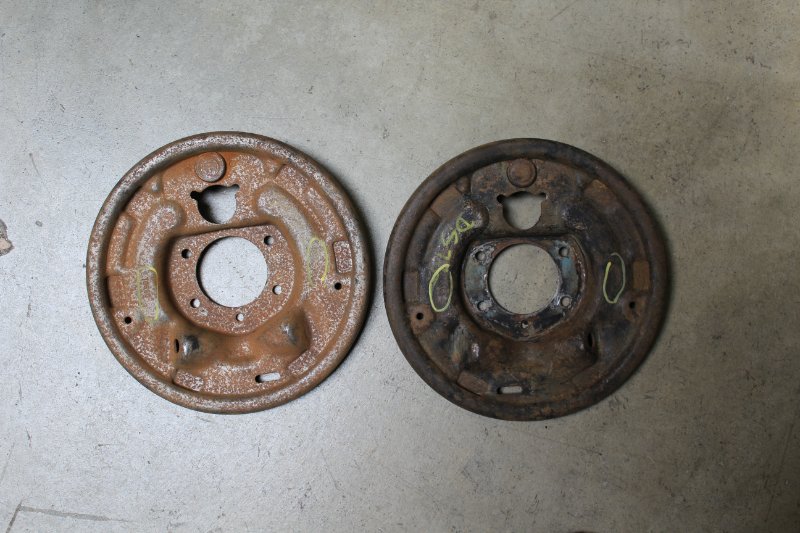
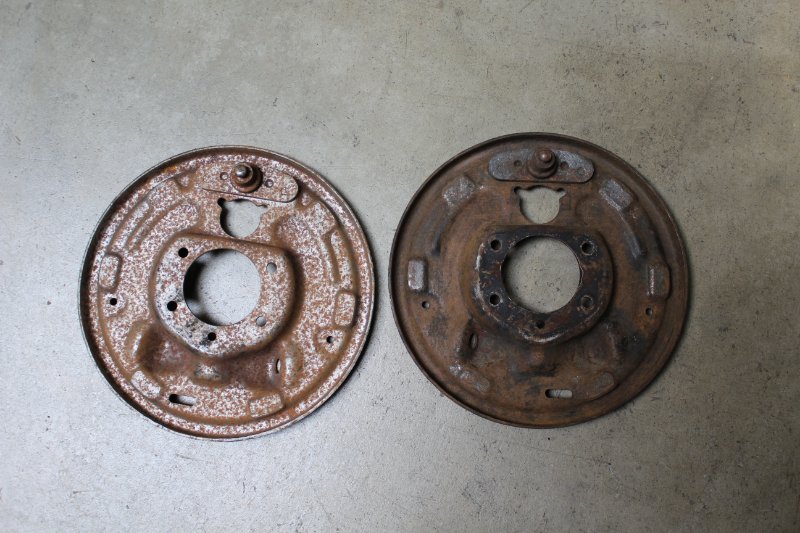
The past week has been on preparing the components for the rear drums. As for the carrier plate’s on which the shoes ride there is a minor issue on both the driver and passenger side. On each plate there are 6 flat surfaces on which the shoes travel on -3 per shoe - that have developed pretty significant wearing that may impede the movement of the brake shoes. A pair of used replacement plates were ordered from WCCC of which had been cleaned up and refinished being painted with a hi-temp black paint on the inner portion and a semi-gloss black on the outer. Pic below is of plates prior to refurbishing.
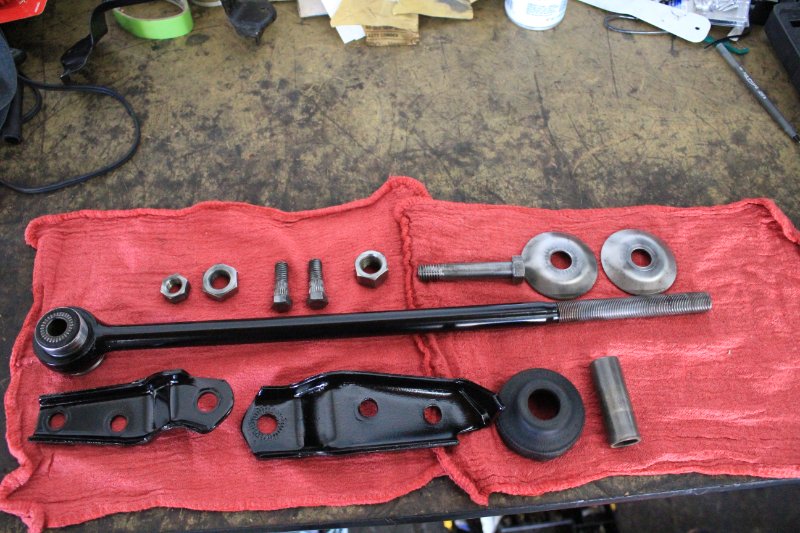
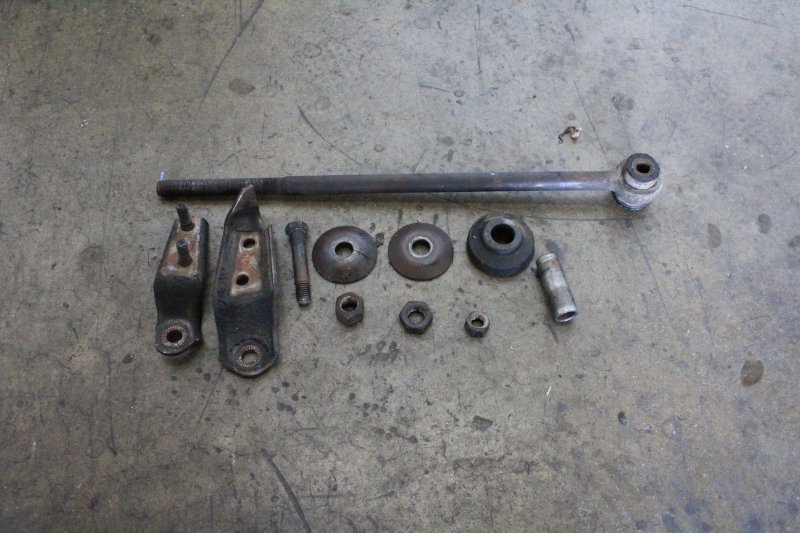
Am debating if I should restore the original lower control arms for the front so that I can run the 3 piece strut rods that came with the car or stick with the 68’ single piece set up that is currently on her. If it is decided to keep the 3 piece units than the bushings nearest the control arms need to be sourced along with riveting in a new set of ball joints on the lower arms.
I could be wrong but I believe the popular vote is to use the 68 parts unless it has to be 100% original.
The 68’ parts are more practical for why would Ford only have the 67’ 3 piece unit for just 1 year unless they have had some issues with it.
The rear passenger side brake assembly has been rebuilt and, with the exception of torque setting the stainless line it is done. As for the driver side I do need to replace the carrier plate which requires pulling the axle out of its’ housing. As the shop doesn’t have an appropriate slide hammer - yes, the 1967 Ford factory service manual instructs the use of a slide hammer - that will have to wait until a latter date. Continuing on with brake related things and not breaking things; the front drum assemblies have been removed off the car to be restored off site. That way I can satiate my OCD of making all the components, plus the surrounding components look new. Speaking of OCD I’ve decided to replace all the hardware that I can with either stainless or yellow zinc chromate rather than use the original were I can. It is an exercise in futility to clean these up only to see a layer of rust later on. In the meantime the original lower control arms and strut rods are in the process of restoration. I’ll post some pictures later on the following week.
Some images of the front brakes. One being the right side that was shot after completion with the picture of the left side photographed prior to disassembly. There is also another image of both in the same picture beside each other. It gives a ‘before’ and ‘after’ perspective. One thing that was too surprising is that the brakes are much more easier to assemble off of the car for the backing plates can be set ‘face up’ with gravity assisting you rather than working against you. Am still waiting on the bushings and dust covers for the lower control arms. One is refinished and the other is amidst preparation. To remove the dust boot from the retainer plate that is held by 3 rivets the plate had been gently pried up around the circumference of the rubber boot enough to extract what was remaining after the majority had been excised and a large percentage of grease removed.

I can never remember the long shoe short shoe issue, I always have to look it up I don’t do it enough.