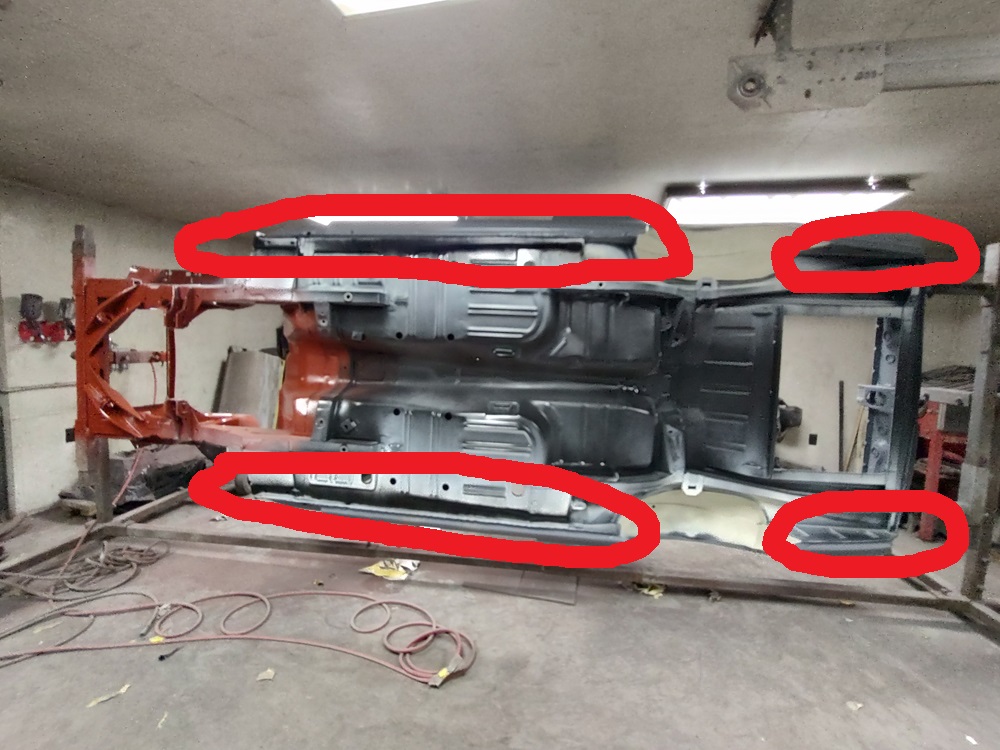
I already did the pinchweld blackout overspray. I won’t paint the outside of the car until early this summer. I plan to blackout the outside facing portion of the pinchwelds after the car is buffed.
I do appreciate the feedback, so if you do see anything wrong or something I missed, please let me know.
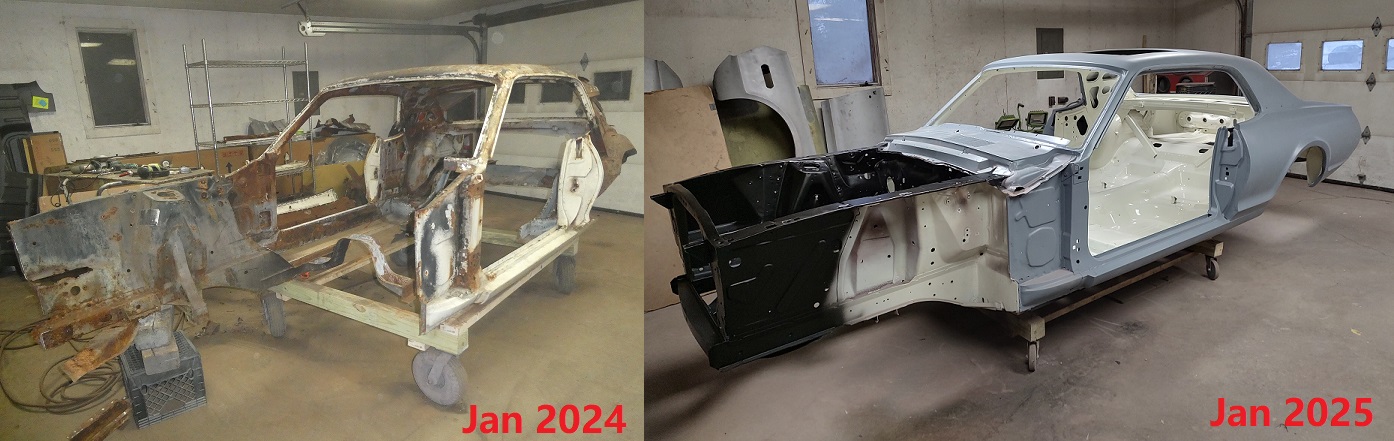
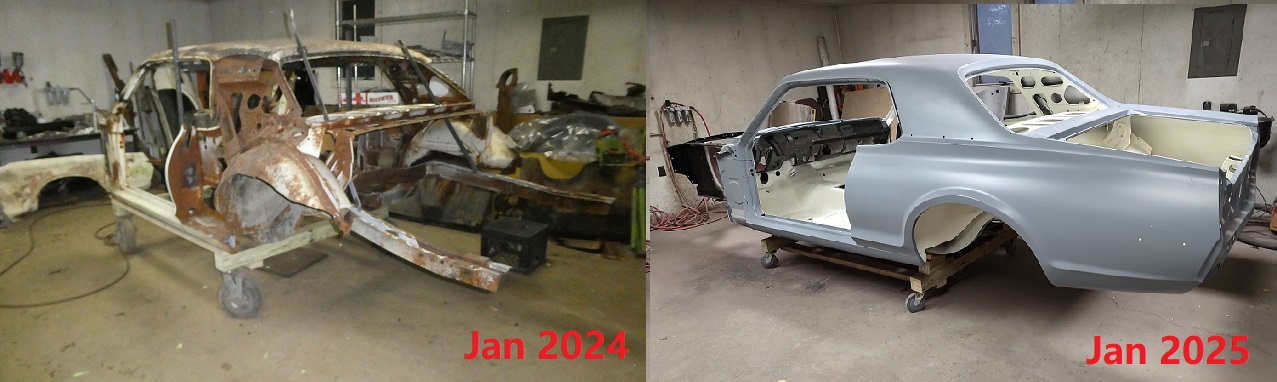
Awesome job, that is a tremendous amount of progress in one year, working solo, in your spare time.
Great job, Chris.
Can’t wait to see the end result.
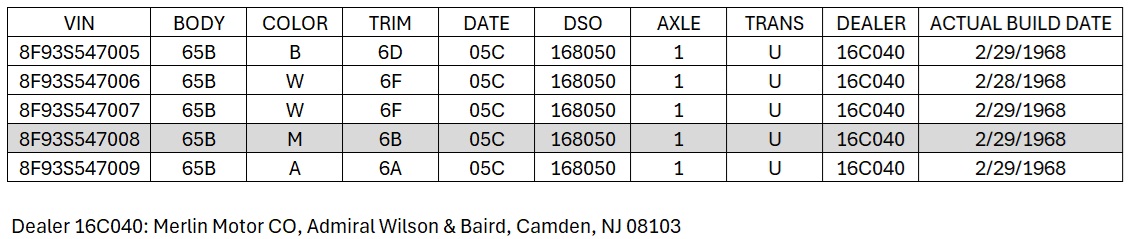
Since there were a couple cars on the XR7G registry that are close to the same VIN as mine and appear to have been delivered to the same dealership, I decided to spend $100 and get the marti reports to see if the unlisted VINs went to the same dealer. Yes, they were. Here’s the list that I know of:
They were all delivered to the same dealer as mine (#8). They were all built on Feb 29th, except for one (#6), which was built the day before. strange…
#5 was sold at Mecum. #9 was crushed in the 80’s. #6 & #7 are still out there one hopes.
I am not going to spend any more money on marti reports. Hopefully others will turn up.
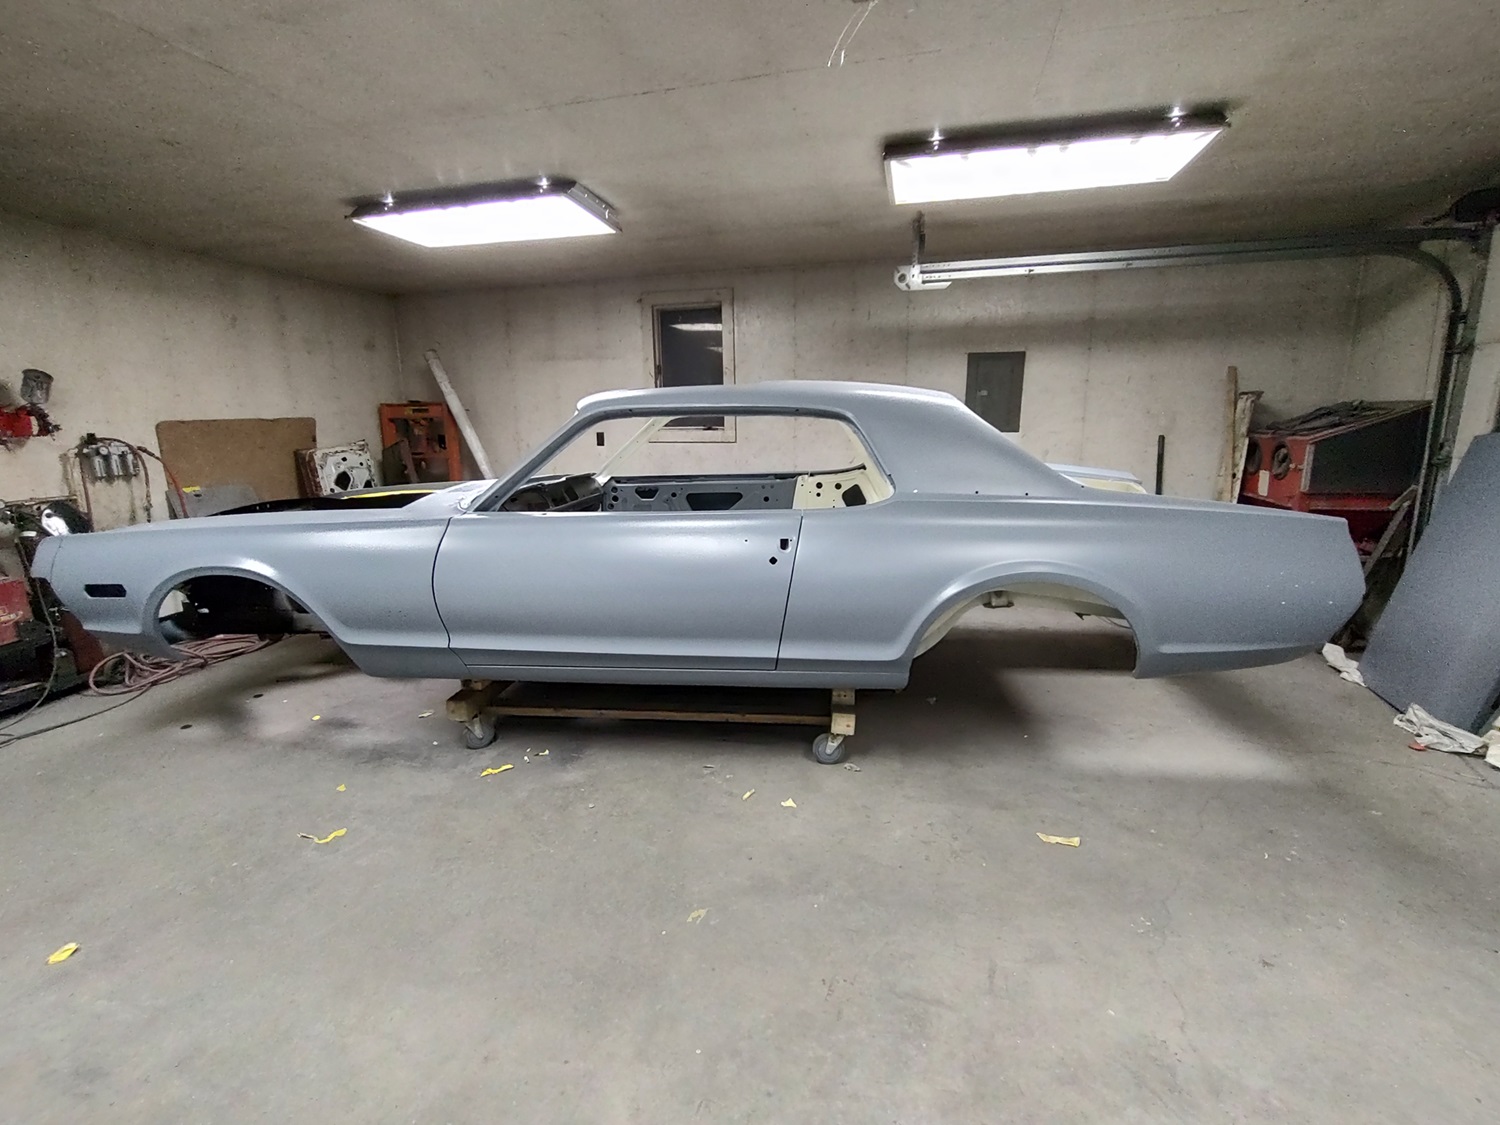
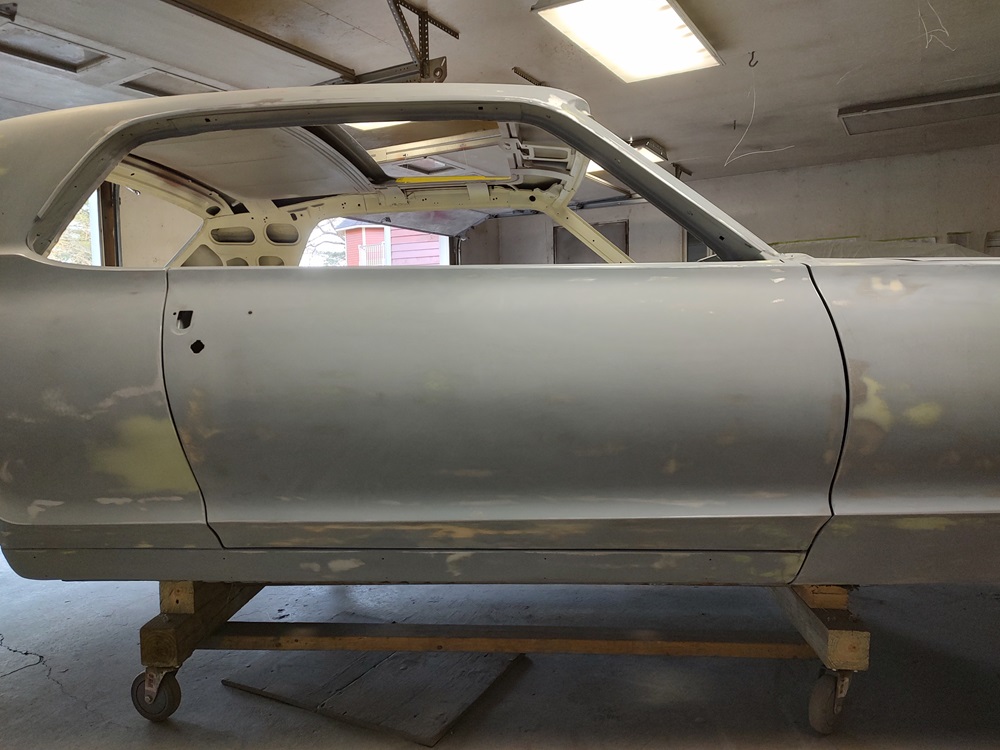
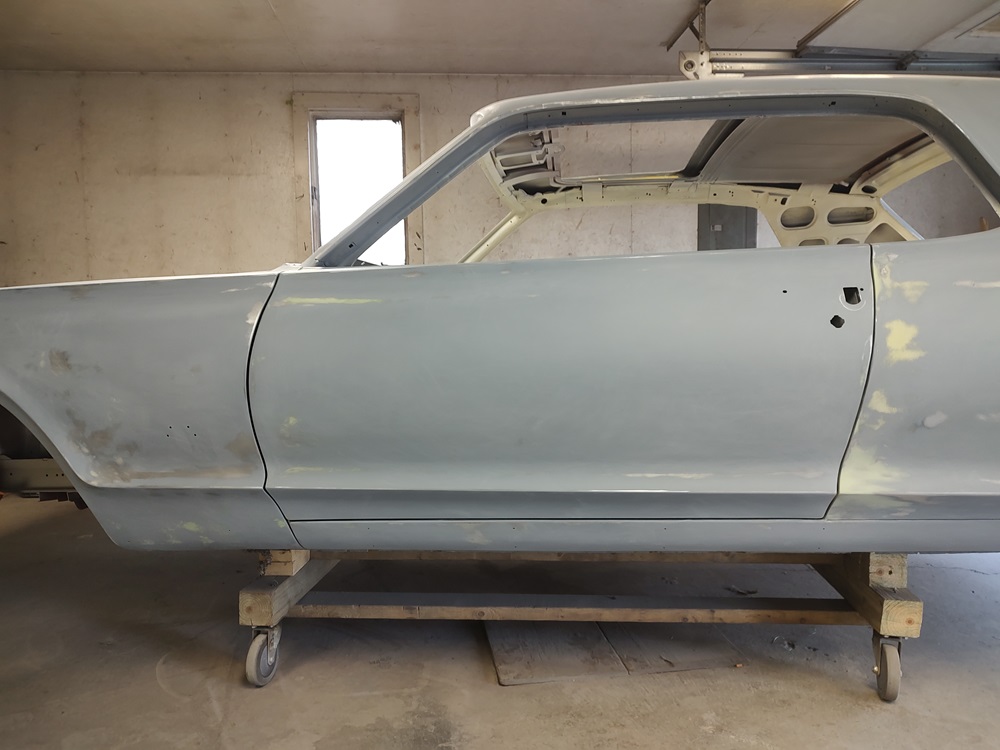
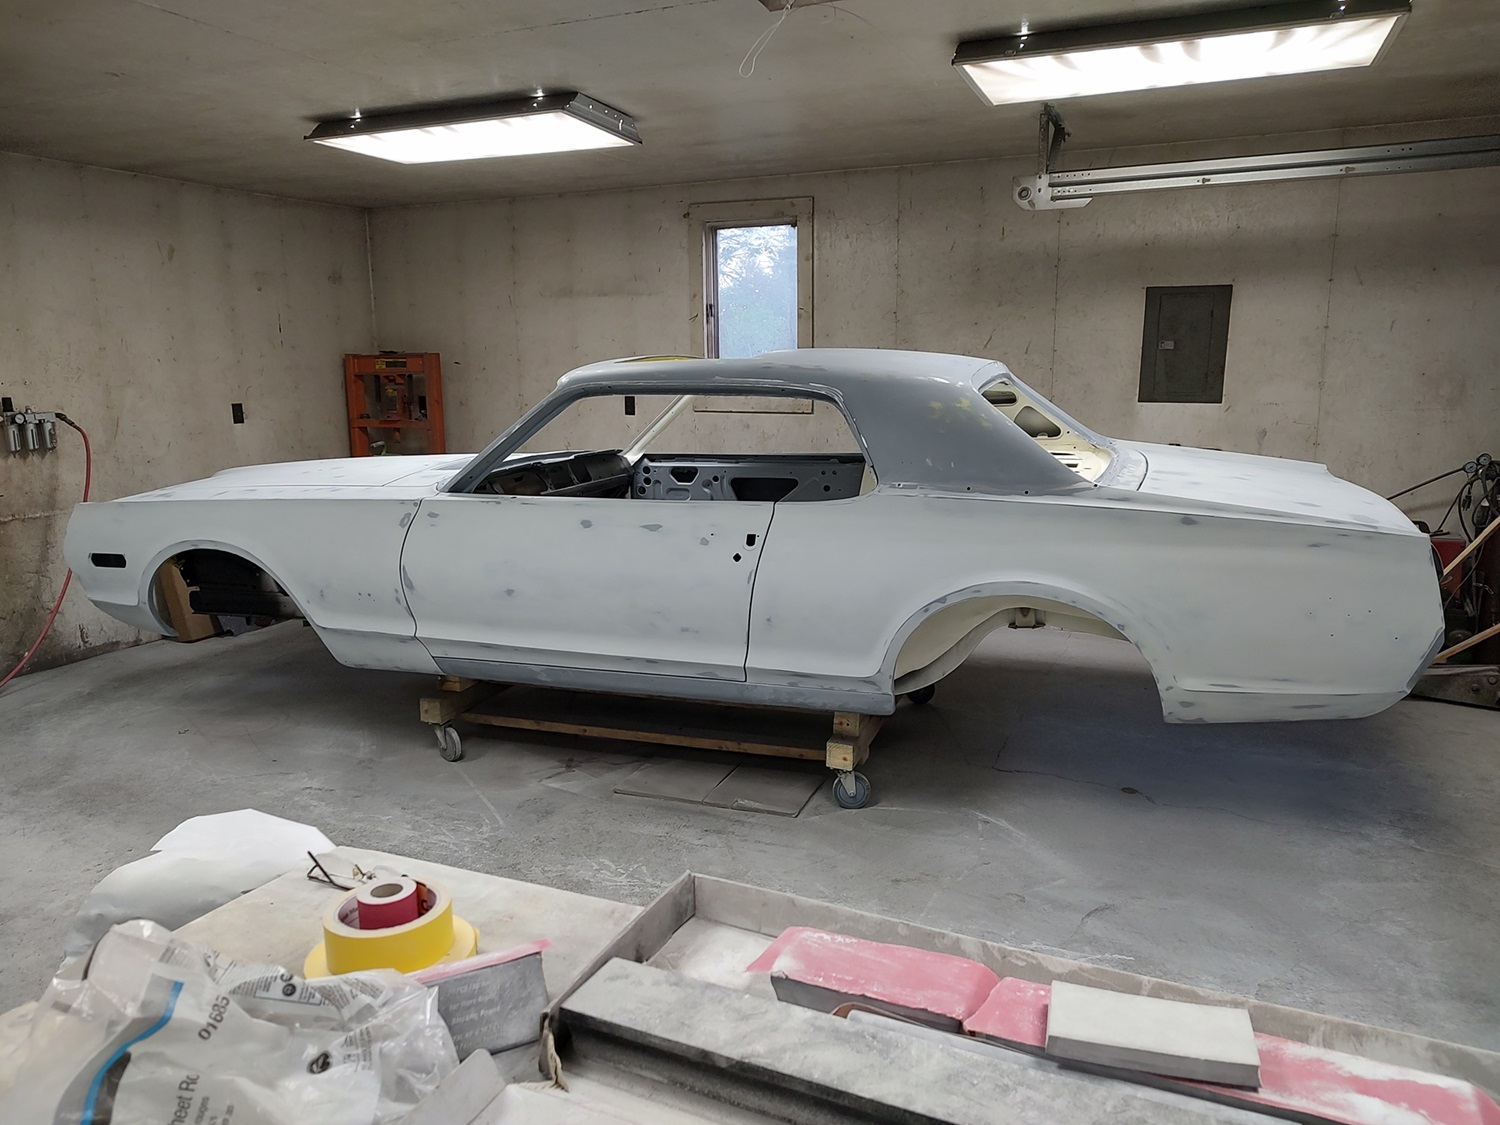
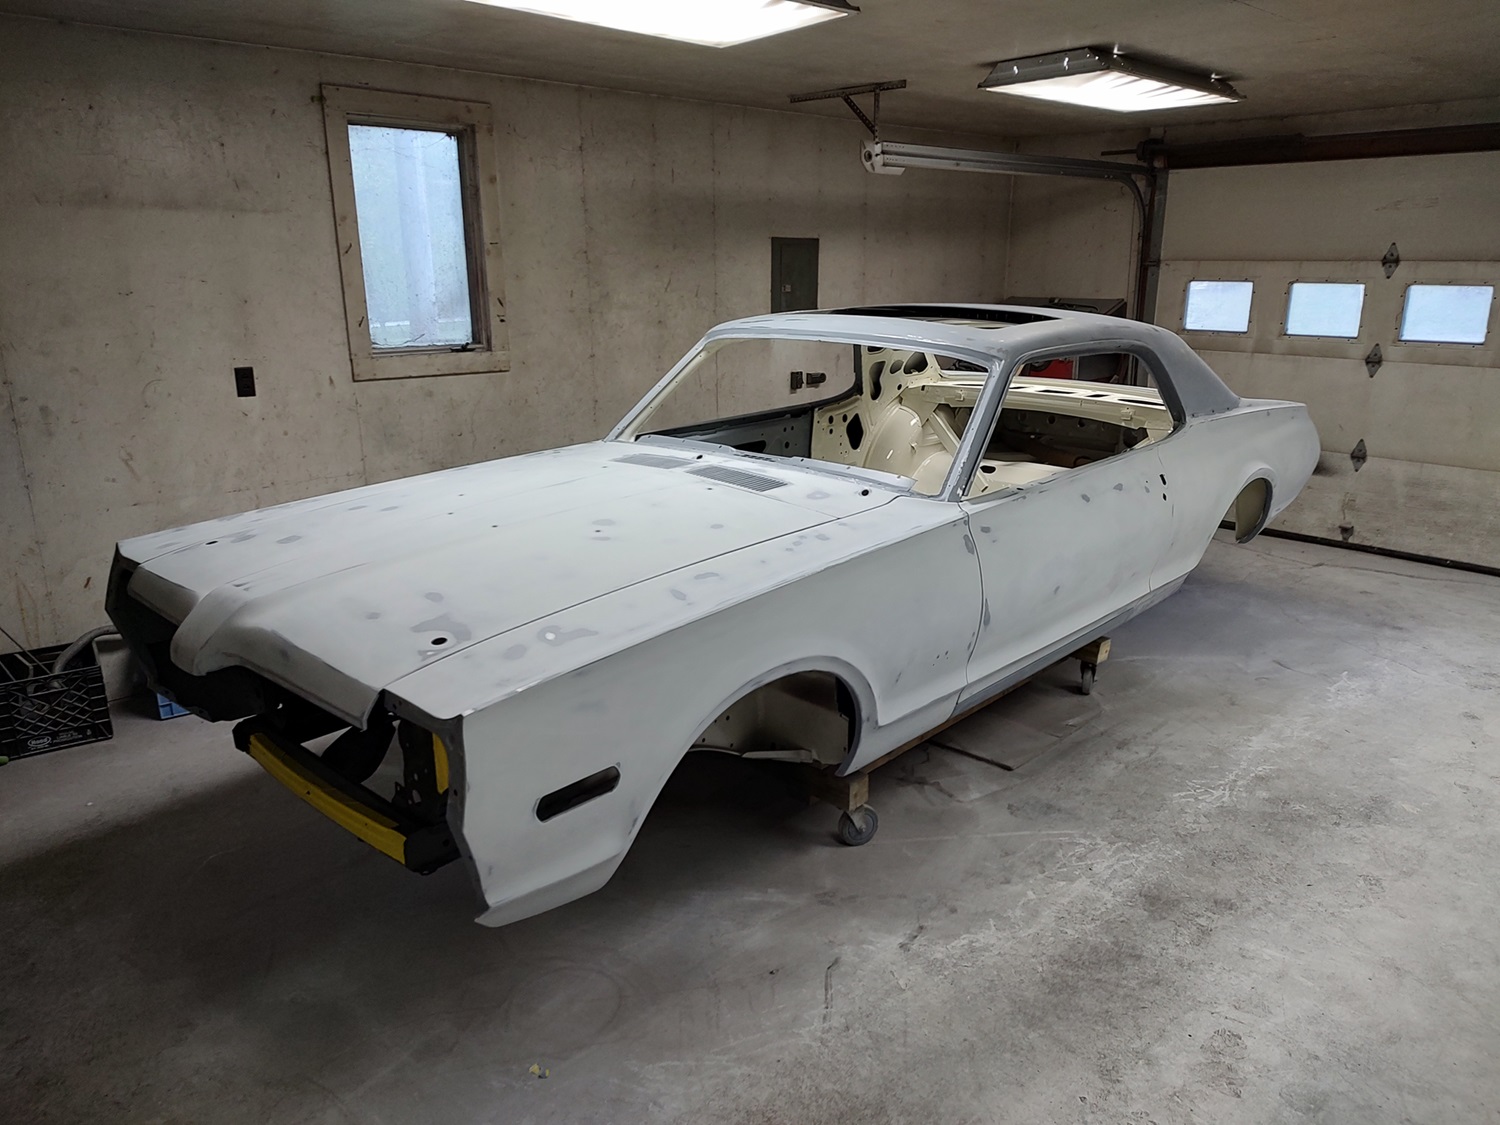
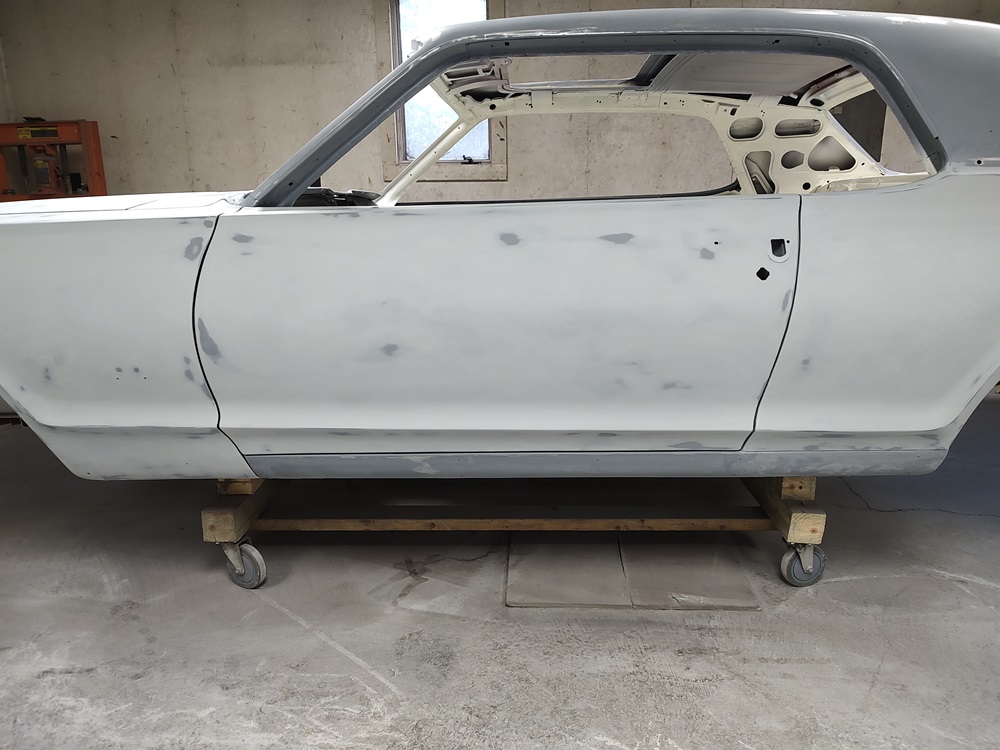
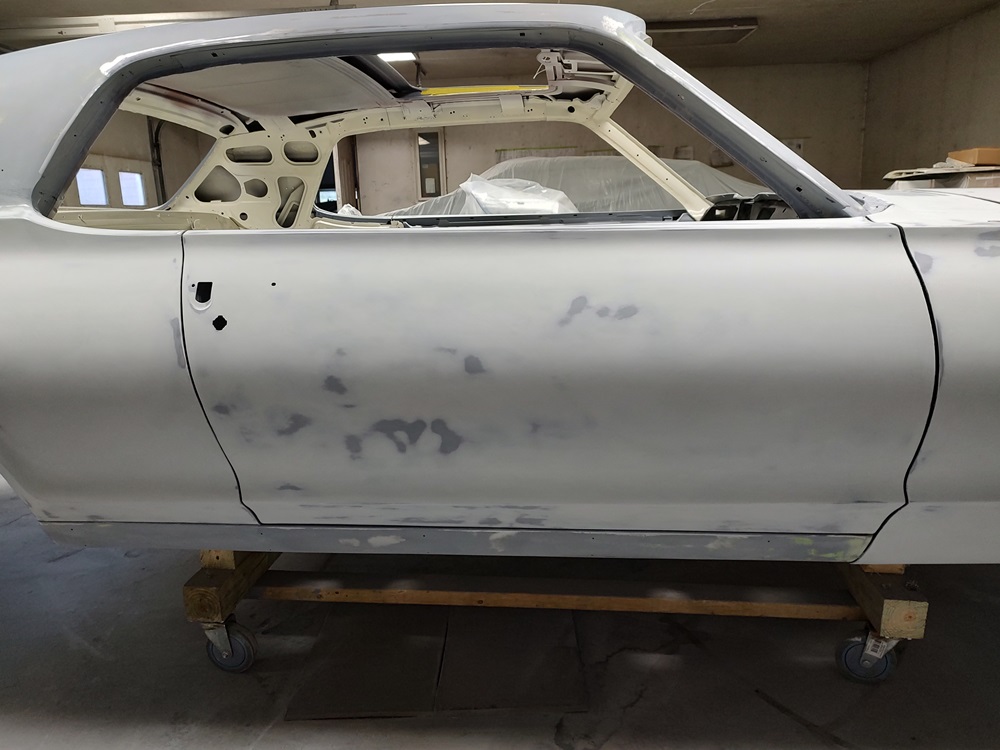
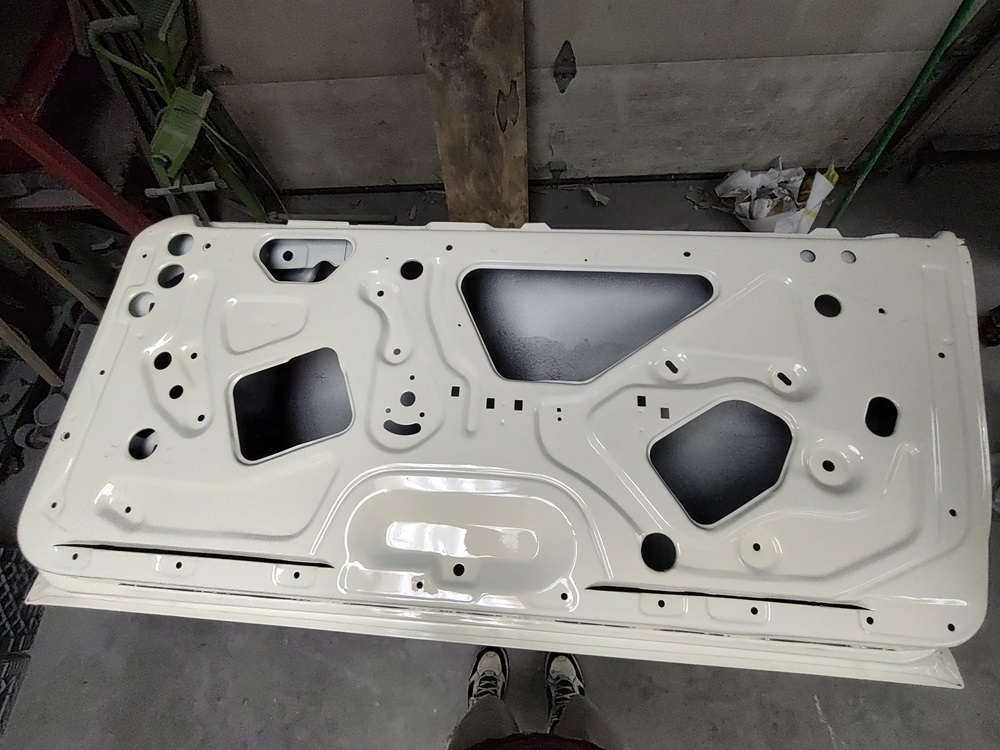
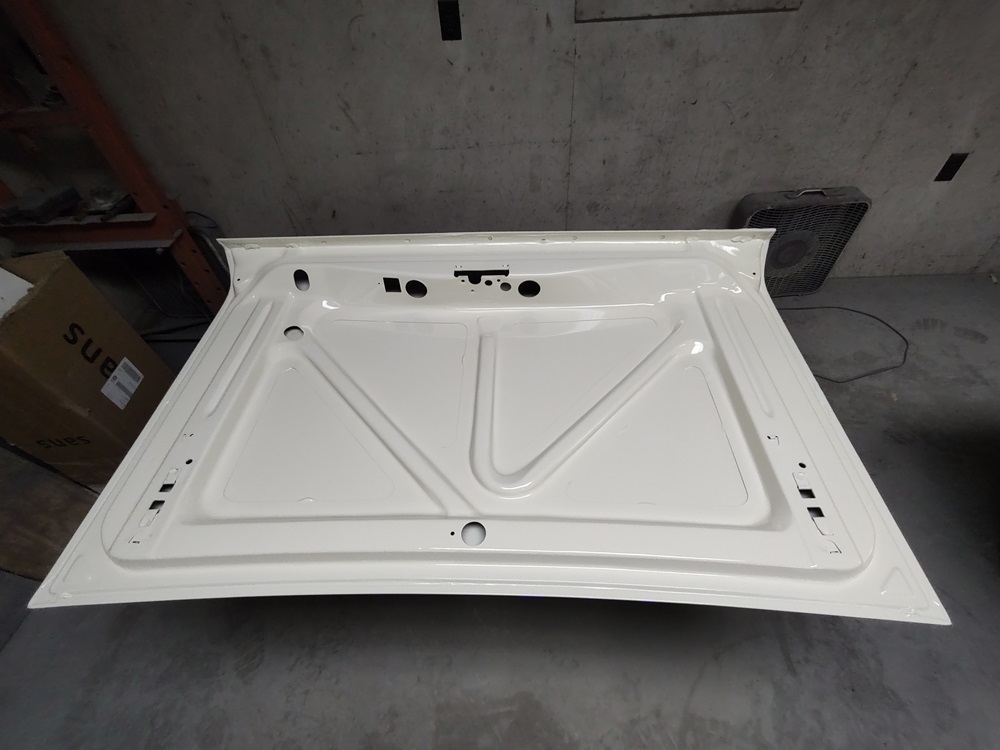
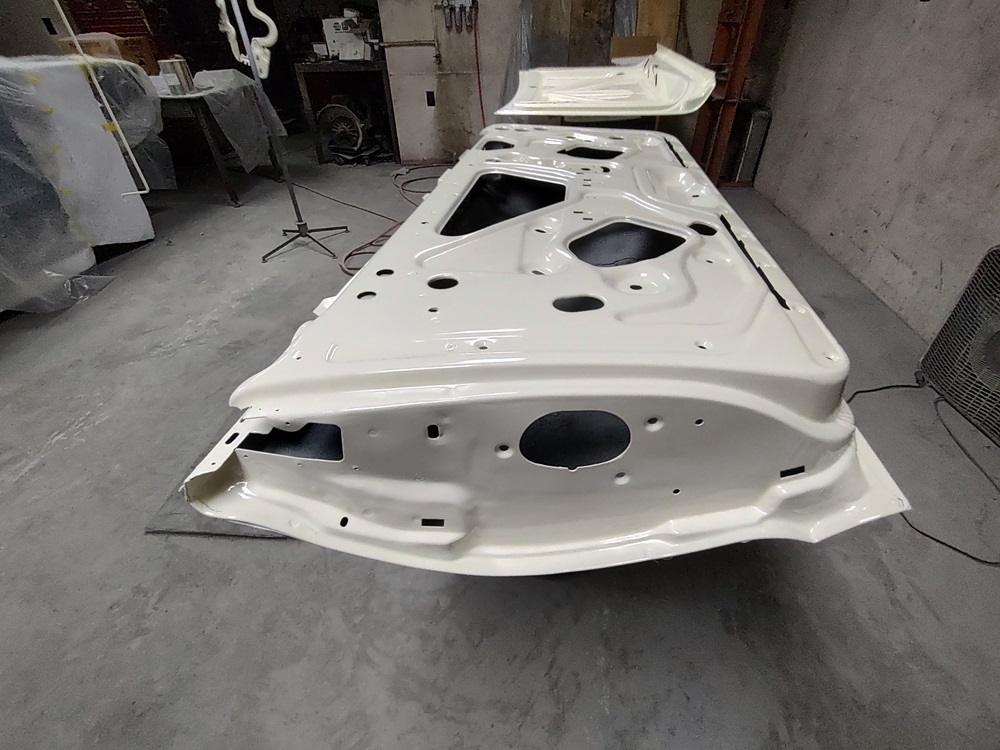
UPDATE 3/10/2025: The doors, trunk lid and the LH front fender all have had the bodywork completed on them and are now in primer along with the rear quarter extensions & front fender extensions. Once I complete the repairs on the RH fender and the holes are drilled in the Dynacorn hood that just arrived, I will put those in primer and then will be able to put all the panels on so that I can put the entire car in high-build prime.
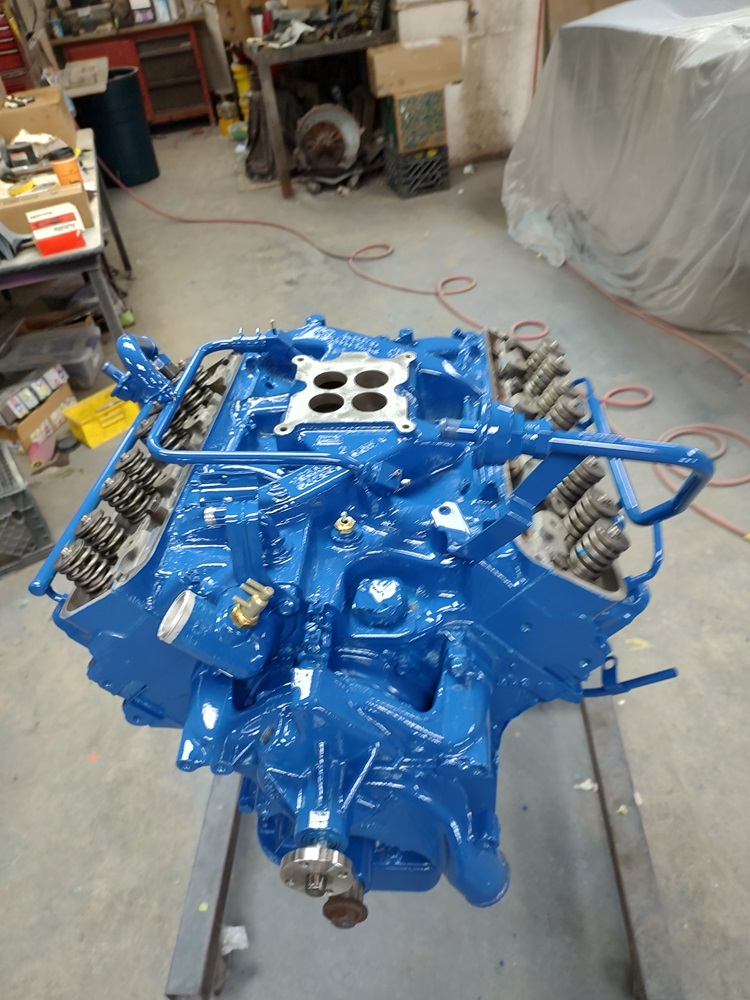
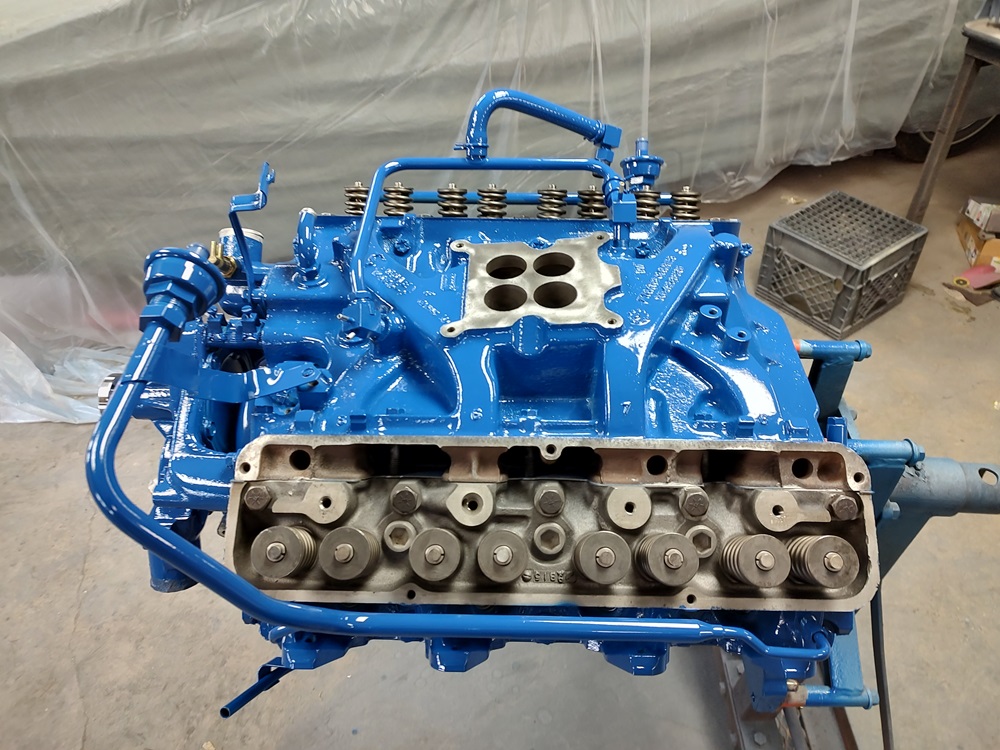
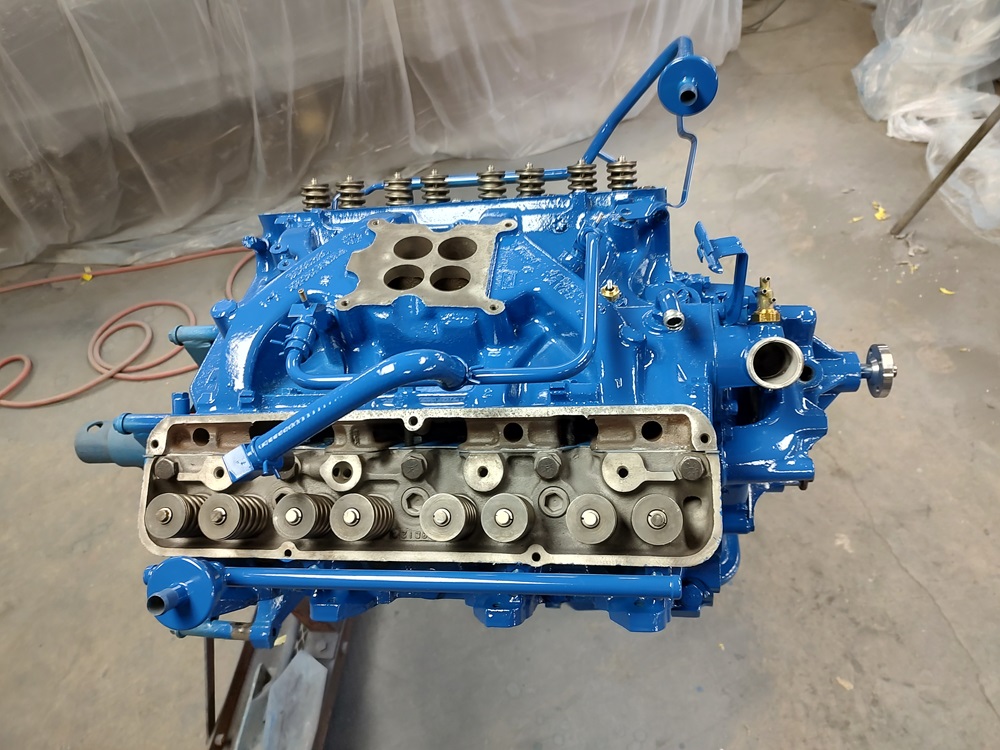
But before that happens, I am playing with this big blue thing. I don’t normally do the engines this early in the project, but I wanted to take a break from bodywork. Here the engine as it sits as of 3/10/2025. Freshly painted and waiting for the goodies to all come in and be attached. I already have the restored distributor and carb to go on it.
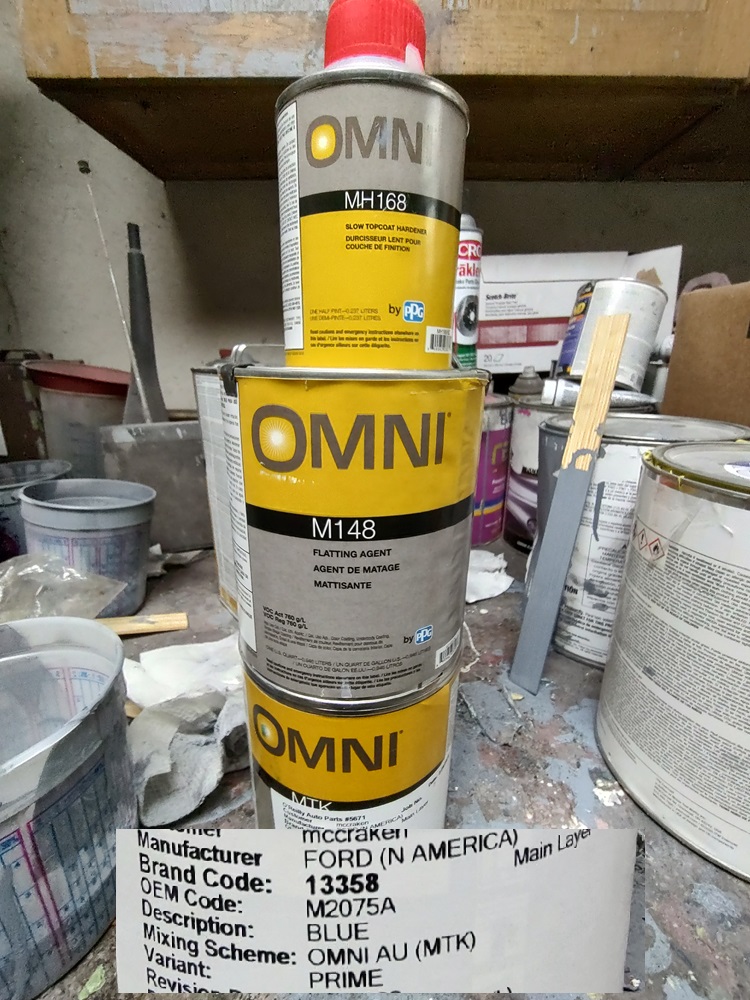
The paint I had mixed in a PPG Omni MTK Acrylic Urethane as I cannot get the PPG DAR 13358 made here in Vermont anymore. It appears to be a pretty good match to my original Ford pieces. I did need to add about 20% of M148 Flattening Agent to knock down the gloss to a more correct sheen. Those who are not paint inclined and wish to do this yourself, I mixed 80% paint with 20% MH148, then I mixed that in a 4 parts paint mixture to 1 part mixture with MH168 Hardener then 1 more part MR186 reducer. You may want to add more or less of MH148 to get the desired sheen.
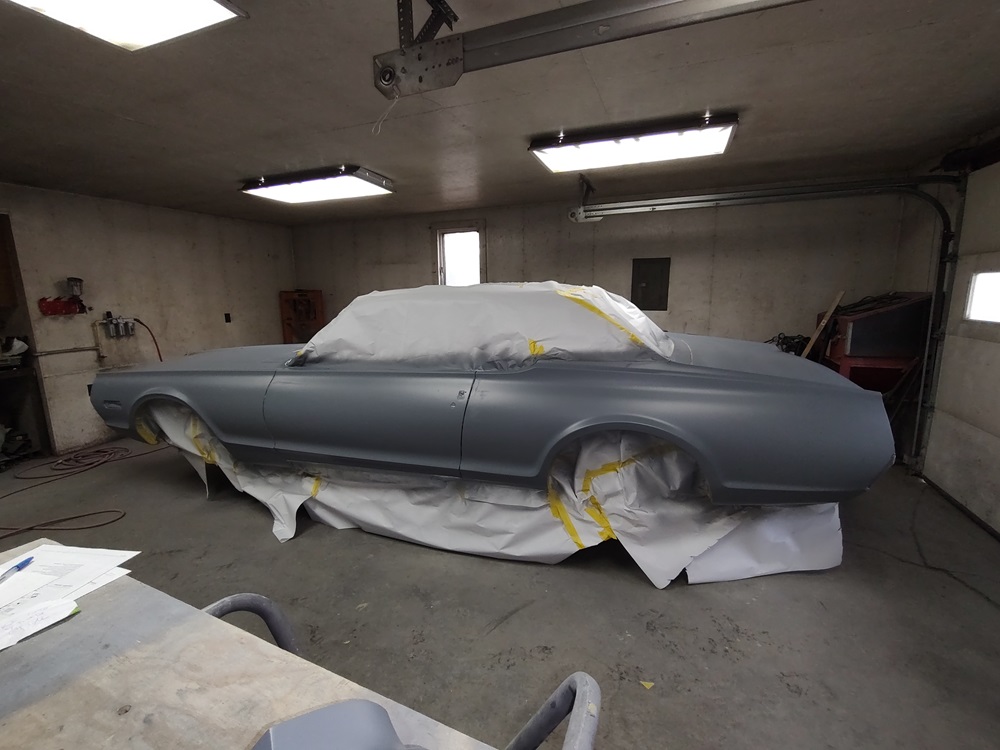
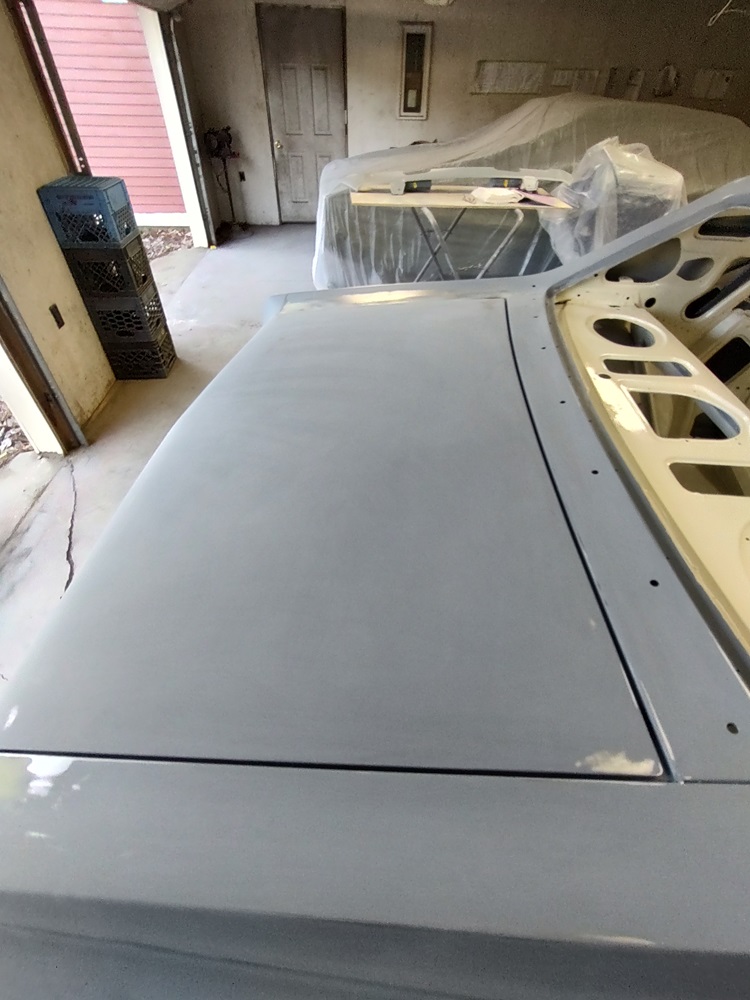
UPDATE 4/18/2025: Not much to report except that all of the panels are now bolted on and I am perfecting the panel gaps before putting it in high-build primer for the final blocking stage. Here it is sans Hood and Trunklid.
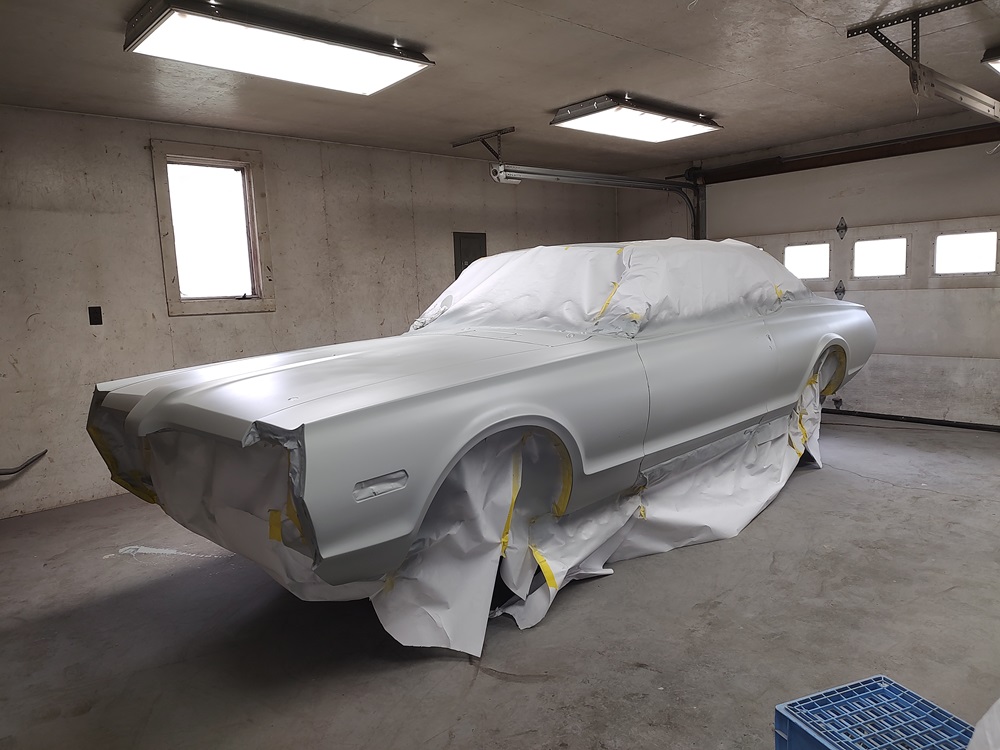
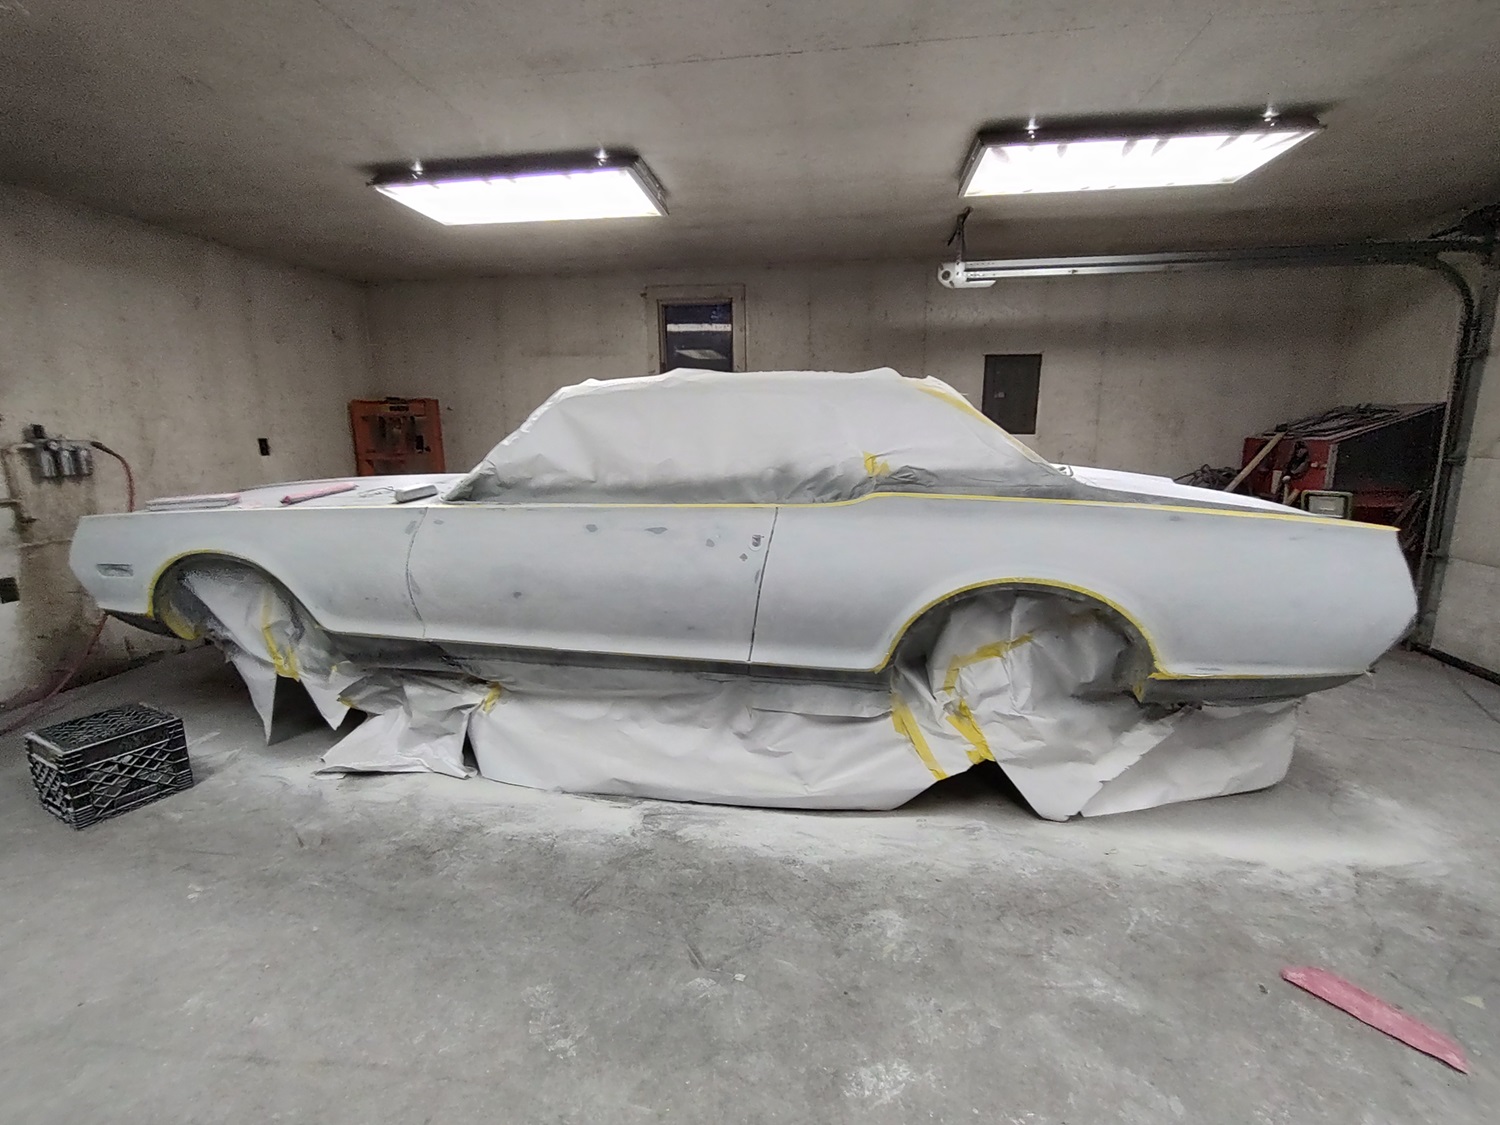
UPDATE 5/5/2025: I spent the weekend putting the car in highbuild primer (slicksand). First it was sealed with epoxy primer followed by Slicksand the following day. I had to reduce it 10% to get it to spray out of my gun with a 2.2mm tip. Now begins the blocking.
Note: I didn’t bother putting the roof in highbuild, but I did blocksand it.
I like to use clean rain water when blocking. Keeps the dust down and the paper cutting abilities last a lot longer. A spray bottle or bucket works well.
For wet sanding I generally use warm tap water with dish detergent. I also use a rubber squeegee to remove the water to examine the sanded surface as I go.
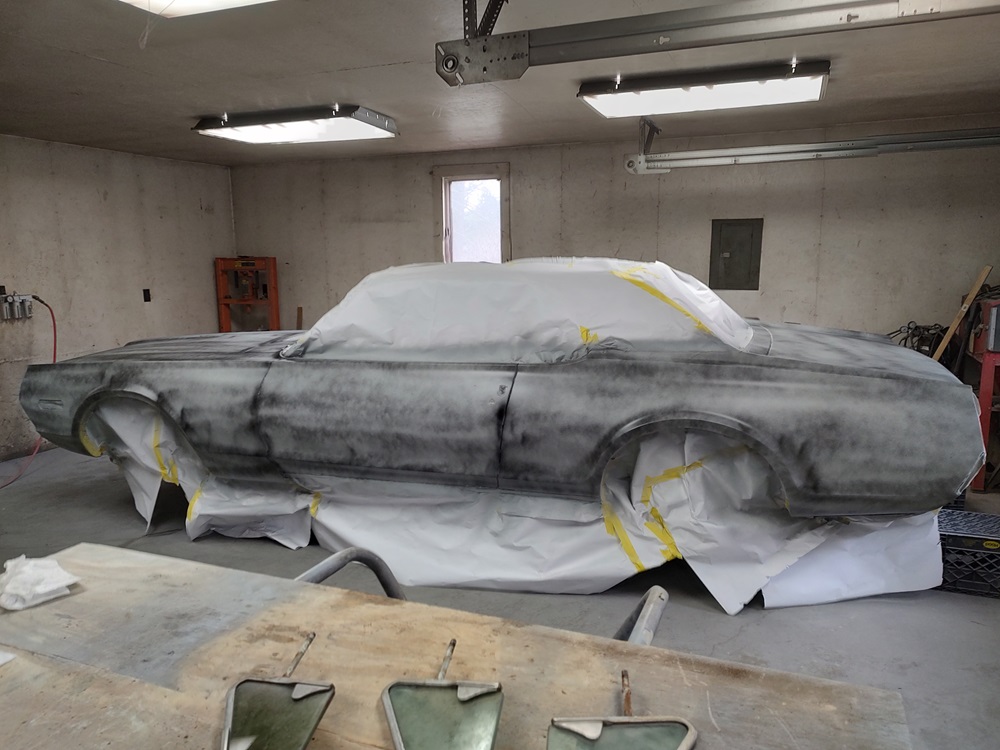
I am blocking with 180 dry right now. The paper comes in a roll with adhesive backing so that it sticks to my sanding blocks. After breaking through the guide coat it sands pretty easy.
After the highbuild is blocked, all the panels come off and I seal it with DP50LF epoxy primer, let it set for a month and then wet sand with 600 prior to paint.
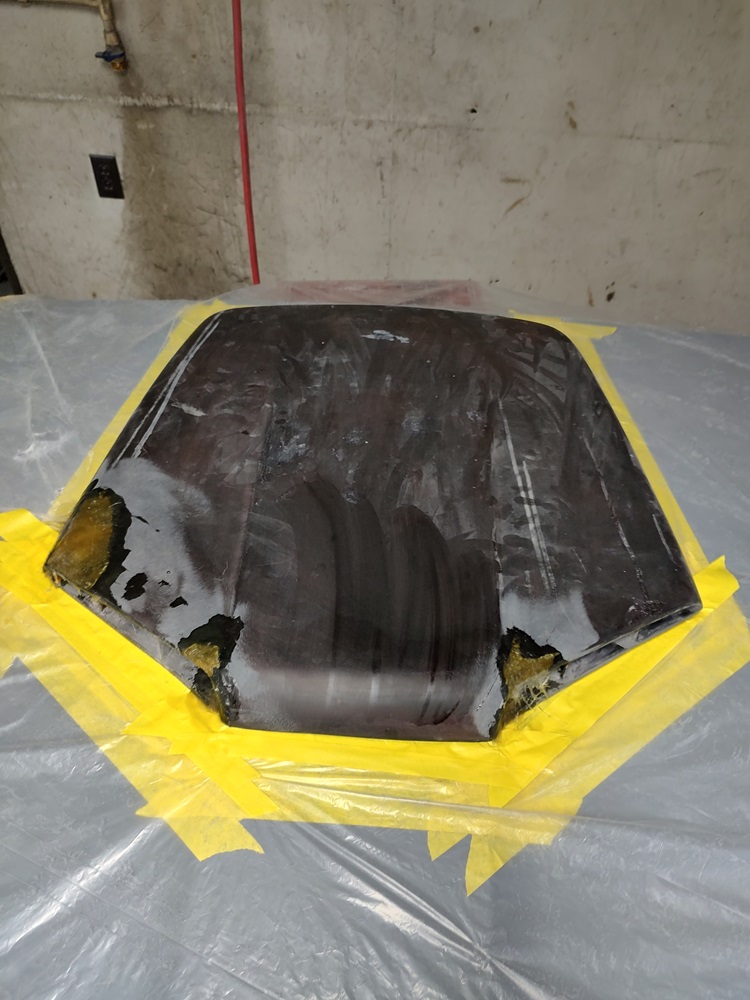
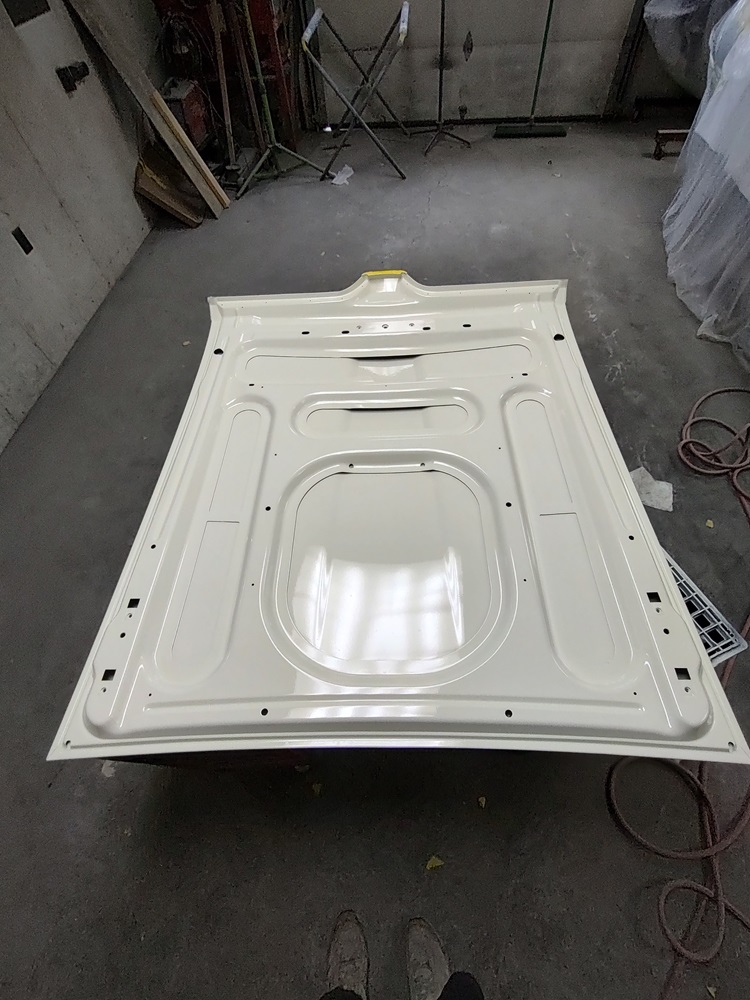
I am futzing with the hood scoop right now. It has a few hairline cracks to fix and it needs to be contoured to fit the repo hood. Once that is done I will paint the underside of the good and get to sanding the body for paint.
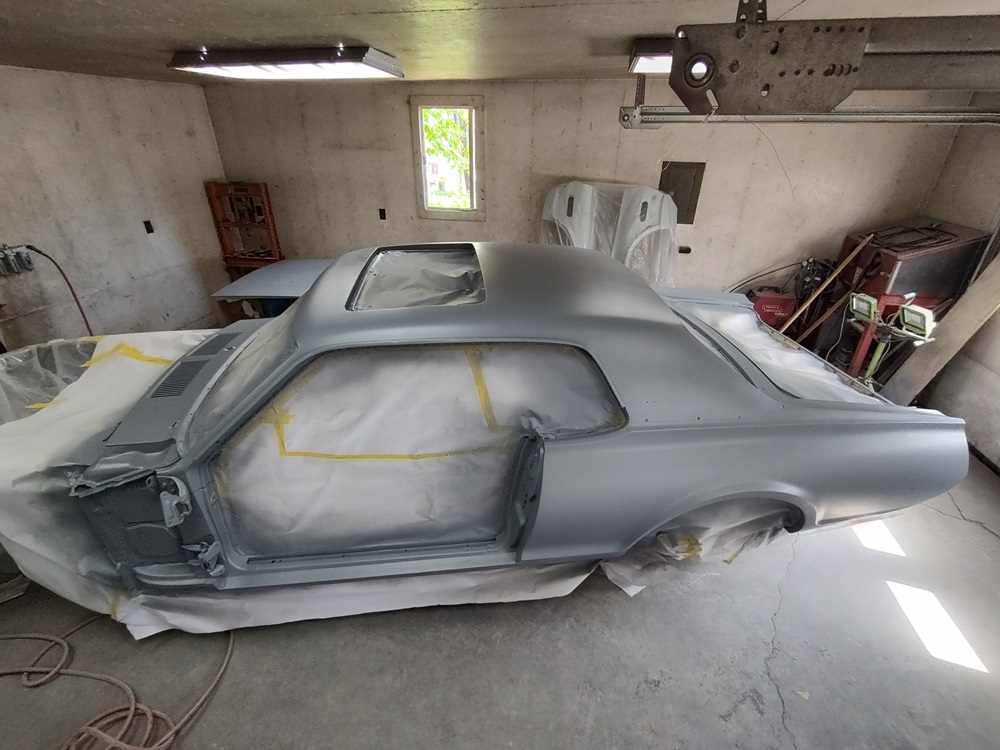
UPDATE 6/26/2025: My plan was to hang the doors and paint the jambs with the rest of the car as to not have any visible mask lines in the jambs. This I usually do by painting just the A-pillars and mask them off where they meet the rocker panels. While I was at it, I decided to do the entire roof. No sense spraying it with my good expensive clear if it is buried under a vinyl top. The car will be far easier to spray this way.
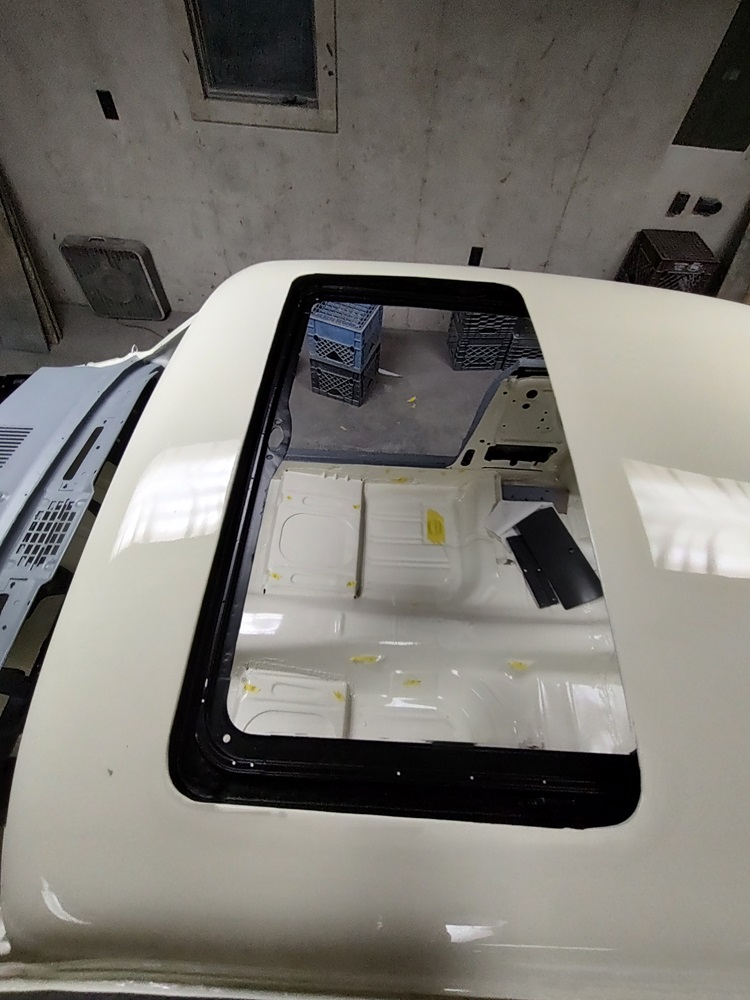
There was evidence that the sunroof opening was blacked out by ASC. So I decided to do that now. Hopefully I won’t mess it up to bad when I glue the vinyl top on.
And lastly I painted the underside of the hood, which completes the paint work prior to painting the outside of the car. I am now engaged in sanding all of the outside surfaces with 600 and expect to have it ready for paint in the next couple weeks.
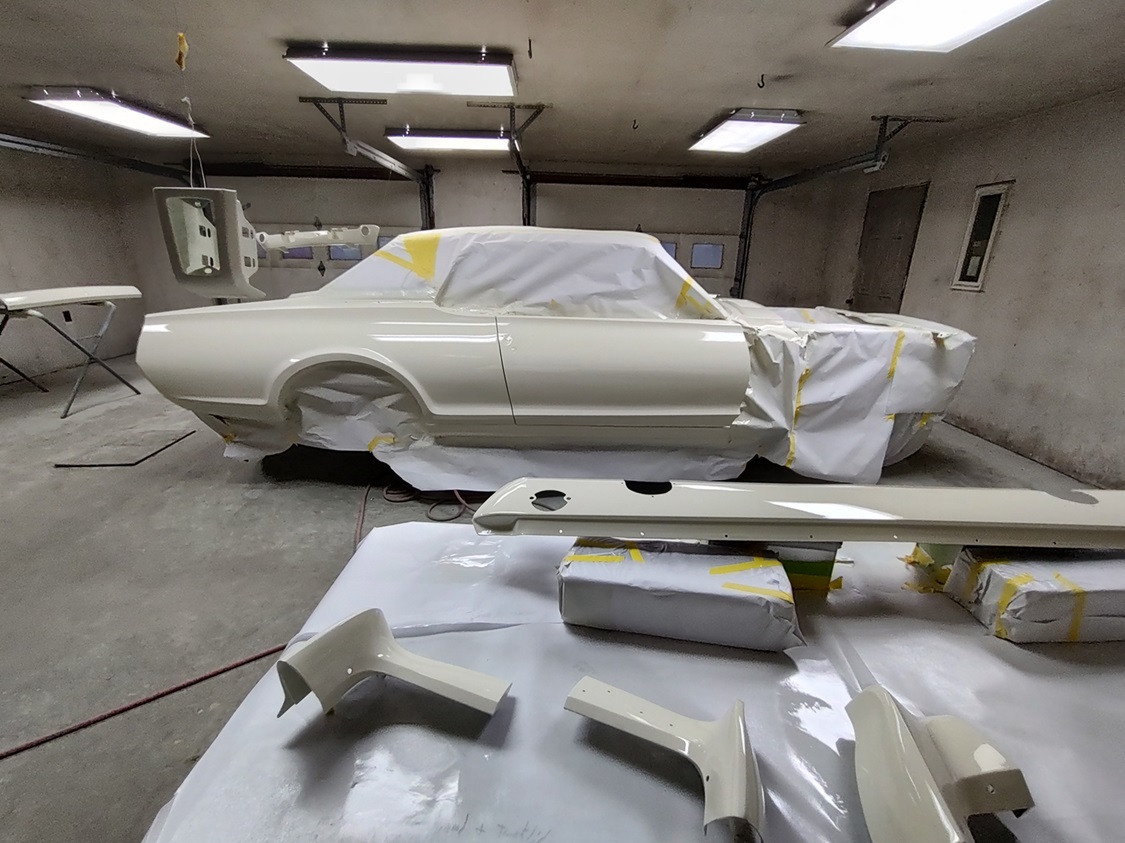
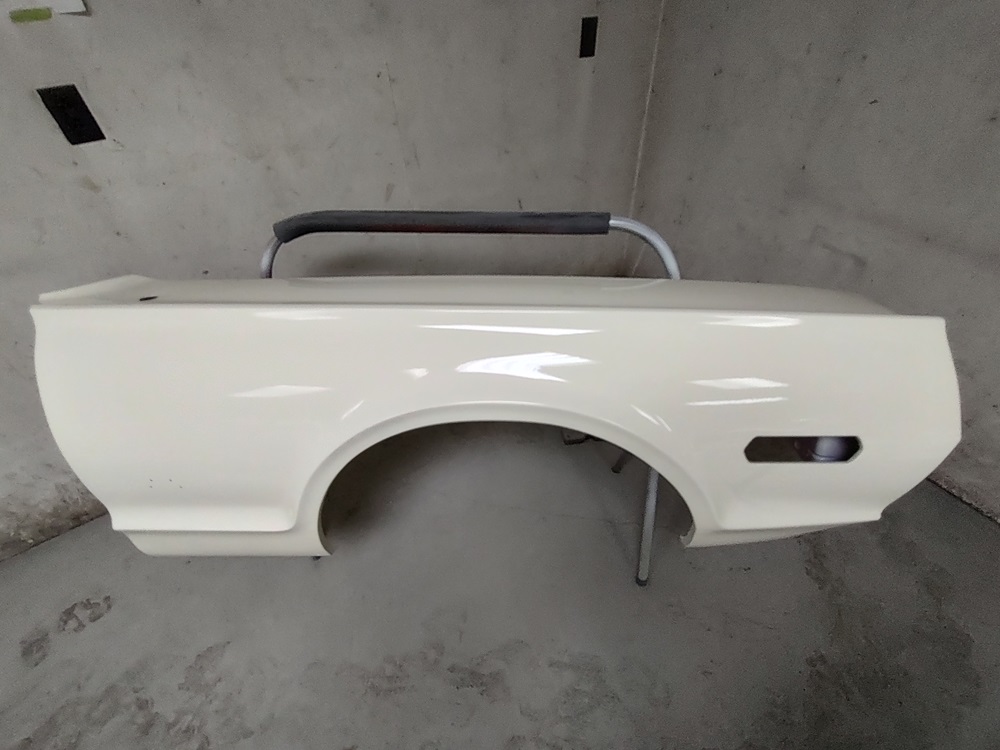
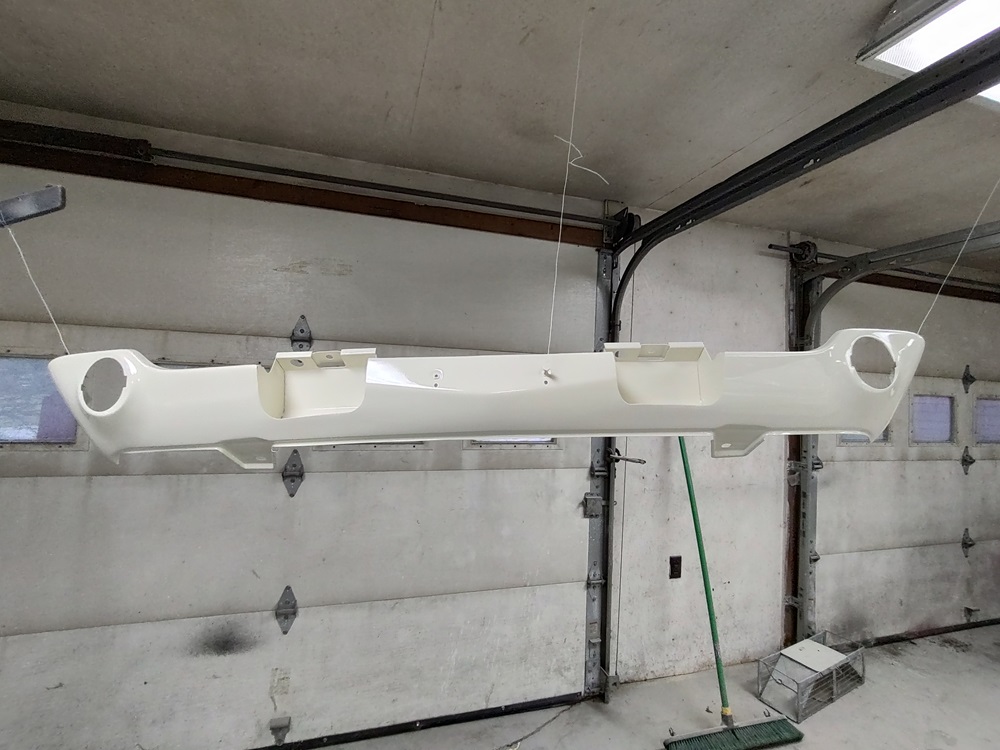
UPDATE 8/5/2025: PAINTED! Here it is after 5 coats of basecoat (Deltron 2000, DBC) and 3 coats of clear (Deltron NXT, DBU2021). I shot everything all at once except for the hood scoop and mirror housing. The fender and quarter extensions were painted while hanging from a rack to ensure I got enough coverage on the back edges. They were then placed on a bench for clear coating so that the clear would flow out as flat as possible.