Steve, all you need now is a set of BF32’s! How long was your turn around for your carb?
About 4-5 weeks including shipping time. Joe was great about letting me know what was up and he’s a neat guy to talk to. Tons of knowledge.
Thanks to everyone for the kind words. Having a great time getting my hands dirty on the Cougar again after so many years. Glad this community is here.
Thanks Steve I had a 67 390 4sp GT in the same colors very fun car to drive it was originally from Berkeley.
While I was under the car doing the fuel system I had time to poke around. The ID tags are still there on the transmission and differential:


The marathon of engine compartment projects is nearly done. I ended up deciding that I wanted to completely refresh the coolant system while I was in there. I installed a rebuilt '69 water pump from Mansfield (more durable than a '68 is what I’m told), a new thermostat, new temperature sensor, new thermostat housing (the old one was stamped “MADE IN CHINA” right on top, ugh), and new heater inlet nipple on the manifold.
I figured I should have a look at the pulley/belt situation. The car was originally equipped without A/C and with smog, low mount alternator, and power steering. The smog is long gone but the low mount alternator is still there with the original brackets:

The original three sheave crank and water pump pulleys are there as well. The alternator was mounted with a single sheave pulley and the belts were set up with one each running around the crank/water pump/alternator and crank/waterpump/power steering.
A little research told me that the alternator should have a two sheave pulley running two belts around the crank and water pump. The power steering should be running only from the crank pulley. If I ever go crazy and get a smog pump it will run only from the water pump pulley. I decided to return the pulleys and belts to stock setup, minus the smog. Picked up a dual sheave alternator pulley from WCCC to make that happen.
While I was replacing the pulley on the alternator I figured I should sort out this wiring mess (I know the alternator is wrong but that’s $400 that will wait for another day):

Cougars Unlimited makes this handy-dandy XR7 big block low mount alternator harness reproduction. Looks much better now:

Last thing is to replace the battery cables with a nice new heavy duty set, do a little repair work to the harness at the solenoid, and then fire it up. Fingers crossed.
Your alternator is incorrect.
Do you have a modern voltage regulator
It’s neither modern nor original. Just old. If I get a nice new alternator I’ll get a nice new voltage regulator to go with it.
Wow, you are really coming along! I can’t wait to see and hear this car in person.
I recommend a new "correct’ Autolite alternator from Jack Brooks @ Dead Nuts On
That’s the plan eventually. Their alternators and voltage regulators look nice and I’ve heard nothing but good reviews on them.
I was hoping to get it out to the Stray Cats meet this Saturday but that doesn’t look like it will happen. In any case I think it’s supposed to rain this weekend.
Maybe the next one.
Been a while since I updated my project thread.I got some great advice from all the other members on here that really helped me get the Cougar started, idling, and running smoothly after having the distributor and carburetor rebuilt.
The car now starts and idles smoothly with 17-18 inches of vacuum. The dwell is set at 28 degrees.
I set the initial timing at 12-14 degrees and found that the engine was really bogging down as it moved through 1500 RPM during acceleration. I charted the advance curve and found that I was hitting 45 degrees of advance at 2000 RPM.
I flipped the distributor centrifugal advance arm from the 15L to the 10L slot and set initial timing closer to 15 degrees. Now my total advance with the vacuum disconnected comes in at just under 35 degrees at a little over 2000 RPM.

There’s lot’s of room to fine tune the timing and the carburetor but it runs smoothly up and down the gears in normal driving, so I’m pumped to have it back out on the road. Thanks to all the people who responded to my posts or have posted insightful comments on other threads that helped me. Too many people involved to name you all.
Now that the car is actually running, I’m going to take a break from the mechanical heavy lifting and tackle a few interior projects like replacing the window rollers and a few other things.
First up, I’m planning to install my stereo:


Before I can do that, I have to repair my console base. Three of the four mounting holes for the radio bezel are broken off.
I was thinking about using some sheet ABS plastic to make vertical strips to glue/rivet onto each side, then locate and drill the mounting holes. Maybe something like this. Any advice on what’s the best glue or epoxy to use? What kind of plastic is the console base made of?

If you search the forum you’ll find a kit you can buy to repair that. I can’t remember the name of it.
I tried several different searches for console repairs, etc. but I didn’t see a kit. Unless you’re talking about plastex? It seemed like that was meant for filling/gluing cracks and small holes so that’s probably not what you’re referring to.
I’ll try some more searches. Please let me know if you remember.
Intake manifold looks a little rusty. Clean & Repost
So after hunting around, I settled on using ABS/acetone mix to repair the broken console tabs.
Lonestarbullitt used ABS/acetone on his dash panels in his project thread and it looked promising.
First I cleaned the “fuzz” off the area around the broken tabs

Then I used cardboard to mock up the patch piece, making large tabs on two sides of the patch to give it strength

I cut the patch piece out of 1/16 ABS sheet and scored/bent the tabs
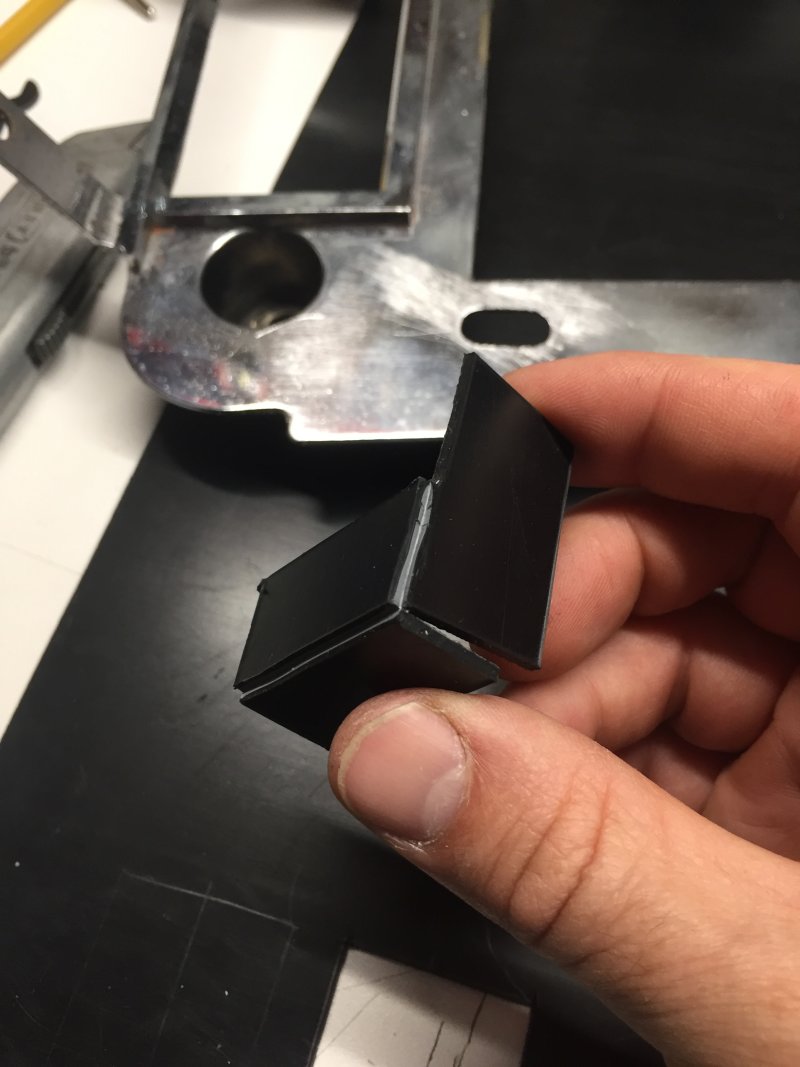
Then I cut a second piece of ABS sheet to glue onto the front of the patch panel, giving it a second layer for strength and also making it flush with the front of the console

Finally I used ABS/acetone mixture of 12 grams ABS to 50 cc acetone. I cleaned all the surfaces with pure acetone and then liberally applied my “glue” mixture

Repeat two more times and let it cure overnight, then locate and drill the holes for the bezel posts. The patched tabs seem to have a lot of strength.

Finally, reassemble and test fit. I had to make a couple of adjustments to the holes and tabs with my dremel, but nothing major. I’m really happy with the results.

Nice!
Nice job! Bookmarking this post in case I ever need to do the same
An update is in order.