The Snowball Saga - '68 Standard Revitalization Project

Many of you probably remember the roof replacement project I undertook on my car, and how it started to snowball into more bodywork, and now is turning into a full-body restoration & repaint. This thread will be where I chronicle the ongoing saga as things progress. For the sake of having everything in one place from the beginning, I’ll go ahead and copy over my posts and pics from MC.net, then update from there. The original thread is here if you want to see the responses / questions & answers, etc: http://www.mercurycougar.net/forums/showthread.php?57353-Rusty-Roof-Replacement-no-turning-back-now

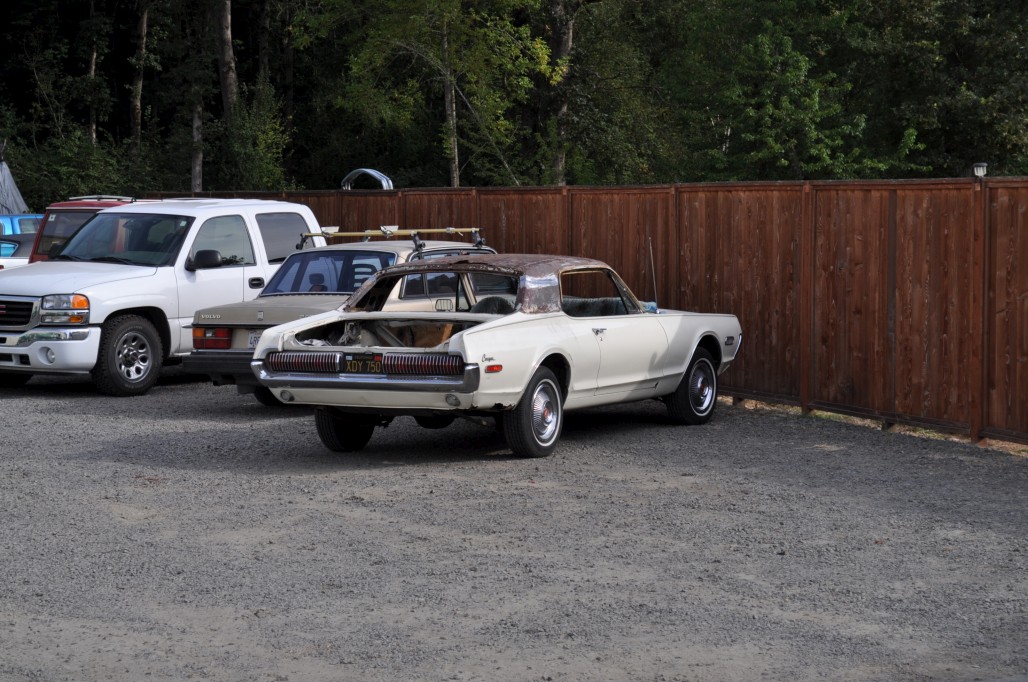
The back story, in case you’re wondering why I’m doing this to a lowly Standard, is that my grandparents (now deceased) bought the car brand new in '68. My grandpa, who probably picked out the car, died about 11 years before I was born, so unfortunately I didn’t get to meet him and bond over cars. My grandma, however, continued to drive the car lovingly up until she passed in 2001. I have fond memories as a kid being picked up from school in the Cougar (it was always a great surprise to see her pull up to the schoolyard), going to get ice cream, driving to the beach, etc. There were always people offering to buy the car from her, and she would respectfully turn them down. The car sat for a few years until I could drive (having proved myself first with an '84 Camry) and in 2006, my senior year in high school, I got the Cougar running & driving and felt like the coolest kid in the world, despite all the obvious maintenance concerns and rust issues. Long story short, the sentimental value is what’s driving me to do this car right.

----First Post - Sept. 12, 2011----

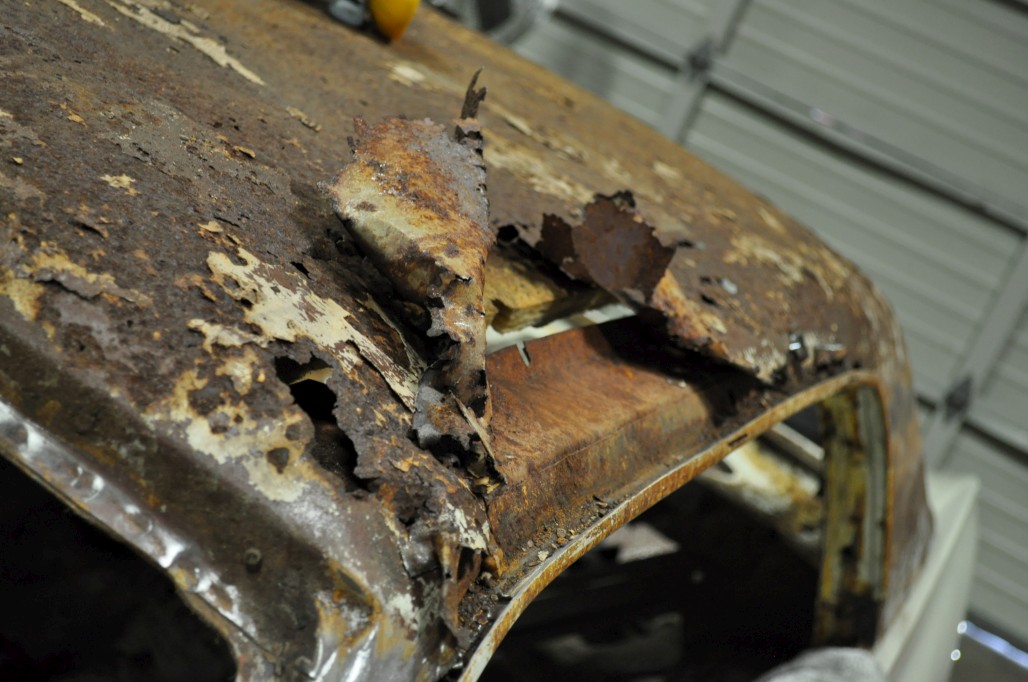
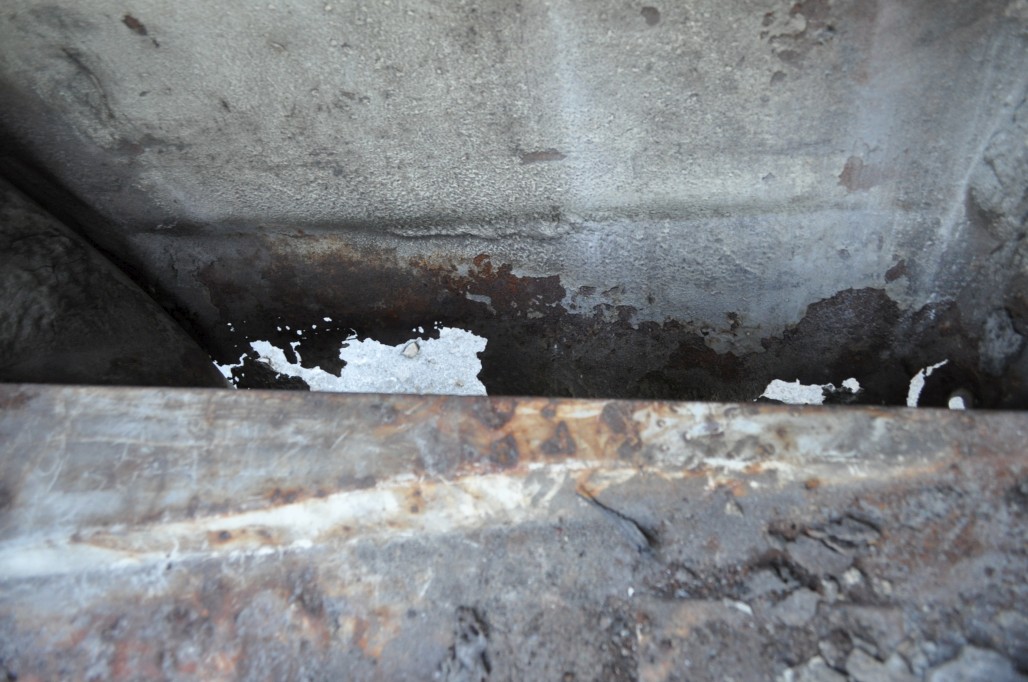
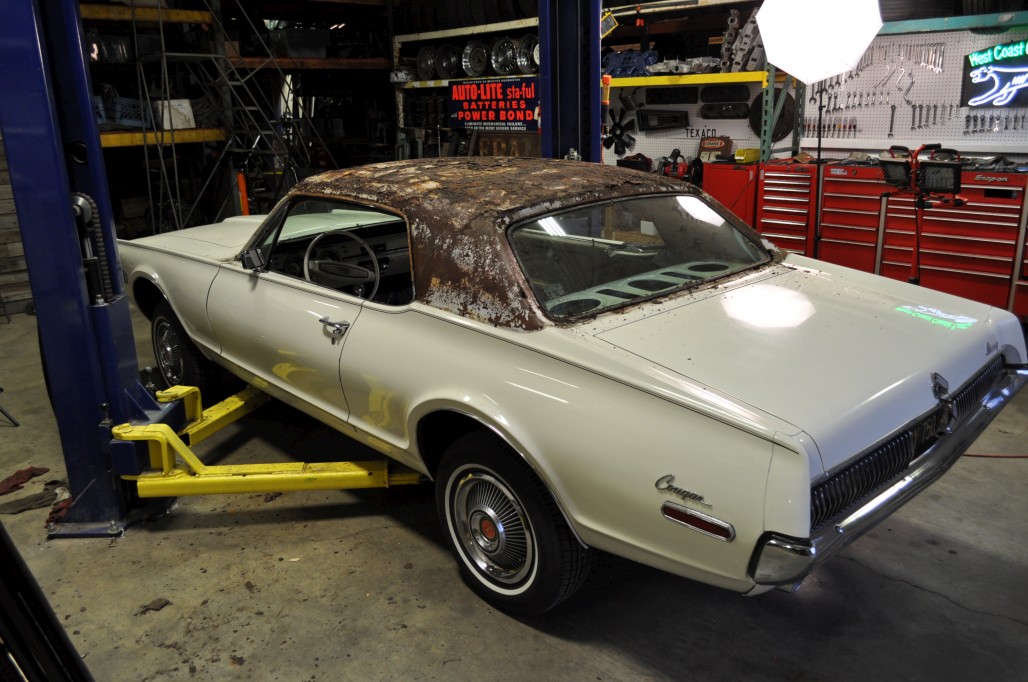
The worst part of my 68 Cougar, ever since I inherited it, has been the rust underneath the vinyl roof. I would often run my hand over the bumps and bubbles and hit the center of the roof with my palm and cringe as I heard it go “crunch crunch crunch.” So finally, I’m doing something about it.

I’ve done an amateur restoration before, with my uncle, so I’m not a complete newbie to working on old cars. But I’m no expert either. I’m trying to find out if someone like me can actually pull this off. Granted, I have some good people around me to help out and give me advice, but I’m trying to do as much as it myself as possible.

While I’m doing this, I’m making a video to document the process. It may not turn out as well as some of our other ones, since I’m mostly just putting the camera on a tripod and filming myself, but hopefully it will be good encouragement for others with rusty roofs.

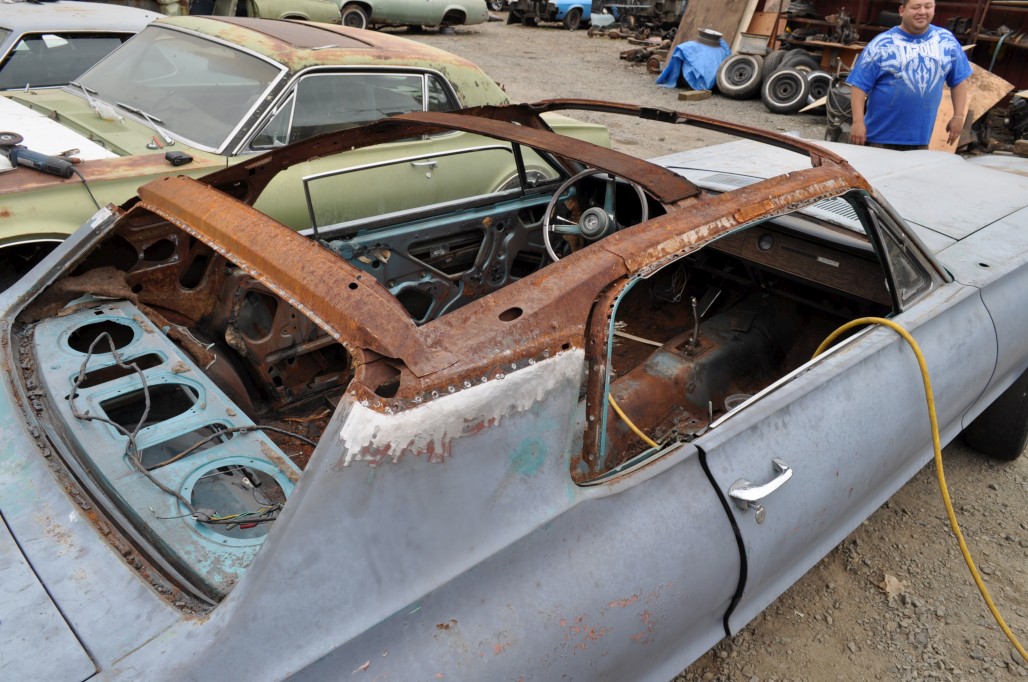
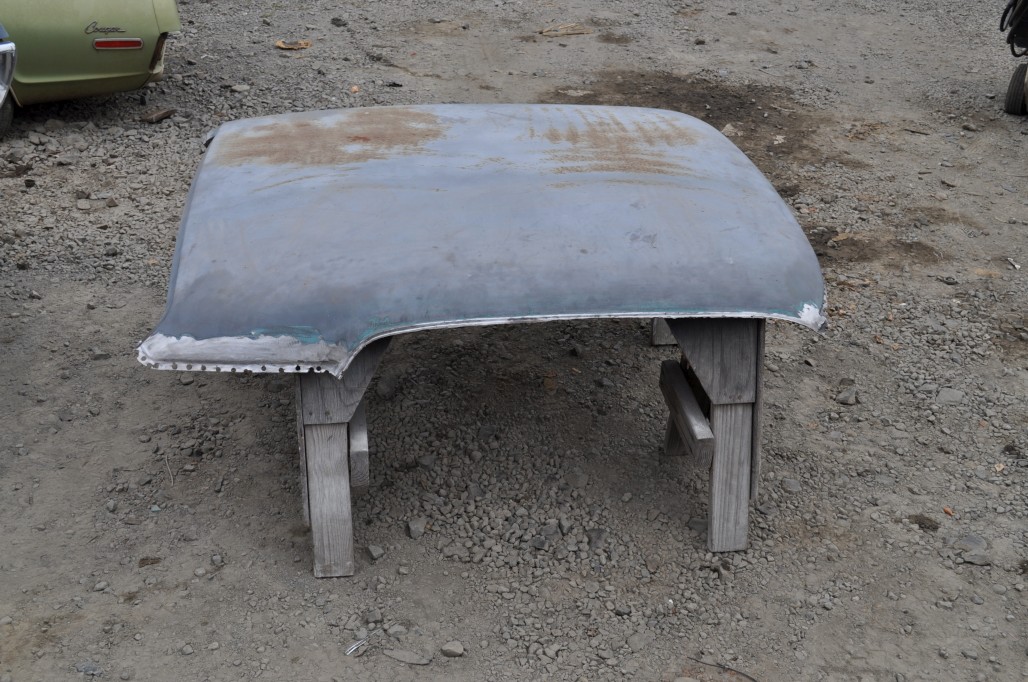
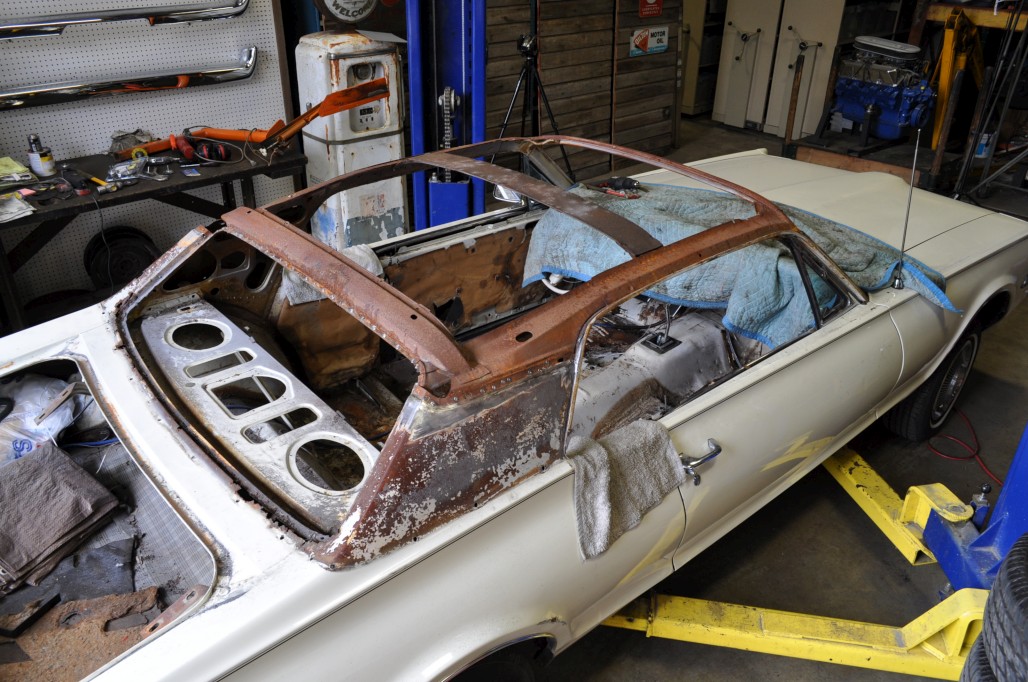
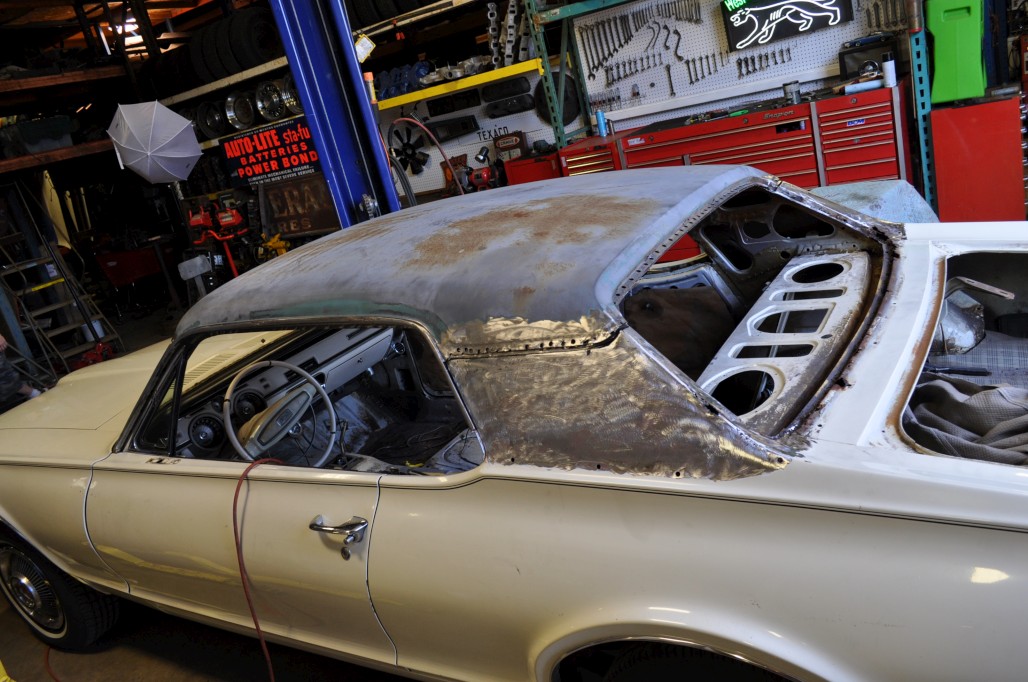
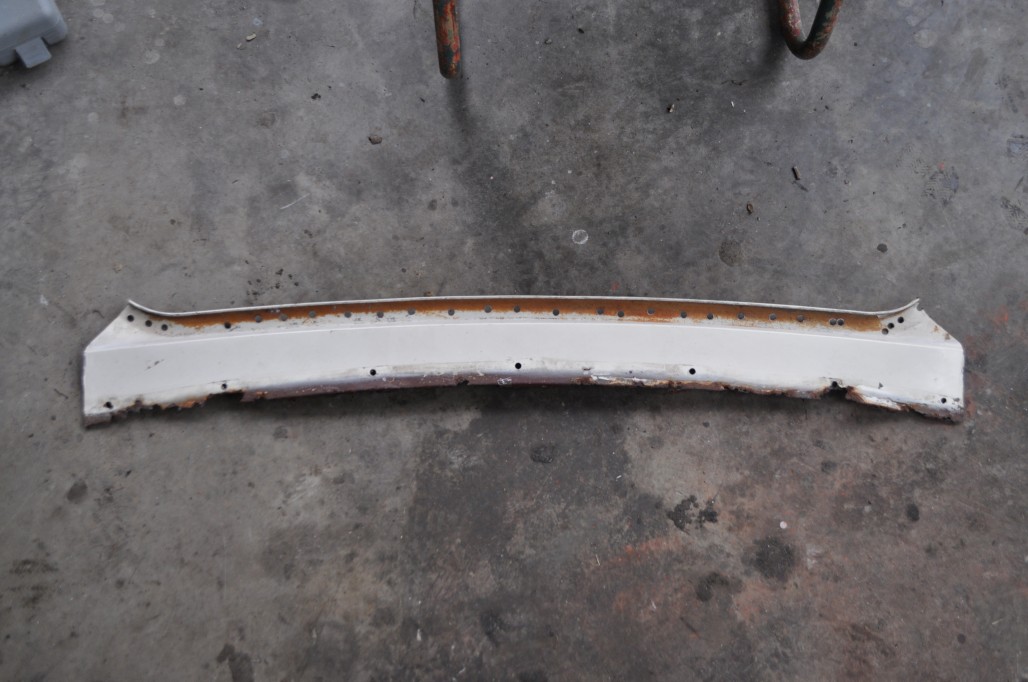
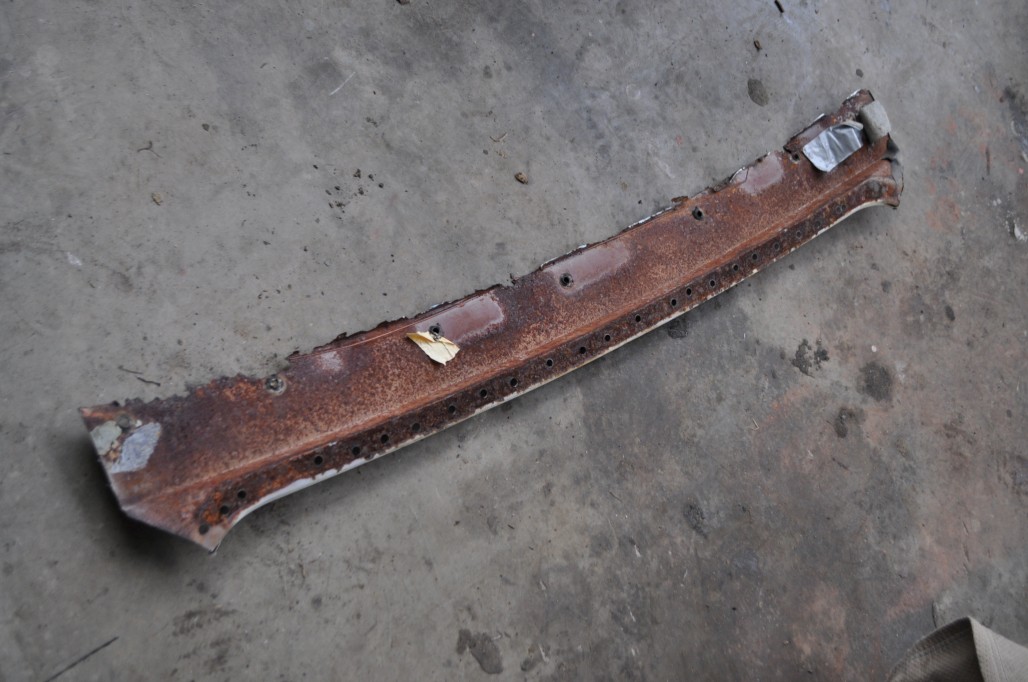
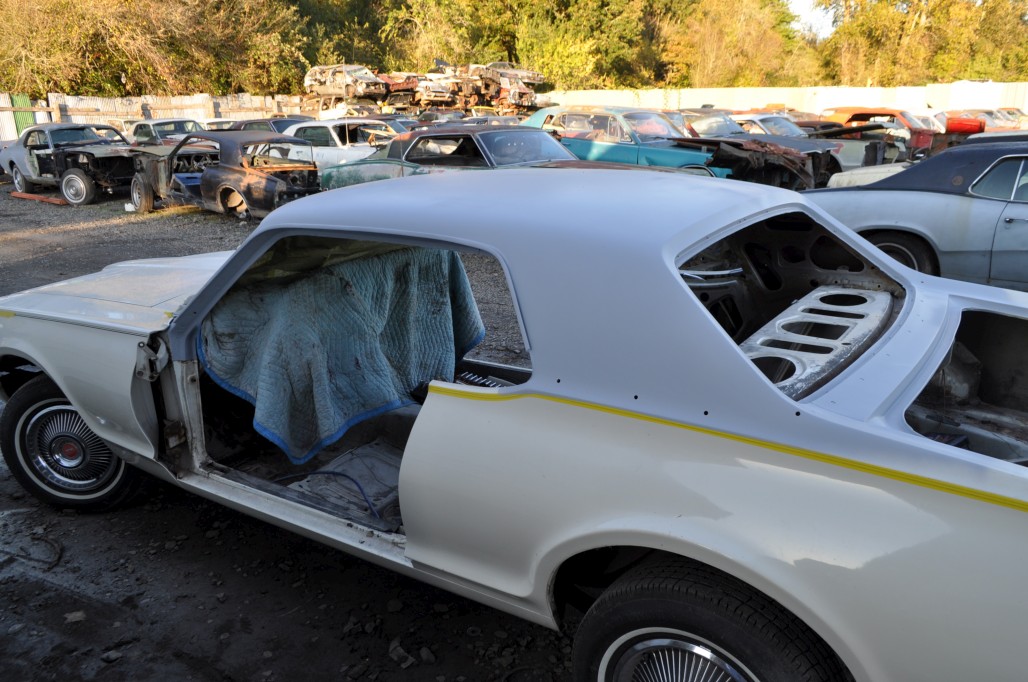
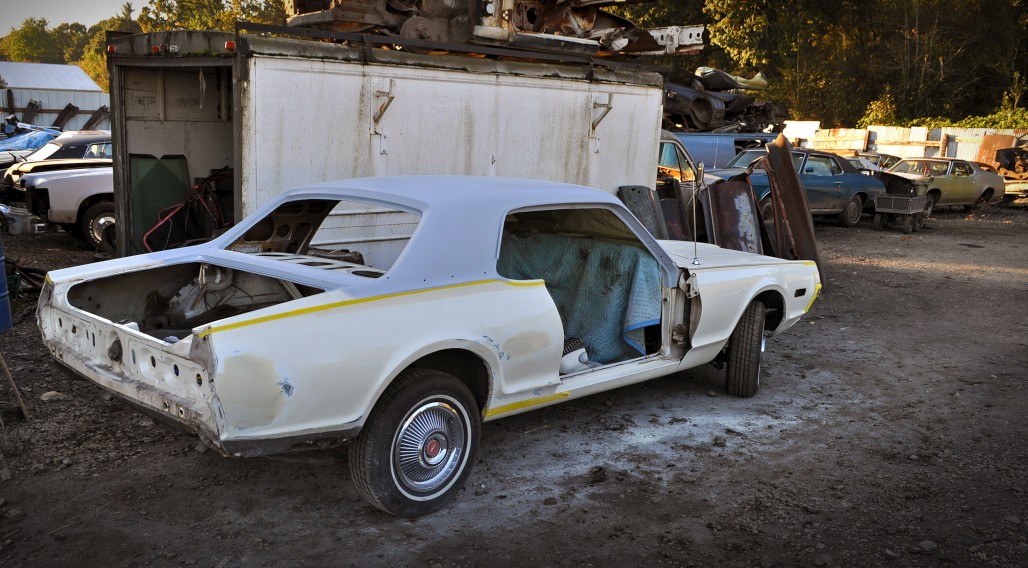
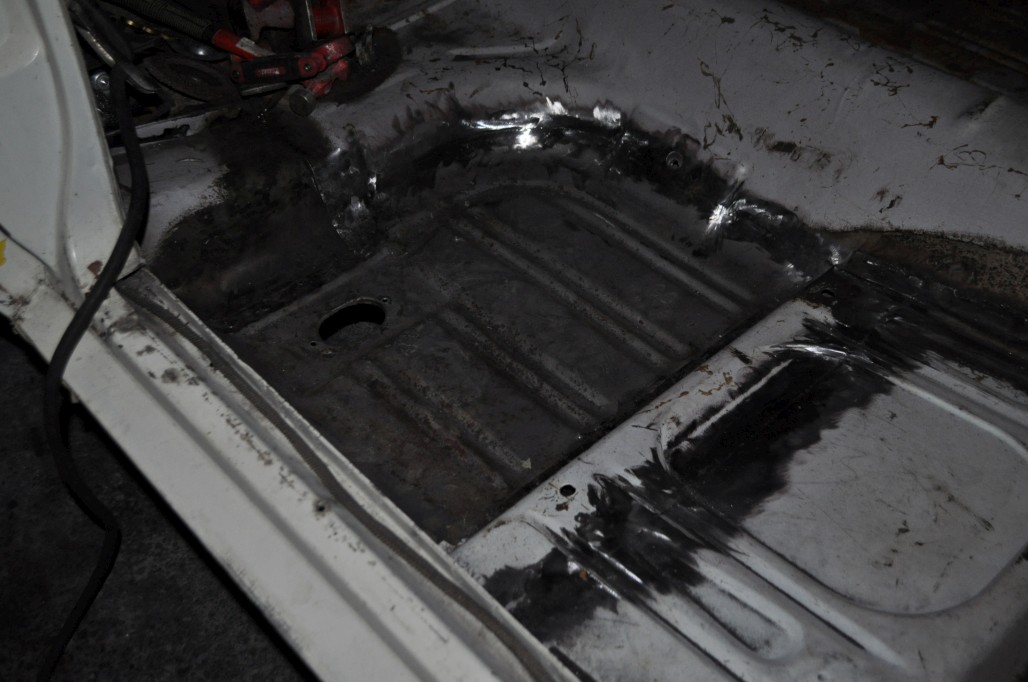
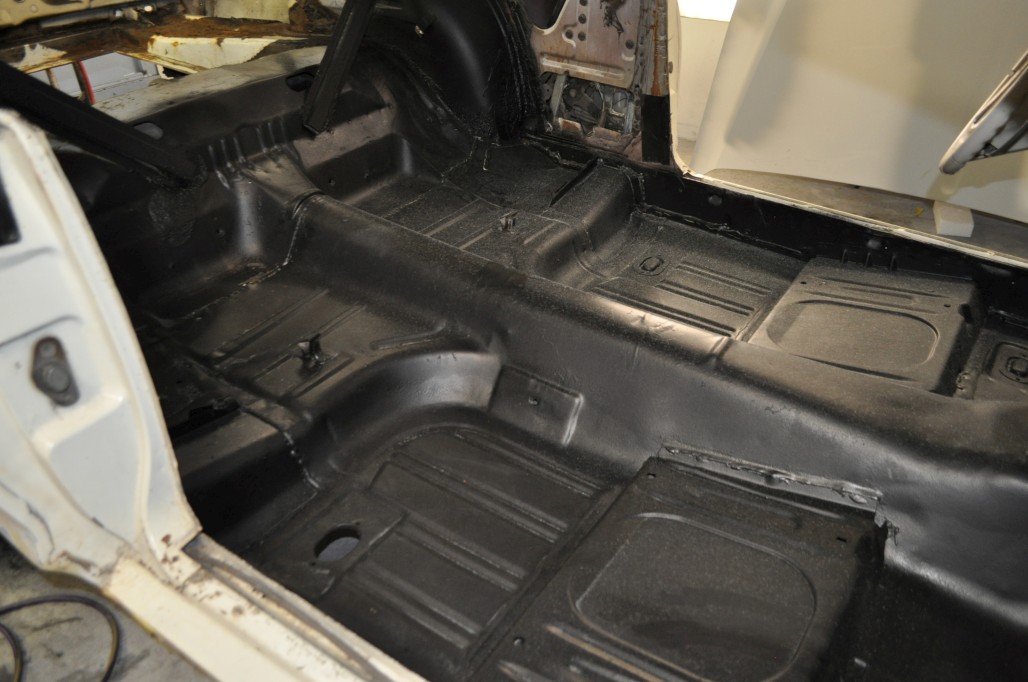
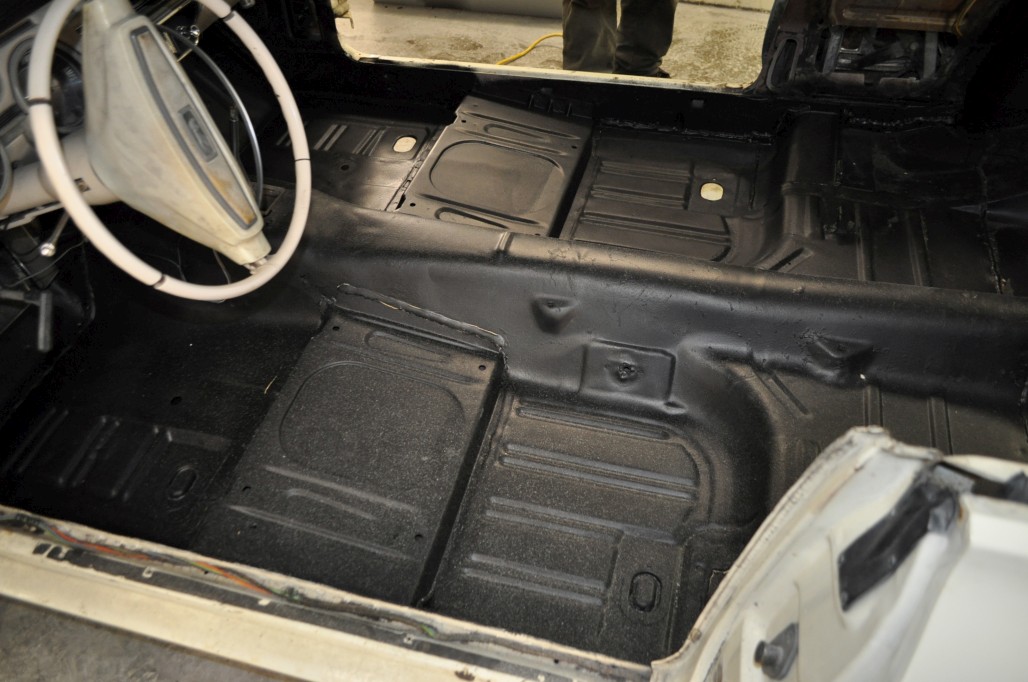
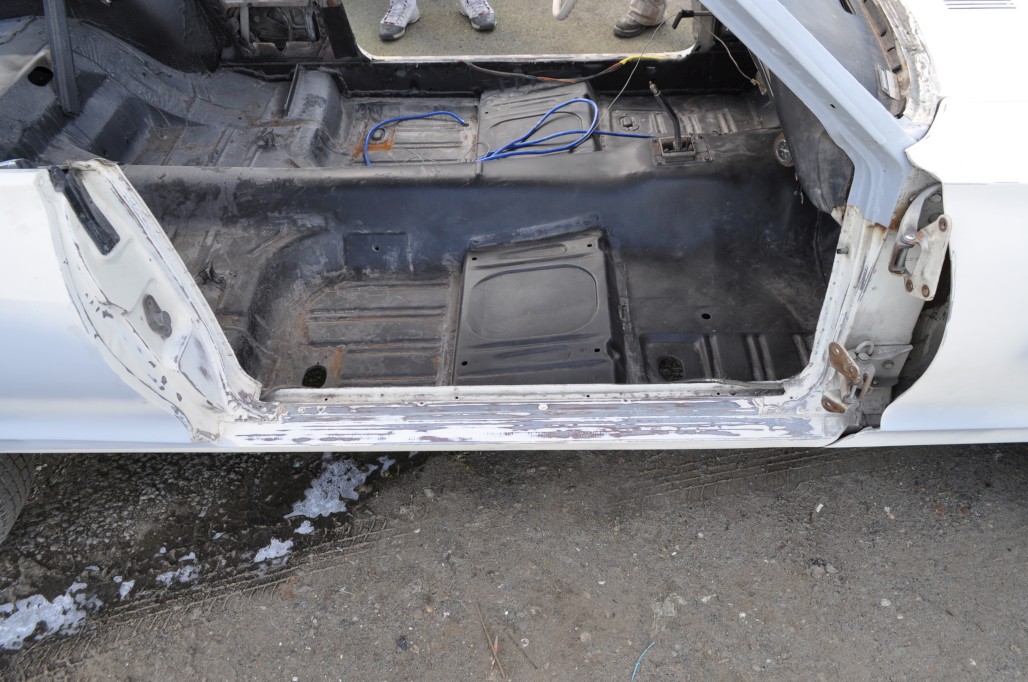
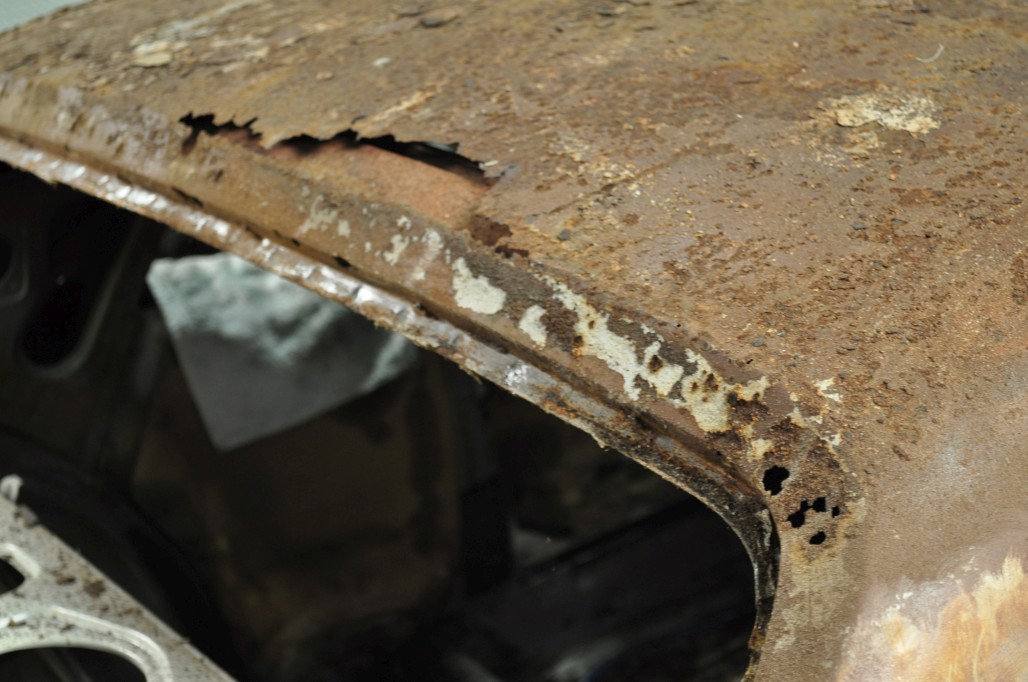
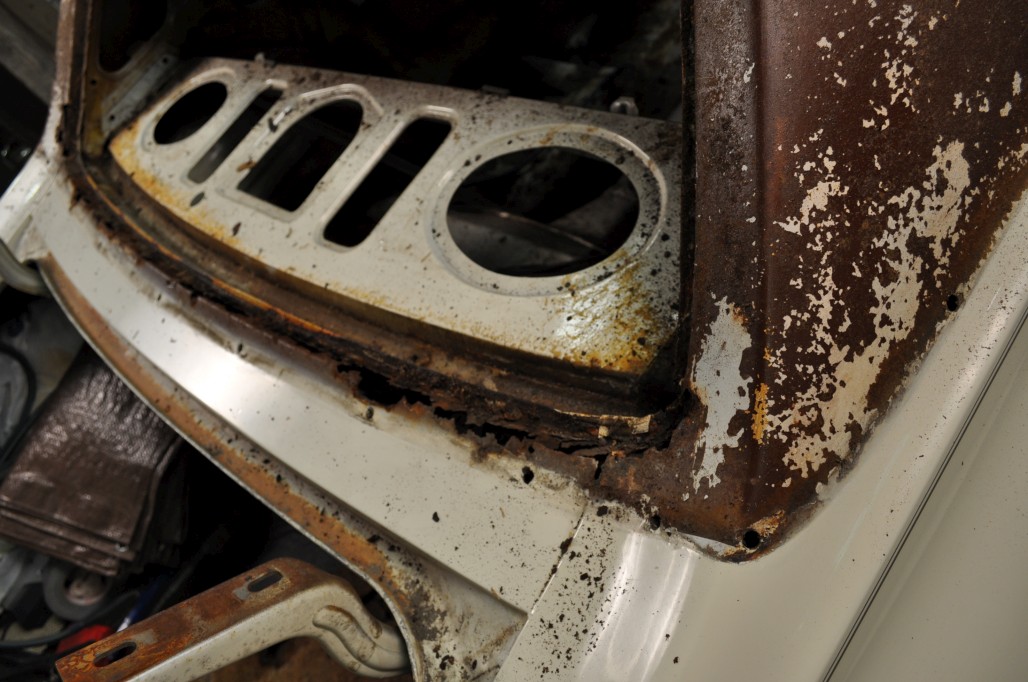
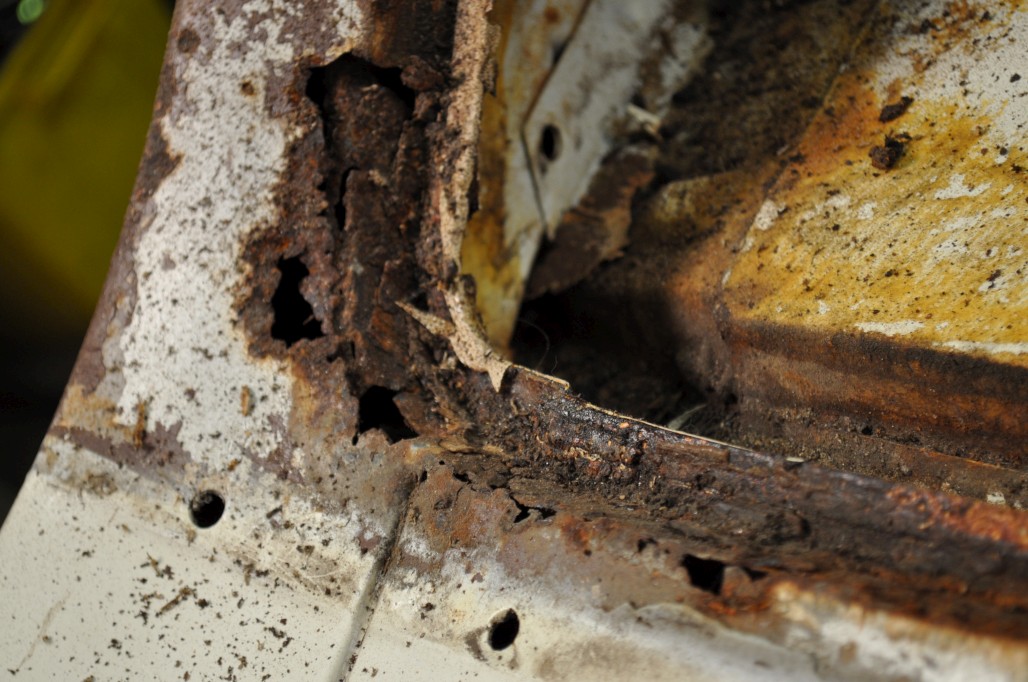
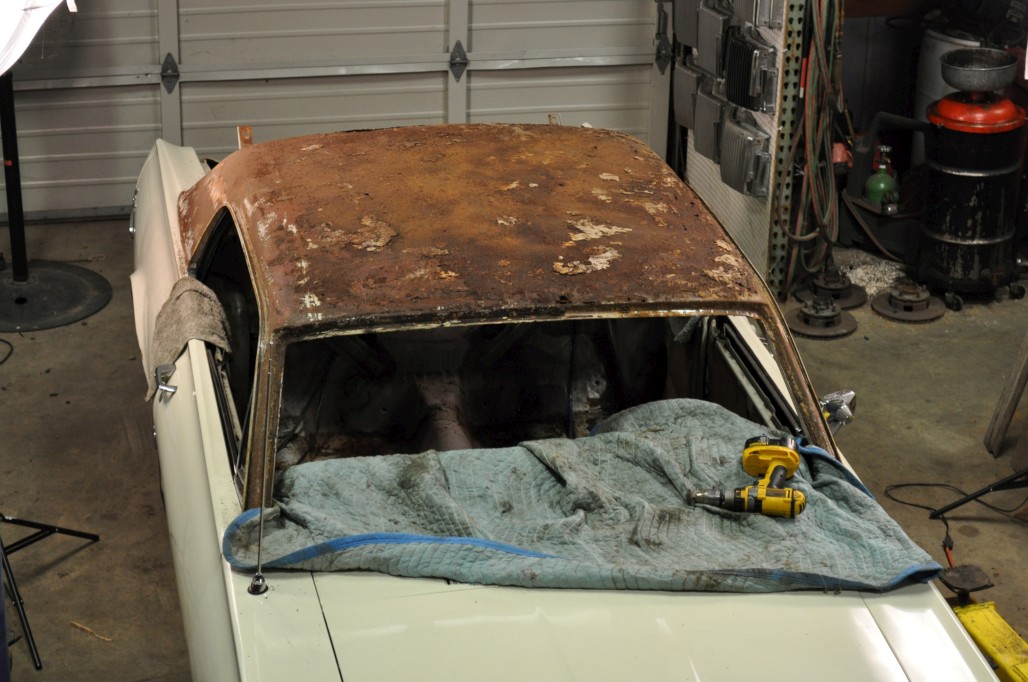
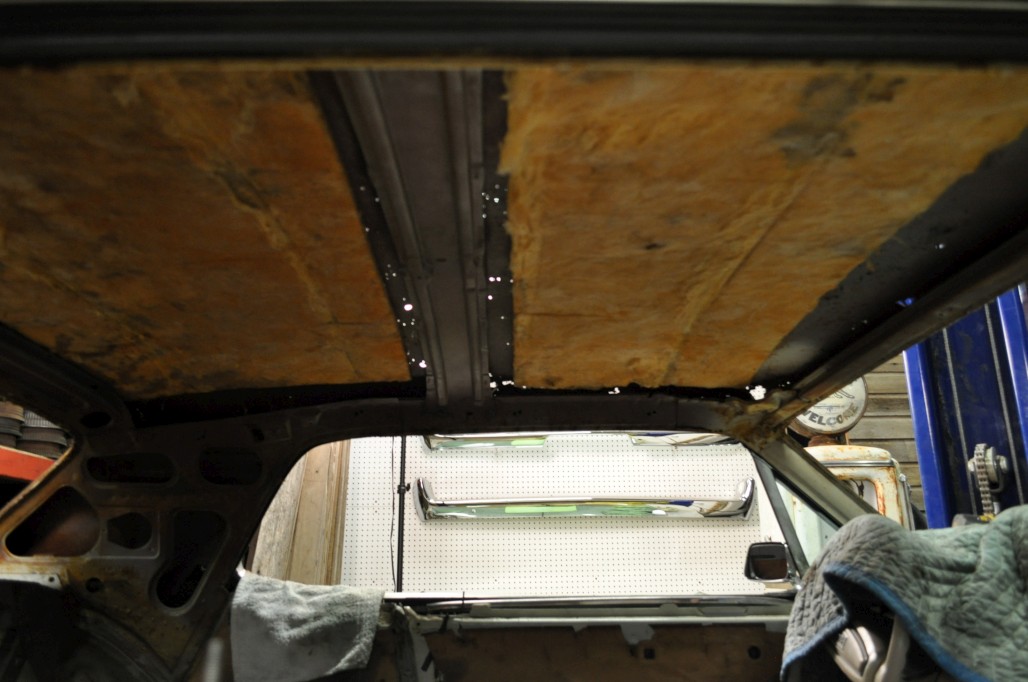
I got started last Wednesday by stripping out my interior (more of it than I needed to, but I wanted to see what my floors looked like) and in the following days I removed the trim pieces and front / rear glass. I actually was able to rip off the vinyl roof before taking the glass out, because the last time it got replaced, they apparently left the glass in and trimmed the vinyl around it. It was the same story with the headliner. Glass left in, trimmed to fit. The roof was covered in flaky bondo, a clear indication of how the previous “repair” was done. There were many pieces with stalagmites of bondo which had dripped into rust holes. Upon cleaning up most of the flakes of bondo and loose rust, I could get a better look at the rust. The roof is mostly in one piece, but there are holes everywhere. It’s gotta go. The rear window channel is shot too, but that’s another job.

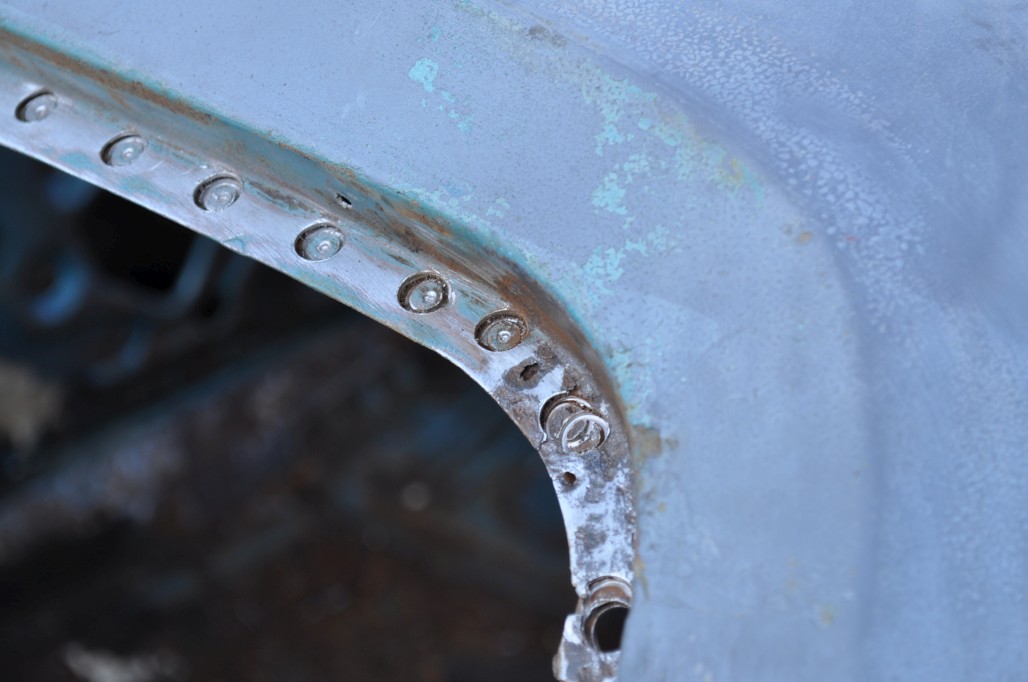
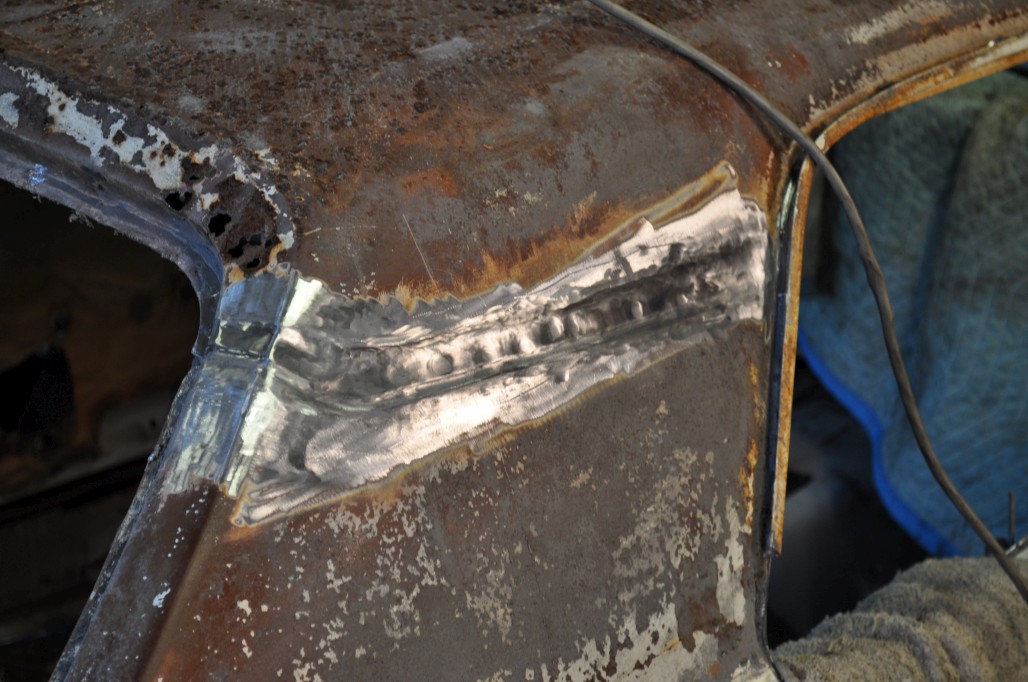
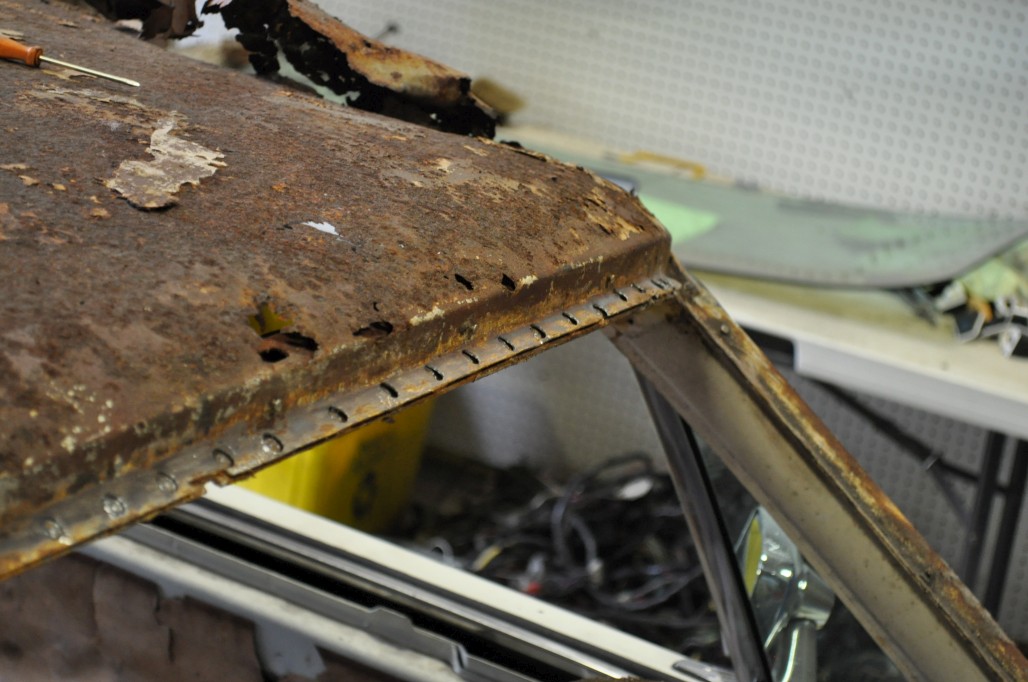
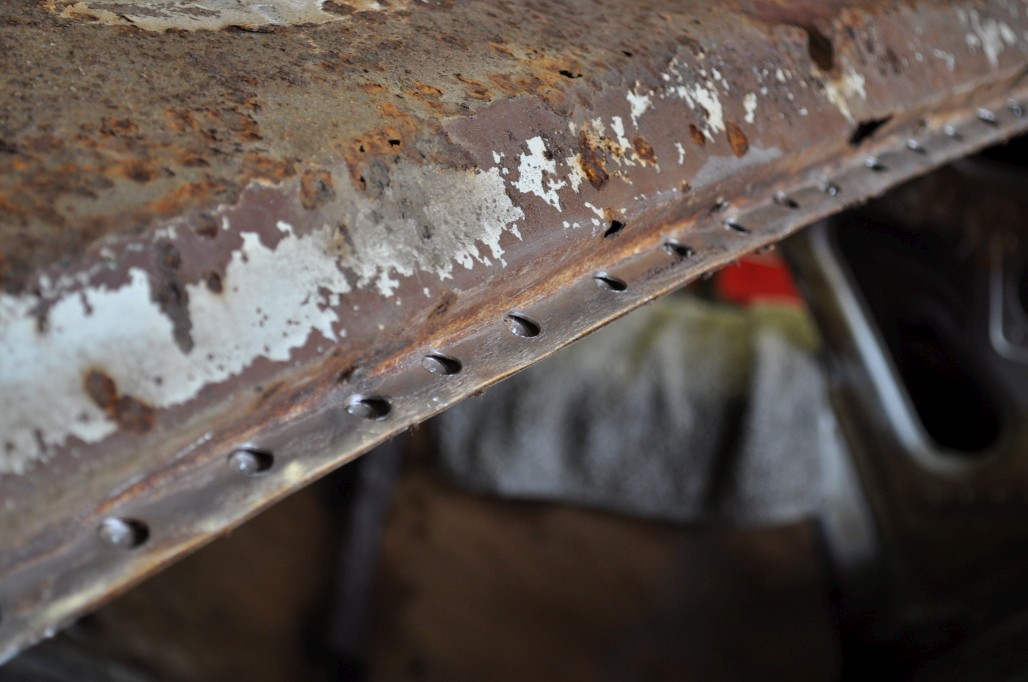
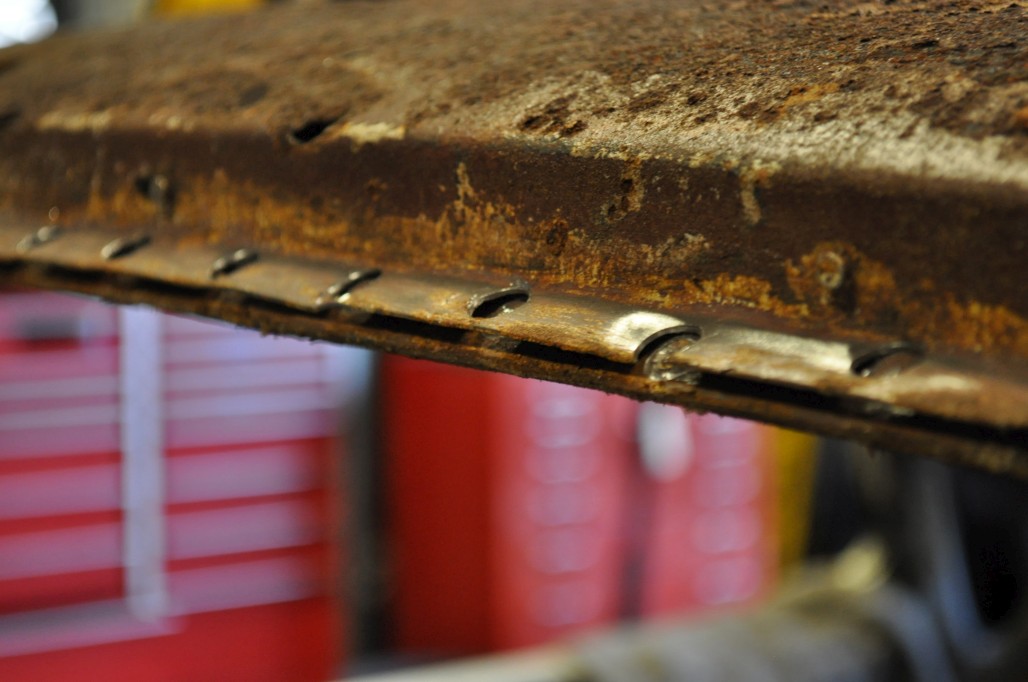
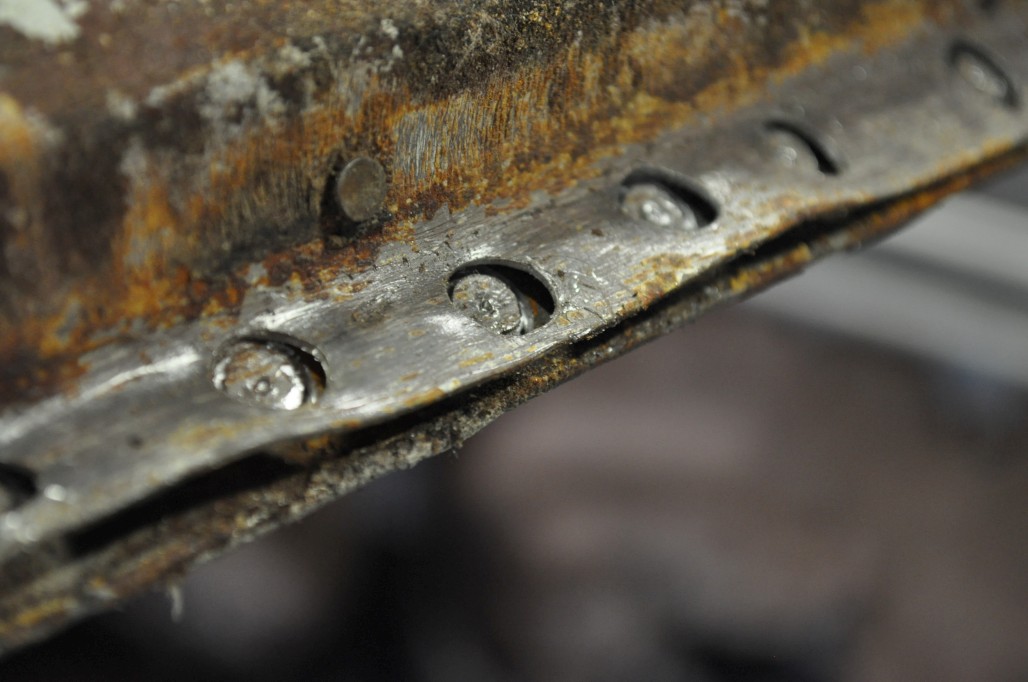
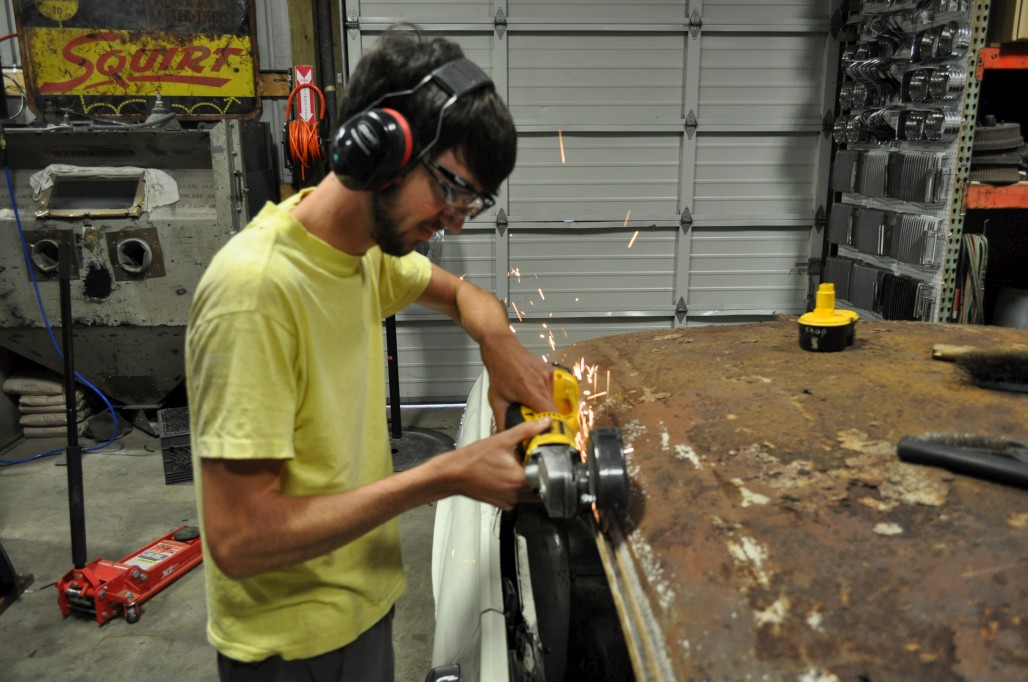
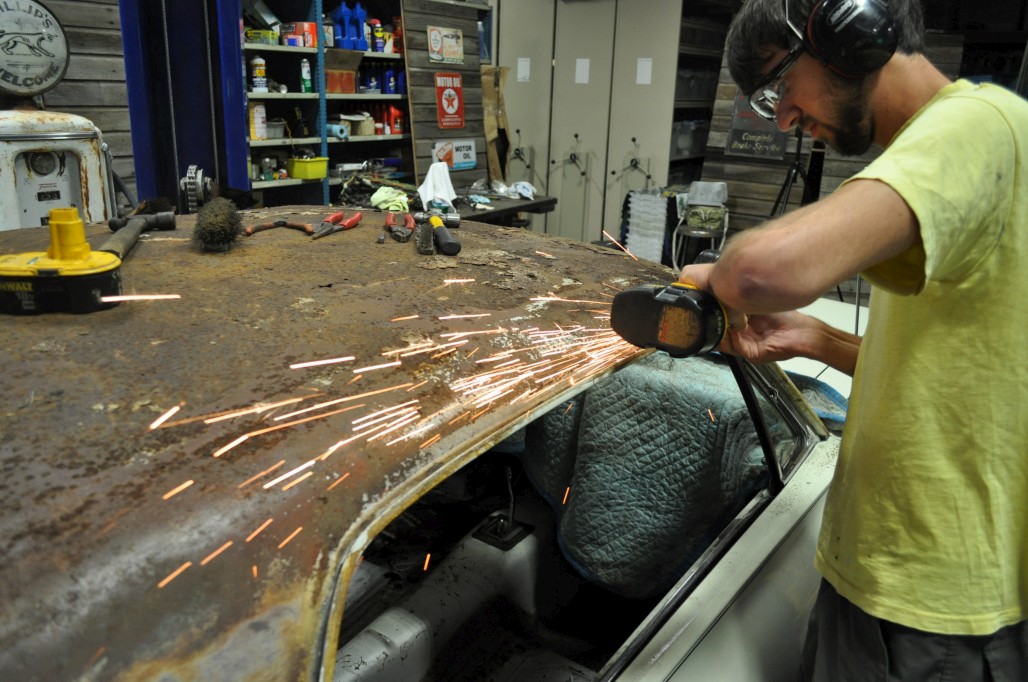
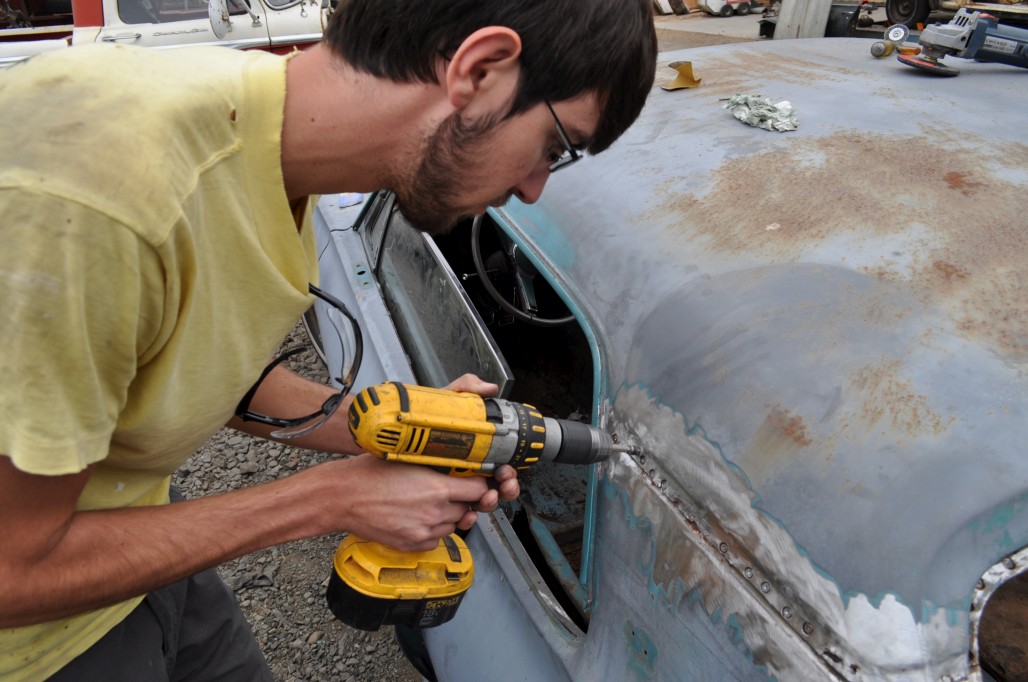
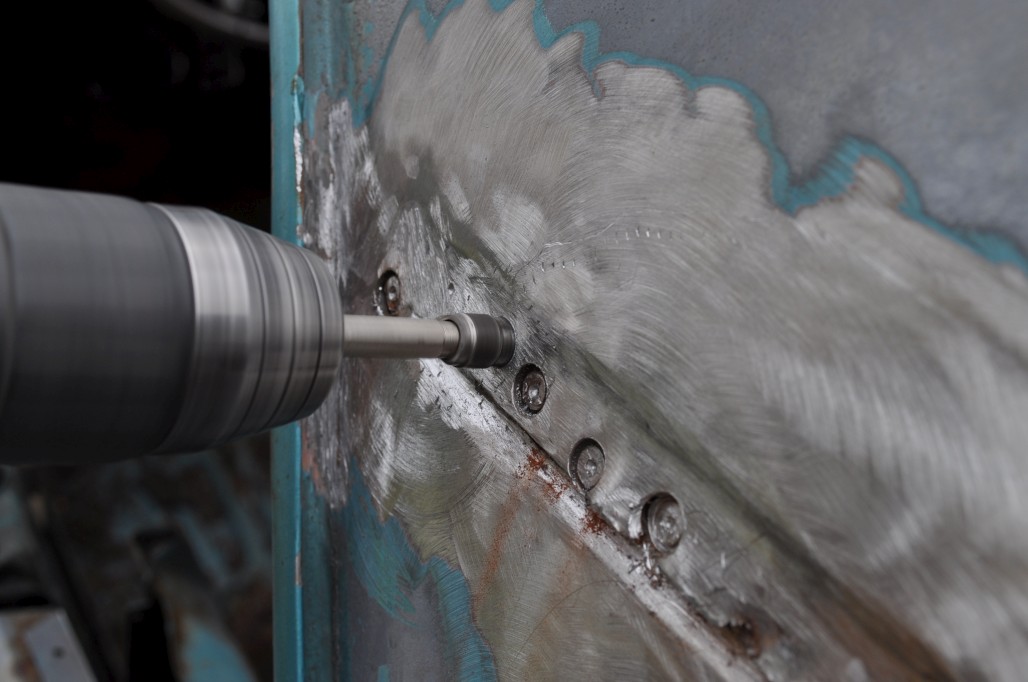
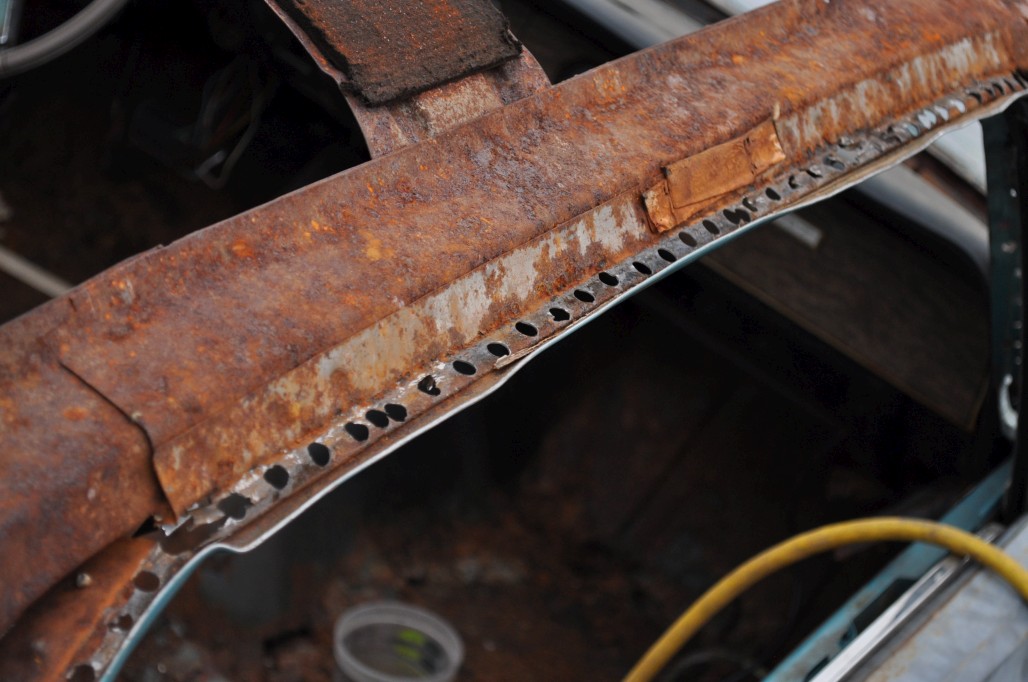
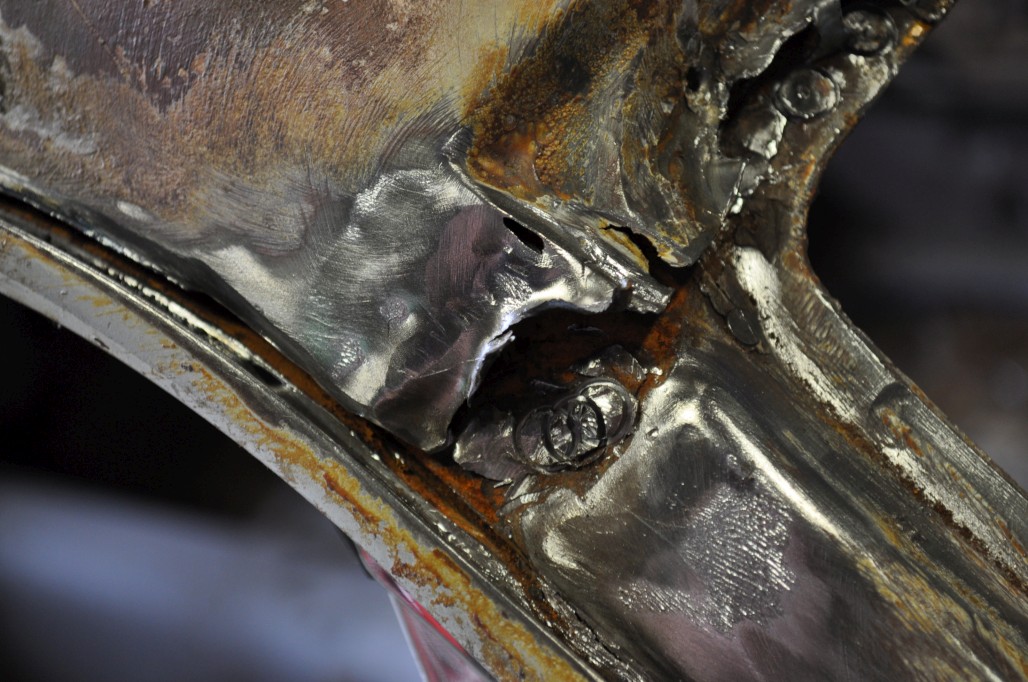
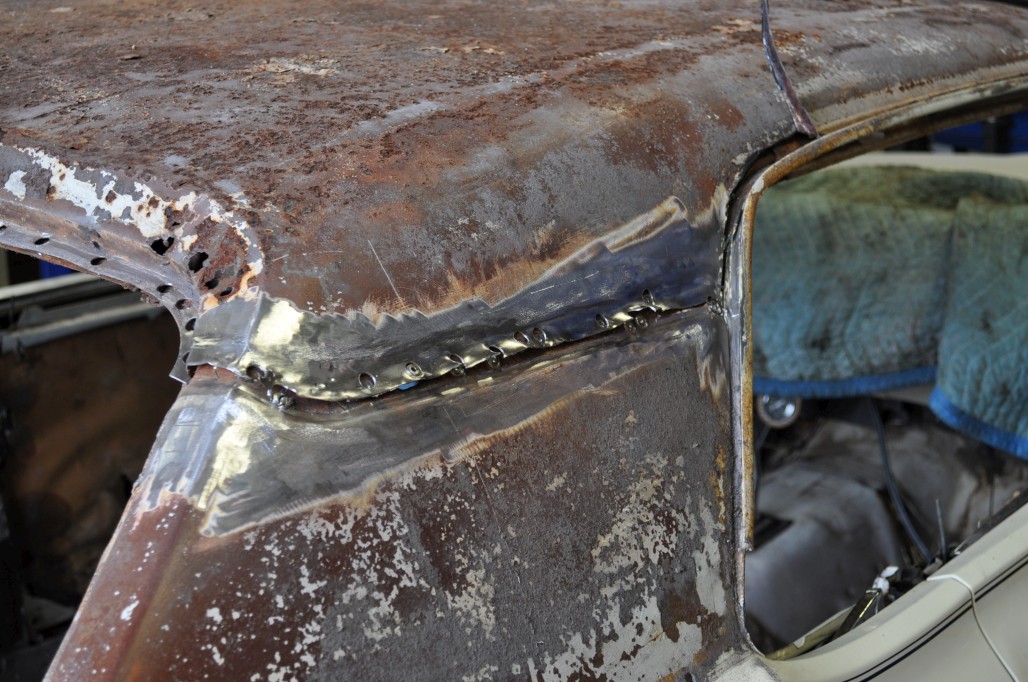
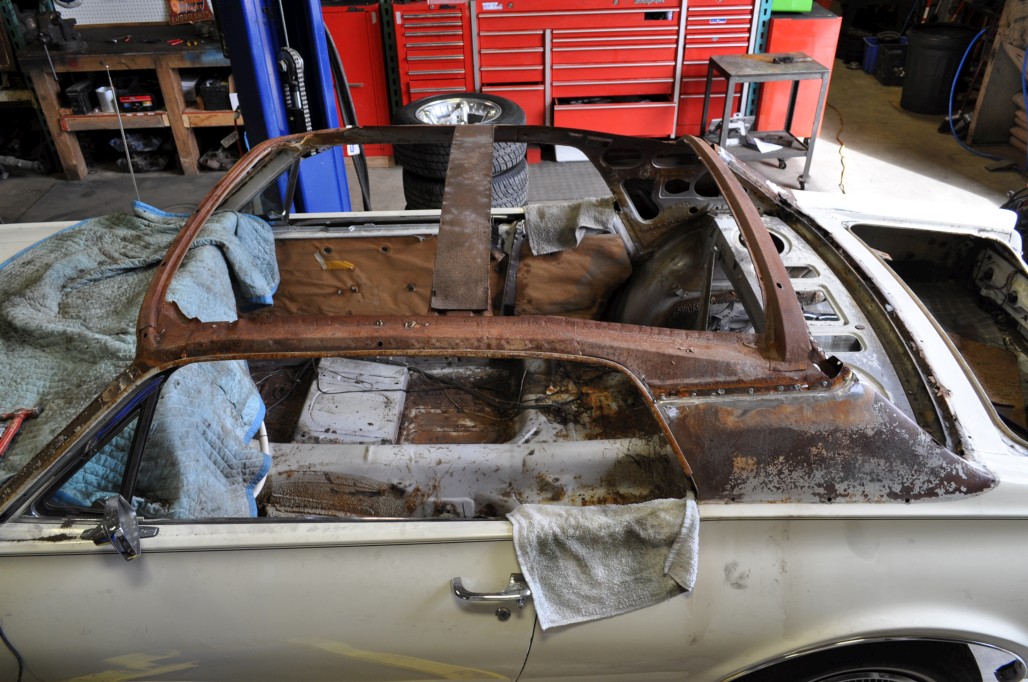
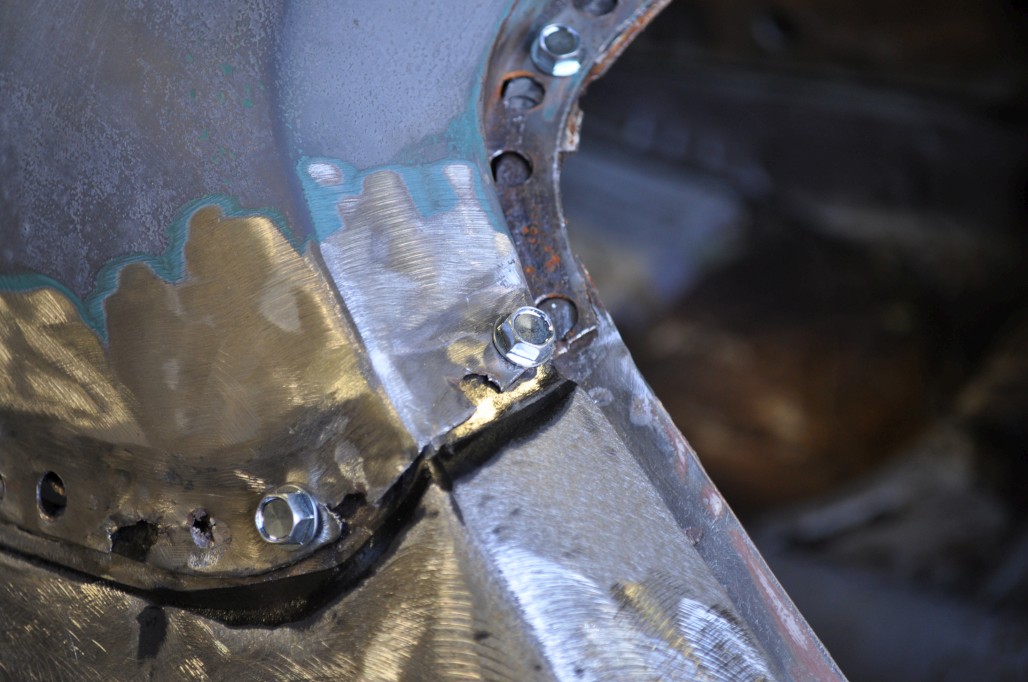
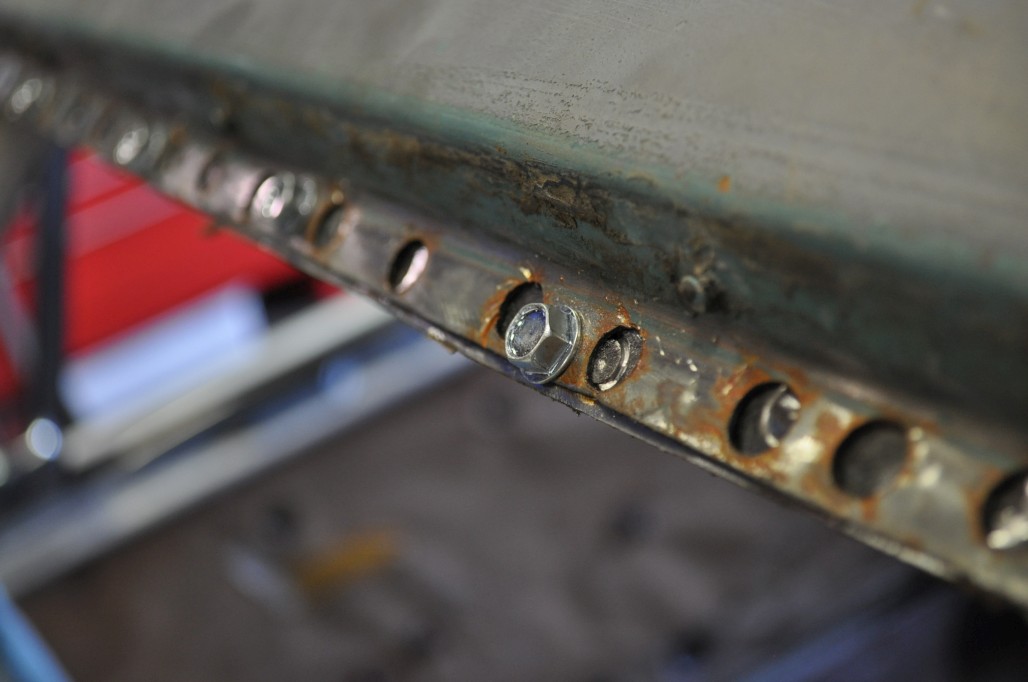
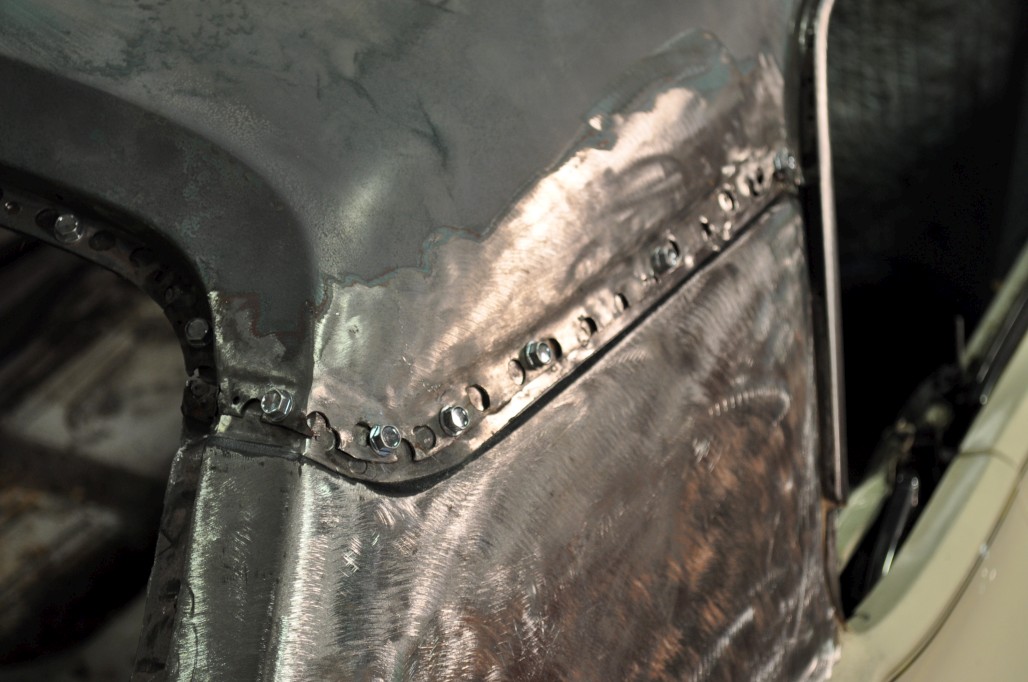
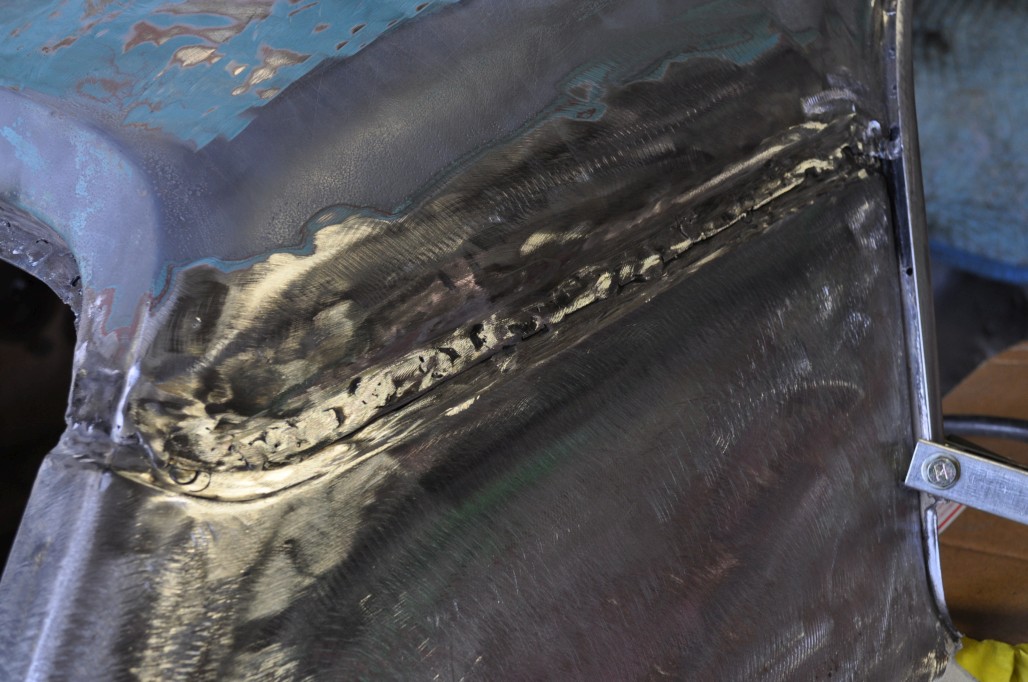
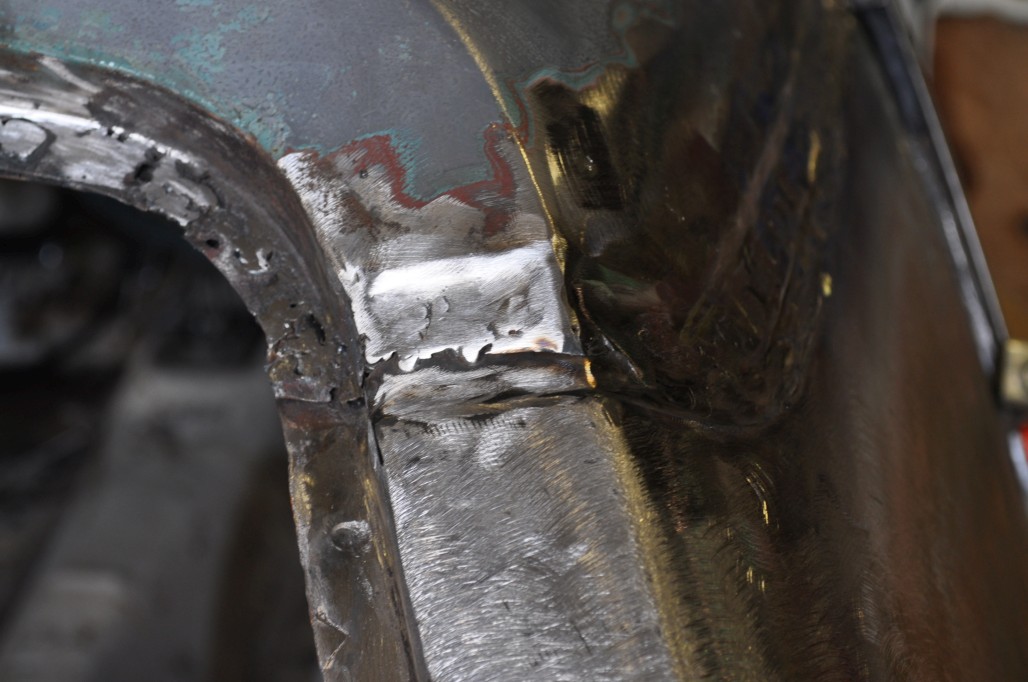
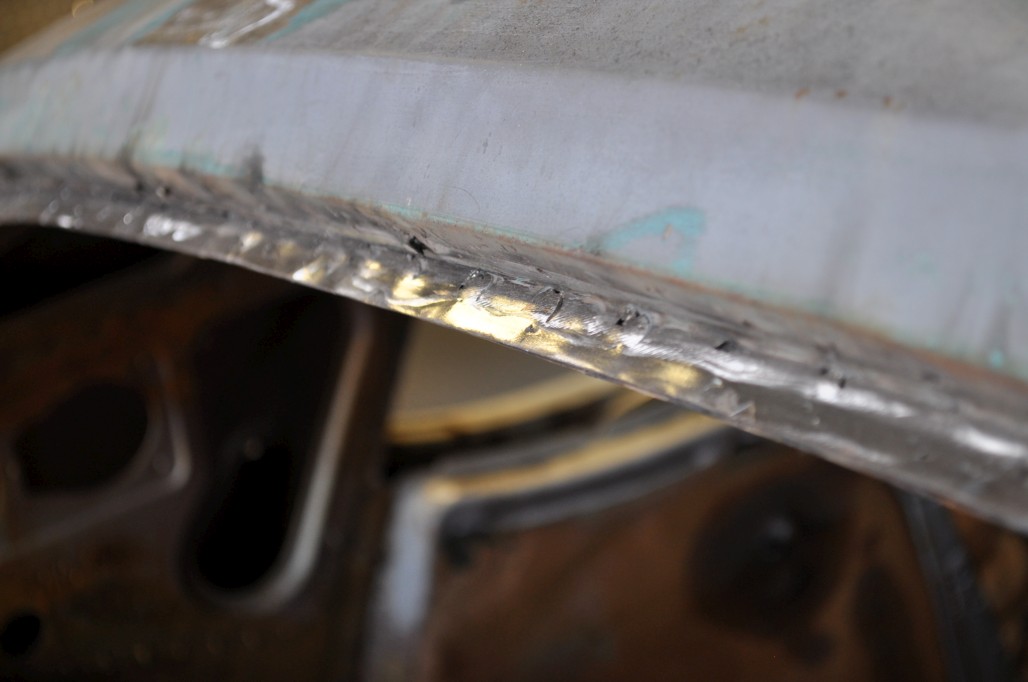
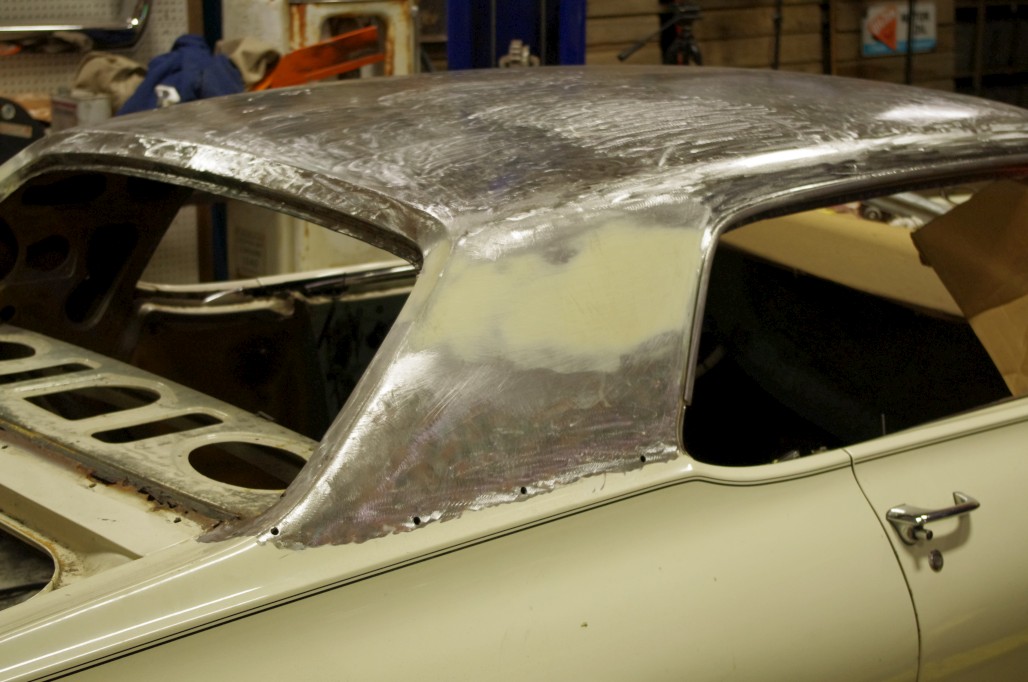
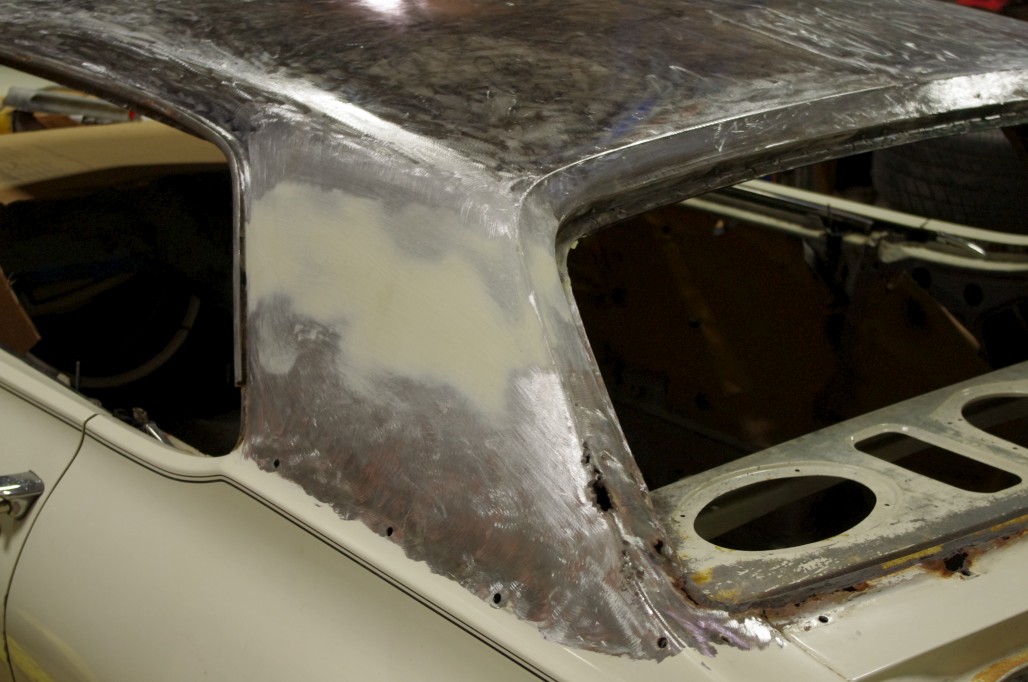
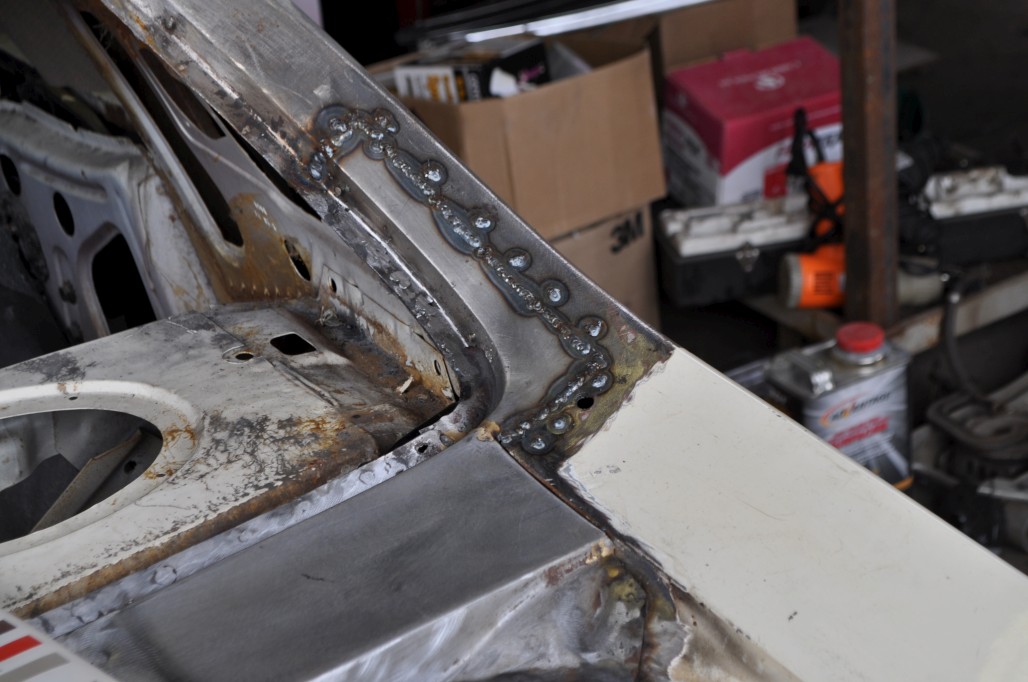
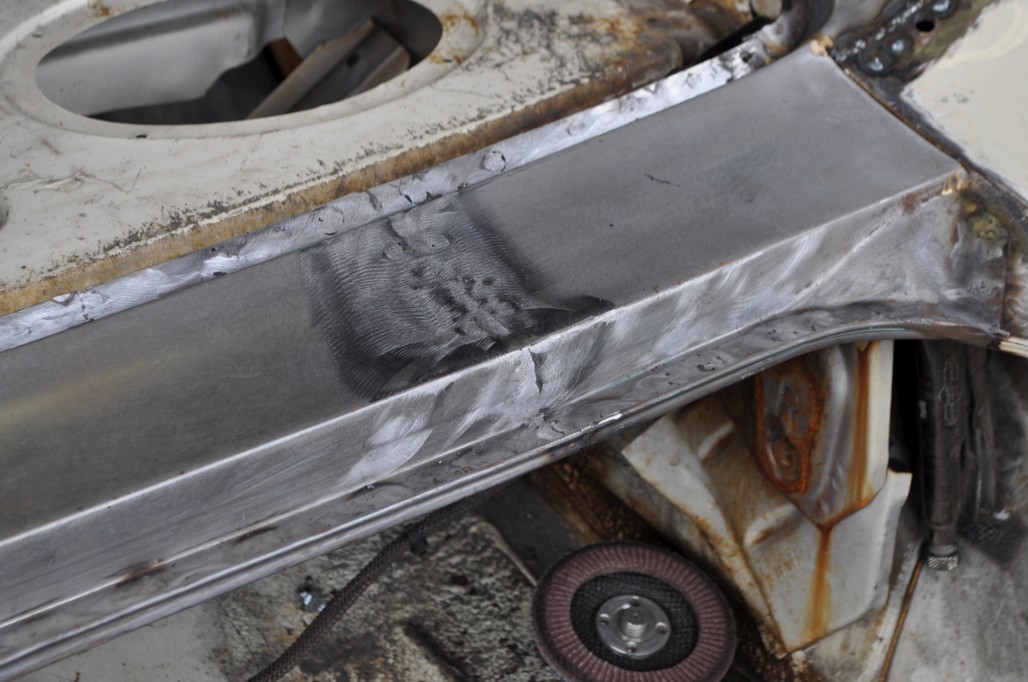
The way I’m trying to do this, by the way, is just the outer sheet metal skin of the roof. I don’t want to cut out the structure. The way this is done is to find and drill out all the spot welds all the way around. There is a lead seam on the C-pillars which needs to be melted off to reveal the spot welds. Anyways, enough said, here’s some pics of the progress so far.

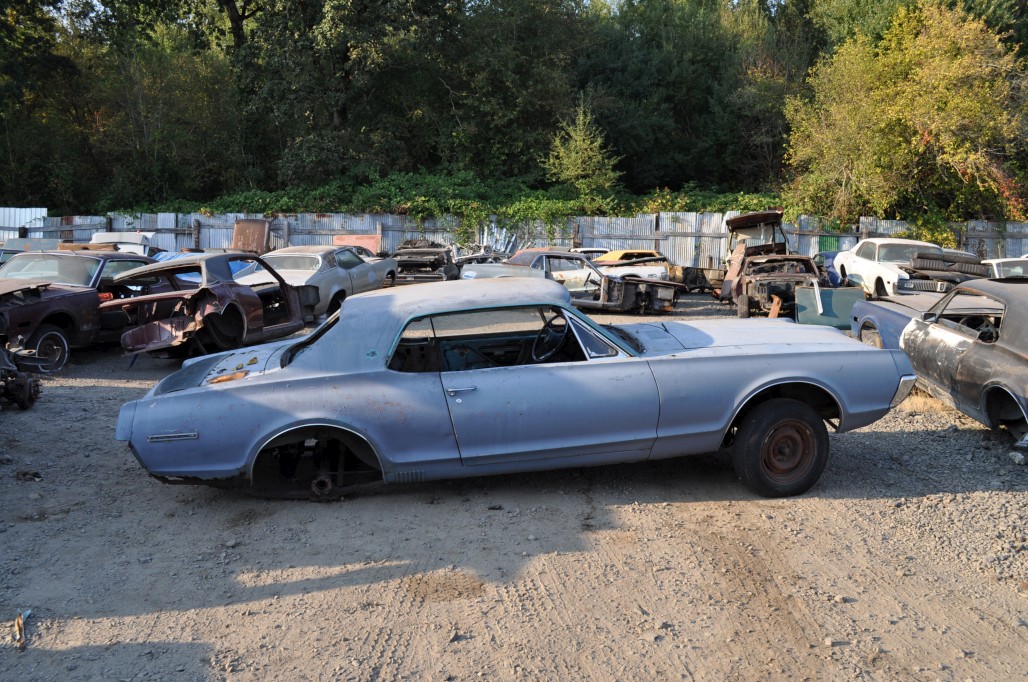
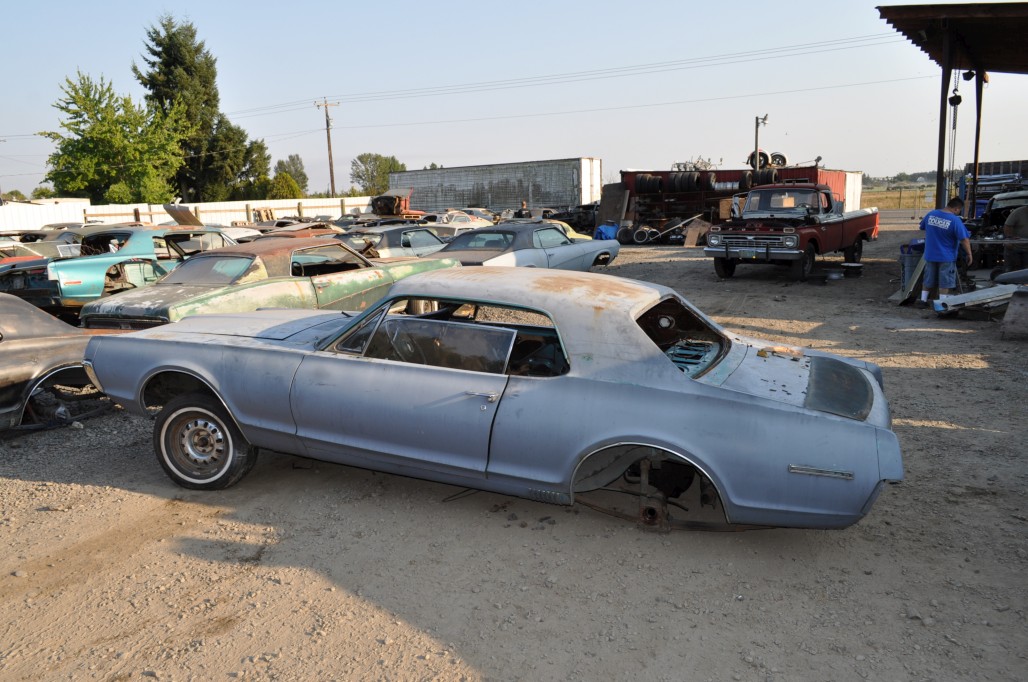
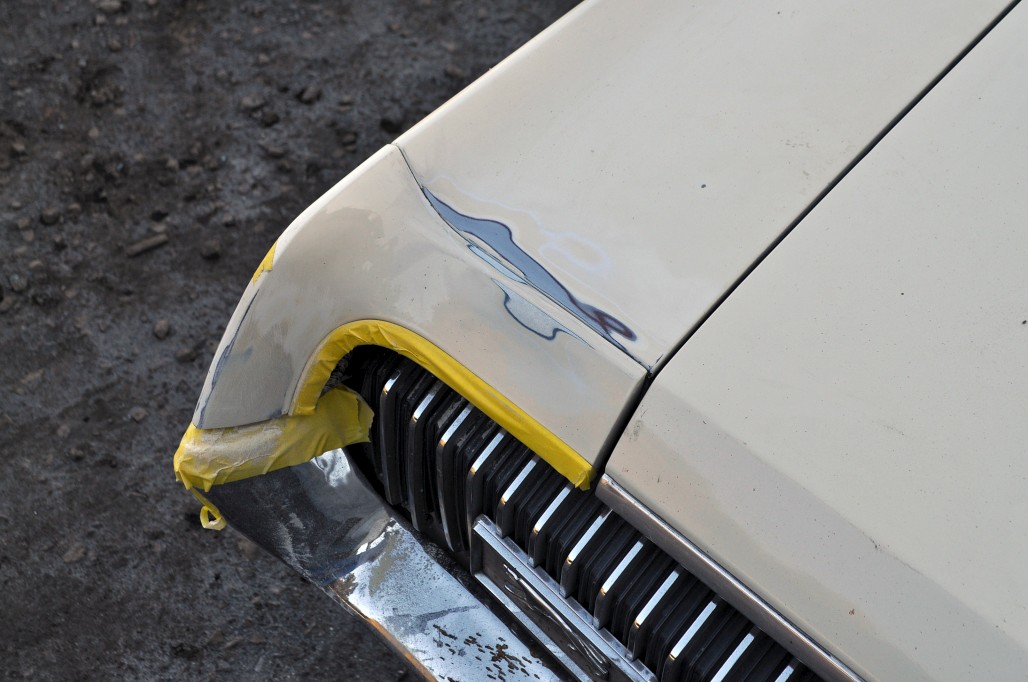
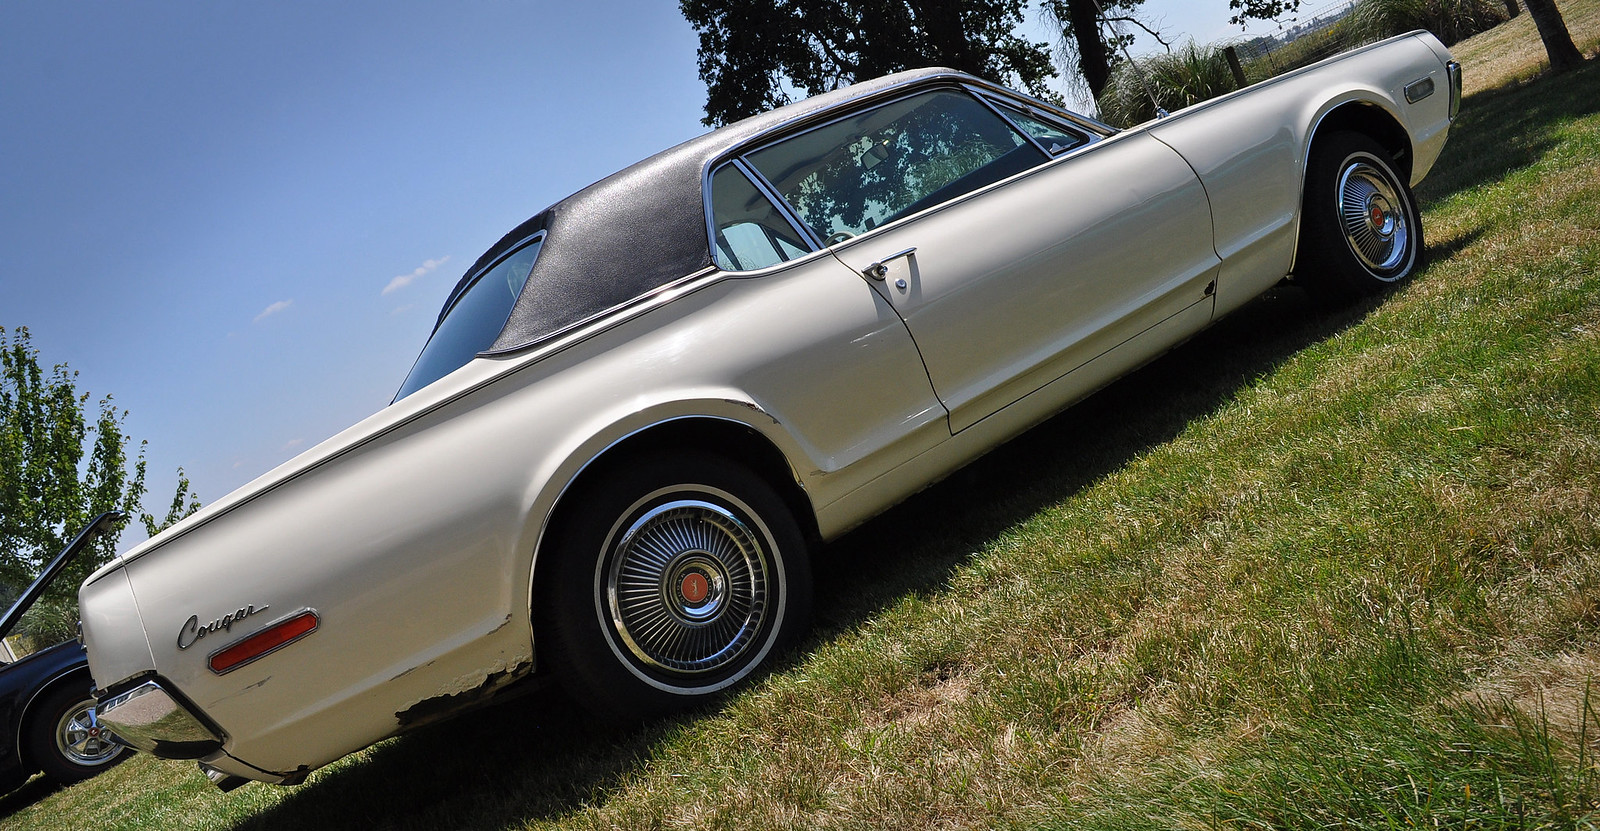
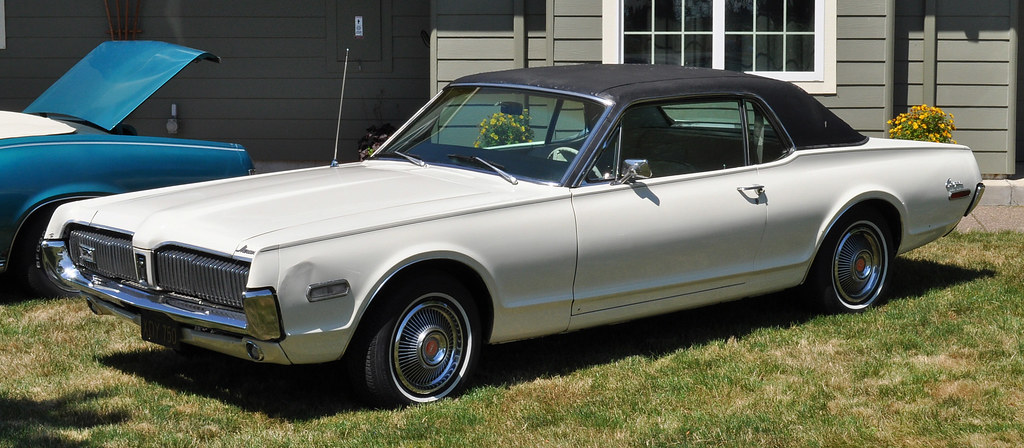
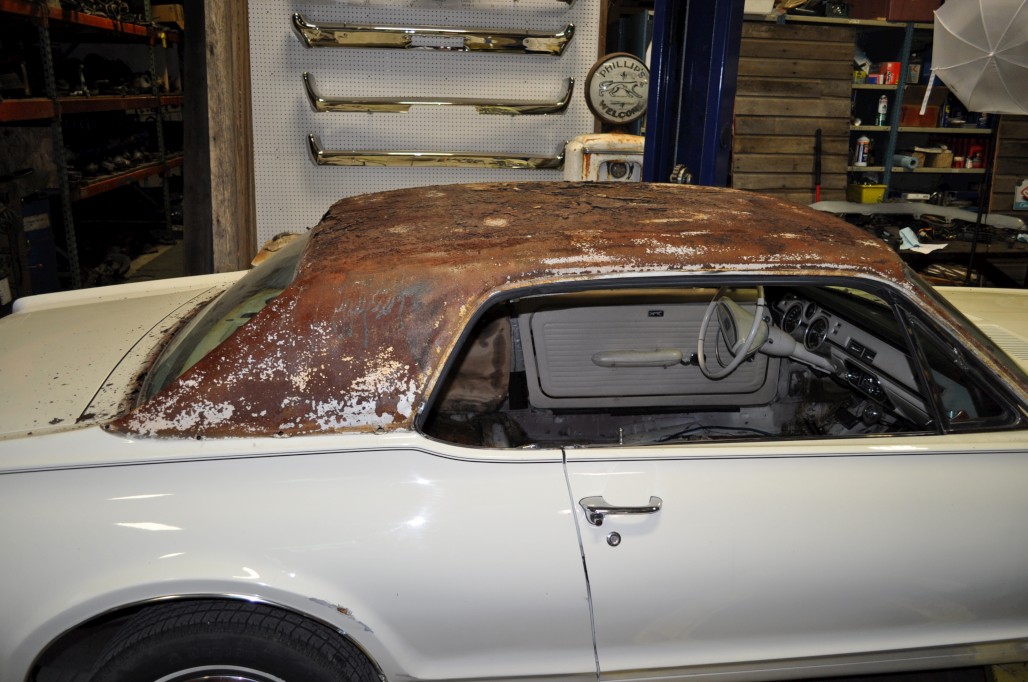
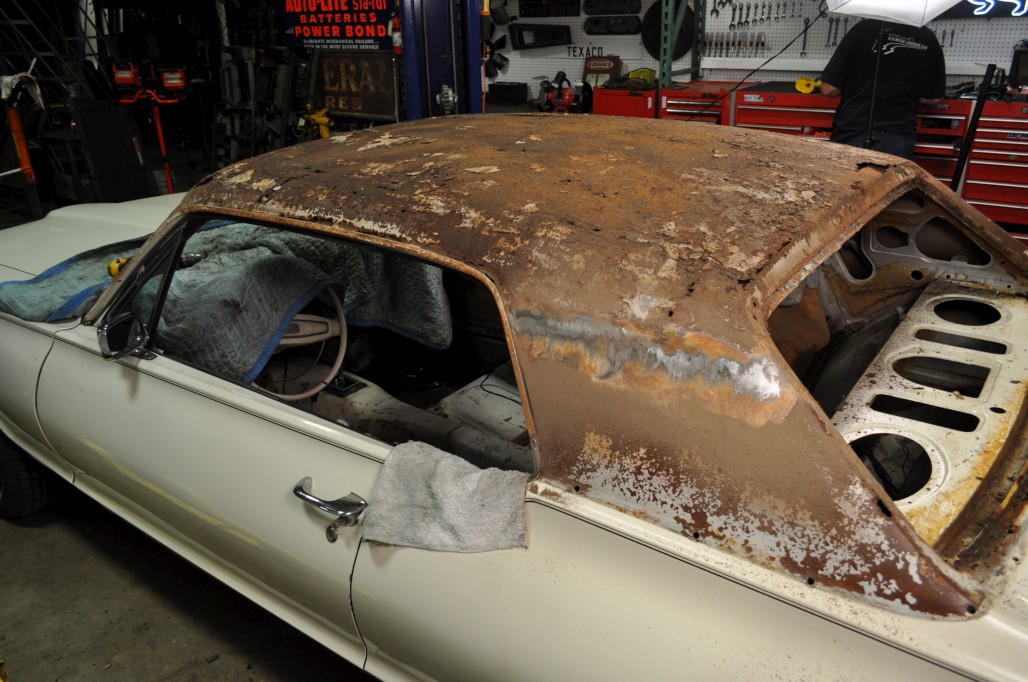
Here’s a “before” shot… you can’t really see the bubbling under the roof but there was plenty. The vinyl itself was pretty rough on top too.

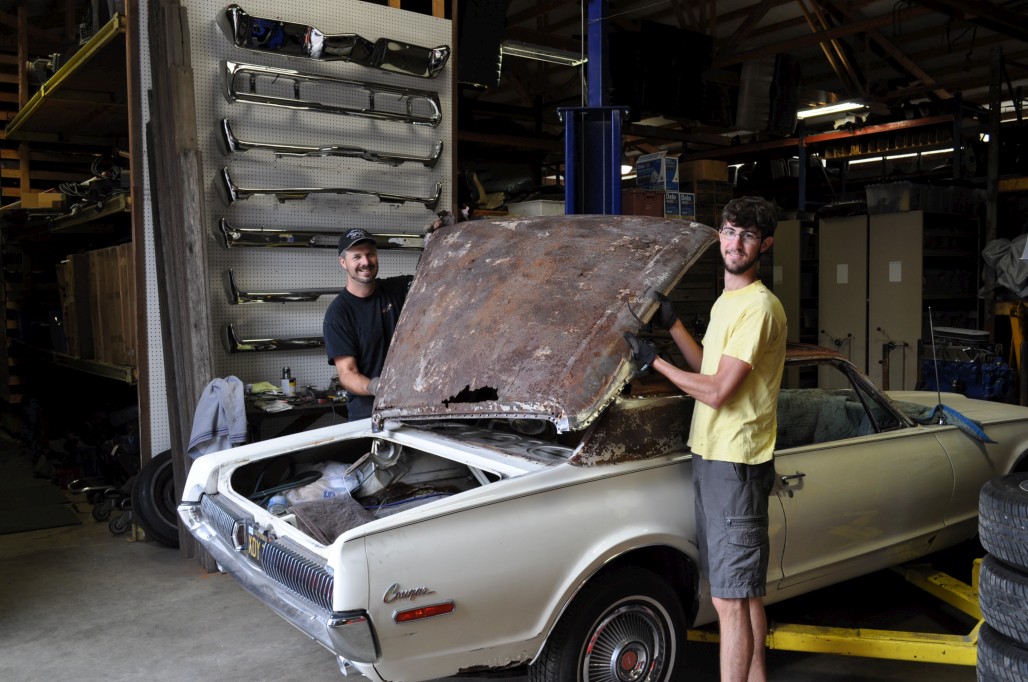
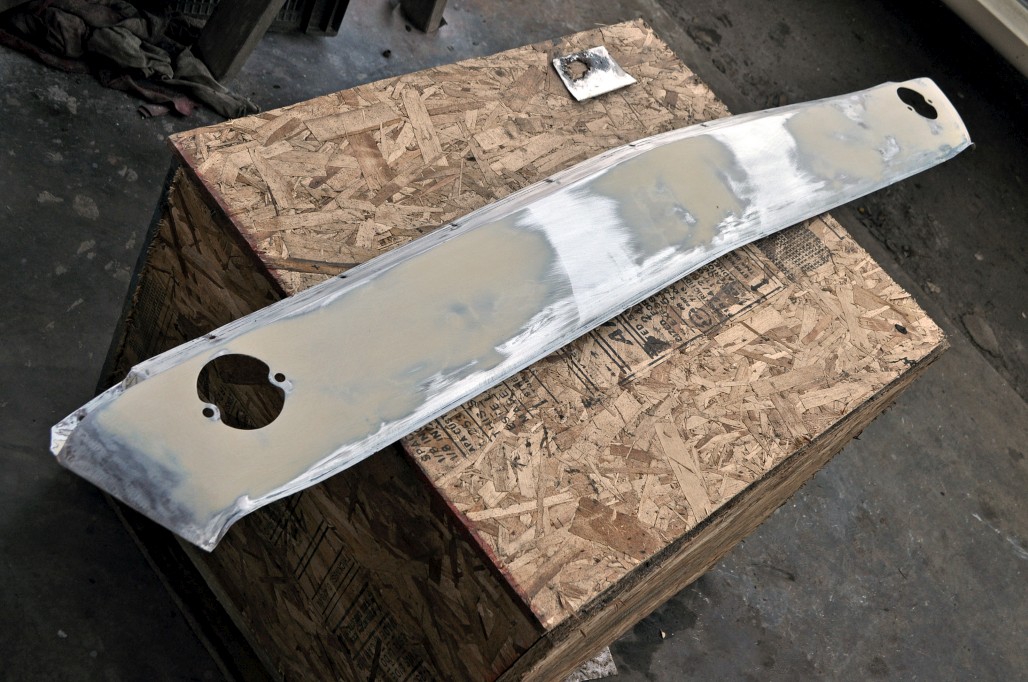
Here’s some shots just after I peeled off the vinyl. Notice the copious amounts of flaky bondo.

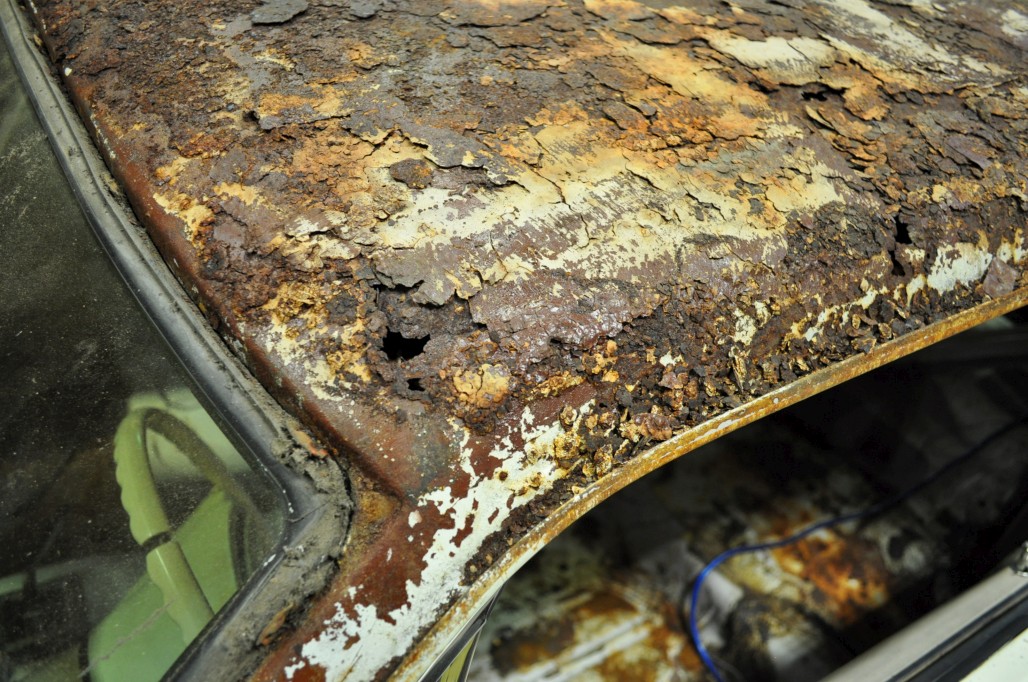
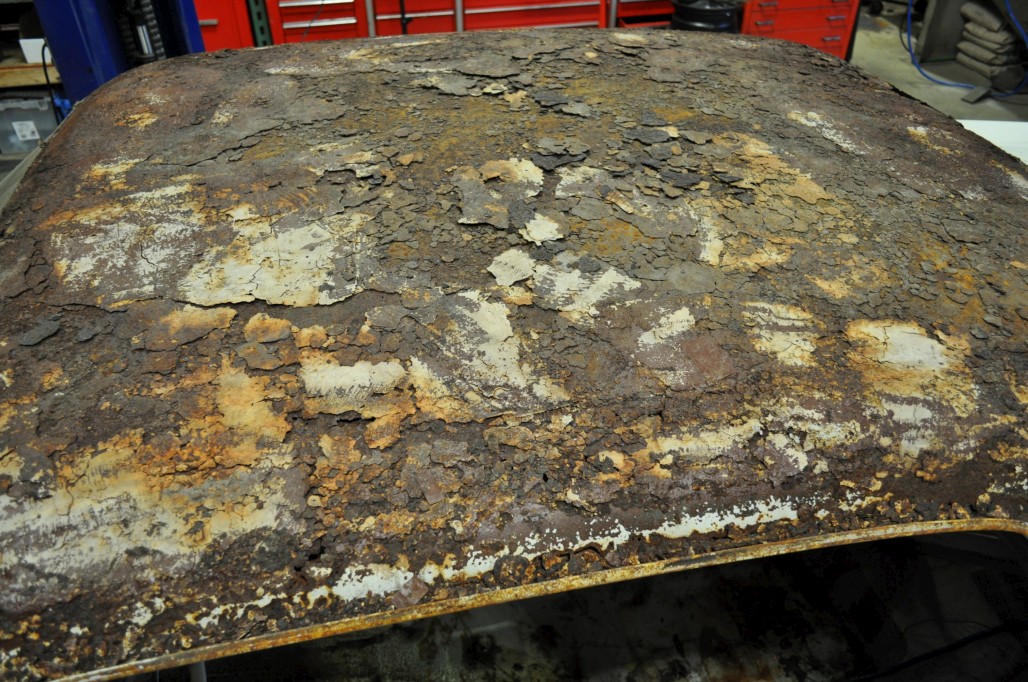
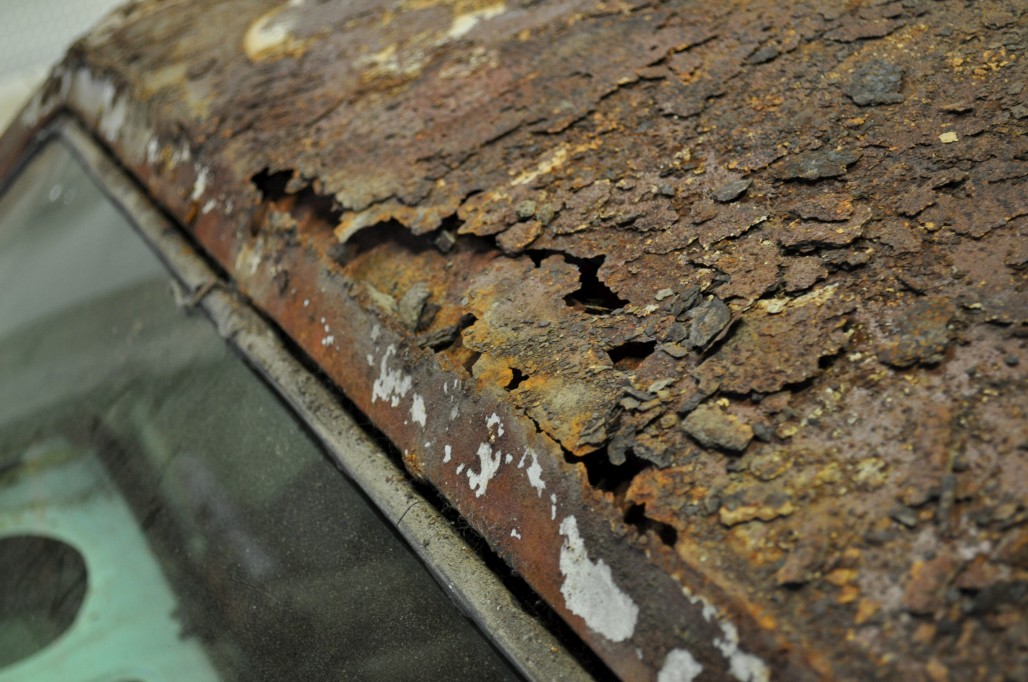
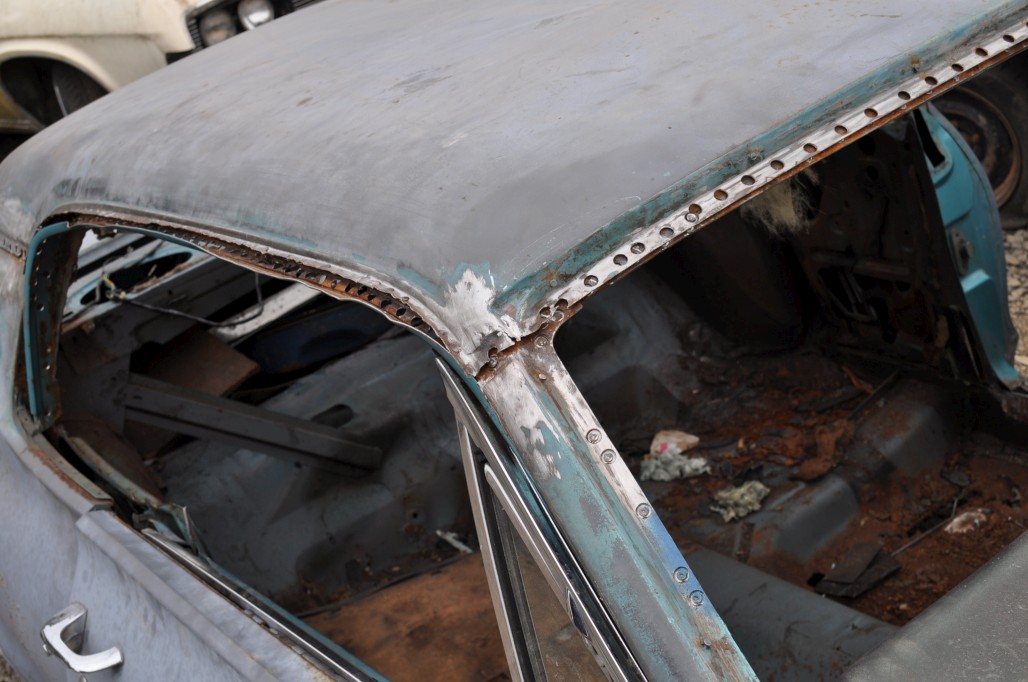
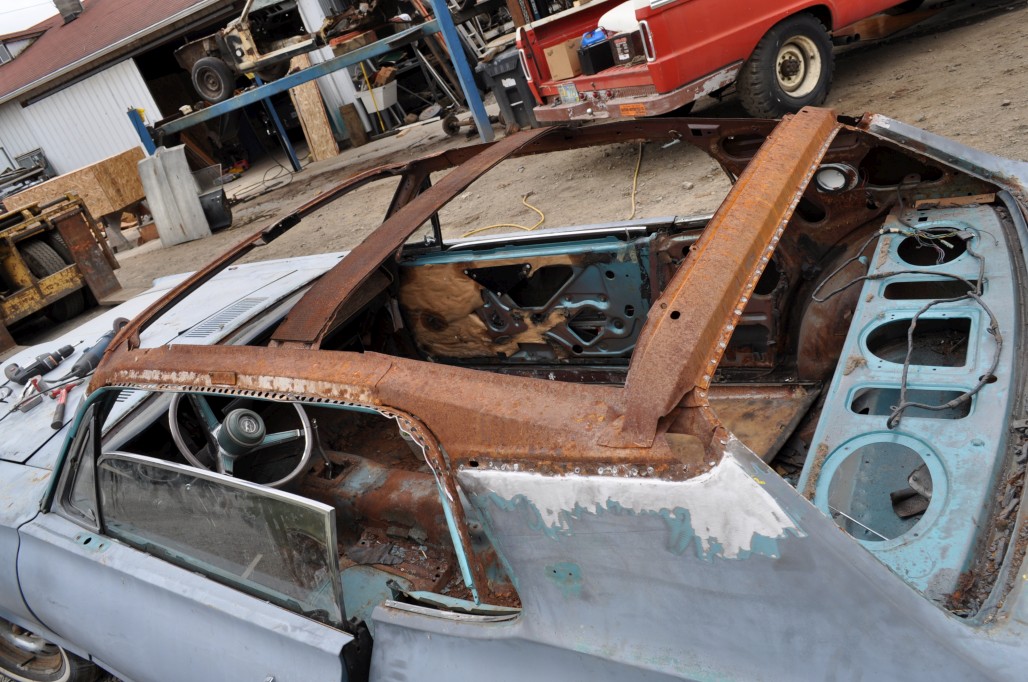
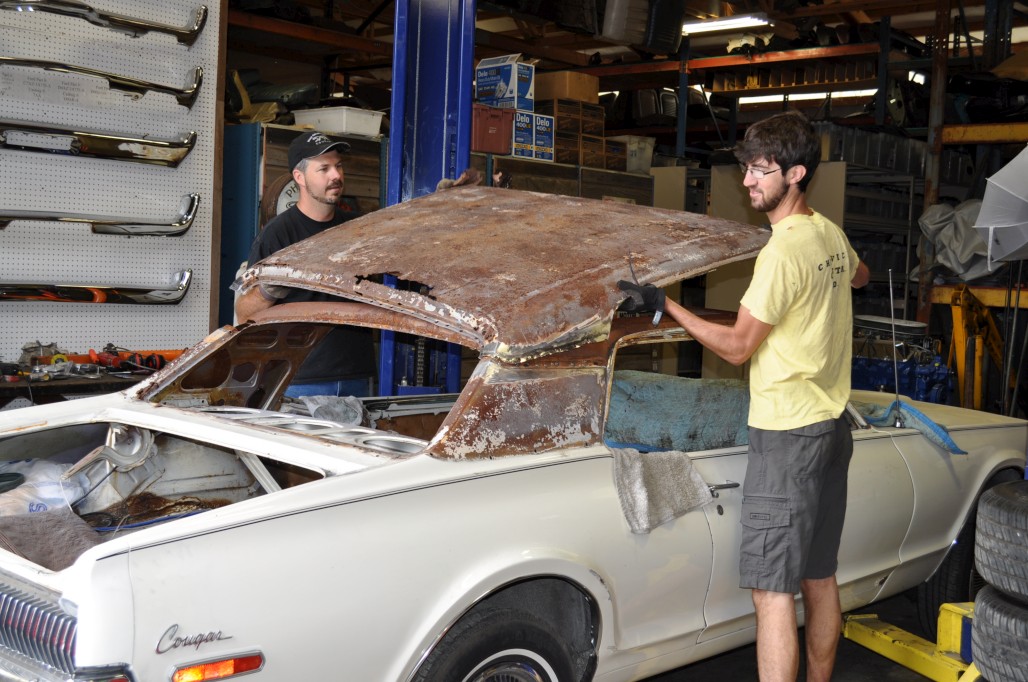
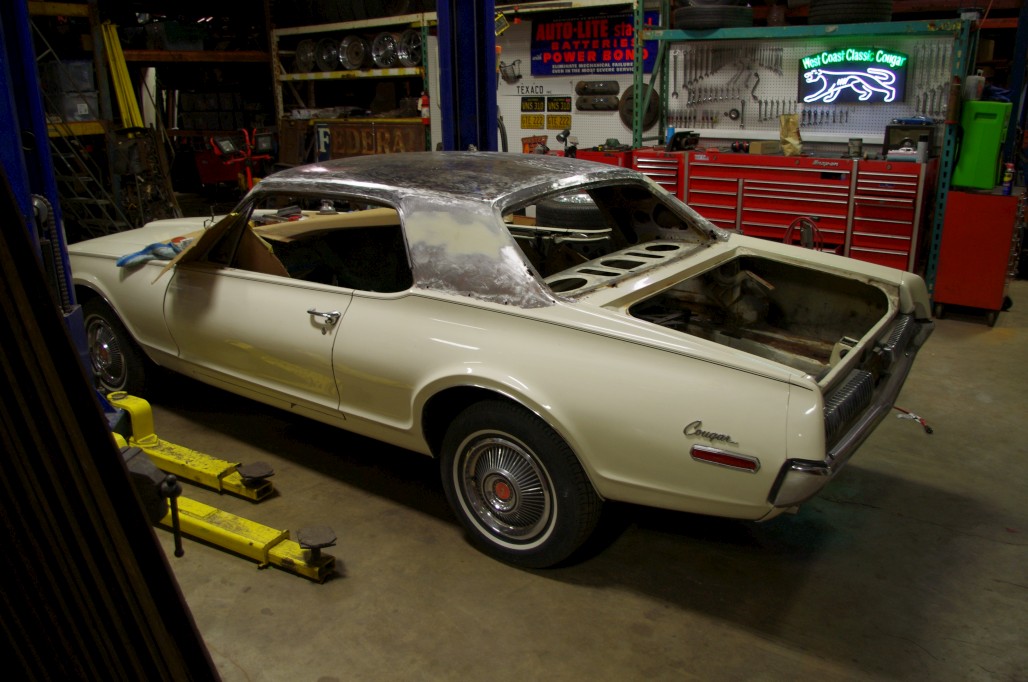
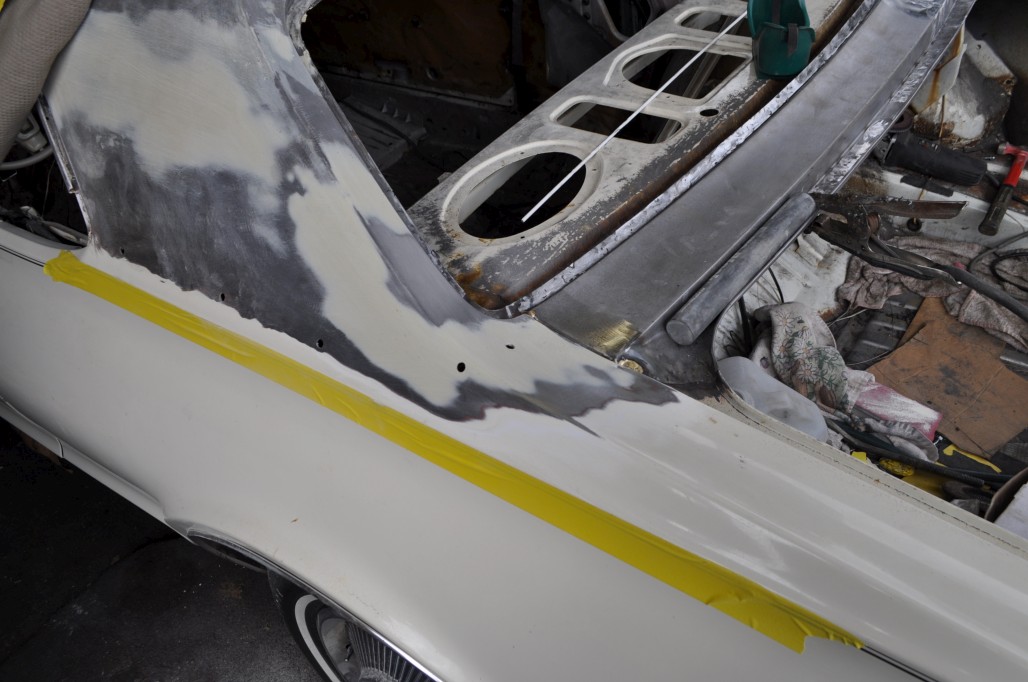
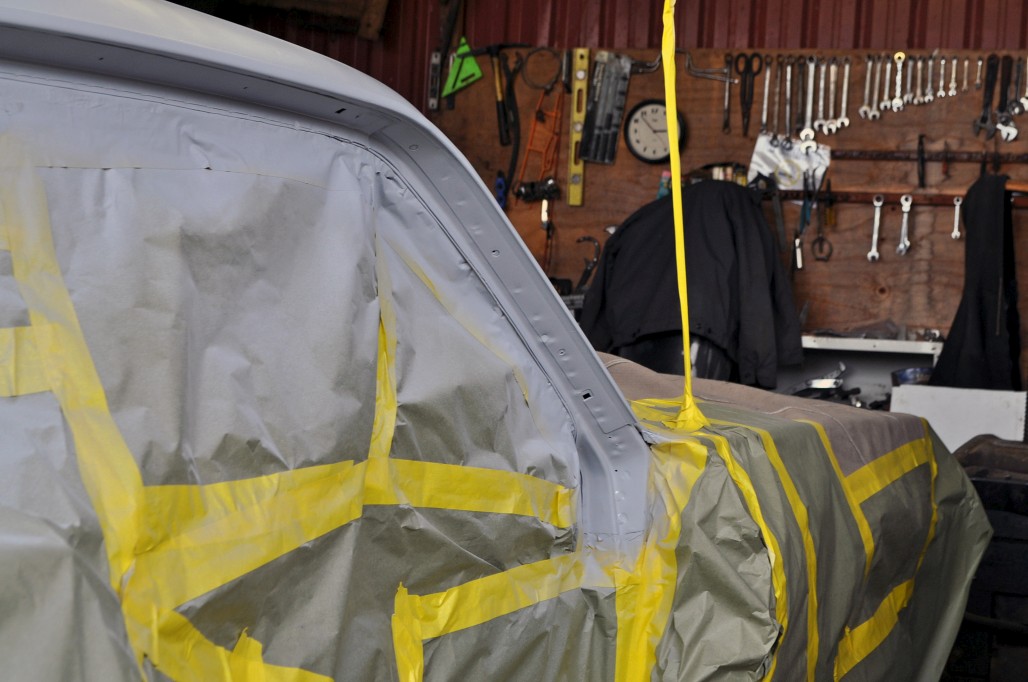
… And below are some shots of where I’m at right now. Flakes mostly cleaned up, glass removed, headliner removed, all trim removed, and locating the lead seam / spot welds with a wire wheel.

Stay tuned! More updates soon. I expect to get most of the work done within the next few days. I guess we’ll find out!

(end of post)

—Sept. 13, 2011—


All I’ve really needed so far is the following:

Some screwdrivers and wrenches / sockets
Block of wood
Hammer
Cordless drill
Wire wheel
Center punch
Spot weld drill bit

So far it really hasn’t been that difficult, even for me… just time consuming. But of course, the teardown is the easy part. The real test is putting it back together, which I will probably need some help on.

Here are some pics of the donor car & progress on drilling the spot welds. I did go through on a couple of them but am getting the hang of it.


—Sept. 14, 2011—

One thing I have found so far is that it works better to drill into the center of the spot weld a little, rather than use a center punch. I was having issues with the bit jumping out / wandering before (and subsequently broke the center guide pin), but found that a small drill divot works much better for keeping the spot weld drill bit in place.

Other things learned: on trying to locate the seam on the C-pillars, use a sanding disc on a grinder. I’ve been told by a reliable source that melting the lead is a bad idea… the heat could warp the steel. If you’re brave you can start with a grinding disc, but I was scared. You can see the edges of the roof skin in the drip rail and rear window channel, so that gives you a starting point. You can also use a screwdriver to scratch the metal and see where the lead is. So once you grind / sand some away, you will also find that the lead doesn’t spark, but when you hit steel, sparks will fly. Also, when you get to steel, you’ll see that it’s a slightly different color - a little darker than the lead. Eventually, it will look like this (picture below) and you can easily see the spot welds and the lower edge of the skin. I was surprised at how much lead you actually have to get out of there.

—Sept. 15, 2011—

[after some discussion on lead removal/using heat or not. Consensus was that heat is a bad idea as it will warp the sheet metal. Good tips on the heat… maybe a compromise between the methods would work well. Grind / sand away 90% of the lead, like I’ve done so far, and then use heat to get final separation. While applying heat, one could probably poke a small chisel / screwdriver in there to work the top roof panel away from the body and scrape out the lead. If you’re trying to save your paint, like me, probably put something on the body to avoid drippage. My thinking is that I should drill out the spot welds now before trying to remove the remaining lead; that way it will separate more readily.

Driver’s side done the same way:

Drilling out all those spot welds… now that I’m used to it, it’s really not that bad. I only drilled all the way through on one so far on my car (donor car wasn’t quite as lucky). Which brings me to a tip - it might be best to start drilling on the donor car if you haven’t done this much, because it doesn’t matter as much if you drill all the way through. On your own car, you want to preserve the under-roof structure as much as possible. But in other ways, you can be less careful with your own car, like with the drip rail section. I’ll talk about it in a sec.

This is me grinding away the outer lip of the skin that is spot welded to the drip rail. This is a way to save some time. Since I don’t need to preserve this roof, it’s much quicker to grind that lip away rather than drill all the spot welds out like on the donor car (see next post). You just need to go far enough to barely separate the panel.

Same thing done on the other side and peeling the roof away for giggles… anyone got a can opener?

Got kicked out of the shop this morning… it was interesting to sit on the floor and drive it By tonight, I’m hoping to have the roof off. We’ll see.

—Sept. 15, 2011—

Oh aaaand by the way… the donor roof is off! I have to confess that I’ve had some help from the guys in the wrecking yard, mainly to speed up the process a little. I have done everything on my car so far though, so it’s basically just the same thing.

Here I am, putting in some time:

Here it is, ready to come off. Notice how we had to drill out the drip rails from underneath, so as to preserve the outer edges / lips of the roof panel. This is where you spend some extra time on the donor roof, trying to keep it as close to perfect as possible.

And it’s off!

—Sept. 19, 2011—

Update - my roof is off!

A pillar separation:

C pillar separation:

Don and I lifting it off:

The naked shell:

Getting closer! Next thing is to grind down the remnants of the spot welds. Sweet!

—Sept. 22, 2011—

Progress report!

After my roof was off, I stripped all the surface rust off the support structure until it was bare metal. Was able to do this with wire wheels and a small sanding disc. Then, prepped it with some wax / grease remover, then painted the area with a couple coats of rust preventive paint (similar to POR-15 but a different product that we’re going to start selling). You can brush or spray it on, I opted to spray.

A gratuitous amount of masking never hurts…

Then the underside of the new roof got the same treatment. Stripped, cleaned and painted with the same rust-preventive paint. (No pic, sorry)

New roof sitting in place… it actually fits really well! Which I kind of expected, being a uniform factory-made piece (one of the reasons to do it this way).

Then, to secure the roof in the right place, I drilled some holes all the way around and fastened it down with some self-tapping screws. You could probably achieve the same thing with a crapload of clamps, except maybe for the C pillar area.

And now the welding commences! This is where I step back and let a friend do it. He’s using the existing holes from the old spot welds to weld the new roof in place. I decided not to go with the body panel glue. I’m sure it would work well, and would be a good option for people who have no way to get it welded, but I felt more comfortable going old school and handing it over to someone who knows how to weld.

Welding progress:

Getting closer every day! I’m a little over 2 weeks into the project now.

—Sept. 27, 2011—

With the guidance of my body guy, I went with a fiberglass filler. It was pretty easy to work with, and once it was all hardened and sanded down, it feels very smooth and rock solid. He didn’t seem to think that primer underneath the filler was necessary. Fingers crossed on that one. You’ll also notice that the roof is stripped all the way to bare metal… a time consuming process! I mostly used 36 grit sanding discs. At times, it was actually faster to scrape some of the paint away with a chisel. Also, what I’d like to make clear is that I don’t really know what I’m doing, just going with what other people tell me to do . The cool part is, I’ve had the ability to do almost everything so far except the welding. I think it’s cool to prove that this is a doable job, as long as you know how to use tools, and are surrounded by good advice (and that you listen to it).

I have to say I’m really impressed with how the roof looks and fits. It’s like a glove! Looks like it’s always been there. So, what’s next is caulking in the drip rails (I think), patching the other rust, primer, paint where needed, aand vinyl! I’m going to be going with the high quality vinyl from SMS. It’s way more expensive than the alternative, but hey… I don’t plan on doing this again if I can help it. I will be taking some comparison pics between the cheaper material and the good stuff.

—Oct. 13, 2011—

This is where I step back and give it to a pro to finish up; to a nameless, mysterious body man who has been doing this for 40+ years.

Here is the old trunk filler panel / rear window channel removed:

For the new rear window channel, I have the luxury of using cuts from two different cars in our yard to patch my rusted-out one. Notice the way he has drilled out the spot welds for the trunk filler panel to preserve that section, and cut just up to the seam line to preserve that as well.

And here’s the right side panel before being stripped and cut to fit like the left piece:

By the next time I went back to check on his progress, he had the left piece mounted in place with self tapping screws, using the same technique he taught me for the roof. I’m a little confused about the purpose of all the screws around the outside of the patch, but I didn’t ask questions.

The right side mostly trimmed and almost ready to go in, plus the mysterious screws around the outside:

It seems like the way to go is to cut your patch panel to the desired size first, then use it as a template to cut away the same area from your car. This way you get a nice, exact fit like you see in the pics. I was wondering how he was going to preserve the seam between the quarter panel and the trunk filler panel, and have been very impressed watching how he is going about this. Also if you’re wondering why there is a car cover on the roof, it’s because we’ve had to move the operation outside, and it’s a line of defense against moisture. Yikes!

I returned later in the day to discover an amazing transformation.

Having welded the left side patch in, and using the same fiberglass filler that I had used on the C-pillar, the left side is now as smooth as a baby’s butt. Notice below how he’s using the same technique on the lower part (trunk panel edge) that the factory used. Brazing? Is that the correct term?

Look at this welding. Beautiful work.

And finally, the two separate panels joined together as if nothing ever happened.

[Note from the future: this didn’t work out so well. It would have been a good idea to have the trunk lid on to test the flush-ness of the rear window panel. Or to not do this in separate pieces. I later found out there was a big gap between this and the trunk lid, and this patch had to be redone with a repro panel.]

We should be seeing primer and paint very soon. [ha ha ha… little did I know at the time how long it would be…]

—Oct. 19, 2011—

Well, I didn’t initially plan on going much further than replacing the roof, but “while I’m at it…” you all know how it goes. I’m getting too good of a deal on bodywork, so it began with “well, let’s fix the worst of the other rust too” and then “well we might as well fix some of these dents and scrapes” aaand then since every panel on the car needed work (except maybe for the hood), it’s turning into a complete full-body repair and paint job. Should I be paying off my student loans instead? Probably. Do I care? Naah. Having a nice car is way more important! Us car guys are idiots, but that’s okay.

Some pics to get you all up to speed:

Roof primered… looks like nothing ever happened!

Other random repairs:

The paint was cracked up here by the extension (above)

There used to be a dent here on the fender (below)

Rear valence… goodbye dents

There was a little rust in the bottom front corners of the doors, along with a small dent or two.

Gratuitous glamour shots of the car sitting in the yard:

You’ll notice that the pinstripes are covered with tape… this was when the plan was just to paint the repaired areas and blend it together. Since then, I’ve decided just to do the whole thing, since almost every panel is getting worked on. If there’s any advice I can give now, it’s to be careful when replacing your roof… it could lead to a complete body overhaul!

—End of Old Posts—

From here on, it will be all new stuff you haven’t seen before. Looking at the dates on those old posts makes me realize how much updating I need to do on stuff that has happened since then, and how much longer this process has taken than I thought. Will start posting progress pics tomorrow probably… for now I’m all forum’ed out from copying over all those posts and pics! :flash:

Edit: Almost forgot to put the video in here! Most of you have probably seen it already, but here is the video I did about replacing the roof. You can view the tiny one below or watch directly on youtube here.

Was curious to how things were going since Oct. Development for the site revamp,I’m sure has keep things busy,…not to mention…WINTER.

That right there is the best advice given on any of these forums! Looking great, and :beerchug: to continued success!

Ditto what T3 said. Ask and take advise. By the looks of your work so far you have done a great job. I enjoy following the progress.
Steven

Good to see that the snowball is still rolling!

Your doing a great job Blitz,

Thanks guys!

So, to pick up where I left off, I don’t think I ever posted pics of the quarter panel repairs. This was the same day as the last pictures (10/17/11). At this stage, I’m merely an observer, watching the pro body guy do his thing.

DS didn’t need much work

PS was another story… here is an inside view after stripping down the outside

Here is an old picture from the WCCC open house last August, not long before I started tearing into the roof. This is just to show what the rusty quarter looked like. You can also see the scraped wheel arch, the rust in the lower door area, the ding on the door, etc.

For some reason I don’t have a pic of the completed patch, but we ended up using one of the repro patch panels. He didn’t like it, said it too a lot of work to get it to fit properly. From then on, we tried to use good original panels wherever a patch was needed, instead of repro stuff. The end result looks good though, and you’ll see it here in a little bit.

After this point, the car was relocated to a different shop off-site. Rainy season was coming, and we didn’t have a good covered area for him to work on it. Because of this, I was only able to go look at the car / take pictures on occasional evenings after work.

The next job was to patch the floors. They were mostly good, except for the RH front, and the RH rear wasn’t great either. He ended up removing the seat riser, patching in replacement (good original) floor pans and then replacing the seat riser. Sorry these pics are so crappy, taken at night. (11/16/11)

By the next time I went to look, it had transformed into this: (11/23/11)

Products used:

Also, he had begun the process of patching the trunk side panels. Unfortunately, both sides were pretty rusty. RH side cut out:

More to come soon!

12/1/2011

Trunk patch progress! RH side done:

LH side cut out:

Fast forward to 1/12/12 when I got back from vacation.

Both trunk patches finished and coated with the same black undercoating stuff.

LH rear wheelhouse actually needed a little love too.

Here’s the RH quarter patch from the inside:

And the lower drop-off area needed help too:

Some work on the fenders:

Front end stripped down:

He’s even paying attention to the door jambs, sanding them down and making them smooth.

The car as a whole - you can see the repaired quarter, front and back.

This is how it stayed for a few months. Logistical and monetary issues were getting in the way of progress. But now I’m happy to report that work has started up again all this week and will probably continue through next week as well. My next post should bring this up to date, but I’ll keep you in suspense until Monday. :laughing:

And now, a look at last week’s progress.

Trunk prepped:

The lip needed a little work but wasn’t too bad.

Doors prepped (inside):

RH fender removed:

Then the next day, the insides of the doors, trunk, and rear valence were primed.

Some prep work up front, and a little brazing by the windshield:

…and a look at the prep work on the front side of one of the doors:

Later in the day I returned to find that the front sides had also been primed. I stood on top of a table to get this shot, haha…

Anyways that pretty much brings it up to speed! I’ll go over there later today and see what else is new, but it is coming along nicely. He is doing a lot more detail work than I expected, and the good news is that I’m all paid up (gave him a flat amount to finish the car ahead of time, which was actually a pretty dumb thing to do) but he is not half-assing anything. He’s also going to paint the engine bay / aprons black and plans to just leave the engine and components in place and paint around them. Not sure how much I like the idea, which may lead me to pull the engine / trans. But that’s a whole 'nother snowball that I may want to postpone getting into.

You’ve gone this far, and it looks great by the way, pull the engine and do it right.

You know, this whole rebuild is a great example to people who feel that a car is too far gone to do the roof or floors, let alone the rear window panel and quarters.
Really, you just have to be willing to learn and get your hands dirty.

thumbs up Thanks for saving it and not just junking it. Your stock will have risen greatly in the community because of this build, and Don will have fostered another person in his outfit that people trust.
Not a bad net product for just fixing up an old car. :beerchug: