Why didn’t you put on the fender extensions before putting the fenders on?\
For WS adhesive removal I would suggest WD-40 and a lot of elbow grease.
Looks great (but you are WAY behind, get going man!).
Why didn’t you put on the fender extensions before putting the fenders on?\
For WS adhesive removal I would suggest WD-40 and a lot of elbow grease.
Looks great (but you are WAY behind, get going man!).
Ah, I was going to mention that. Good to make note of this for anyone reading: normally, the extensions should be put on the fenders first, then put the fenders on the car. They will be hard to install with the fenders on the car, although supposedly it’s possible (haven’t installed the front splash shields or vacuum tank yet).
Why didn’t I put them on first? They haven’t been painted yet. ![]()
I’ll probably do a separate post on my paint / body woes that I’ve alluded to. It’s part of what’s been keeping me from moving forward. Hoping to remedy this situation in the near future.
Looking good Andrew. I hope the rest of your parts are done soon.
Wow, even WCCC folks (“Rush-ians”, get it?! ![]() get stuck in body shop jail? It just ain’t right I tell 'ya!
get stuck in body shop jail? It just ain’t right I tell 'ya!
All the more reason to DIY!
+1 DIY paint and body.
Looks great Andrew and you’re almost there!! For the removal of the weather strip adhesive I would suggest wax and grease removal.
Regarding the trunk lid, can you grind out a little material in the trunk lid hinge where it attaches to body of the car to suck the trunk lid down in that corner? My hood hinge on the passenger side was bottomed out with respect to adjustment and the hood was still a 1/4" to high above the fender and cowl and in order to suck it down a bit we grinded a sliver of material out of the hood hinge. Once the hood hinge is fastened down the bolt head covers up the bit of material grinded out and no one will ever notice.
Great update, lots of cool pics and progress! Hopefully we’ll see it on the road this summer!
…maybe I need to get my updates posted too >.>
Looking mighty fine Andrew, Great job!!
Alright, let’s see if I can outline what really happened with the bodywork & paint. The guy that did the work was known only as Jose, and he didn’t speak English. He was an experienced body man looking for work, trying to make ends meet, and seemed like a nice enough, hard working guy. I’d had a chance to see what he could do, and he seemed to be quite skilled. There were a couple guys here that spoke Spanish, so at the time, I had interpreters and all was good. He was willing to work for way less than what a retail body shop would charge, and to me this is what made it possible to move forward. I couldn’t afford anything more.
Sept. 2011 (wow) is when I dove in and started the roof replacement, which led to fixing the other rust and body damage on the car, which led to a decision of doing a full repaint. Jose did the work in the WCCC yard where I could check in on progress regularly, and he was doing a good job, as you can see in my early posts.
Late in the year (Nov) the car got moved off-site, because Jose had been allowed to use shop space by someone he knew. Here the floors were patched in the cabin and trunk. I went to check up on the car regularly, and progress looked good. Then the car came back to WCCC.
Finally, in May 2012, the car and most of the major panels had been prepped and were in primer. Jose was able to use another friend’s shop to spray the body shell and the doors. I got the car back by the end of that month, and was stoked to see it in fresh paint.
Eventually I decided to go all-out, and pulled the engine. Around April 2013 I had Jose prep and paint the engine bay, and something went wrong with his mixture… the paint is still a little soft to this day and I can scratch it with a fingernail. But it looks good overall. In hindsight I probably could have gotten better results from rattle cans myself.
Keep in mind at this point, the fenders, hood, trunk lid, extensions, valences, etc had still not been painted. Something I would continually bug him about.
I don’t know what happened in his personal life, but it seemed to be in turmoil. He started working at yet another shop in another part of town, and still had my parts with him. I kept showing up to bug him periodically, and he wanted me to buy more paint materials (I’m pretty sure he used supplies I had previously bought for other projects). Finally, in May 2014, when I was in France, Don sent me this picture:
At last! The hood, trunk, and fenders were painted. Only 2 years after the body shell and doors had been painted, with a different batch of materials, in a different environment, with different equipment… see where this is going? So far, the pictures you’ve seen have been from far enough away to say, “hey cool, that looks good! Yay for progress!” Well, let me zoom in a little.
Hood closeup:
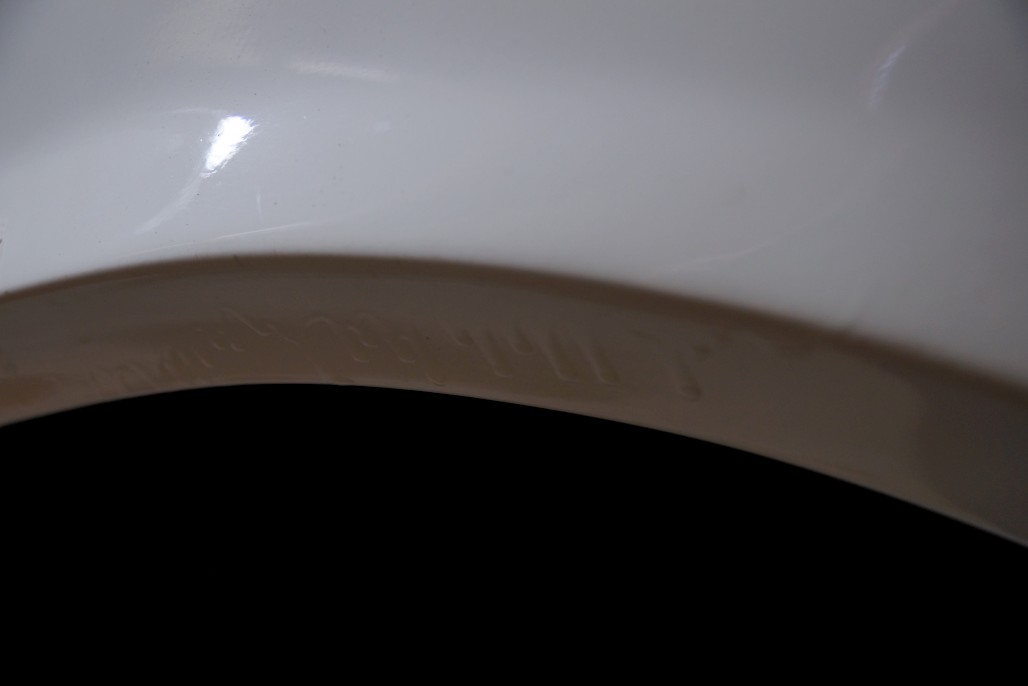
Fender drips and cracks:
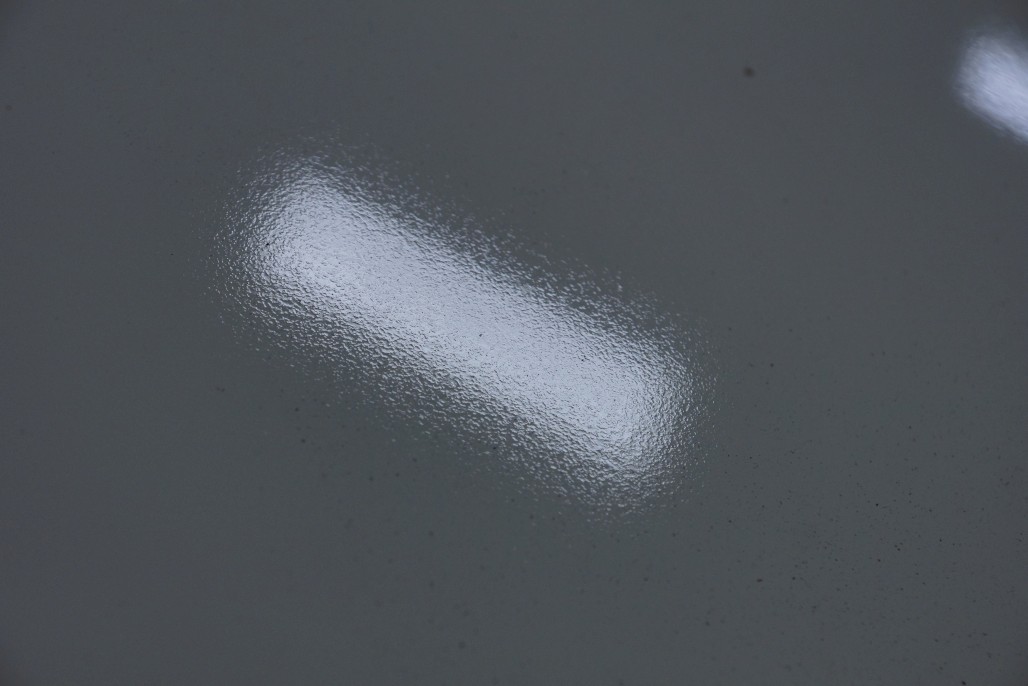
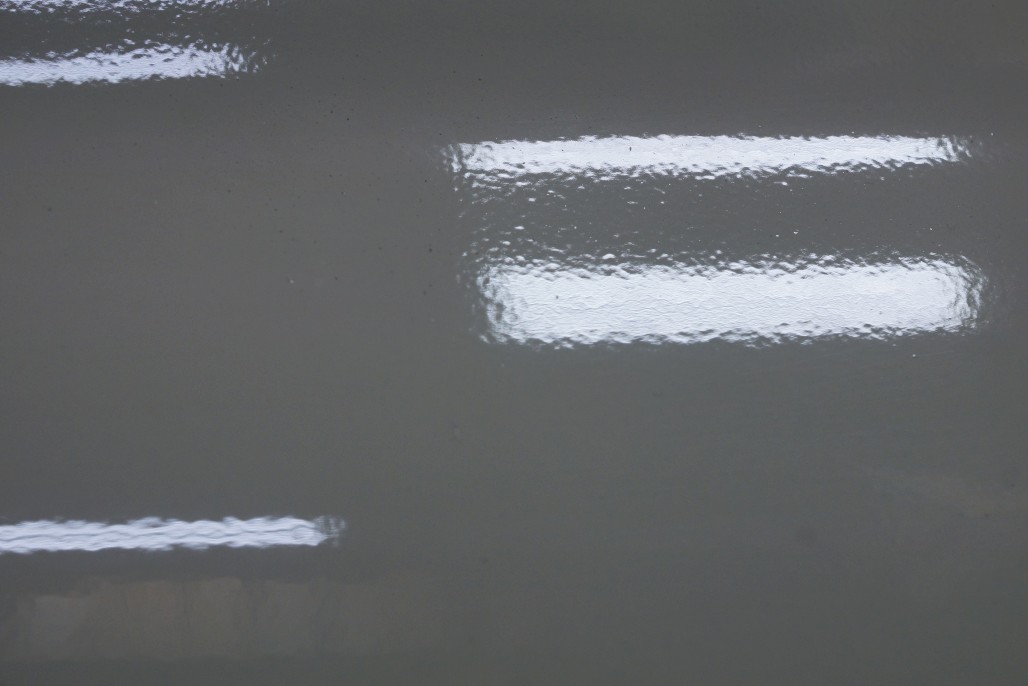
Dust bubbles & orange peel on trunk:
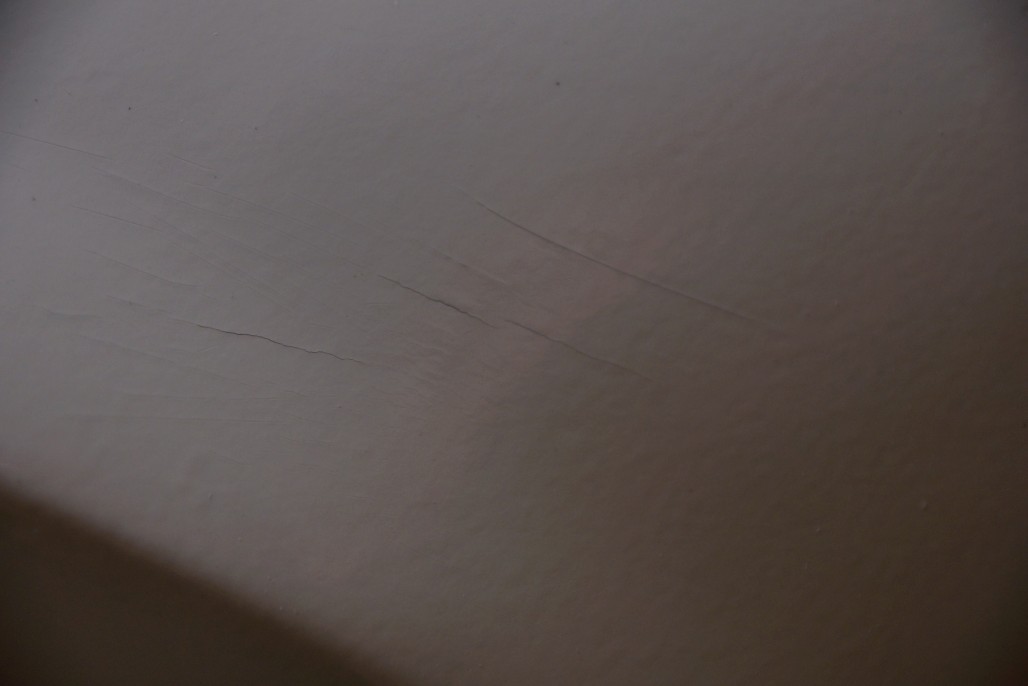
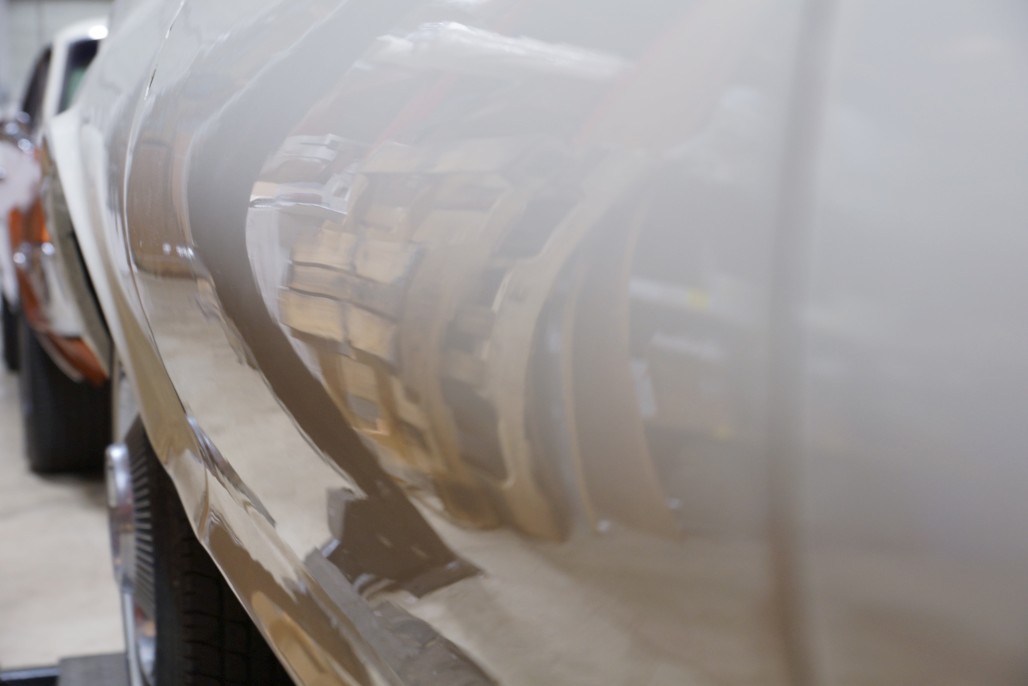
Other fender “texture”
Hard to get a picture of, but this one kinda shows the waviness that’s everywhere. Not the end of the world, just one more negative.
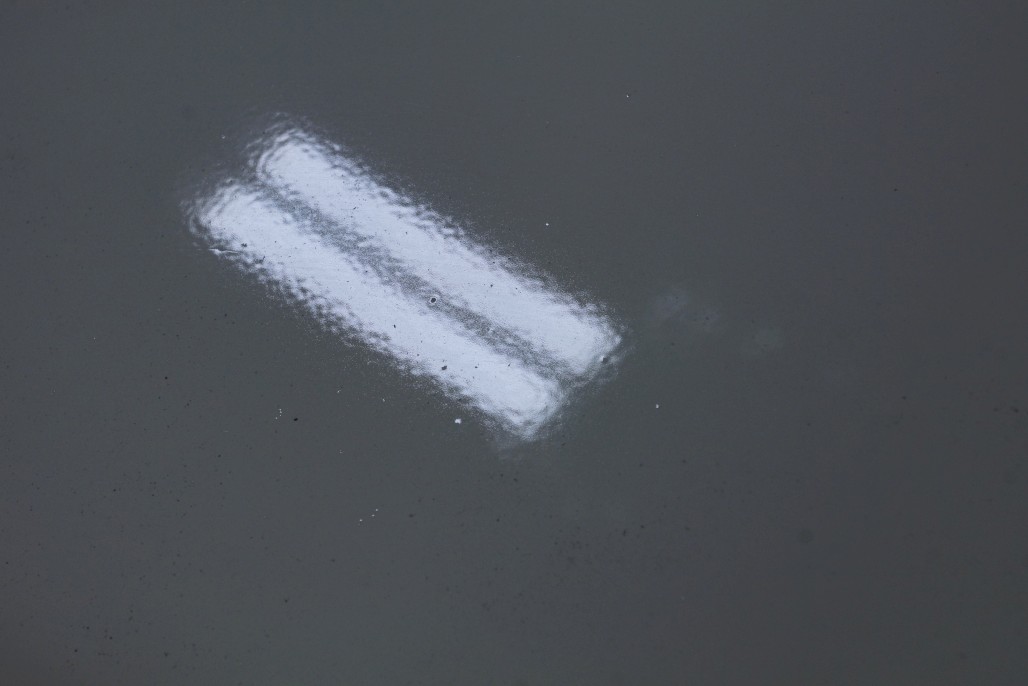
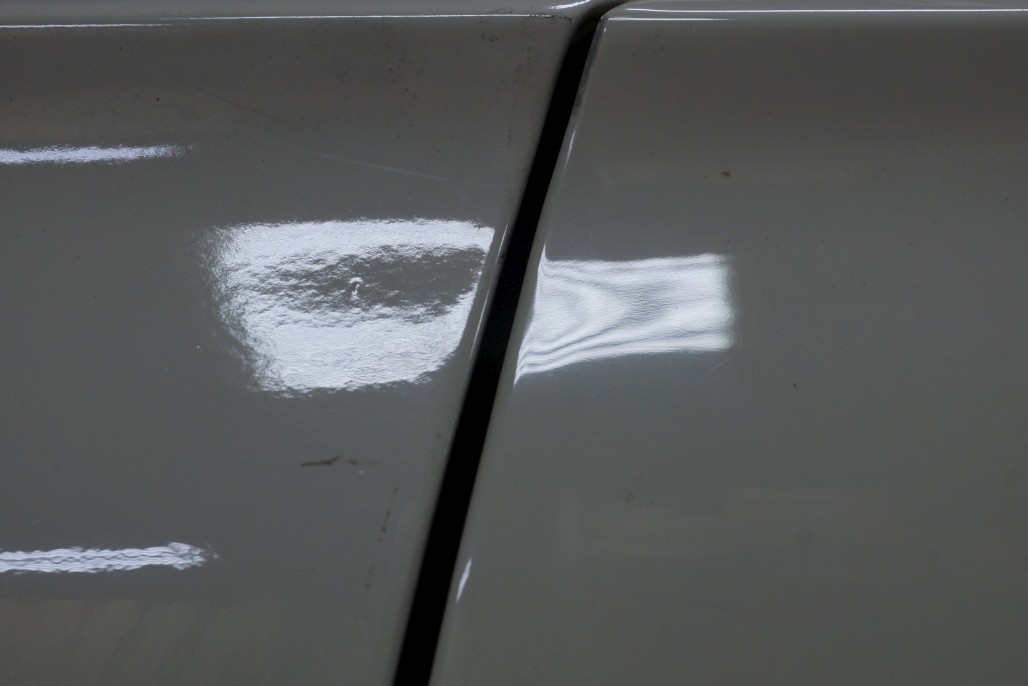
Fender vs. door difference in finish:
This one I think shows the difference in color the best. It’s hard to capture, but if you look closely, it’s there. Hood vs. cowl:
Anyway, after this, I was hoping to get the rest of the little pieces finished in a timely manner - valences, stone guard, fender & quarter extensions, glove box door & ash tray door, trunk hinges and rods, So I could at least get the car together and try to color sand / buff out his paint job and make it look decent. After weeks / months of constantly checking in, hearing his false promises over and over, giving him the benefit of the doubt way too many times, I finally gave up. Give me back my stuff, I’ll figure out something else.
![]()
![]()
![]()
![]()
![]()
![]()
![]()
![]()
![]()
![]()
Current plan? There’s a good restoration shop up the road who seems open to the idea of finishing up the body & paint on my car, and I can partially pay for the work by doing some photo / video stuff for their business. They want to get the panels aligned better, prep the unpainted parts, block sand the entire car to smooth out the waviness / imperfections, and spray fresh color and clear. This is the only way it’ll be “right,” but painting the entire car twice is mind-blowingly frustrating. Of course it will just be the outer surfaces, but still…
So there ya go. I think this whole fiasco is what’s really slowed me down from putting the car together. Don’t get me wrong, I’ve been lazy at times, and distracted by other things, but I didn’t feel like I could “finish” the car when the paint work wasn’t satisfactory.
After all this, I’d have to agree… it would probably be worth learning the skills and investing in the equipment just to avoid all the BS and delays.
I really like the sound of that. It needs to happen! Lately it’s been feeling more like a far-away dream, so much time has gone by. But I haven’t lost the determination…
Hm, it shouldn’t be necessary to do that… it would be preferable to massage the body a little to get it back closer to how it was originally. I looked at some old pre-resto pictures and the trunk used to fit great. The restoration shop tentatively finishing up the body may be able to improve it.
Also thanks, I think there is some wax & grease remover laying around, I’ll try that on the WS adhesive.
Seems that this is the regular story when we try and get a low cost paint job. We’ve heard it so many times over the past 15 years.
Good luck with the new guy
That is frustrating, Sorry to hear the time you had. Repainting isn’t the end of the world, Just make sure the shop is competent enough to know the arias that are cracked will need to be stripped or at least sanded totally back all the way. Your base has to be good and sound or the new top layer will lift the bottom one.
Man I hate the paint and body issues that you have had. It looks good in most of your pictures but the close up’s show the painter wasn’t up to the task. I’m sure in the end you’ll get everything to your liking just hang in there! ![]()
Steven
Ugg… paint problems… That sucks :-/
I hate the idea of paying someone to F’ up my car :-/
I think about this too, because it sounds really cool to learn how to do all these things and be able to say “I did it myself”! Then I get scared by what I’ll find lurking under the paint (I get shivvers just thinking about it). And then I realize that I’ll either have to farm out the body work or learn to fuse metal with fire (which sounds cool, but is probably WAY harder than I think - and I already think it will be hard). And finally, I fear that after spending all the time, effort, and money, that it will end up looking worse than Jose’s paint job ![]()
Hrmm… I guess F’ing it up myself would still be better than paying someone else to F’ it up! LOL!
It’s not hard to learn paint and body. I did it at a very young age by watching others do it for a living and asking a lot of questions. I needed work so I went out and bought a good gun, best brand of paint at that time, “it does mater” and found work. The result was great and I did learn from my mistakes, but in the end, I know that if I need to do a job, it’s a mater of going out getting the paint, renting a booth and shooting it myself. Just remember that any paint that has an activator/hardener will emit Isocyanates. Make sure you have good ventilation and the best respirator you can find. An air supplied type is best, typical filters will not filter outIsocyanates.
Mike B, practice, practice, practice…spraying test panels first helps. Second, prep, prep, prep.
I didn’t learn to fuse metal with wire until after my metal had been repaired(farmed the replacing steel part of it out). I would DIY that now myself, too.
I would DIY my own paint again in a heartbeat. Matter of fact, I’ve been pondering a re-spray of The Heap lately…
This is motivational stuff. Mike I think a good way to go about it would be to farm out the major metalwork (rust repair, dent removal, etc) and then once the body is straight, you can do the prep work and paint. That’s how I’d approach it as a newbie, anyway.
If I was going to learn to paint cars, I’d probably start on a car I didn’t care about as much, though. Not necessarily the “crown jewel” car.
Well I might as well update the situation. As I mentioned earlier, the car is now getting the bodywork re-done (argh!) by a real shop. Finn’s Auto Restoration in Woodburn, OR. Check 'em out (and if you need any classic car restored / worked on, I can vouch that they do nice work. Tell them I sent you).
So far what’s been done is basically just trying to get everything to fit properly. This turned into more labor than I expected, but just about everything needed work, especially the extensions. The fenders and doors and hood and valences and all that needed fiddling too. When I went to check on the car, it was immediately obvious that the body lines were crisper and better aligned. This attention to detail costs some dough, which is not something I have a lot of, but in the end it makes a big difference.


The rear window channel area was a concern, because when it was patched before, back in 2011 with two separate pieces, it wasn’t quite done right. Because of this, the panel didn’t have the upward “crown” contour to match the trunk lid, and there was a big 'ol gap no matter how I adjusted it. The pic below doesn’t really do it justice, but here’s a “before” shot.

So, I bit the bullet and bought the new Dynacorn patch panel for this area, and the shop removed the old repair and began fitting the new piece.

The glass had to be removed, and the vinyl top had to be peeled up a bit. Fingers crossed that the vinyl will glue back down without a hitch.


Another area of concern is the RH quarter panel. In front of the rear wheel, the lower body line dives in, rather that staying relatively straight like it should. Some kind of previous bodywork here I suppose. The pic below illustrates what’s going on, red line added for reference.

I haven’t decided yet whether to address this or not. They’d probably have to separate part of the quarter skin, tweak it out and re-weld it. Might also require some work to the wheel house. I guess it depends on how much time it will take. They are pretty skilled metal workers.
So that’s where things are at right now. There was a pause in activity while I caught up to what $ I owed them, but we’re square as of now, and I’ve started doing some work for them for their new website, so that will help get the ball rolling again. I’m lucky that the timing worked out, and I have some skills to trade for their work. Still, the big expense of paint is looming ahead. I’d love to have the car together and on the road for the WCCC open house in August, but that’s looking less likely all the time. We’ll see!
Andrew, that will look great when it is finished. You will be glad you did it!