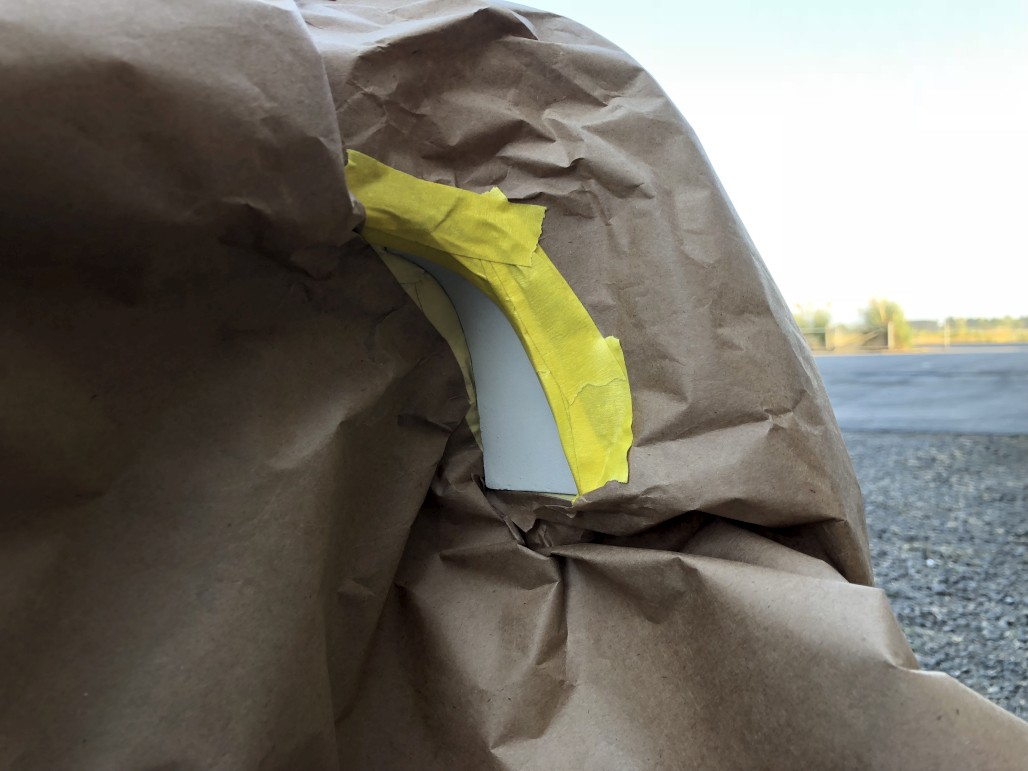
Andrew, If your going to take more then a week or so to install your quarter windows remove that tape now. White or slightly off white masking tape drys out and will not come off with out a lot of work that may damage your nice new parts. When hot it will bond faster then when cool too. Use Blue painters tape for longer periods of staying in place.
WOW! That’s a mess! …and it still looks pretty darn good! ![]()
Seriously, I think there is a lot of laquer thinner in your future. Be sure to wear good gloves so you don’t absorb too much of that stuff!
Small issues aside your Cougar looks great Andrew.
Steven
Dang, I had no idea! Thanks, I will change it over to blue tape.
How silly of me to forget to say… your car is looking great. I can’t wait to see it.
Nice work! Glad to see your sticking with this project over the years!
I feel your pain on the over spray. I had a similar issue with mine but I have yet to get into the engine bay detail so it’s not near as bad. Got some issues under the dash I’ll have to clean up but my painter was pretty good with masking. It’s never perfect tho. The bracket thing always drives me nuts too. I have a couple that got left on and my thinking was I’m sure he will pull them off but didn’t happen. Brake clean helps with over spray too. Not the over the shelf can stuff tho but the 55gal drum of industrial stuff!
Keep plugging away! Love the attention to detail
Little at a time what gets it done.
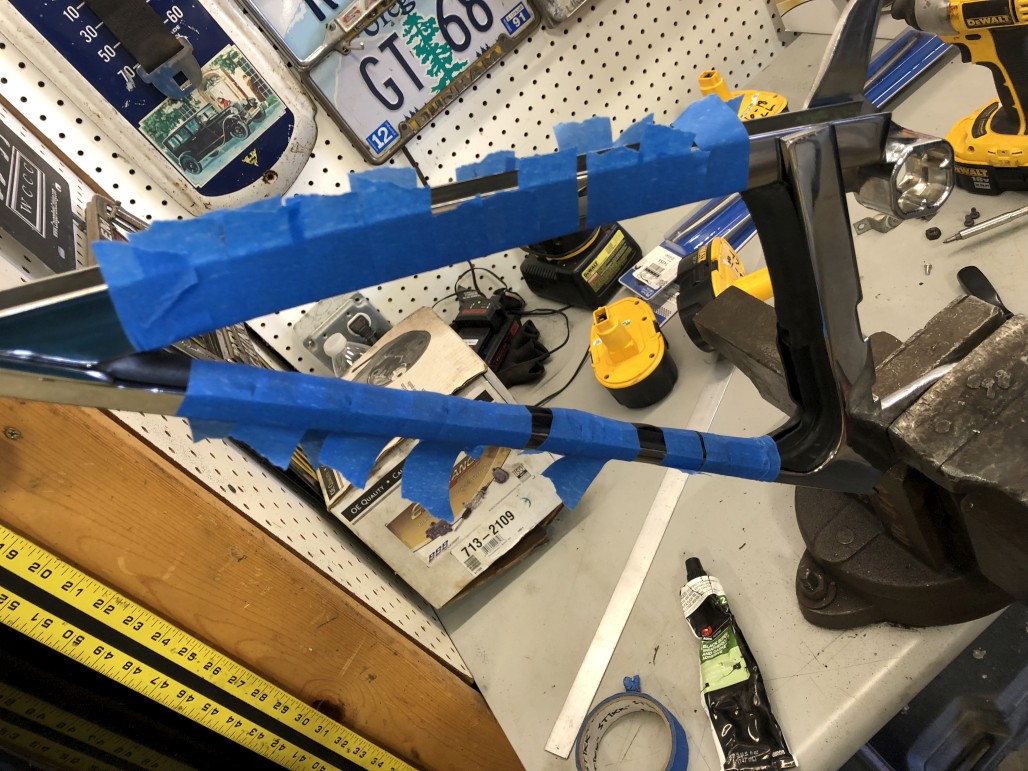
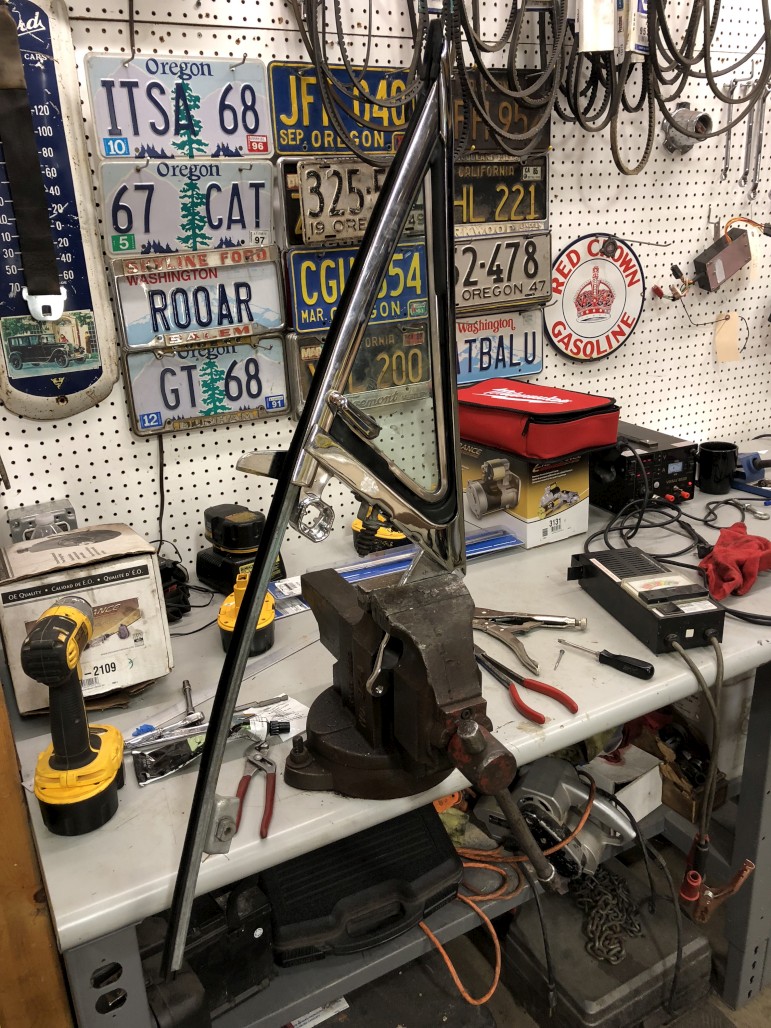
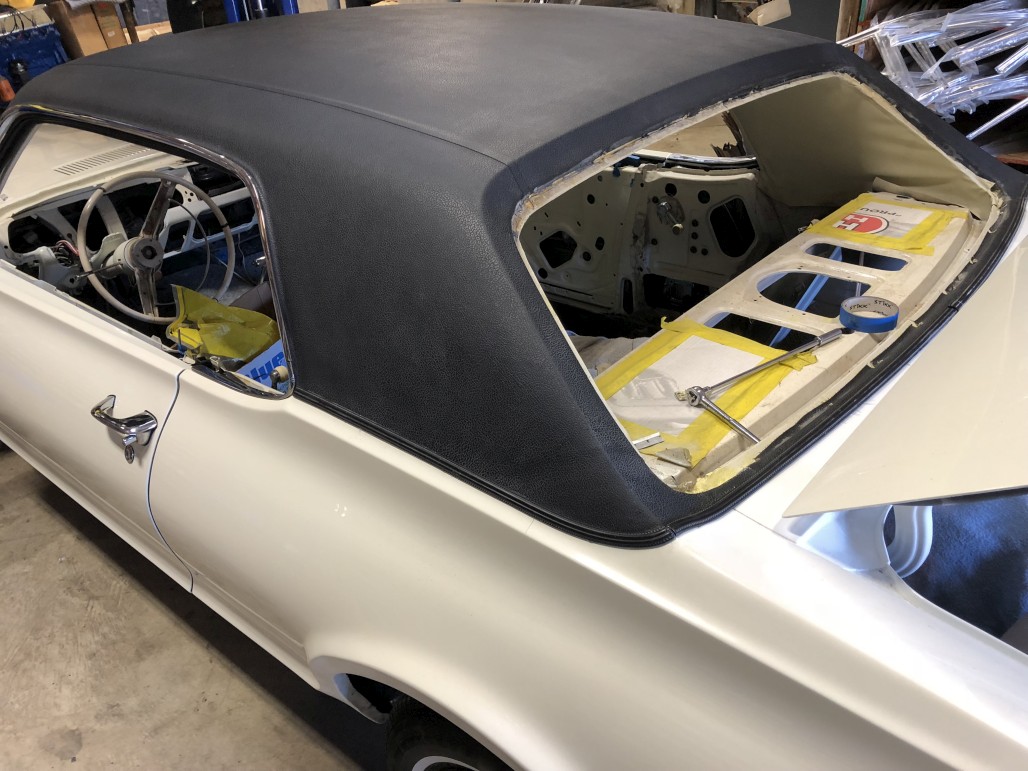
AND NOW: More than you ever wanted to know about quarter window rollers. But maybe this will be useful info.
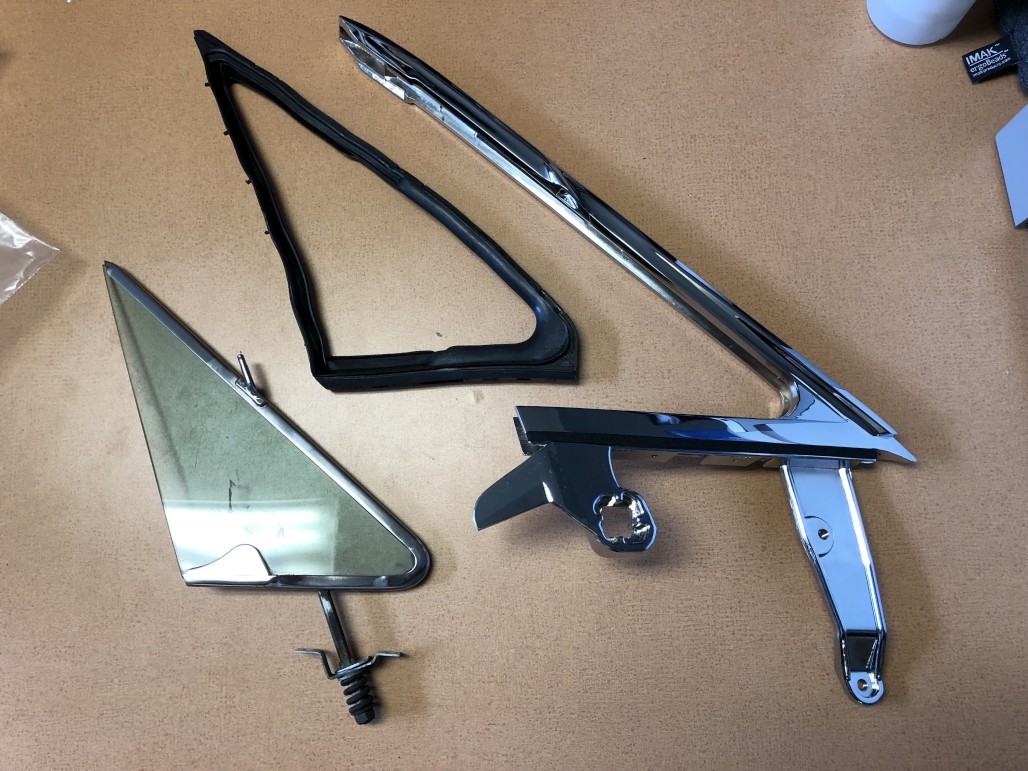
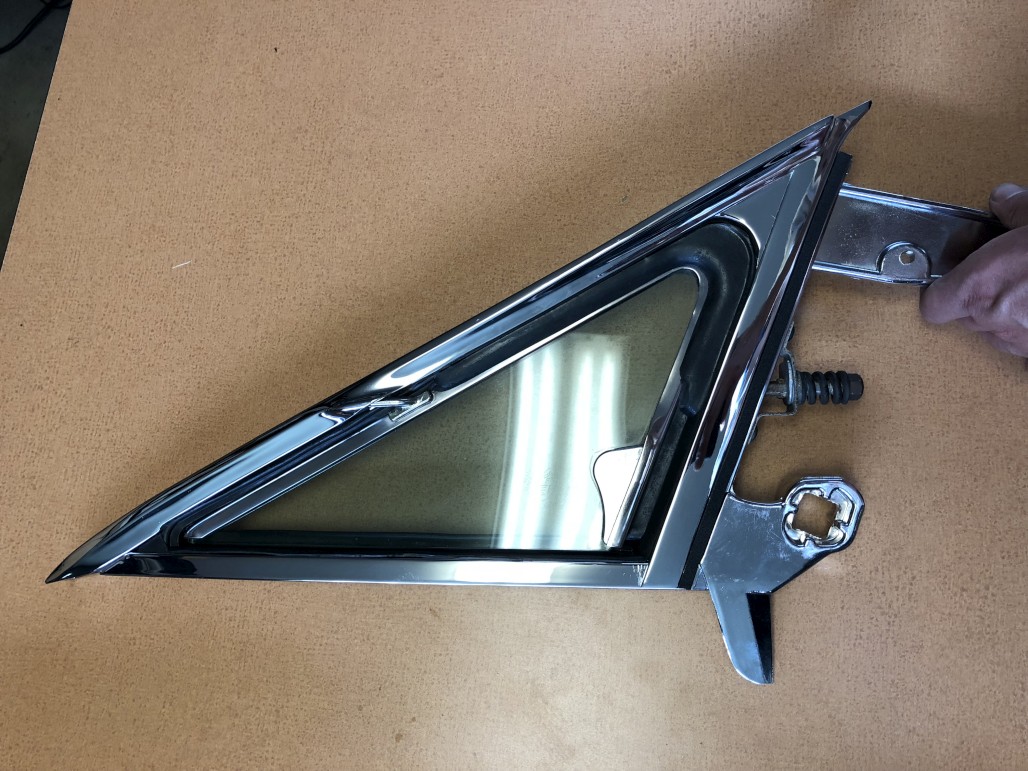
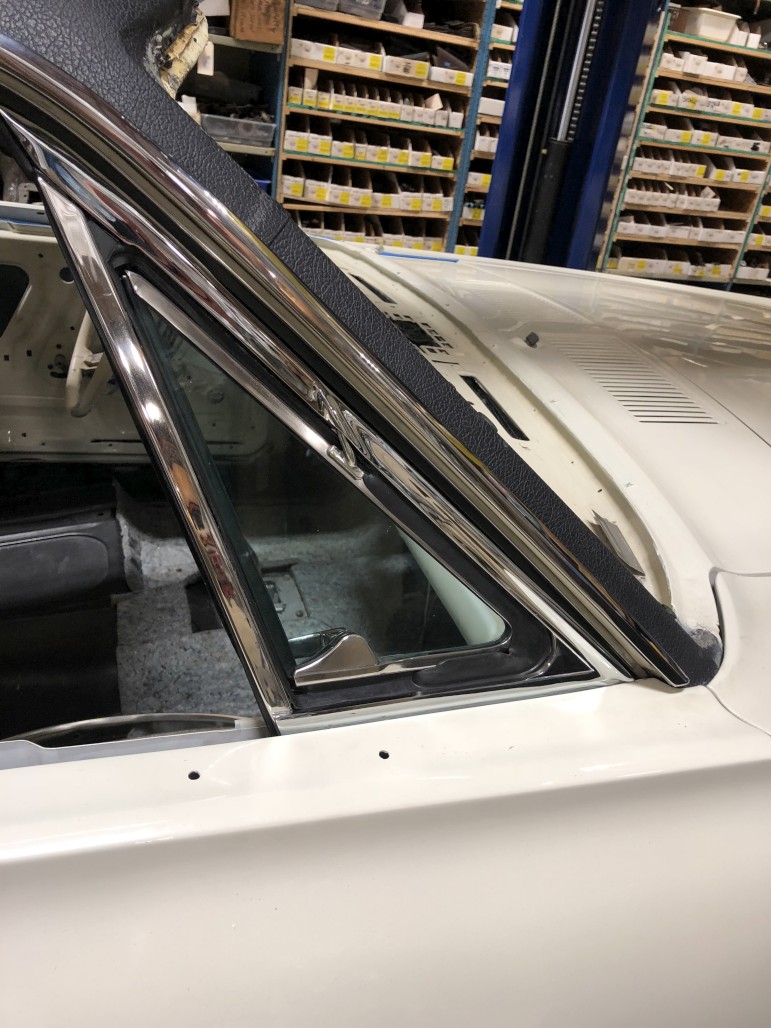
BUT FIRST: A shot of the assembled windows, while I was changing out the tape per Neal’s suggestion.

Oooo shiny.
Okay, so the journey with the rollers began because this one in particular was totally frozen in place and clearly in terrible shape:

The others would spin but felt kinda rough and chunky, so I figured if I’m doing one I might as well do them all. That’s the danger of “while I’m at it” syndrome.
So these rollers are riveted / peened over from the back side. Forgot to take a picture of this, but those center metal roller pins were mushroomed over on the back, nice smooth and round with no cracks. So those were easy to drill and punch out. When I went to put the new ones in, however, this is what happened:


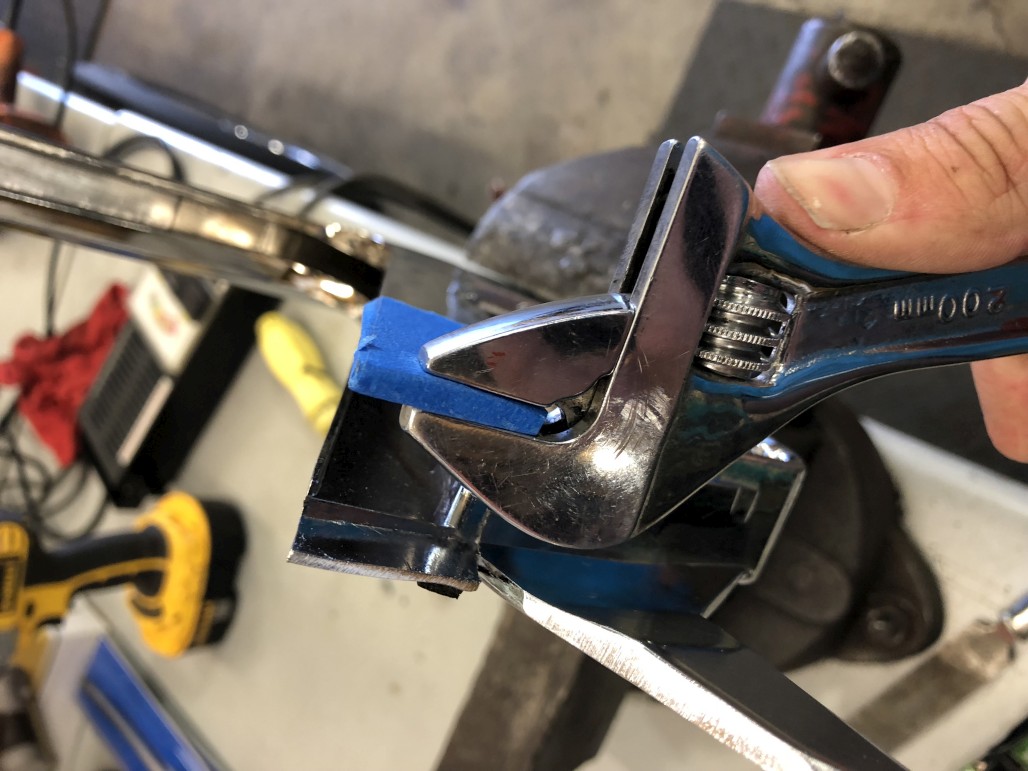
These new pieces are clearly too hard and brittle to be mushroomed over like they’re supposed to be. So I had to go to Plan B. I split them all open on purpose to get rid of the extra material, starting by chiseling an X in to help them split:


Sometimes only half the pieces would come off, so I’d use that as a guideline and grind the rest off:

Here’s what they should end up like. It’s handy that they have a divot in the middle, that made it easy to drill into them.

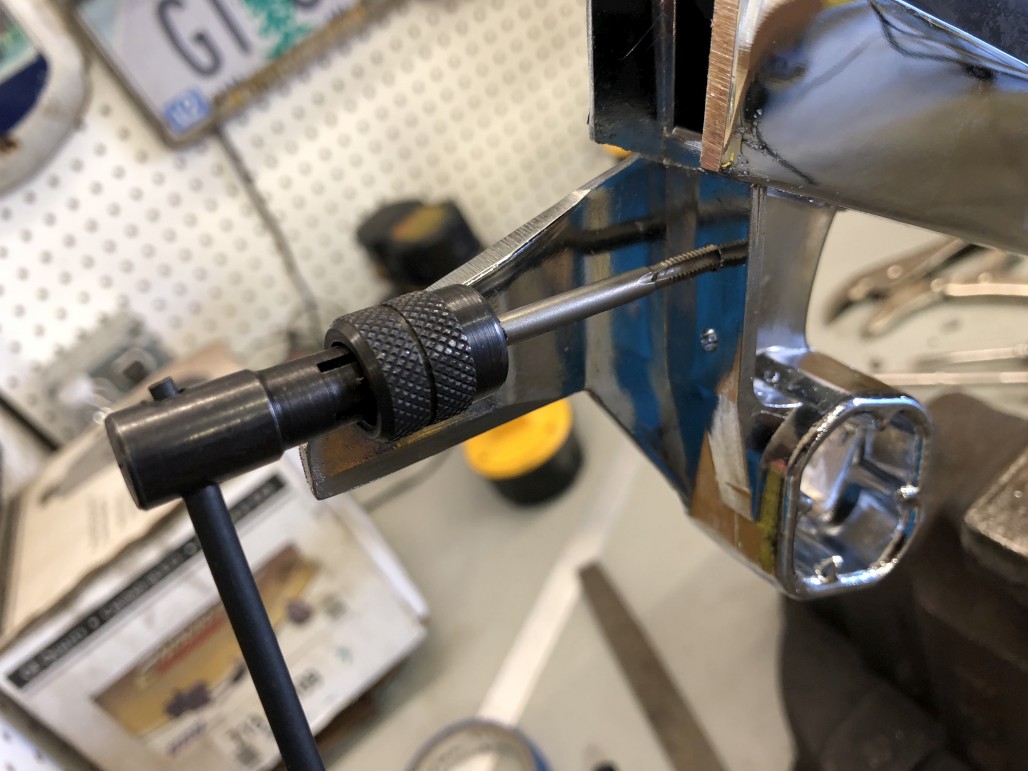
Next, after determining what size screw would fit, I used the drill press and drilled into them deep enough to tap threads into without going through. For threading, I chose 8-32 NC.

Ta-da:

Installed. Ignore the wrong size lock washer, I’m gonna take that out. I think it’ll hold just fine with just a flat washer.


So here’s another “before” shot. I mostly took this to remind myself that the one upper roller is just single, without the second inner roller or spring washer. Not sure why.

After. It’s nice to have these in, looking fresh and spinning freely. I’m looking forward to seeing how well these roll up and down. It better be smooth as butter after all this!

To be honest I’m still not quite done because I broke the tap off in the 4th one I was doing. Gonna seek assistance from a coworker with welding skills and maybe weld a nut onto it and back it out, hoping to save the roller pin. Ugh.
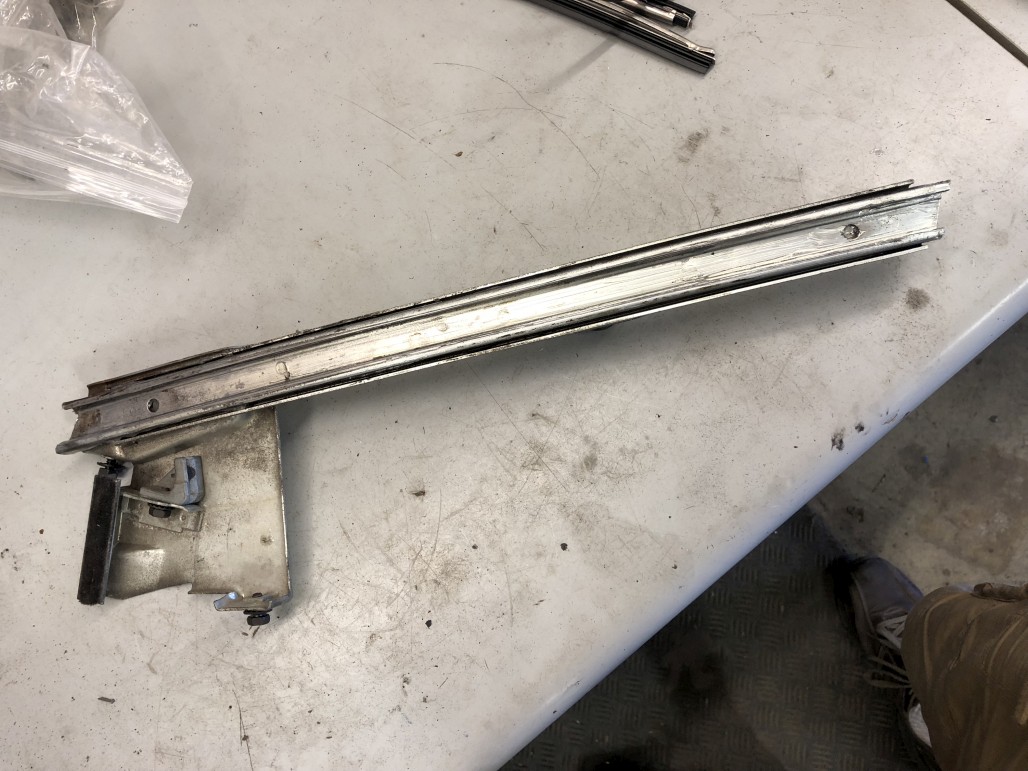
Anyway, on the same note of getting these ready to put in, I cleaned all the gunk out of the quarter window tracks, sandblasted and painted them a natural silver. I know they’re supposed to be zinc plated or galvanized or whatever, but this works to beautify and protect them. Before & after:


Getting bogged down on little detail projects like the rollers is why I’m not going to be done for the show, but that’s okay. I’m of the “do it once, do it right” mindset, because I plan on having this car for a very long time and want to avoid taking it apart again!
Even though they don’t attach like they’re supposed to, at this point I still think I can recommend the new rollers, just because it’s a wear and tear item that can be pretty frustrating when your windows are hard to roll up and down. We’ll see how it goes together though. I’m also putting in new window regulators because my originals are bent and ugly. Hoping to have this little project wrapped up soon so I can move on to the other windows.
That’s a good fix.
Be careful using that grinder, get you finger sucked in there.
That all cleaned up nicely!
I have a question though: won’t the paint in the channels come off and / or gum up the rollers?
I’m wondering the same thing… thought about masking off the channels but then they’d just be bare metal, and I didn’t want them to get rusty. But then I guess once I load everything up with grease, that would prevent rust, so I dunno. I’m going to do a test run before I put everything in and see how much friction & scrapeage there is.
If Andrew used the type of paint it appears he did, it’s like what machine shops use. There’s an aluminum version and a cast iron version, Alumi-Blast and Cast-Blast are two brand names that come to mind. Anyway, these go on very thin. I have used (and recommend) them. Used them on numerous things on Isabel, there is (or at least I have had) no problem with scraping/gumming, etc.
I painted my quarter window tracks as well with the exception of the tracks themselves. kept those bare, the lube for the tracks should be sufficient in keeping any type of rust at bay. Then again here in the southwest I dont have to worry quite as much about all the rust issues some of you guys see.
What do you guys recommend for grease / lubricant? What we have here at WCCC is Sil-Glyde but it technically a brake parts lubricant. Open to getting some second opinions before I go ahead and use it.
Oh and the paint I used was VHT “flame proof” flat aluminum.
I have always used this since I always have a can of it in my toolbox at work
https://truckpartsinventory.com/parts/details/80254884
Well, it’s time for an update! I’ve been staying busy, trying to do a little something to the car every night after work, and on Saturdays too. We just had our Open House at WCCC this past weekend too, so that added to the chaos. And I just found out I have to move out of my house in a month, but that’s another story…
So, I got the quarter windows in along with the new regulators and little slide pieces. Don’t forget the two stops on each window and the stop that attaches to the regulator.


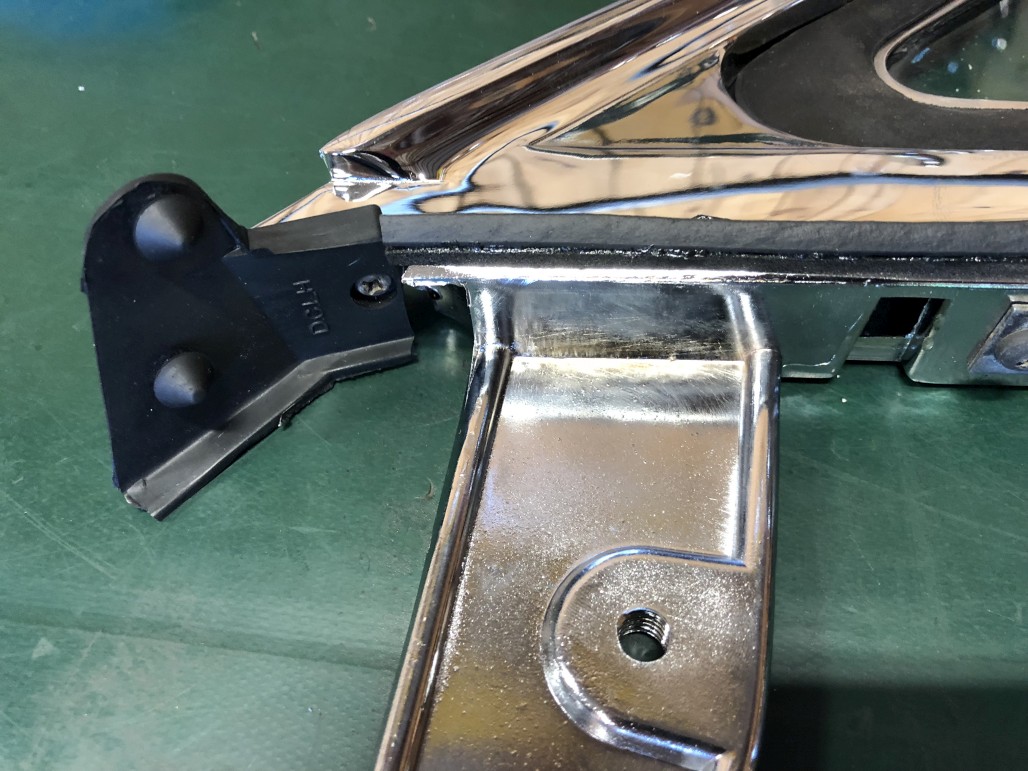
Also don’t forget the lower L-shaped bracket on each side. I blasted and painted these because they were a bit crusty, but still in good shape.

I ended up using the Sil-Glyde grease and it seems to work well. I still need to adjust these windows but at least everything is in place now.
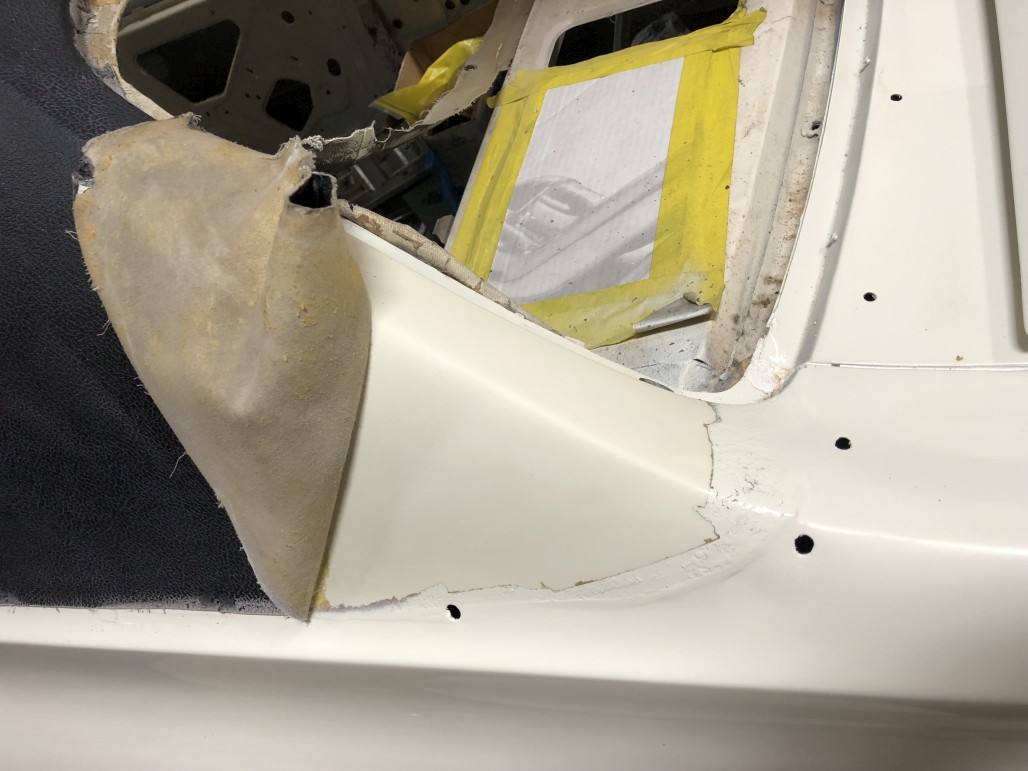
Next I tackled a little project that I was apprehensive about but turned out to be easy. So when the rear window patch panel was installed, nobody ever sealed up the seams, and somehow neither I nor my painter noticed before paint. These are the gaps and holes that were present:


So, out comes the masking tape. I’m starting to think there’s not much you can’t accomplish with masking tape.


I got a tube of SEM white seam sealer from my local automotive paint supply store. Just had to lay it in there and smooth it over with a gloved fingertip. The consistency was nice and thick, easy to work with.

Looks messy, but here it is after pulling the tape:


Not bad! I think the color is close enough that I’m not gonna worry about painting over it, but it would be pretty easy to get in there with a tiny brush and touch it up if I ever feel it’s needed.
Next, I continued working on the back end by installing the rear valance. Using the correct hardware kit, this is how the studs on either end go:

Installation went pretty smoothly. Like most things like this, it’s best to keep things somewhat loose at first, tweak the panel around until it’s in the right spot, then tighten things down.

As you can see, I also installed new reverse lights. I did this after putting the valance on. Quality looks nice and installation went pretty well aside from the gasket fitment. I still need to mess with these to get them to fit better.


So after getting that stuff on, there was an obvious empty spot, and I was excited to put on a shiny rechromed bumper. First step was to clean up my rubber fillers. I’m lucky that my originals were in good shape, though be advised that new reproductions are just around the corner! Here they are before any cleaning:

All they needed was a light sandblasting and a good cleaning with a rubber conditioner.

Install these on the car first:

Then slide the upper corner fillers into the bumper before installing. I had retained my original rear bumper brackets and blasted / painted them, and used a new bumper hardware kit. I was able to get it installed by myself without incident, but I’d recommend having a helper if you can! I also chose to remove the quarter extensions for this task, so there wouldn’t be any interference with the rubber pieces.

Woo! It looks awesome. I’m not gonna lie, after doing this and taking a couple steps back, I couldn’t help but grin and stare at it a while. It’s so shiny, and makes the car look so much more finished (at least from the back).
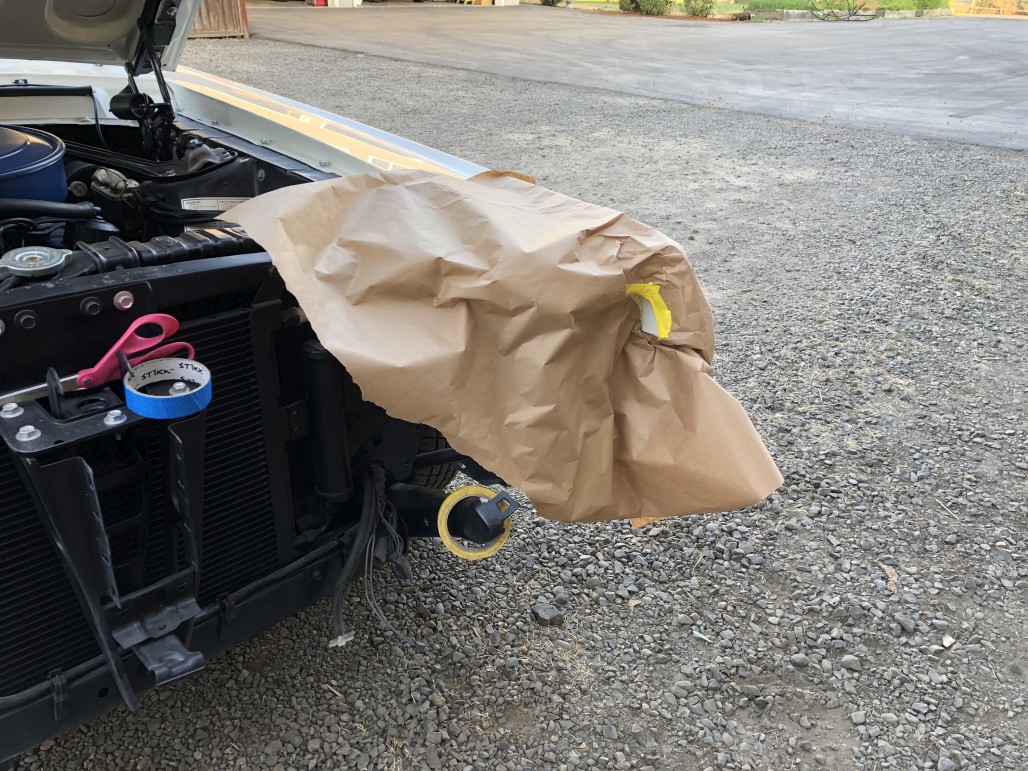
So, next I had a Saturday to mess around, so I wanted to clean up the dirty engine bay. So I pulled outside and covered the windshield opening…

… and pressure washed the engine bay (after covering up the carb and every other opening I could find). Below is a before and after:


Better! Still not as fresh as it once was, but maybe some additional detailing will bring it back close to looking new again.
Okay. Next project was to continue on the windows. I had separated all my windows from their frames because I wanted nice shiny restored frames. On the vent window frames, WCCC doesn’t currently offer a restoration service, so I did those myself (more on that later). First step was to reinstall the glass into the frames. In hindsight, I really didn’t need to remove the vent glass from the frames in the first place, but here we are. I did a little research and found that 1/16" glass setting tape was supposed to be the right stuff to replace the old rubber surrounds. I got mine from Bob Drake, but notified Cleve here at WCCC that it’s something we should look at carrying, so look for that sometime soon hopefully.

Note that you’ll have to make relief cuts for the corners:

So it’ll fit without overlap like this:

I used a little glass cleaner for lubrication, which may or may not have been needed, and pressed the glass and rubber into the frames.

Then trimmed off the excess:

In this shot you can see that it fills the gap nicely, but isn’t wide enough to come all the way up to where the handle is. Oh well, nobody will ever know…

Next I went to town with my favorite tool, masking tape, in preparation for buffing the frames. If these look dull, it’s because I had already sanded them down a bit in preparation for polishing. May not have even needed to do that, but anyway…

Fast forward to another day when I went over to Brian’s to use his buffing wheel. That thing is awesome. Thanks Brian!

While I was at it, I brought along my door locks. This shows a before and after. I didn’t do any sanding on these, just went for it. Not absolute perfection, but nice and shiny! I’m happy.

Another day, I went ahead and installed the locks along with new repro exterior door handles.

Back to window stuff… I started the process of installing new hockey stick trim pieces by digging out my original brackets and cleaning them up. Here’s a before / after (steel wool is all it took):

I’ll make a note here: make sure to test the fit of the new trim against the original brackets, as well as the car itself. I found that the curvature of the new pieces was a little off, and had to gently bend it by hand before securing the brackets in place.

Next I used the double-sided 3M tape that comes with the new trim pieces to attach the brackets. I pressed it firmly in place but also went to town with clamps, which may or may not have been necessary…

Next it was time to get a beltline weatherstrip kit and install the pieces that go on these sticks before putting them in the car.
Here’s how great they fit when you get the first few rivets in…

But I was able to bend it up into place and it fits okay. Also the kit did not come with rivets, so be prepared to get your own. Speaking of rivets, I had trouble getting any of mine to squish over entirely…

…so I gently smashed them down with a small hammer.

Ready to install:


Phew. And now, onward to the door glass. I used the same glass setting tape to install restored window frames. Here’s an after shot (before trimming excess rubber). It’s always a good precaution when working with highly polished parts to throw some tape on it when you’re manhandling it, tapping it with a rubber mallet, etc.

As of now I just have the door windows loosely sitting in the doors, getting ready to figure out how all that goes together with the vent windows and everything.
Back to shiny stuff, I finished off the back end with some restored anodized aluminum trim for the trunk lid and quarter extensions. Woo! Looks great, and it feels good to see the back of the car looking done.


I was also able to install a restored drip rail moulding on the driver’s side, but for the life of me couldn’t get the passenger side on.

So! It was right about at this point that the Open House happened.

Kurt Lawrance from KTL Restorations flew out from Virginia to install my other drip rail moulding, and Greg Taylor and son Alex came along to consult:

Actually, they were all there for the event and Kurt was kind enough to lend a hand to me and several other people there. It seems like a simple thing but I’m super grateful for the help, and I think it’s a cool bragging point to say that Kurt worked on my car!

This took a surprising amount of finesse to get on without messing anything up. We had a bit of an audience, including John and Cameron Benoit.


It looks great, thanks Kurt! I may have never gotten that thing on!
It was a fun and busy weekend. A little disappointed that I didn’t have my car done in time like I had hoped, but I had my hands full running around with cameras anyway.
That brings things about up to speed. I’m still playing with the vent windows and trying to get everything to fit in the reproduction chrome frames. More on that later.
Wow, what a great job on the photos and progress on you car. Then I noticed that’s your real job so no wonder they are so good!
This is my first post, just registered tonight.
I am the proud new owner of a 68’ XR7.
I am starting my project from the backside, taking off everything. I ran into a problem removing the back valance.
How the back do I get access to the two main end bolts you show in your fine photo??
I looked underneath and not sure what to do.
Thanks much,
Welcome to the site. The two end bolts go through the lower quarter and there is a nut on the back side. Reach down into the trunk drop off area from inside the trunk and you will be able to remove them.
Time for another update! I’ve been picking away at things as best I can, and things are going pretty well. I’d like it to be going faster at times, but it takes however long it takes. I’m going to split this update into a couple parts, starting with the miscellaneous.
Continuing on the window theme, I started to assemble the vent windows. My originals were quite pitted, so reusing them wasn’t really an option. I’ve heard that rechroming original frames doesn’t usually turn out too well because of how the polishing process takes away a lot of the detail and edges. So I decided to give the reproductions a shot. This was a mixed bag and I’m still not totally sure how I feel about them now after assembling everything. They do look good and have a nice shiny chrome finish, but there are some issues and challenges with fitment. Anyway, here’s the passenger side before assembly. I opted for the premium seals.
And here it is mocked together along with a restored vertical division bar (yes I scratched it a little ![]() )
)
So that all seems fine and dandy, right? Well, not quite. Once I tried to put on the vertical division bar, I found that the repro frame piece didn’t really line up with it at the bottom (hence the scratches). So in order to get a better fit, I had to carefully twist the lower back ends of the window frame. This was the safest method:
Next - originally the division bar would have been riveted to the window frame. But there’s no way to get the head of a standard rivet gun into the channel to put new ones in. So the only option is to tap threads into these holes and find the flattest screws possible to attach the bar to the frame.
The flattest screws I could find ended up being allen head screws. In hindsight, this was a bad idea, especially driving them in with an electric driver. Stripped the heads pretty badly on the way in. Guess I won’t be taking this apart again… should have looked for torx or something.
Anyway, the reason those need to be low-profile is that the front channel for the door window clips into the division bar and sits right on top of those fasteners. Before that, though I had to get the seal and glass back in. For some reason, all my messing around, taking things apart and putting them back together resulted in a fit that was not as good as the first mockup. I ended up having to glue the seal in with weatherstrip adhesive to try to keep it in the right position. It still doesn’t look great as I write this, but not sure if I want to deal with improving it further at this point. Pain in the butt.
Then I could put the glass back in and install the glass rail and a new felt strip / window run insert.
Don’t forget these little vent window to door seals. I also opted to attach the long narrow door shell seals on top of the foam ones that came on the repro frames. This is because I found that there was still a bit of a gap between the window frame and the door shell when doing some test fitting.
Those front corner seals suck. Or at least maybe something is up with the design of the new window frames. I’m not sure. But when installing the vent window assembly in the car, I had to stretch this seal waaaay forward of where it’s supposed to be, in order to clip the two “nubs” into the door. Weird. I still need to do some adjusting, but here’s a shot of it in the car. I still haven’t done the other side because I moved on to other things.
Also cleaned, lubed and installed the back slider for the door glass, and installed the door glass itself. No pic of that yet. Further adjustments are still needed. That whole door window system is ridiculous and difficult in every way, I really don’t like it. But it looks nice when it’s all together.
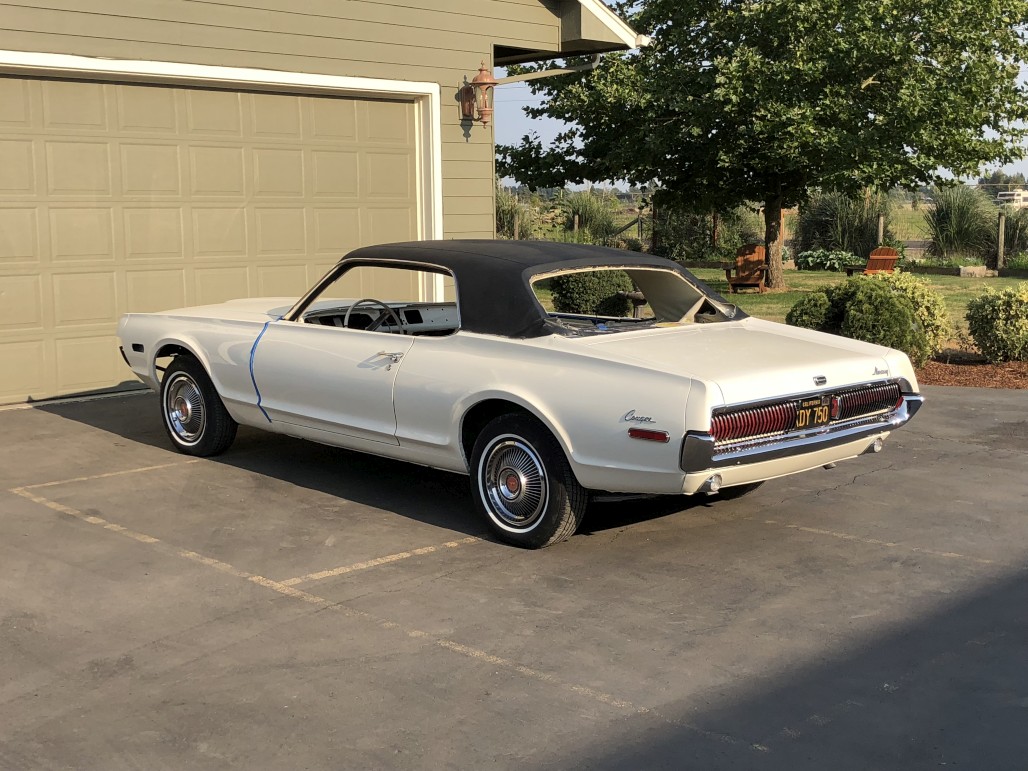
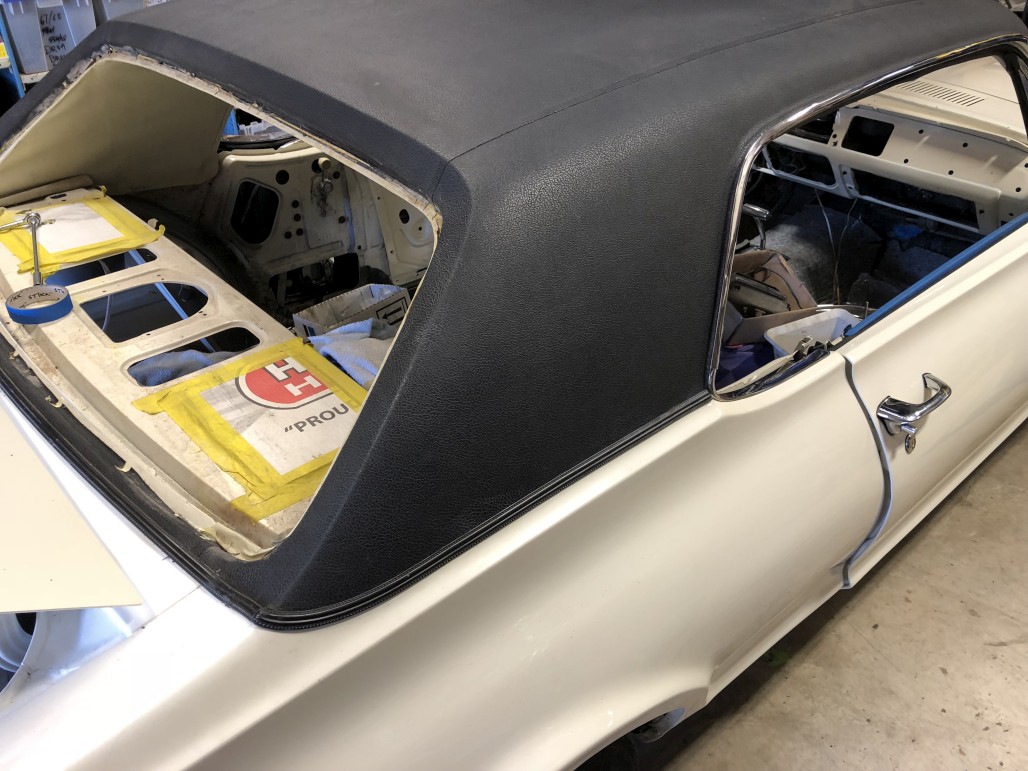
Alright, that’s enough of the vent window saga for now. Next, I finally got something done that was bugging me for a while - sticking the back of the vinyl top back down! I was a little worried as to whether it was doable and that the top would still be okay. I called in some help for this one, our local upholstery guy. But first, here’s a rarely seen outdoor shot of the car:
The first step was to clean off the old glue from the body and try to smooth the transition of the old and new paint jobs.
Then Matt the upholstery dude stopped by and went to town with his heat gun and spray-on contact adhesive, did some stretching and finessing, and boom. I jumped in with my trim pieces and we cooperated to get those installed. Very glad to have this step done. Thanks Matt!
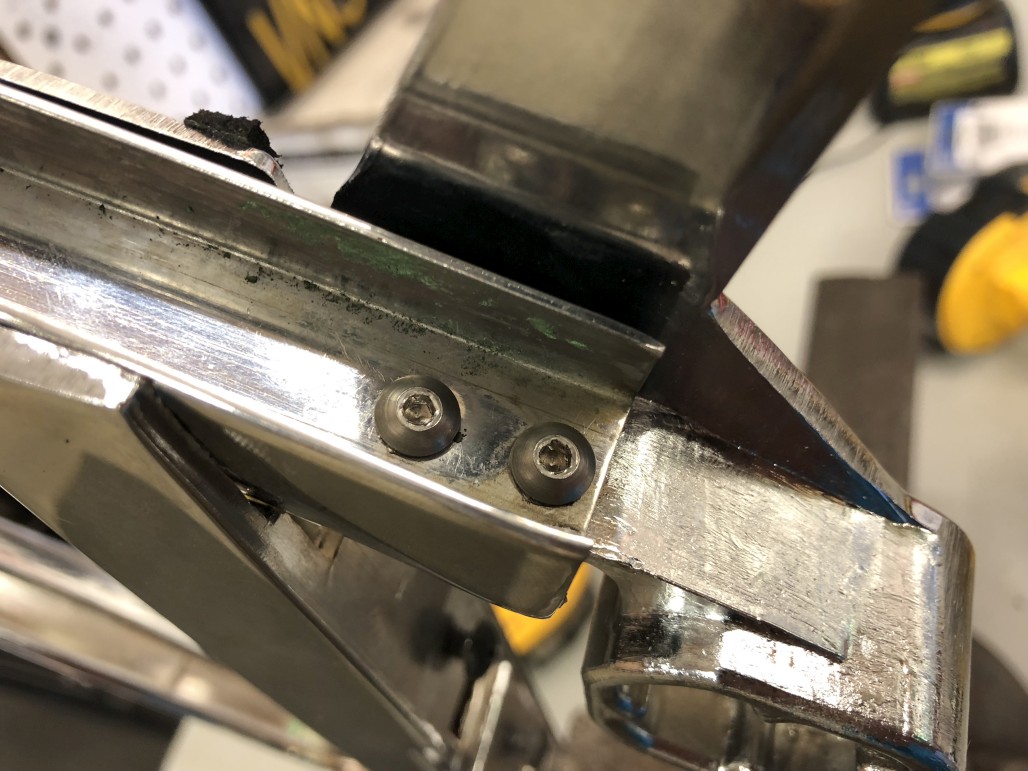
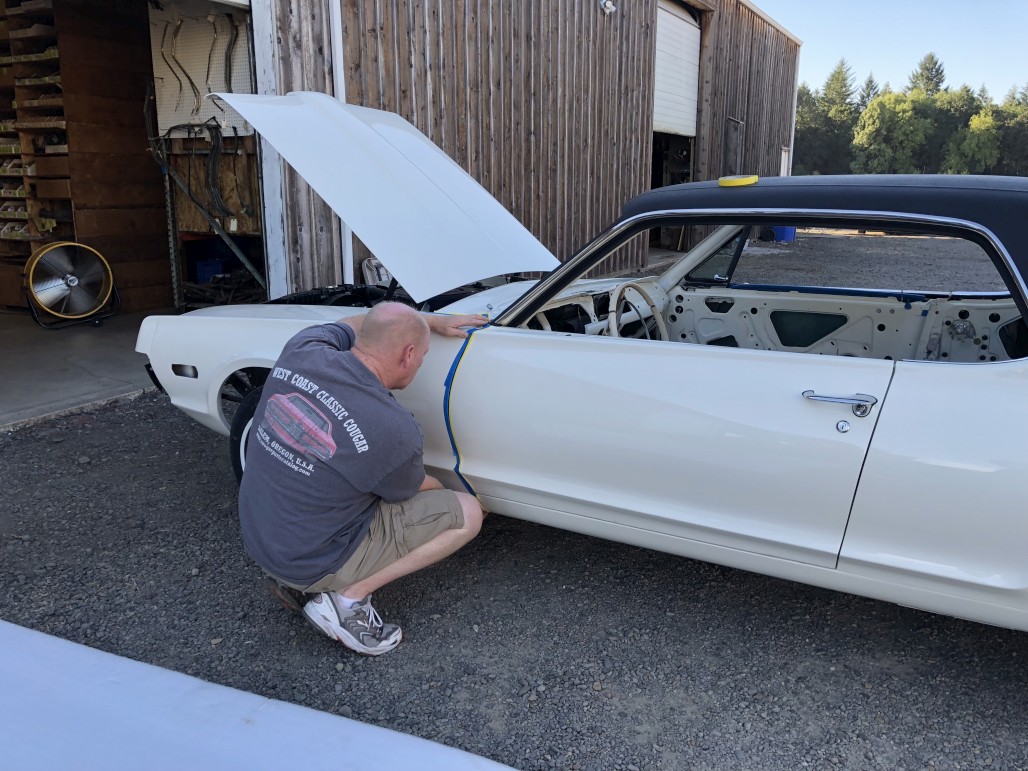
Next random thing is one of my FAVORITE things - undoing and redoing work that you paid someone else to do properly, and they didn’t. ![]() So when my car was at the restoration shop after rescuing it from its first ill-fated paint job, one of the main things this shop worked on and billed me for was panel alignment. So… imagine my surprise when I’m installing and test fitting windows when I find out that the doors seem to be sagging further and further down every time I open and close them. Well… came to find out that the door hinge bolts were all just a step above finger tight
So when my car was at the restoration shop after rescuing it from its first ill-fated paint job, one of the main things this shop worked on and billed me for was panel alignment. So… imagine my surprise when I’m installing and test fitting windows when I find out that the doors seem to be sagging further and further down every time I open and close them. Well… came to find out that the door hinge bolts were all just a step above finger tight ![]() The only thing to do was to remove the fenders, re-do and perfect the door and latch fitment, tighten things down, and then reinstall and line up the fenders again. Had to do this on both sides. It sucked that I had to go back and do this, but ultimately I’m glad to have it right now. The doors fit and shut so much better now.
The only thing to do was to remove the fenders, re-do and perfect the door and latch fitment, tighten things down, and then reinstall and line up the fenders again. Had to do this on both sides. It sucked that I had to go back and do this, but ultimately I’m glad to have it right now. The doors fit and shut so much better now.
It’s largely because of Darrell’s encouragement to take things back apart that I even did this. He was there to help out a bunch and he has a good eye for panel alignment and knows how to move things around to get them to fit right. Thanks Darrell!
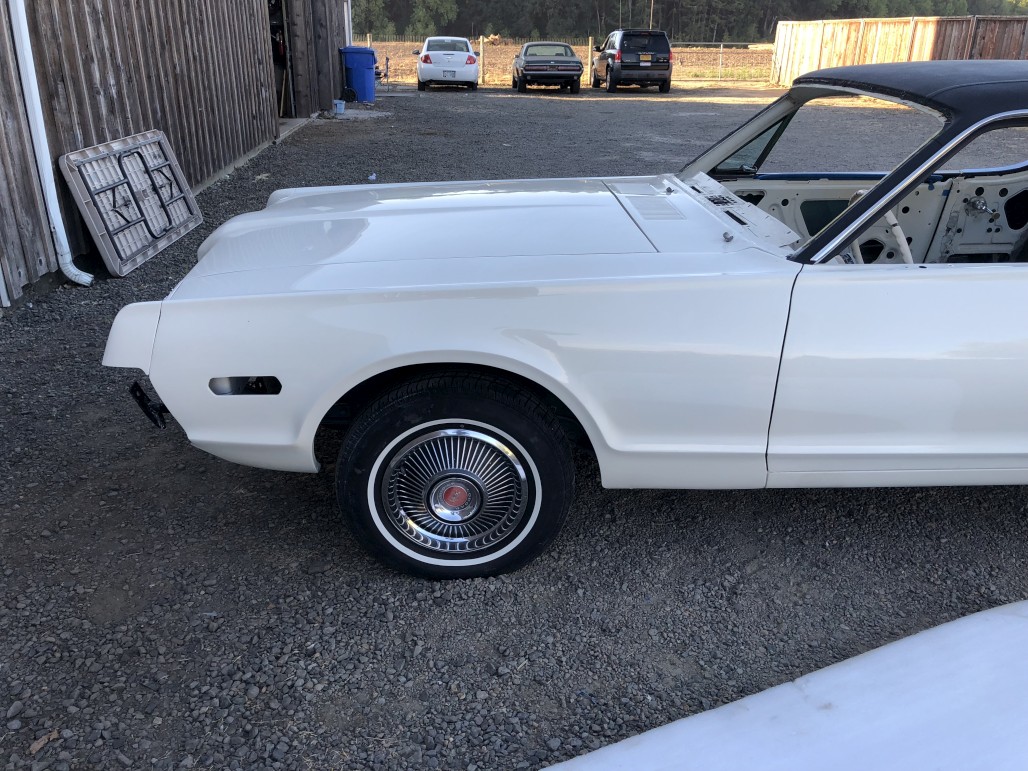
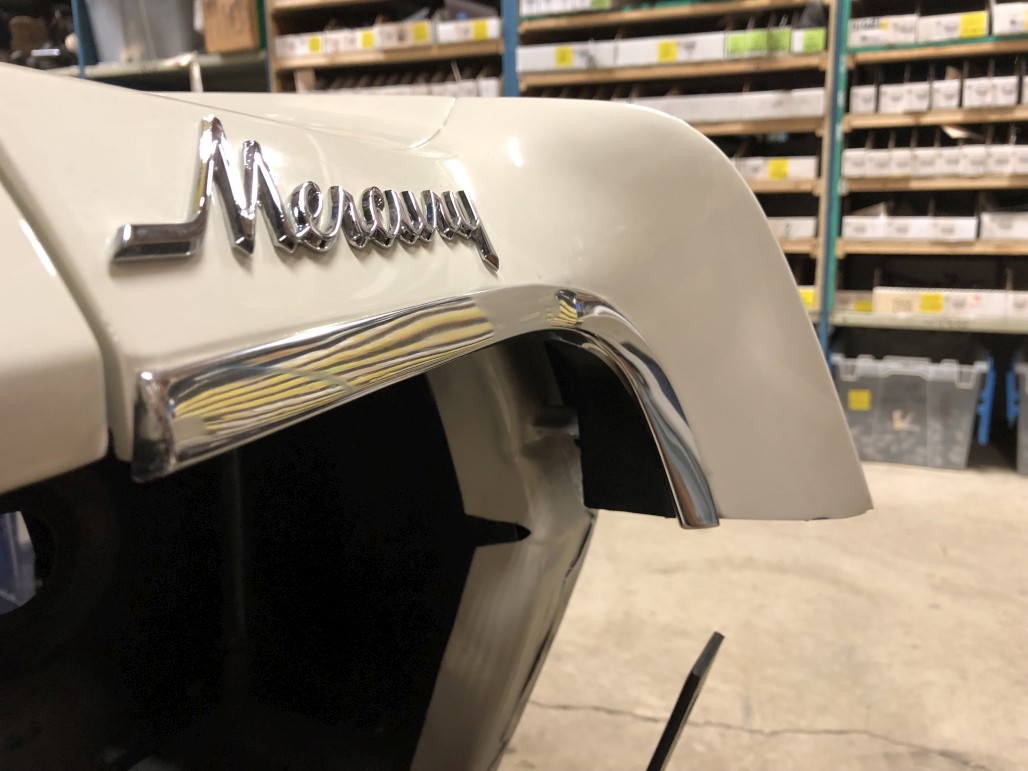
Also, while the fender was off, this was the ideal time to install the restored trim (I got the whole six piece restored trim set) and Mercury emblem on the fender extension, and get that lined up and installed with new seals, before putting the fender back on. I also replaced the hardware with new stuff.

This is about as good as it’s gonna get. I like it.
Other side in progress:
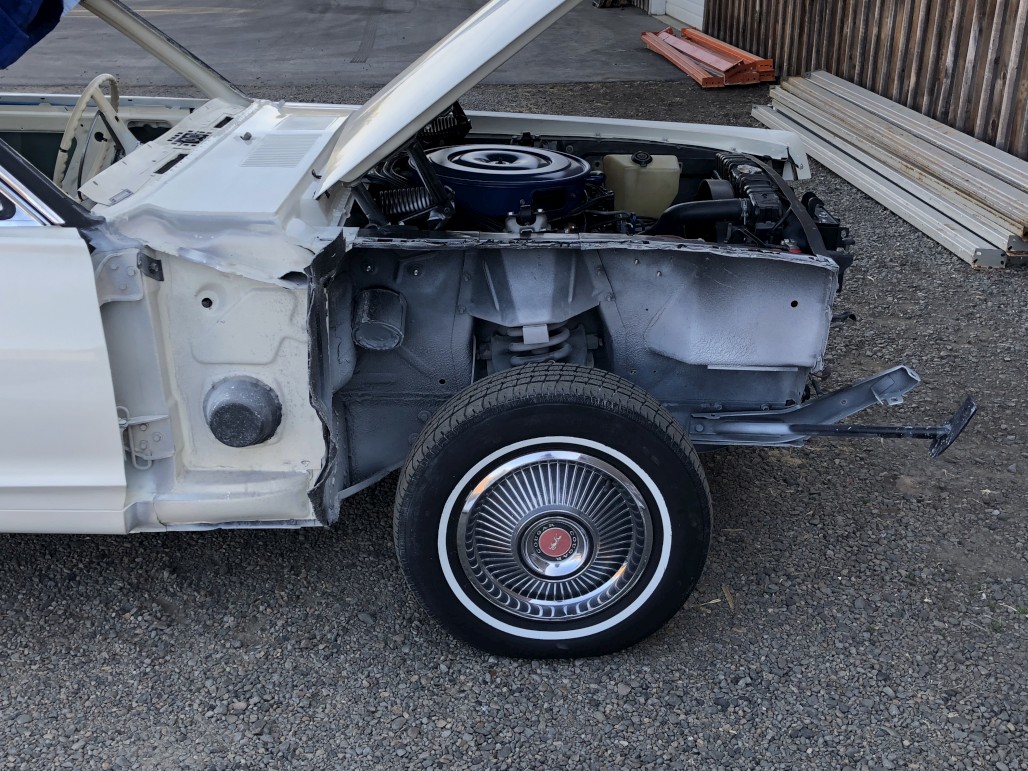
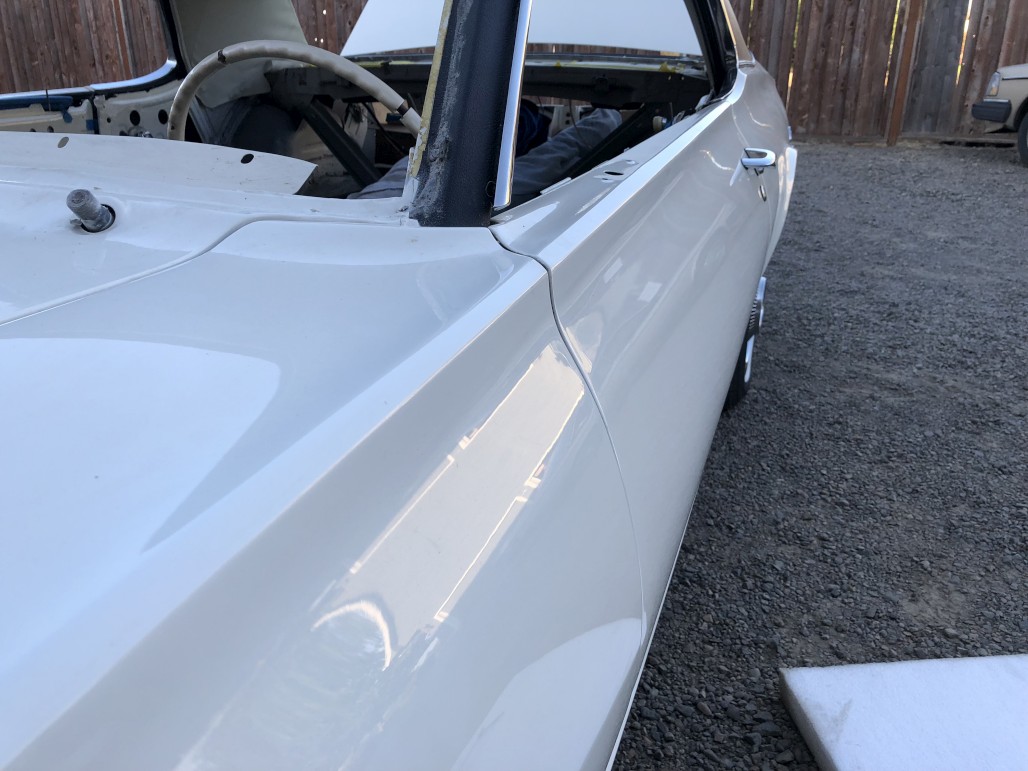
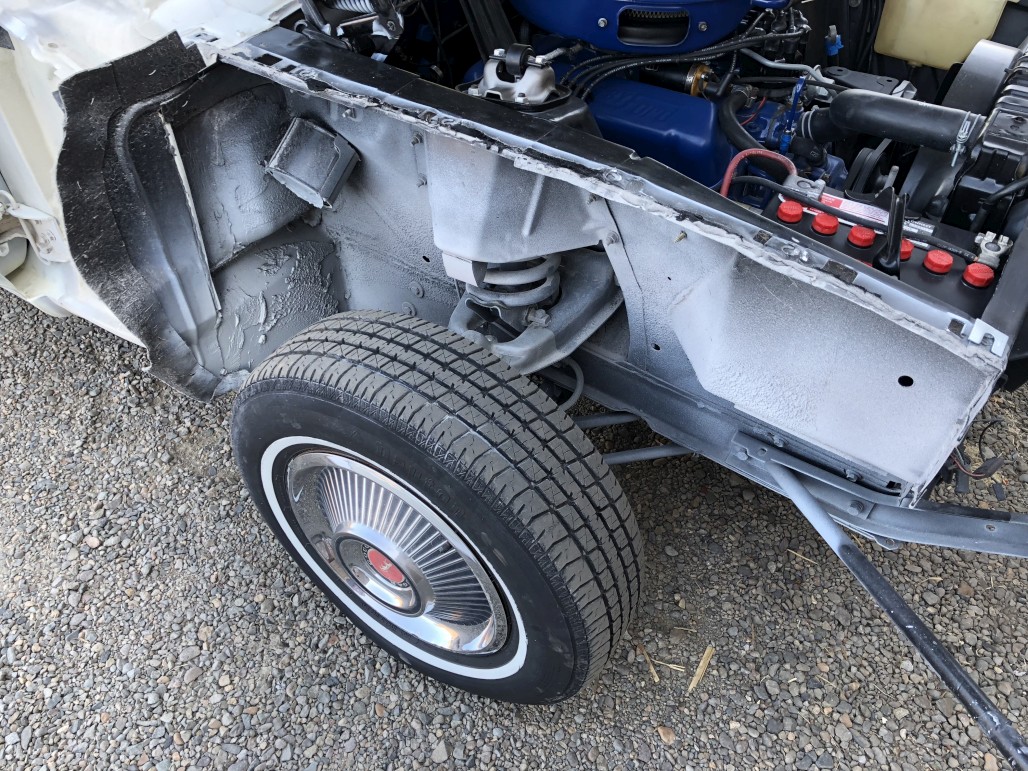
How about that overspray? ![]() Once again, this is why you don’t do things in the wrong order, kids. If you look a few pages back you can see how nice this area looked with fresh black undercoating and all new front suspension components. Now it’s just a mess and looks like crap. And I’m too worn down to do anything about it at this point. Just wanting to get this project done. Oh well… maybe later I’'ll re-detail this area.
Once again, this is why you don’t do things in the wrong order, kids. If you look a few pages back you can see how nice this area looked with fresh black undercoating and all new front suspension components. Now it’s just a mess and looks like crap. And I’m too worn down to do anything about it at this point. Just wanting to get this project done. Oh well… maybe later I’'ll re-detail this area.
Anyway, it was at this point I realized I had forgotten a little detail step. The inside corner of each fender extension, behind the trim, is supposed to be painted satin black. I still had the passenger side off, so that was fairly easy to do, but I had to do the driver’s side in place. Well, nothing some liberal masking can’t fix.
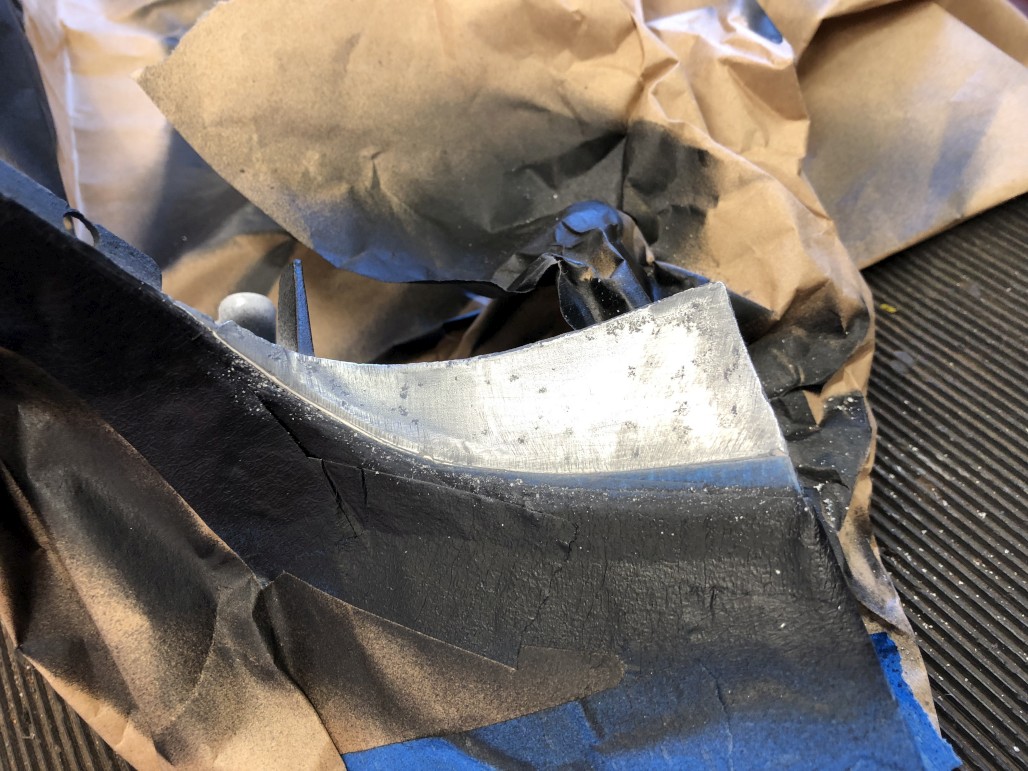
I’ll go ahead and save some time and pictures here by saying: the first attempt didn’t work out so well. The black paint (SEM Trim Black) reacted with the existing white paint / clear (and yes I scuffed it and used wax & grease remover before spraying). It turned out all crinkly and bubbly. So, out came the acetone, and I was able to pretty easily strip these sections back to bare metal to start over. It worked out perfectly after this. Here’s a shot of the other side stripped:
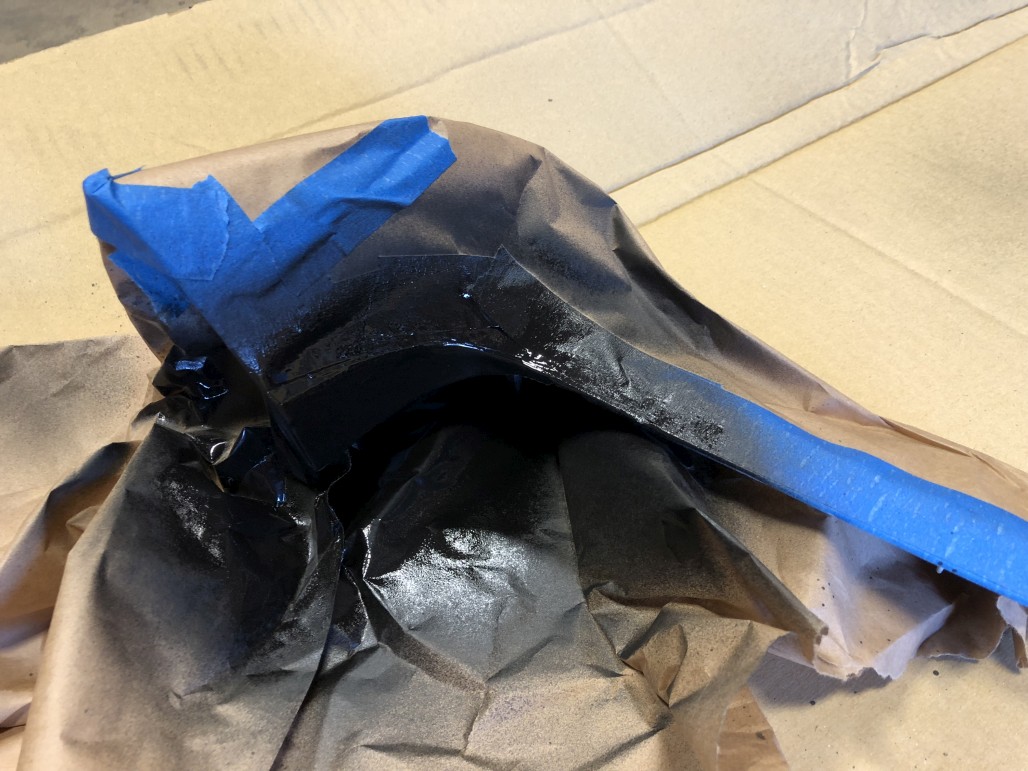
Painted:
And a finished shot of the DS:
That does it for part 1 of the update. I think part 2 will have to wait until tomorrow. There’s a whole 'nother saga coming, but it’s a fun one (mostly). For now, I’m going to actually go work on the car!
Alright, part 2 of the update. Grille restoration! This is something I’ve been looking forward to for a while. The grille is basically the crown jewel of the whole car, as I think most of you would agree, so I wanted to make sure it was nice.
First, some “before” pics of what they looked like to begin with.


So, months ago, I attached my grilles to a parts car and installed the straightening kit to get things back into shape. Sadly WCCC doesn’t carry this anymore but I got lucky and found an older set on the shelf. I let it sit on the parts car for months and checked it a couple times, making small adjustments to the spacers. Also labeled it to make sure nobody messed with it, it is a junkyard after all!


Passenger side was worse. These things helped a lot though, and eventually when I took the spacers out months later, things stayed straight!


On the PS, you can see that the eyelid still isn’t quite lined up with the inboard section. I dunno if that side is more bent up than the other, or if I didn’t do enough adjusting on that side. But more on that later.
Meanwhile, of course I sandblasted and repainted the buckets and all other loose pieces. Didn’t take pics of all of that process but here’s a couple.


I also had some foresight here, for once. A few years ago I was more of the mindset that I wanted things to be all original and stock. But the idea of electric headlight motors won me over. I want my grille to stay straight once I do all this work, and to reliably open and close without robbing engine performance. To do this conversion, there’s only one hole you need to drill in the passenger side grille bucket. Simply line up the two existing holes and mark the third. I’m not sure why it’s designed this way, as the driver’s side just utilizes the existing two holes.

Anyway, once everything was relatively straight, it was finally time to completely disassemble.

This video shows how to take off the chrome bars, and this one deals with the walking cat emblem and other grille freshening tips.
My original chrome bars were pretty tired.

Original walking cat emblem for comparison:

Sandblasting the grille pieces took a long time. The original black paint on these was really baked on.

Gave them all a good wipe down with wax & grease remover, then hit them with the SEM Trim Black. Have I mentioned I love this paint?


So next, I had to take the plunge and buy rechromed grille bars. It’s expensive but for me this was mandatory. Everything I’m doing is an attempt to make the car brand new and shiny. Skimping on the brightwork is not an option.

Shiny! The only slight downside is that the edges all get rounded off. Originally these bars had more of a square edge. Oh well, the shiny-ness far exceeds any original grilles at this point.

Being freshly chromed, they come completely bare and need detail painting. I debated a lot about which way to go. Should I go with the original argent silver sides and black horizontal sections? Or just black out everything but the faces of the bars? A third option I hadn’t considered hit me when I placed them on the freshly painted grille sections…

Option 3: leave the sides of the bars chrome, and just black out the horizontal support pieces and tops. It’s a lot of extra work for a subtle difference, because the sides actually appear black when they’re against the black background pieces. But they will catch light and reflections at certain angles, and I think it looks great.
So, the masking marathon began. This took a lot of painstaking hours.


Now, this is where I wish I would have had the guts to put these in the blaster and lightly blast the exposed chrome to rough it up before painting. I was really dumb not to do this. However, I had painted my taillight bezels with the SEM paint over bare chrome, and it stuck well. I had heard that this paint has self-etching properties, so I was banking on that. But these rechromed items are so highly polished, I should have taken that extra step. Anyway… paint turned out nice!


You can see in the pic below that I didn’t get super crisp lines on the sides here. The tape pulled up a little paint with it. Not a great sign for adhesion. But I’m hoping it’ll hold up fine as long as I’m gentle with it.

Here’s a better shot of these all dry and ready for assembly:

Time to gather up the fasteners. This time I was smart enough to bag and tag everything. If you’re doing this, it might be worth just getting new screws for the grille bars. I found that some of my old ones were too short and didn’t reach all the way through, but was able to scrounge a couple replacements where needed.

Also important to note - after rechroming, it’s pretty much mandatory to re-tap the threaded holes. These are 8-32 NC.

Ta-da! Oh yes. Very satisfying moment here.

Also mandatory: new Cougar emblem / corral / decal for the RH eyelid.

Time to put all the little bits and pieces back in. I was able to reuse most of my old stuff. If you find you’re missing any of the hardware, WCCC has everything. Here are some links:
Headlight adjusters: used / new
Headlight springs: used
Screw for headlight cups
Headlight retaining ring, used


I also reused my original nylon inserts and screws for the moment, for the rectangular cover pieces. Those are fairly easy to replace later if needed. As for the headlights, they’ll work for now, but I’m considering doing the H4 halogen and relay upgrade kit. For the moment though I’m just trying to get things together and functional.

Next it was finally time to re-introduce the headlight doors to the larger grille sections. I ran into some issues here and have some important tips to share.
Firstly, clear out any paint from the brass inserts that the eyelids pivot in. I didn’t do this at first, and the first time I installed them, the doors were binding up pretty bad. You want them to swing open and closed with almost no resistance. So this is how I cleared them out:

Next tip, DON’T OVER-TIGHTEN THE PIVOT BOLTS

Yeah. This was a moment accompanied by many bad words. I took a deep breath and went into surgeon mode. I got pretty lucky, and was able to drill it out without compromising the threads in the grille. If that hole got ruined, I would have had to find a whole 'nother grille half and start over. Not good, but crisis averted. I re-threaded the hole on the grille afterwards and all is well.

So, what’s the right way to do it? You might notice on the pivot bolts there’s usually some remnant of red threadlocker visible. This is for a reason. These are just meant to be snugged down, and the threadlocker will keep them from backing out. Don’t forget to put some grease on the moving parts as well, for good measure.
Also almost forgot to mention something I found out later. Put the eyelid adjusters / bumpers in before you reattach the eyelids to the frames. The back one is very tricky to get in otherwise. When I did this, we were out of stock on the premium bumpers and elongated adjuster bolts, so I reused my original adjuster bolts and went with the economy bumpers. Hopefully they will hold up ok, and it seems like I have just enough travel on the original bolts to get the eyelids where I want them.
Anyway, finally I got things married back together:

Here are the buckets with the electric headlight motors installed. Now is the time to put them in, much easier with the grilles off.

And here they are reassembled. I cleaned up and reused my old hardware in this case, but there is a handy hardware kit available for this purpose.


Woo! Also worth mentioning - with the electric conversion, you only need two of the eyelid springs instead of the original four. It will still keep the eyelids in place and prevent bouncing, but put less tension and pressure on things, which could be a potential factor for things re-bending. Install each spring in the inboard position.
Anyway, here’s my car, ready to receive its refreshed grille. Also note that I installed the restored hood lip trim pieces.

Installed! This was a little fiddly but I got it on there, along with the center piece. Still need to do some adjusting so everything is even, but it’s looking pretty good. You can also see that I’m now trying to correct the alignment of the PS headlight door a little more.

I might as well link to the fasteners I used here. Here is the grille to body hardware kit and here is the center grille hardware kit. Take a look at yours and see if those weird studs are still in place on the core support. 3 out of 4 of mine were gone. The new ones are a little tricky, not a super tight fit, so you may have to fiddle with them a bit while tightening the nuts down. Anyway, more pics.


Lastly, and most recently, I put on the stone guard. It didn’t just drop into place, the middle tabs needed some bending to get them to line up to the grille. Maybe that’s why it has a little bit of an arc in the middle. I may need to do some further adjusting on this piece. It’s crazy how everything on these cars has some wiggle room in every direction. Not at all like today’s precisely engineered cars.

So that’s where I’m at currently! Next step will be to put on the front bumper, which is pretty exciting. I’m still leaving the grille stuff loose for the moment. Once the bumper is on, that will give me a reference point to make sure the grille pieces are straight, as well as the stone deflector.
It’s quite a crazy process, but this step was pretty satisfying to get done. More updates to come eventually!
Very nice work! I did the same thing except I went with new vacuum actuators and a new vacuum hose kit. But I really like what you did.