Wow, awesome! I guess I missed the post where you had it back out on the road. That’s great!
Maybe now I’ll see you at Cars & Coffee in Wilsonville some time?
Car looks great. Excellent update posts, as always. Can’t wait to see what’s next ![]()
Wow, awesome! I guess I missed the post where you had it back out on the road. That’s great!
Maybe now I’ll see you at Cars & Coffee in Wilsonville some time?
Car looks great. Excellent update posts, as always. Can’t wait to see what’s next ![]()
What is wrong with the sending unit?
Thanks Mike! Not a bad idea, I’ll have to see if I can make it one of these times.
I’m kinda mystified… repro stainless steel standard sending unit (this one) was reading about 1/4 tank with the tank full of gas (right after filling up at the station, 10+ gallons and it splashed out of the filler neck a little). Tested the gauge to make sure it was ok by grounding the wire for the sender, which made the needle peg past full. Also did the test light on that wire and got the pulsing signal, so that all seems fine. Once the tank was close enough to empty, I drained it and removed the faulty sending unit. Took it to the bench and tested the resistance from empty to full and it all appeared to be within spec. Tested the float and it was fine. Even plugged it back in to the car using a jumper wire for ground and played with the arm, and got it to read full on the gauge. So I have no idea what the problem was. For now I’ve installed one of the cheaper generic units (this one) which also seemed to test ok, though it’s not as well built as the stainless one. At this point I don’t know for sure what the status is, since I only had about 4 gal from the fuel can to pour in. It’s reading around 1/8 tank, somewhere in there. Guess the only way to know for sure is to go fill 'er up again.
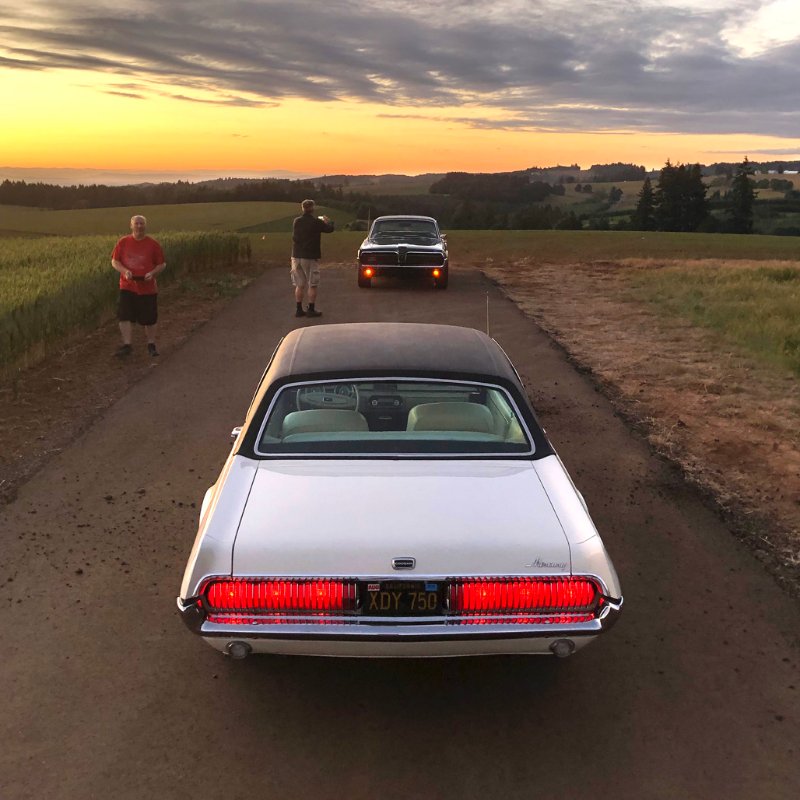
All the hard work (and re-work) is paying off: Snowball looks great!
(And I’m happy to see you included pinstripes.)
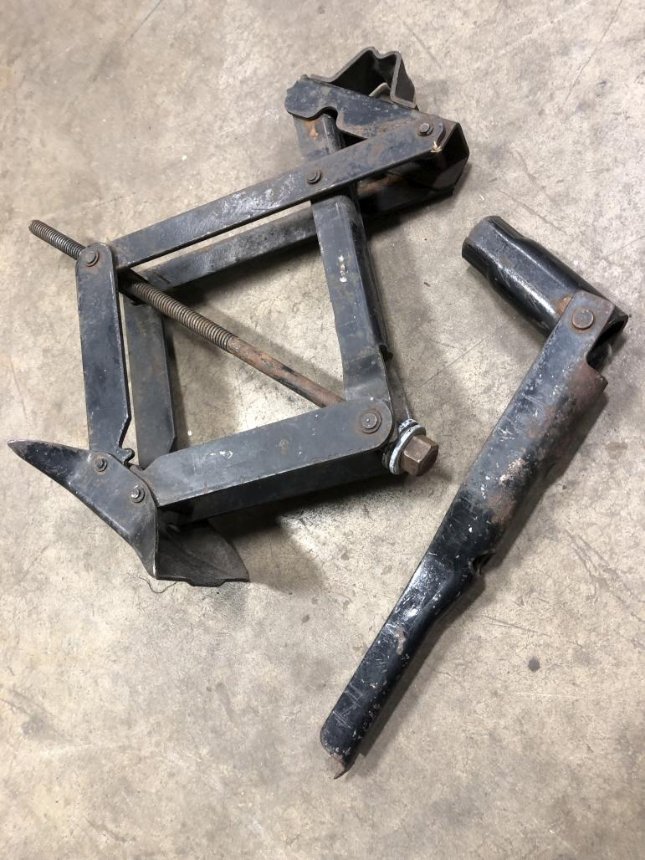
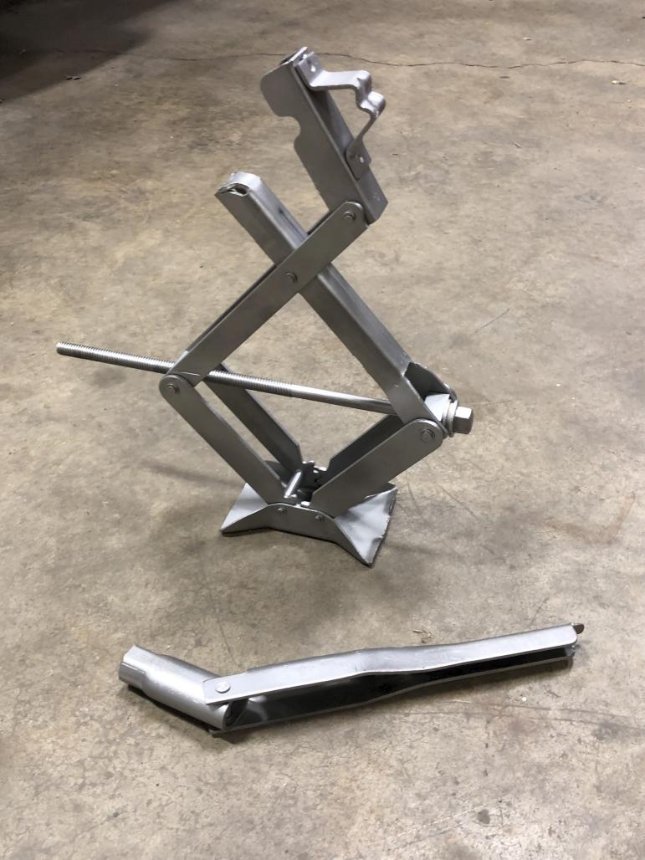
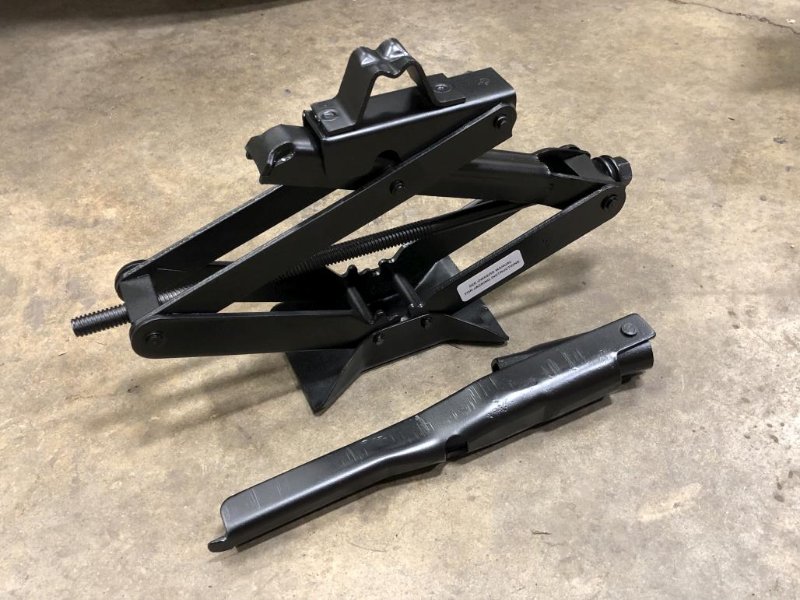
Details, details… amazing how much there still is to do even when it seems mostly done. This past weekend I did a couple of cosmetic projects, the easiest of which was to restore the original jack.
Before:
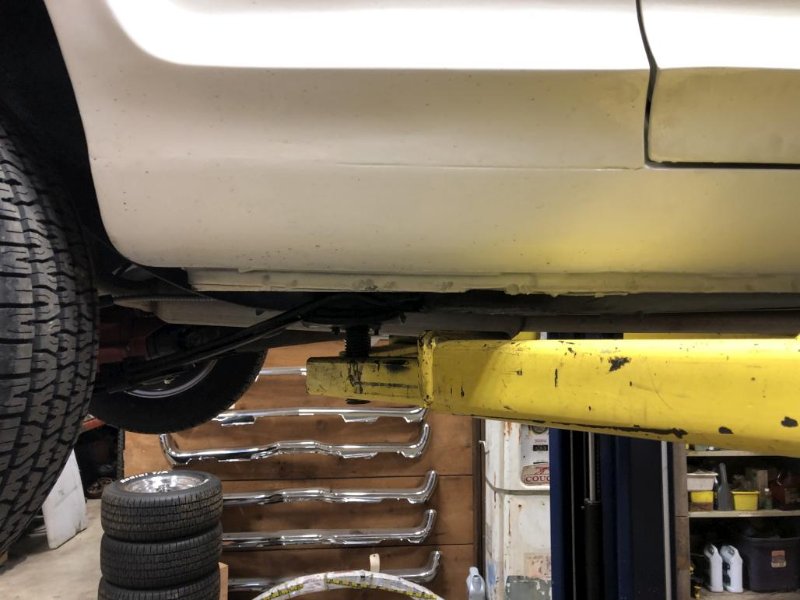
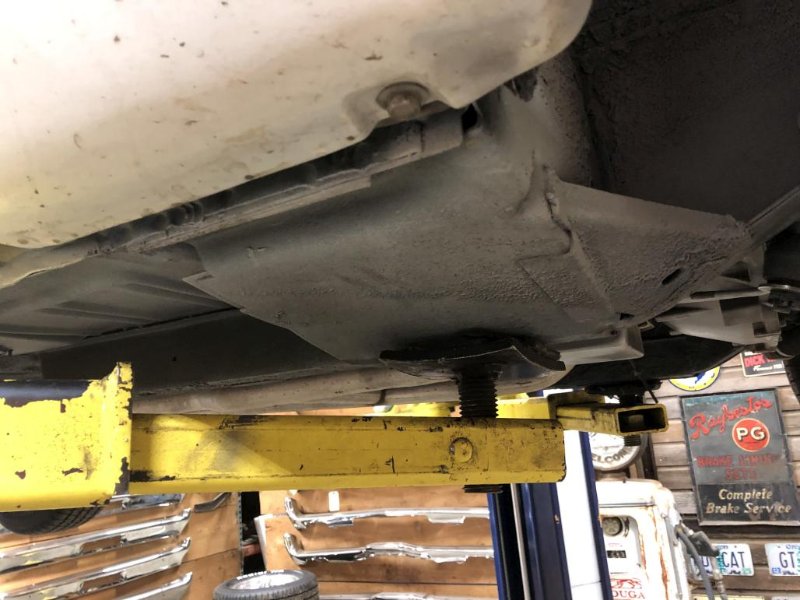
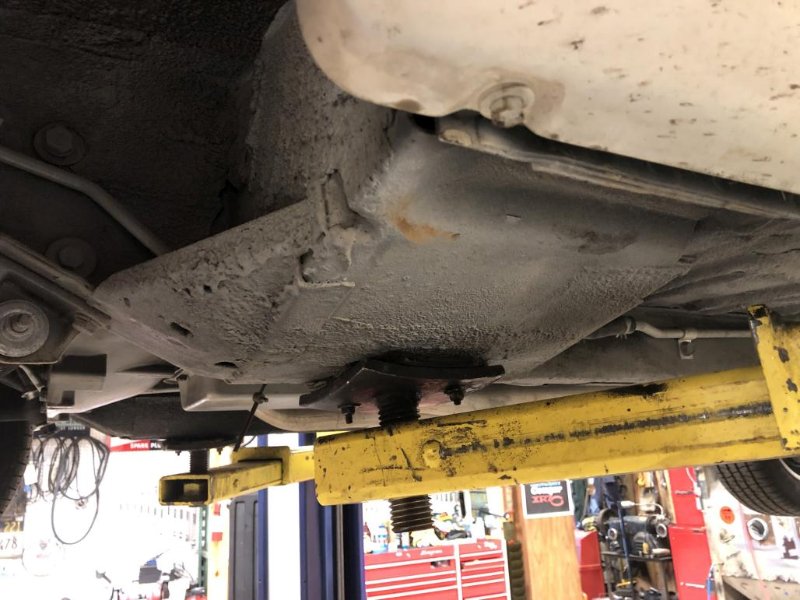
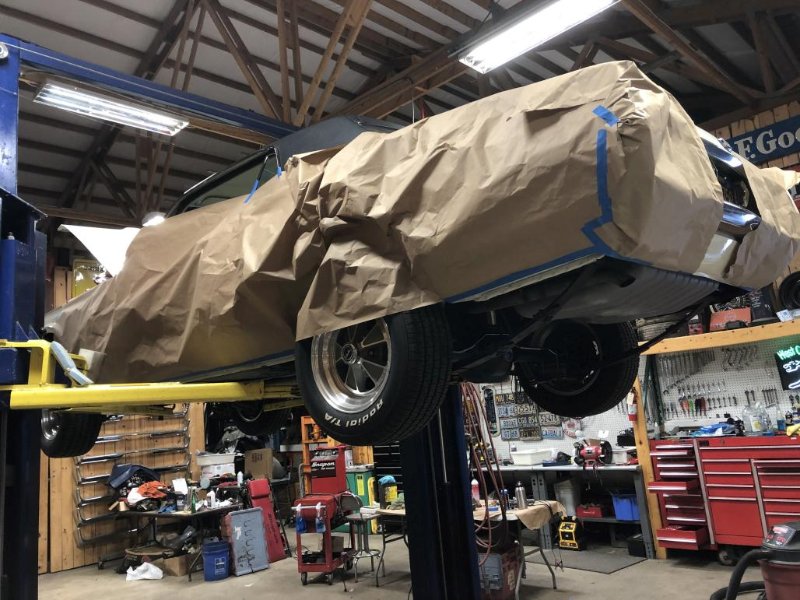
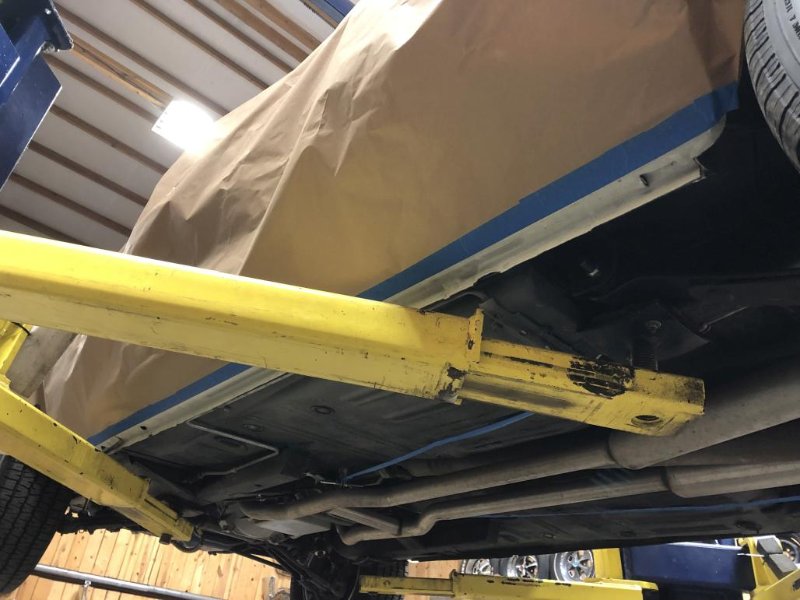
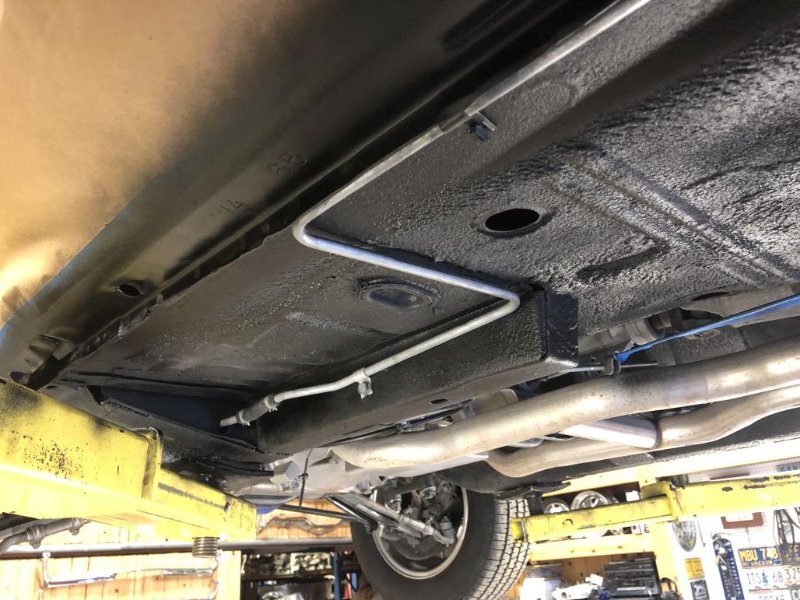
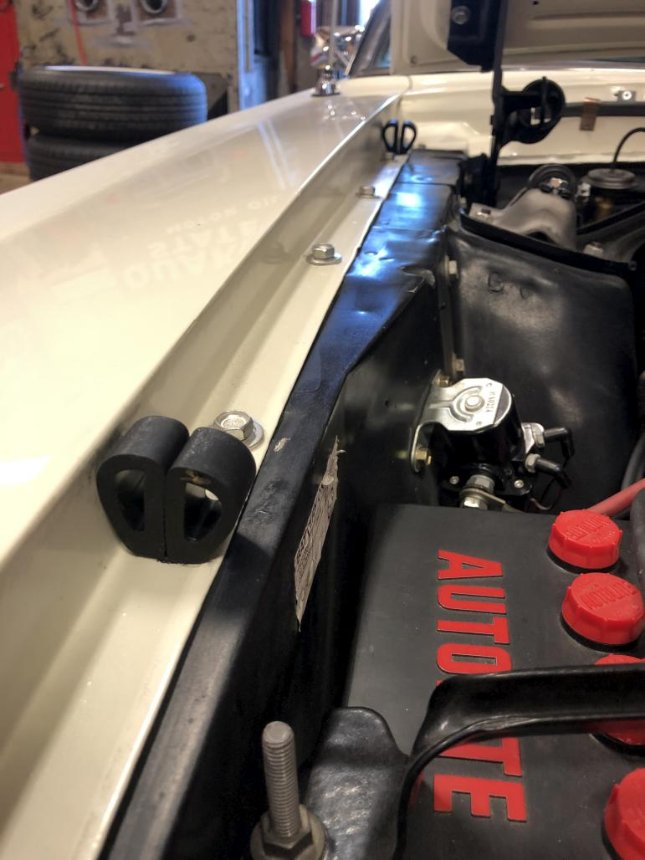
Anyway, on to the bigger project of the past weekend. I’ve been wanting to do this for a while. It’s another case of deja-vu, since I did this after the first time the car was painted. Point is, I wanted to black out the pinch welds, and while I was at it, fog over some of the white paint overspray that got on my previously nice looking undercarriage. Here are some before pics, pardon the dirt.
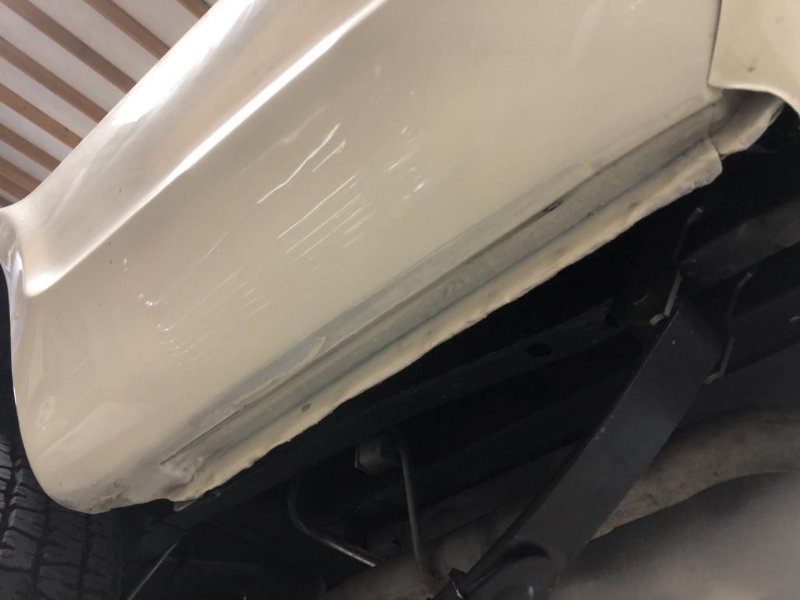
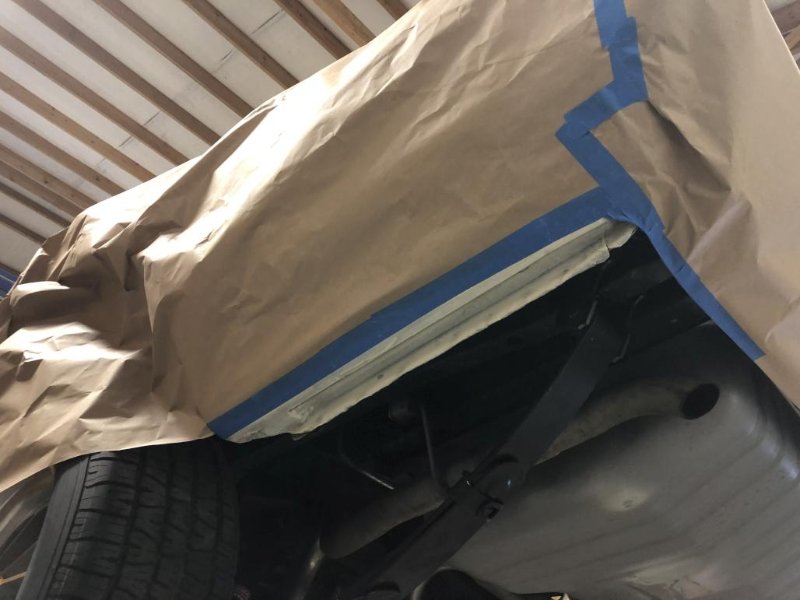
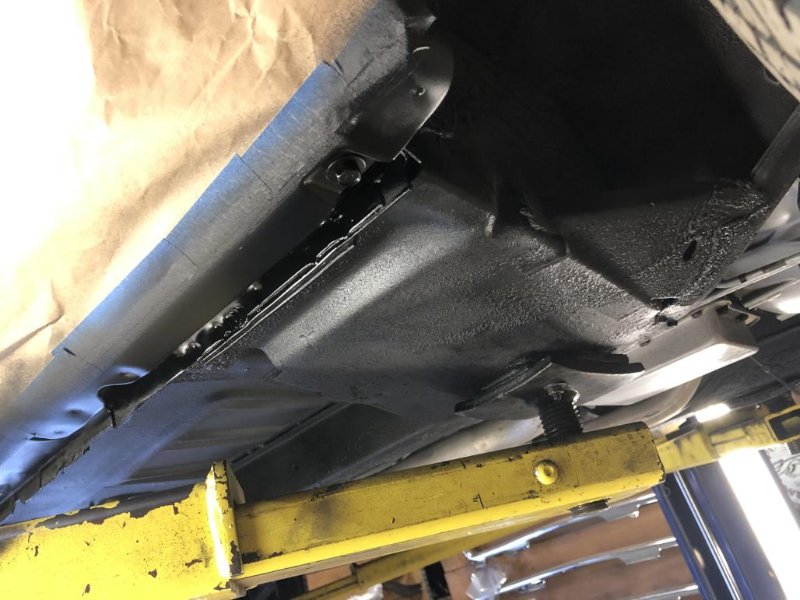
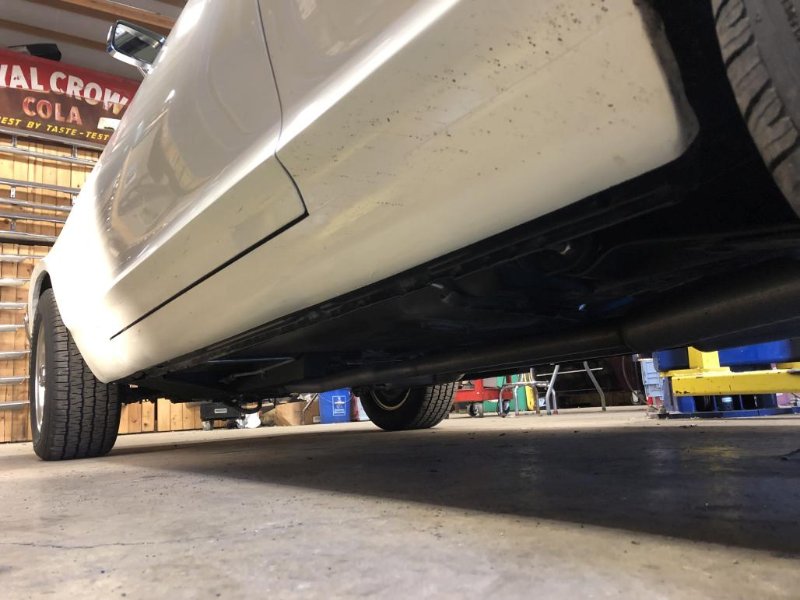
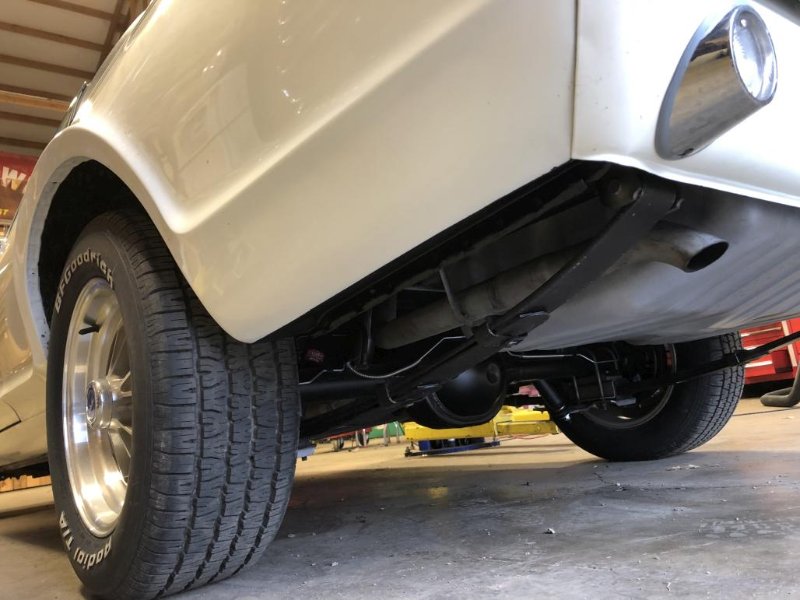
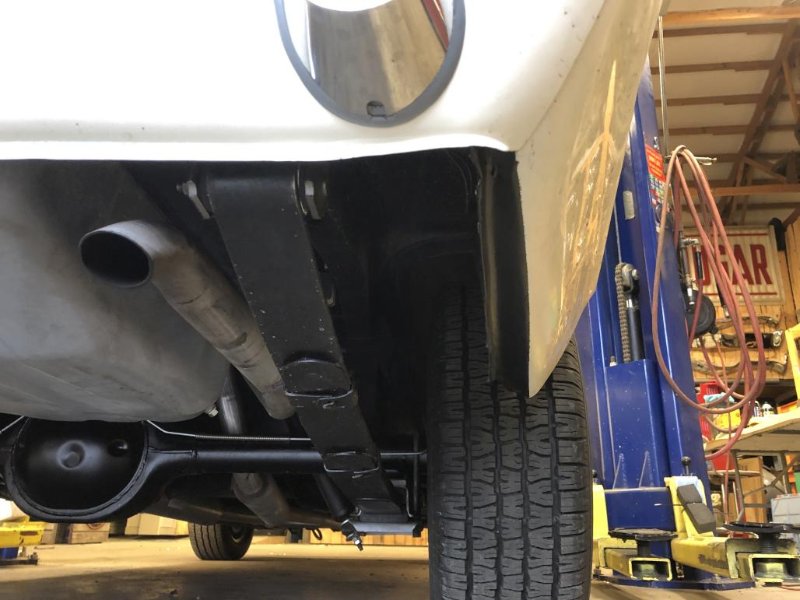
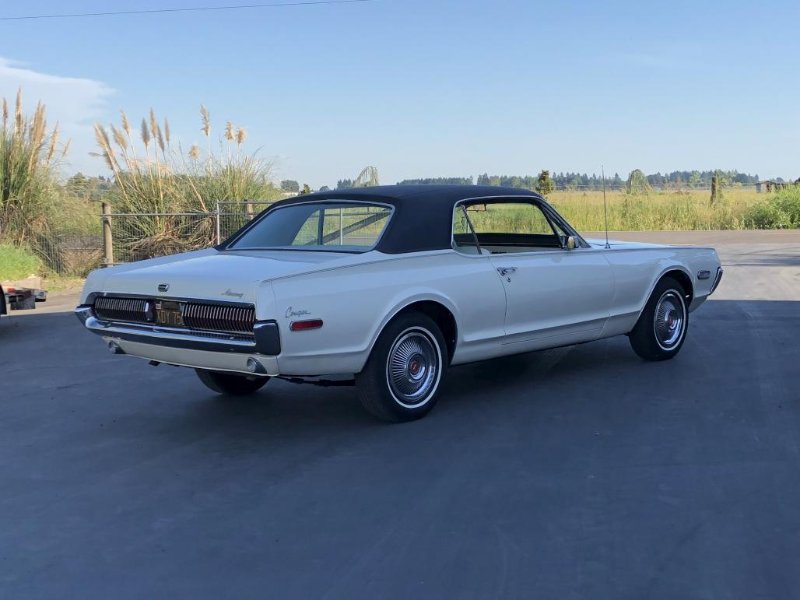
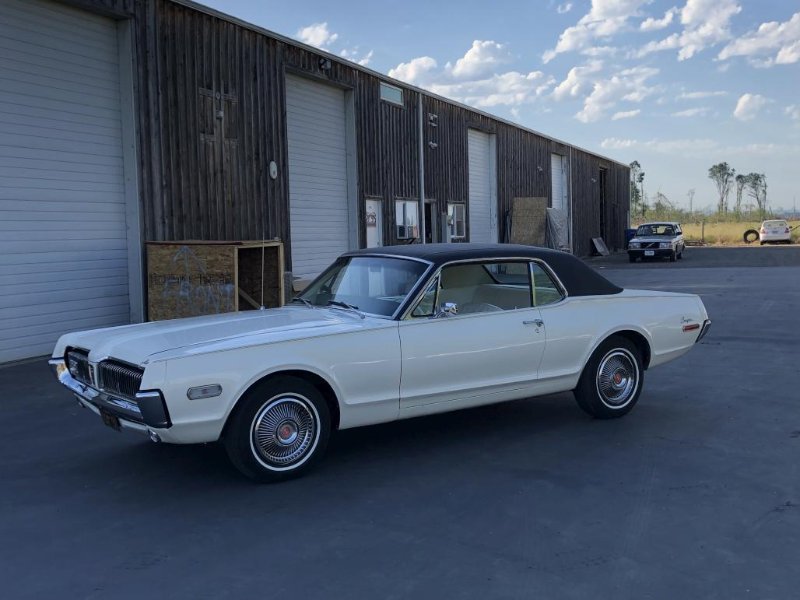
So this time around, I decided to go a little further outboard with the black paint than the factory did. I basically wanted to black out the whole horizontal bottom surface on the rockers, quarters, and fenders. Part of this choice was to hide thin paintwork, but I also thought it would provide the cleanest body line when looking at the car from the side. The fenders originally did not get any blackout paint on the bottom, but I went for it, in order to follow the same line that was established on the rocker panels. This worked out well on the quarters too, because it ends up creating perfect-looking corners where the valance meets the quarters.
A couple “pre-spray” pics:
I would have thought the jack would sit on top of the spare. But I must confess I really don’t know.
Looks great Andrew! For some reason the pinch welds always grab my eye when they aren’t blacked out.
It doesn’t go on top, but I may not have done it exactly right in my picture. Never thought I’d be researching exactly how the jack goes in the trunk, but here we are. Here’s a look at the decal in the trunk. I think this might be why the top part of the jack swings up, I was wondering about that. Looks like it hooks to the J bolt, or the bracket in the floor. There are marks on the arms of the jack which I think show where you’re supposed to set it for stowage.
I’ll mess with it and report back.
Thanks! I agree, it makes a big difference. Many people just don’t think about this detail.
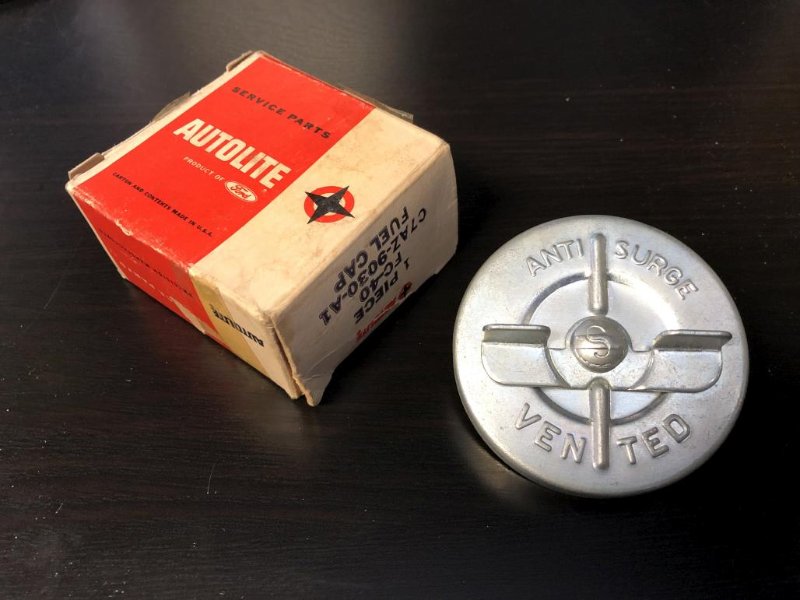
If they are working properly original gas caps only let air in the tank. They don’t let fumes out of the tank. So the classic mistake is to fill the tank up on a cold night and then put the car in a warm garage. The fuel will expand when it warms. If you inadvertently remove the gas cap it will give you a face full of fuel.
Not sure what Kurt is thinking. That’s how they are supposed to work.
Interesting. At least I spared you all the details I learned from the Mustangs guys about how it’s dipped not sprayed and how many inches on the screw can have paint…etc.
It has to be kinda gratifying to be at this point in your restoration.
Nice work on paying attention to detail Andrew ![]() , I had my paint guy do the same thing on the pinch welds, front valance tabs, front fender extensions & the tabs behind the center grille ornament.
, I had my paint guy do the same thing on the pinch welds, front valance tabs, front fender extensions & the tabs behind the center grille ornament.
Regarding the placement of the jack assembly and wrench, the Body Assembly manual on page #47 shows the locations depending on what wheel (conventional steel or styled steel) and what tire (full or space saver).
Guess I just wasted $60 on a gas cap then. Hooray! At least I have bragging rights that it’s NOS I guess ![]()
It is! And kinda surreal. I haven’t quite gotten to the point of enjoying it yet, because I’m still stressing over some final details and making sure it’s going to be reliable to drive. But yes, it’s crazy that the to-do list has gotten pretty short, I almost don’t know what to do with myself anymore.
Thanks! I still need to take my center grille apart and black out those tabs, thanks for the reminder. These kinds of details can make a big difference overall.
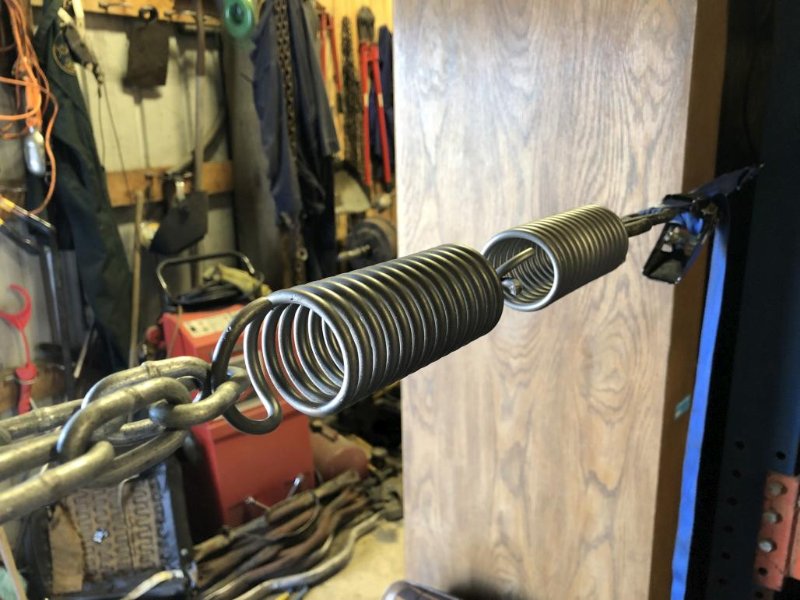
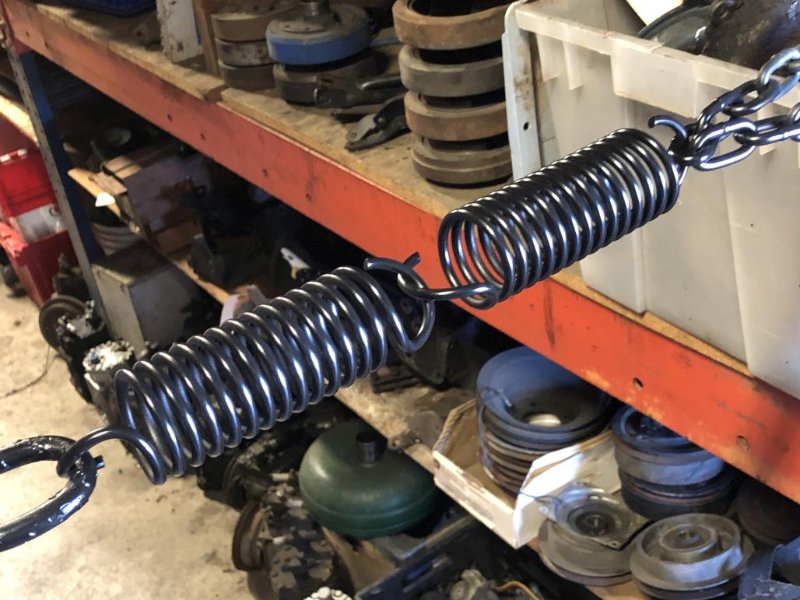
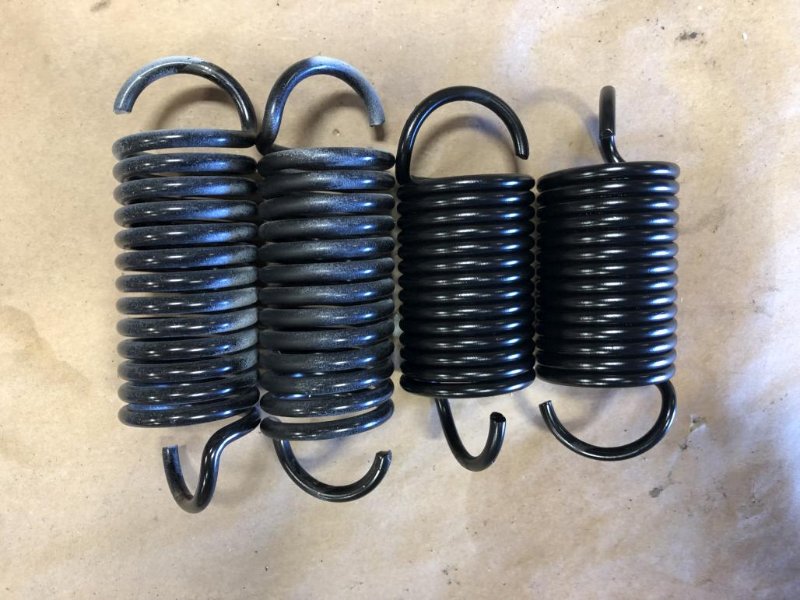
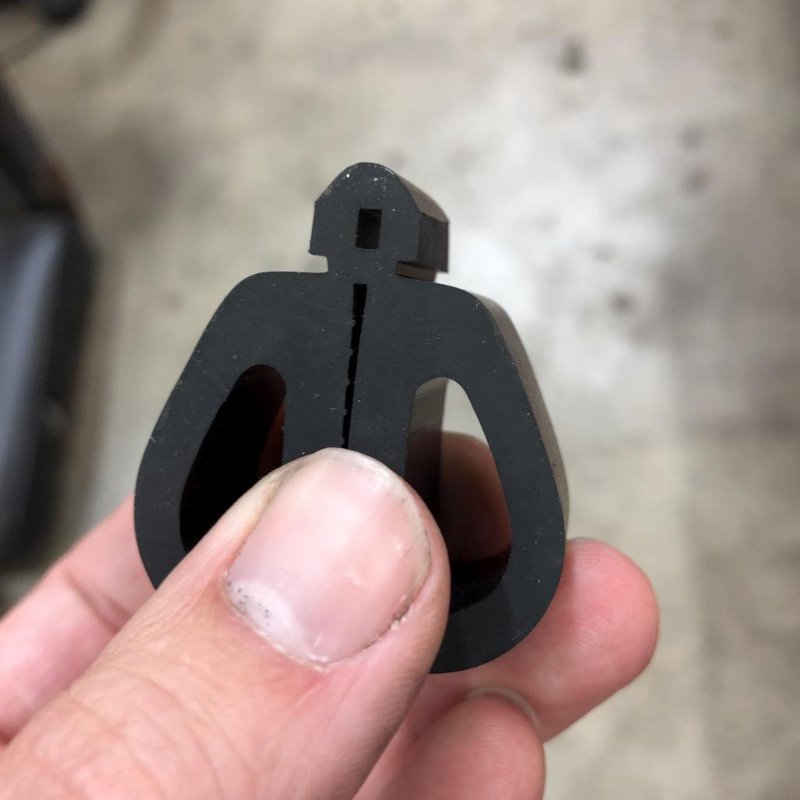
I do have a few little things to update. First of all, I had put on repro hood springs when I did the hinges, and they’ve never really held the hood up all the way. I even discovered recently that if I held the hood up all the way with one hand, I could take the springs right off the hinges with the other. Not good! They’ve only been on there for a year or two and they’ve already stretched out. Meanwhile, all the 50 year old orignial hood springs are still perfectly fine and have all the tension in the world. So I nabbed a set of original springs, bead blasted them, then had to figure out a way to paint them and get inside the coils. This is what I came up with.
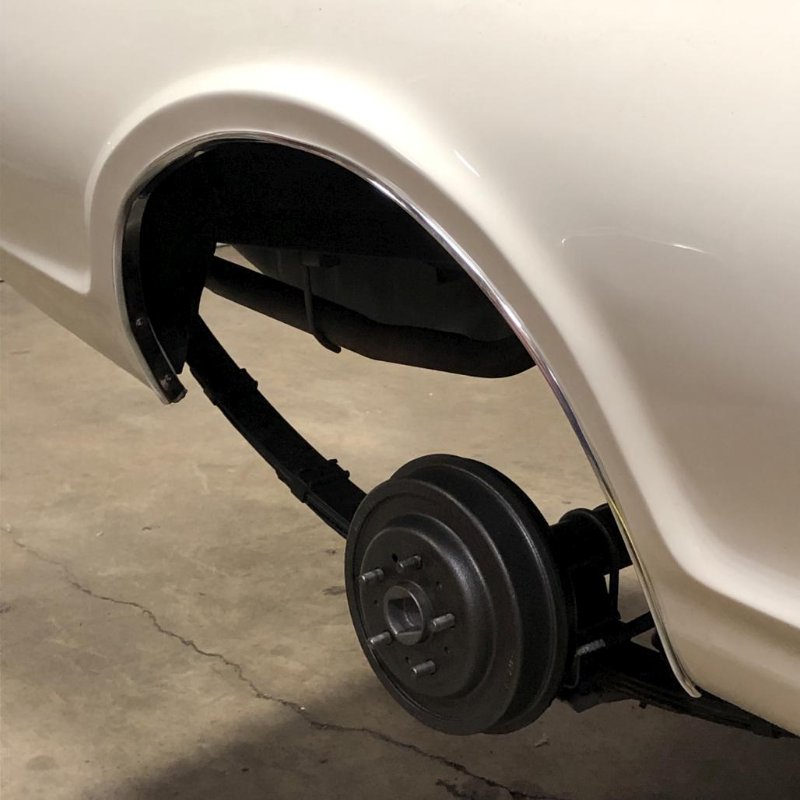
Anyway, lastly, I finally installed restored wheel lip mouldings. For a minute I did consider the much less pricey, not-correct-but-works repops. But I’ve gotten picky and knew I wouldn’t be happy with that, so I stuck with the restored originals. I ended up taking the wheels off, which made it much easier. I did have to drill a few holes that were missing in the body. All in all it went well and I was pleasantly surprised that none of the screw holes stripped out.
If I’m not mistaken hinges are supposed to be phosphate/oil. I’ve been wondering how to keep the springs stretched open while they’re in the near boiling solution. Or maybe they don’t need to be.
Good choice on the wheel moldings. I think the car looks much better with them. I like the rocker moldings as well.
If you leave the springs installed on the hinges while you’re coating them you should be able to keep them stretched somewhat, I think. Agreed on the trim, although my car didn’t come with the rocker mouldings so I’m going to stick with the plain look there.
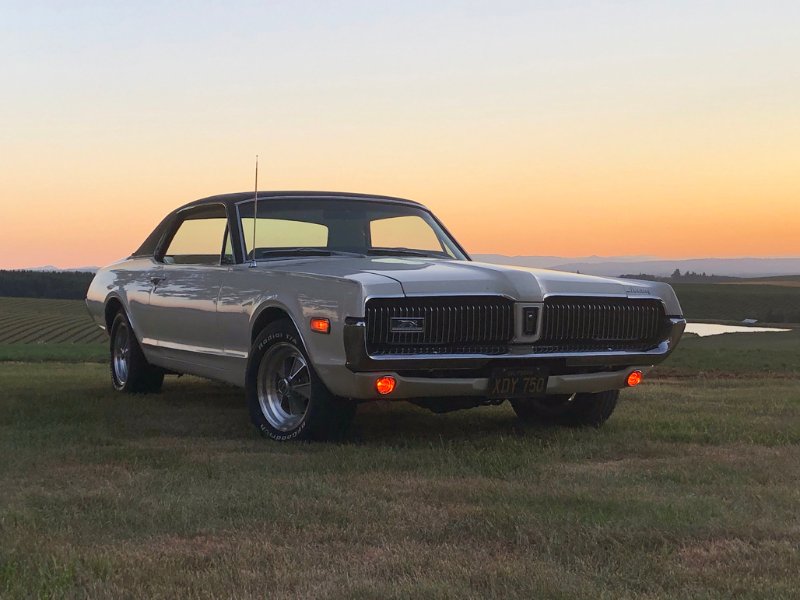
I think what I’m proving here is that even the most basic, standard '68 Cougar can still be a damn nice car, without any of the fancy options. At least that’s what I tell myself ![]()
It is a nice car, no question about it. I’m not just a Cougar fan because of my GTE.
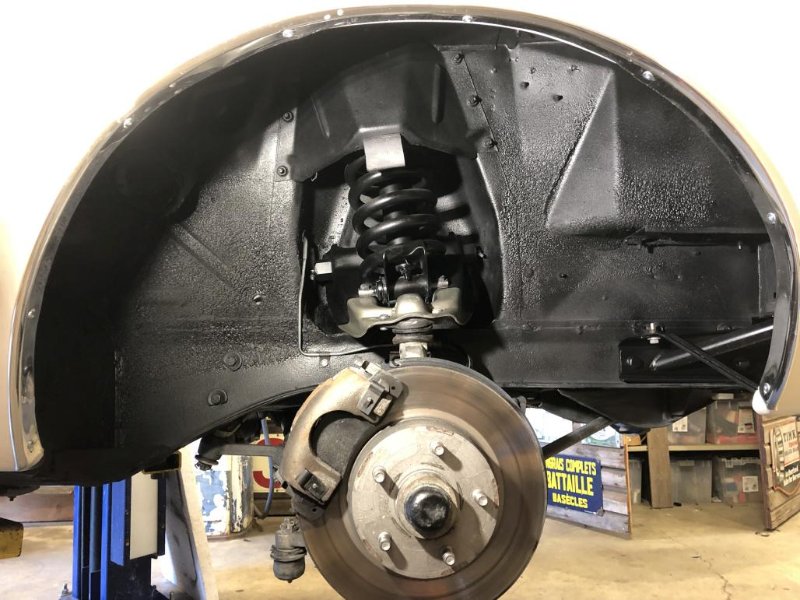
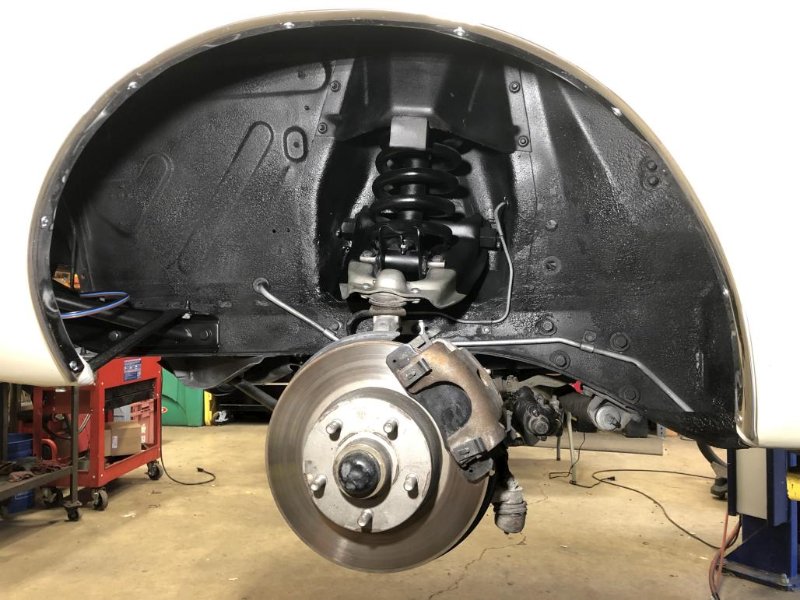
Little progress update. Since I did the pinch weld blackout and floor overspray hiding project, I was reminded of how much ugly overspray remained in the front wheel arches. See a reminder of how bad it was in post 238. This was bugging me, so I finally got it up in the air with the wheels off and went to town. Started by cleaning as best I could with an aerosol can of paint prep stuff (like a cheap wax & grease remover) and various brushes and rags, and that removed some of the white overspray on the suspension. Luckily I was able to clean up the silver portion of the upper control arms. Everything else would just have to be painted black. Once again I used the VHT Rollbar & Chassis satin black paint. By being careful with a piece of cardboard in one hand, and by masking various holes that led through to the engine bay or grille, I was able to do this pretty easily without getting black paint where I didn’t want it. Quickly after painting, I made sure to wipe off the brake lines, fuel lines, etc with paint thinner to let them show and look like things were done in the right order. Much better now! Glad to have this done and looking somewhat presentable again.
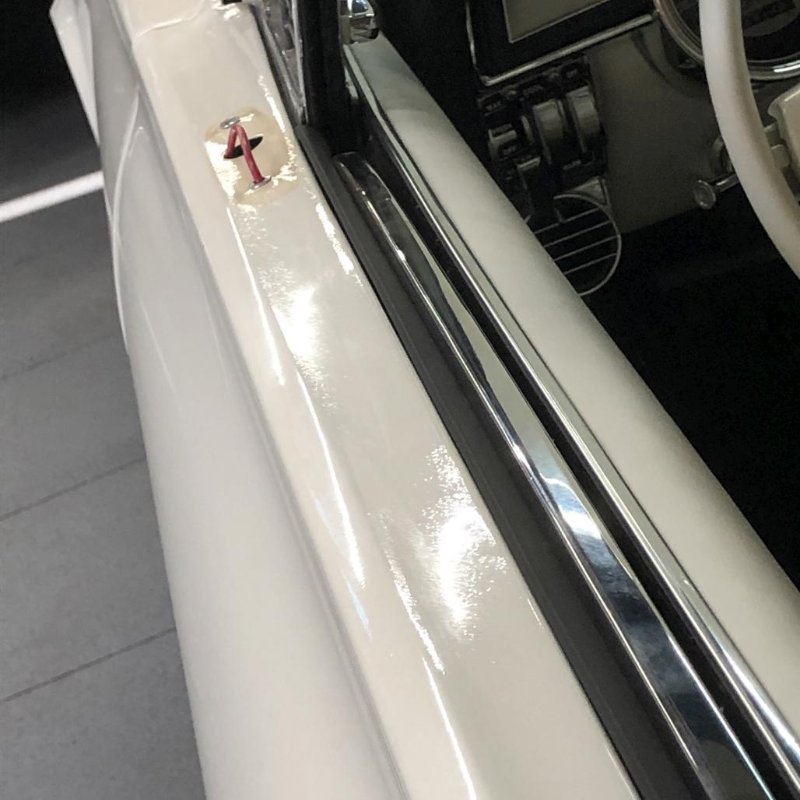
Next little backtracking project was to remove the side mirrors and quarter panel emblems & reflectors to prep for some final paint detailing. There’s still some significant orange peel and finish issues in some spots, so I’m taking it to a detail guy to get that stuff wet sanded and polished out. Here’s an example. You can also see that I opted to leave the door panel in place and use a piece of wire as a snake, so hopefully I can thread the remote mirror cable back in without removing the door panel.