Great update, Neal! Hopefully I’ll get to see it this summer at PROWL!
Always love to see stats too! Not sure if we talked about this already or not…
For 1970 Cougar Standard Hardtops …
458 with the 428CJ engine… 374 of them were Eliminators = 84 non-Eliminator standard hardtop Cougars w/ 428CJ
243 with C6 Automatic transmission… 192 of them were Eliminators = 51 non-Eliminator standard hardtop Cougars w/ 428CJ/C6 Auto.
43 of them painted Competition Yellow… 41 of them were Eliminators = 2 non-Eliminator standard hardtop Cougars w/ 428CJ/C6/Comp Yellow.
17 had Black Standard bucket seats… 16 of them were Eliminators…
= 1 non-Eliminator standard hardtop Cougar with 428CJ / C6 automatic / Competition Yellow / Black Standard Interior.
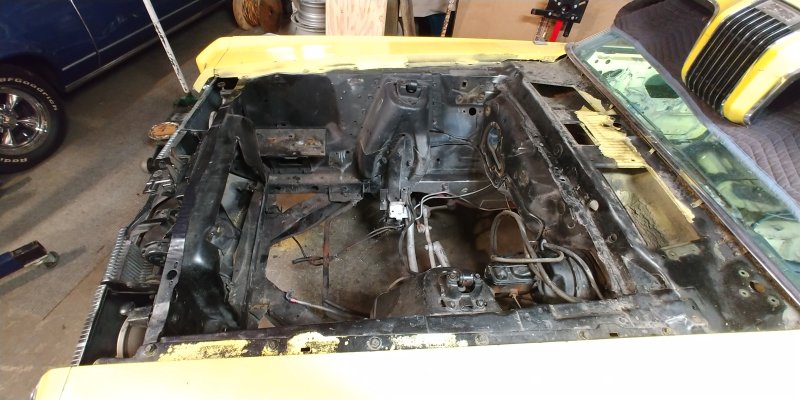
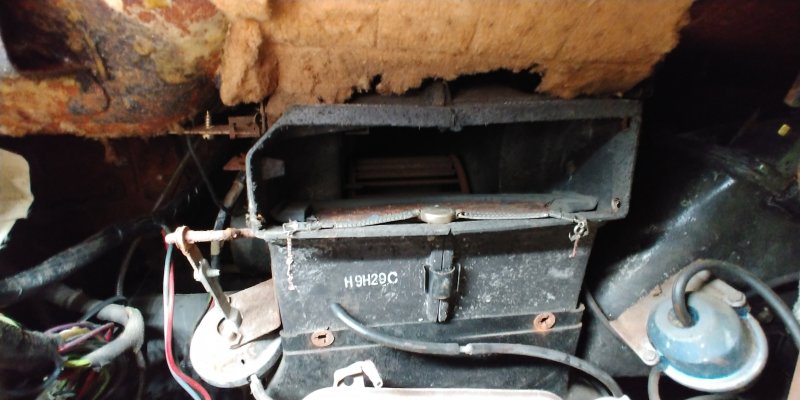
Time for a small update. I got the old small block C-6 out before Christmas. I started removing the wiring for the car, and went overboard. I removed nearly all of it. I still have a couple running down the passengers side rocker. One being the rear seat speaker wiring. To bad iti had been butchered at the package tray. I then removed the lower dash, brake pedal hanger(with a clutch pedal on it) The A/C box and most of the vacuum lines. I filled up 4 moving boxes with the parts. Even though the wiring is butchered I am holding on to it for now. Who knows, the one in my parts car may need some help that this may render pars for.
I’ll remove the rest of the steering column when I get in to the engine compartment some more.
I have a lot more work to do in the engine compartment, but parts are getting removed.
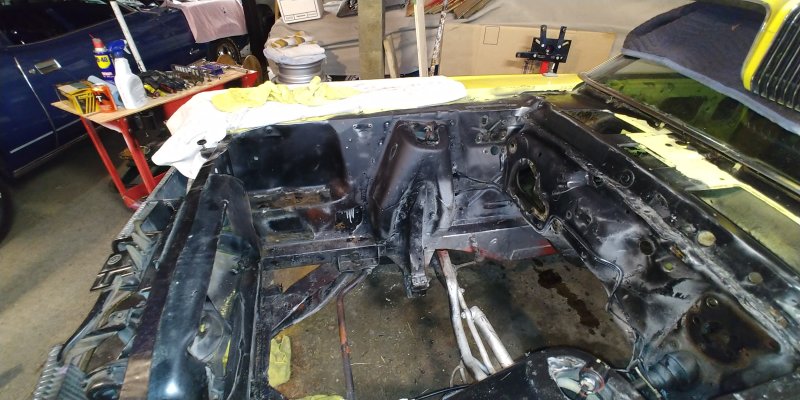
It looks like somebody has painted the area on the P/S frame rail Red tnen Silver. The rest looks like it was painted Silver then back to Black.
I have been working part time for some friends. Last week I put this project car back together. It need a total restoration. But it is a legit L-78 65 GM Plastic car.
It sounds nasty, I have only moved it out of the shop and back in. I think this will be for sale soon. My friends put out a request for help in December. I responded and have been playing around with their cars as well as mine. It is kind of fun not needing the money but going to work anyway. It is helping me stay off the computer too.
More later.
Oh I almost forgot, when I took apart the A/C unit I found a Lady’s Omega watch in it.
I was back at it yesterday. I hope to get more done this afternoon as well. I started with removing the drivers side seat riser so I ca get on to replacing the floor pan. What a mess! Look at that rust!
When I looked at the car it has about 2 inches of water sitting in it, from a leaky rear window seal. And it took its toll on the floors. I know this going in. If this were a “H” code car I would not have planned to repair this. But being a rare “Q” code… The seat riser was bad as I suspected. I have another set that I will most likely use.
I set the new floor panel in the car to see how it would look.
I then moved on to the engine compartment. I removed more parts, Master cylinder and booster, frame mounts, battery tray, vacuum lines and the transmission cooler lines. I them gave it a washing. It will need a bunch more work down low before I start removing all the layers of paint. I think this is about the ugliest engine compartment I have ever done.
A couple before cleaning shots.
A couple after cleaning shots.
It’s going to be a long slow slog on this beast. But it’s underway…
I spent a few hours back on this car today. I ordered an export brace for it and thought it might be a good idea to test fit it. So I dug out the bolts for the shock caps and found a set of cowl end bolts and it went on fairly easily. I may end up needing to place the car on jack stands when I do the final install.
Next as I was going to start cutting out the floor on the driver’s side, I cut out the drive shaft loop. I thought as I’m working by myself at this time and I’m replacing both floors I would just hack it out.
I then moved on to slicing and dicing the rusted floor out.
There is still a lot of trimming to do. Next time I work on it I’ll set the new floor pan back in place and do some marking. Then decided how much more trimming I’ll do. I also need to get the tank for my welder refilled.
do you need a wiring harness?? I know of a guy on facebook I just bought some parts that he had left over from a 70 eliminator drag car and 1 of them was a harness and has some 1/4 glass and a few odds and ends. Let me know on FB I`ll give you his name…
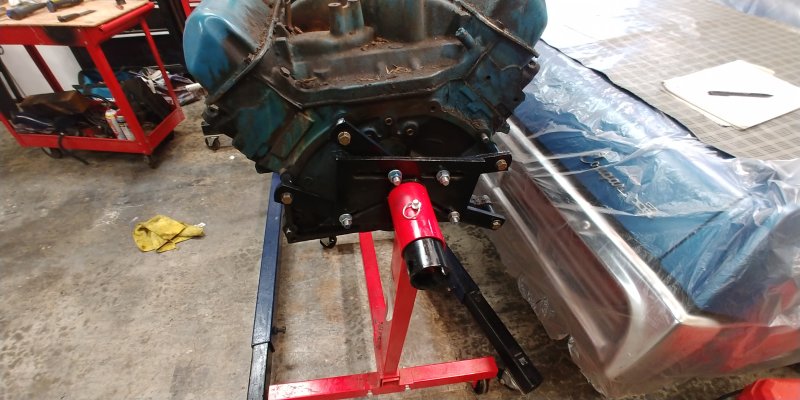
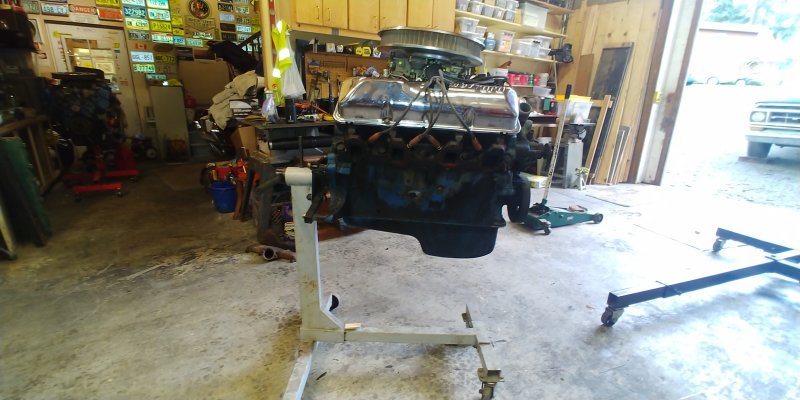
Yesterday I finally got around to getting the 428 PI out of the F-250. It was not that bad of a chore getting the engine out. But that transmision was…
To help with not having to lift as high we let the air out of the front tires. Saving a good 5 inches of lift.
Once out I tried putting it on a stand, the stand works well with small blocks and will hold 1000 pounds, but the slots on the plate will not let the arms adjust out quite far enough to built it on is a balanced location. I decided to strip off some unneeded weight, Exhaust manifold came off without a hitch. I removed the flex plate and motor plate and lower pulley from the crankshaft.
It is truly a 428. I was told it was a 1970 Mercury Police Interceptor and the numbers look good for that. One funny thing os the L/H head is a D2TE-AA but had a C8SE-B exhaust manifold on it. The Right had has a C8AE-H head with a D2TE-AA exhaust manifold. It apparently had some head work done to it at one time.
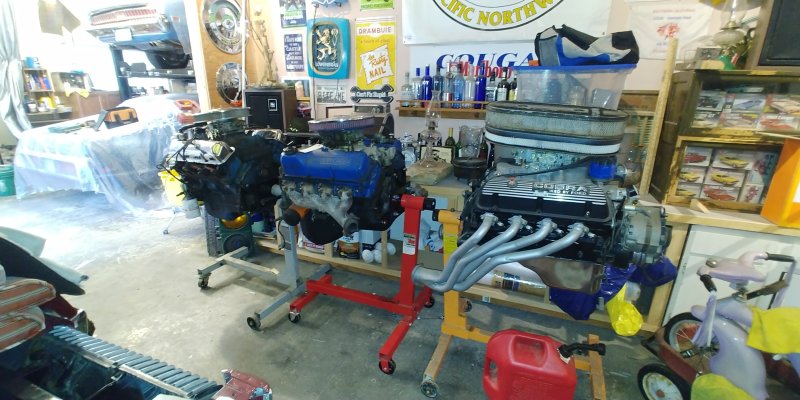
For the night I left the engine bolted to the stand, but also have the hoist attached to it incase something fails. Today I will remove it and check my other stands to see if one will bolt to a FE. One has a 302 bolted to it and the other has a 351C on it.
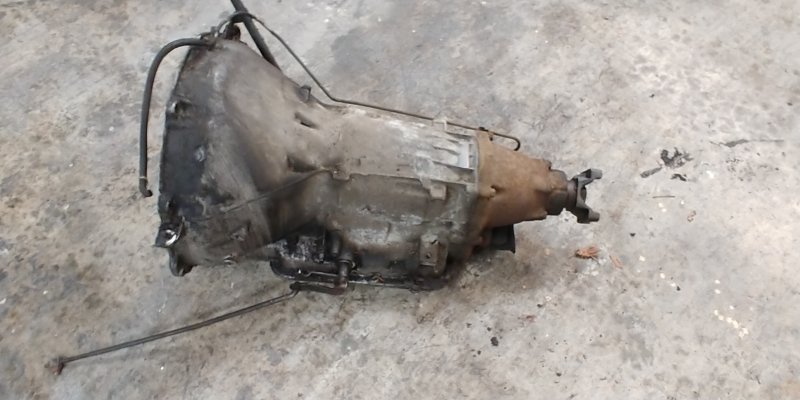
As for the transmission, being it is a C-6 I wanted to keep it. It has a good clean case, though a short tail shaft unit. But it can be built with inturnals from a long tail shaft unit with a bad case. These are getting harder to find all the time.
The hassle in removing it separately from the engine were mostly stubborn bolts in the 2ne crossmember under the front of the transmission. It has to come out to drop the transmission directly down. It will not move toward the rear as there is not enough clearance. The 3rd cross member it was hard to get a wrench on the bolt head. Good thing I have a set of drophead box wrenches. None of my others would get a hold of them. did not take pictures of this part of the project. But I do need to go down to the shop this afternoon and clean up and put things away. I may snap a few.
So what are you doing during this “Social Distancing” quorintene?
For the 1970 model year, Per Ford it had more power then a CJ. But with an Autolite carb and C8AE-H heads and log exhaust manifolds I doubt the factory numbers for at last one of the 428s. And as no insurance company cared much about how powerful Police cars were, it is the CJ.
As I am here, I have a little more to add. This is the C-6 from the F250. I didn’t know the short tail shaft units had a cast iron tail shaft housing.
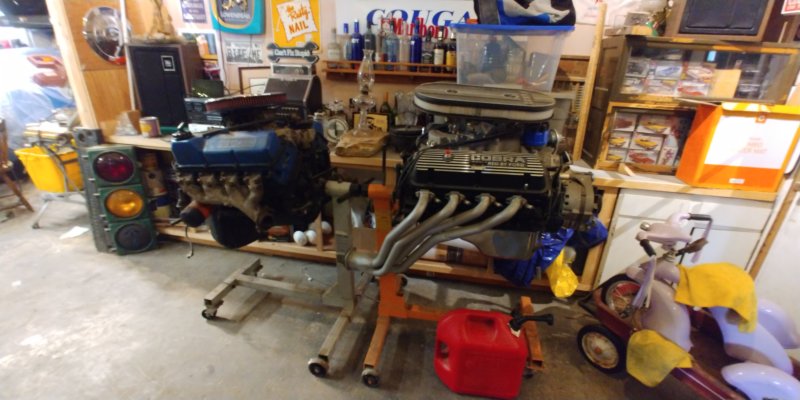
The Other stands had engines on them. The Gray one with the 351C will work. So I started swapping them around. Funny thing is that one is the only one I didn’t buy. It was given to me.
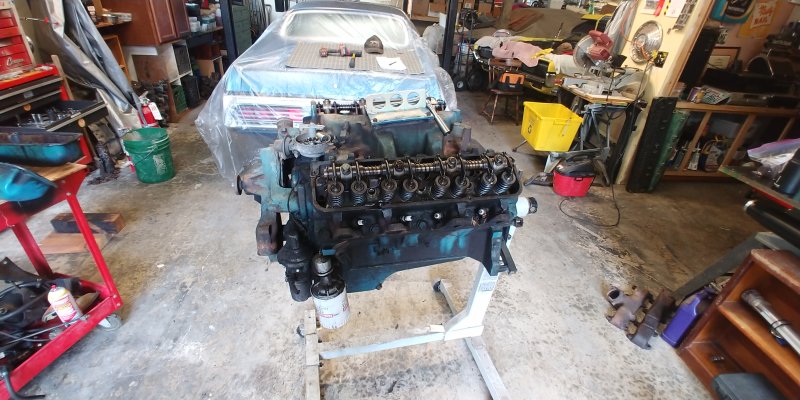
I took the valve covers off to see how messy in might be inside. I was pleased to see it is not too bad. I will be opening up the bottom end in a few months when I have time and new gaskets. I will need to swap the oil pan for one that works on a COugar as well as add a windage tray.
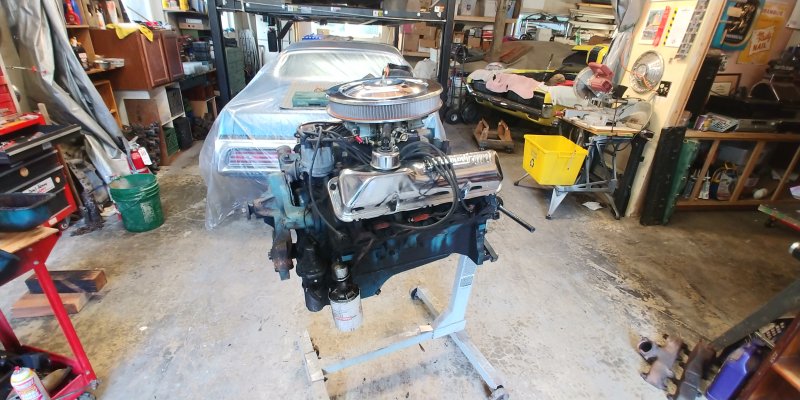
As it will be sitting awhile, I decided to make it look a little better. I have the correct Finned cast aluminum ones that were used on 1970 CJs that it will be getting. I thought it may help me with ambusion having a little bling on it.
I am in a holding pattern with the floor repairs. I am waiting for the new toe boards to come it. Then I can fit them and finish trimming the front of the ling pan. I still need to do a trim on the rear as well.
I did a little cleaning on the 428 this evening. I am also mocking it up. Tomorrow I plan to turn it around tha do the other side. I am making a list of things I will need to get. Top of the list is a AMK engine fastener kit.
My being the only adult not working in the house has put me in charge of keeping the granddaughter doing her studies. It has also made it a little harder for me to do what I want when I want. But the kid is more important than my projects.
I removed all 8 spark plugs and used my bore scope to inspect each cylinder. I did not find any over size markings on the piston tops. Thay are all slightly dished like I have seen on other 428s with valve eyebrows. I have pictures, but need to find the cord to down load them.
I also removed the truck fuel pump and inspected the timing chain. It is a double roller unit and tight.
I bolted up both headers to see if they line up with the bolt holes in the 8 hole heads. At leas one top one on the R/H side will need to be slotted. I bolted up the alternator and started to bolt up the P/S pump But ran into a wall when I found I don’t have a correct long bolt. This had a Pick up truck style one on it and I am changing it to a more correct set up.
I bolted up the motor mount plates, I will need correct bolts. Then I put the water pump pulley and crank pulley on. I will need them in place to check the belt alignment.
My new toe boards arrived today. I hope to get back onto the floors soon.